Installed Hitch and Wiring on Q5 S-line, lots of photos.
#1
 05-28-2016, 09:34 PM


I installed my hitch today. It was this one: 2011 2016 Audi Q5 Trailer Hitch Wiring Harness Kit Drawtite Class III 2 Inch | eBay
It came with the wiring kit and all needed fittings, for just $265 shipped.
It took me about 4 hours, 2 of them figuring out the wiring on the car. I used this thread to get the basics. Read the whole thread and save yourself some time. https://www.audiforums.com/forum/aud...trical-171730/
I backed the car onto a set of ramps to give me more room, but I suggest that, unless you are tall, don't bother. Very little is done under the car, and my short stature made me on my toes a lot.
Beginning:
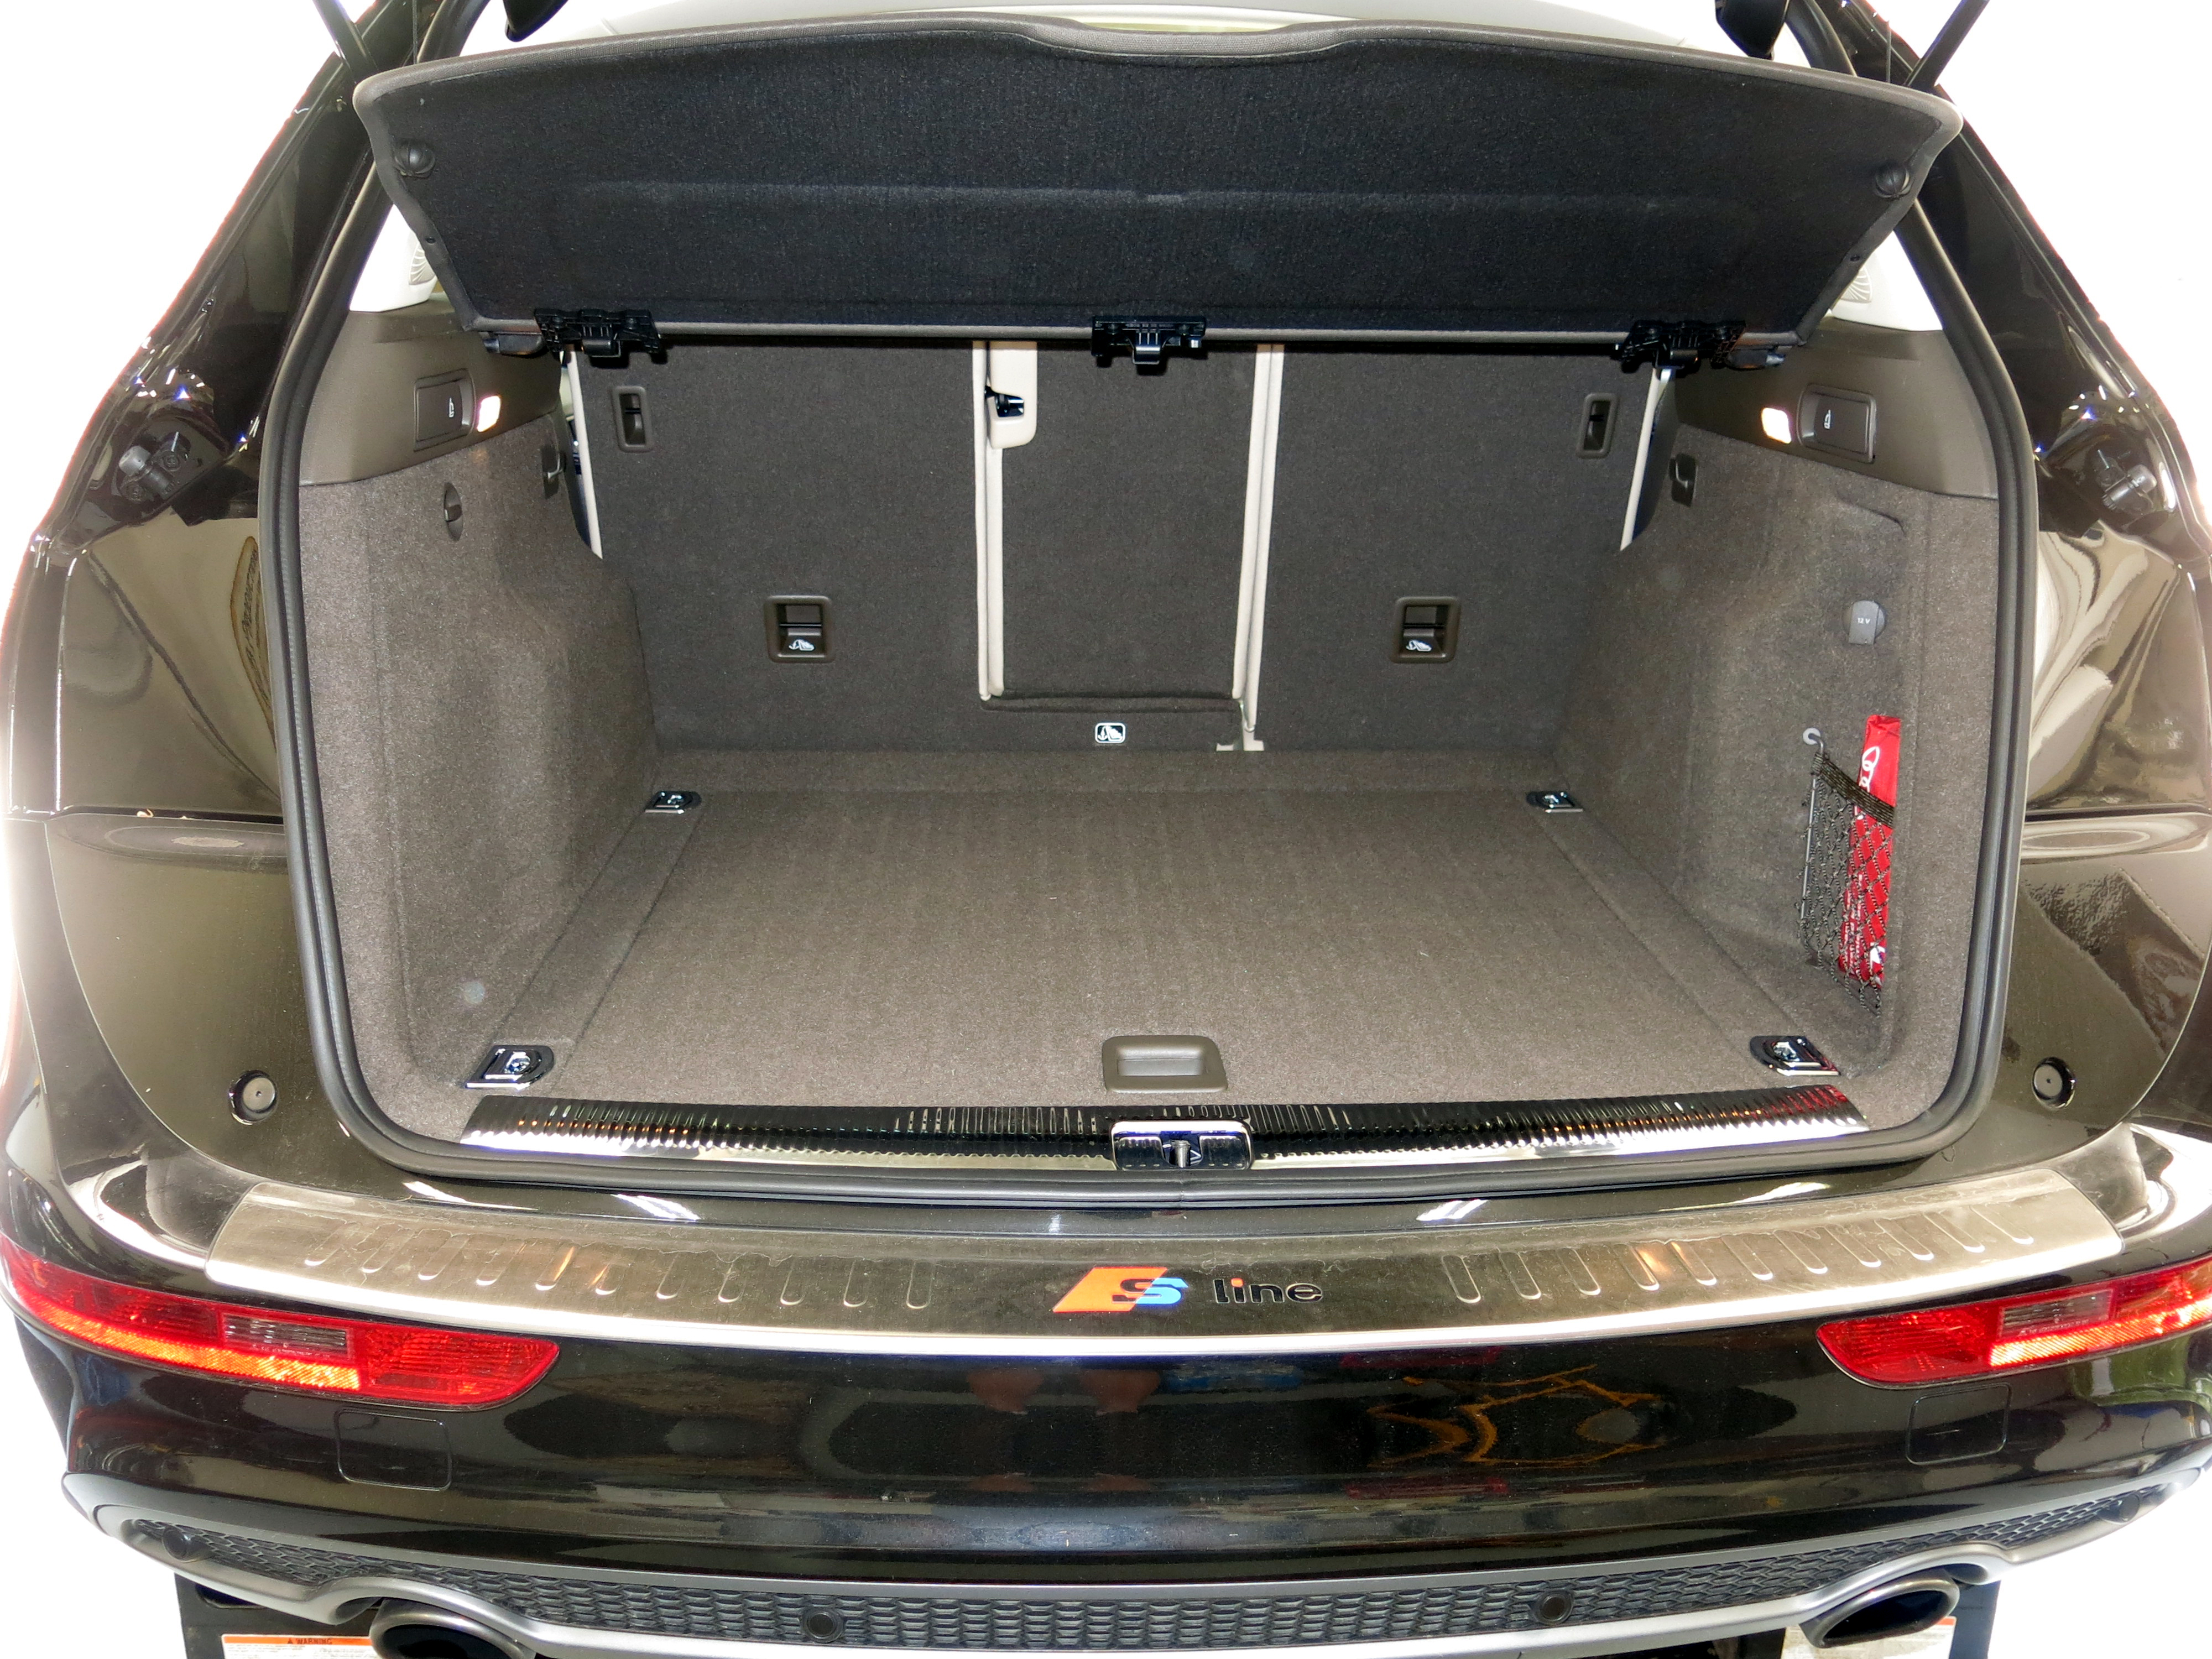
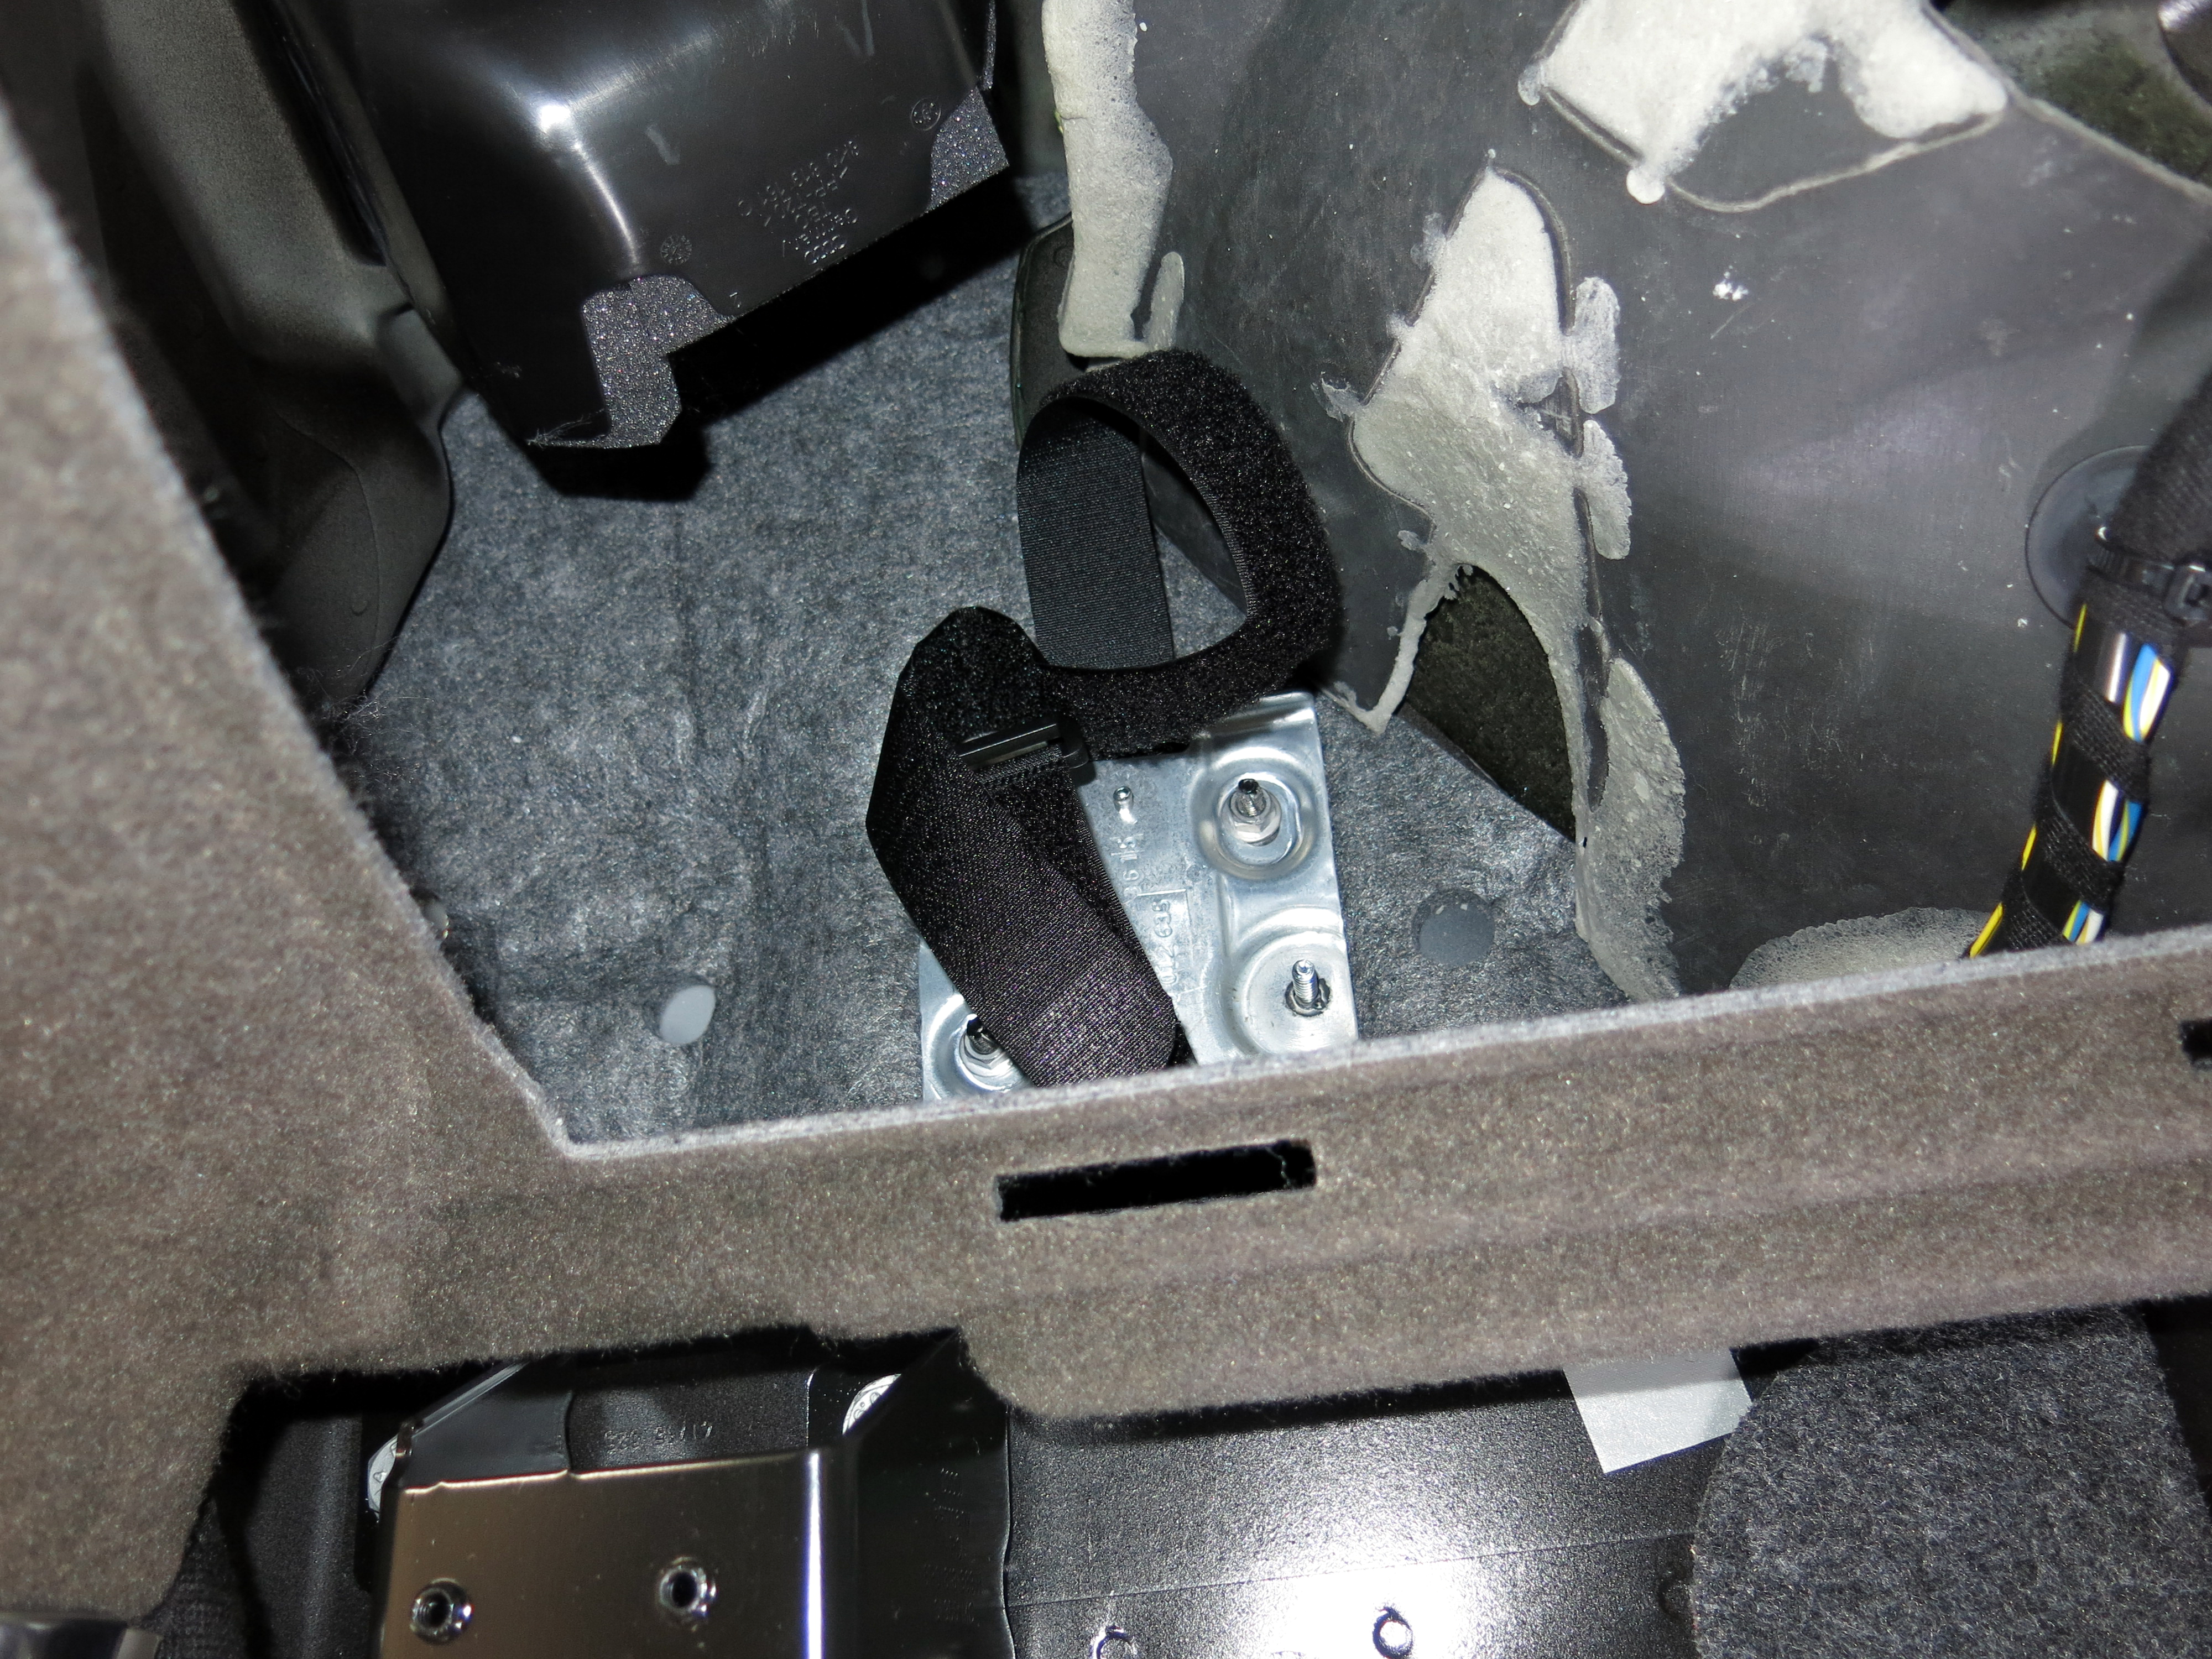
Pull both side covers:

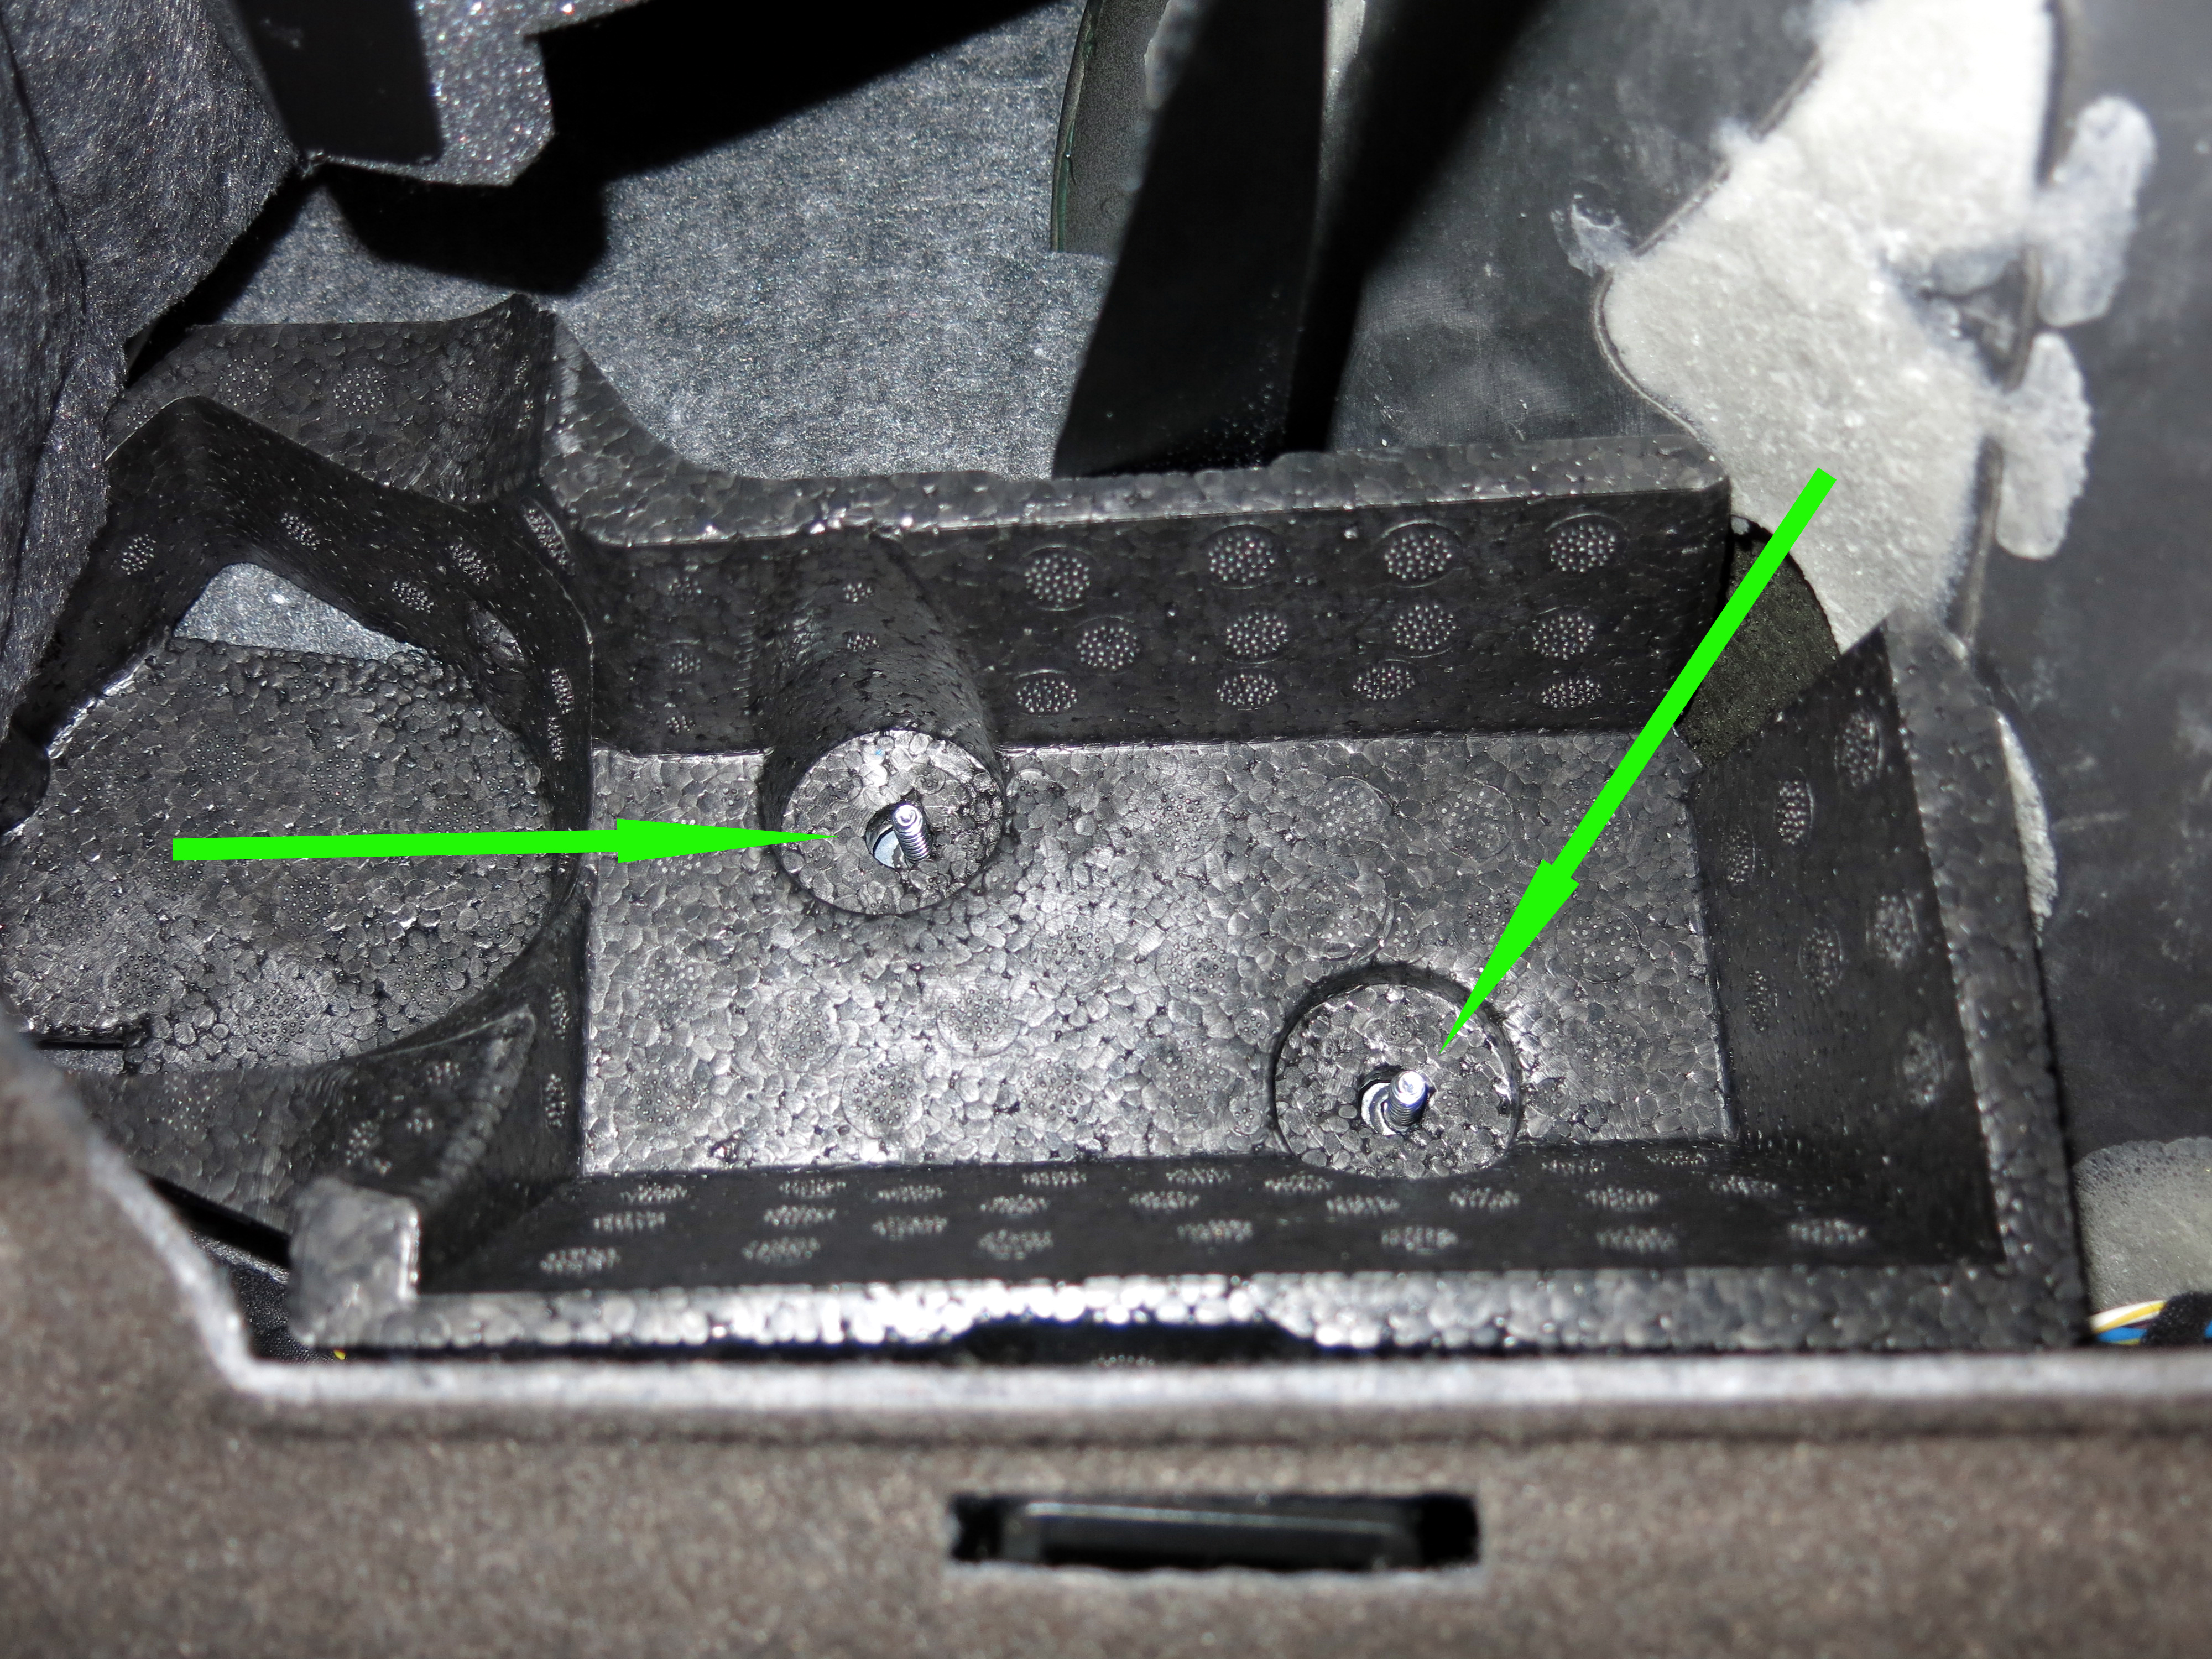
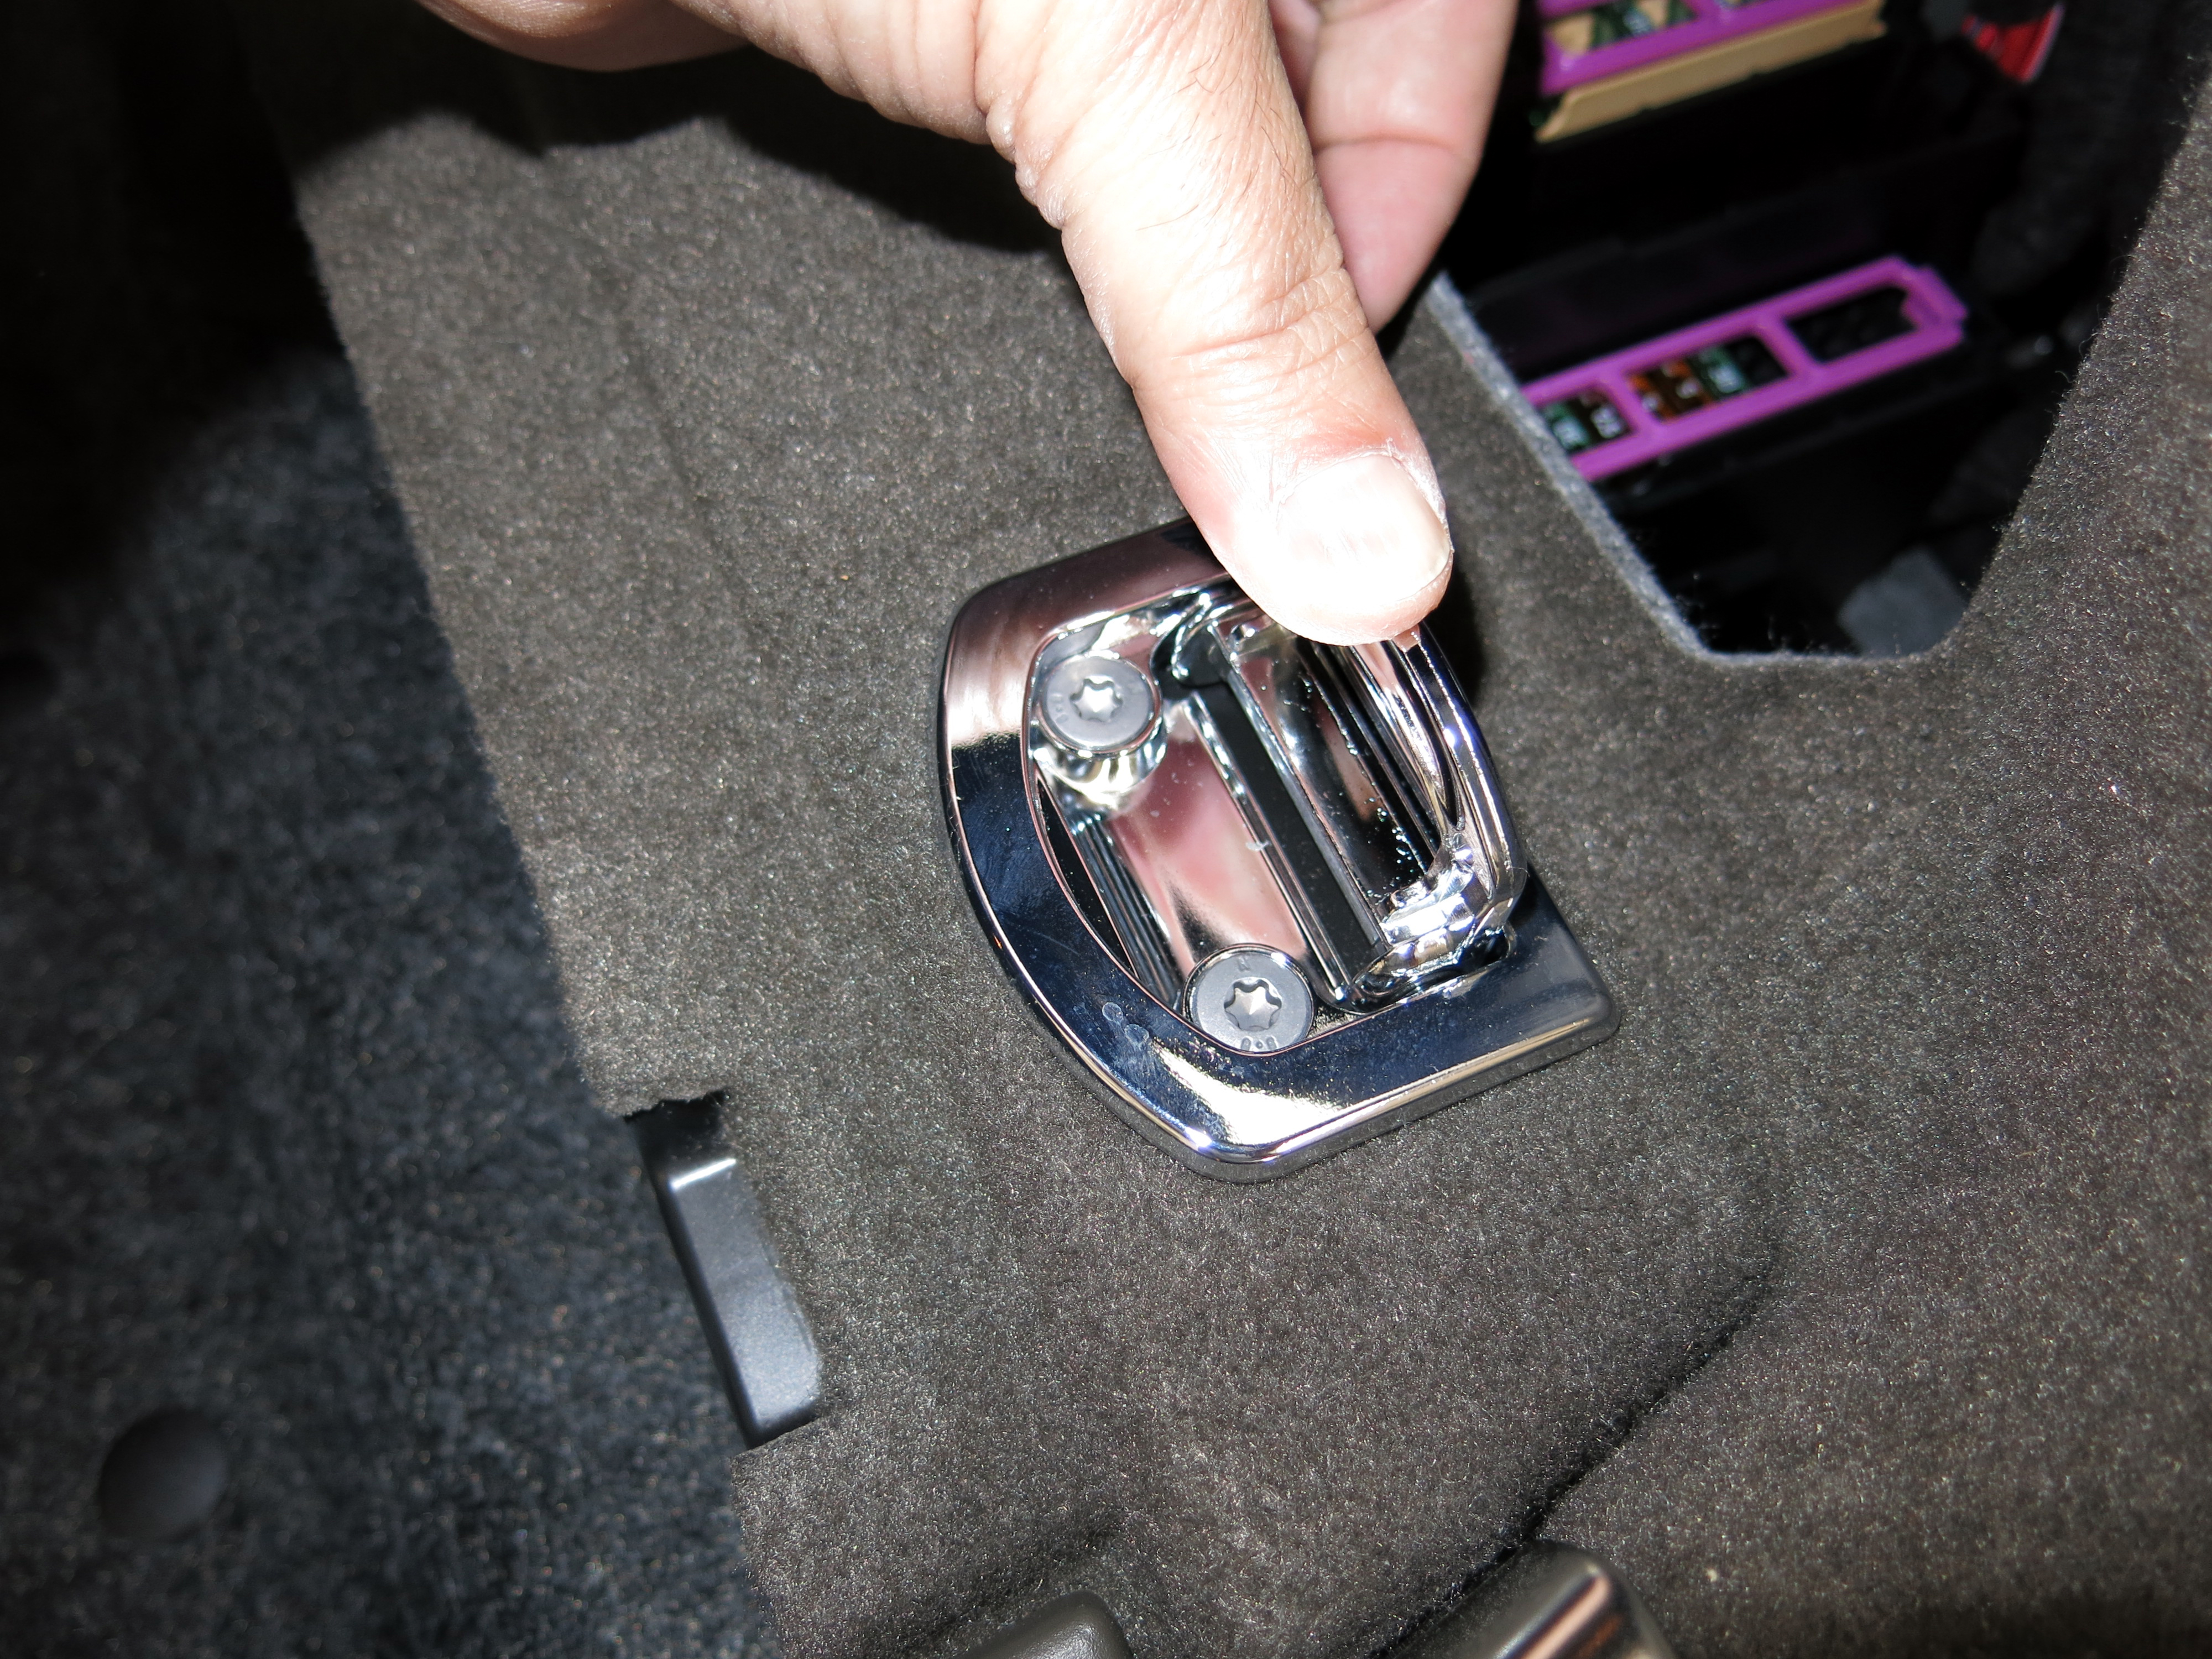
Remove the tie down with a T30 Torx bit, then lift the side rails out. They pop up and unhook from the cross piece by the seats.

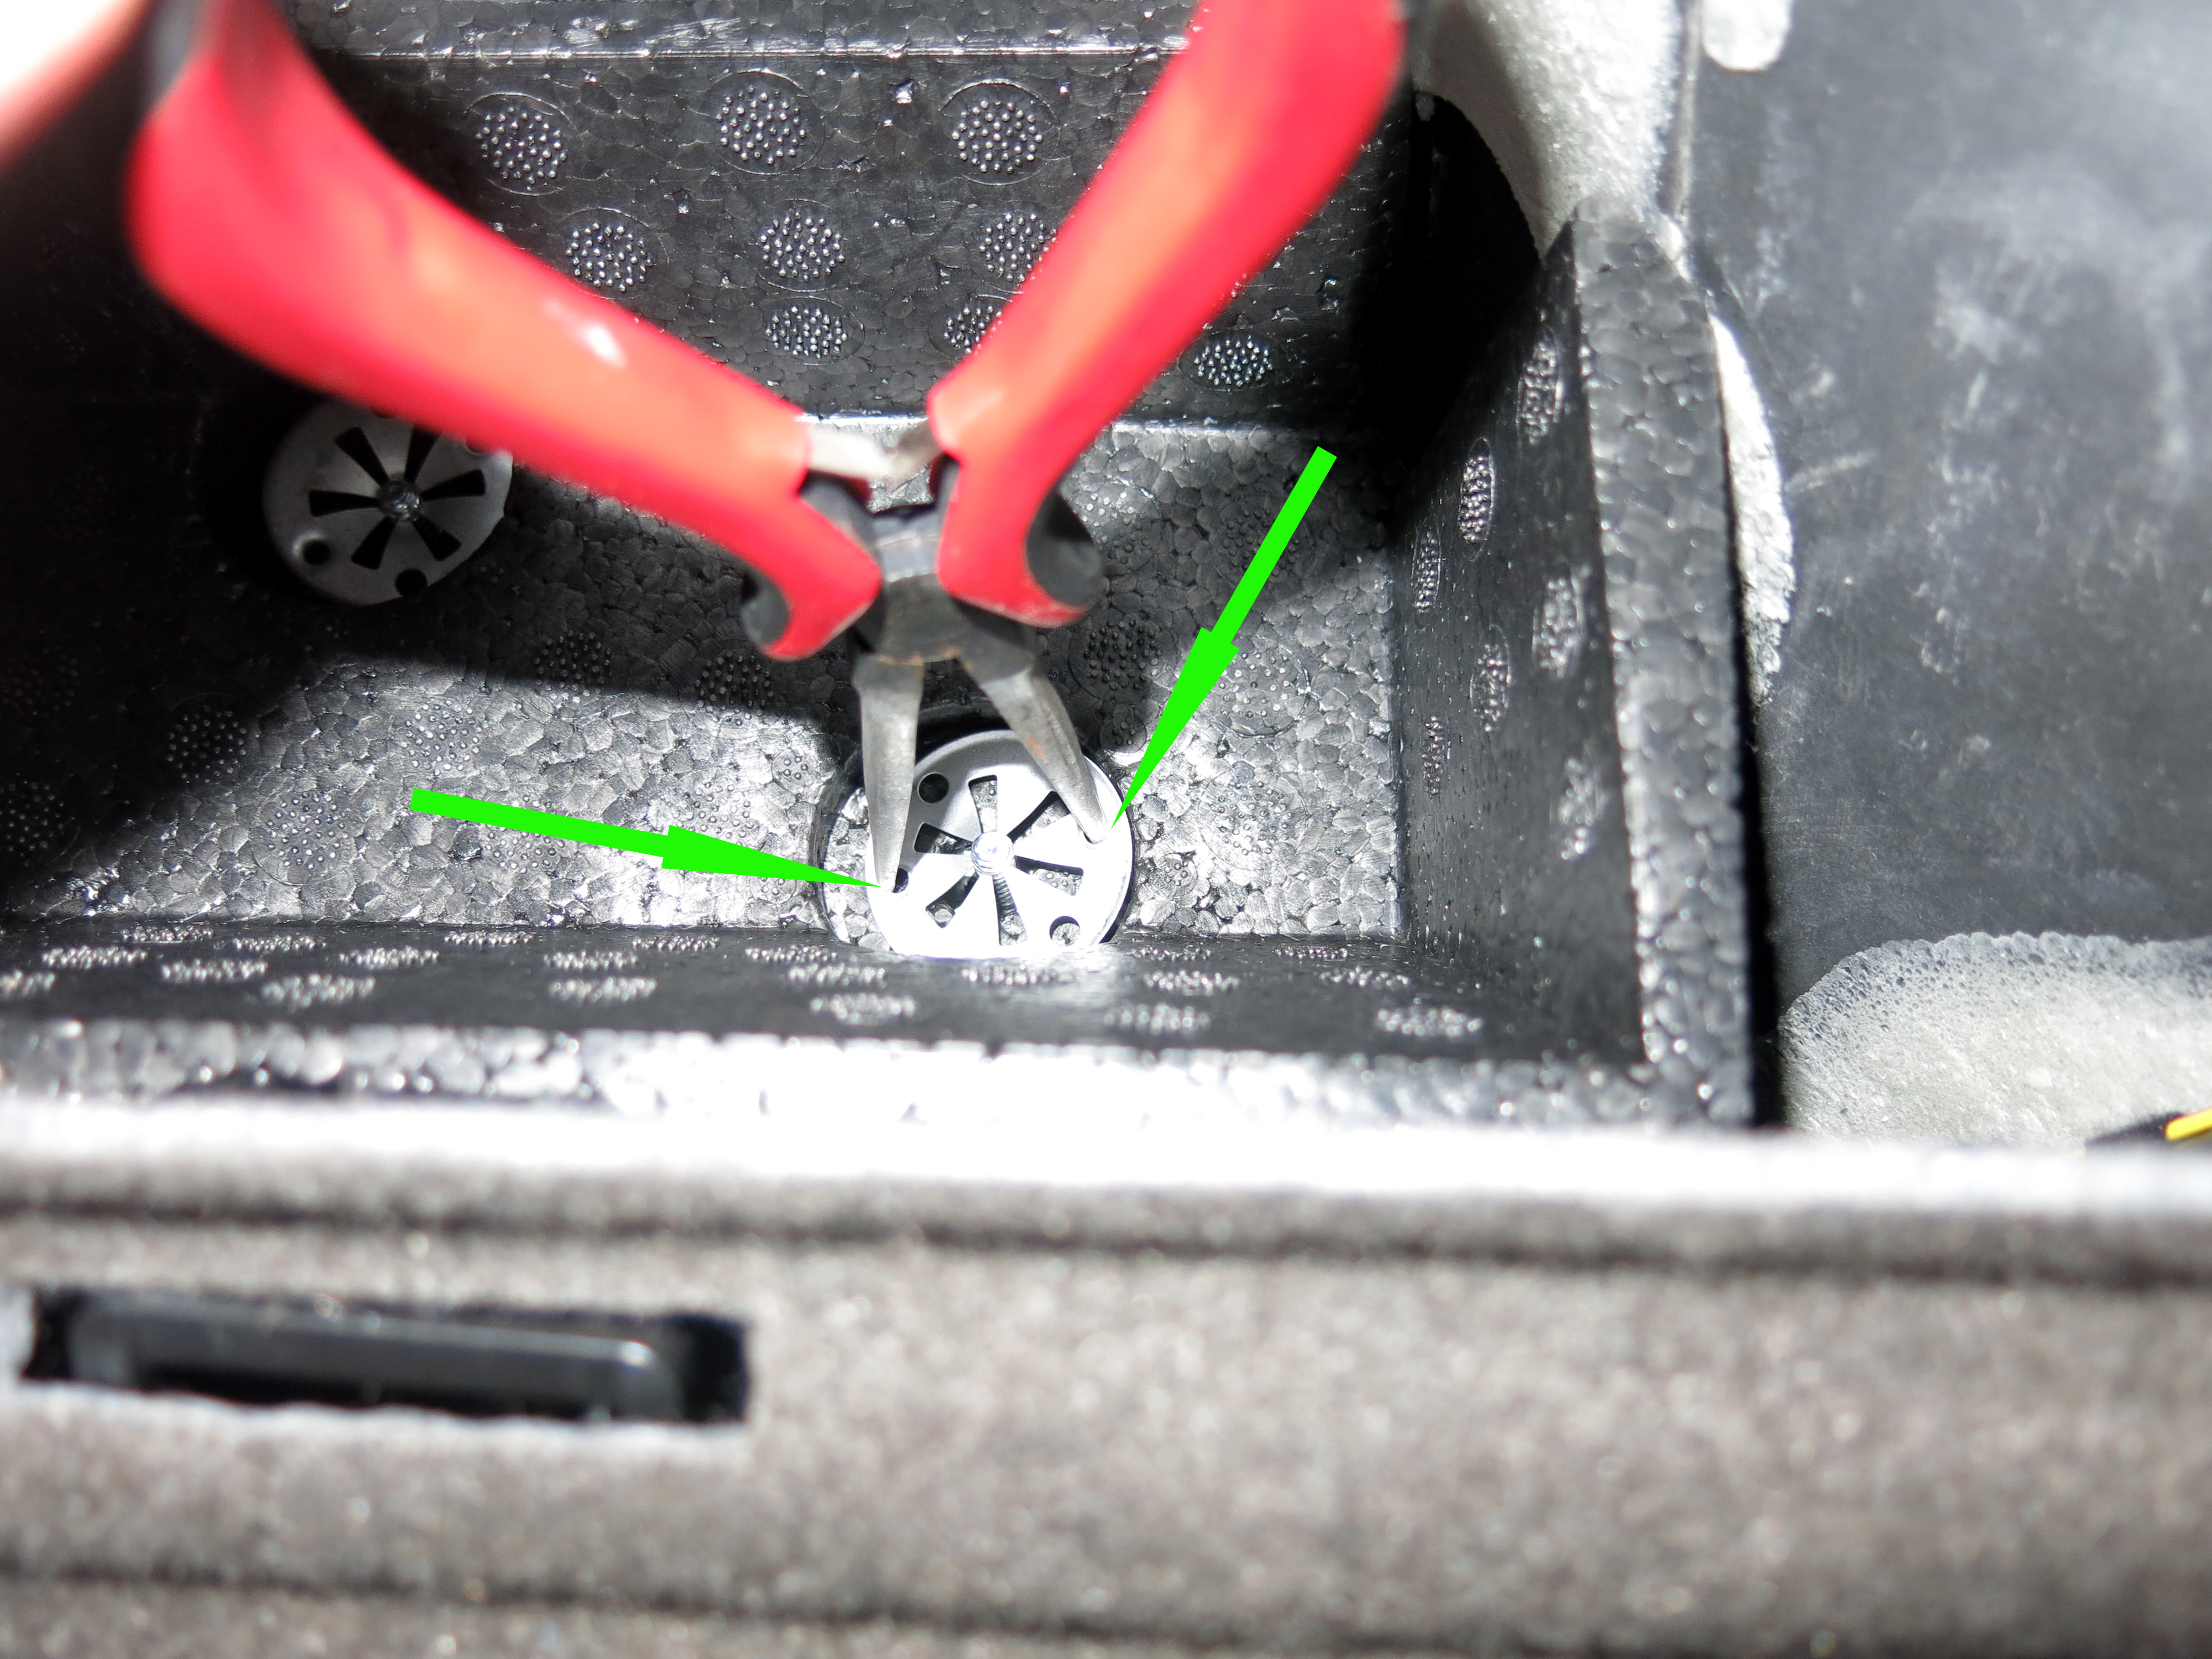
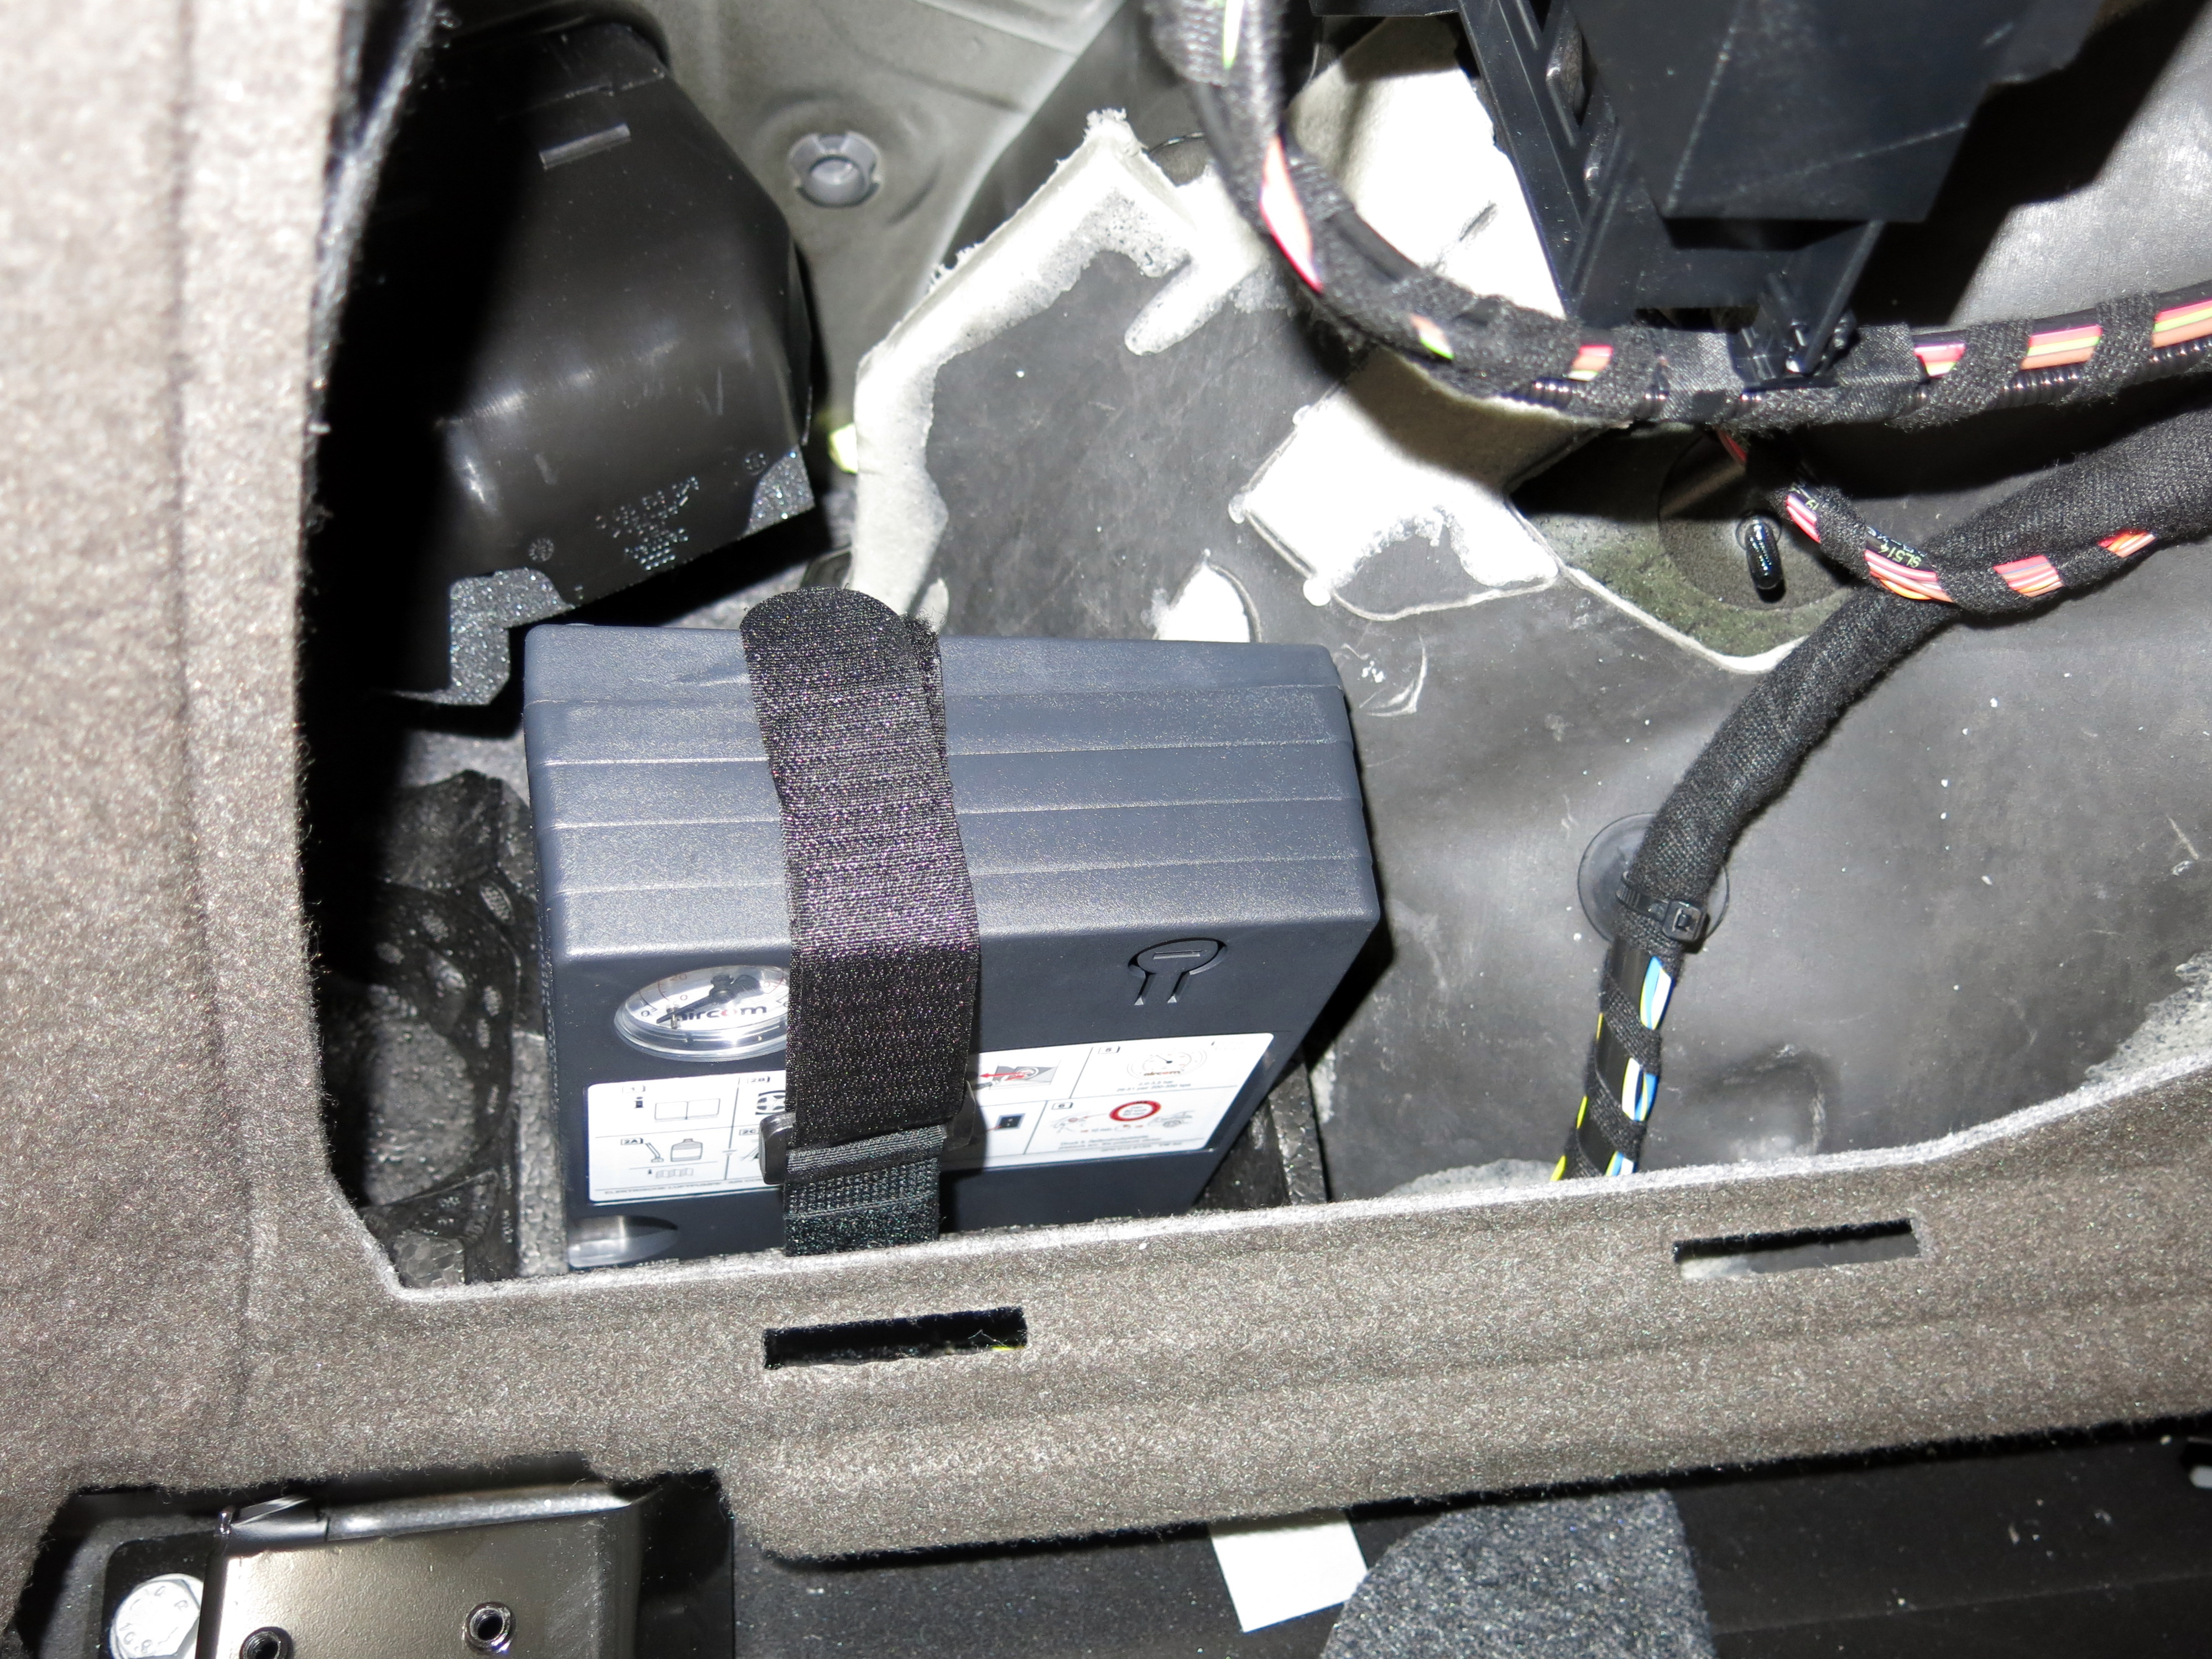
Remove the tire pump, and mount. Use needle nose pliers to turn off the flat washer/nuts.
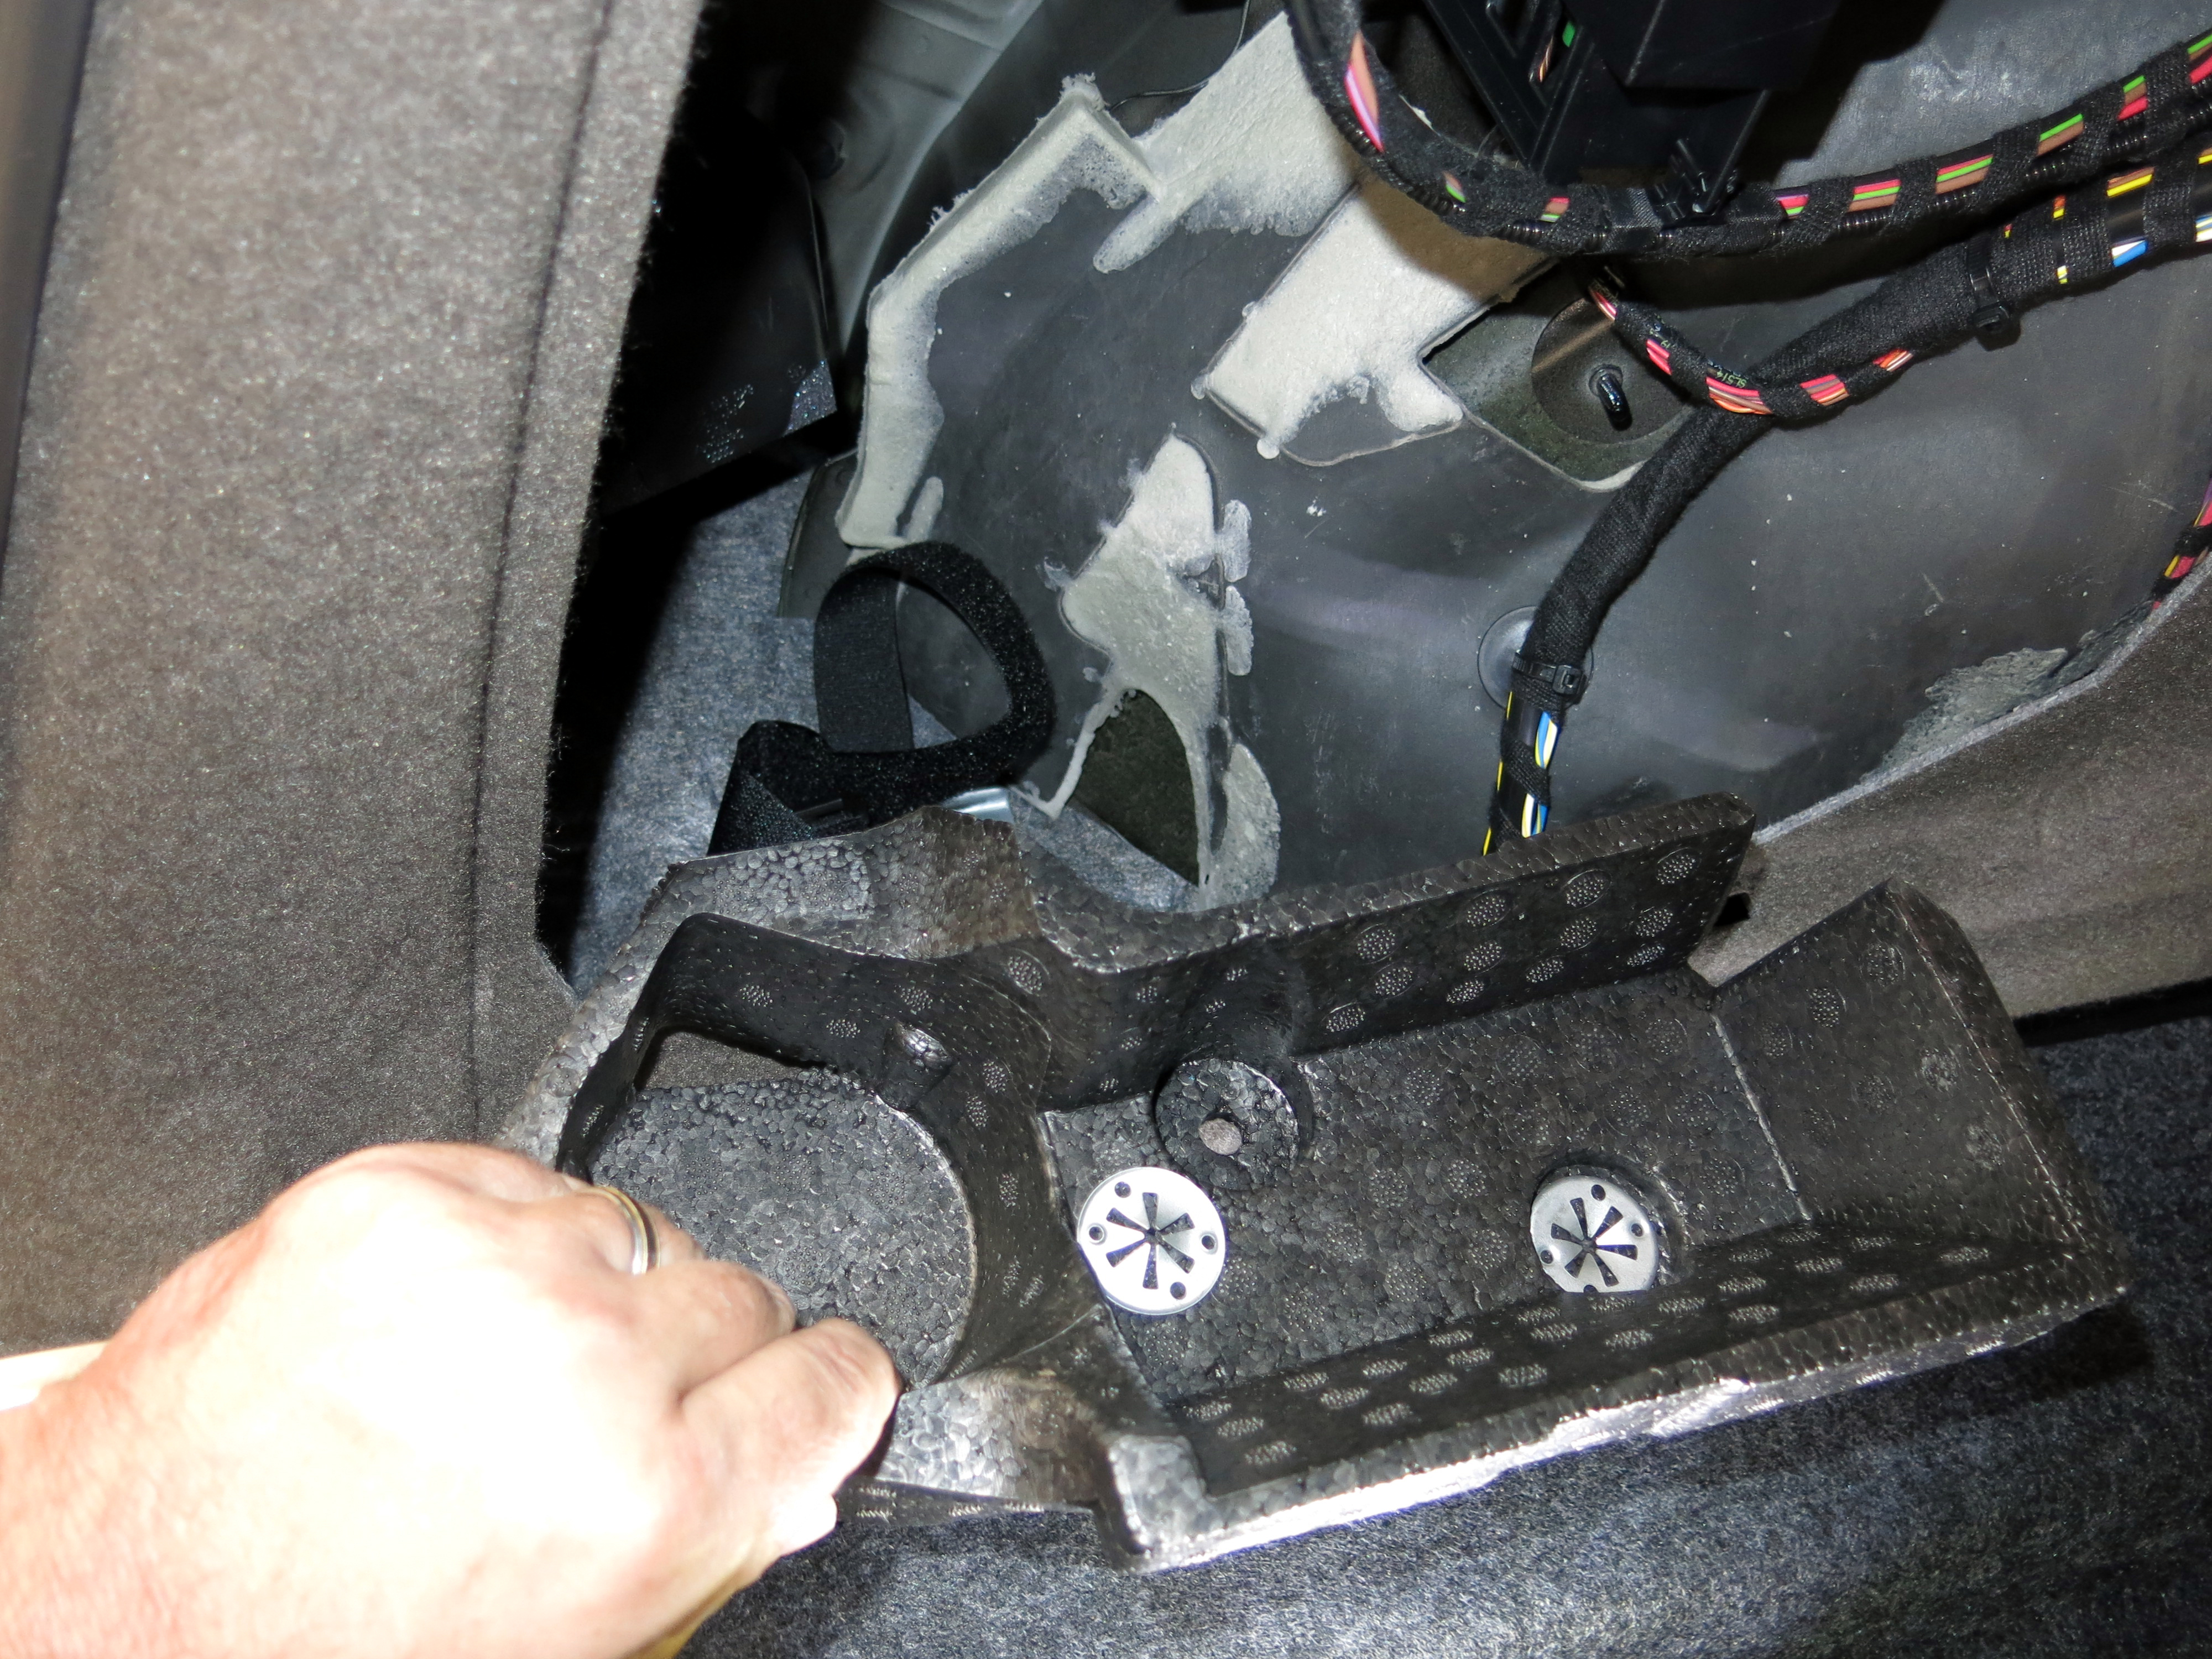
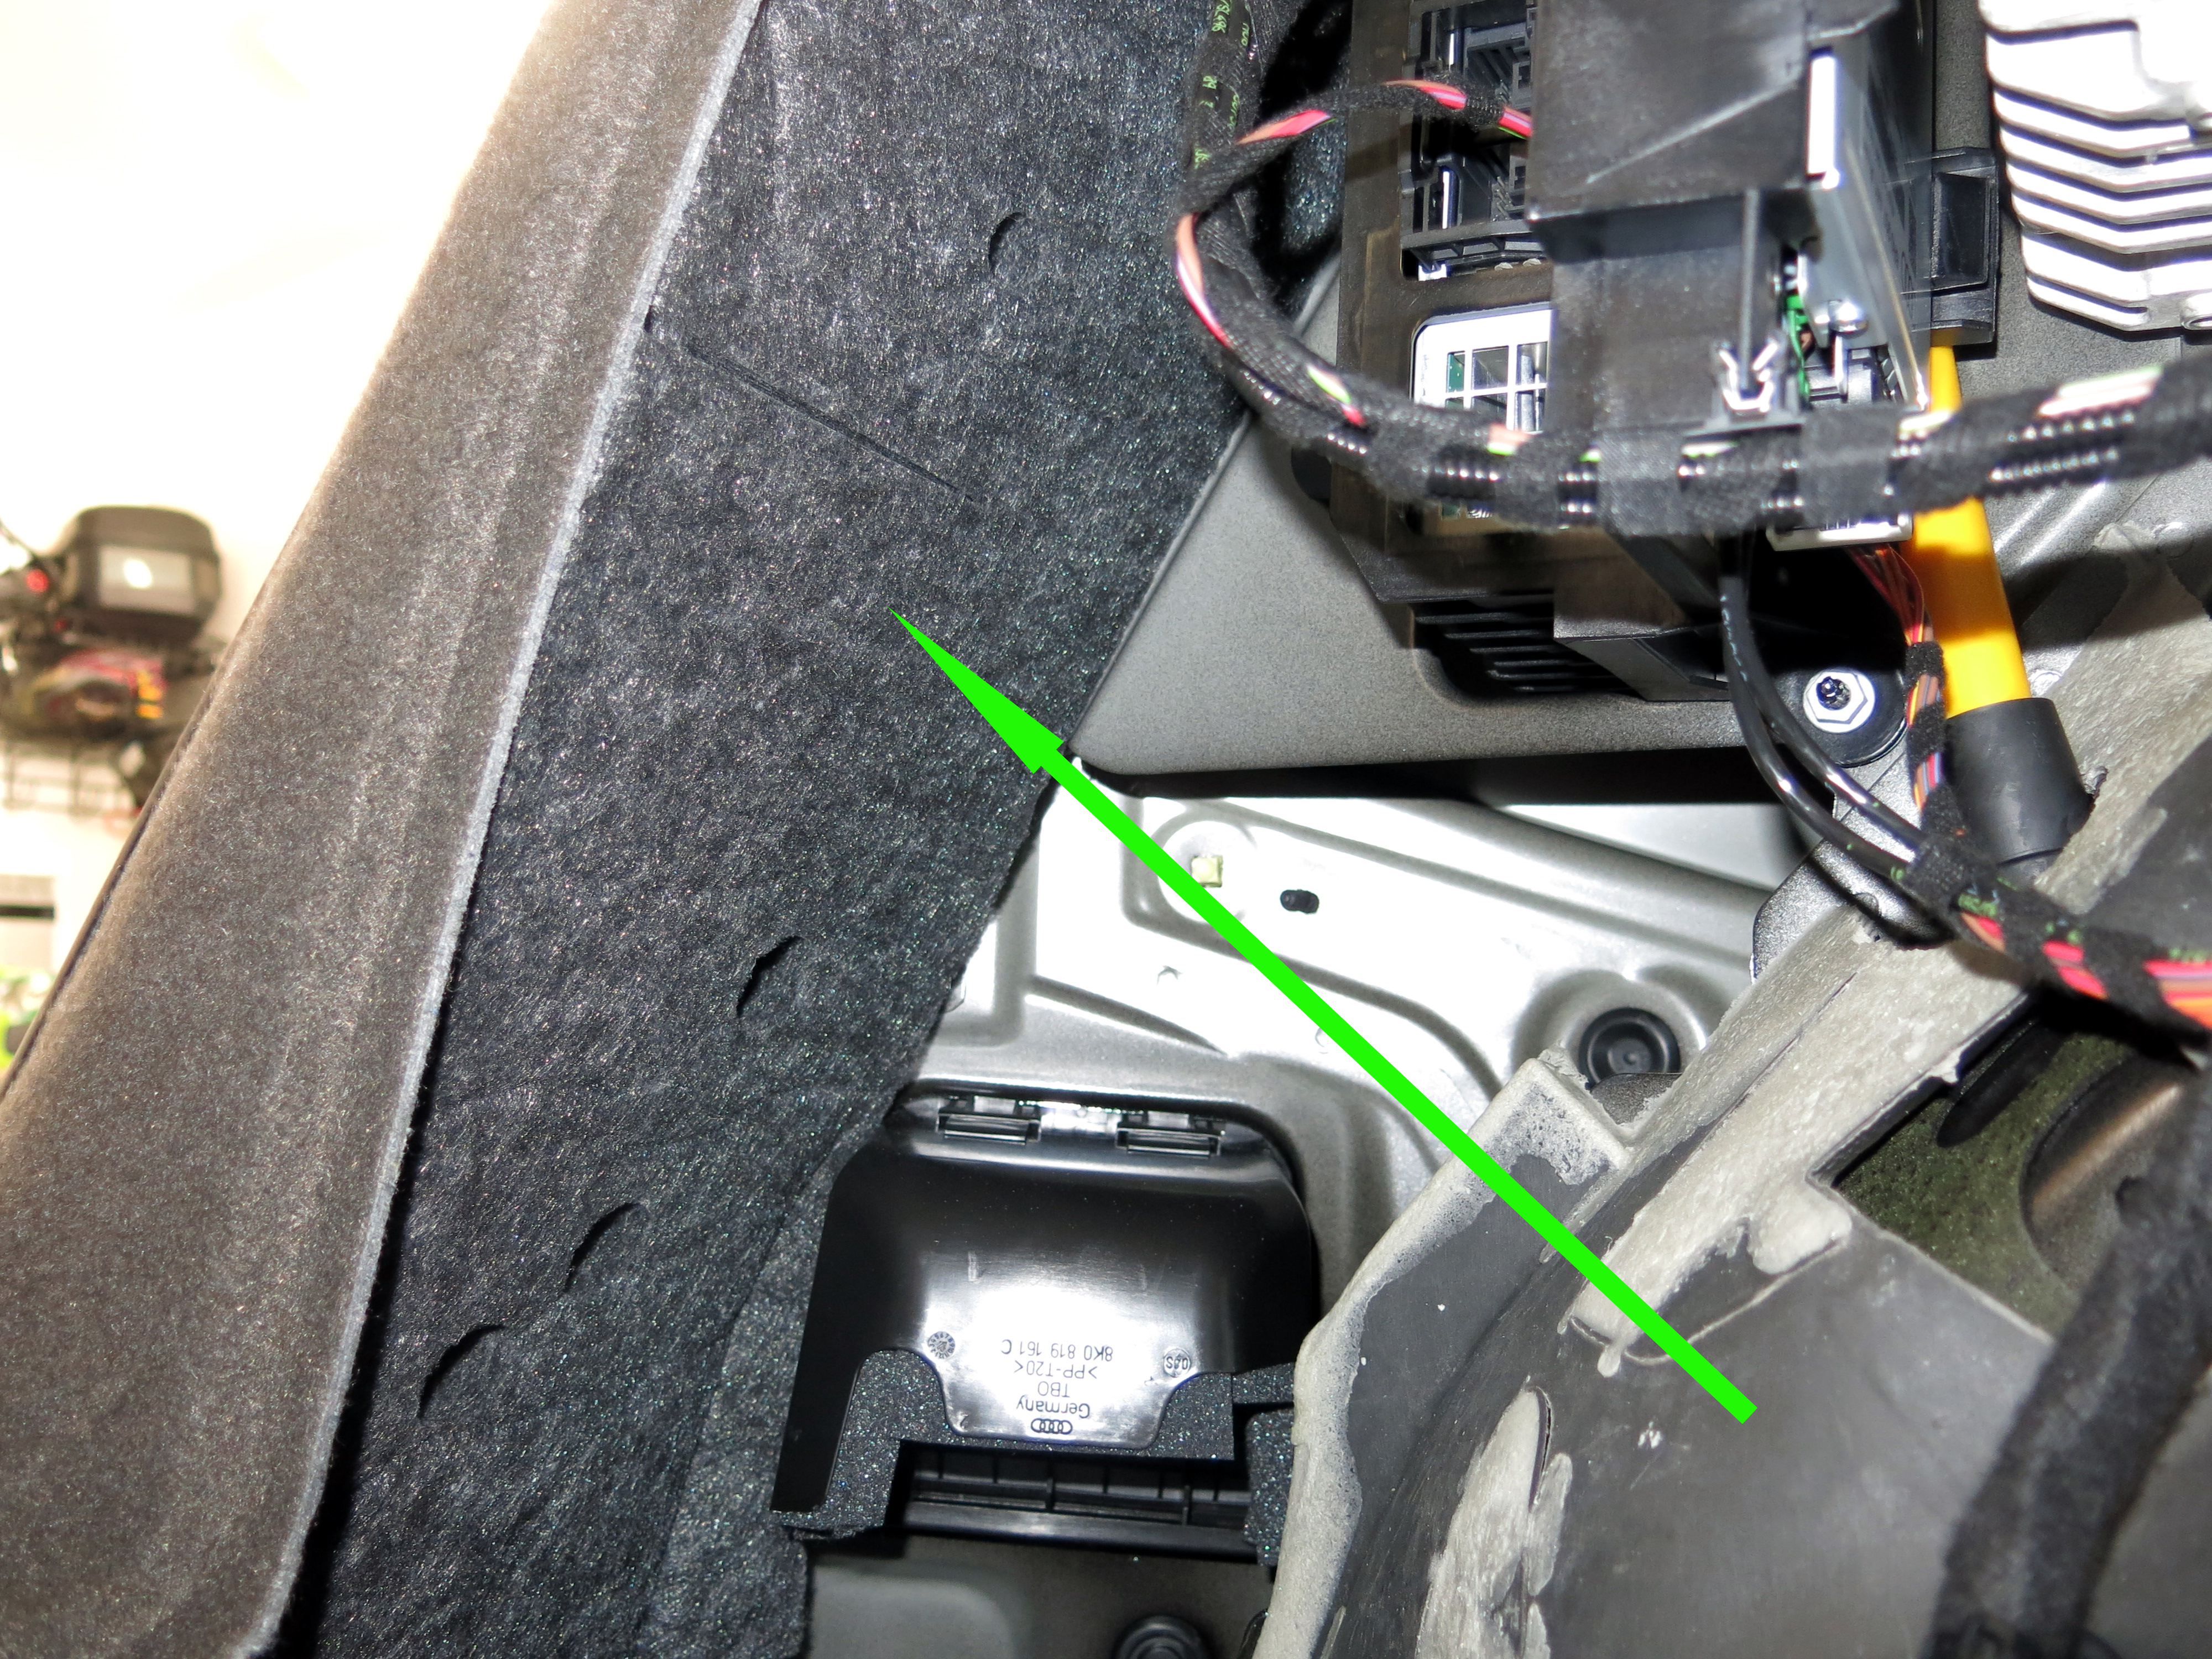
Now for the strike plate cover. Grip it at the bottom on one side and pull straight up. Once it pops loose, do the same on the other side. This will release it from the two pins. The unplug the connector.
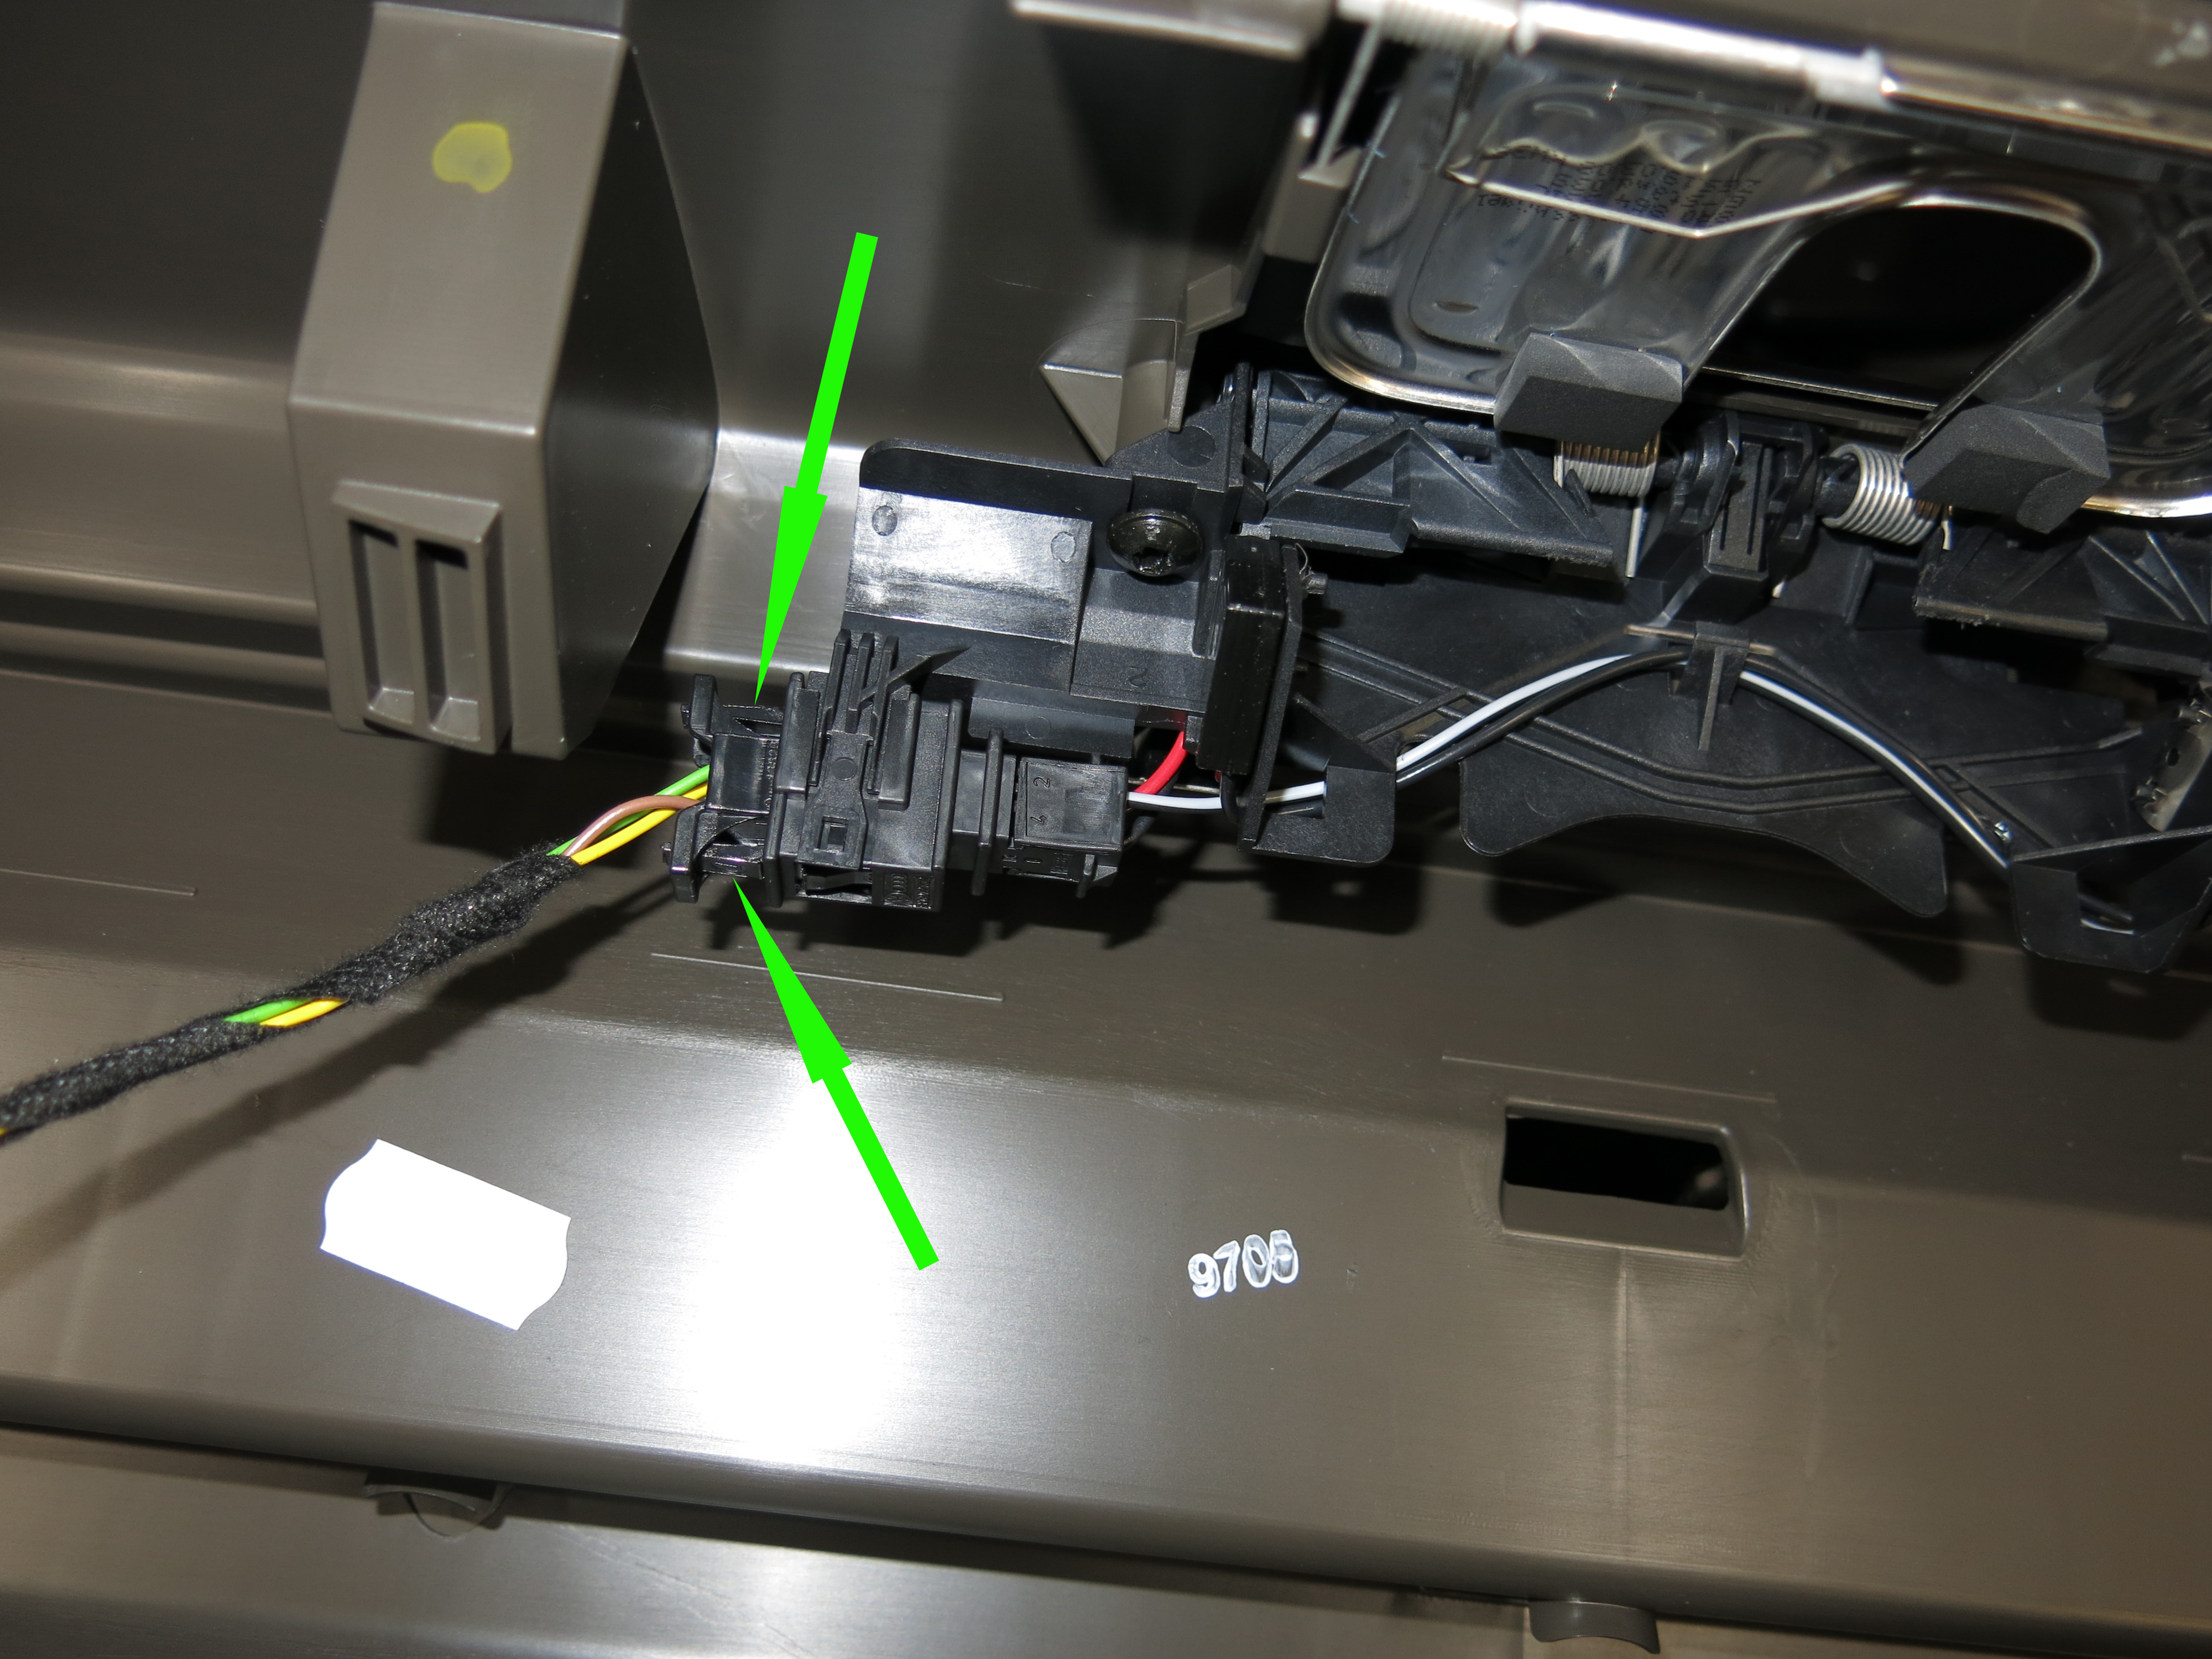
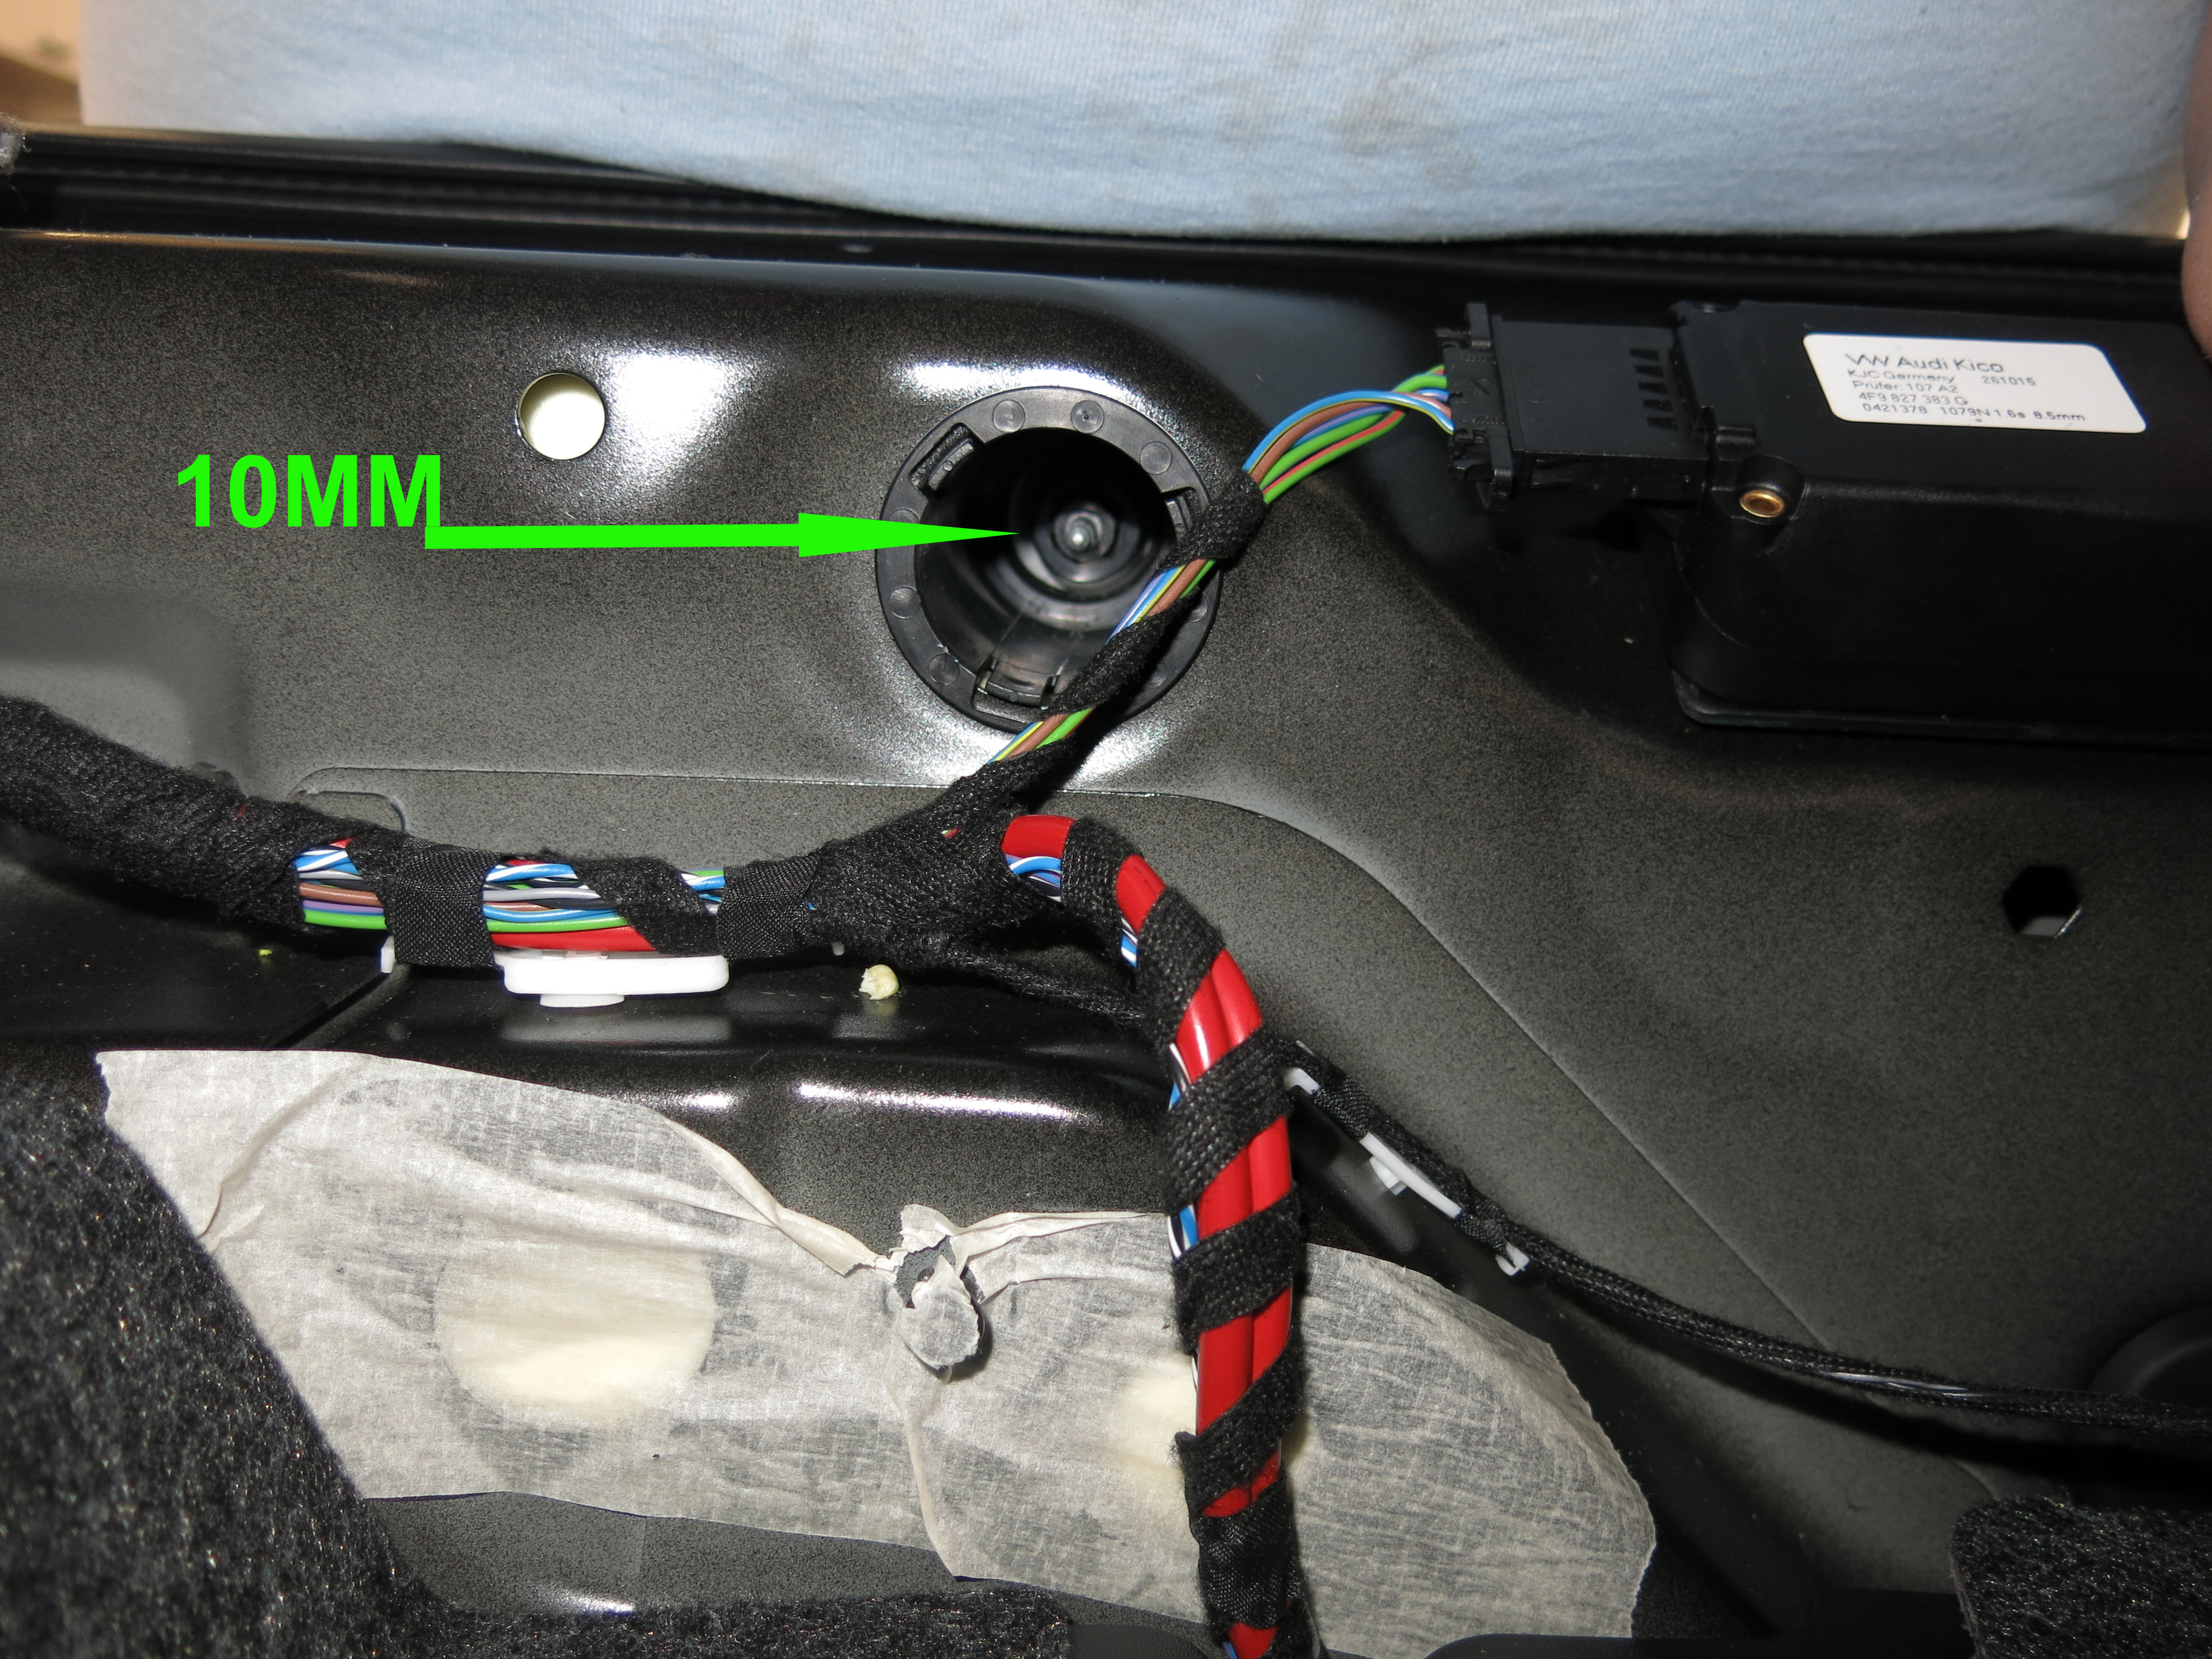
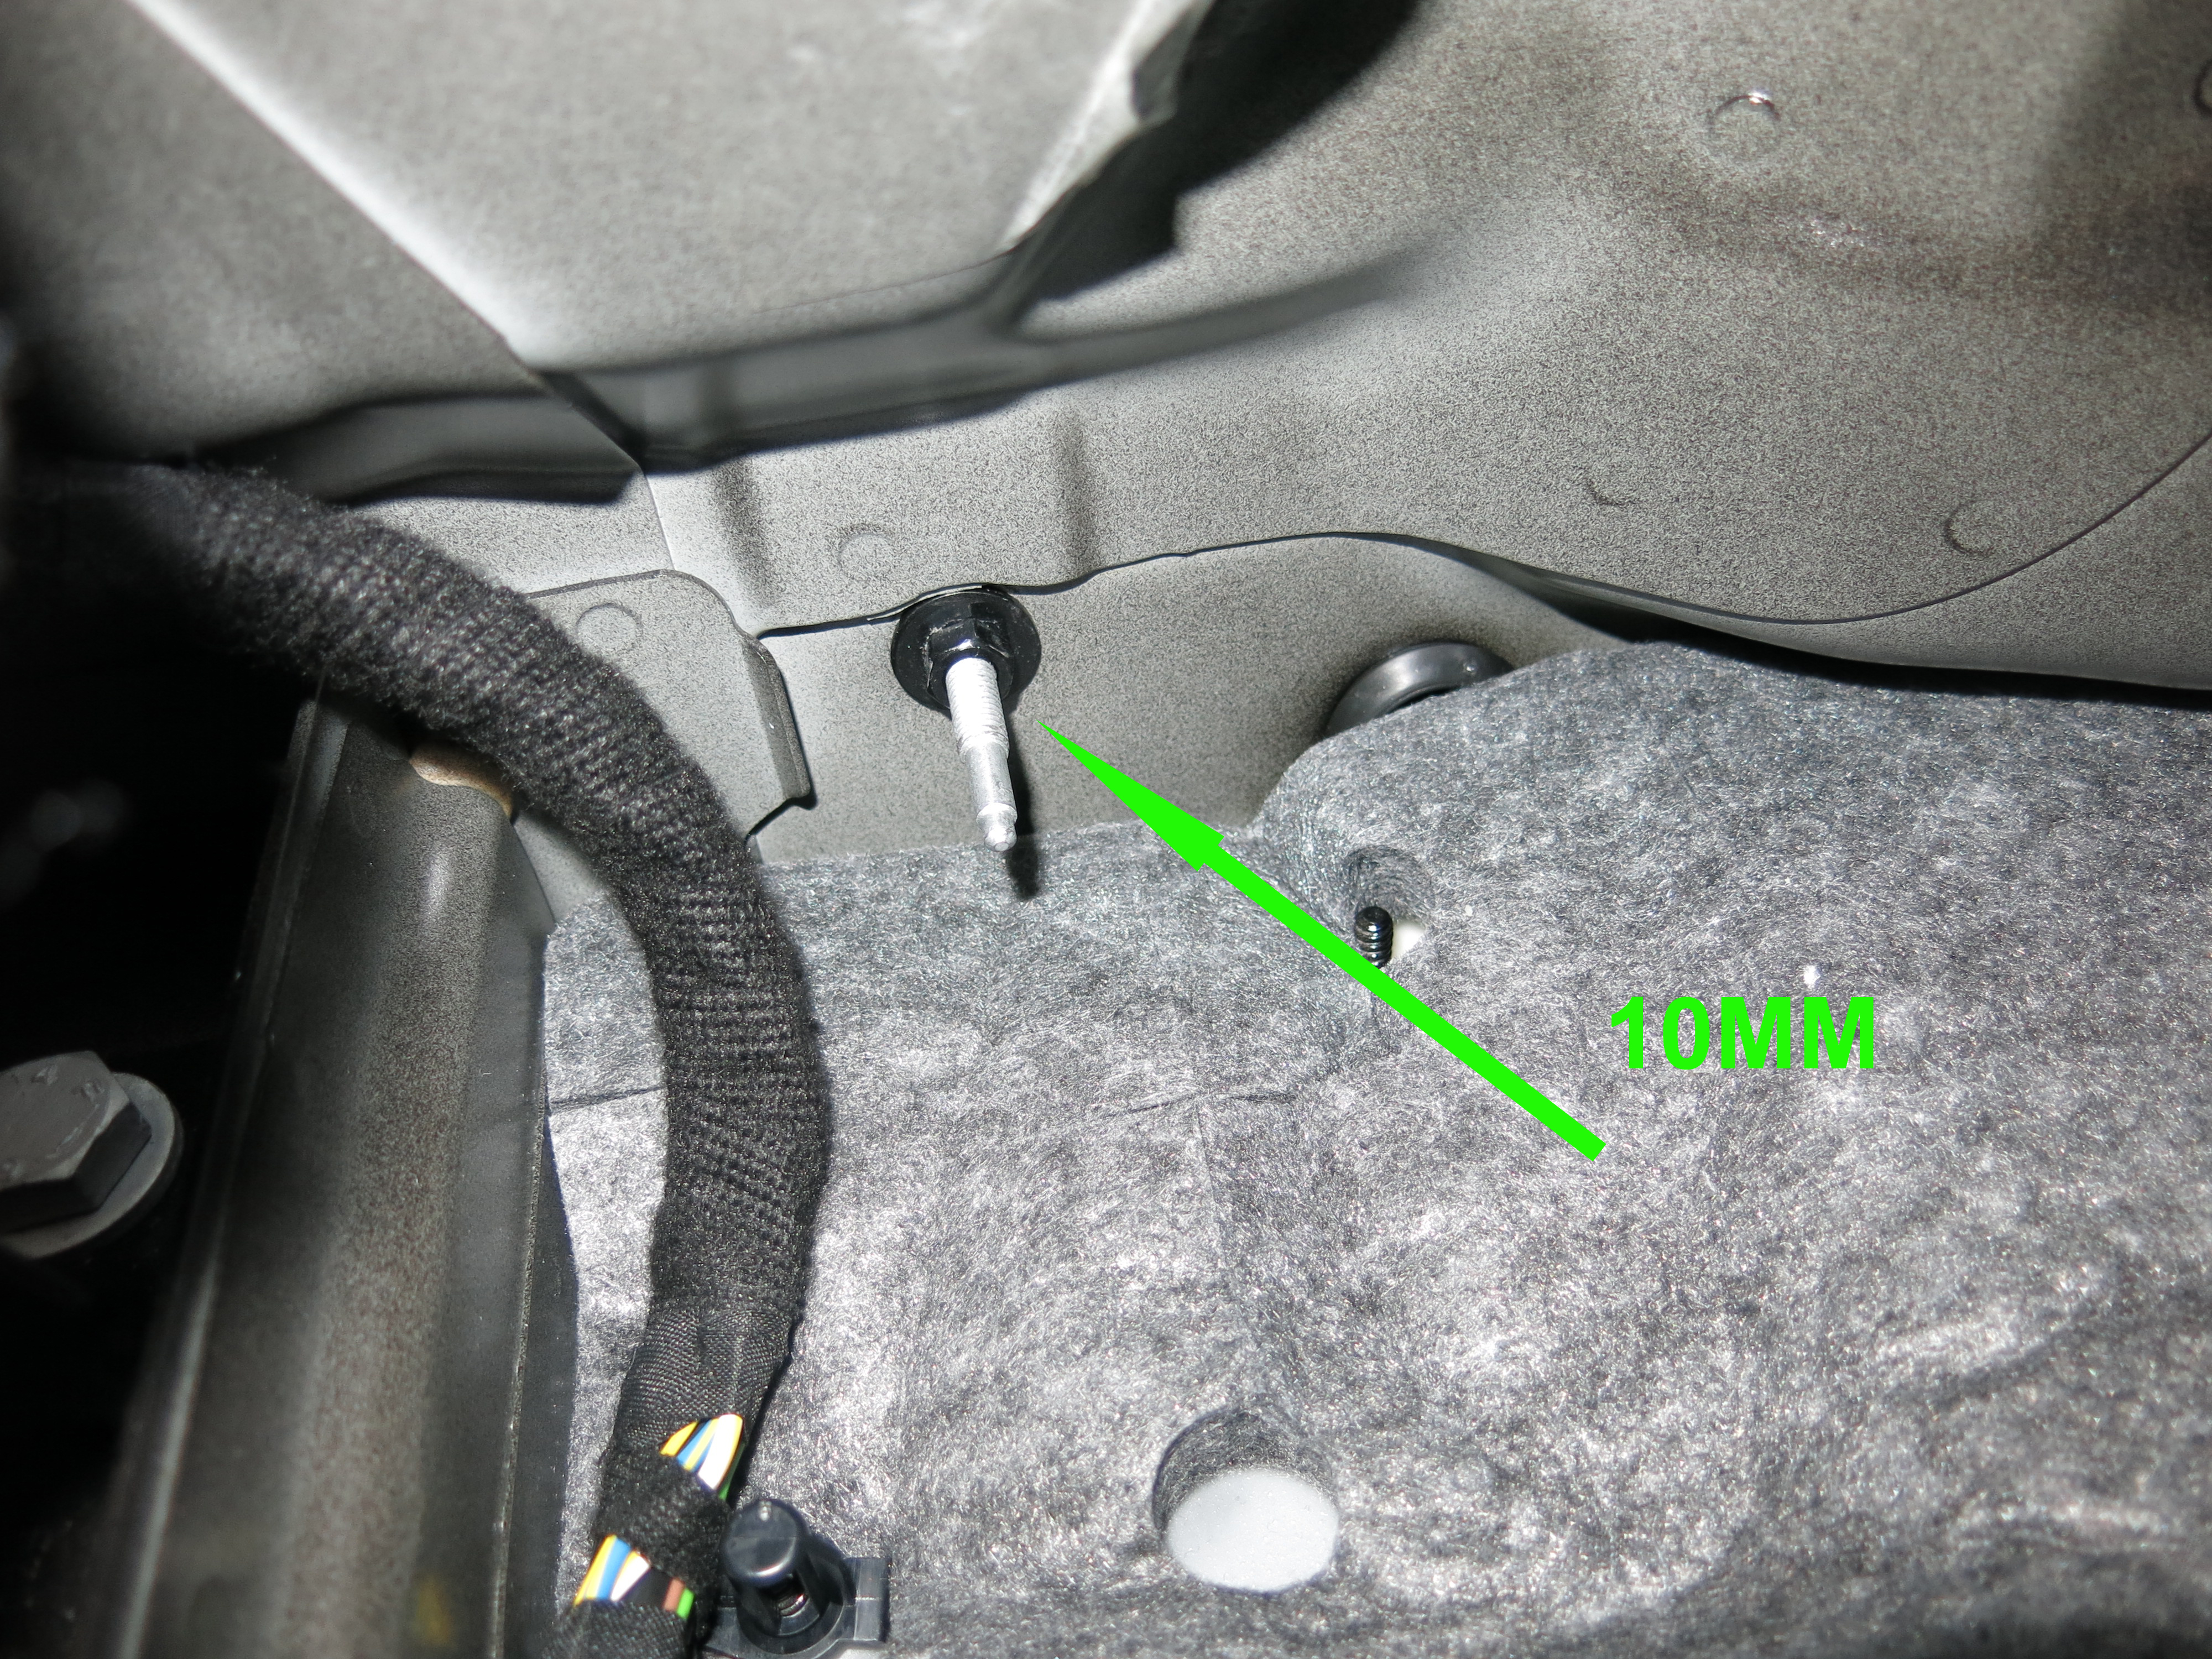
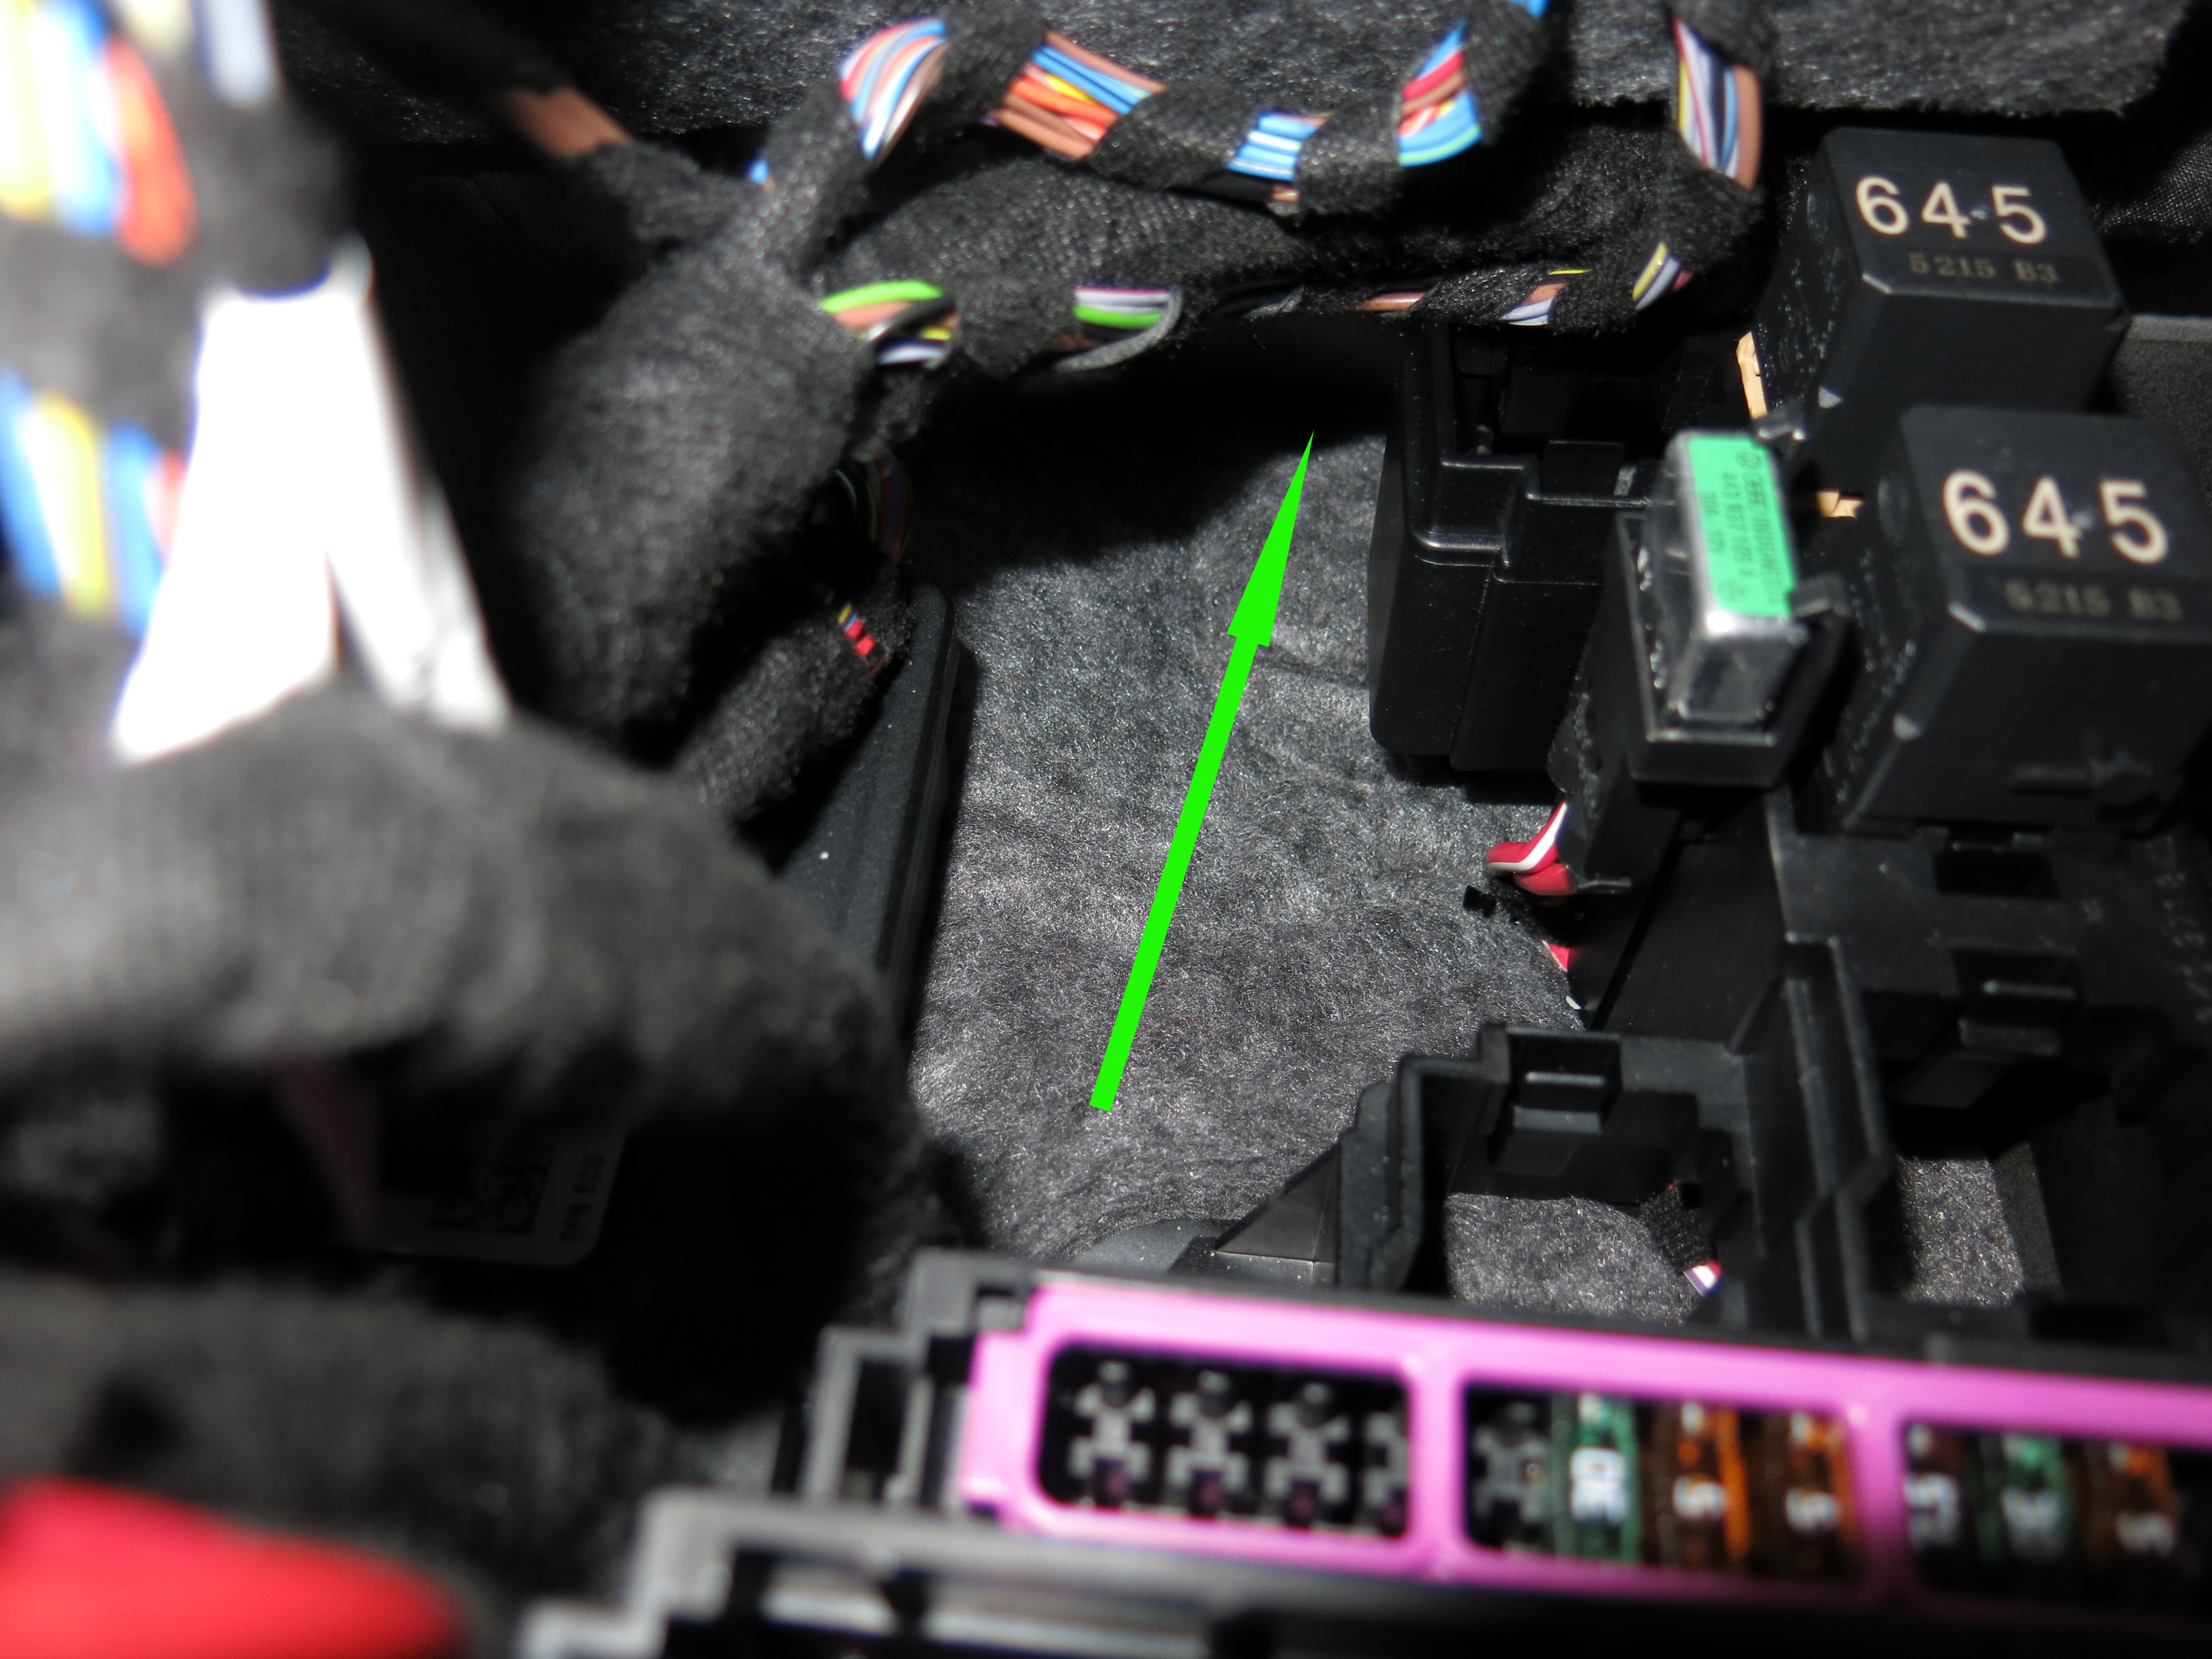
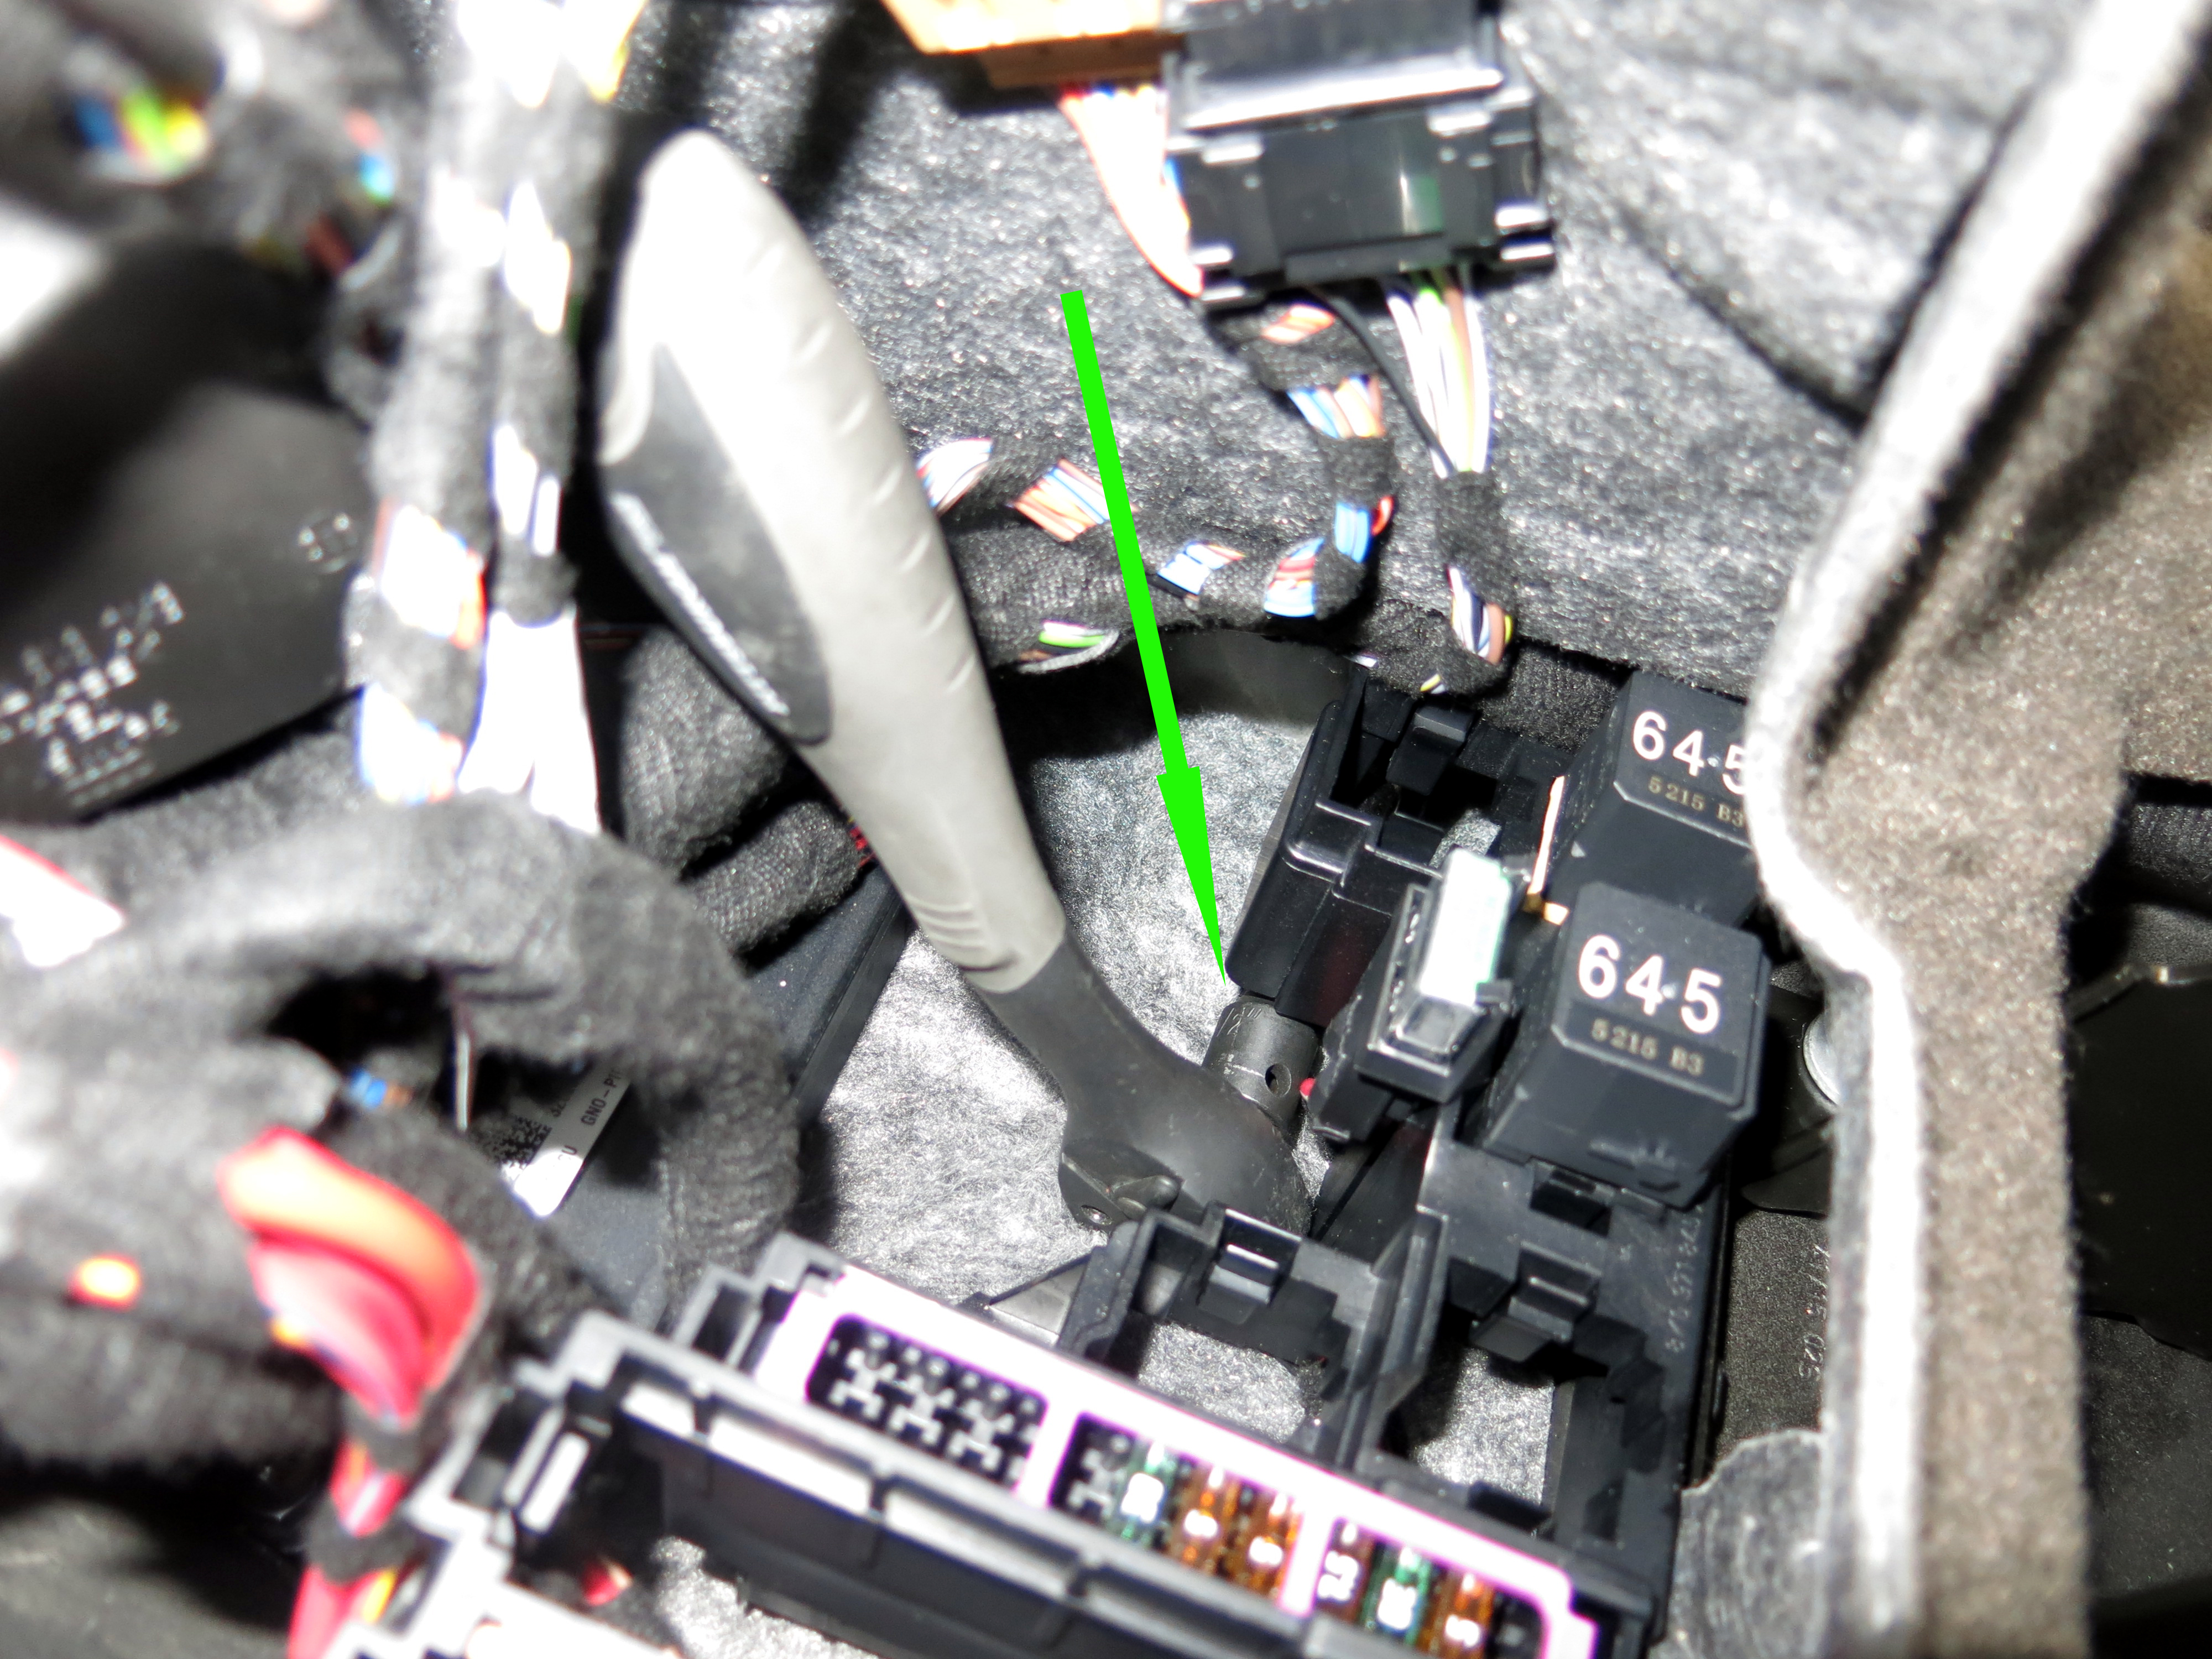
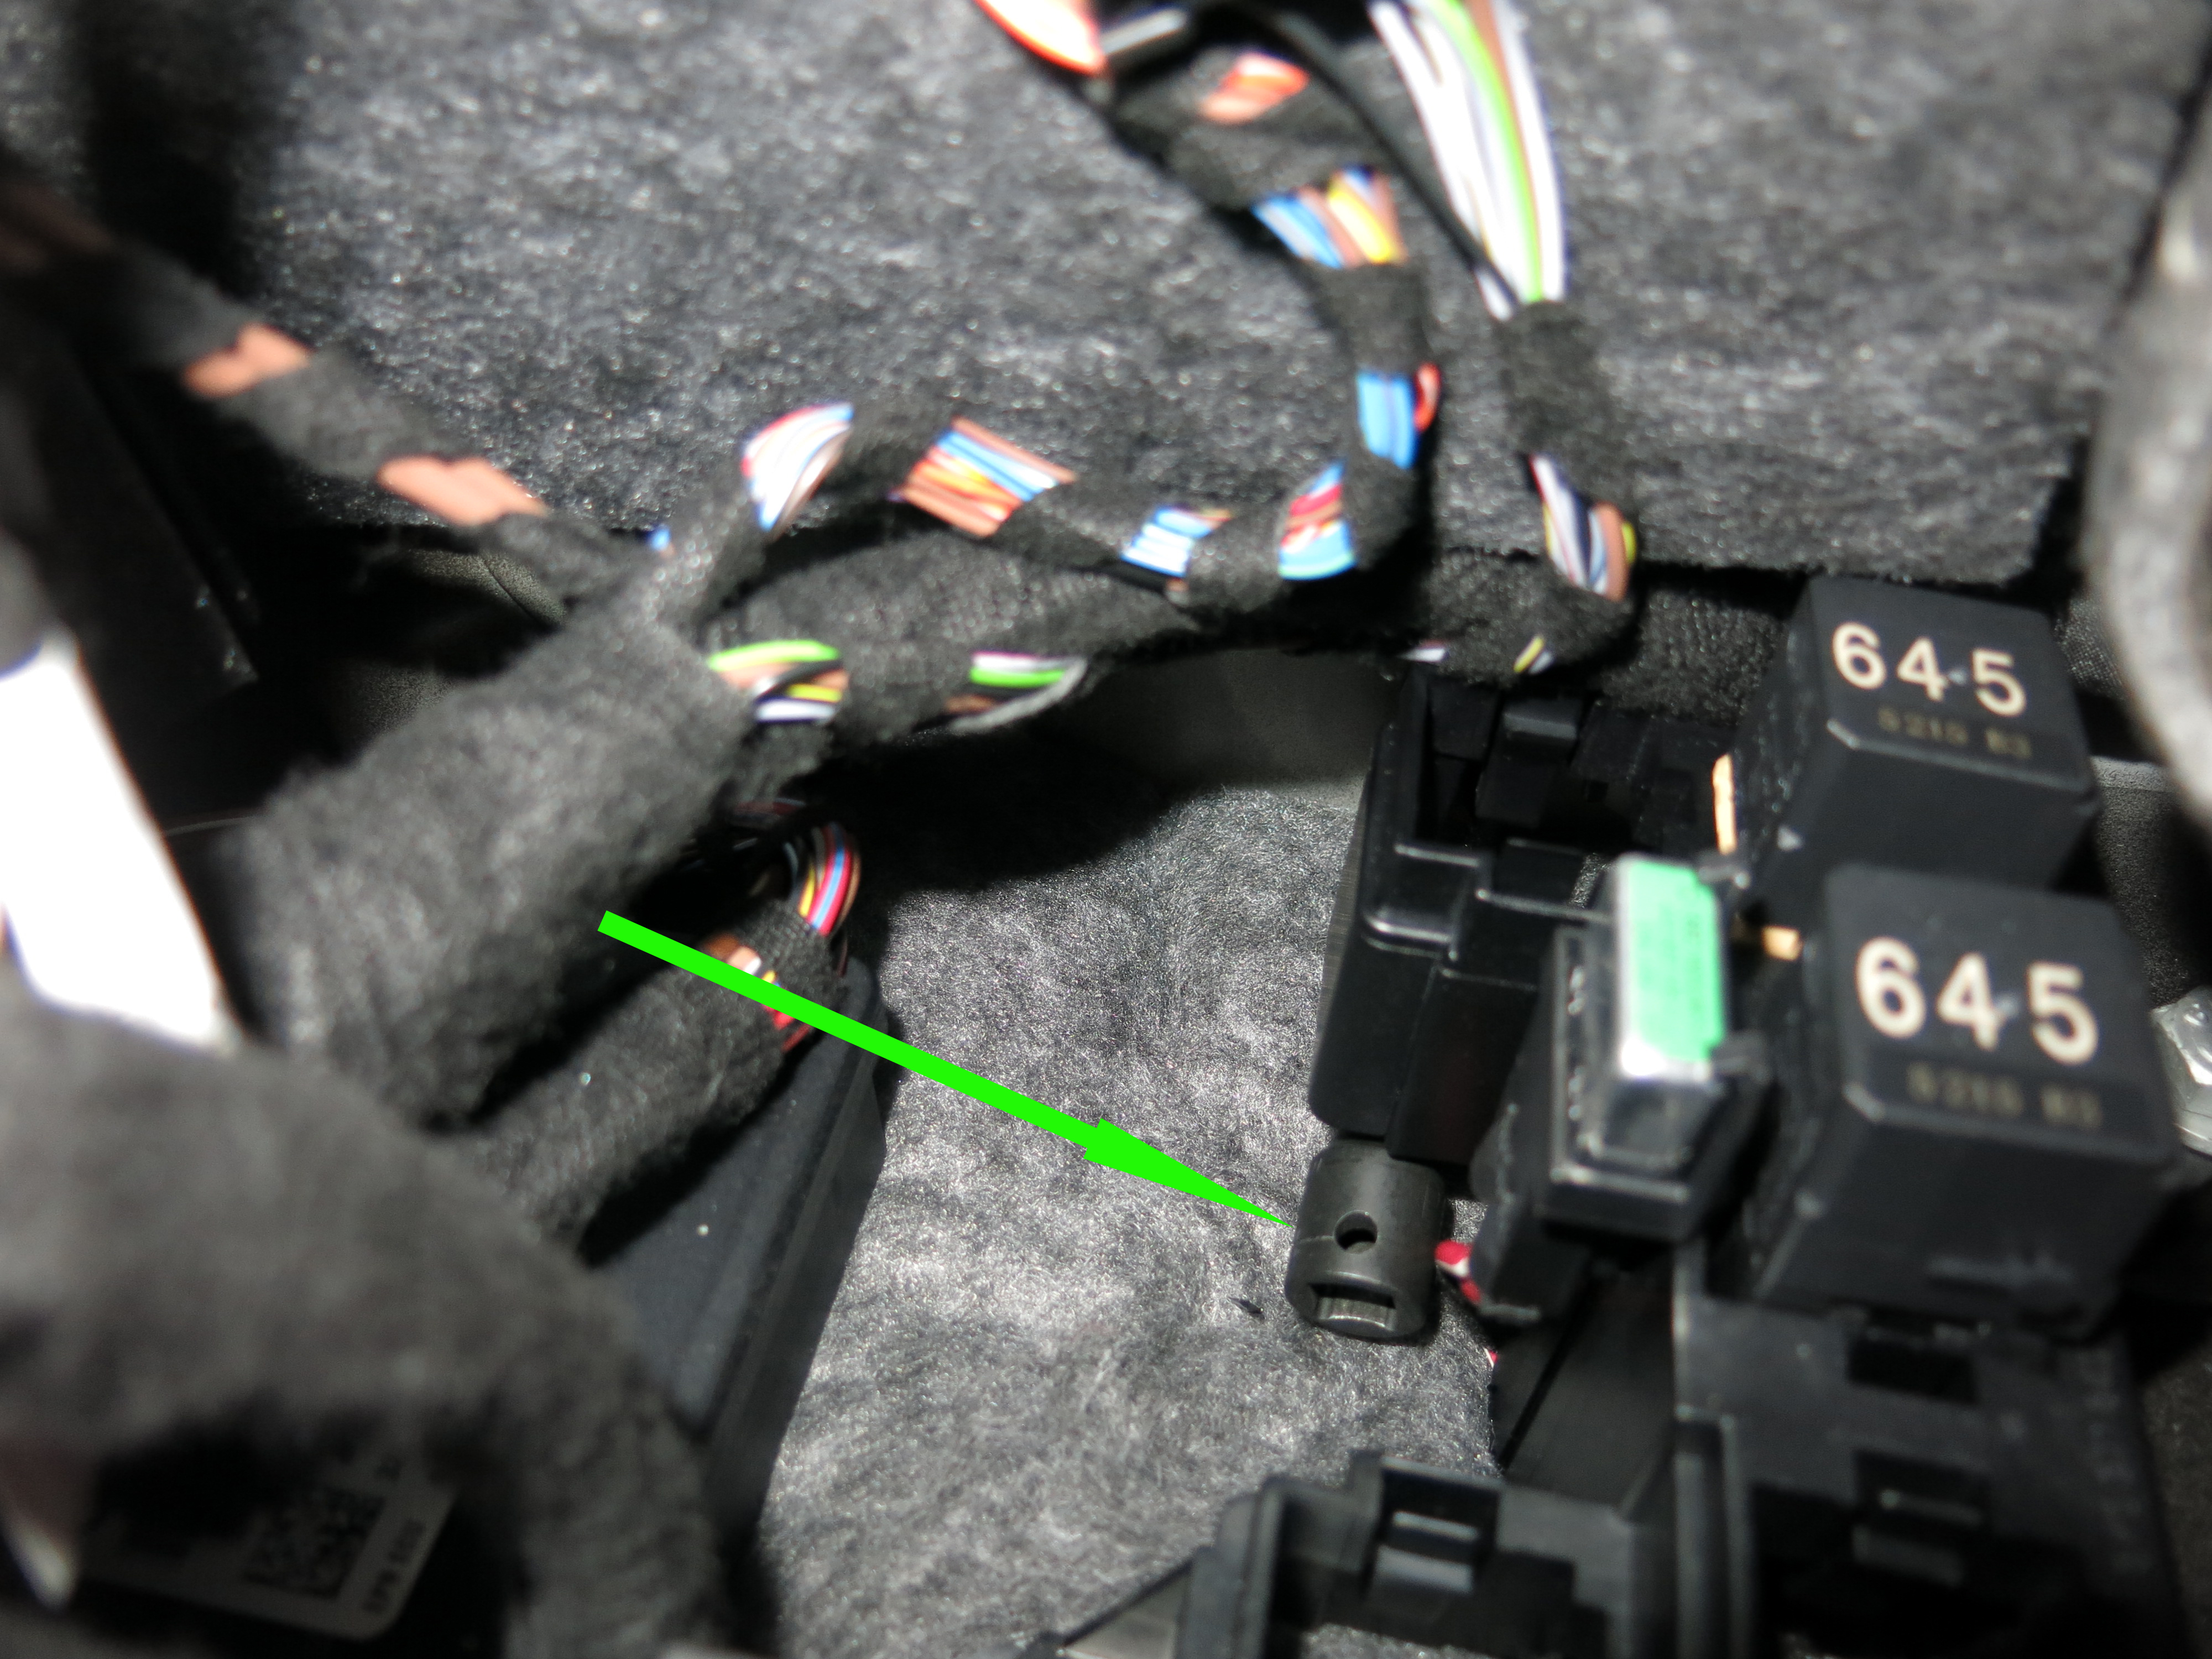
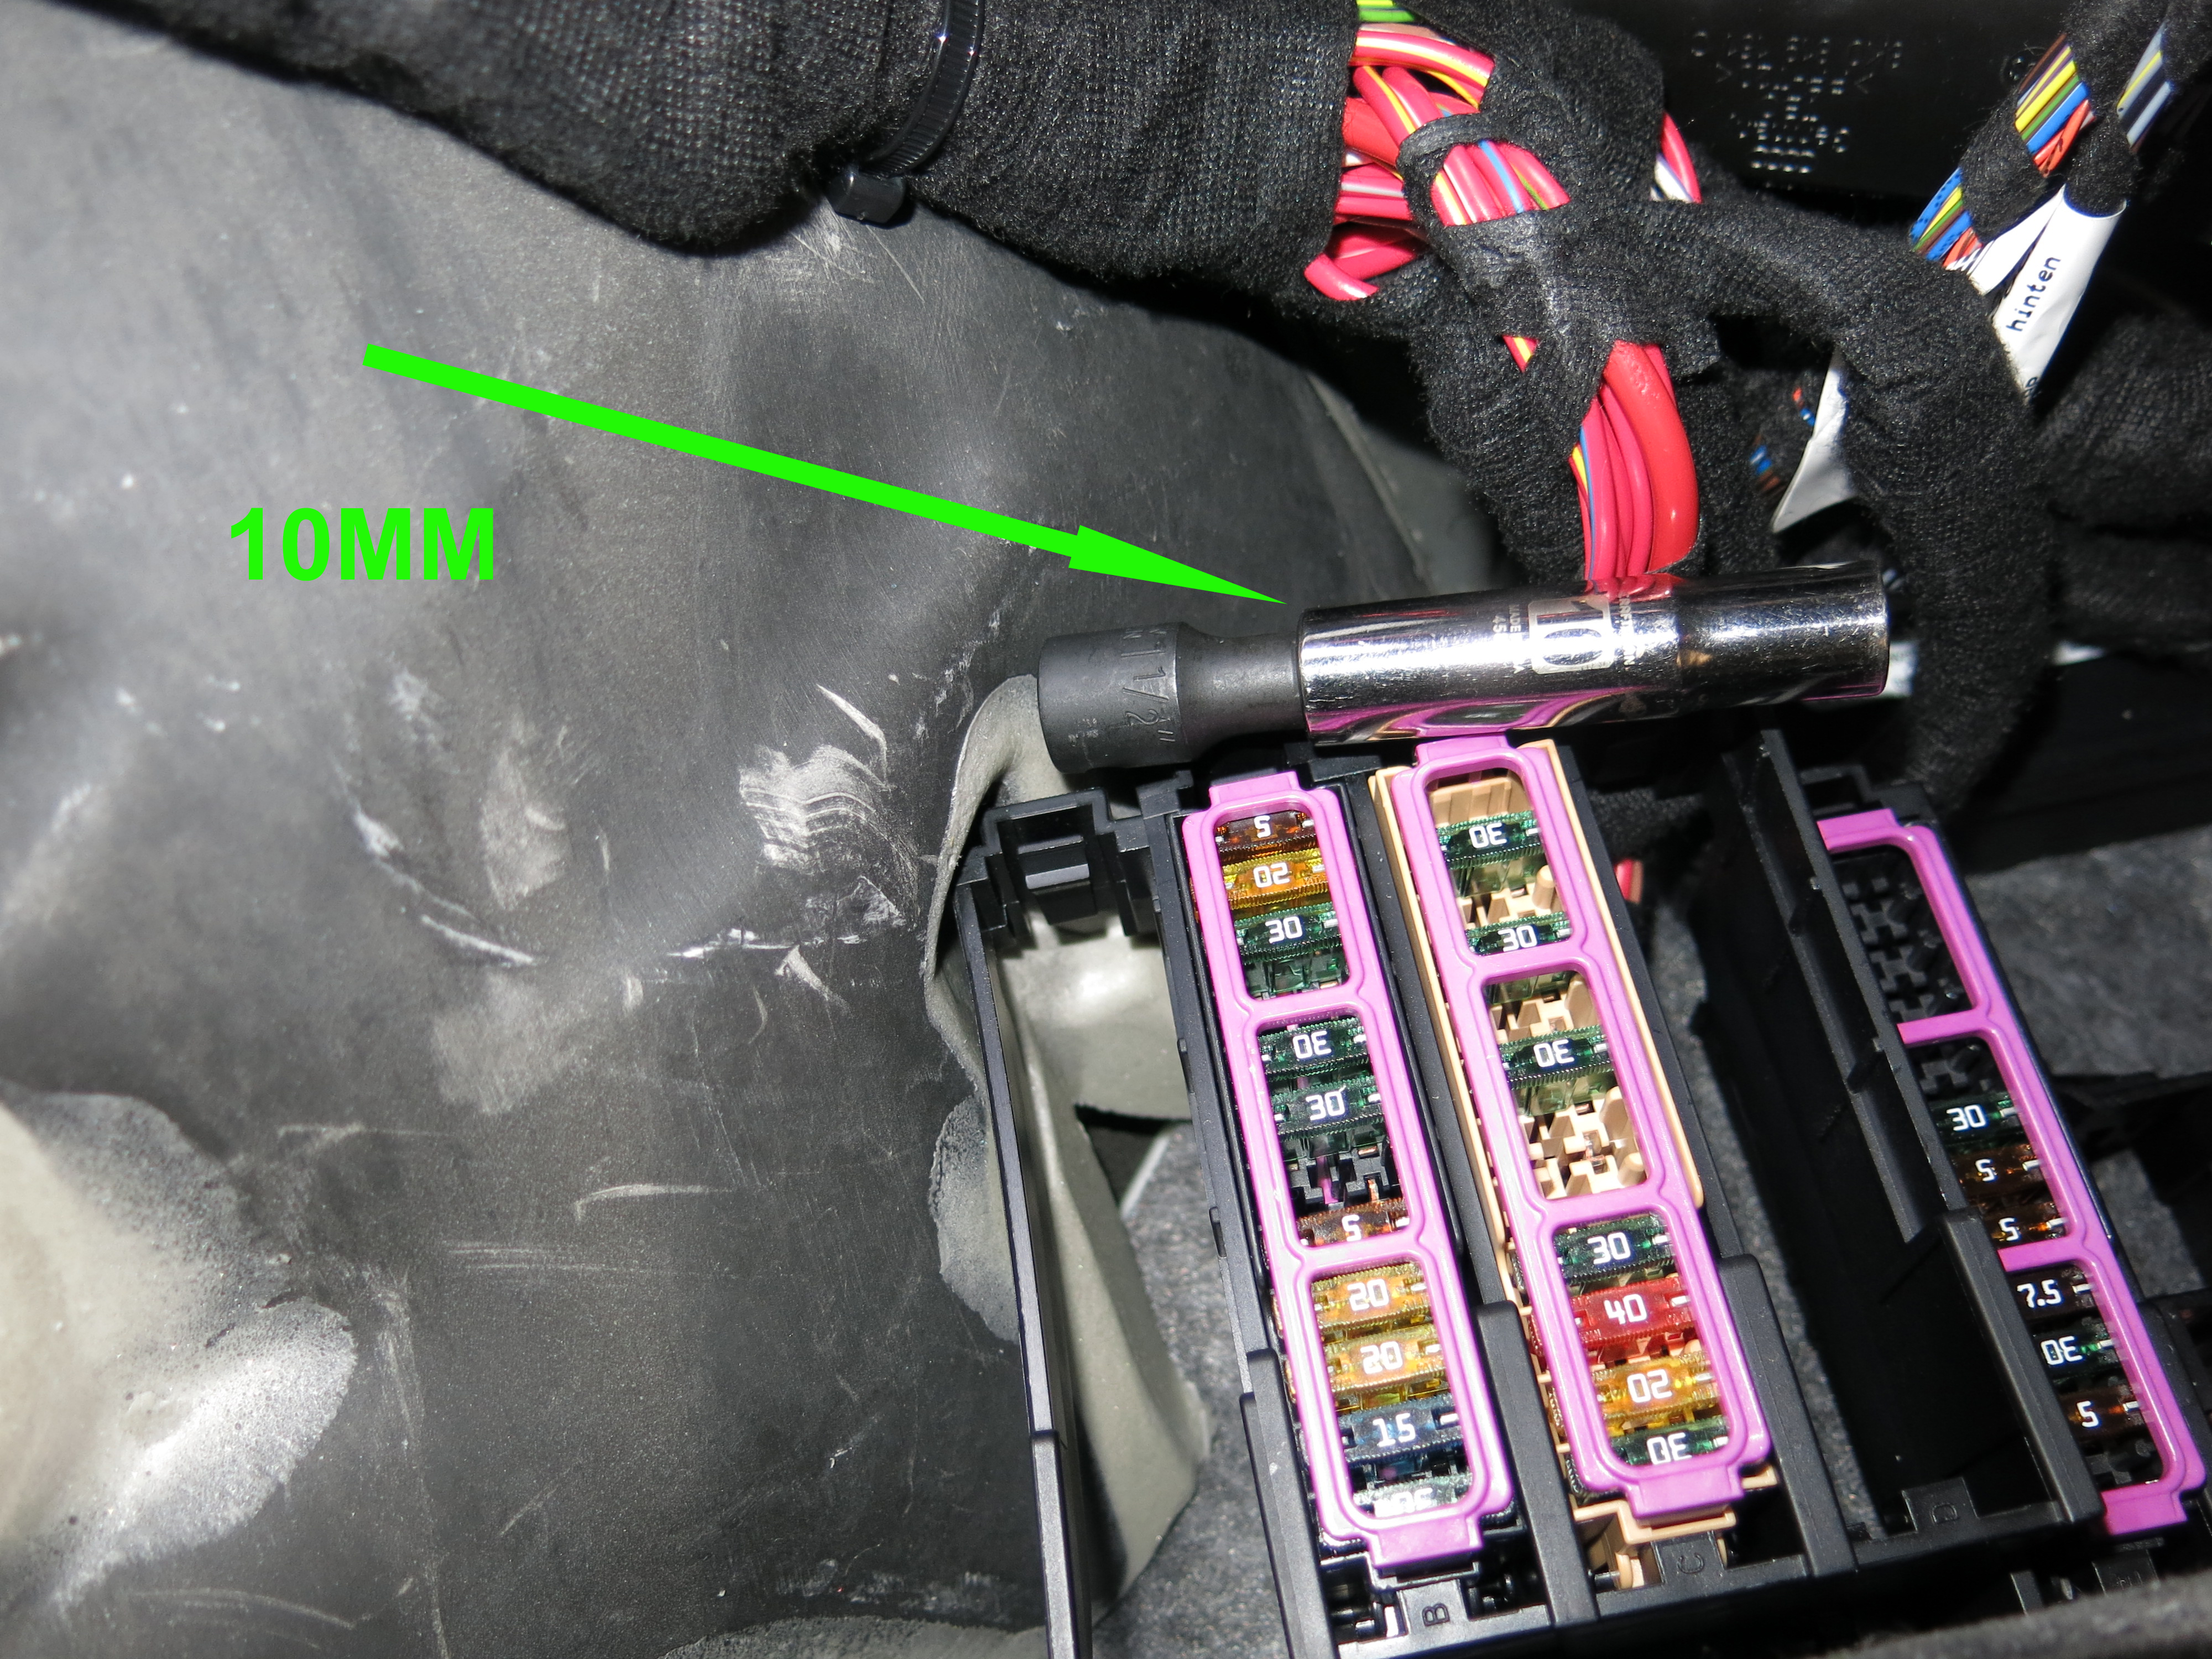
Now to remove the four main bumper nuts. They are 10mm and on long studs used to locate the bumper. Three of them are easy access, the one under the right side fuse box is tougher. You need a deep 10mm socket and a shot extension to reach it. I also remove the 10mm nut from fuse box so I could move it enough to get the bumper nut off.

It came with the wiring kit and all needed fittings, for just $265 shipped.
It took me about 4 hours, 2 of them figuring out the wiring on the car. I used this thread to get the basics. Read the whole thread and save yourself some time. https://www.audiforums.com/forum/aud...trical-171730/
I backed the car onto a set of ramps to give me more room, but I suggest that, unless you are tall, don't bother. Very little is done under the car, and my short stature made me on my toes a lot.
Beginning:
Pull both side covers:
Remove the tie down with a T30 Torx bit, then lift the side rails out. They pop up and unhook from the cross piece by the seats.
Remove the tire pump, and mount. Use needle nose pliers to turn off the flat washer/nuts.
Now for the strike plate cover. Grip it at the bottom on one side and pull straight up. Once it pops loose, do the same on the other side. This will release it from the two pins. The unplug the connector.
Now to remove the four main bumper nuts. They are 10mm and on long studs used to locate the bumper. Three of them are easy access, the one under the right side fuse box is tougher. You need a deep 10mm socket and a shot extension to reach it. I also remove the 10mm nut from fuse box so I could move it enough to get the bumper nut off.
#2
05-28-2016, 09:35 PM
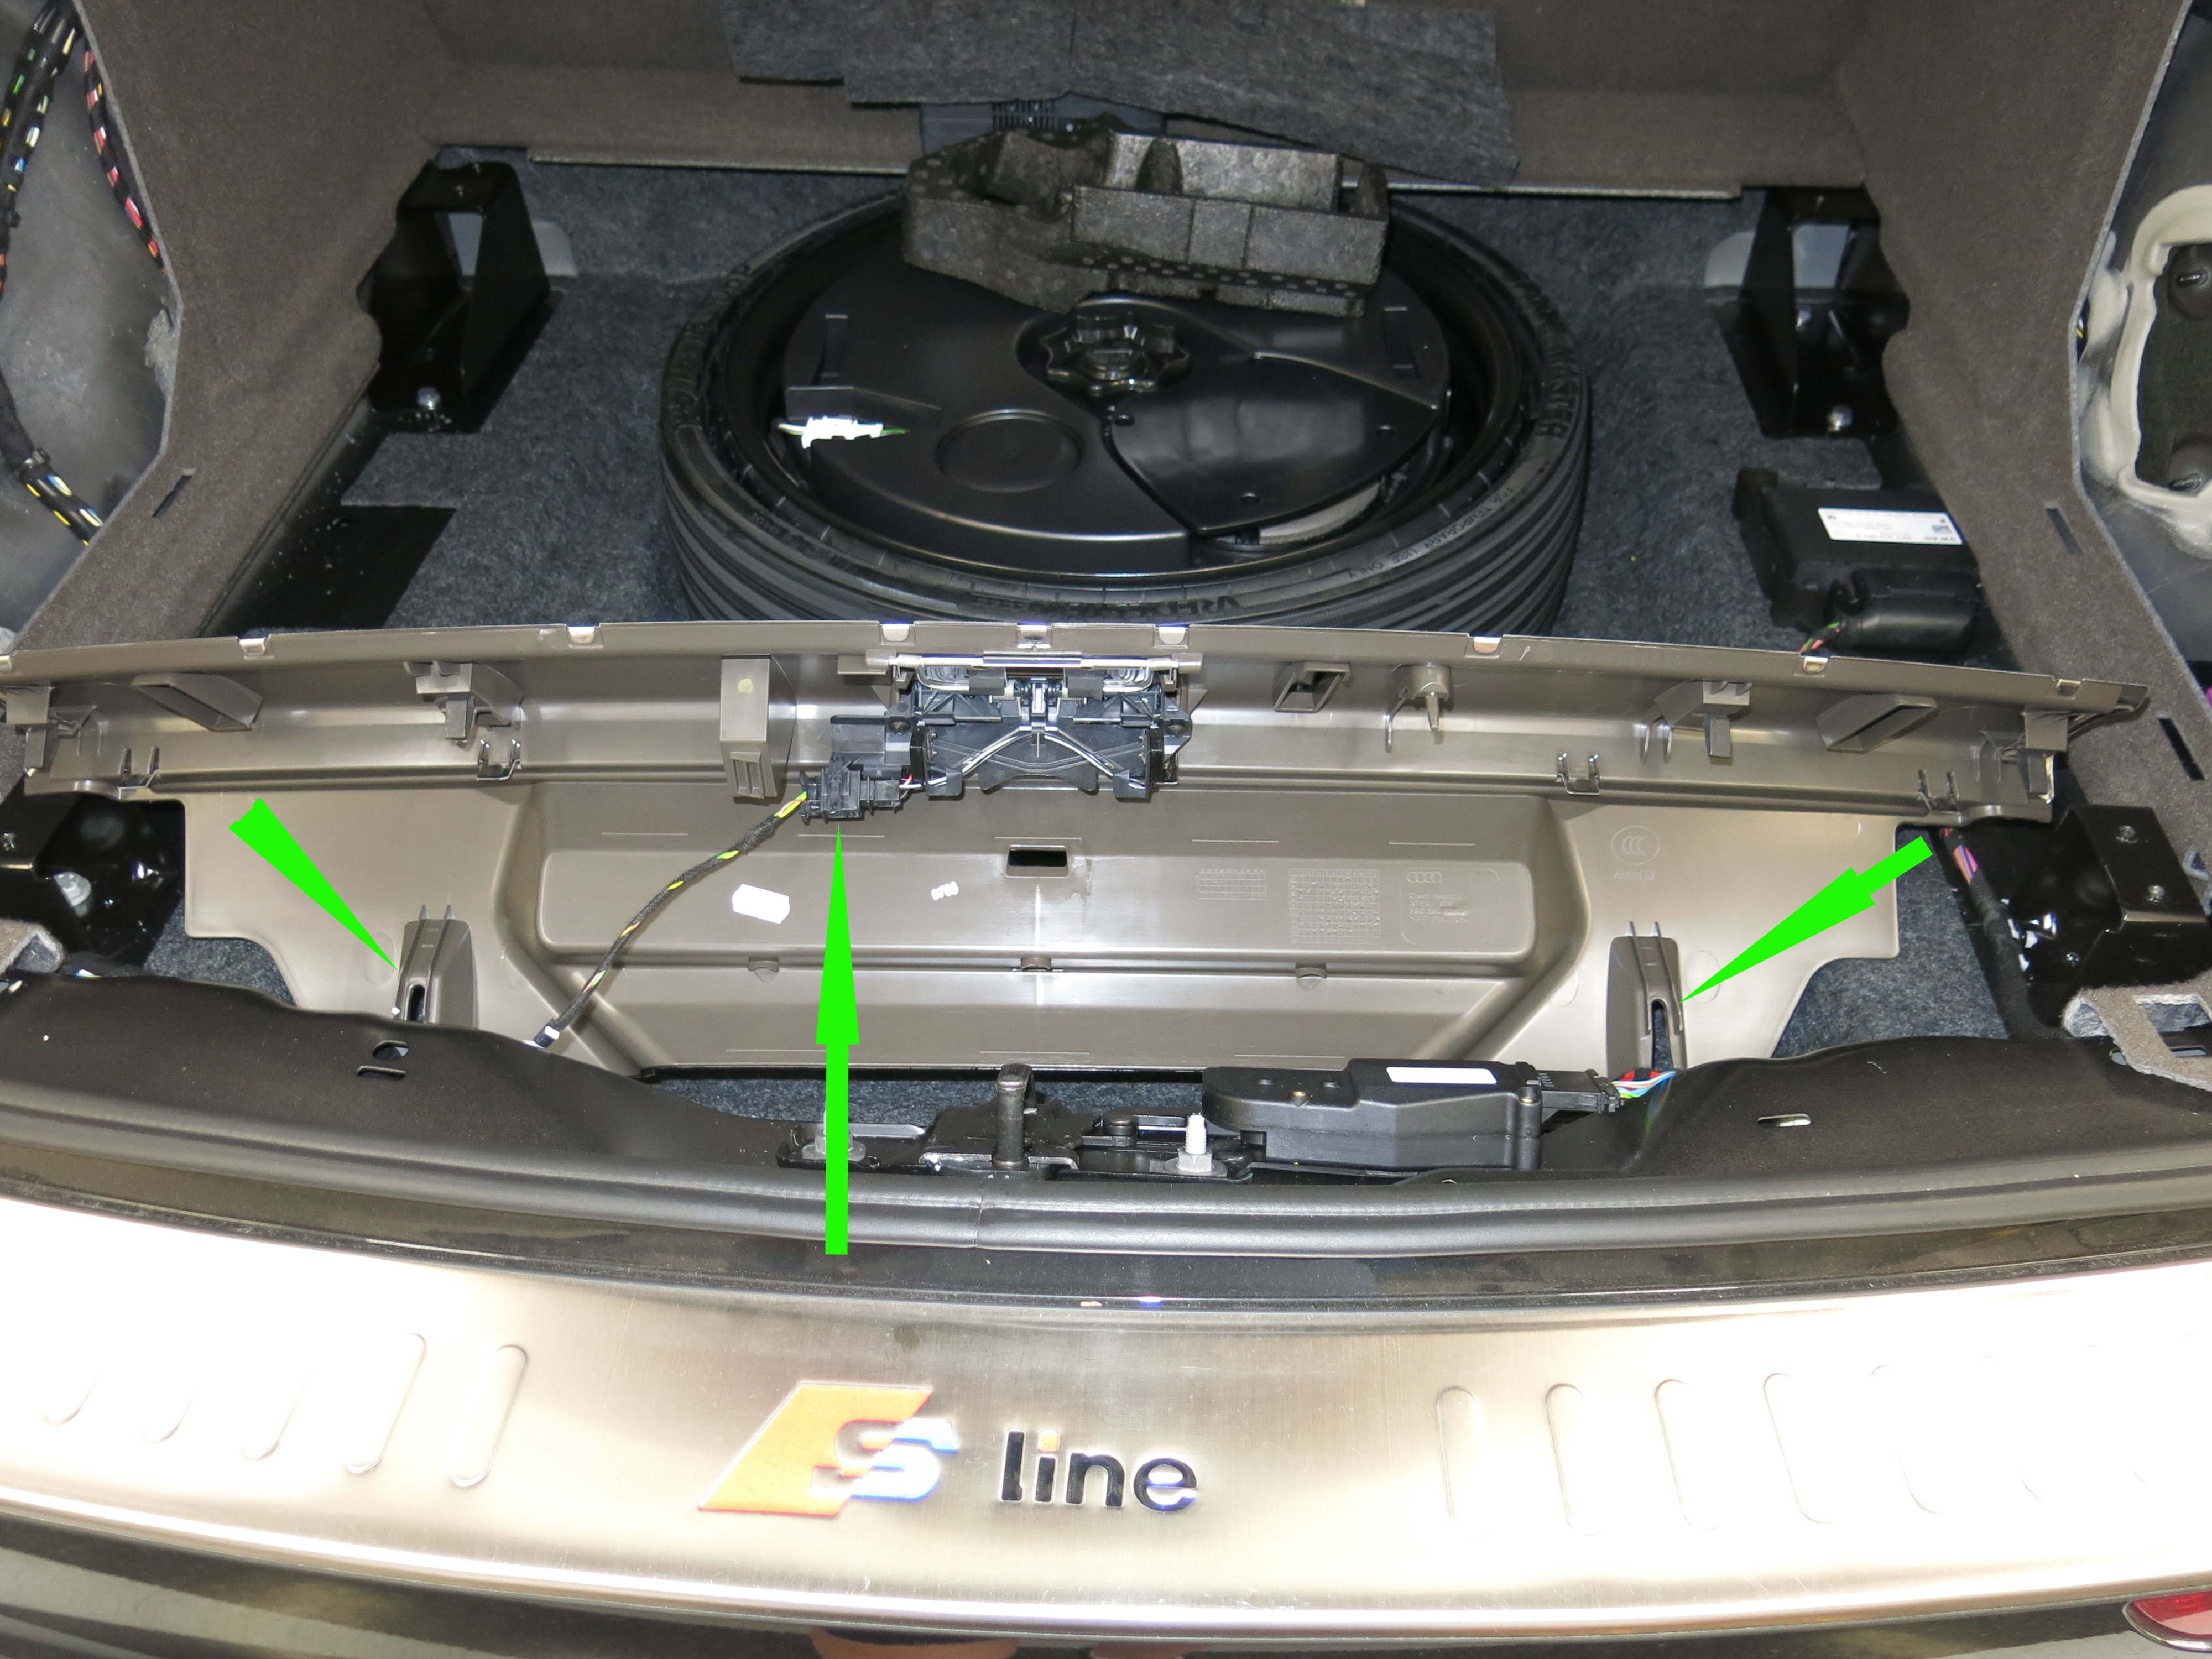
Remove the two bolts holding the hitch cover, and the two holding the bumper center to the chassis.
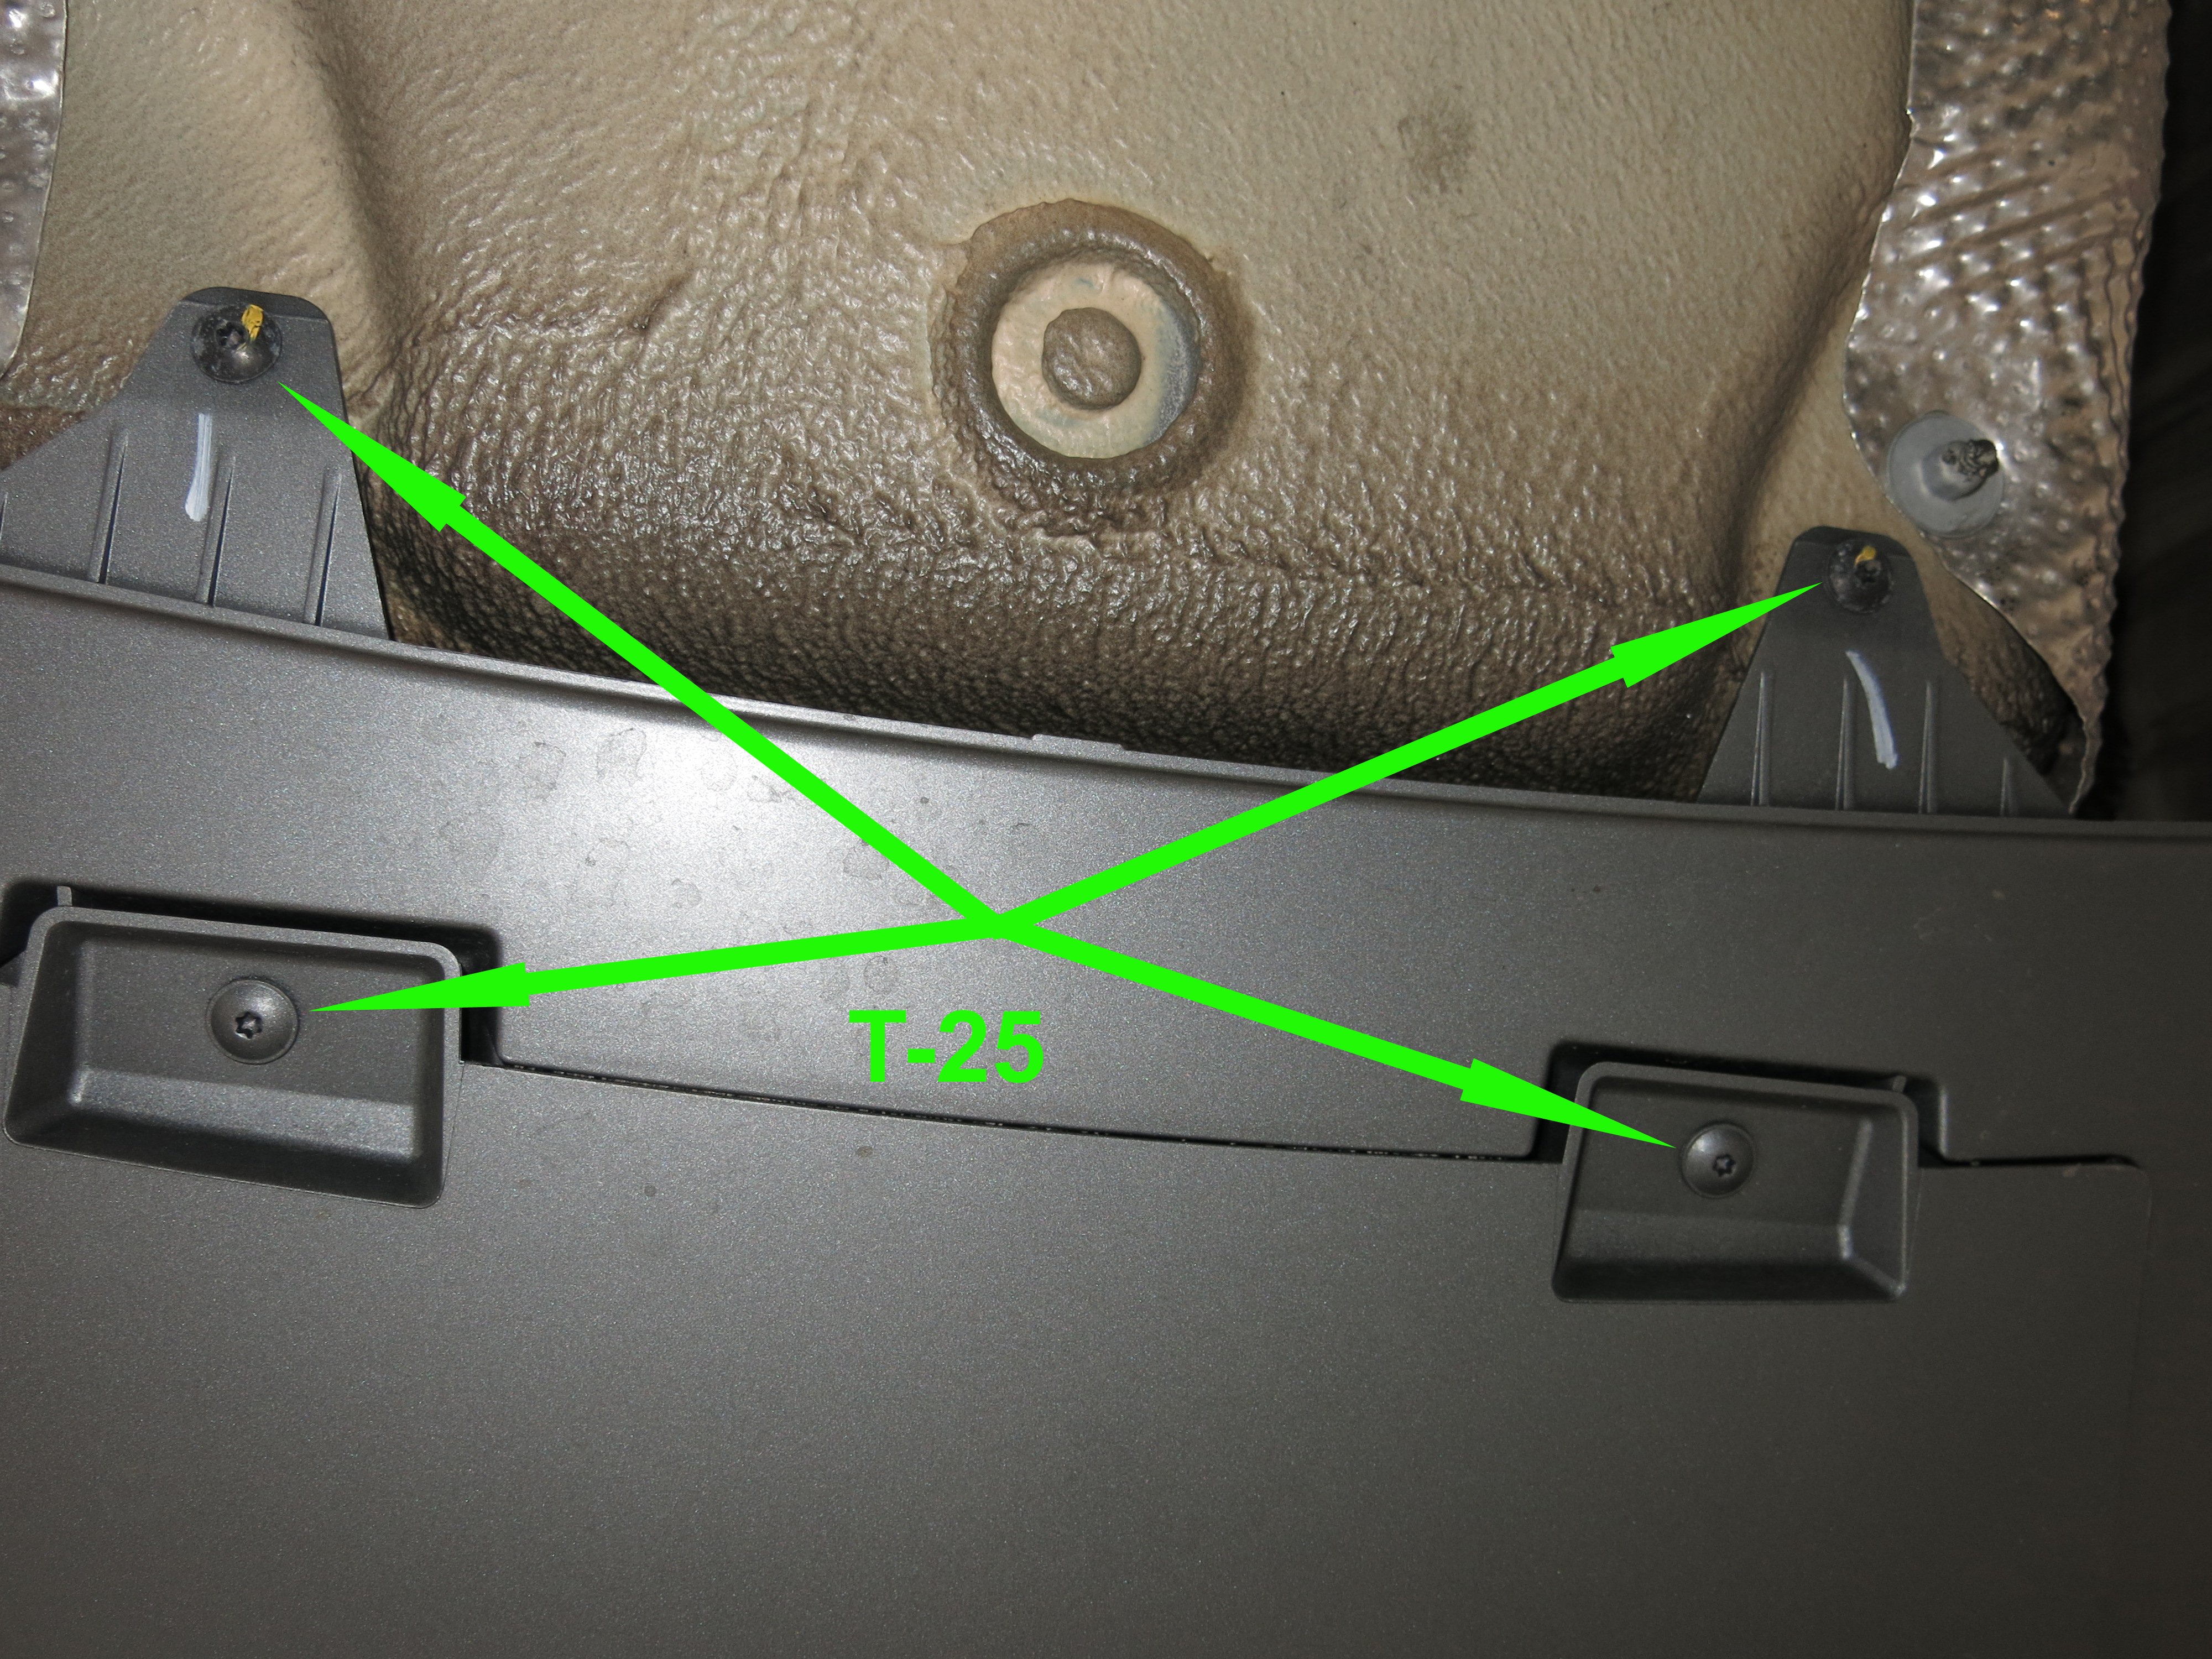
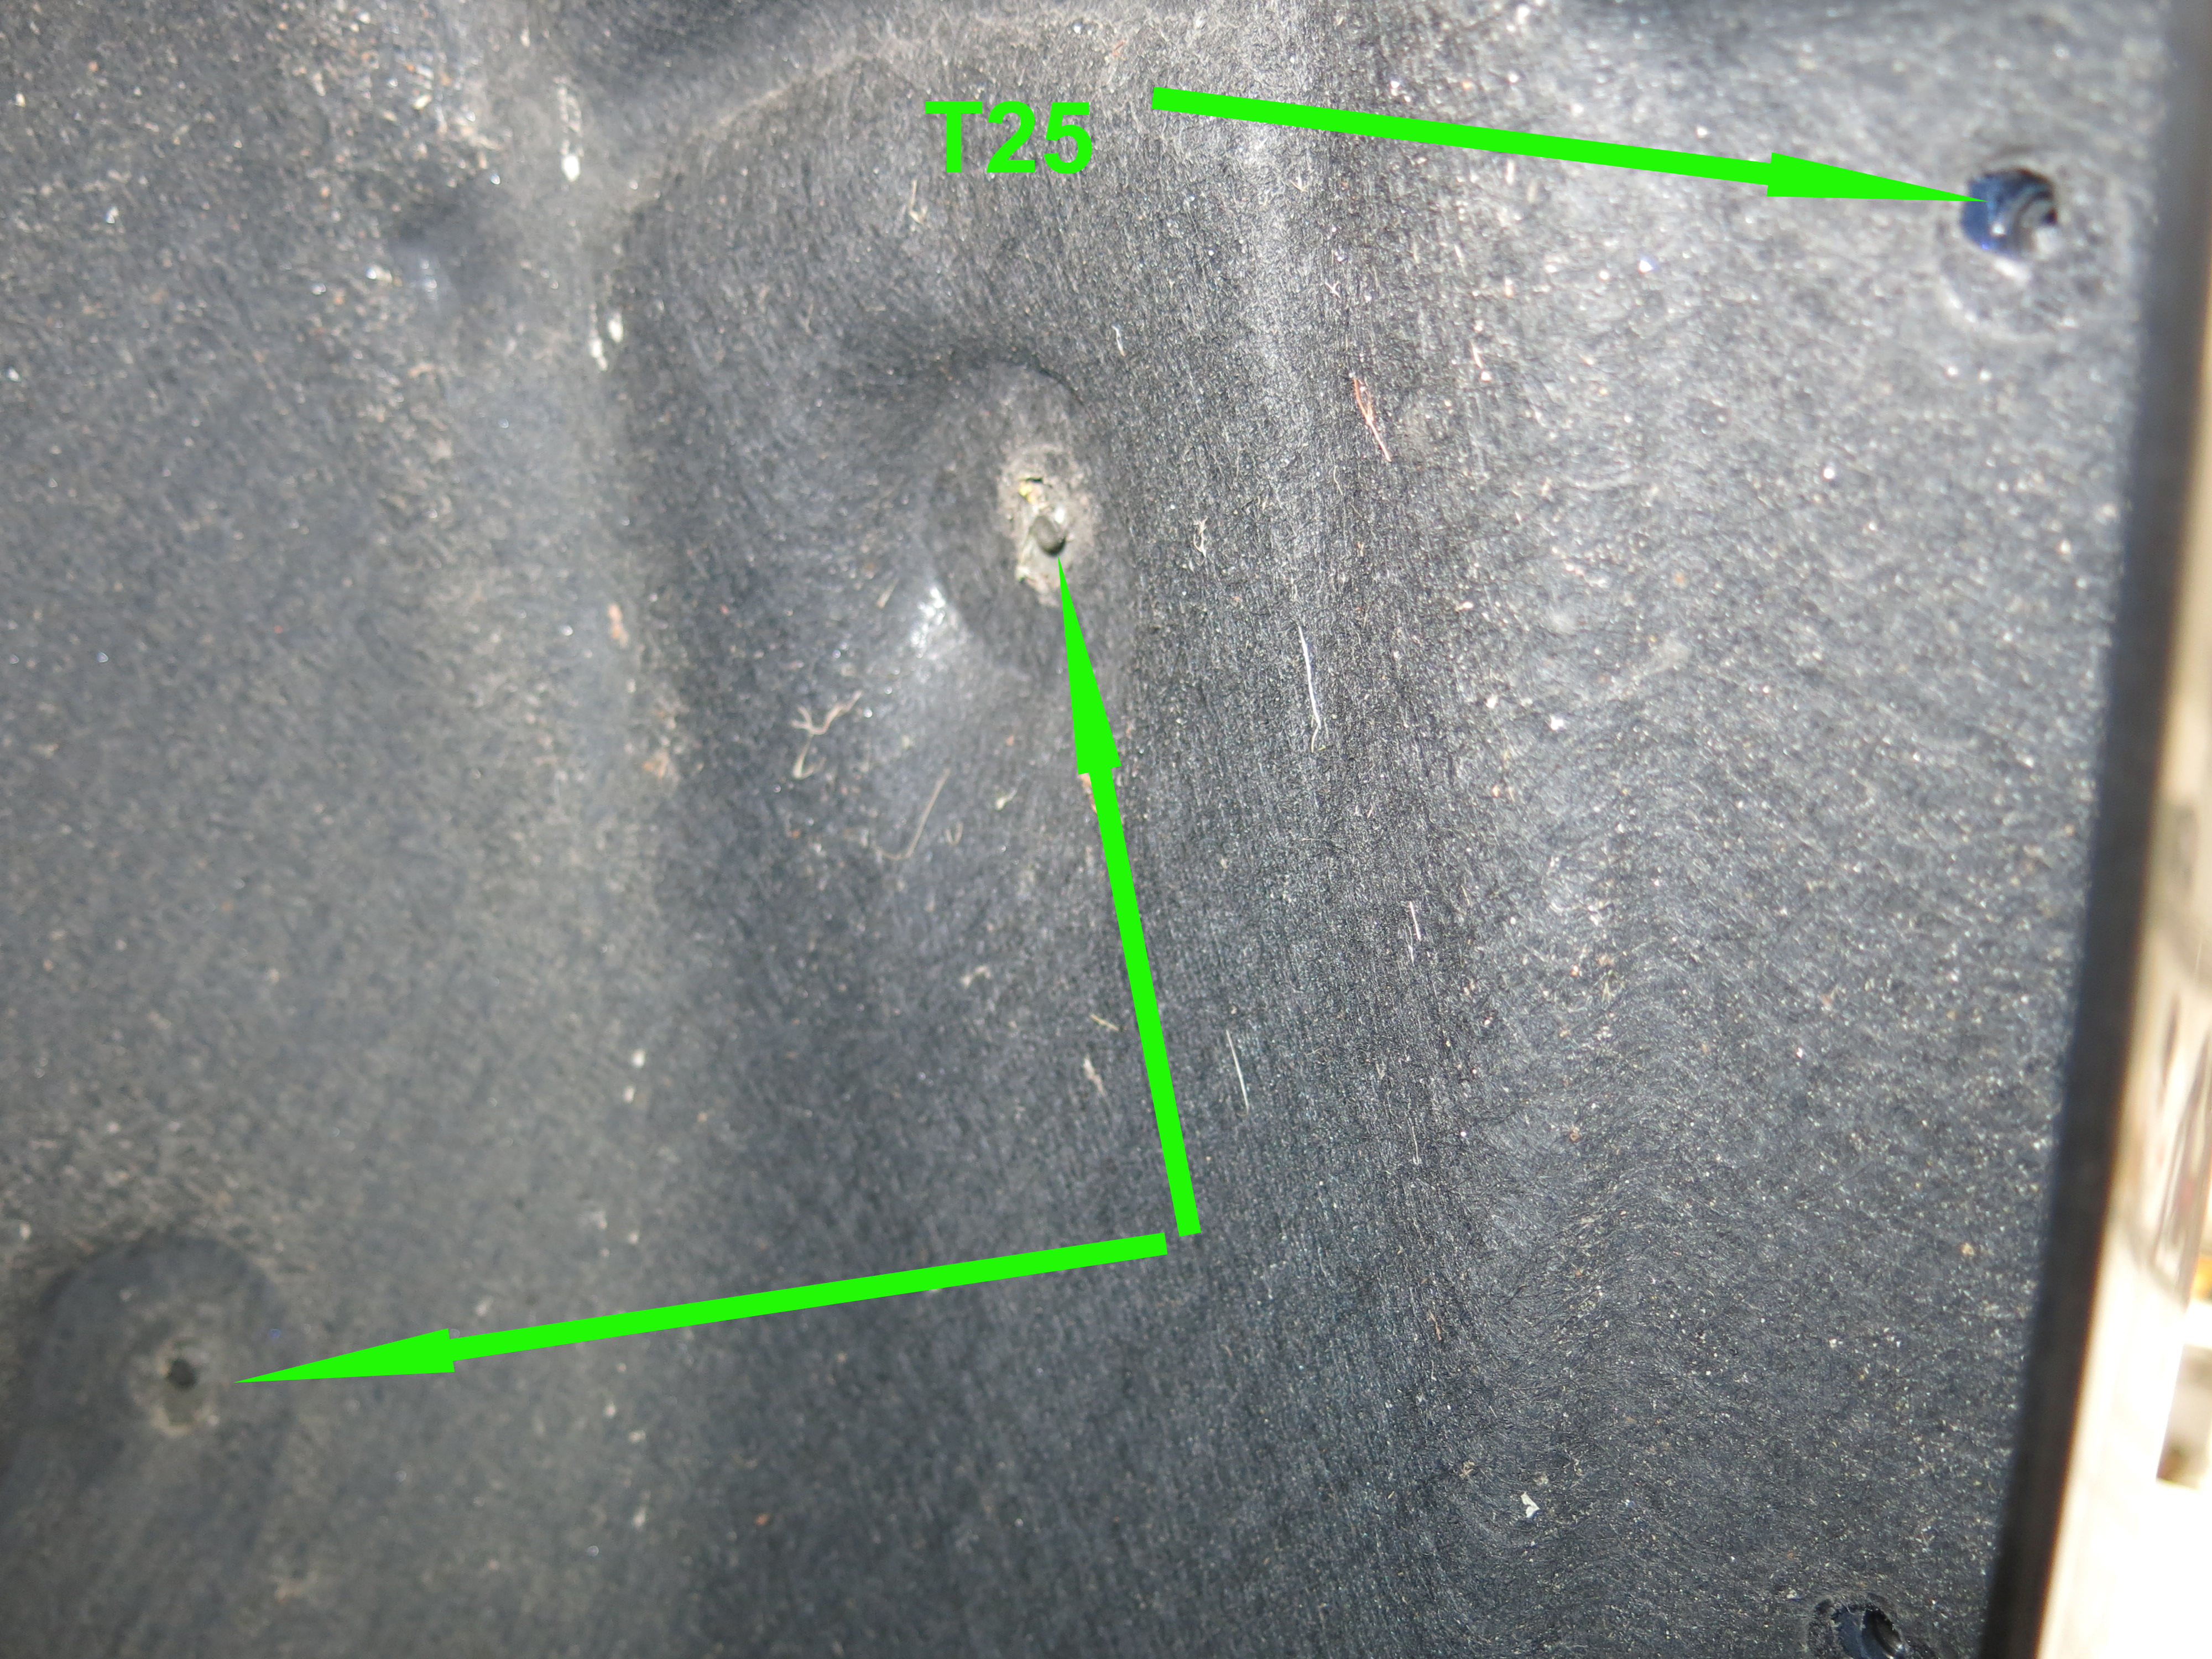
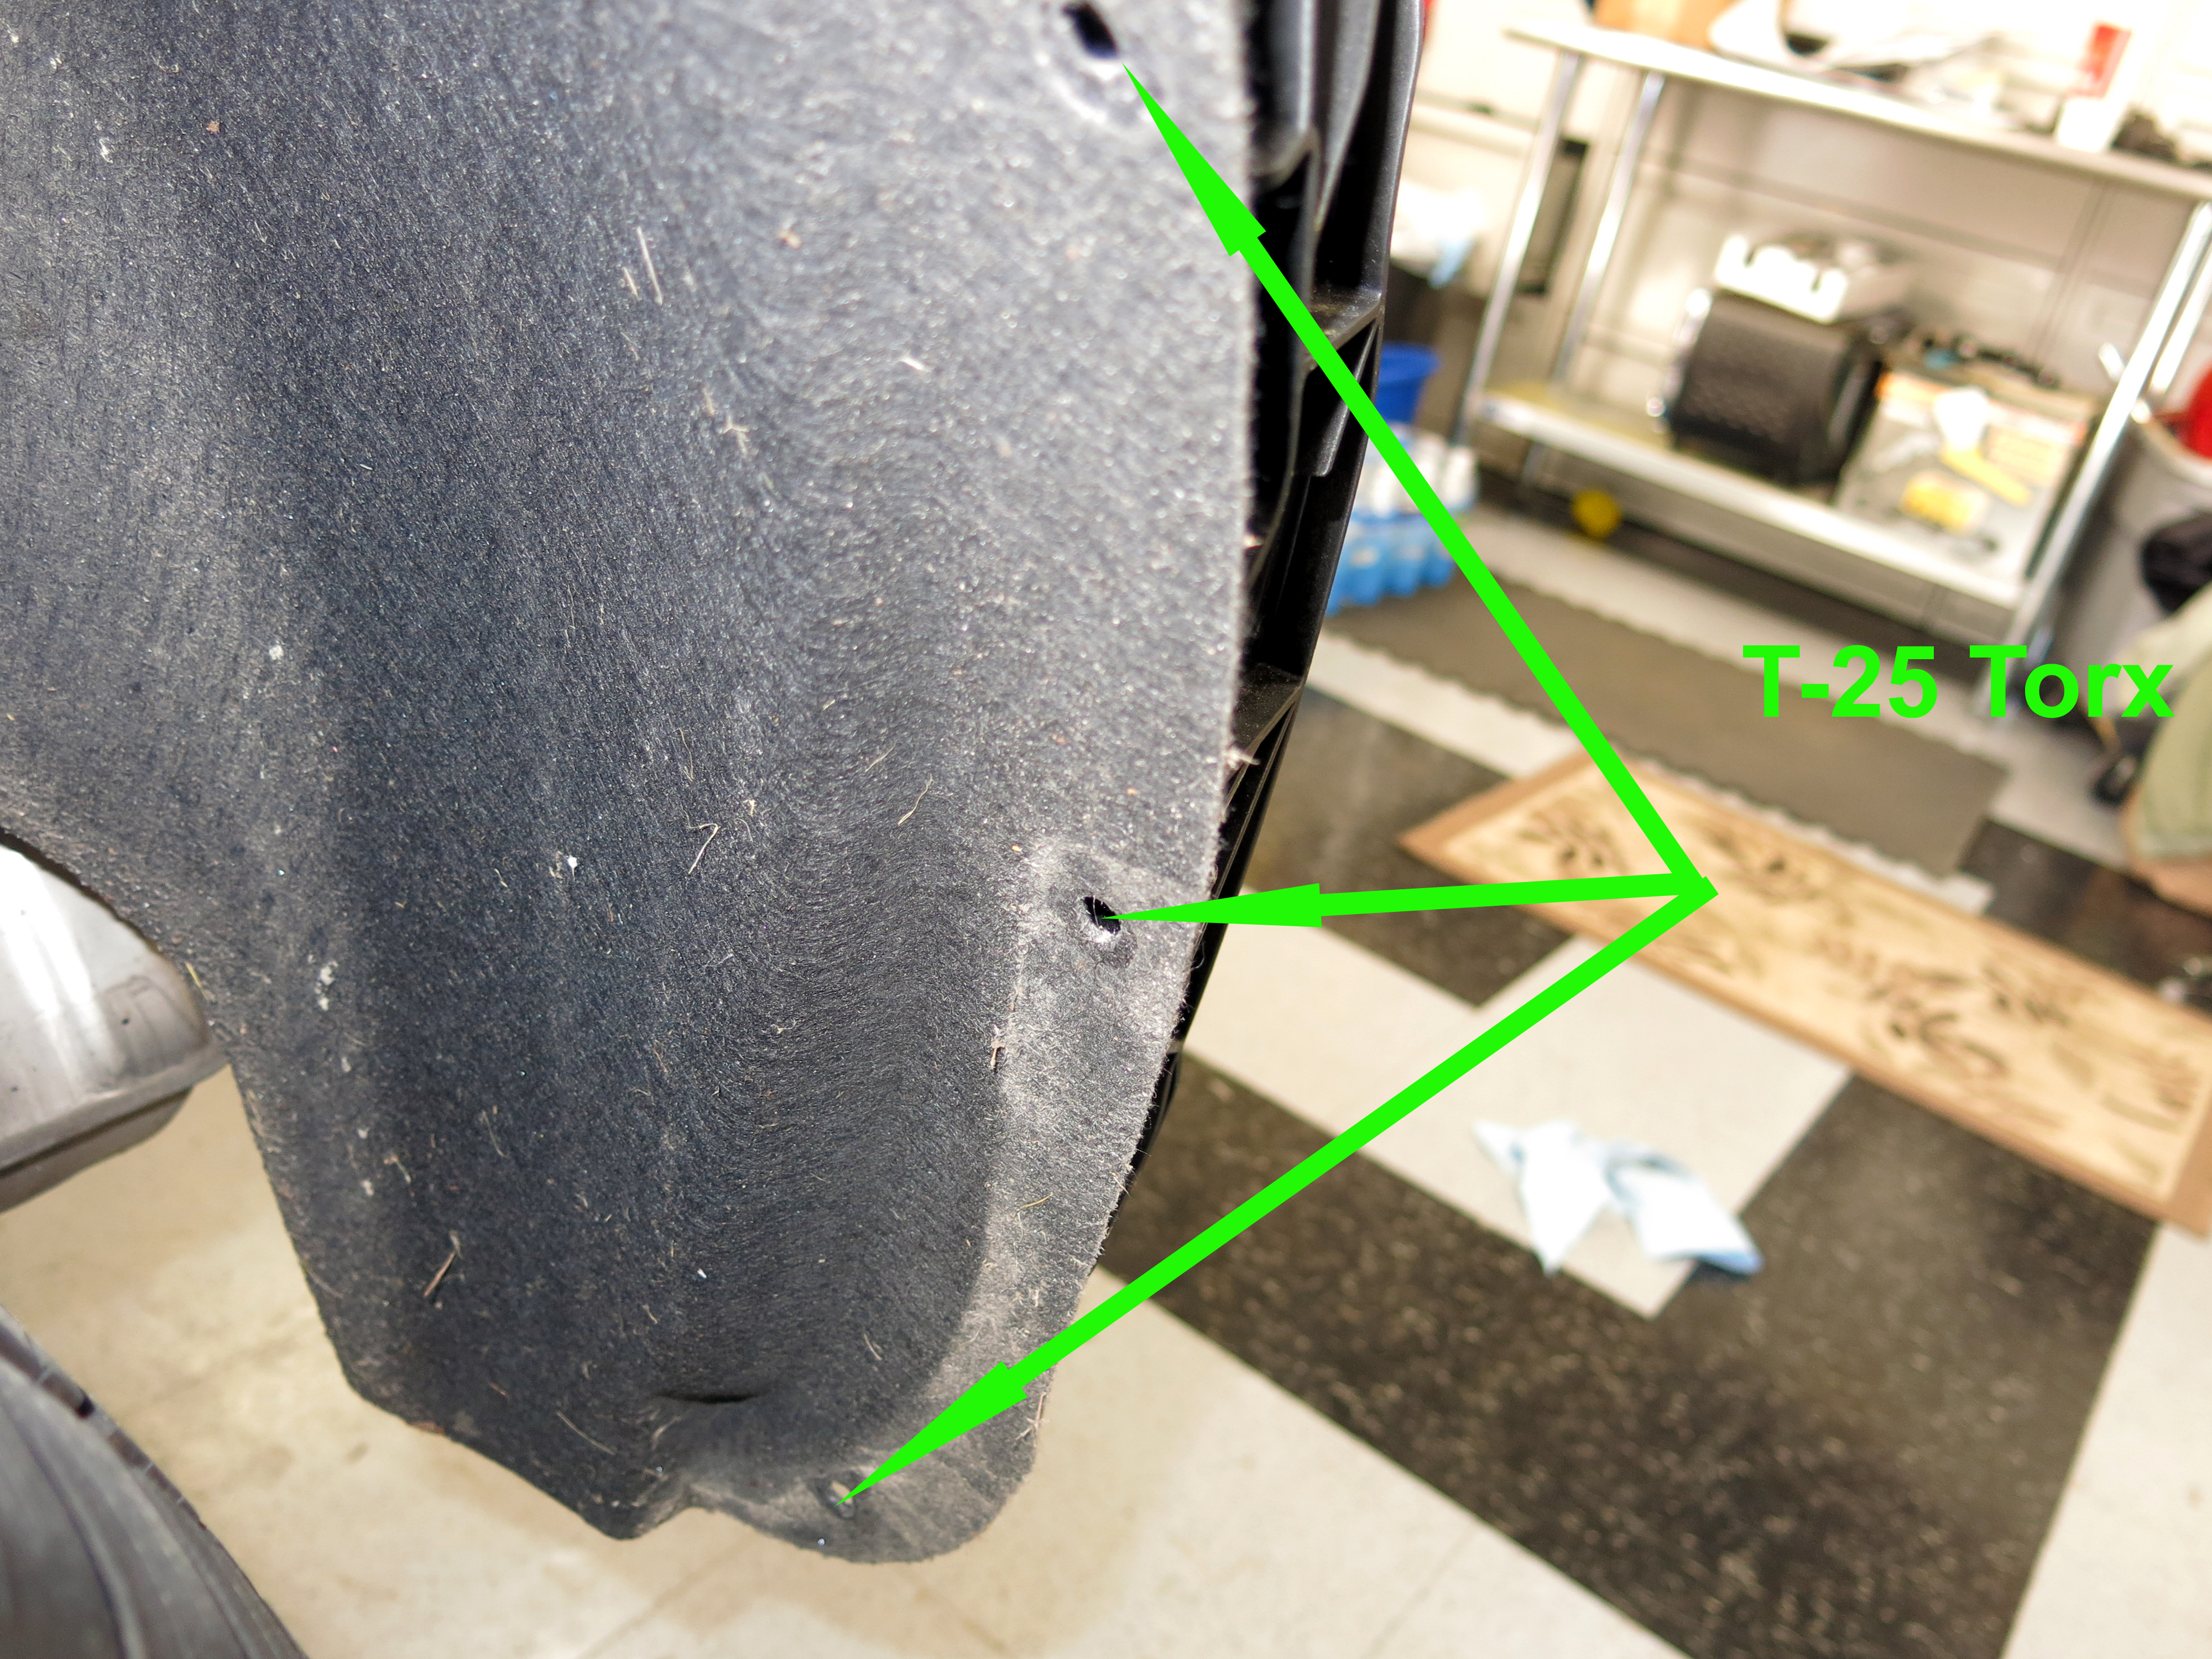
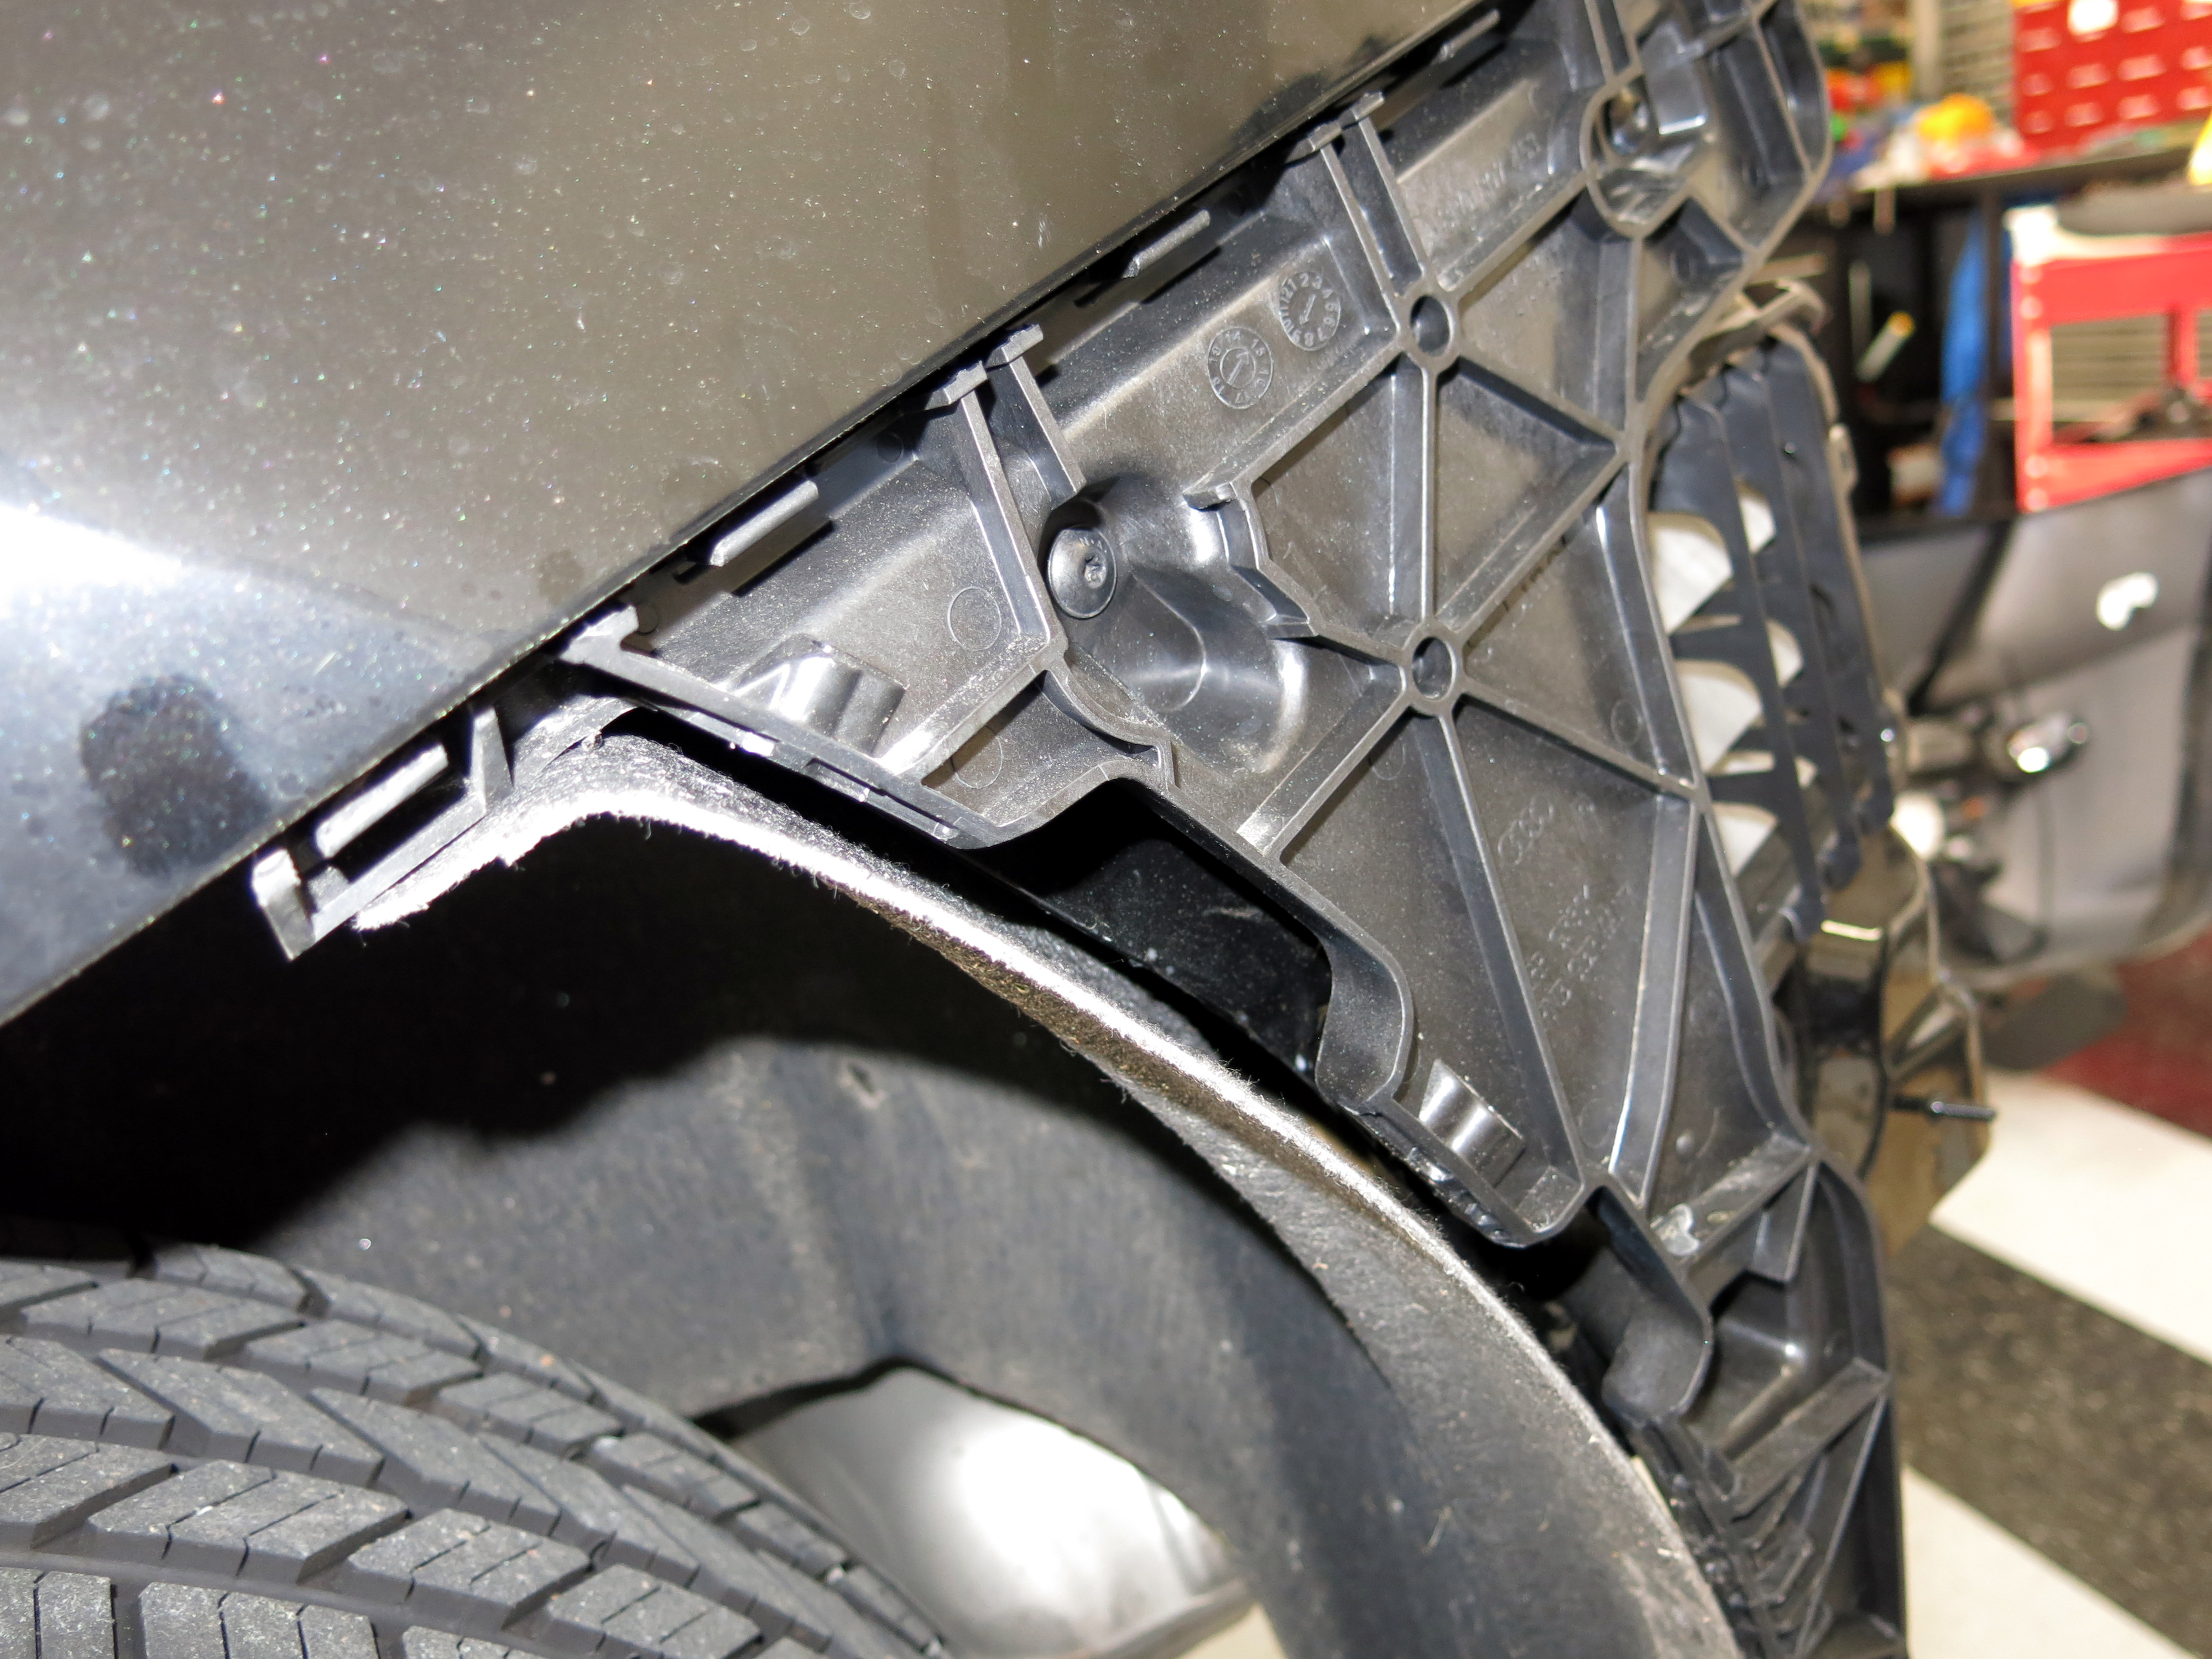
Next remove the 8 T-25 Torx screws, 4 on each side, on the fender cover on the back side of both wheel arches. This allows the inner wheel well to be moved.

You also need to remove two clips on each side that hold the inner fender well on. I failed to document this, so I am stealing from this thread: I will add it when I find it.
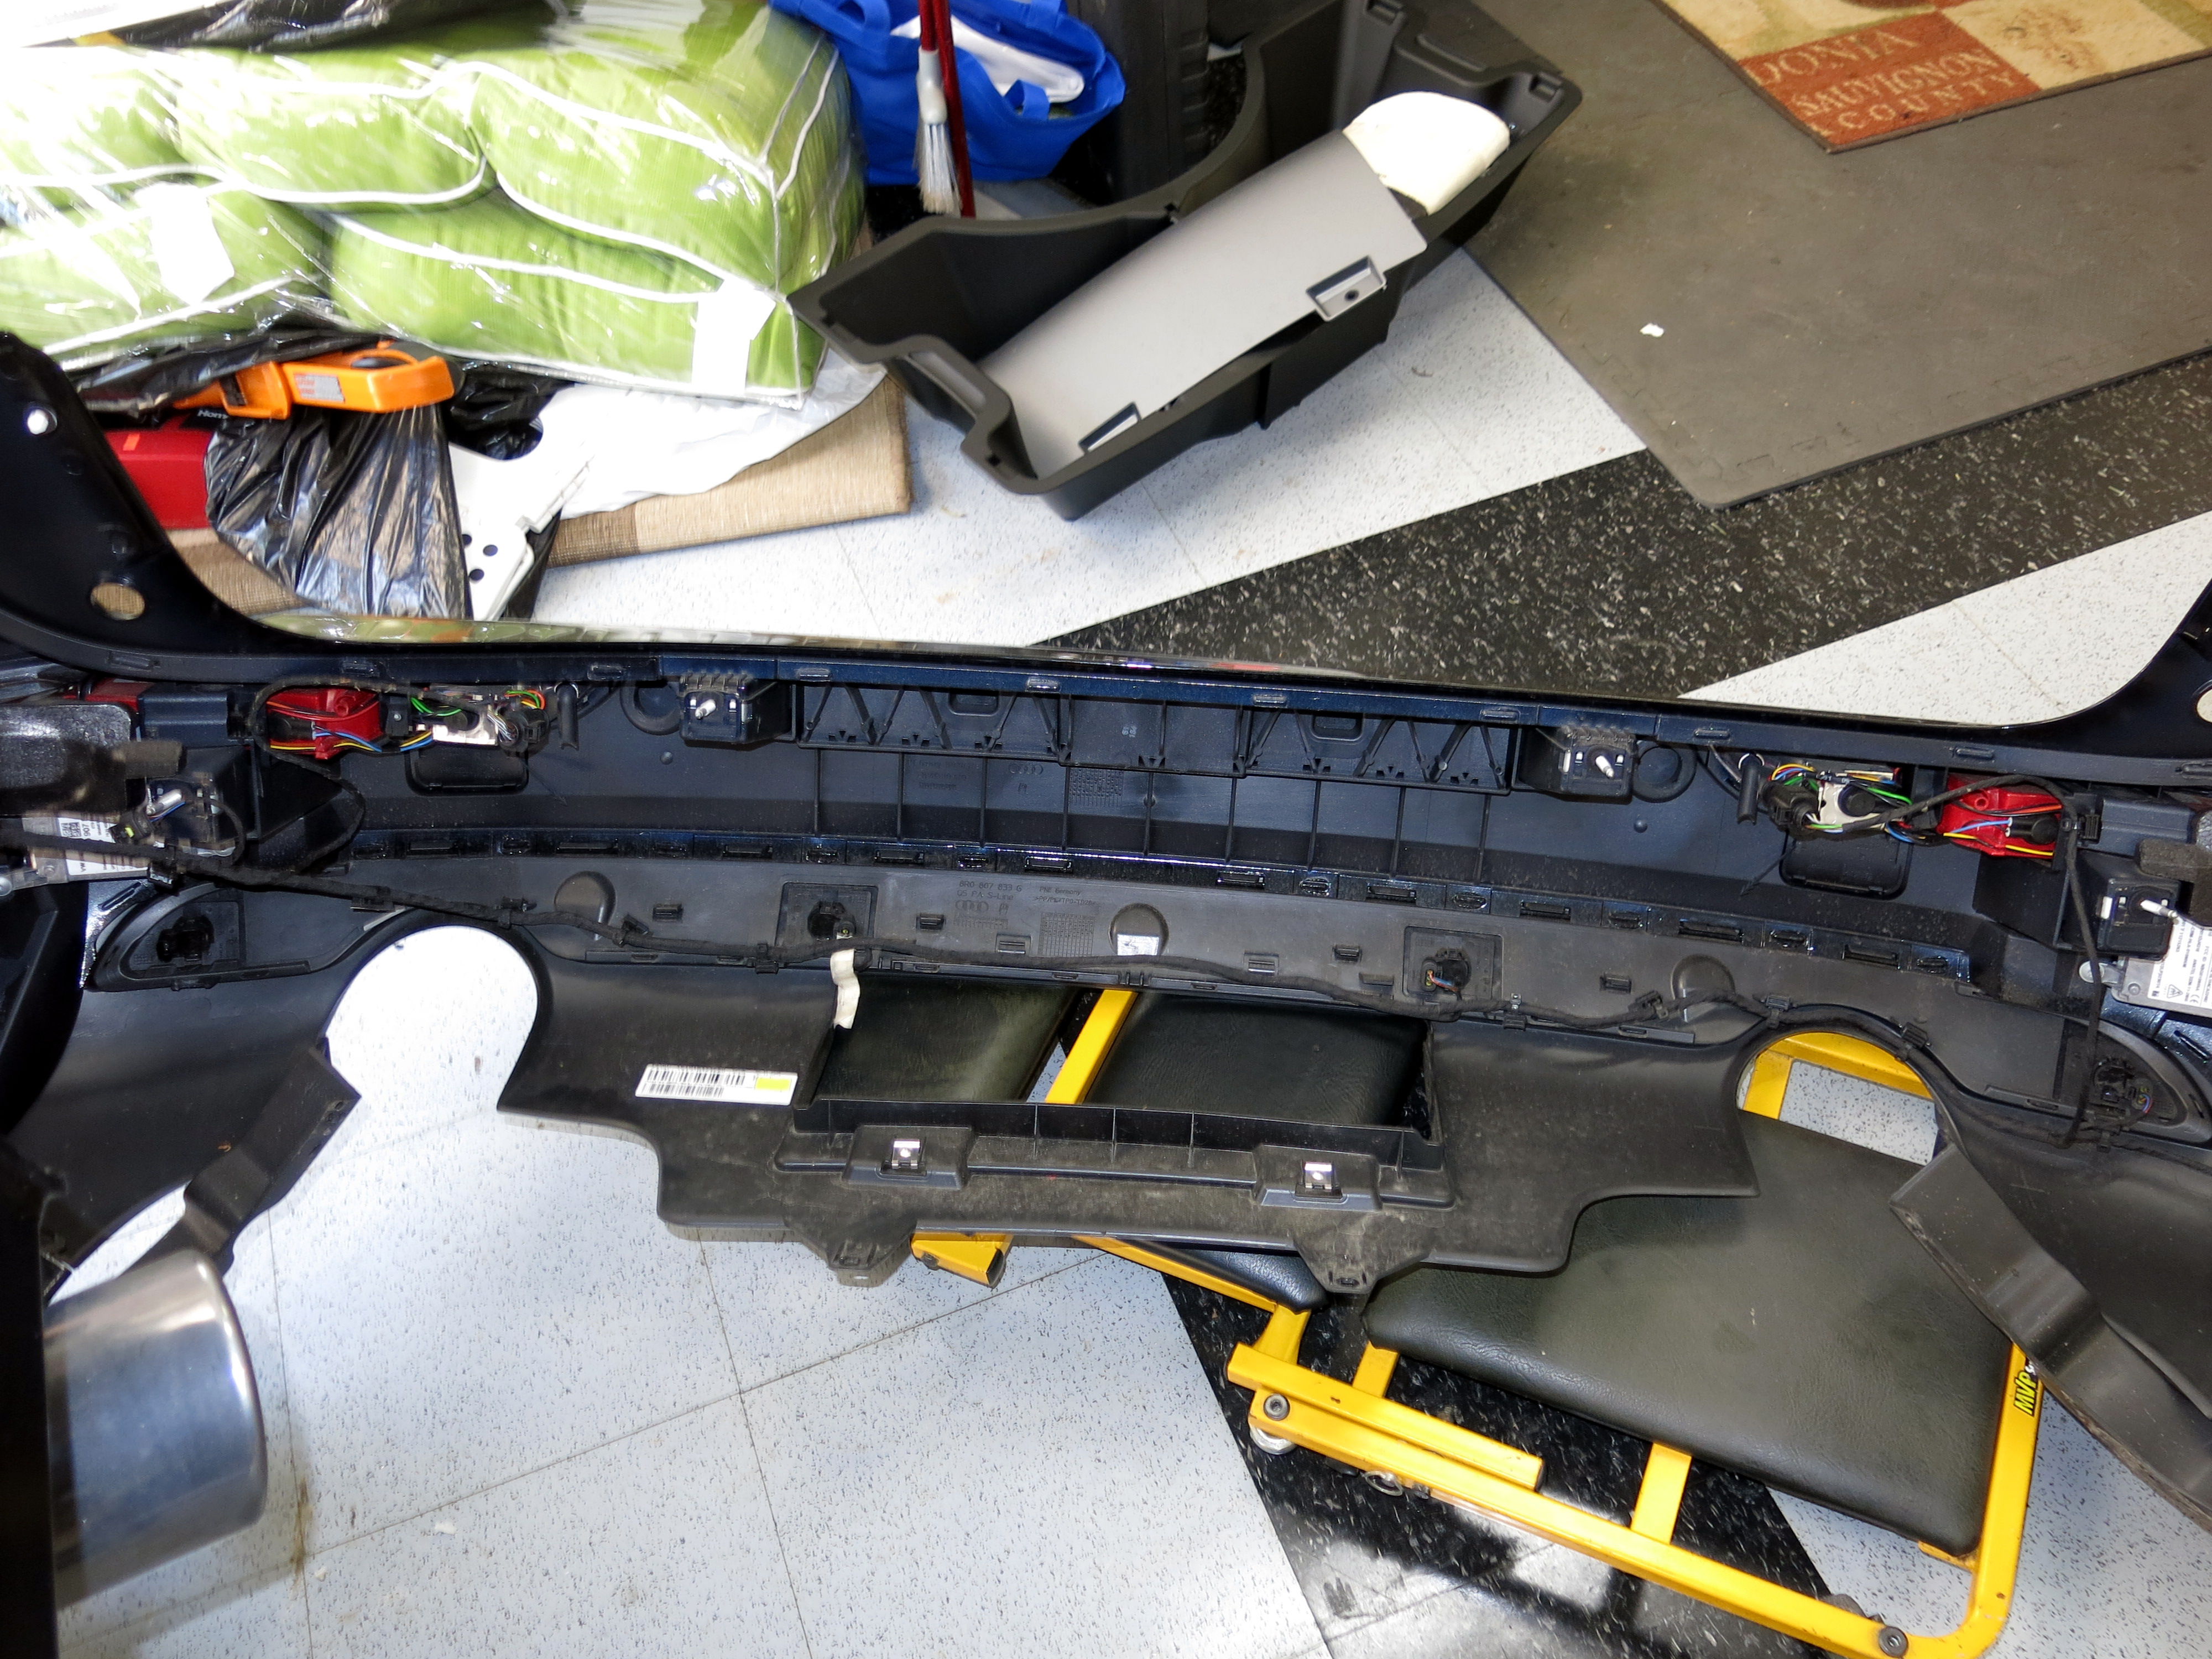
At this point you are ready to work the bumper cover off. Note that I have the back-up sensors, but there is no need to disconnect any wiring or sensors to remove the bumper cover because you will not completely remove it.
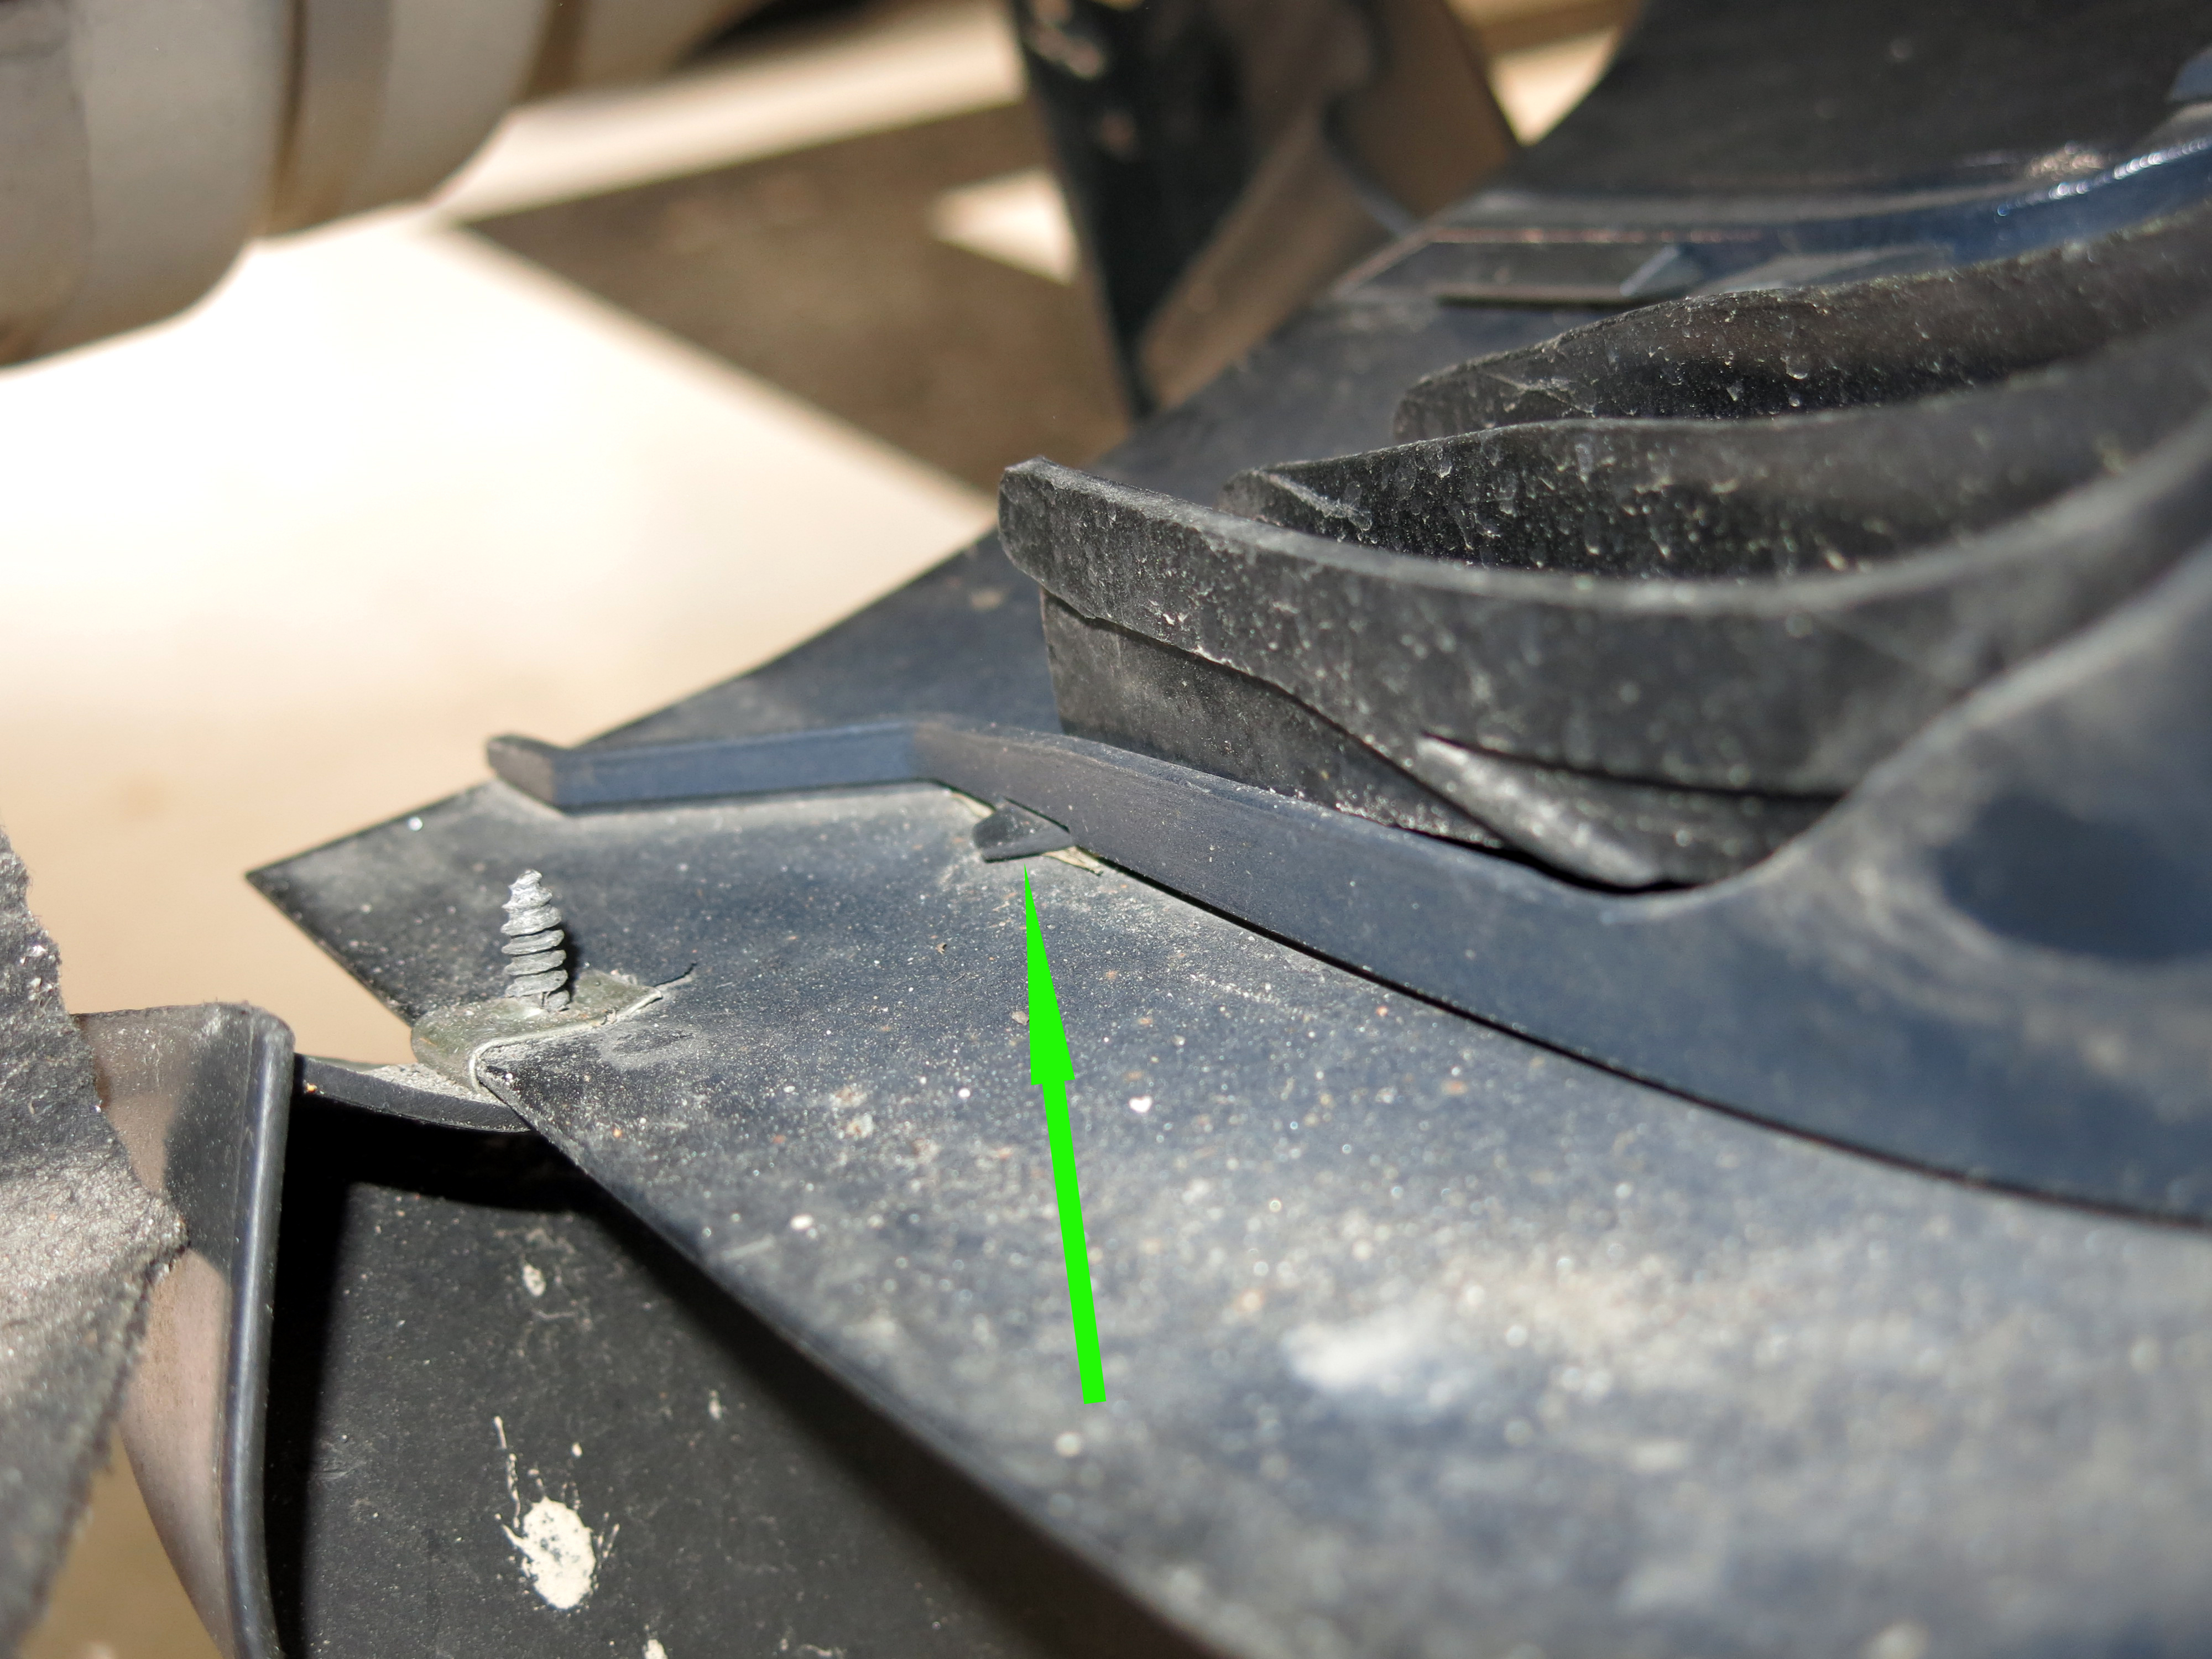
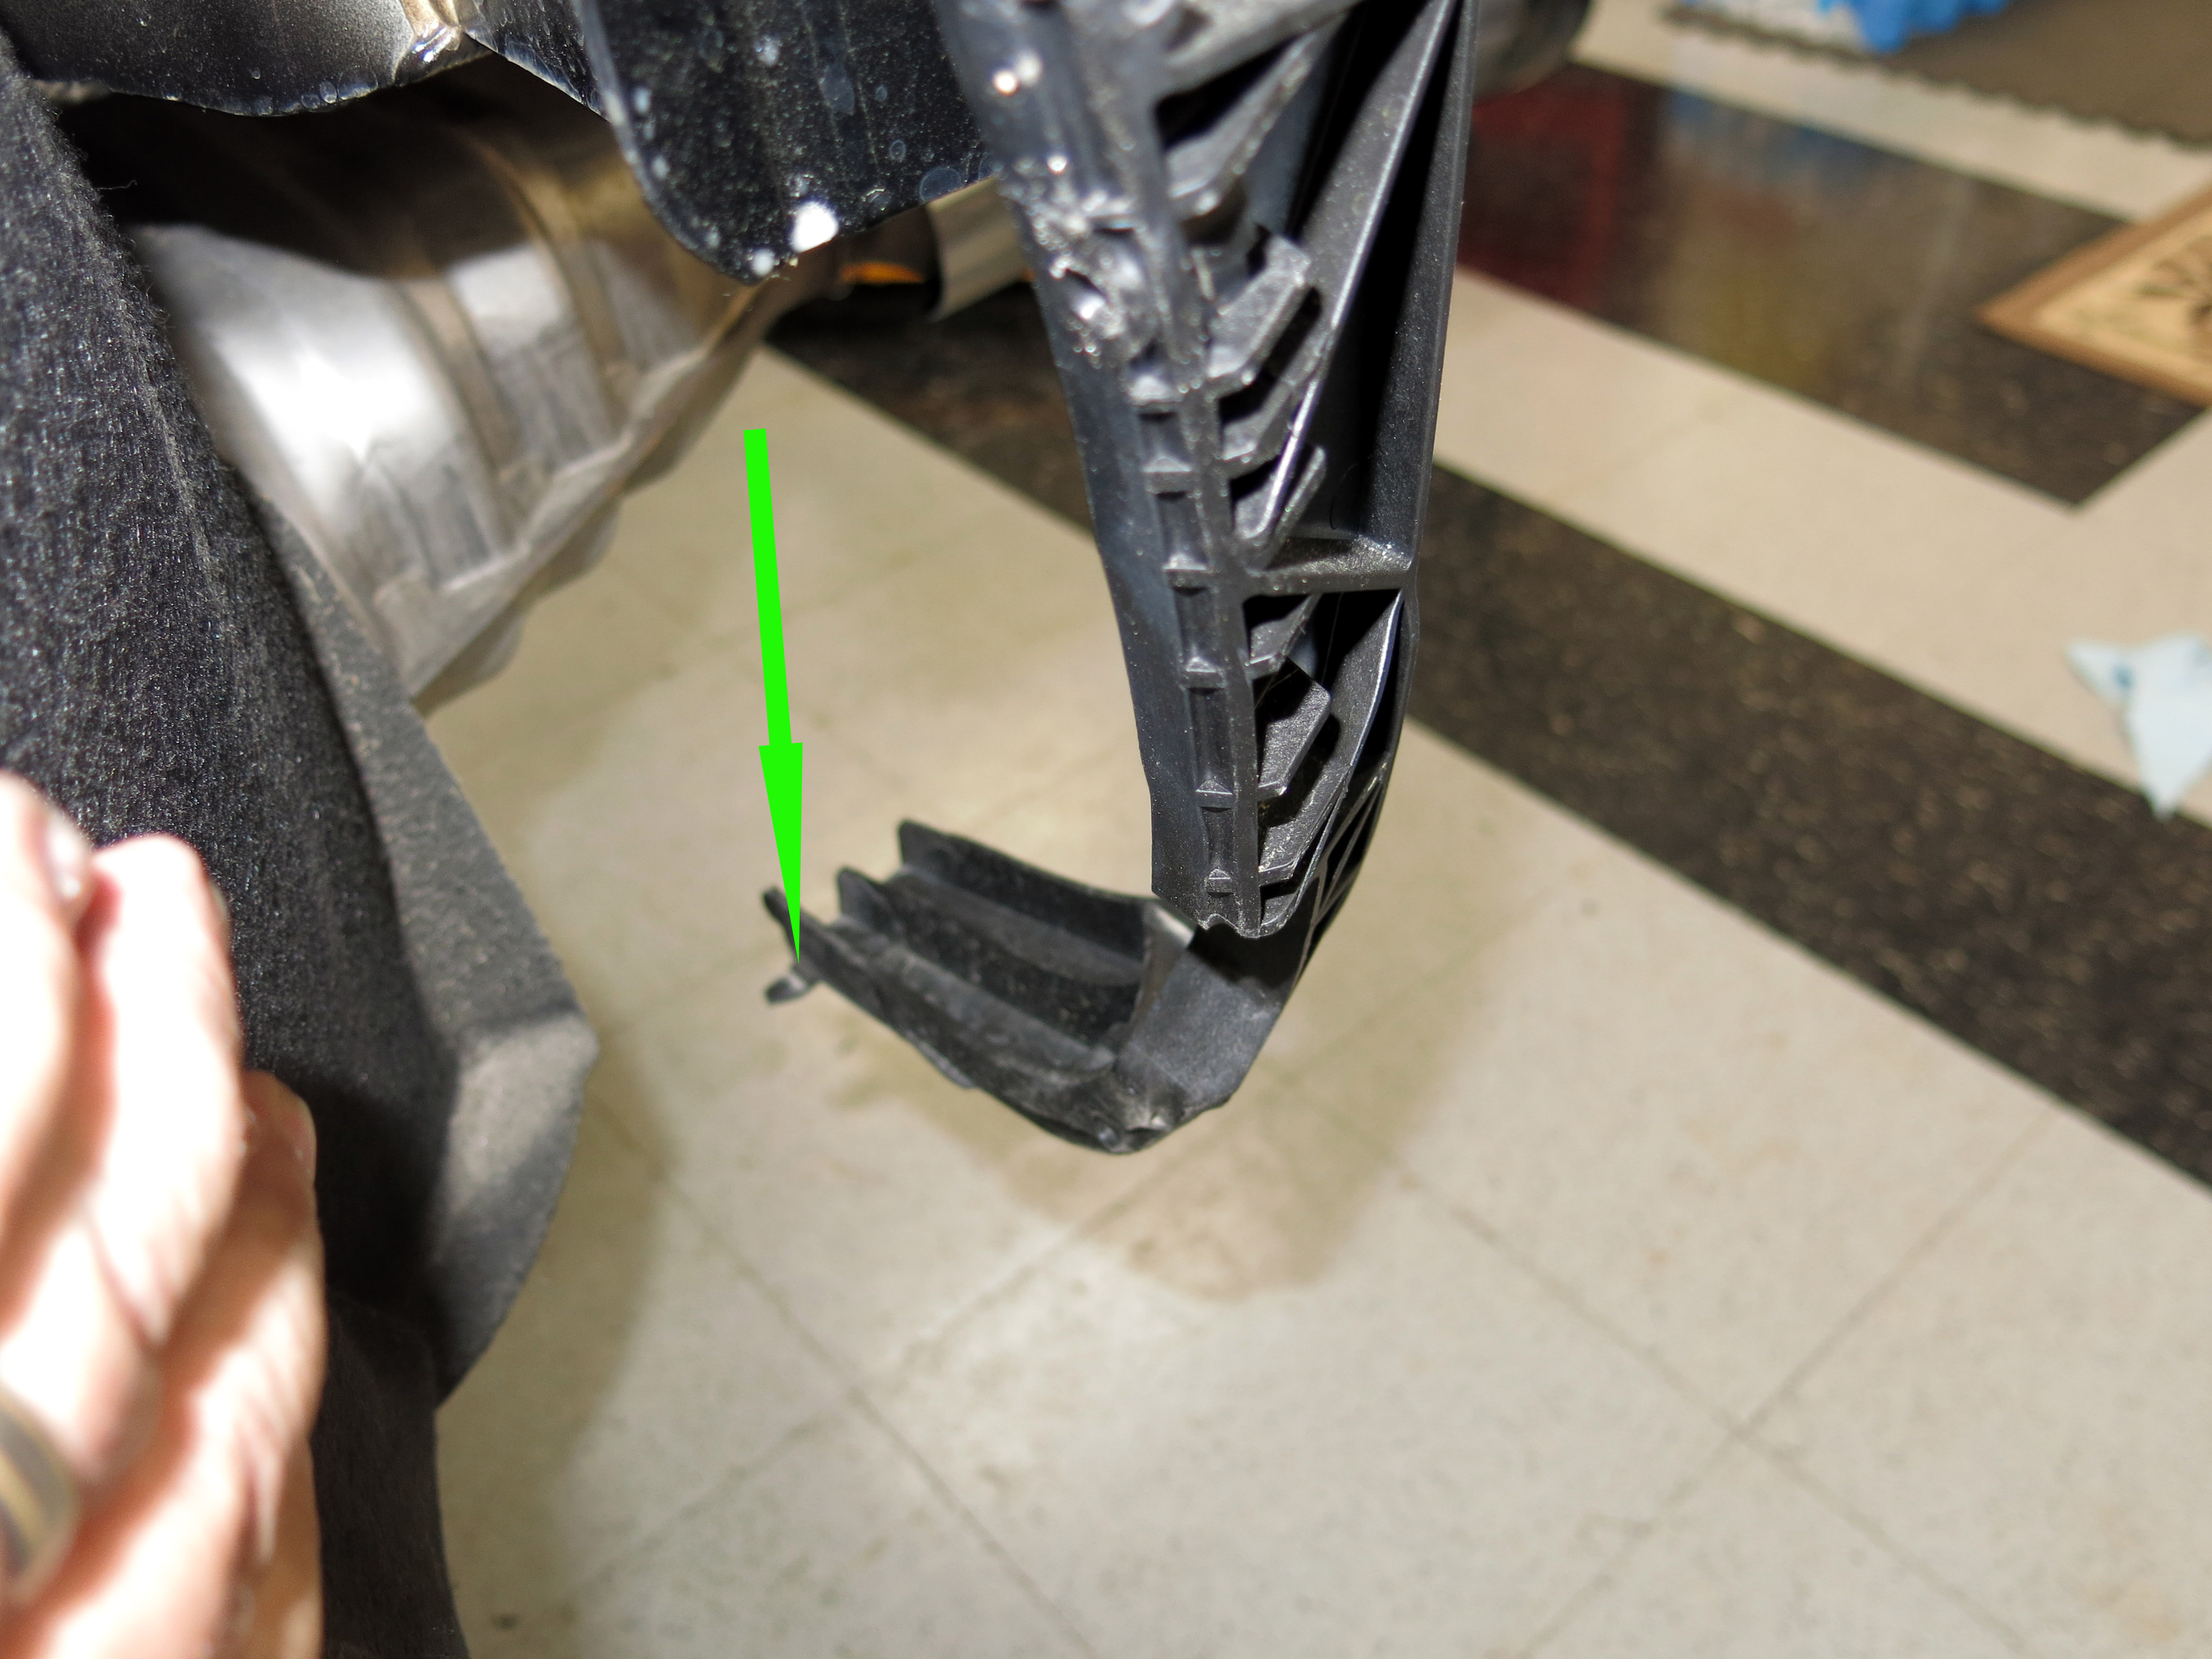
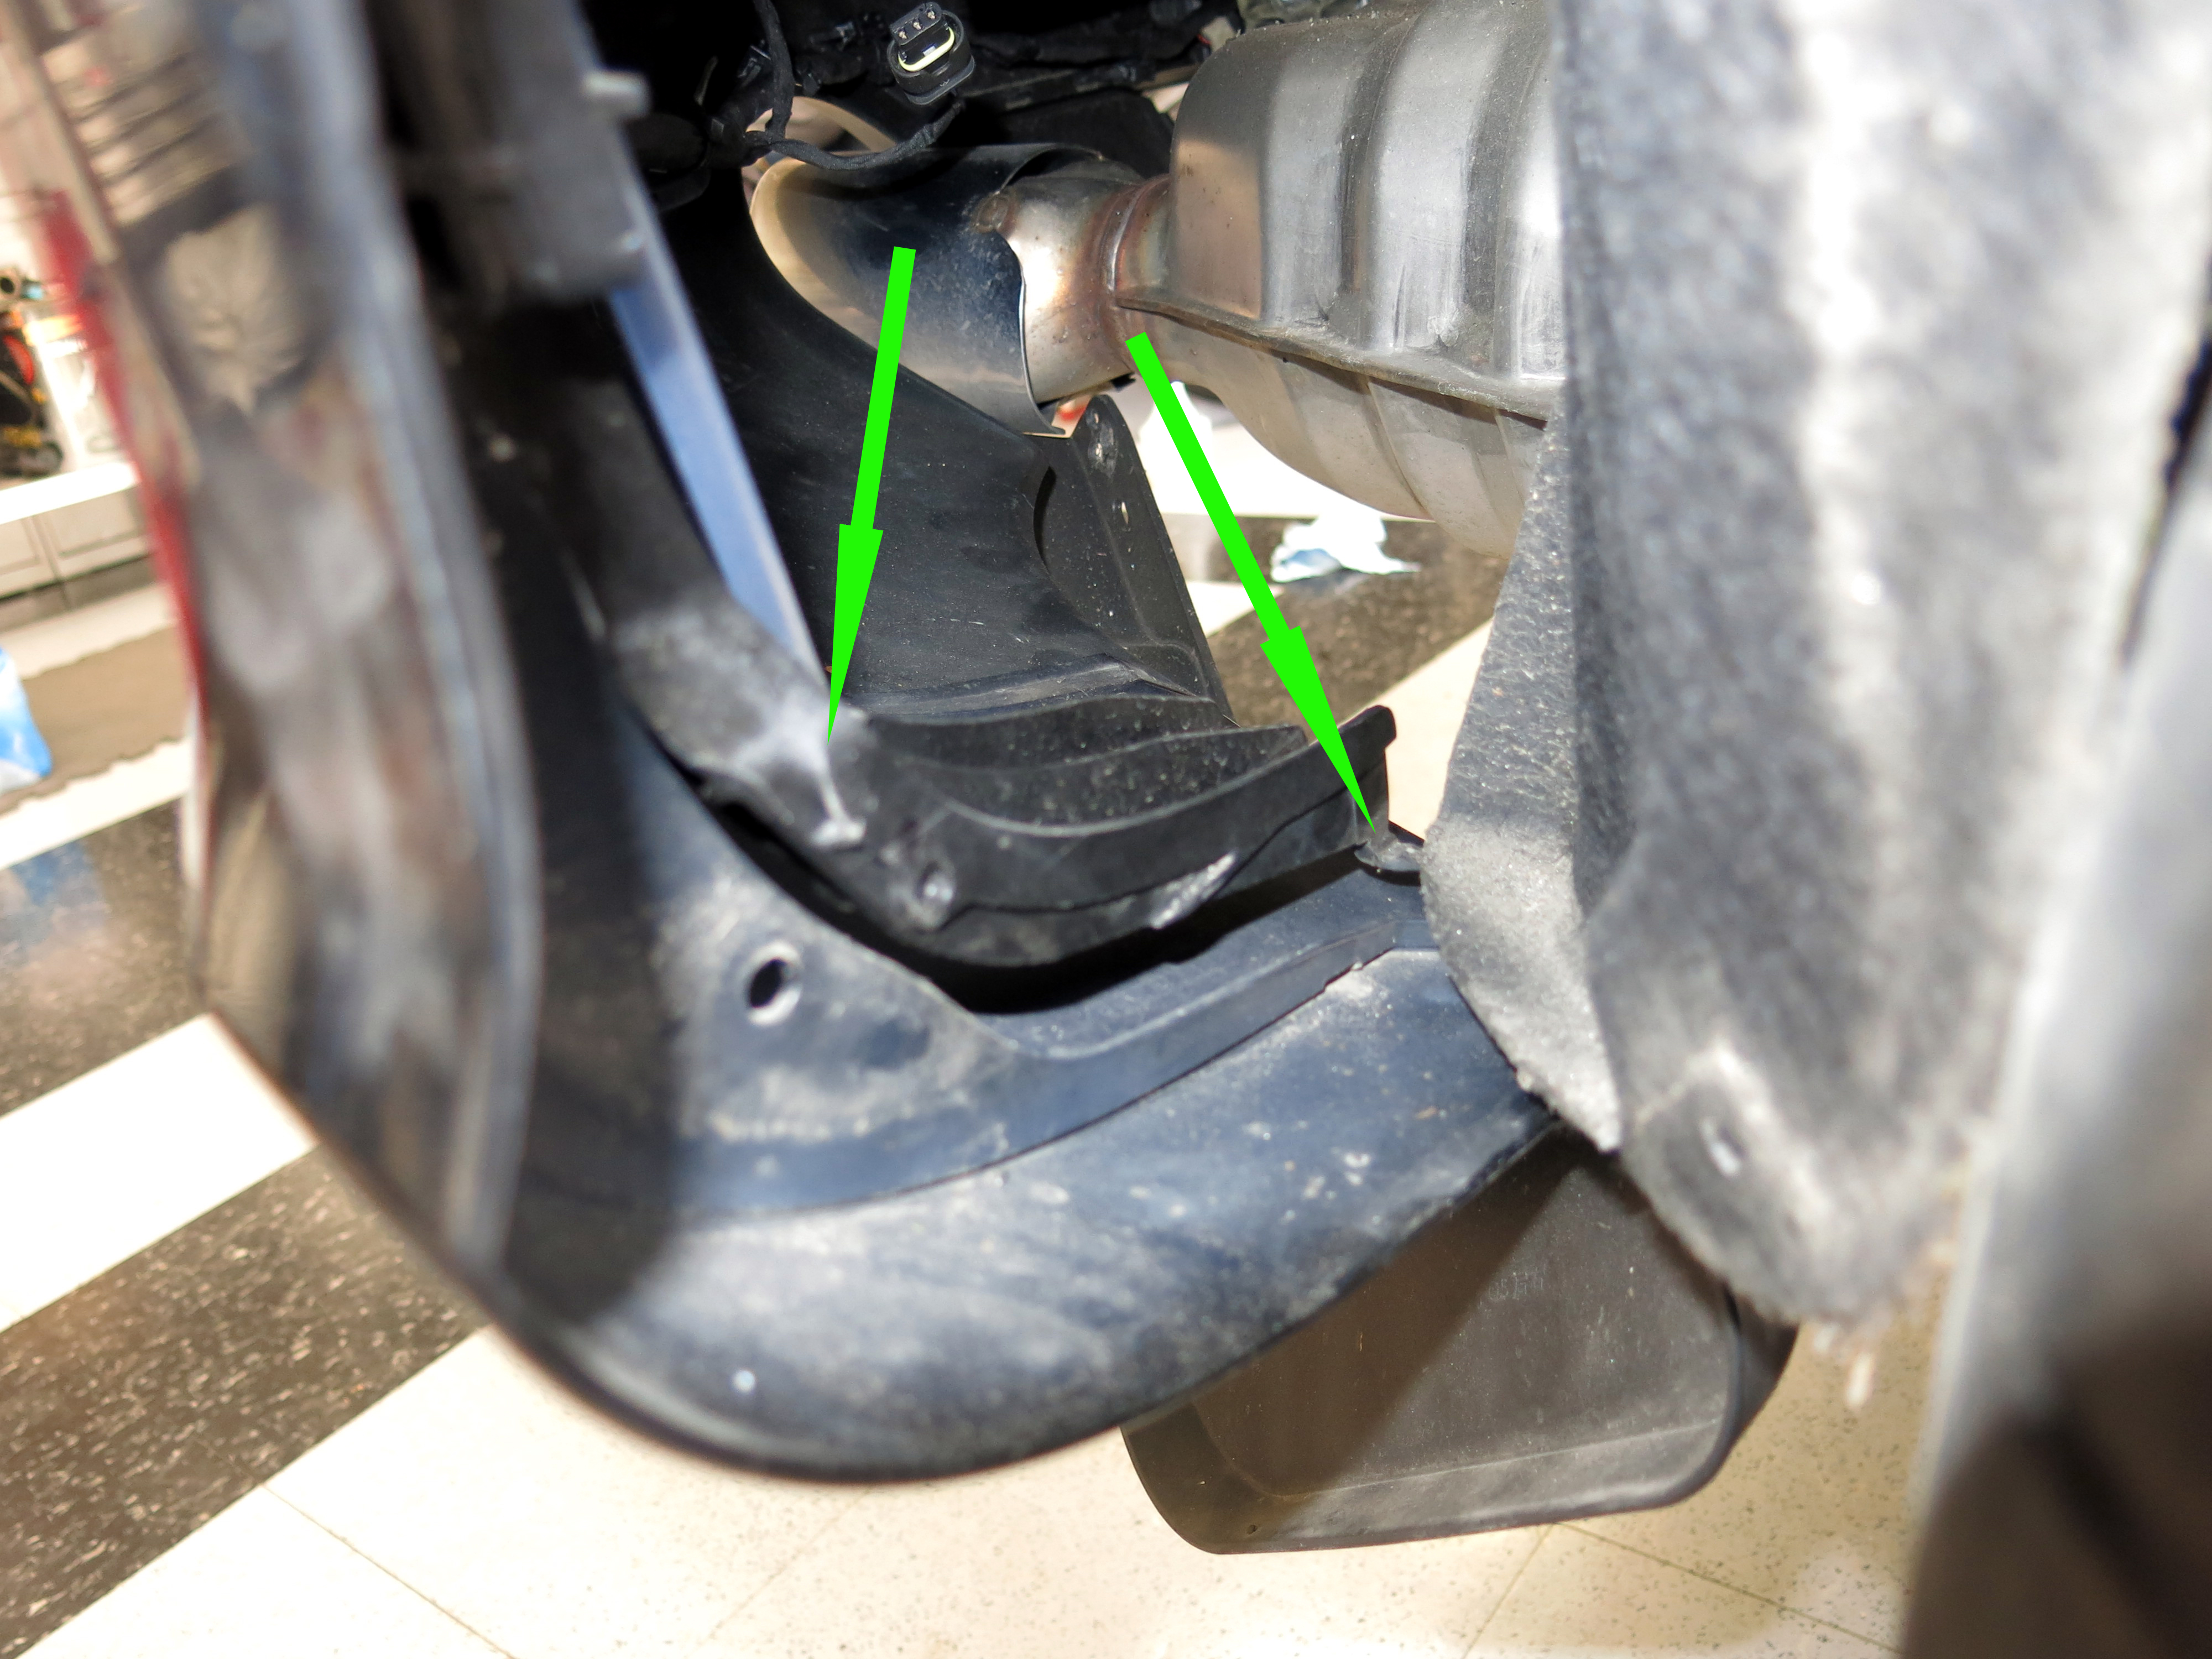
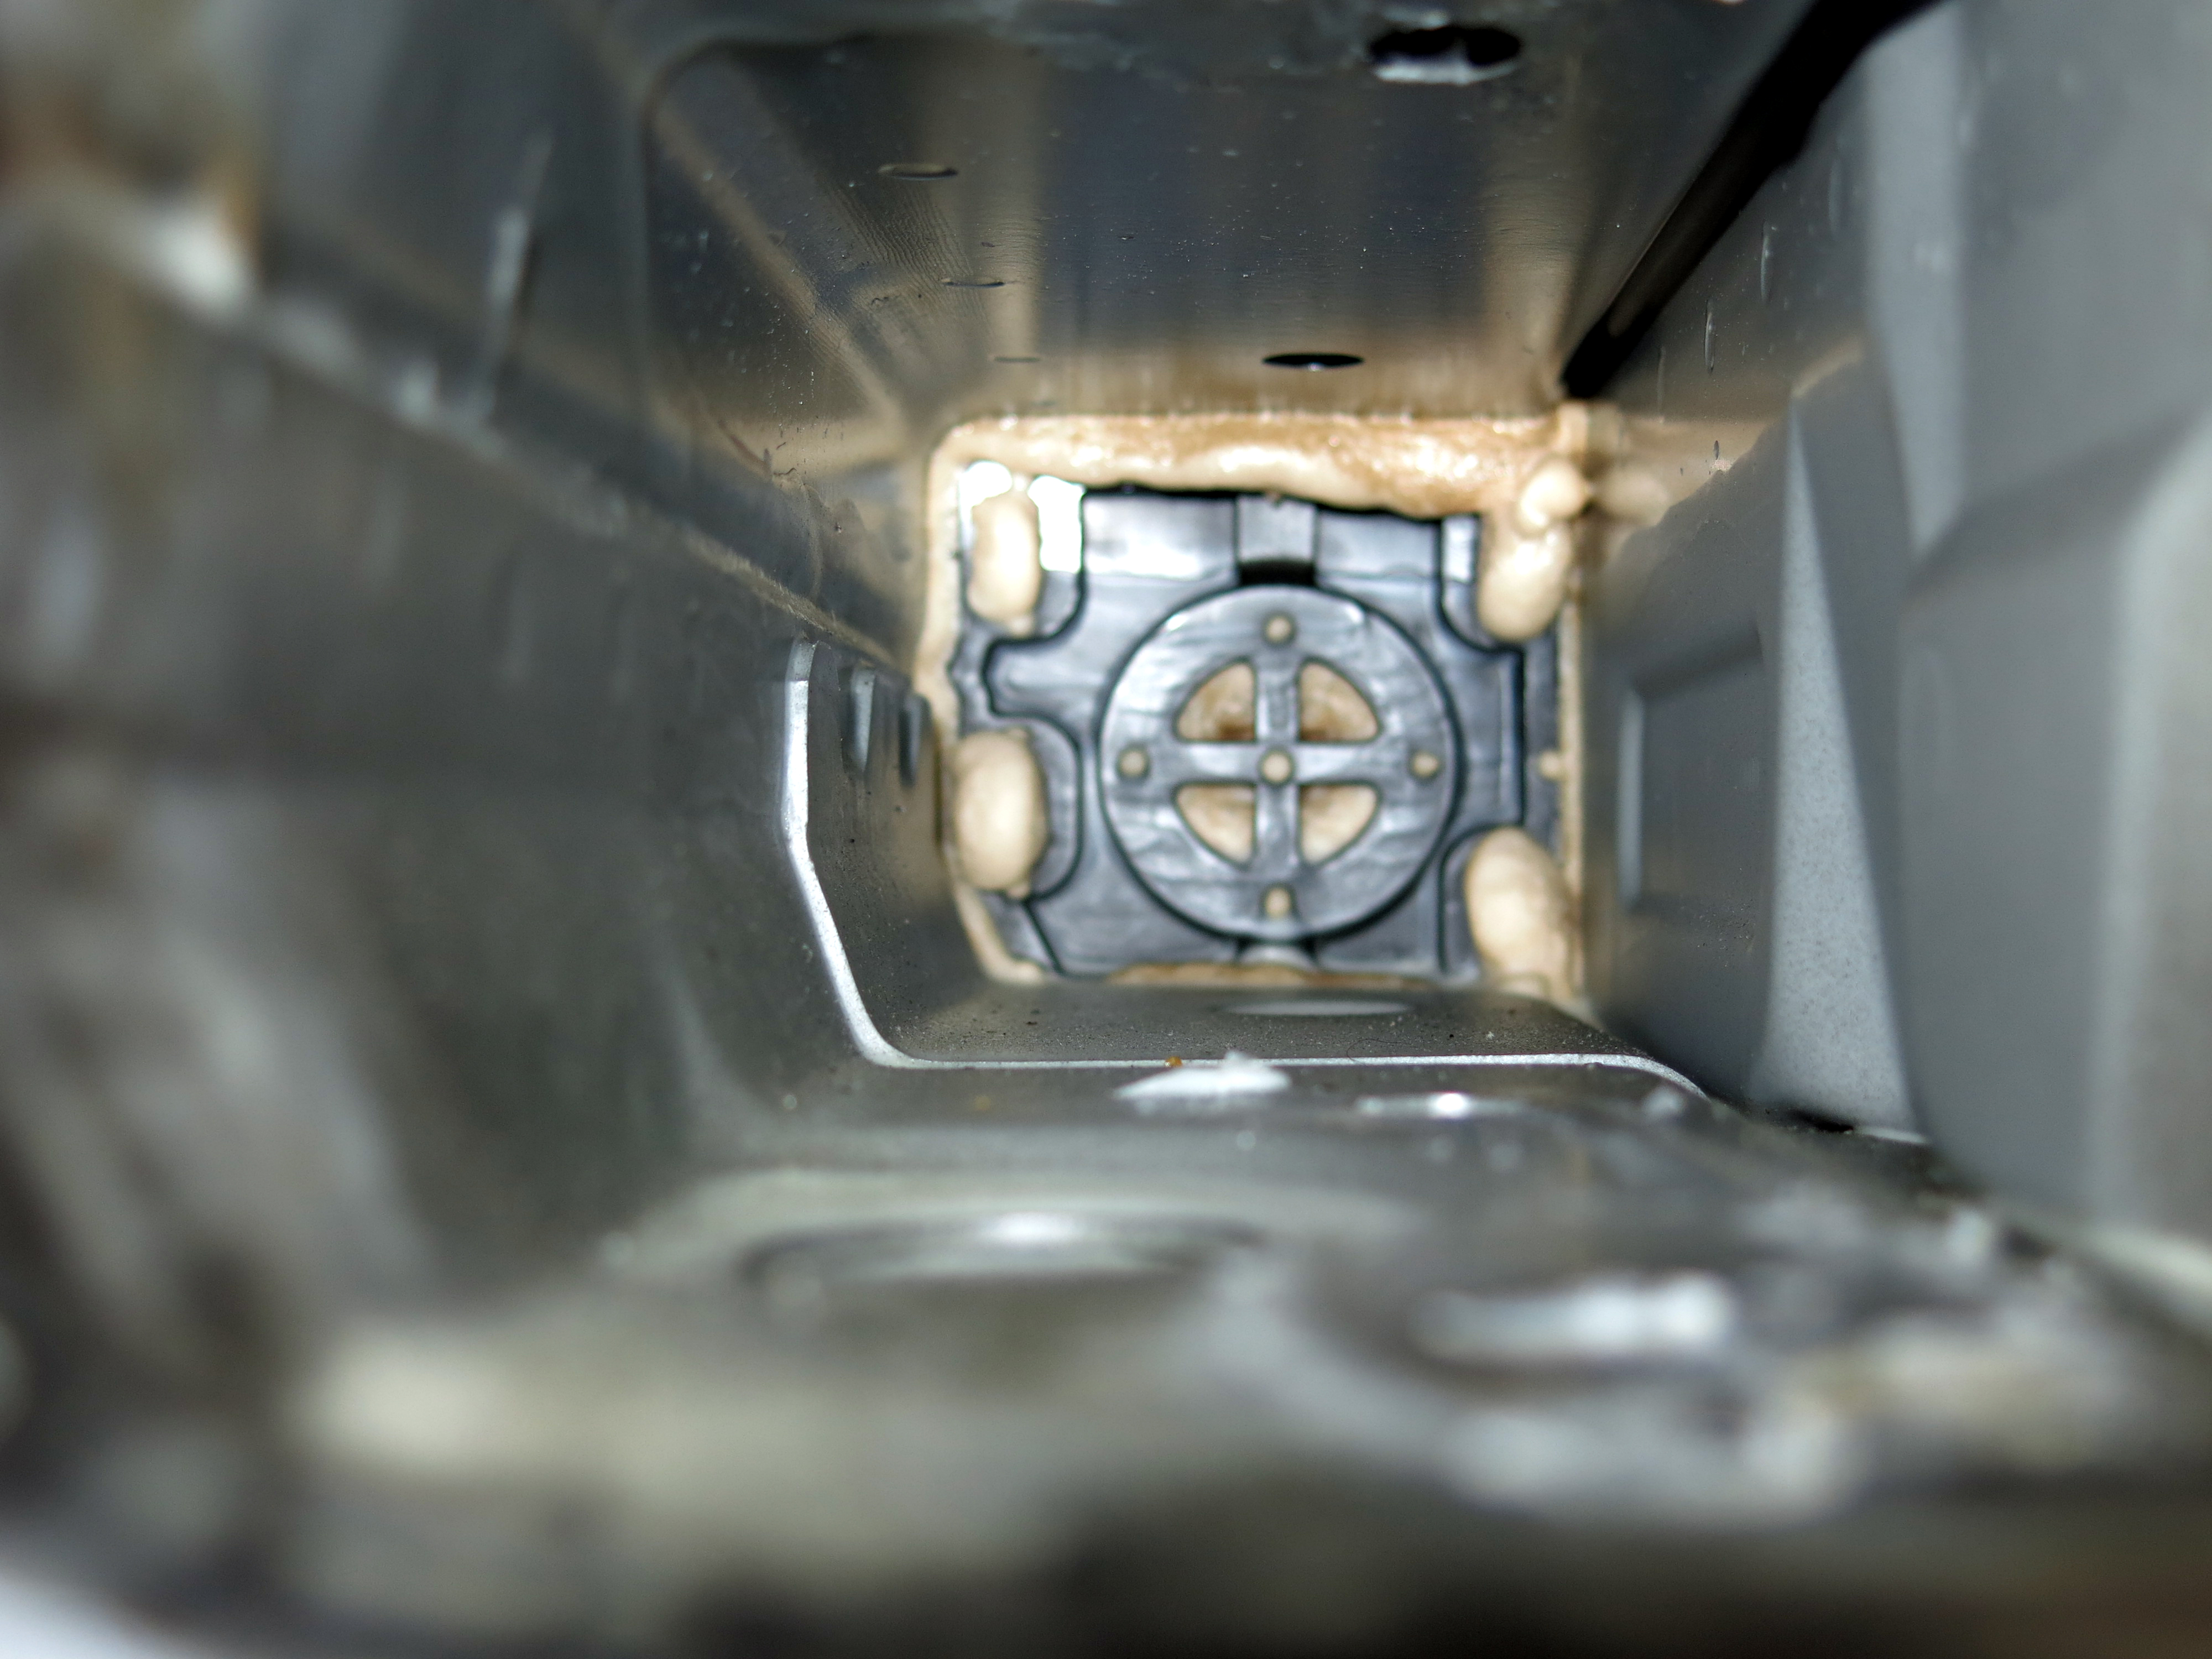
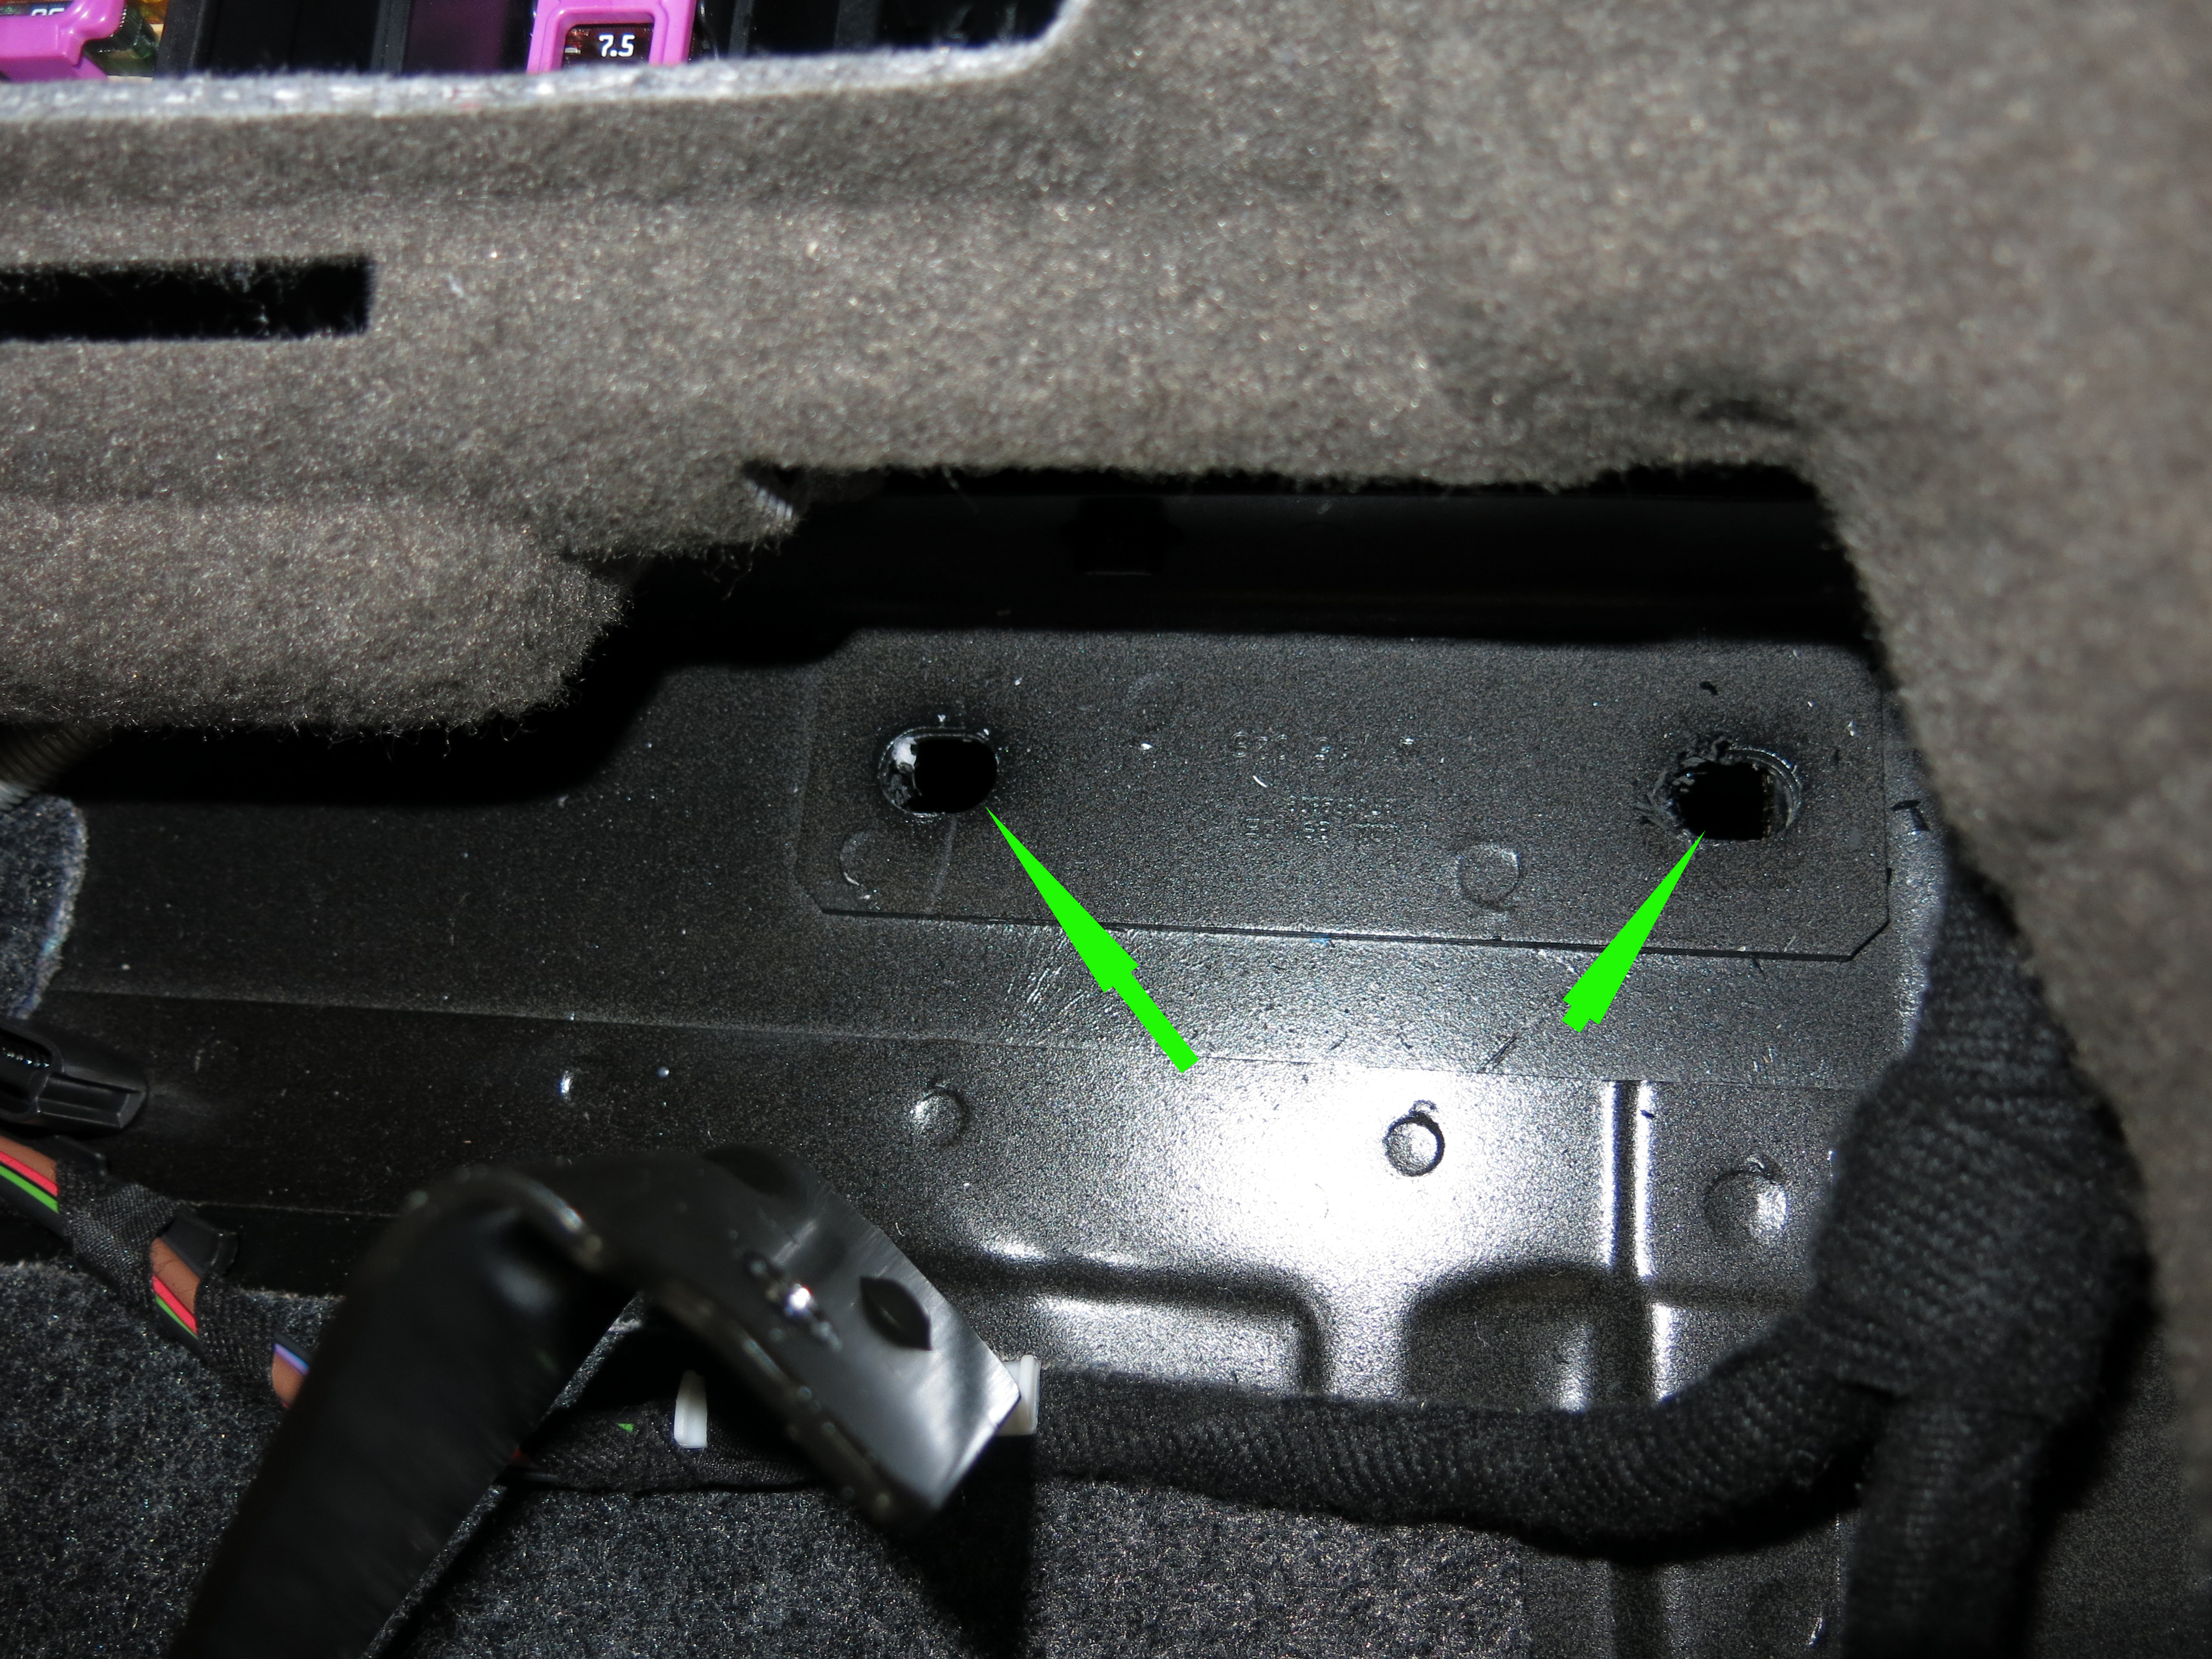
Make sure you work slowly, starting with the connecting clips at the top of the bumper cover where the cover meets the body of the car. Gently but firmly pop the clips by pulling out and back, Once loose, work each side a little at a time to unpop all the fasteners. Note that the bottom inner portion of the bumper cover will catch on the pictured points.

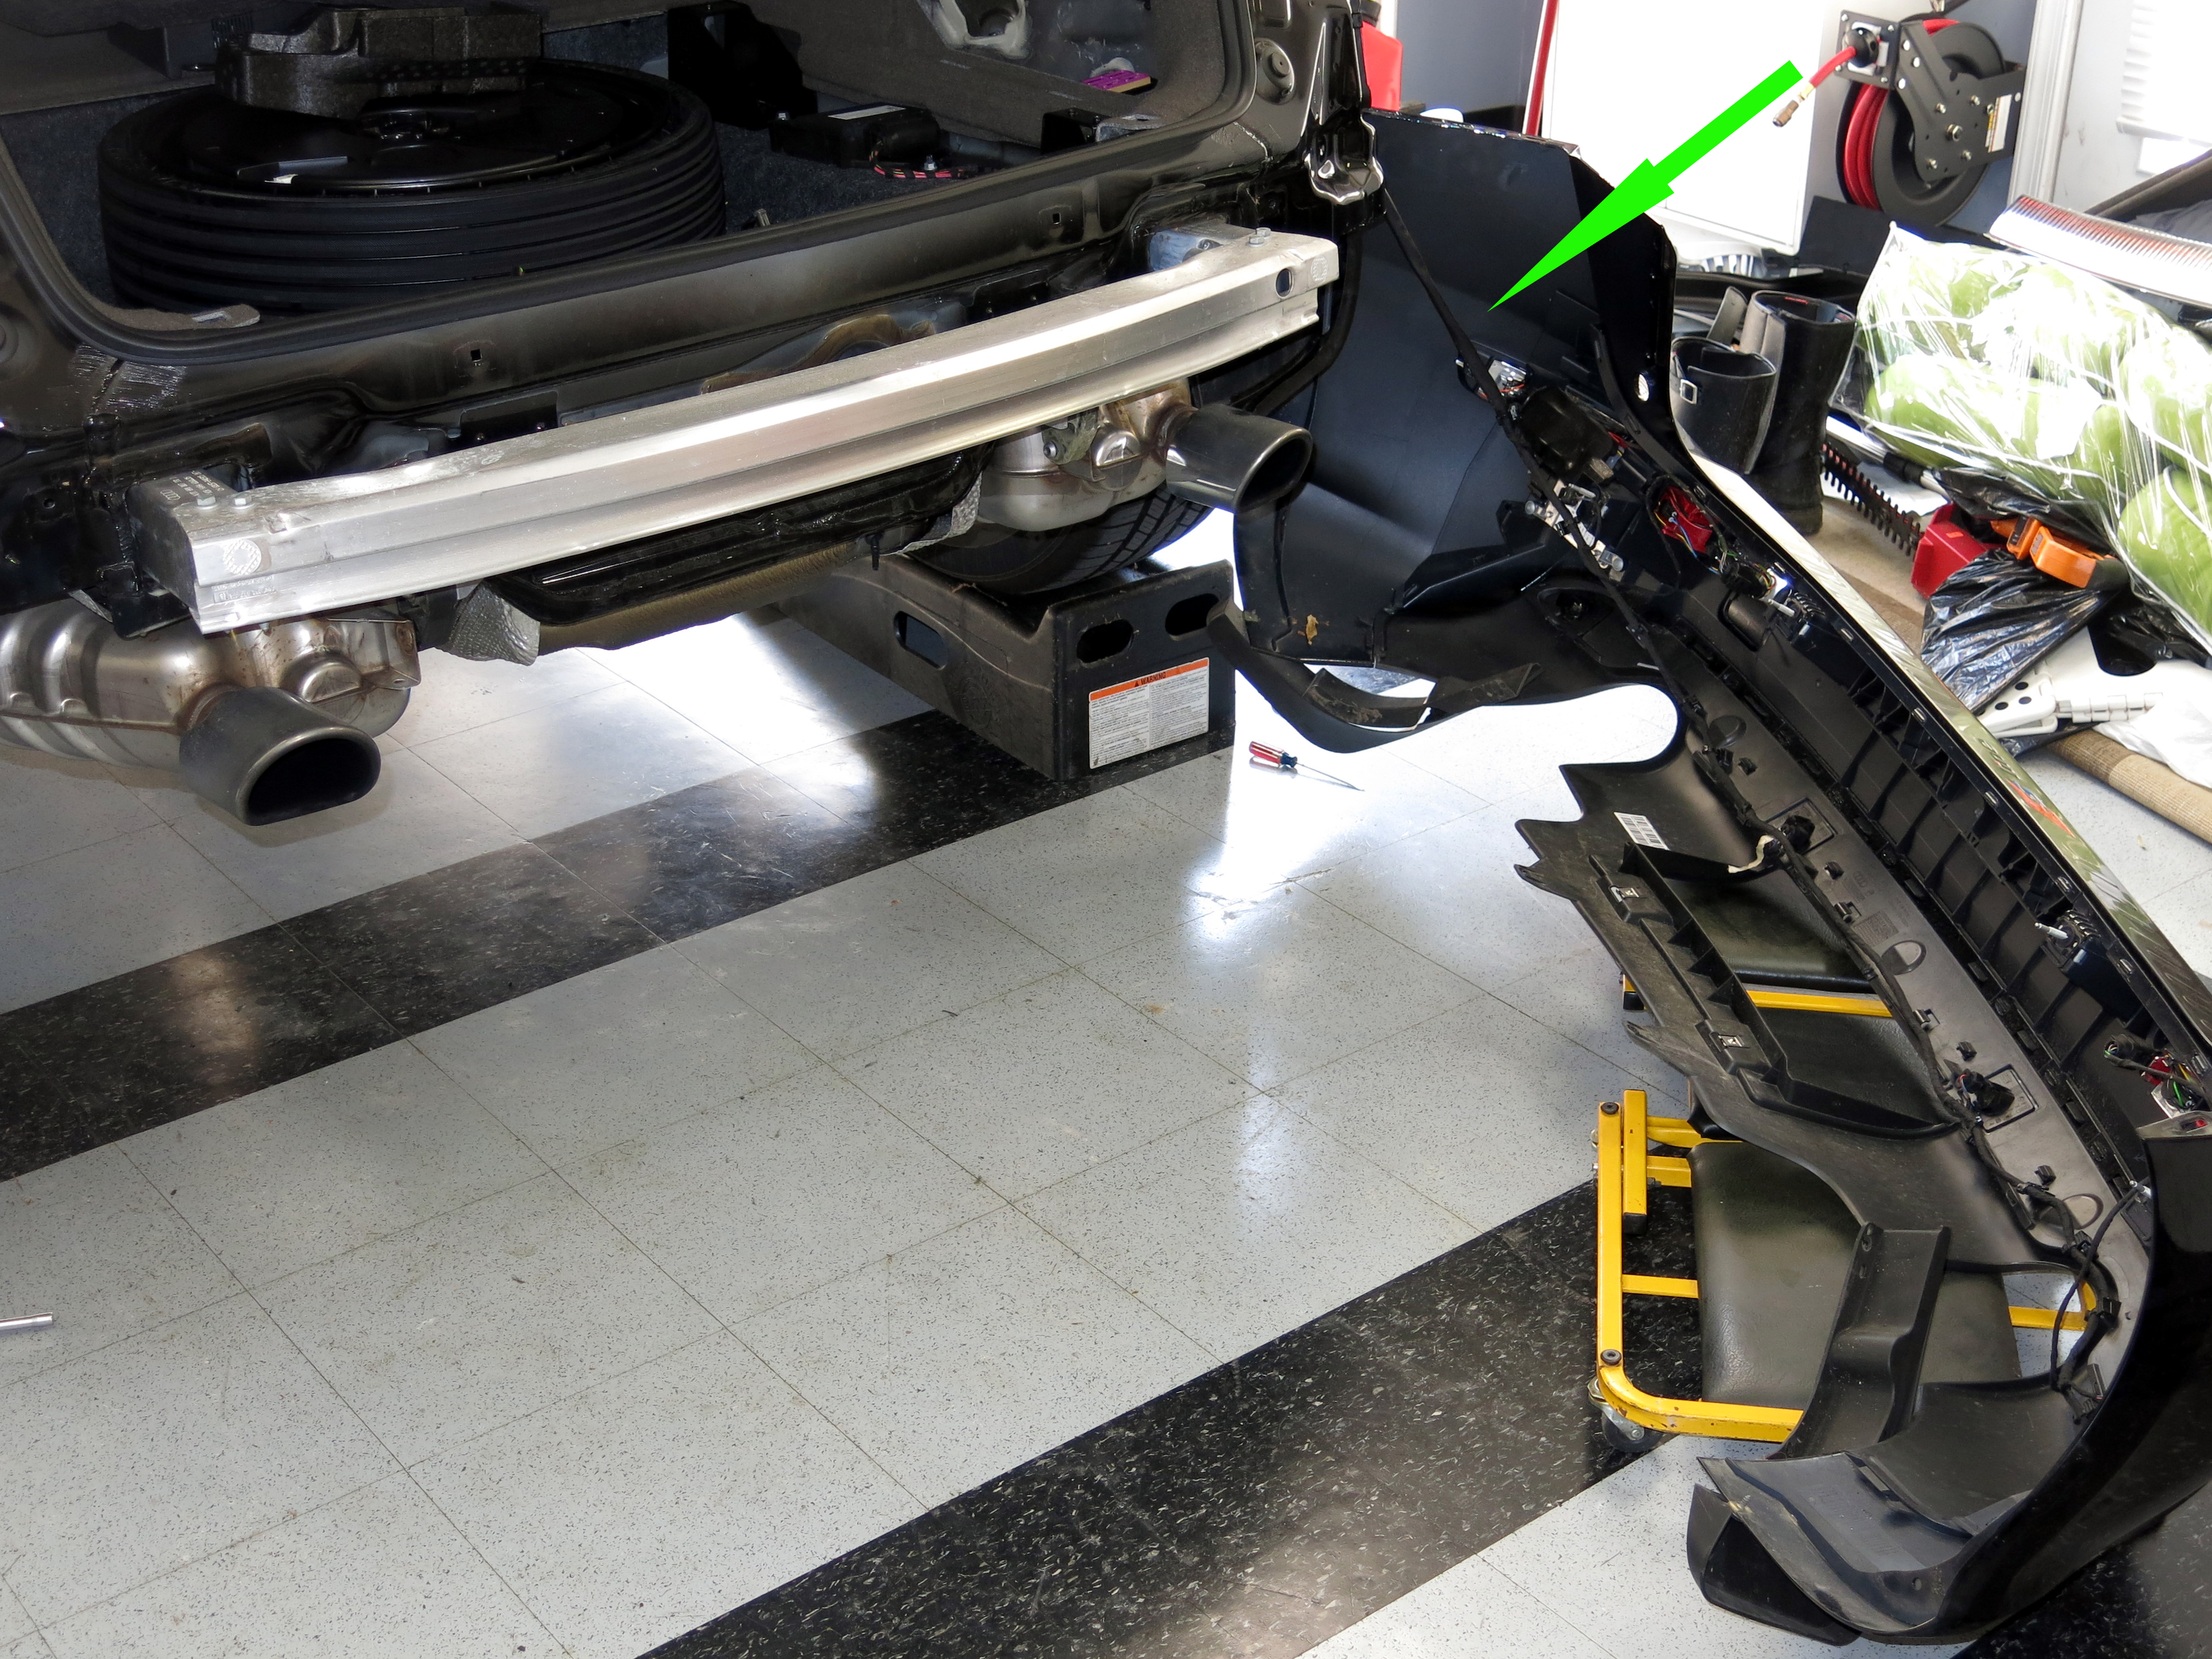
Once you have worked your way back and forth, the bumper is ready to pull completely loose. Have a blanket or similar ready to rest the cover on when you swing it off and to the right as pictured.
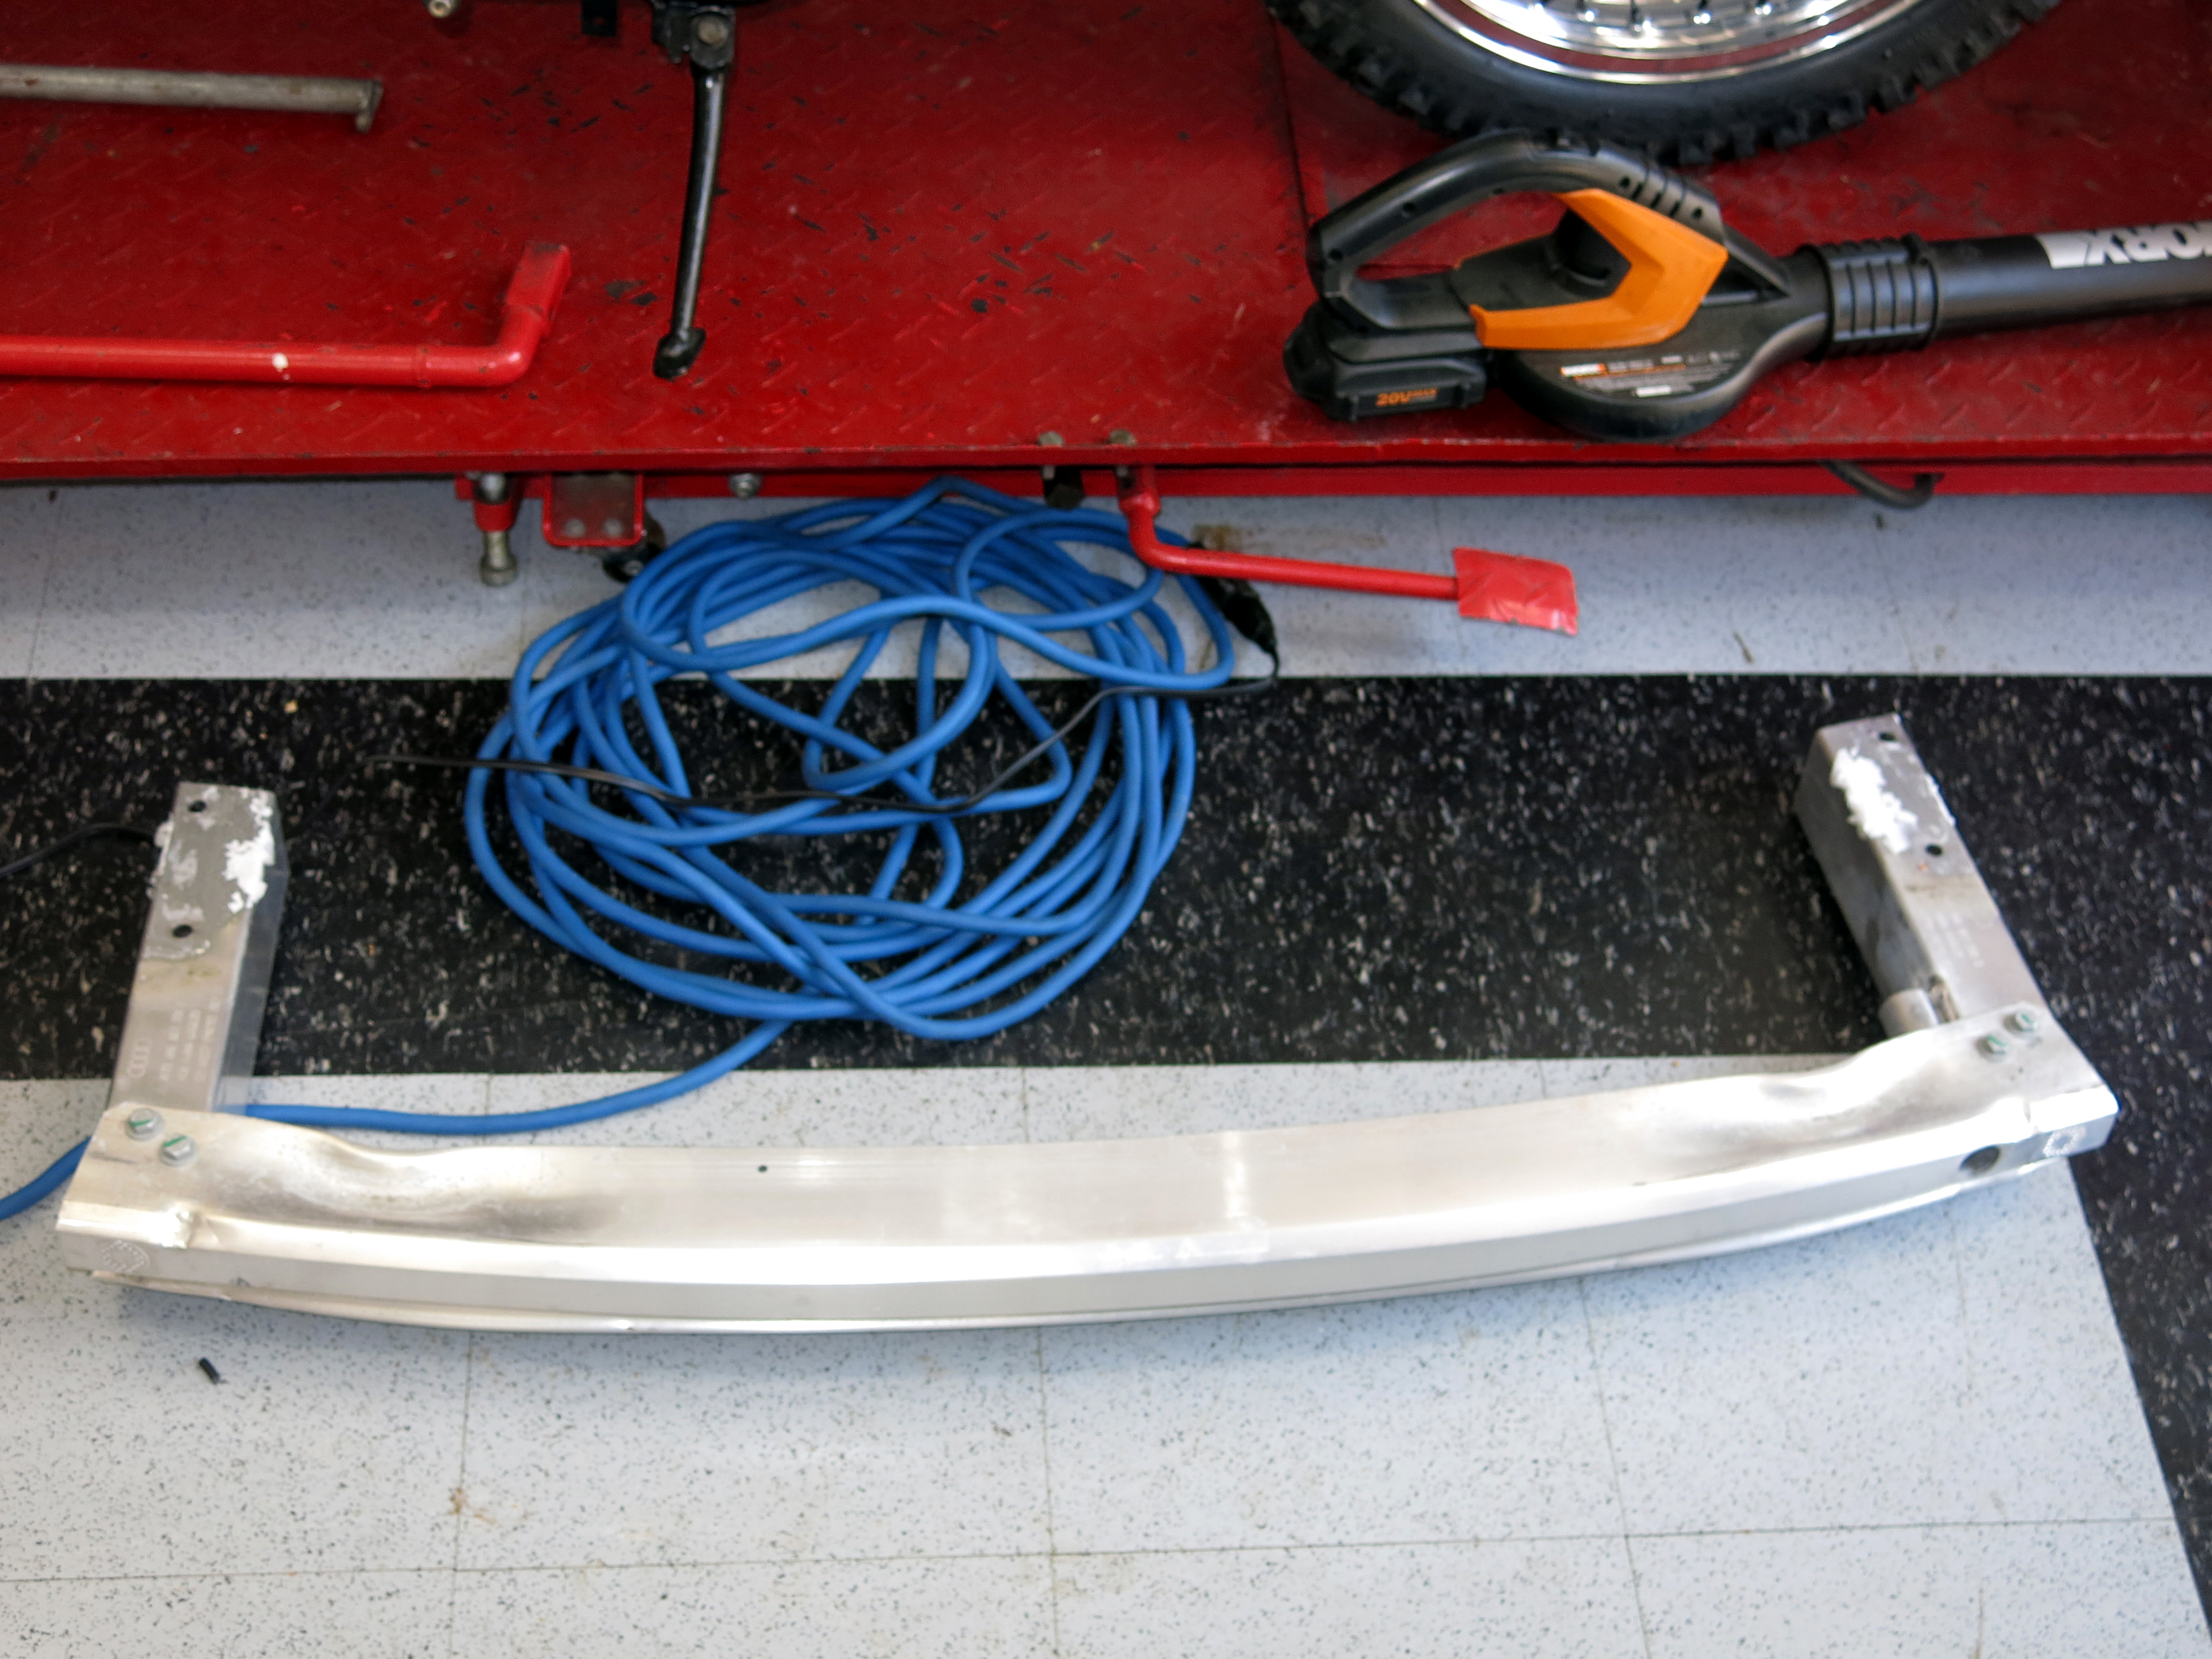
Now you have exposed the actual bumper:

Pulling the bumper is simple, remove the four long bolts, 16mm, then pull the bumper straight out.

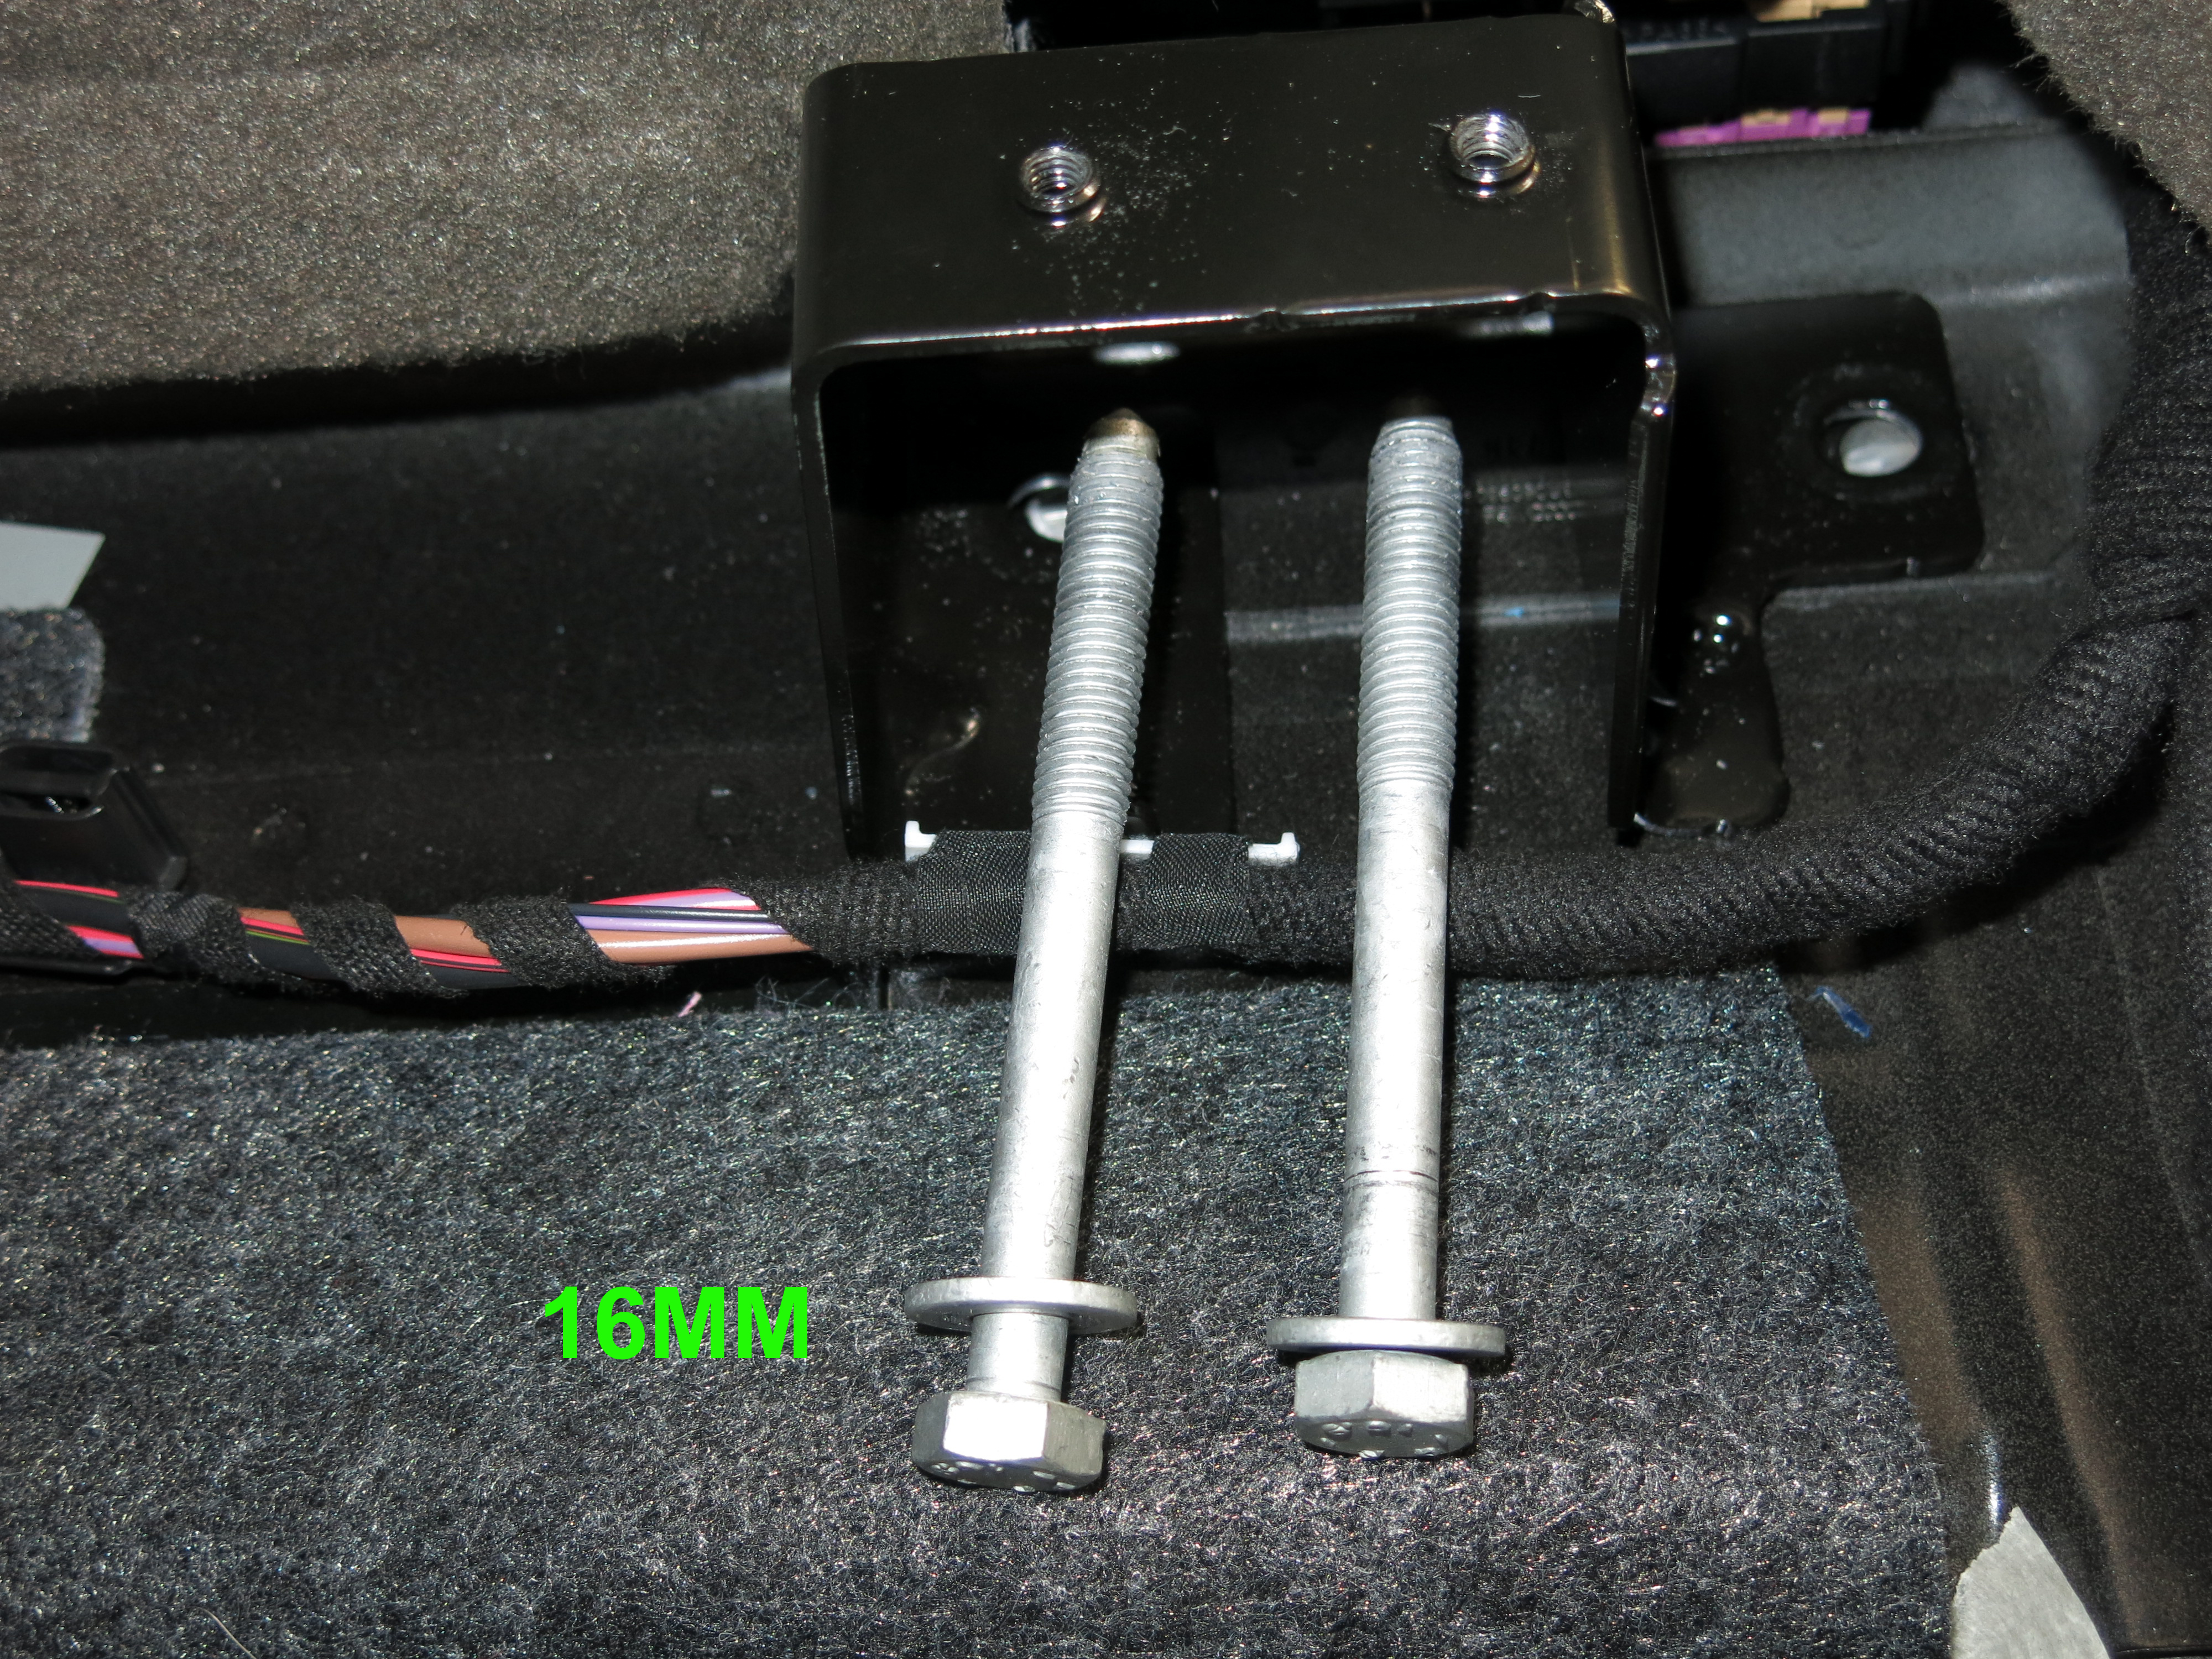
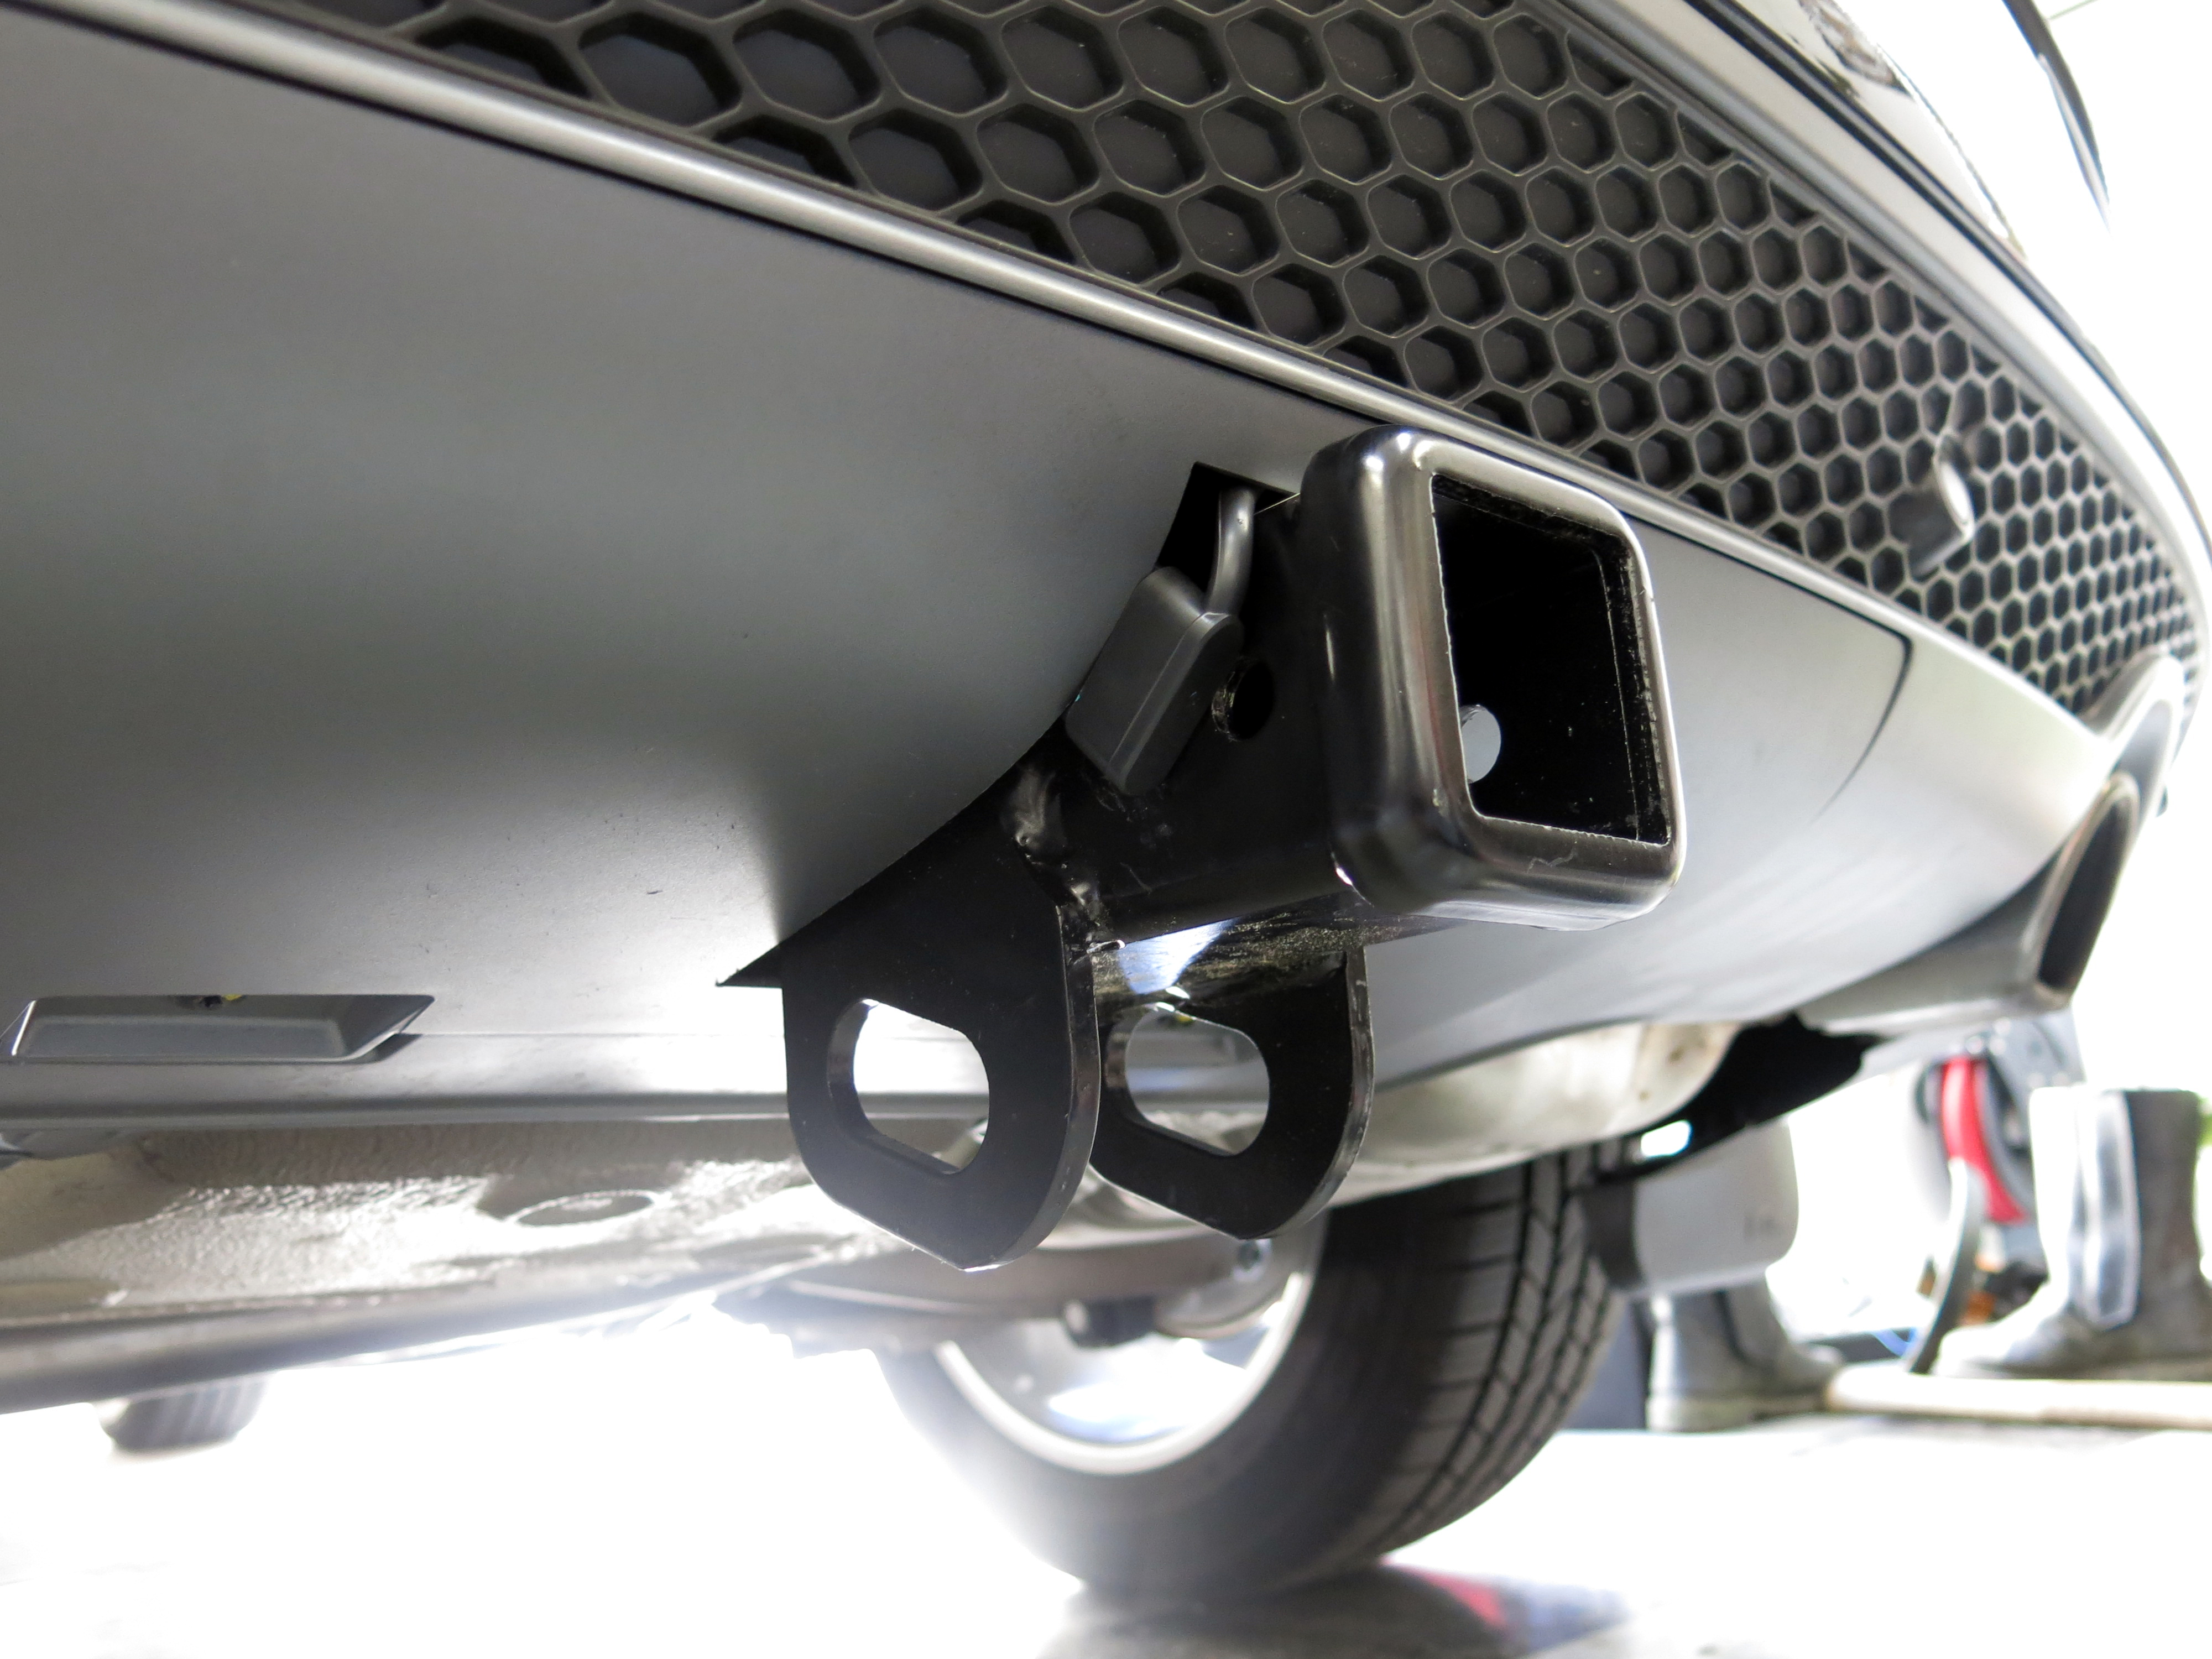
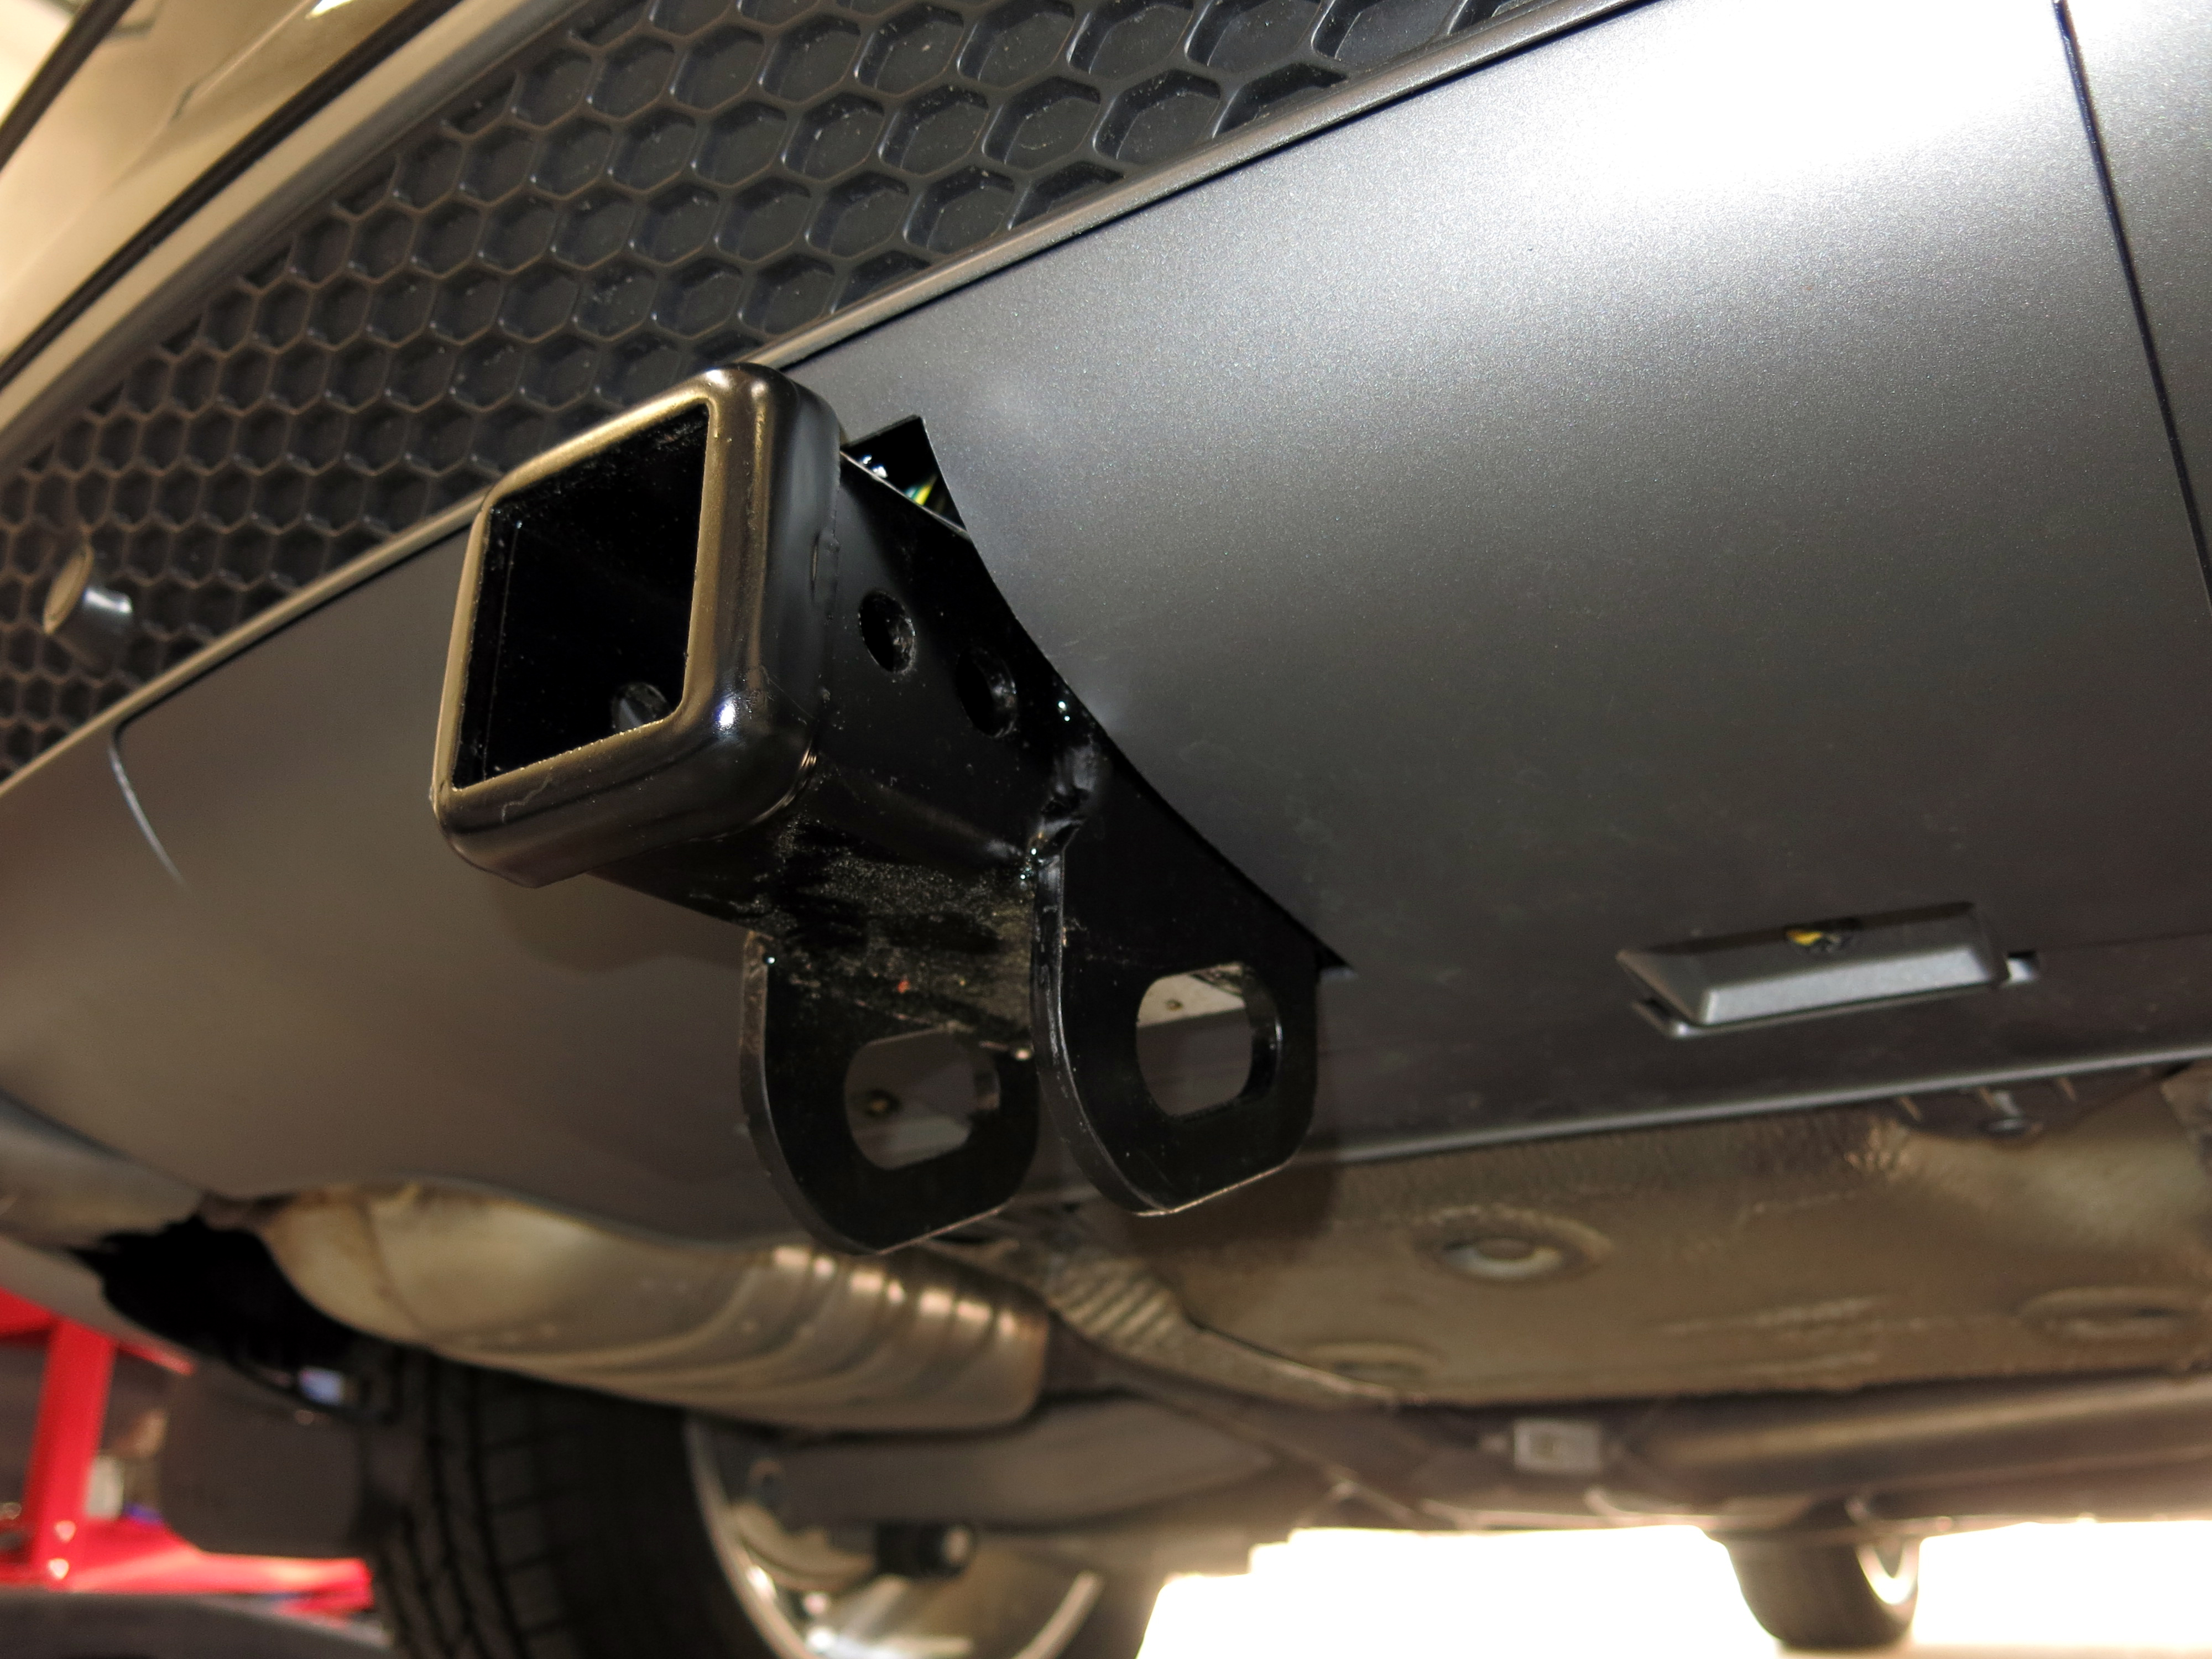
Lift the much heavier steel hitch/bumper into place, and slide it in. As you slide it in, watch the bolt holes and line them up.
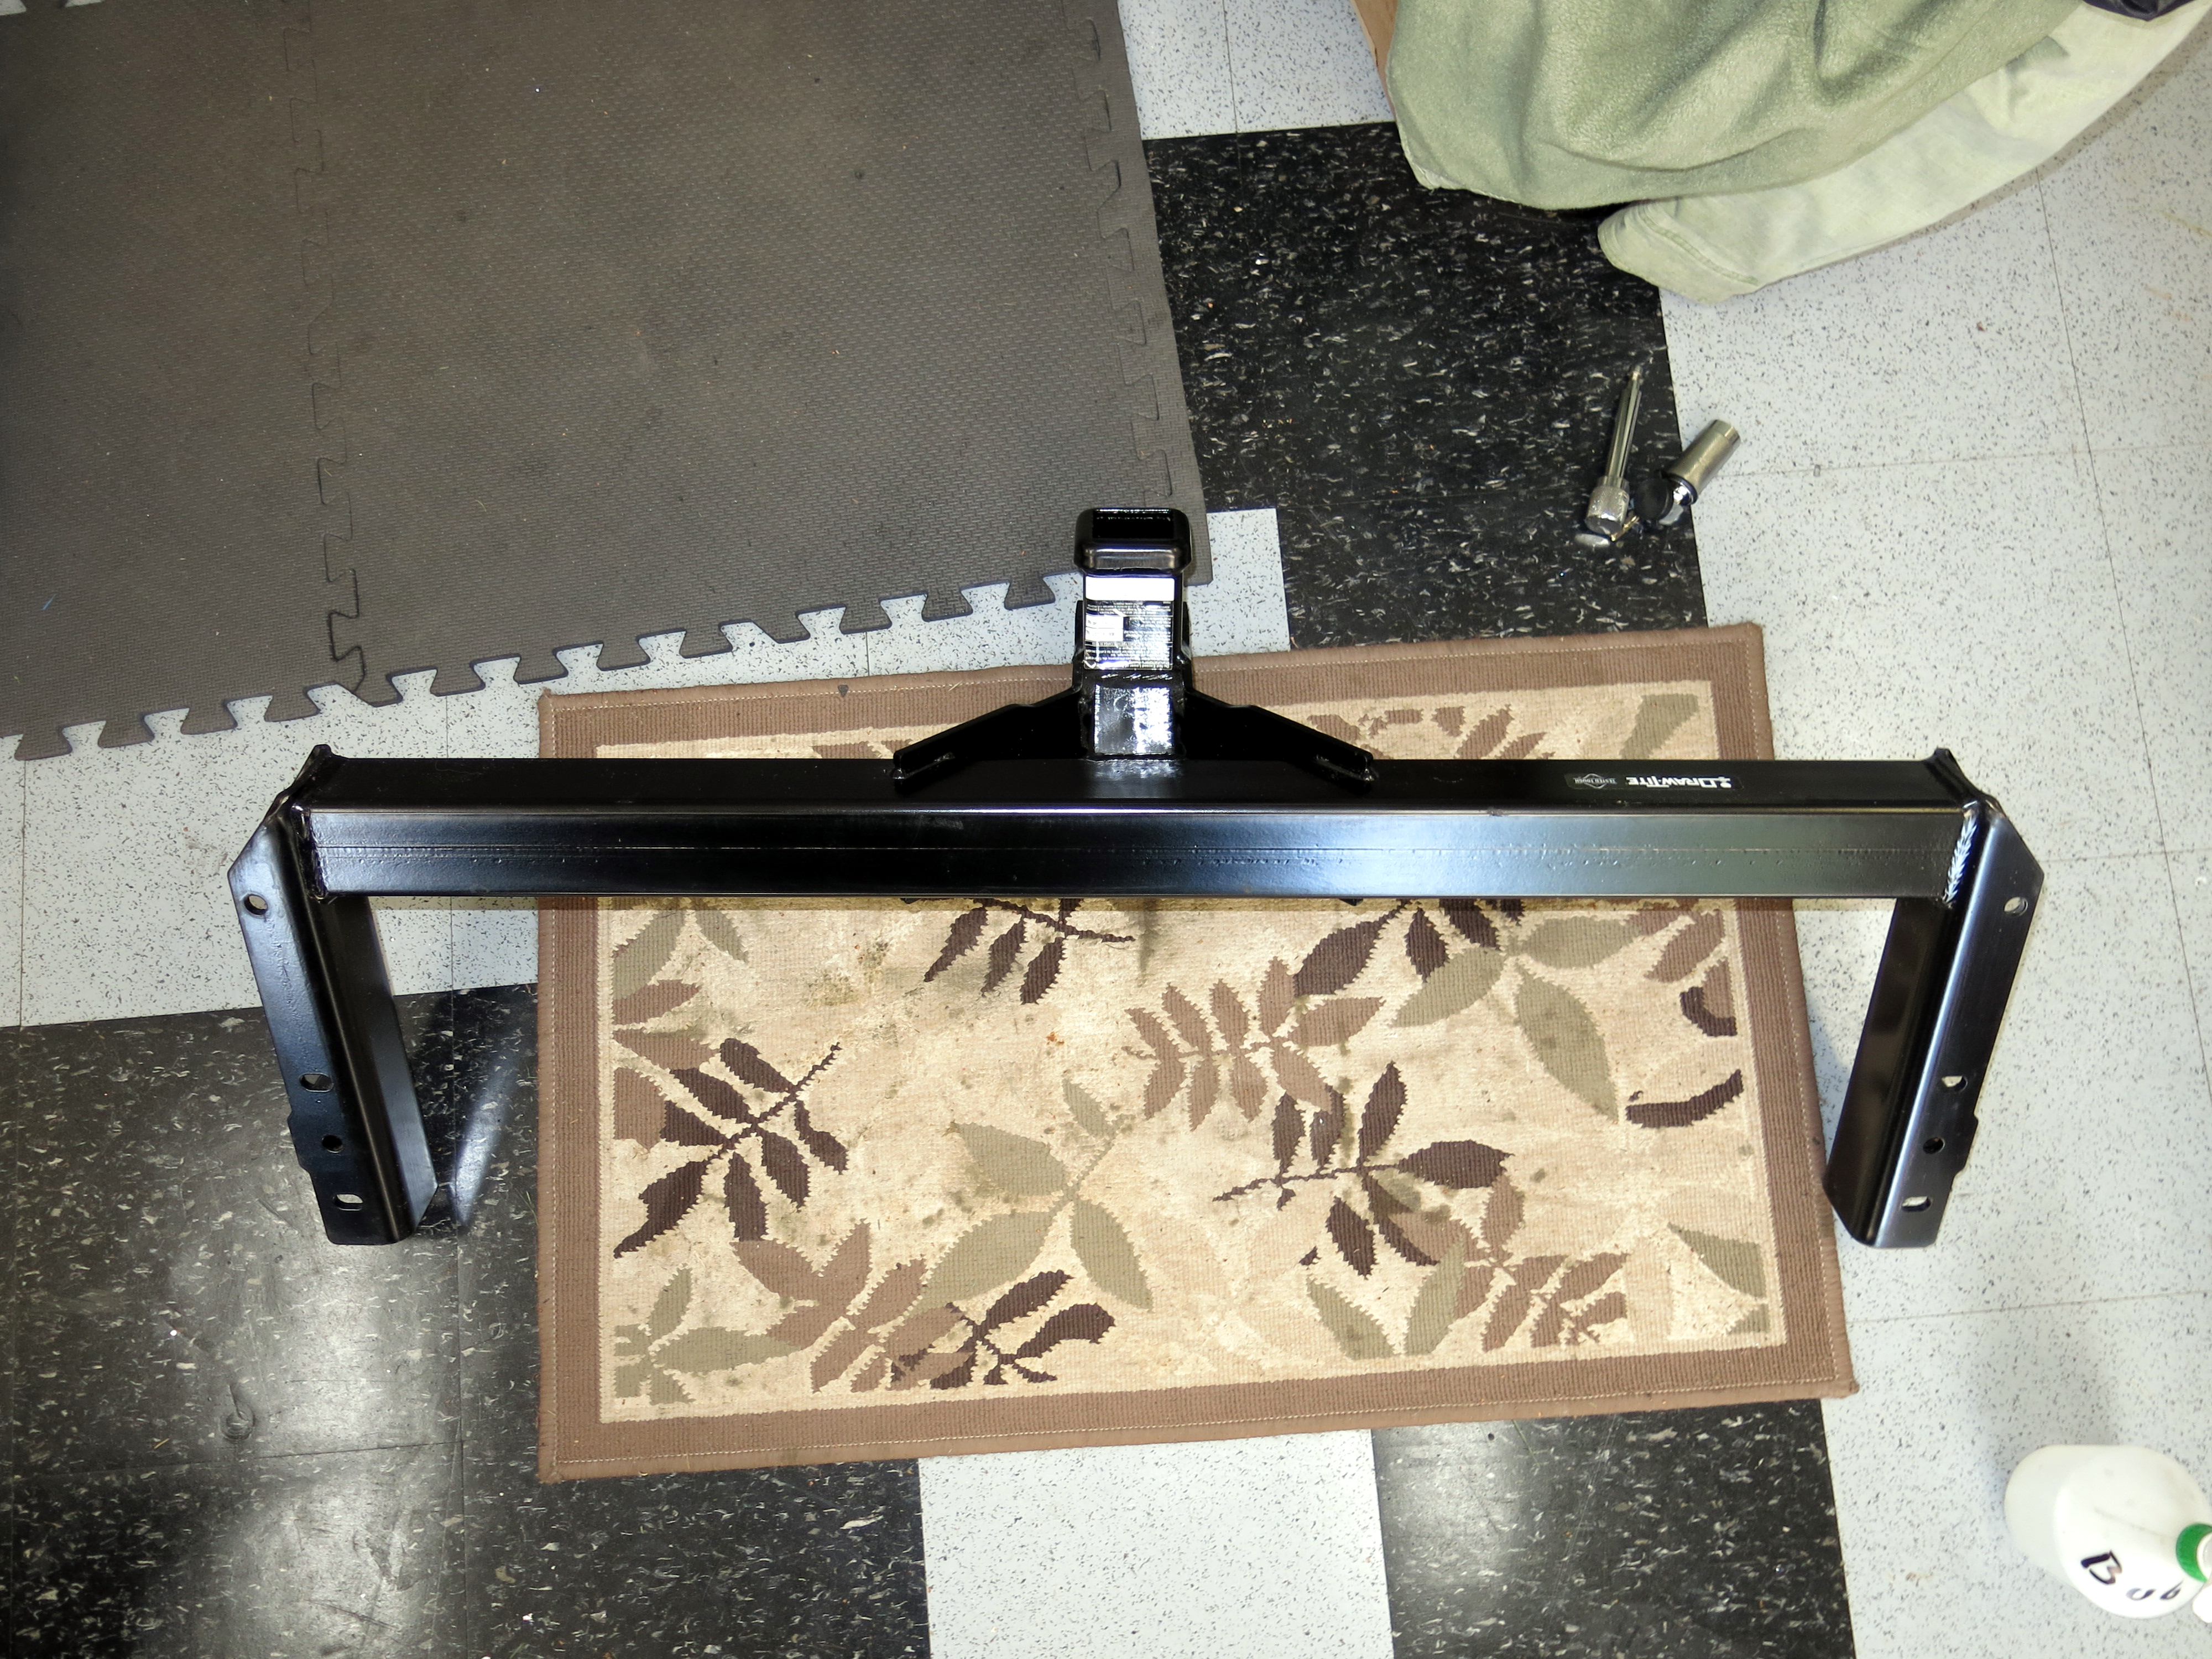
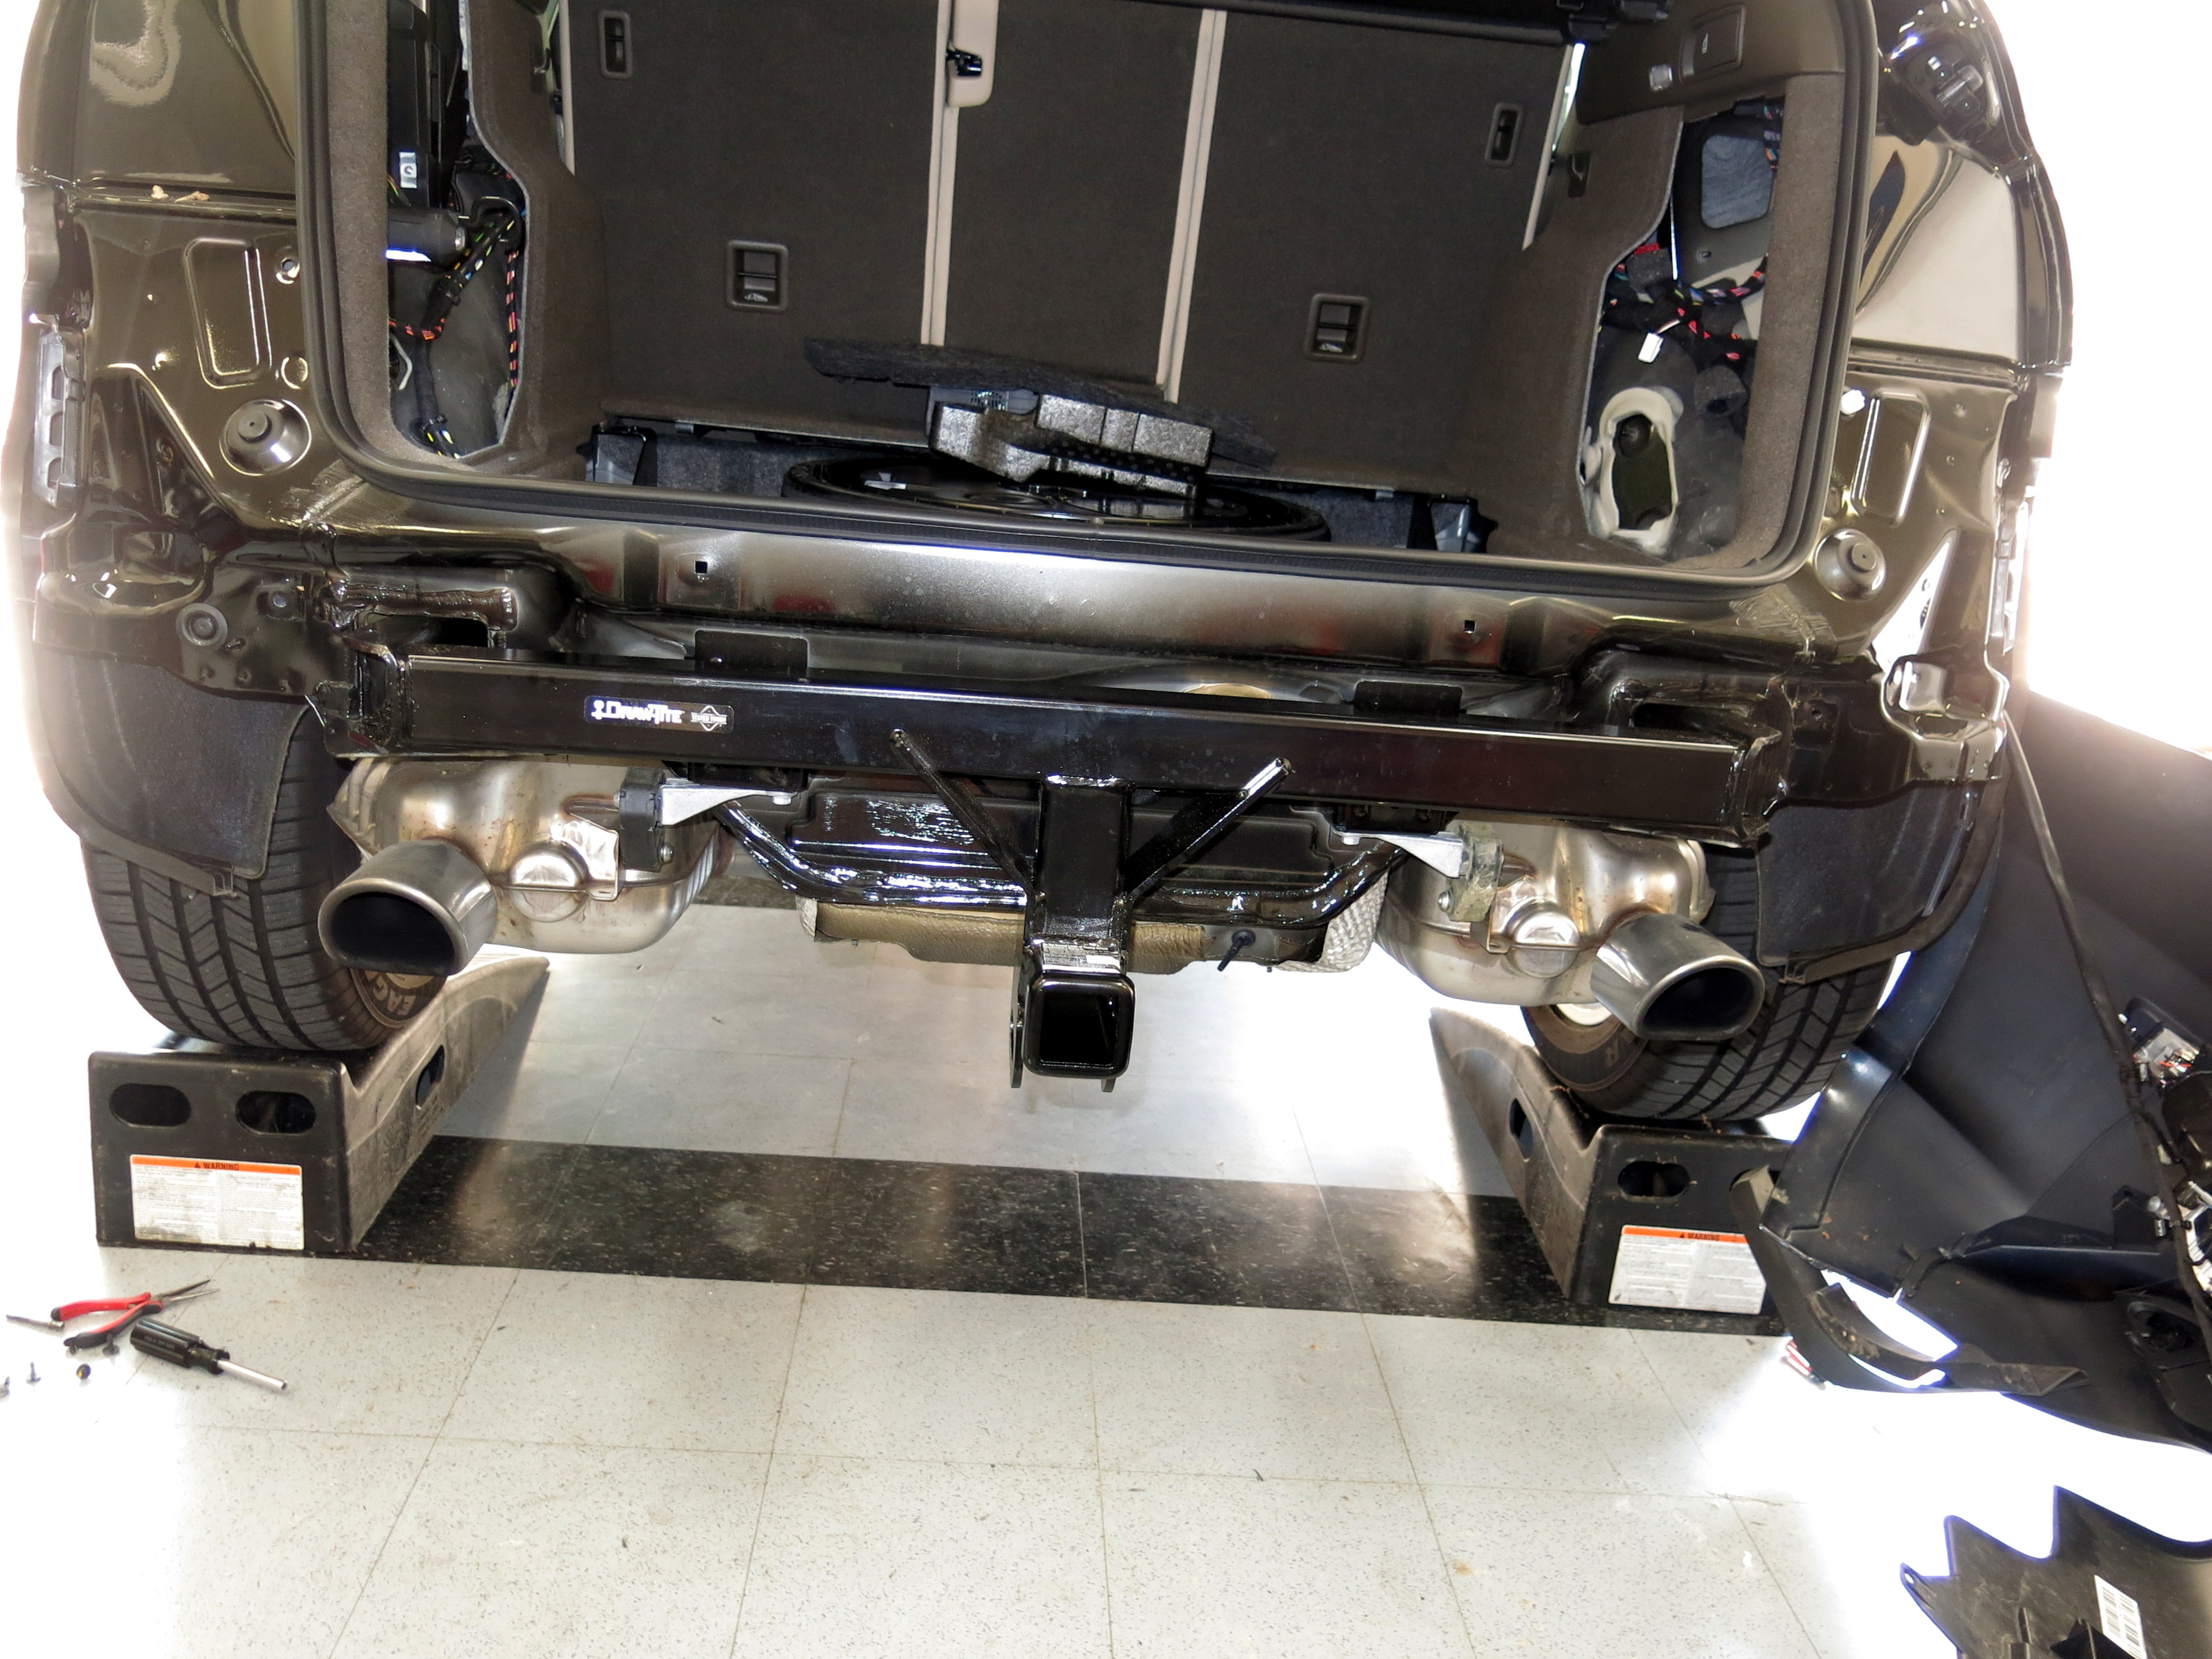
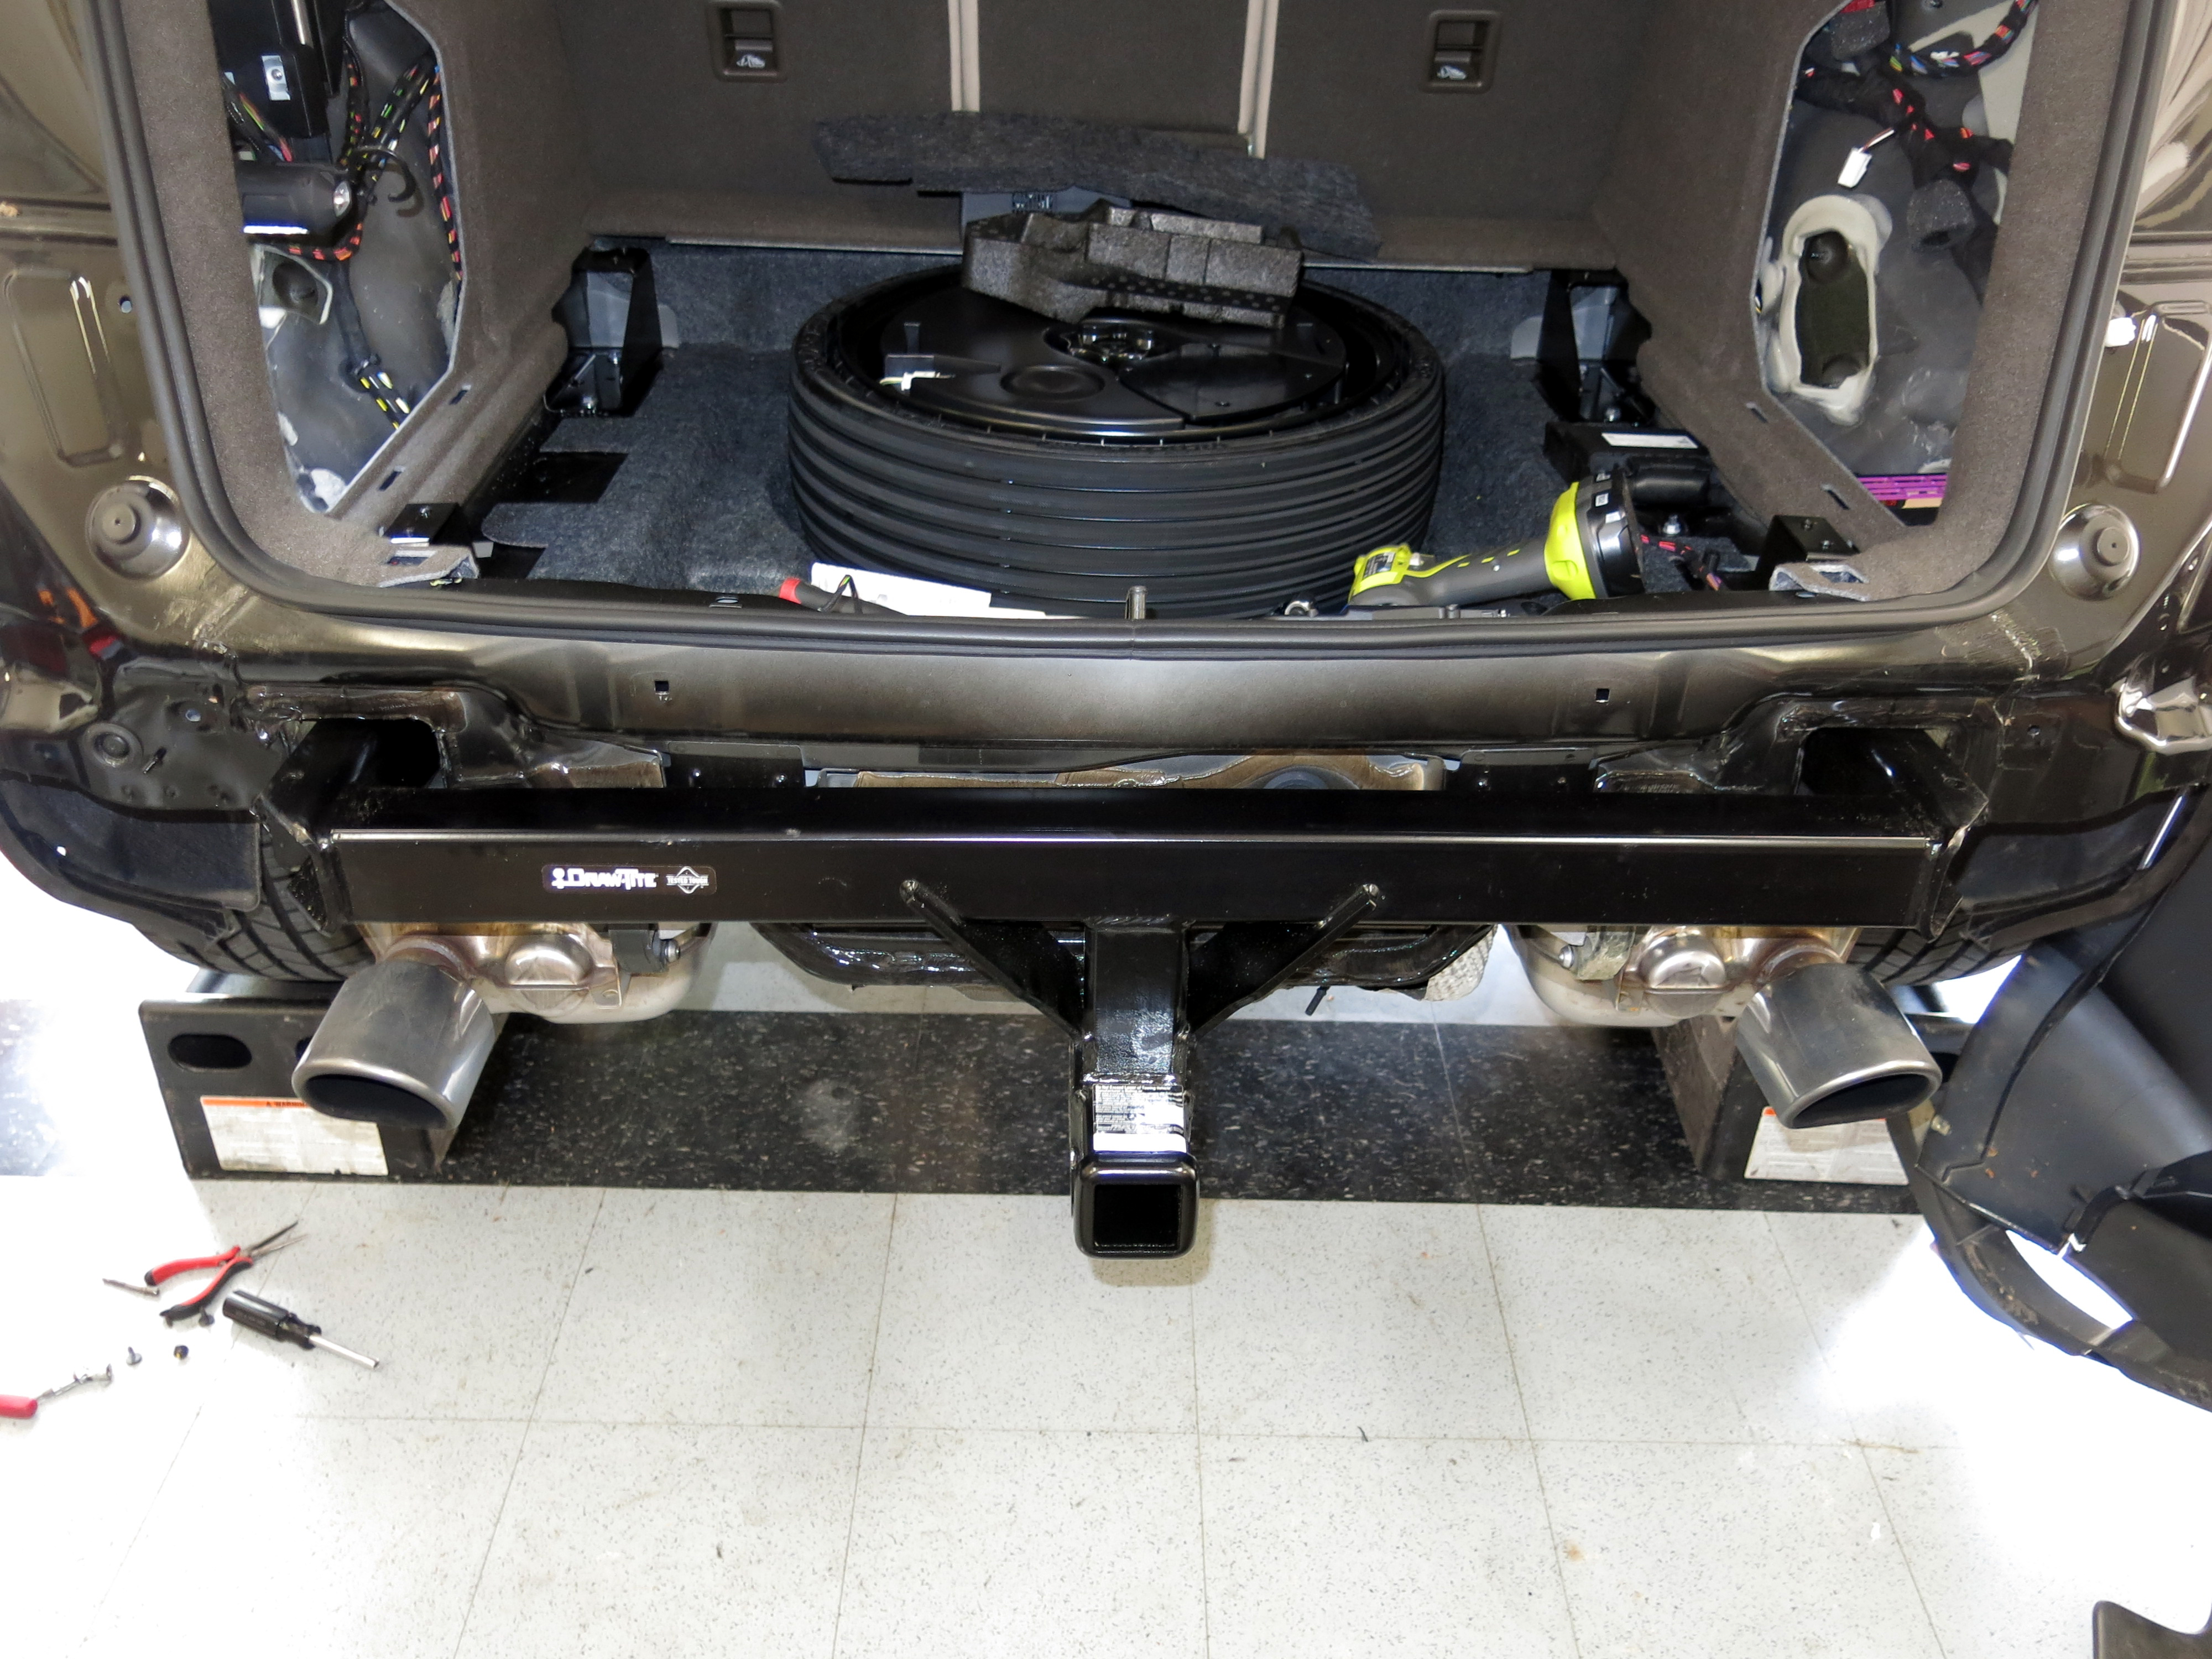
Install the four bolts and torque to spec.
Next remove the 8 T-25 Torx screws, 4 on each side, on the fender cover on the back side of both wheel arches. This allows the inner wheel well to be moved.
You also need to remove two clips on each side that hold the inner fender well on. I failed to document this, so I am stealing from this thread: I will add it when I find it.
At this point you are ready to work the bumper cover off. Note that I have the back-up sensors, but there is no need to disconnect any wiring or sensors to remove the bumper cover because you will not completely remove it.
Make sure you work slowly, starting with the connecting clips at the top of the bumper cover where the cover meets the body of the car. Gently but firmly pop the clips by pulling out and back, Once loose, work each side a little at a time to unpop all the fasteners. Note that the bottom inner portion of the bumper cover will catch on the pictured points.
Once you have worked your way back and forth, the bumper is ready to pull completely loose. Have a blanket or similar ready to rest the cover on when you swing it off and to the right as pictured.
Now you have exposed the actual bumper:
Pulling the bumper is simple, remove the four long bolts, 16mm, then pull the bumper straight out.
Lift the much heavier steel hitch/bumper into place, and slide it in. As you slide it in, watch the bolt holes and line them up.
Install the four bolts and torque to spec.
#3
05-28-2016, 09:36 PM
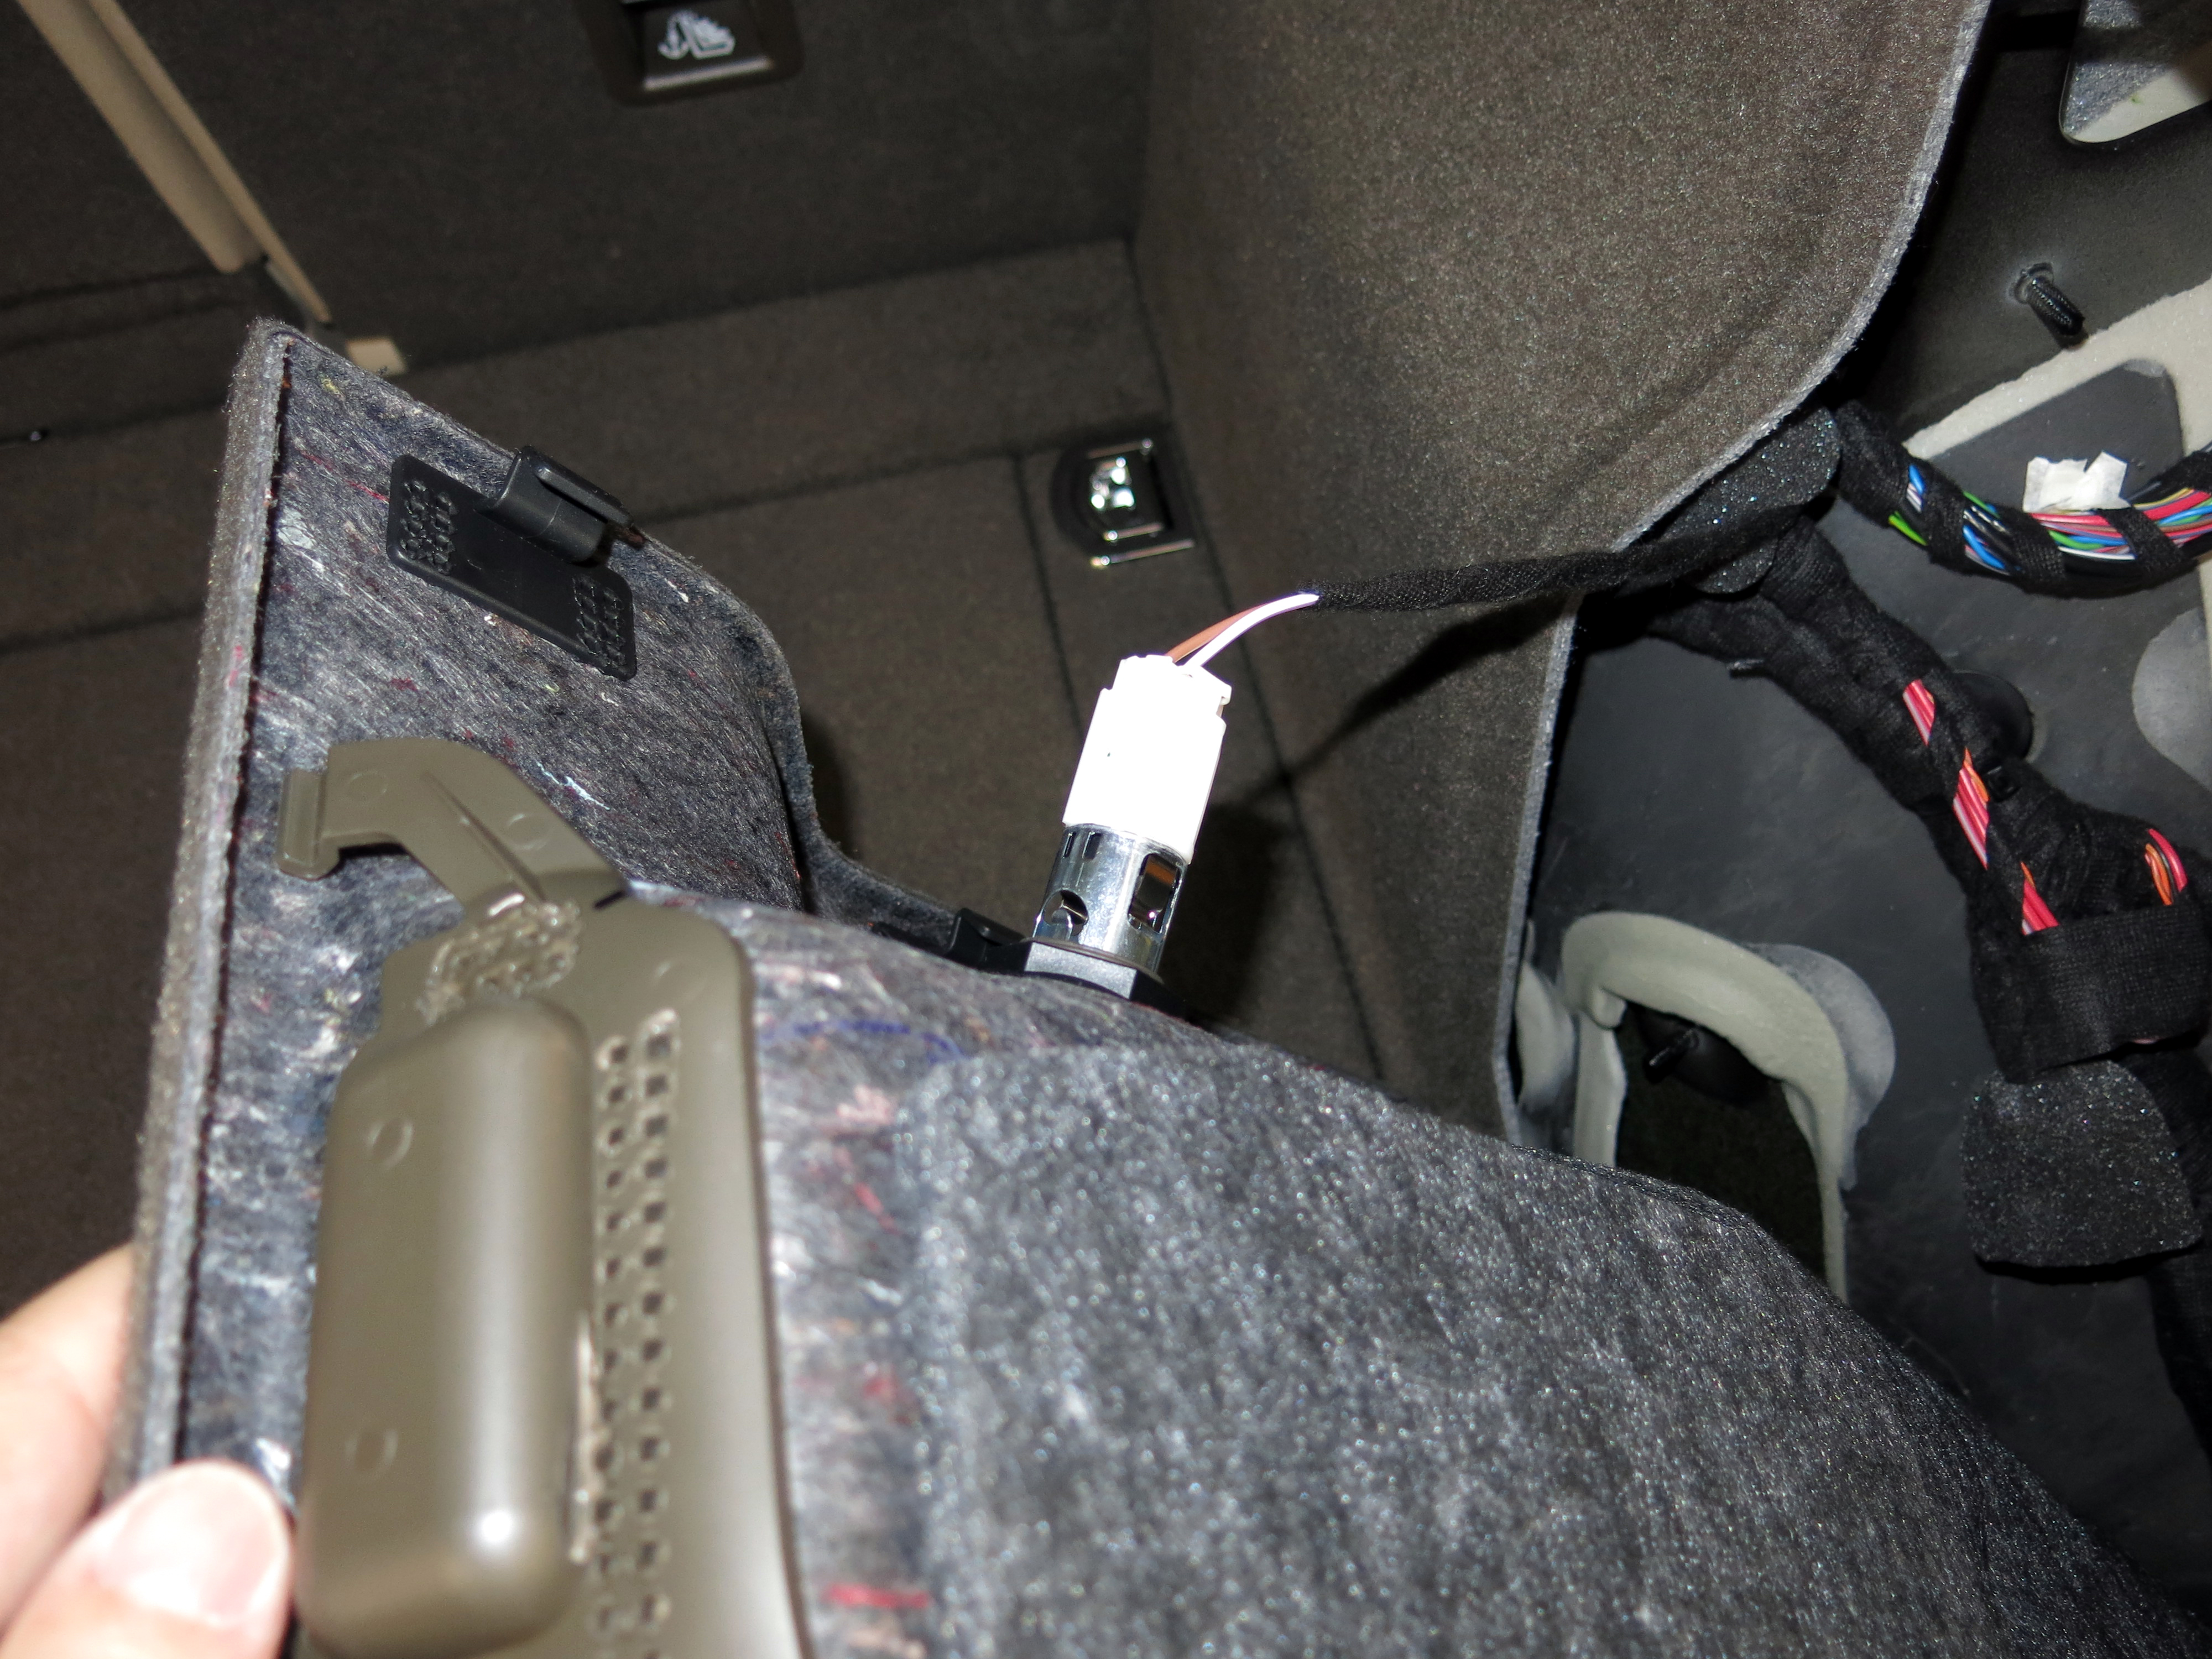
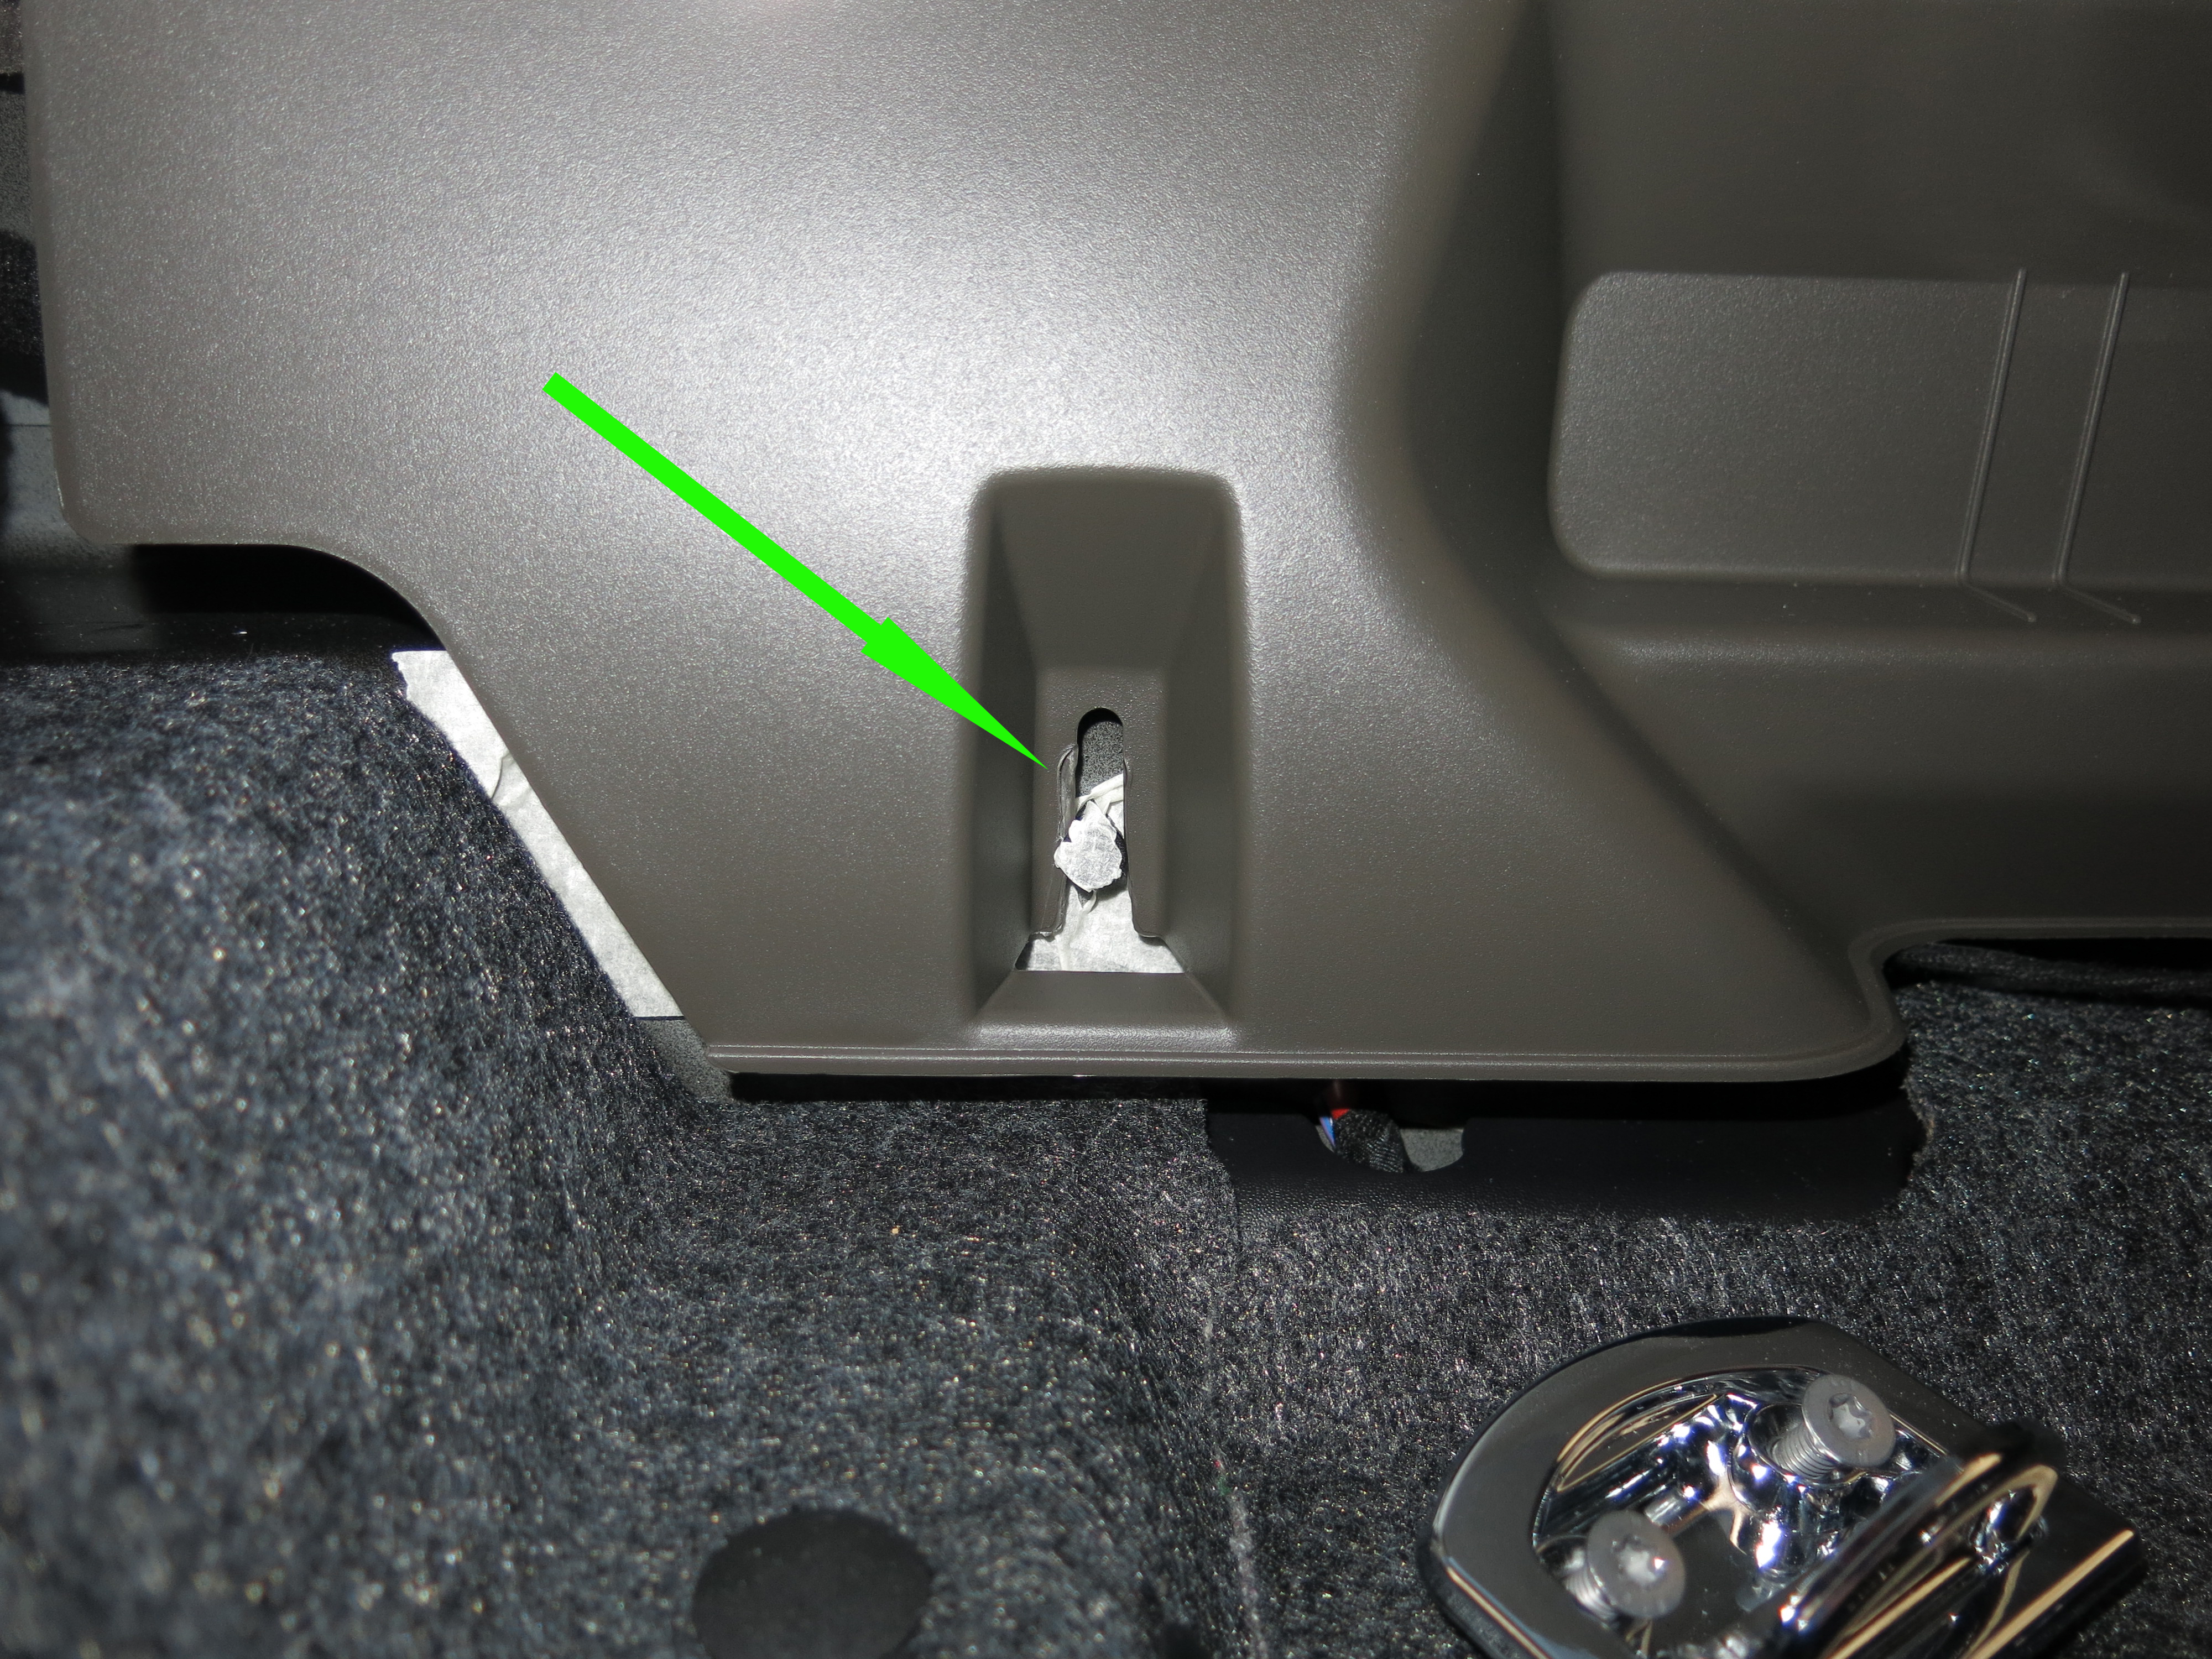
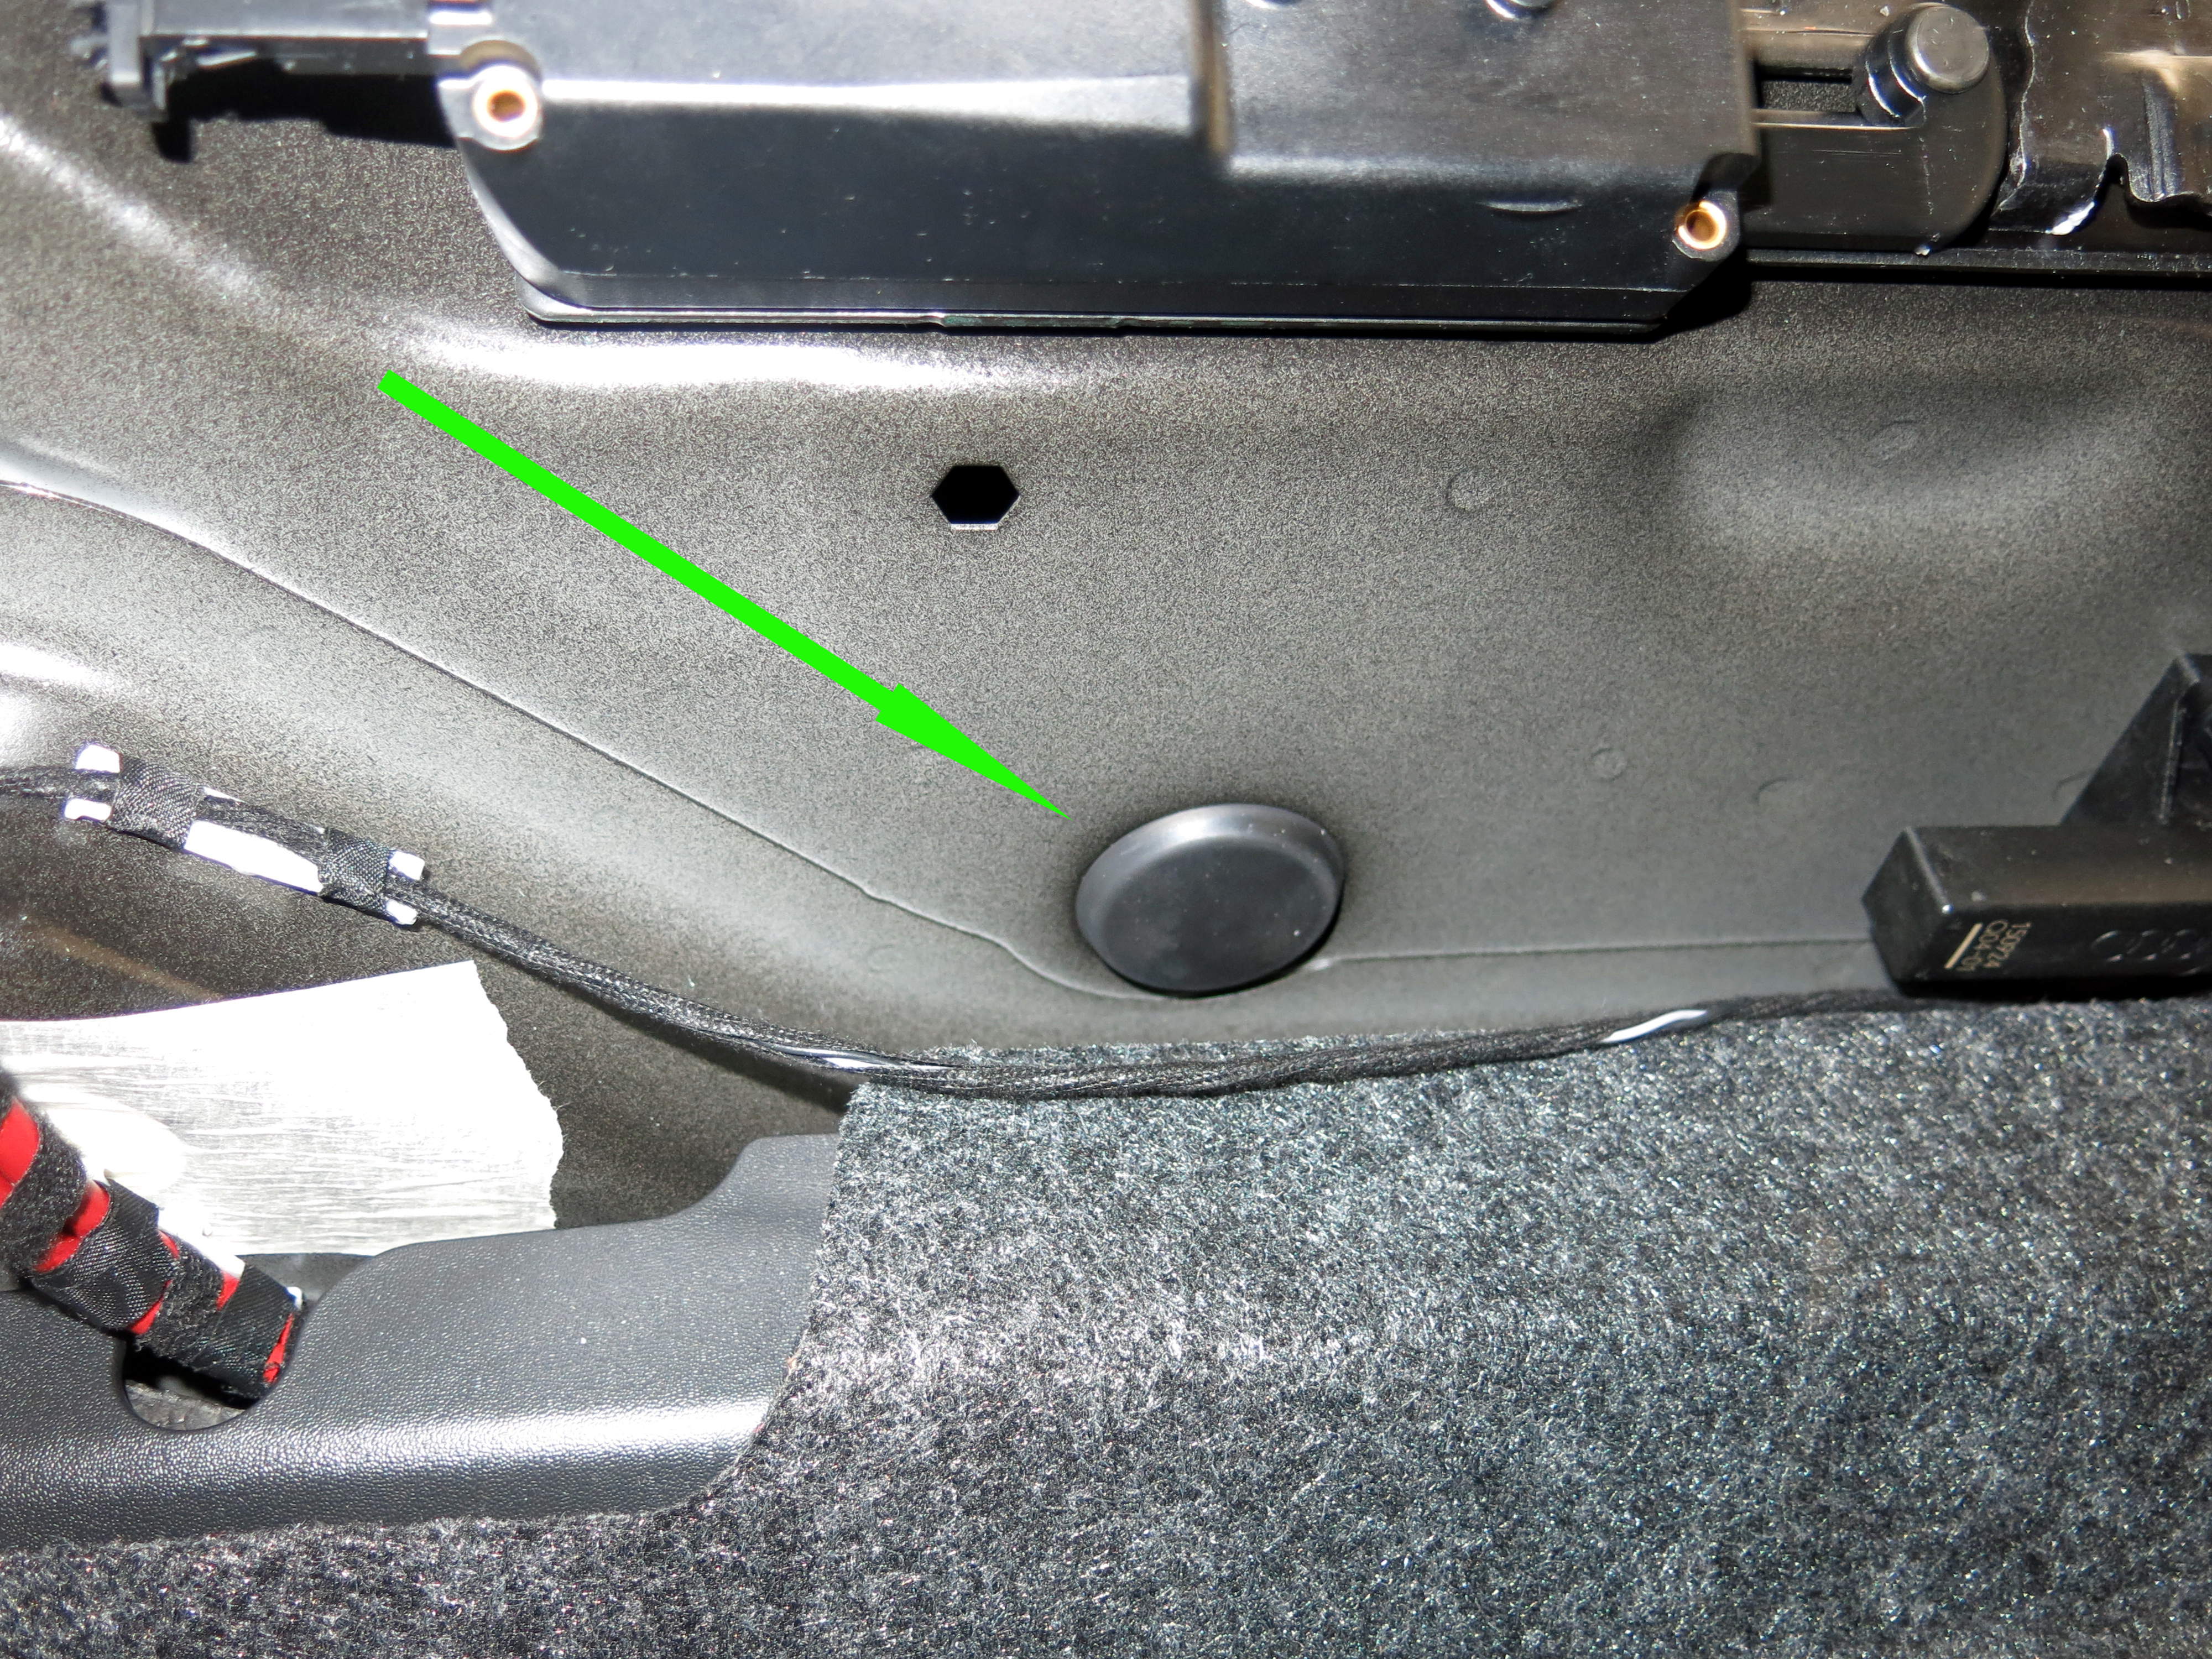
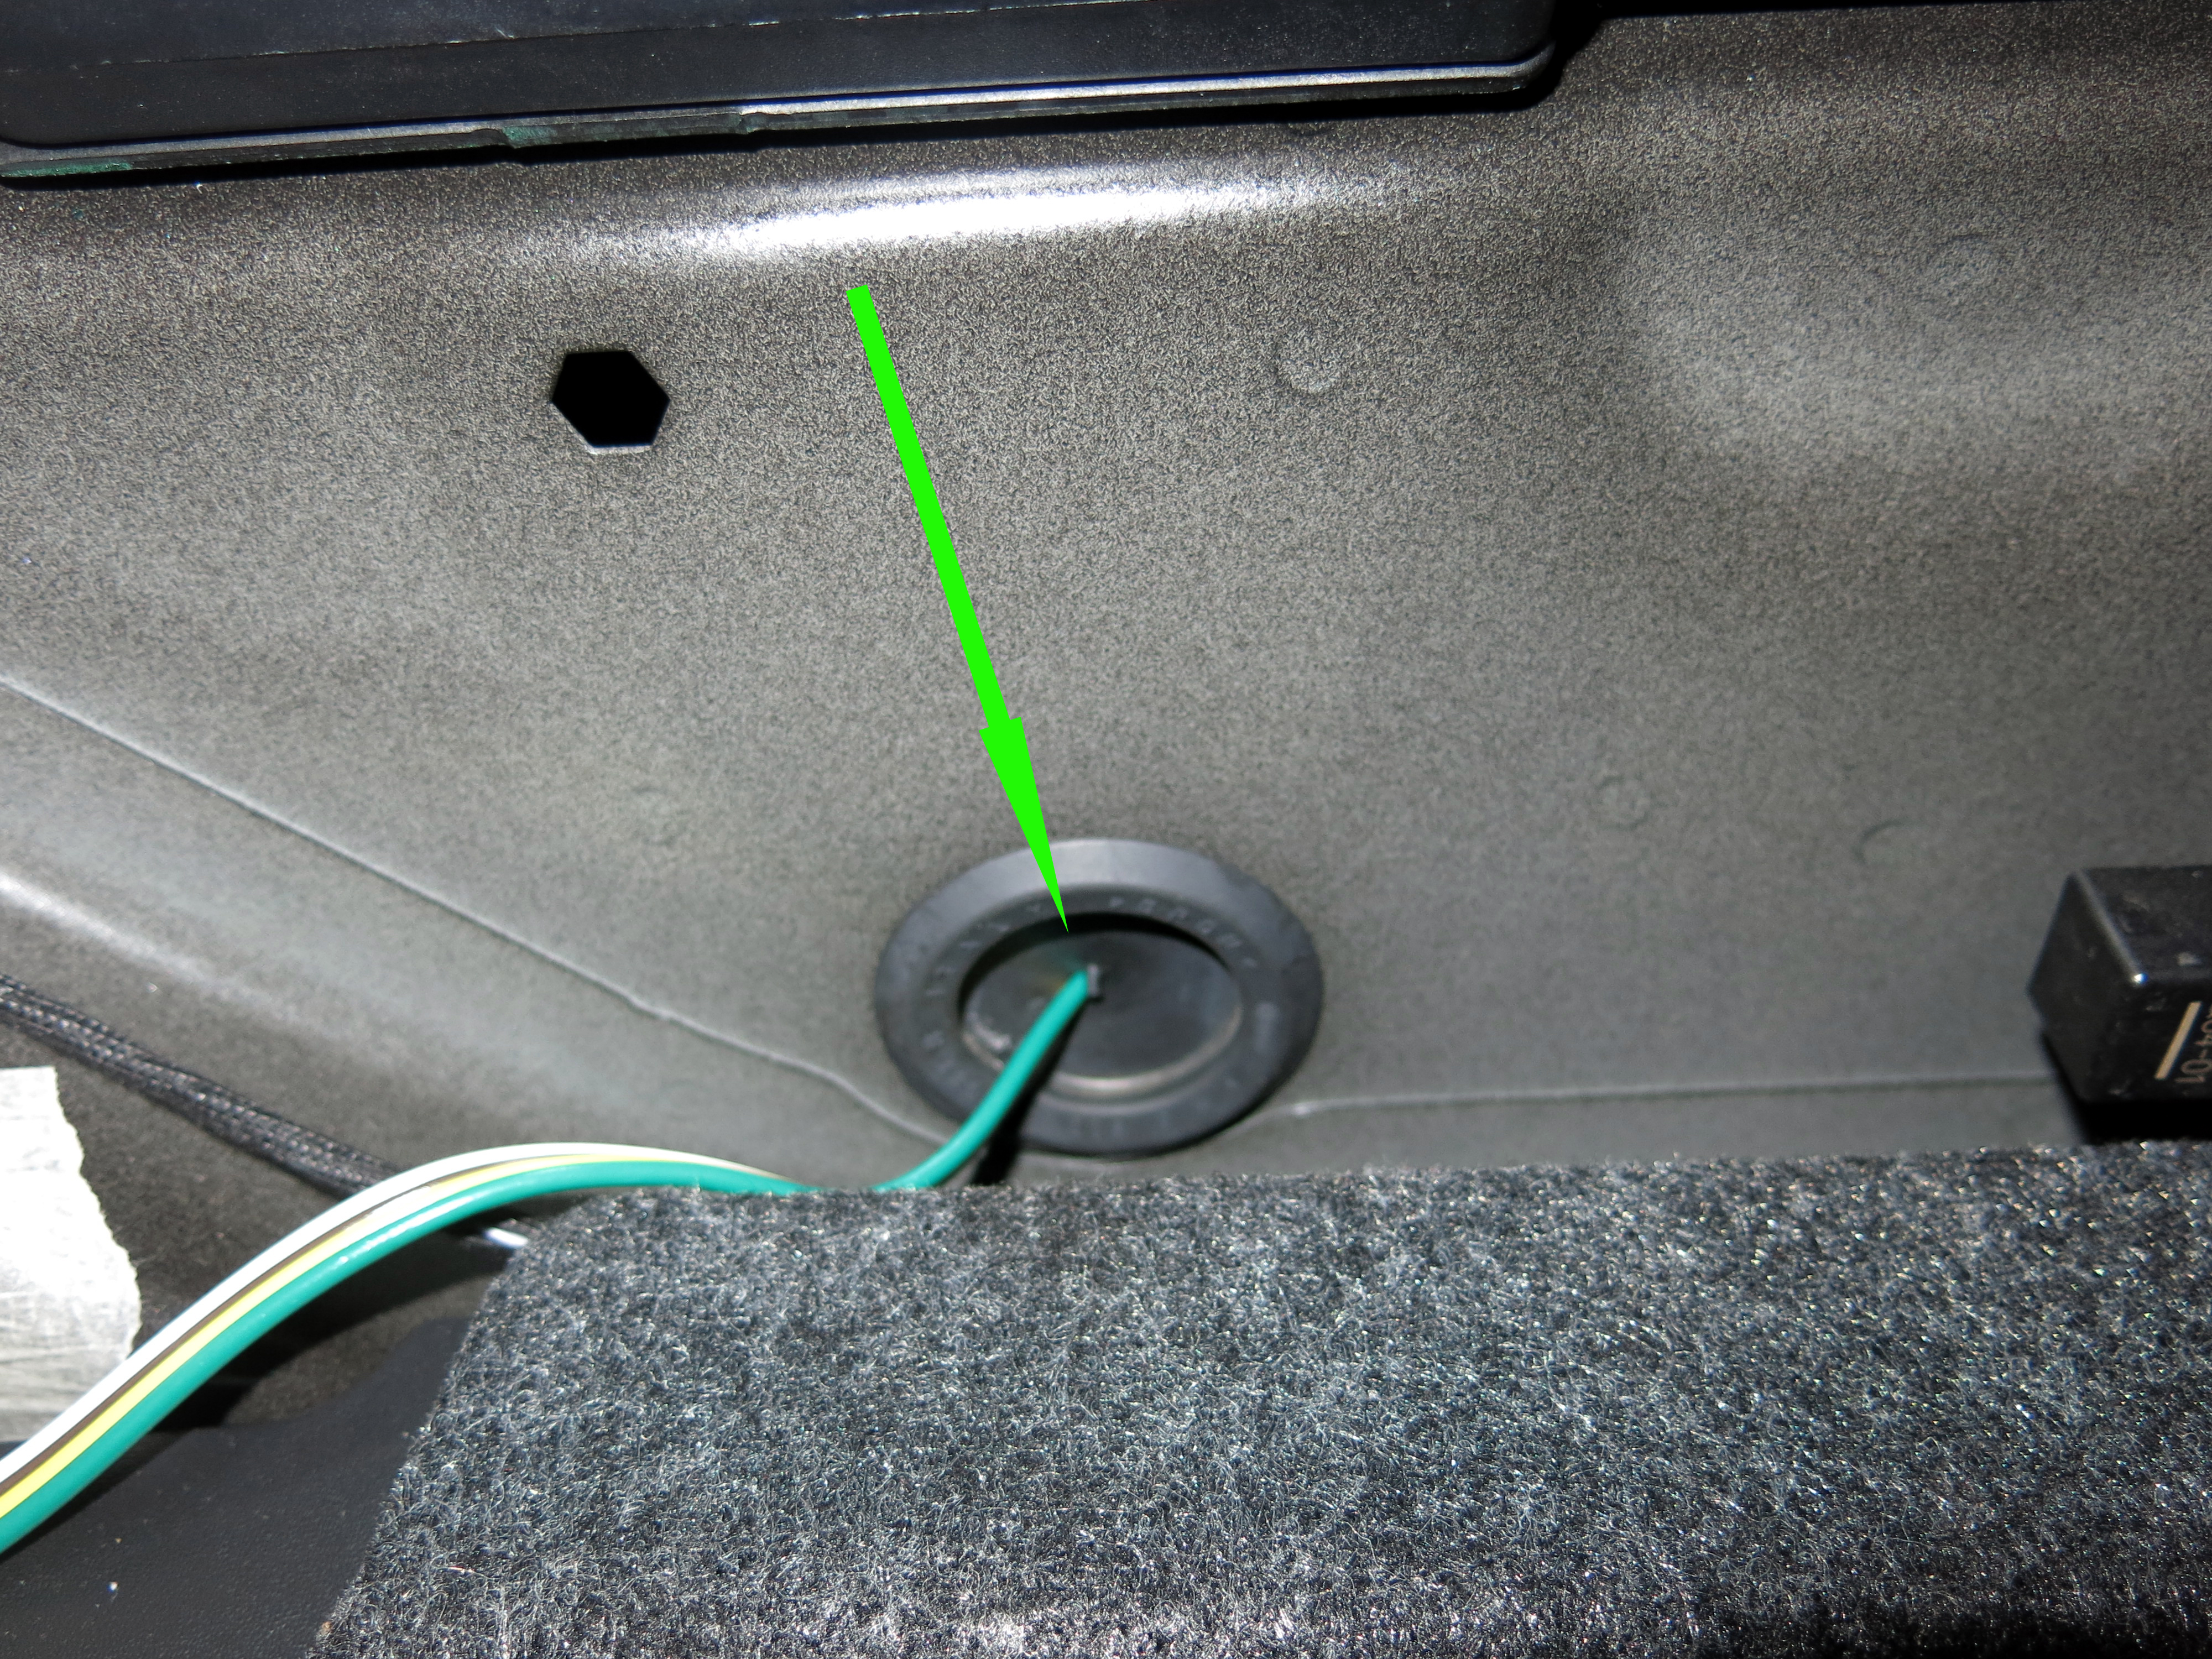
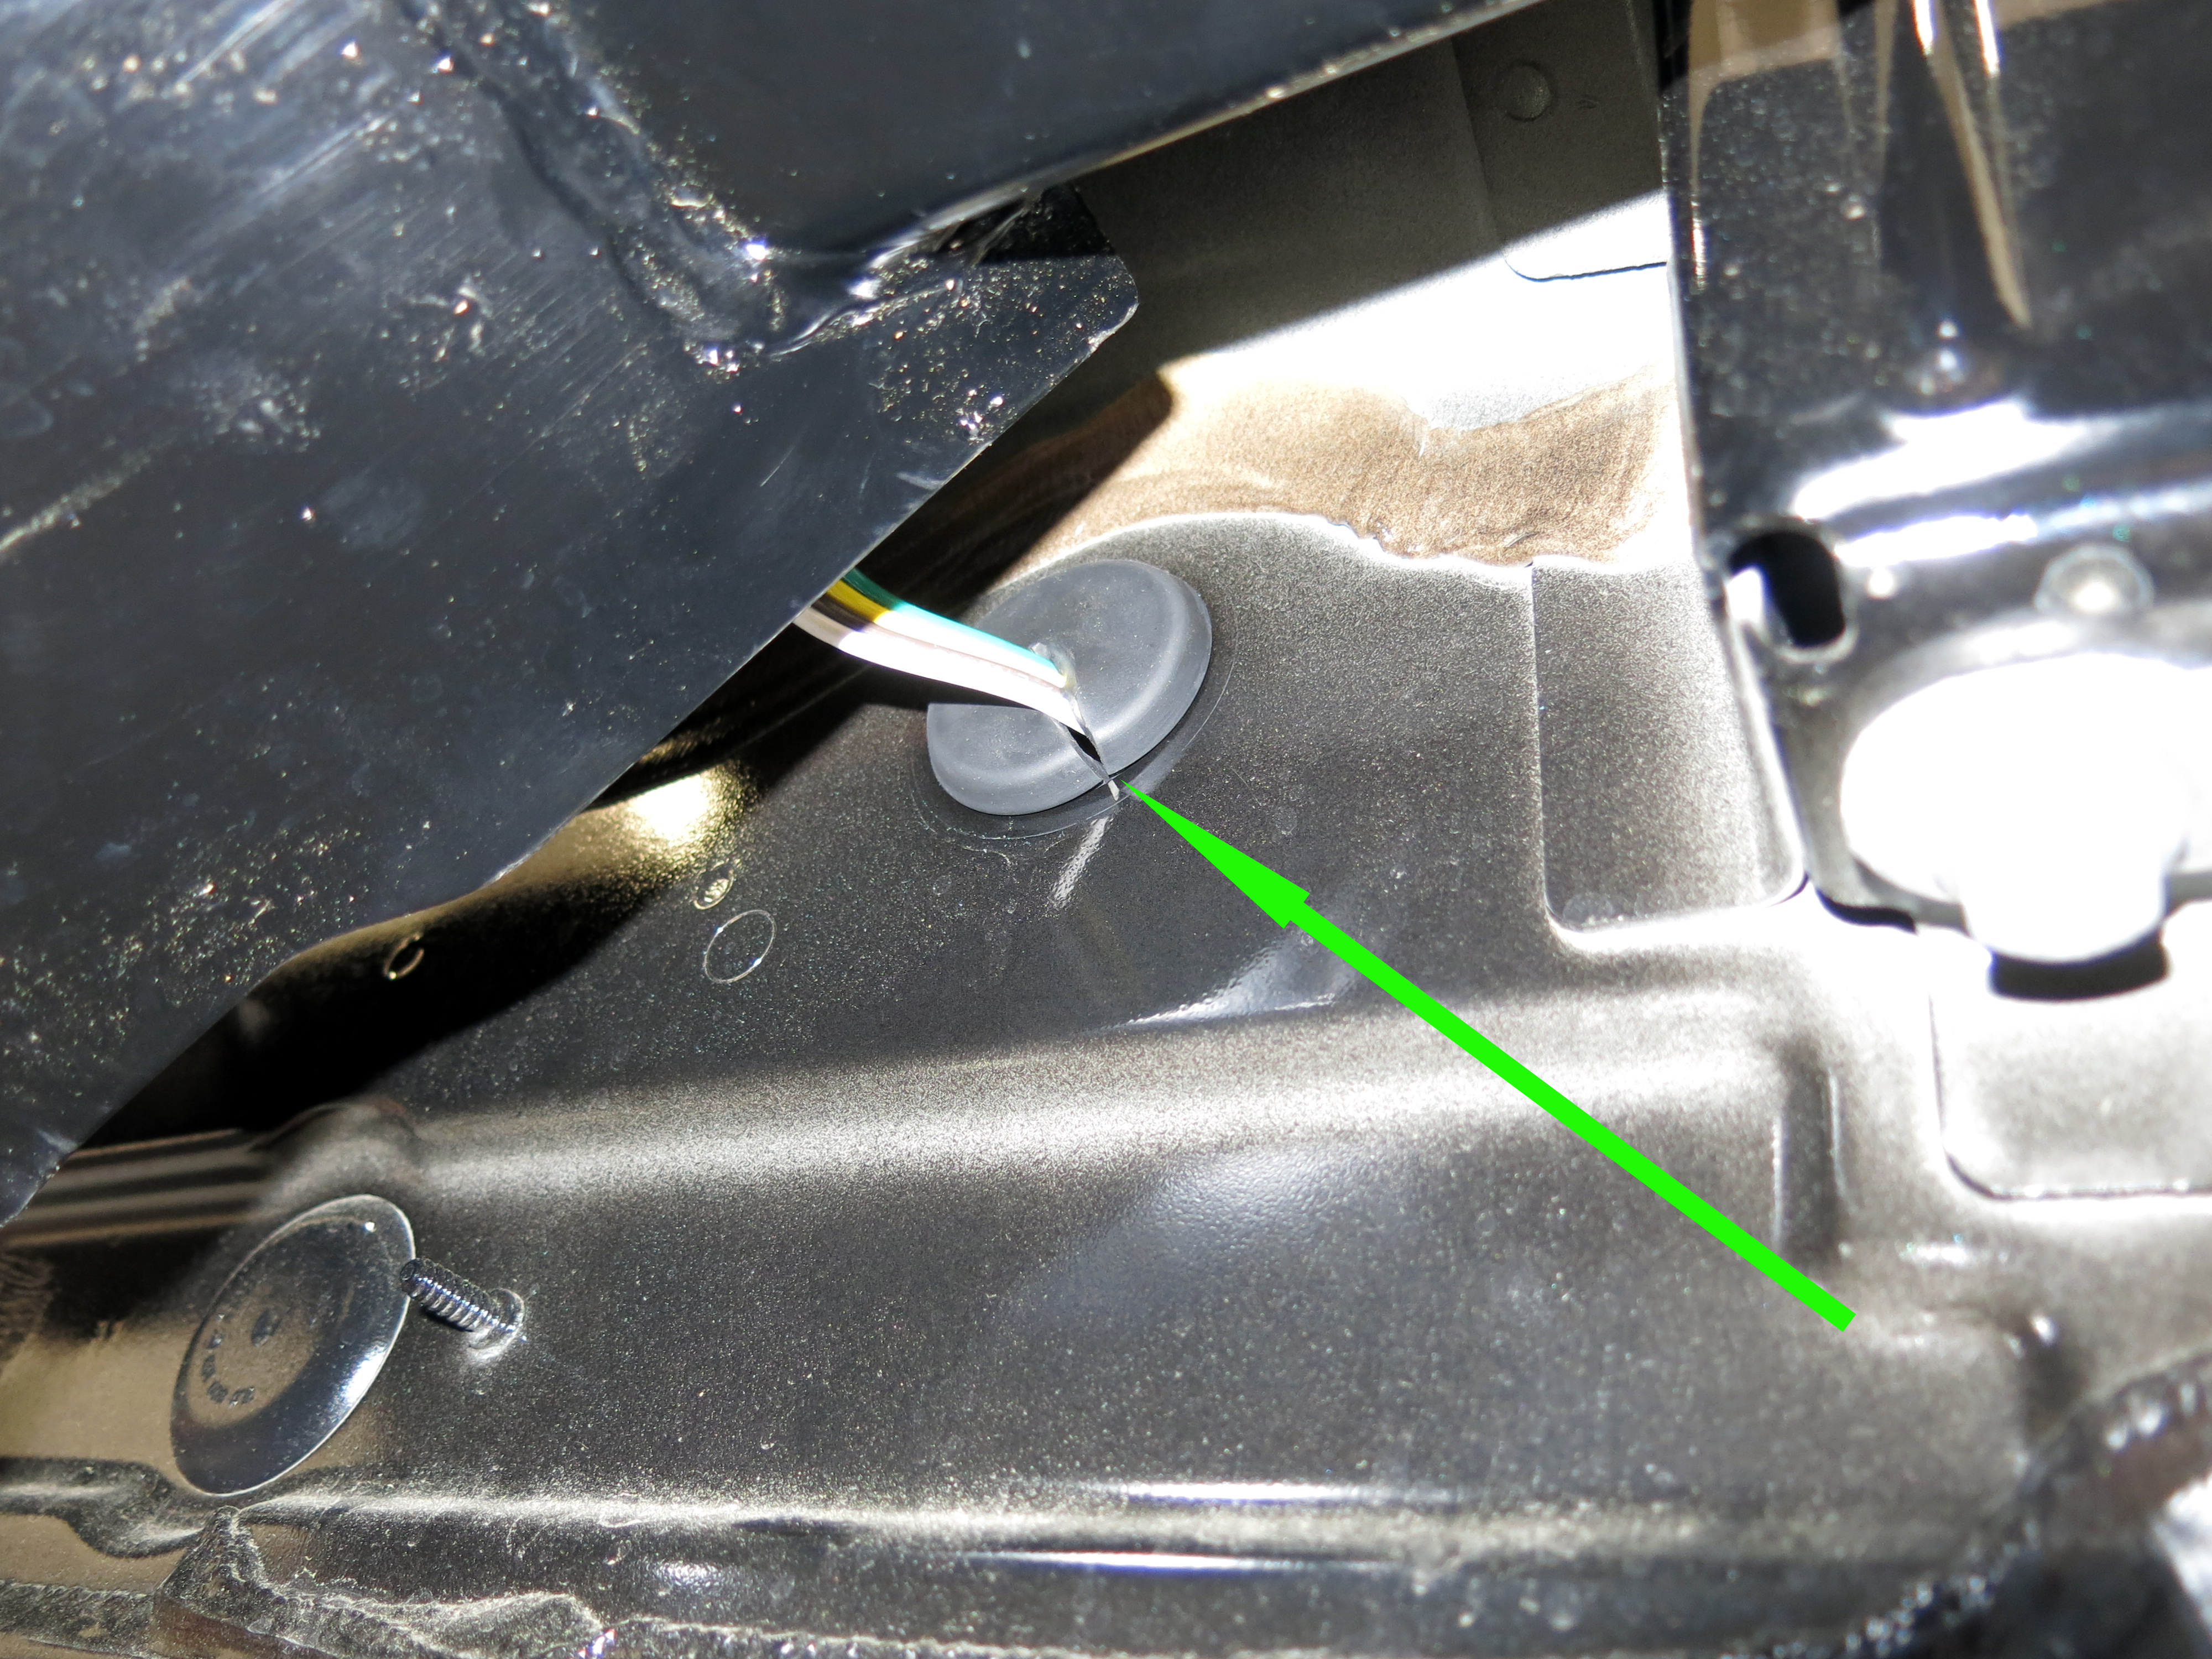
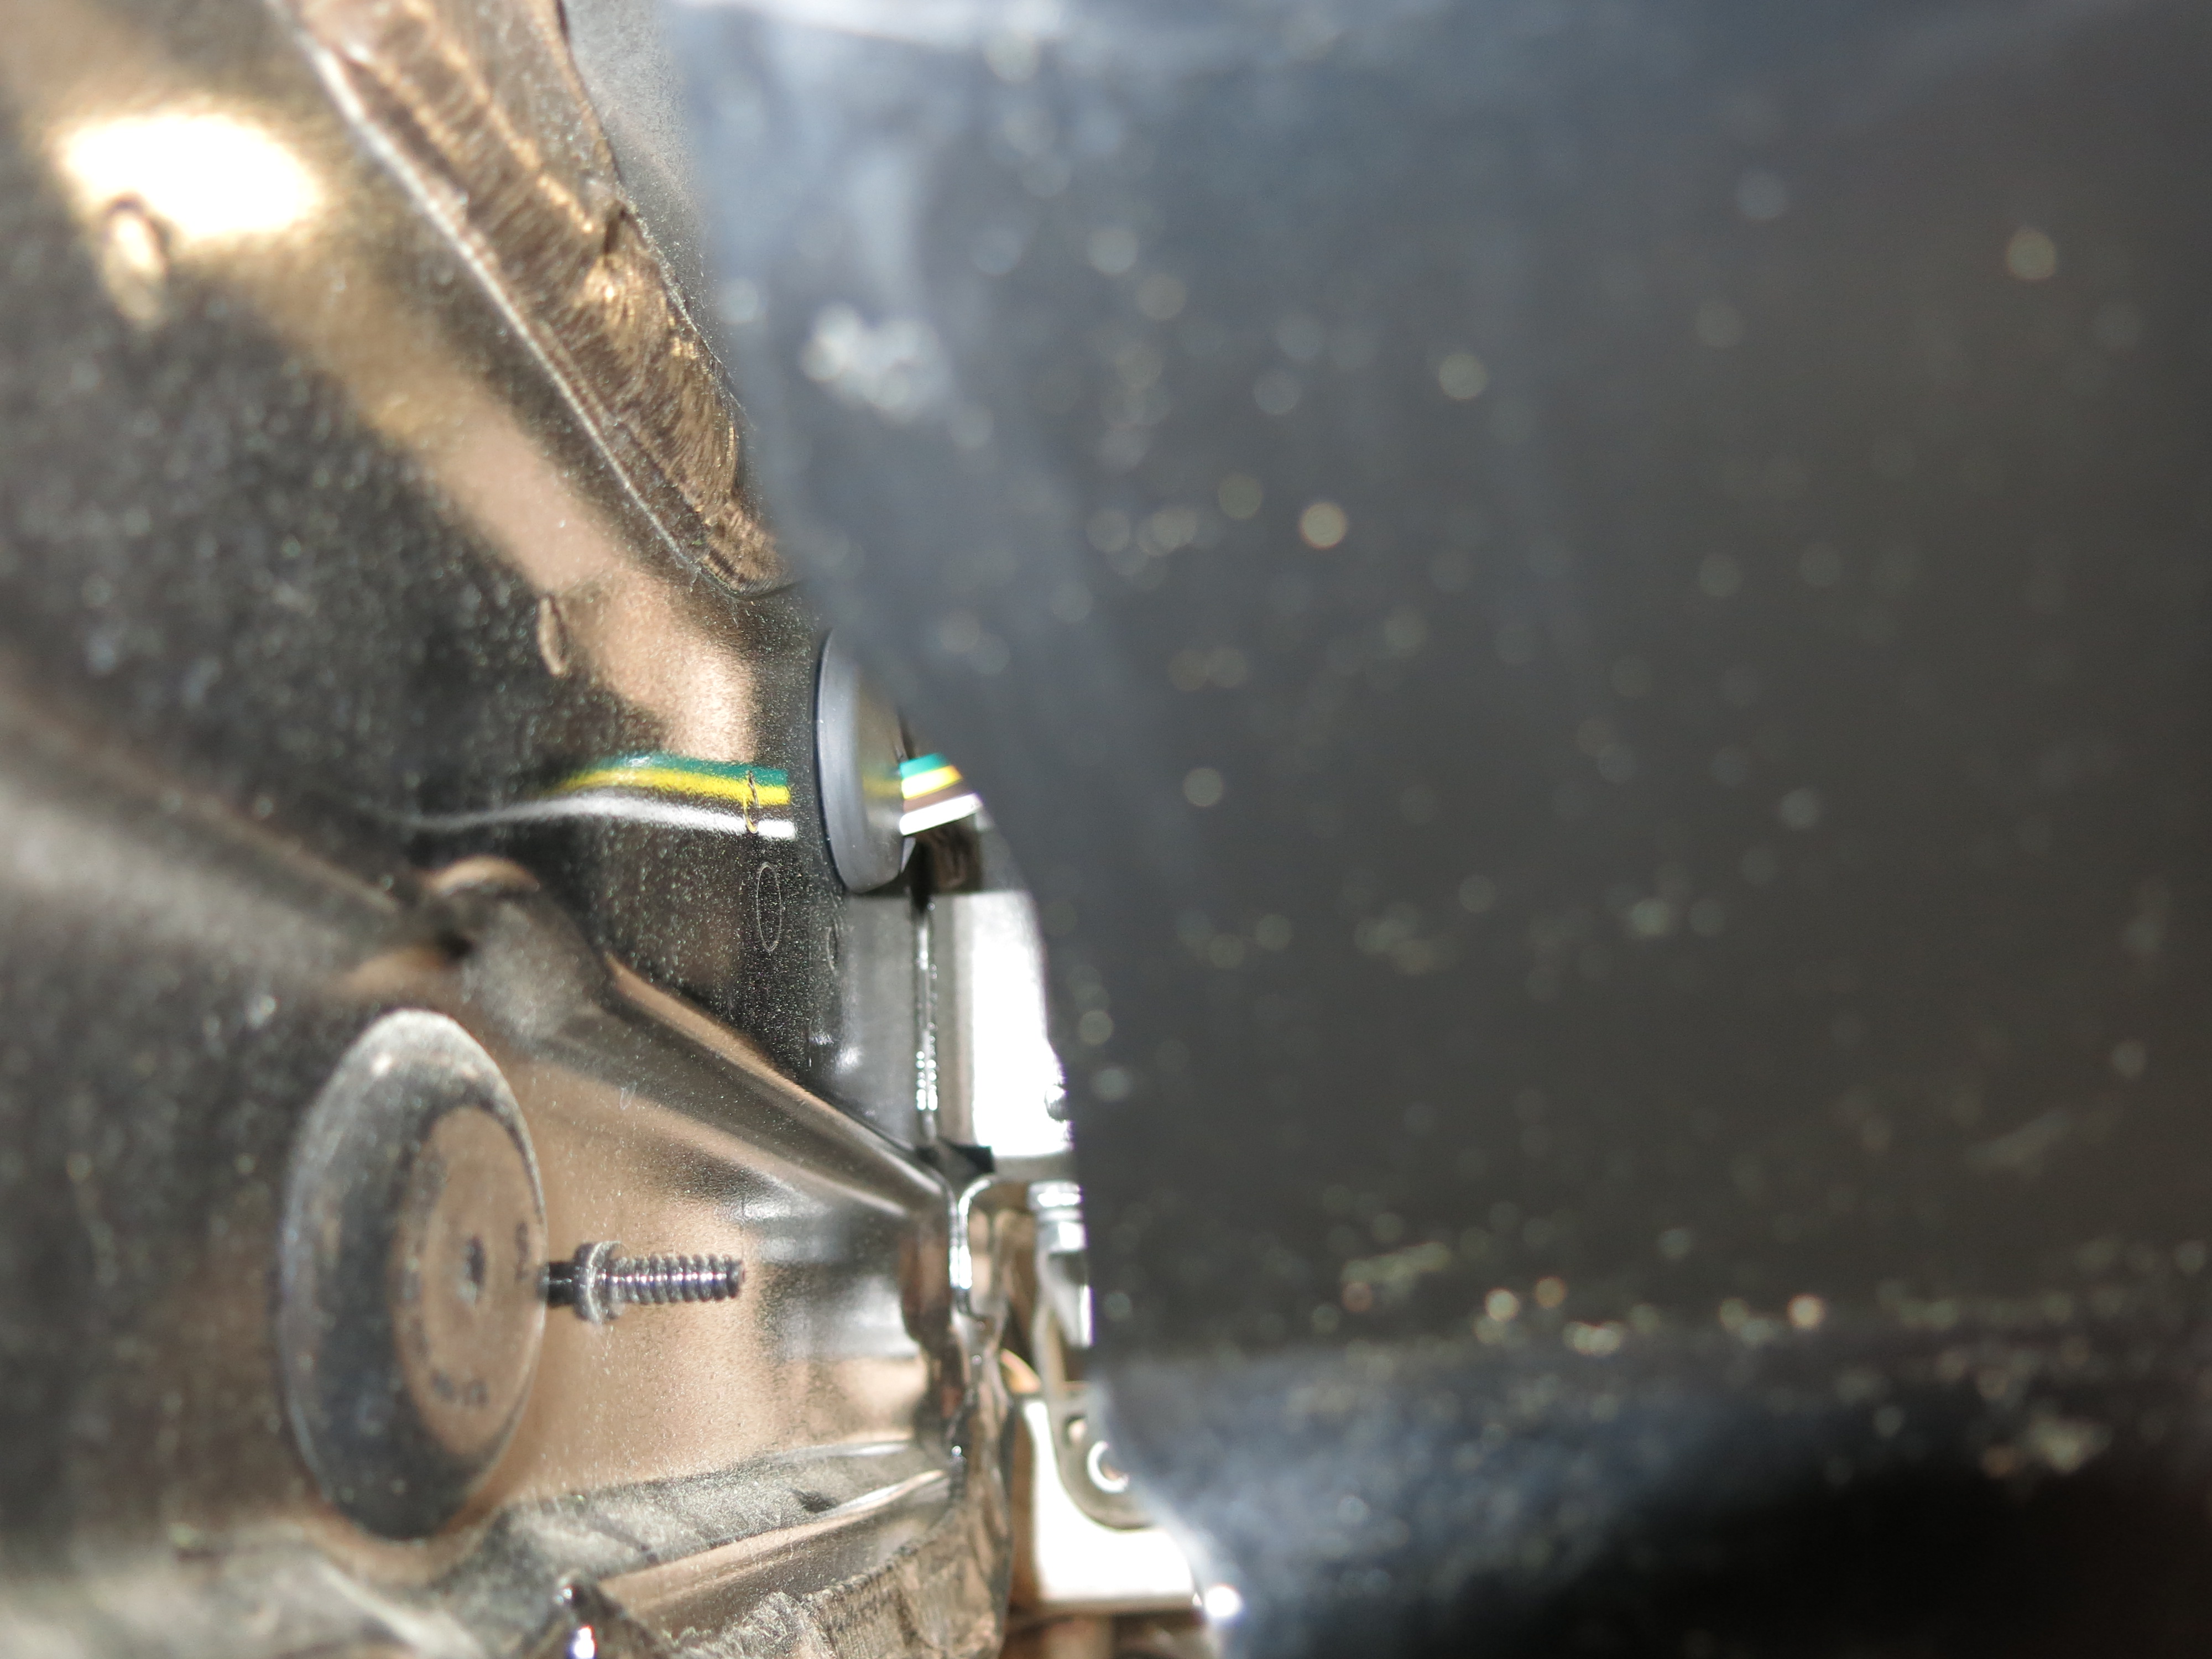
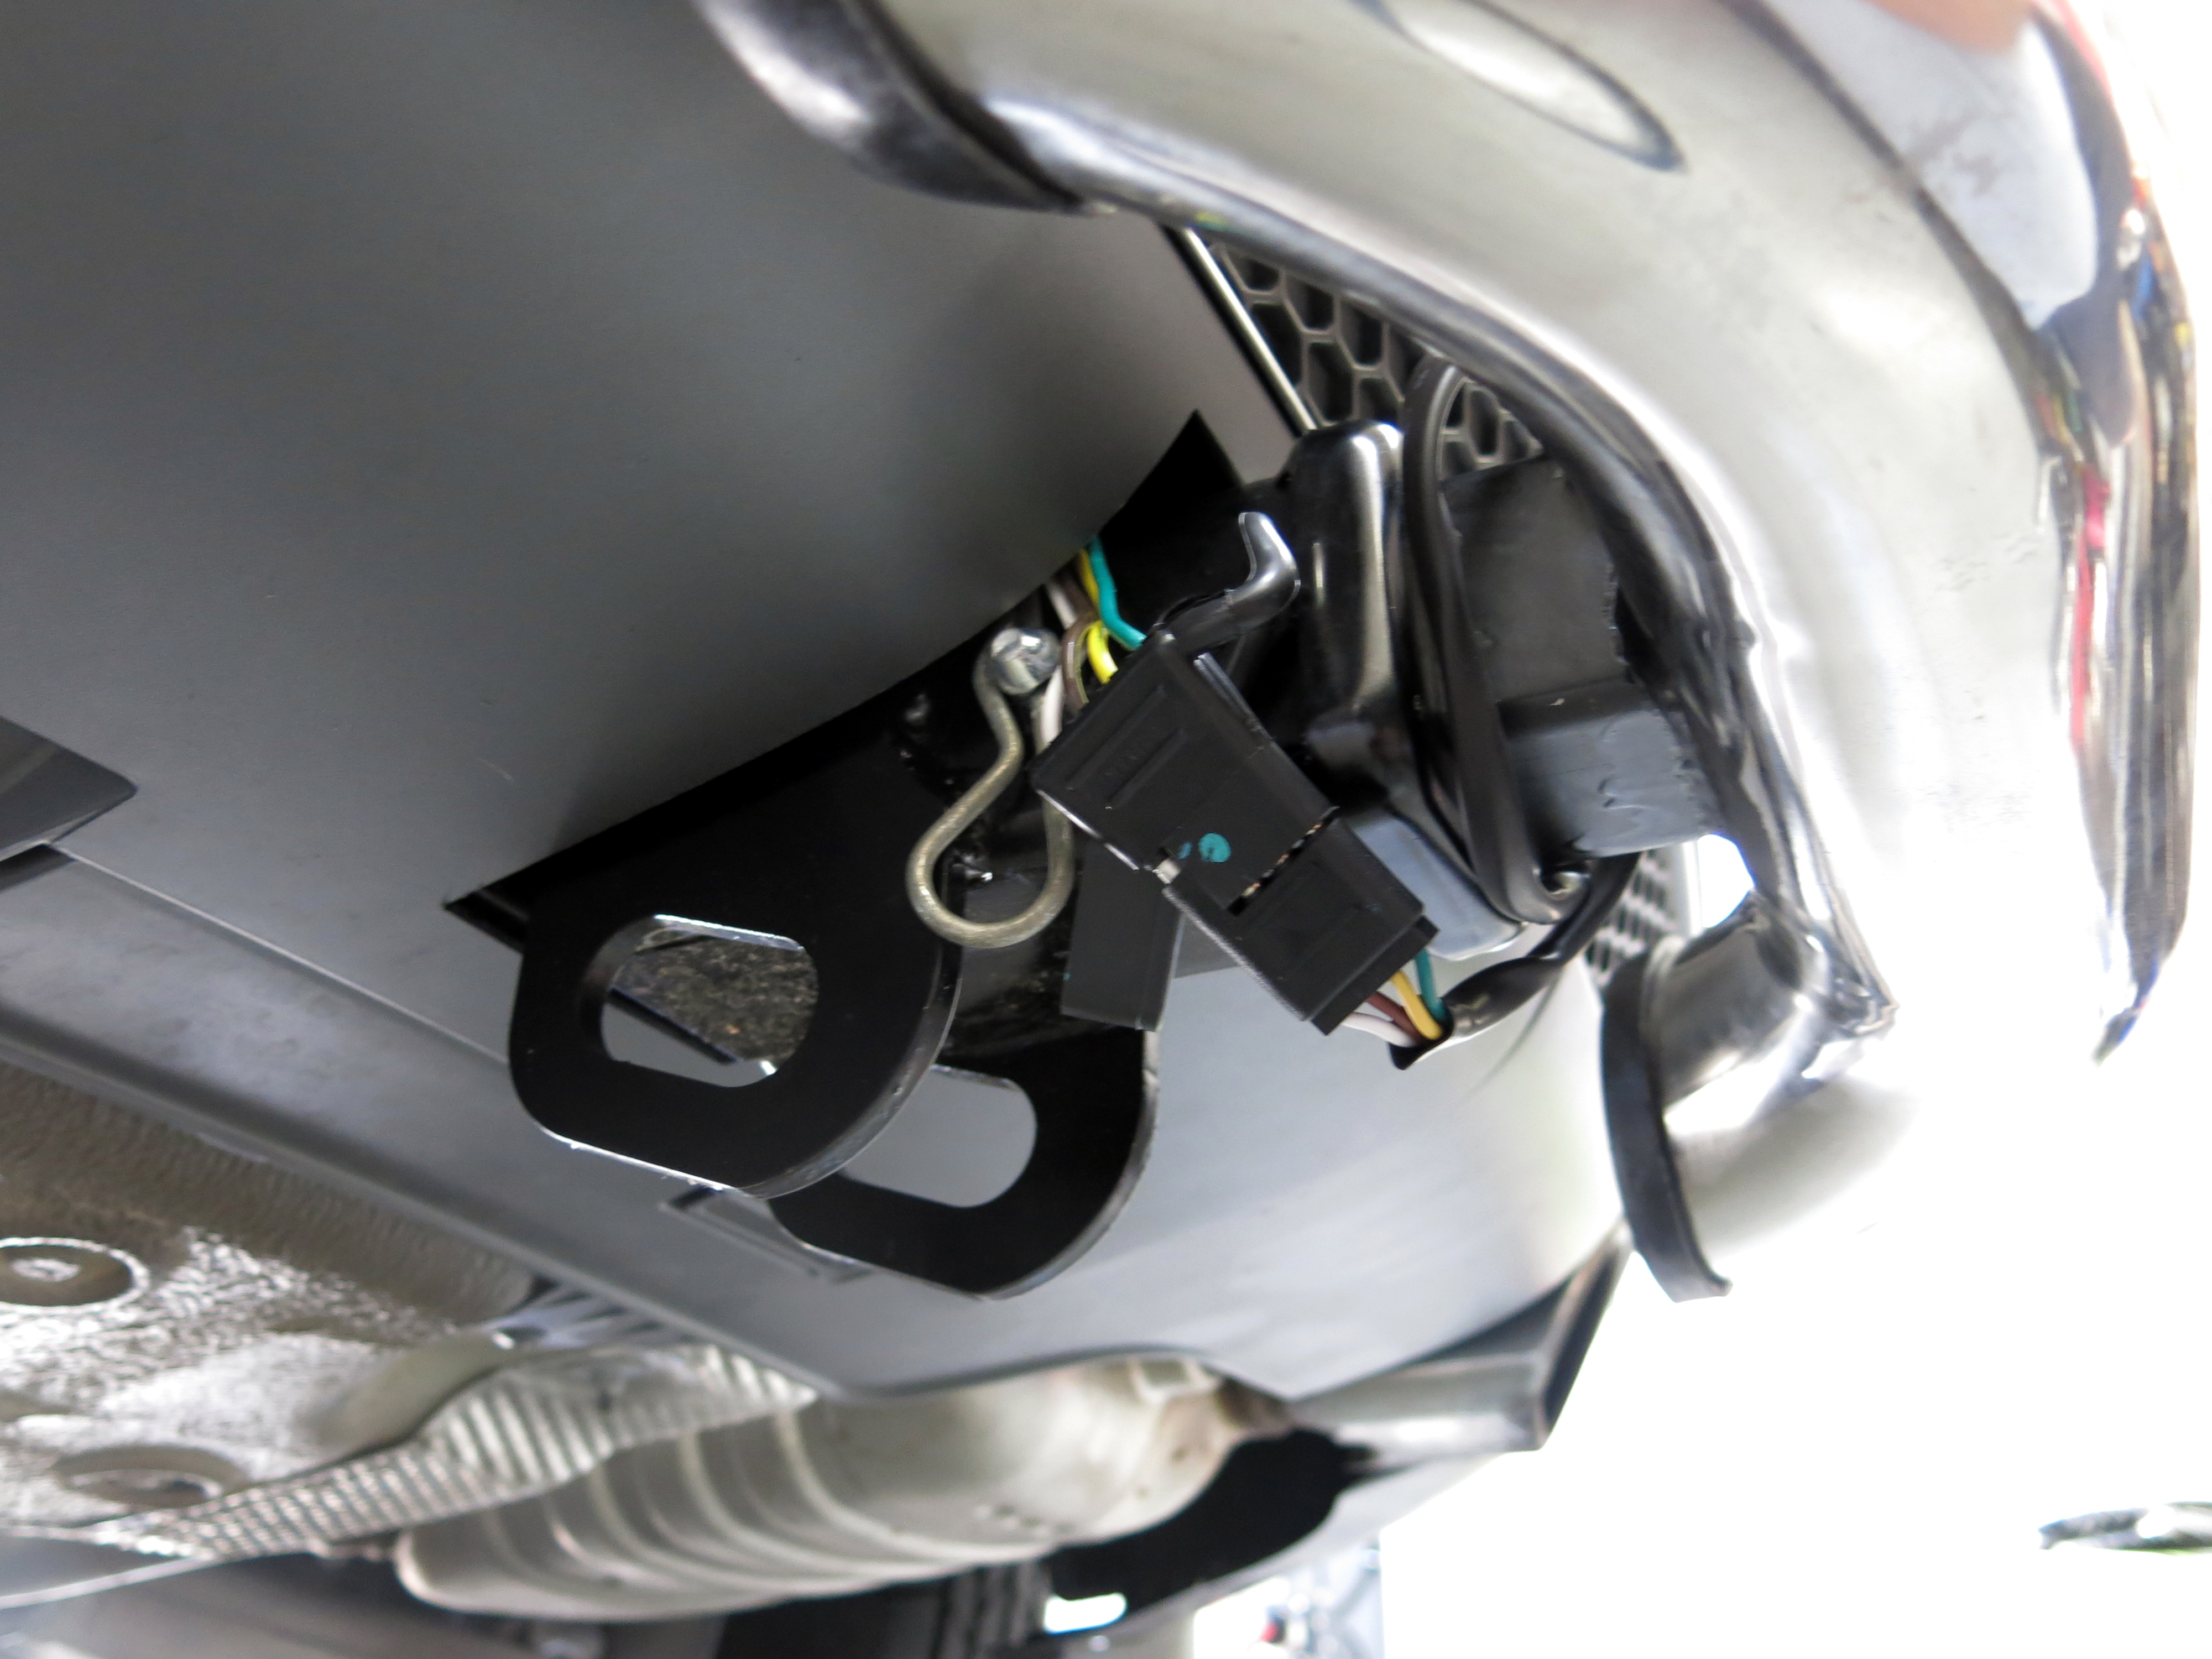
I elected to put the bumper cover back on before completing all the wiring, but you need to route the trailer connector first. Remove the plug pictured, and make a slit in it. Cut a bit of extra out in the middle to fit the wires. Slide the trailer connector into the hole, the pull it the needed distance to the hitch. Slip the wires into the slit, then reinstall the plug with the slit facing down to minimize water intrusion.
Installation of the bumper cover is basically backwards of removal. However, it is important to get everything carefully lined up as you proceed. The for main studs must be fit into the holes before you proceed too far. Once you get all four in, get the nuts one and just finger tight.
Now work your way over the top of the bumper cover to snap in the tops against the body.
These just snap into place.
Now fit the lower portions of the bumper cover into the inner fender mounts:

Pop everything into place and tighten the four main nuts. Don't forget to refasten the fuse box in place. Then install the T-25 Torx screws, and the inner fender well clips. I will add photos later.
With the bumper cover in place, complete the wiring. as follows:
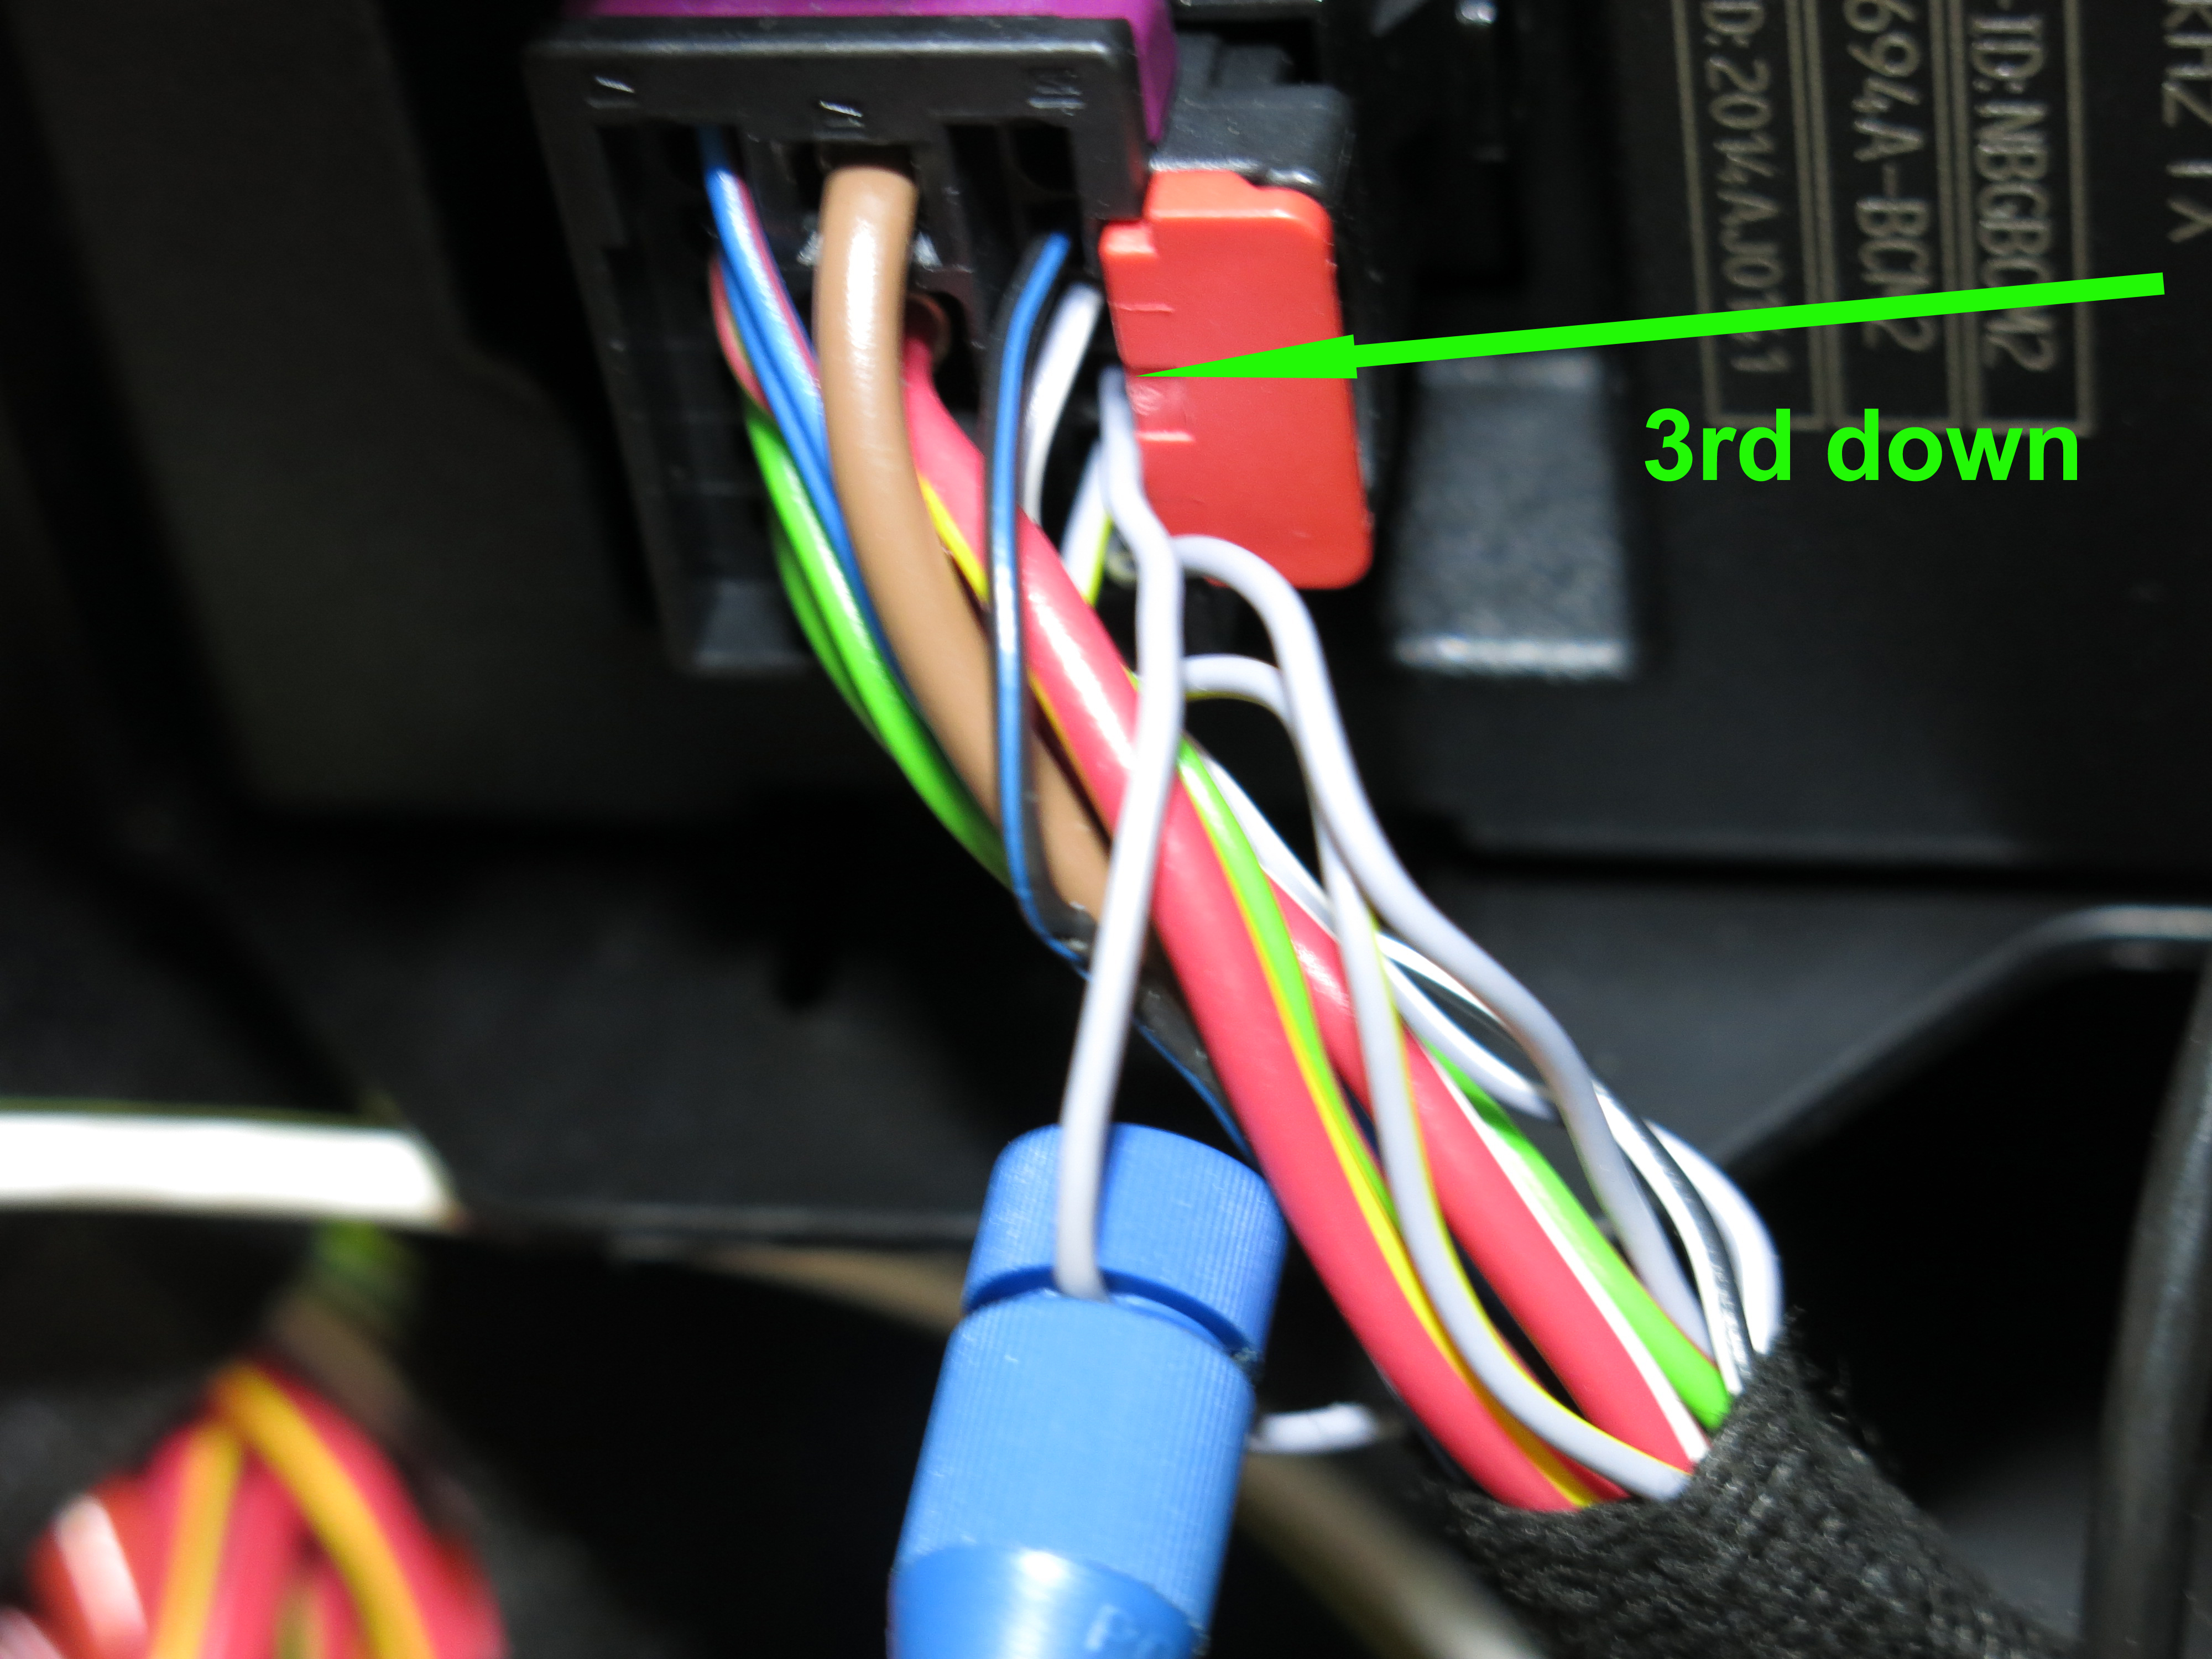
Gray wire with black tracer is for left signal. Solid gray wire is for right signal. solid yellow is for tail lights.
Gray with black tracer wire is on top orange plug.
Yellow wire is on middle black and pink plug.
Solid gray wire is on bottom black plug.
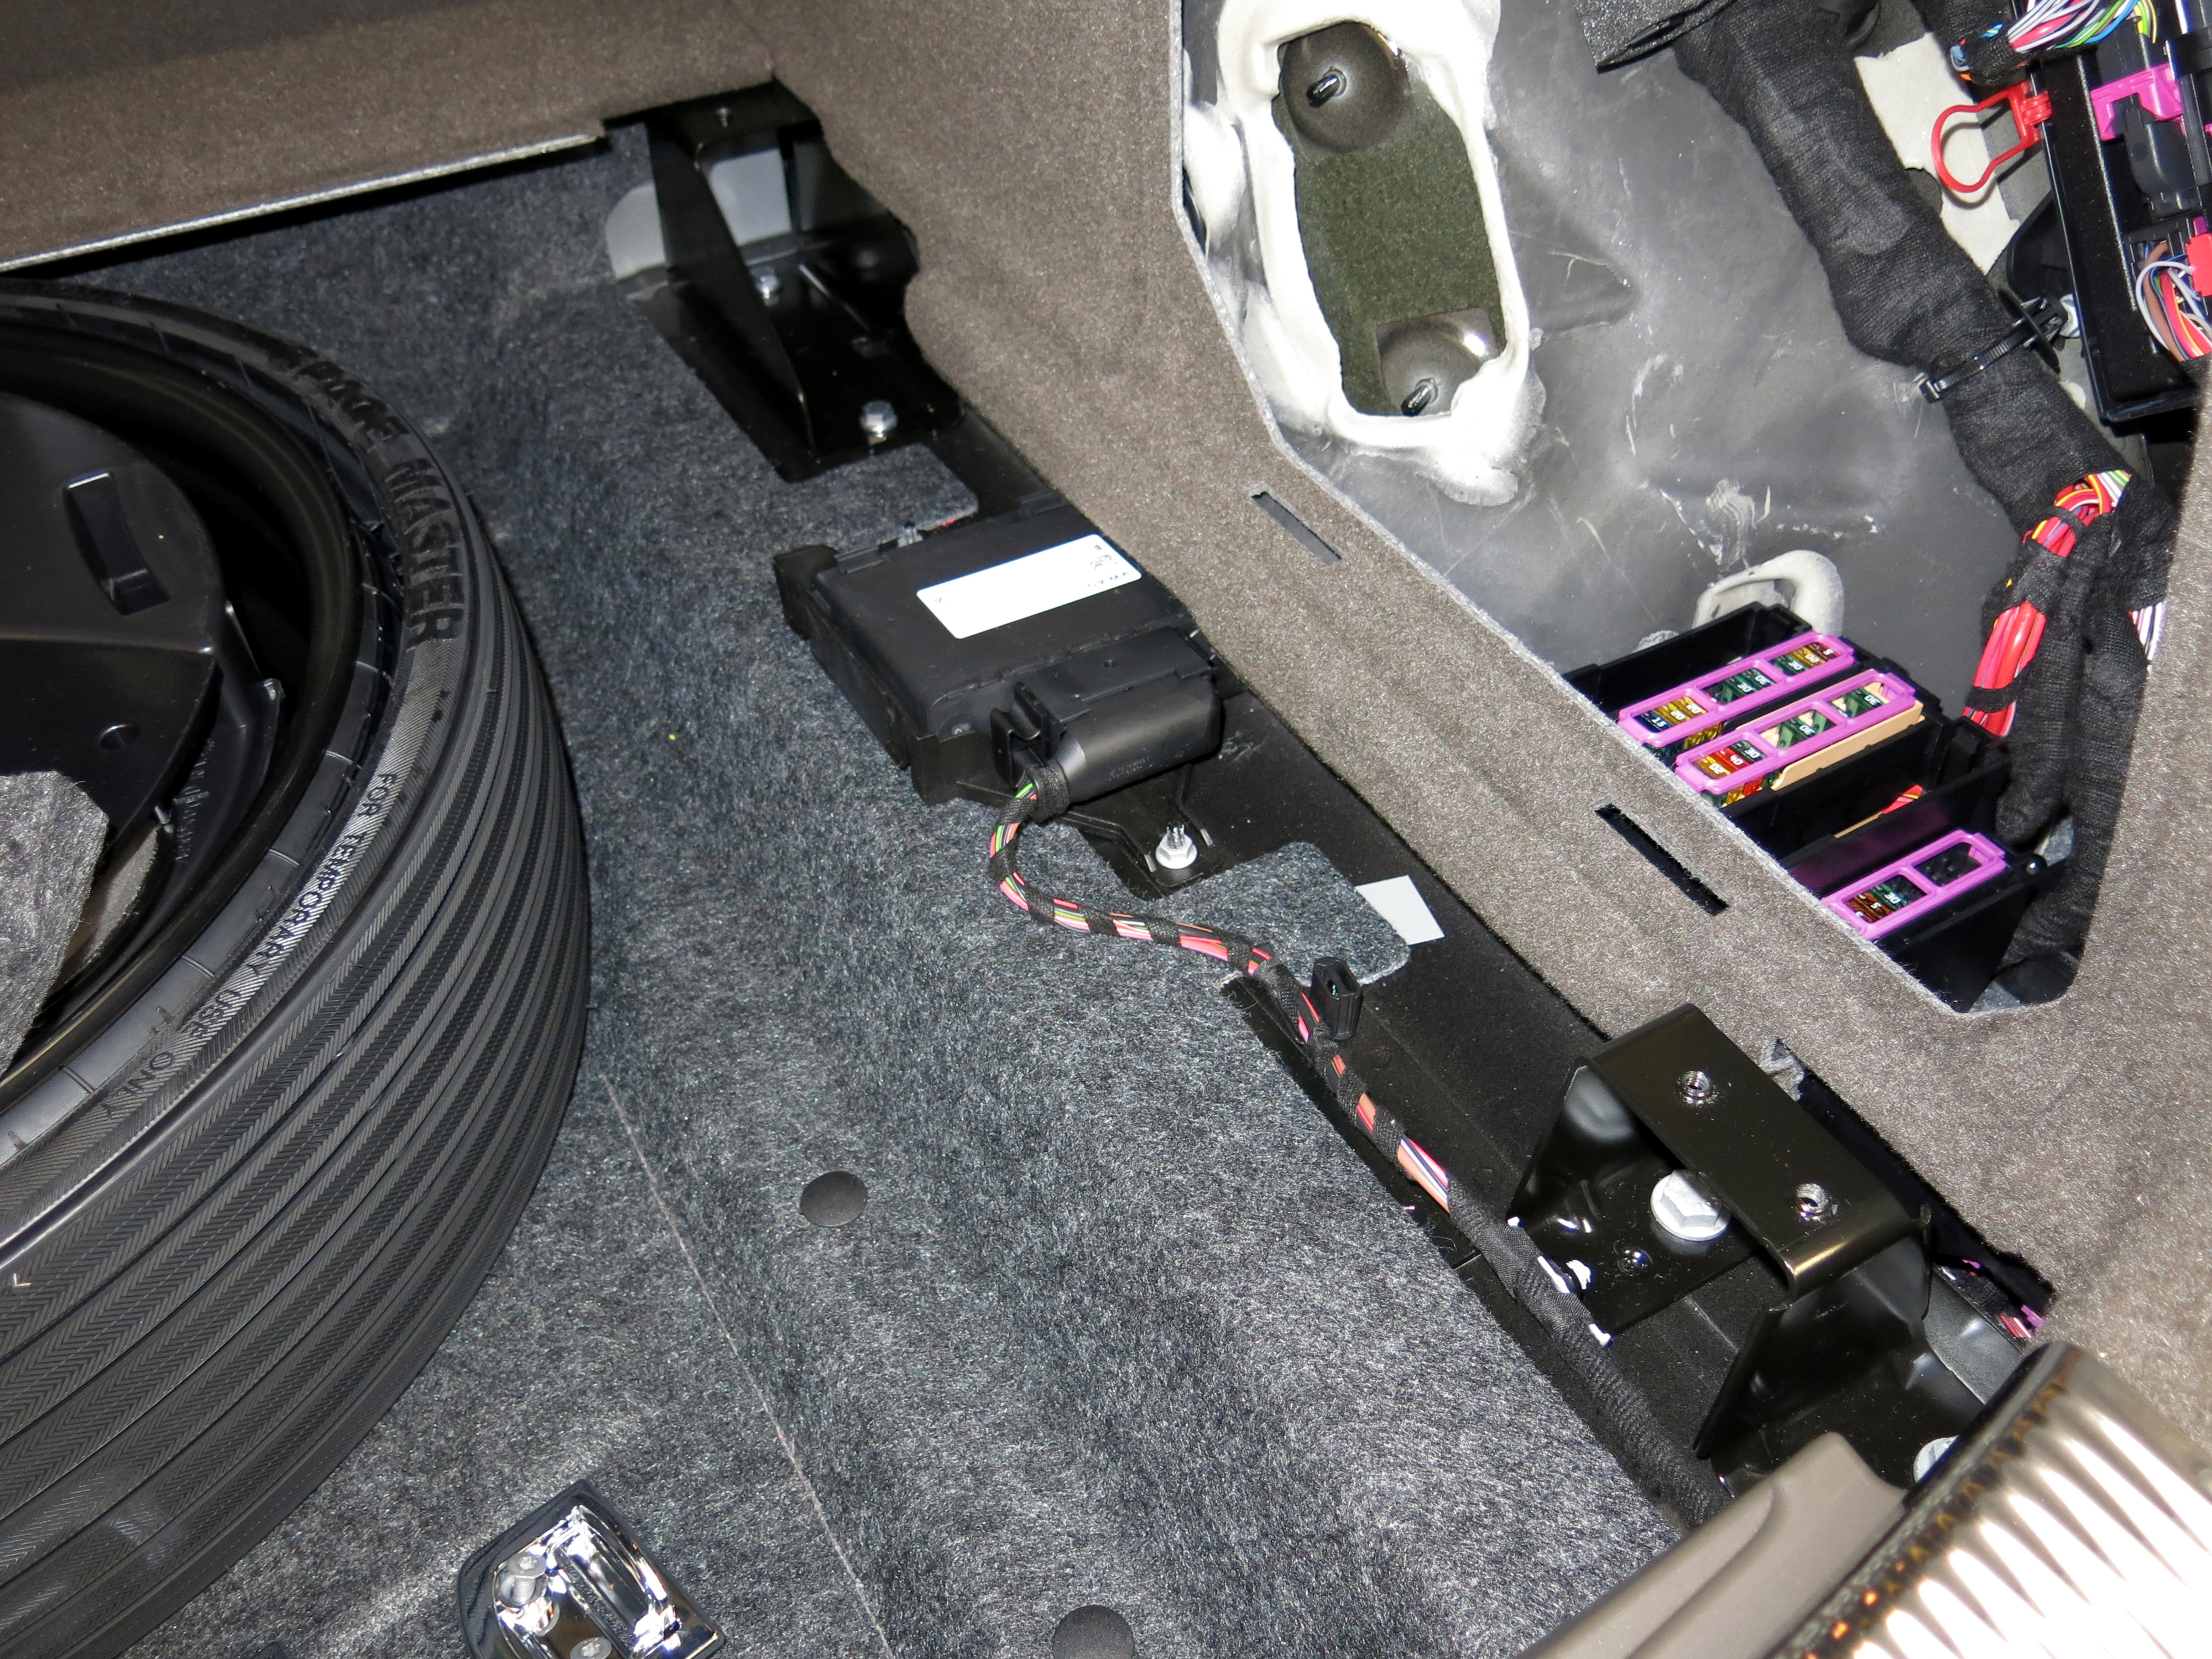
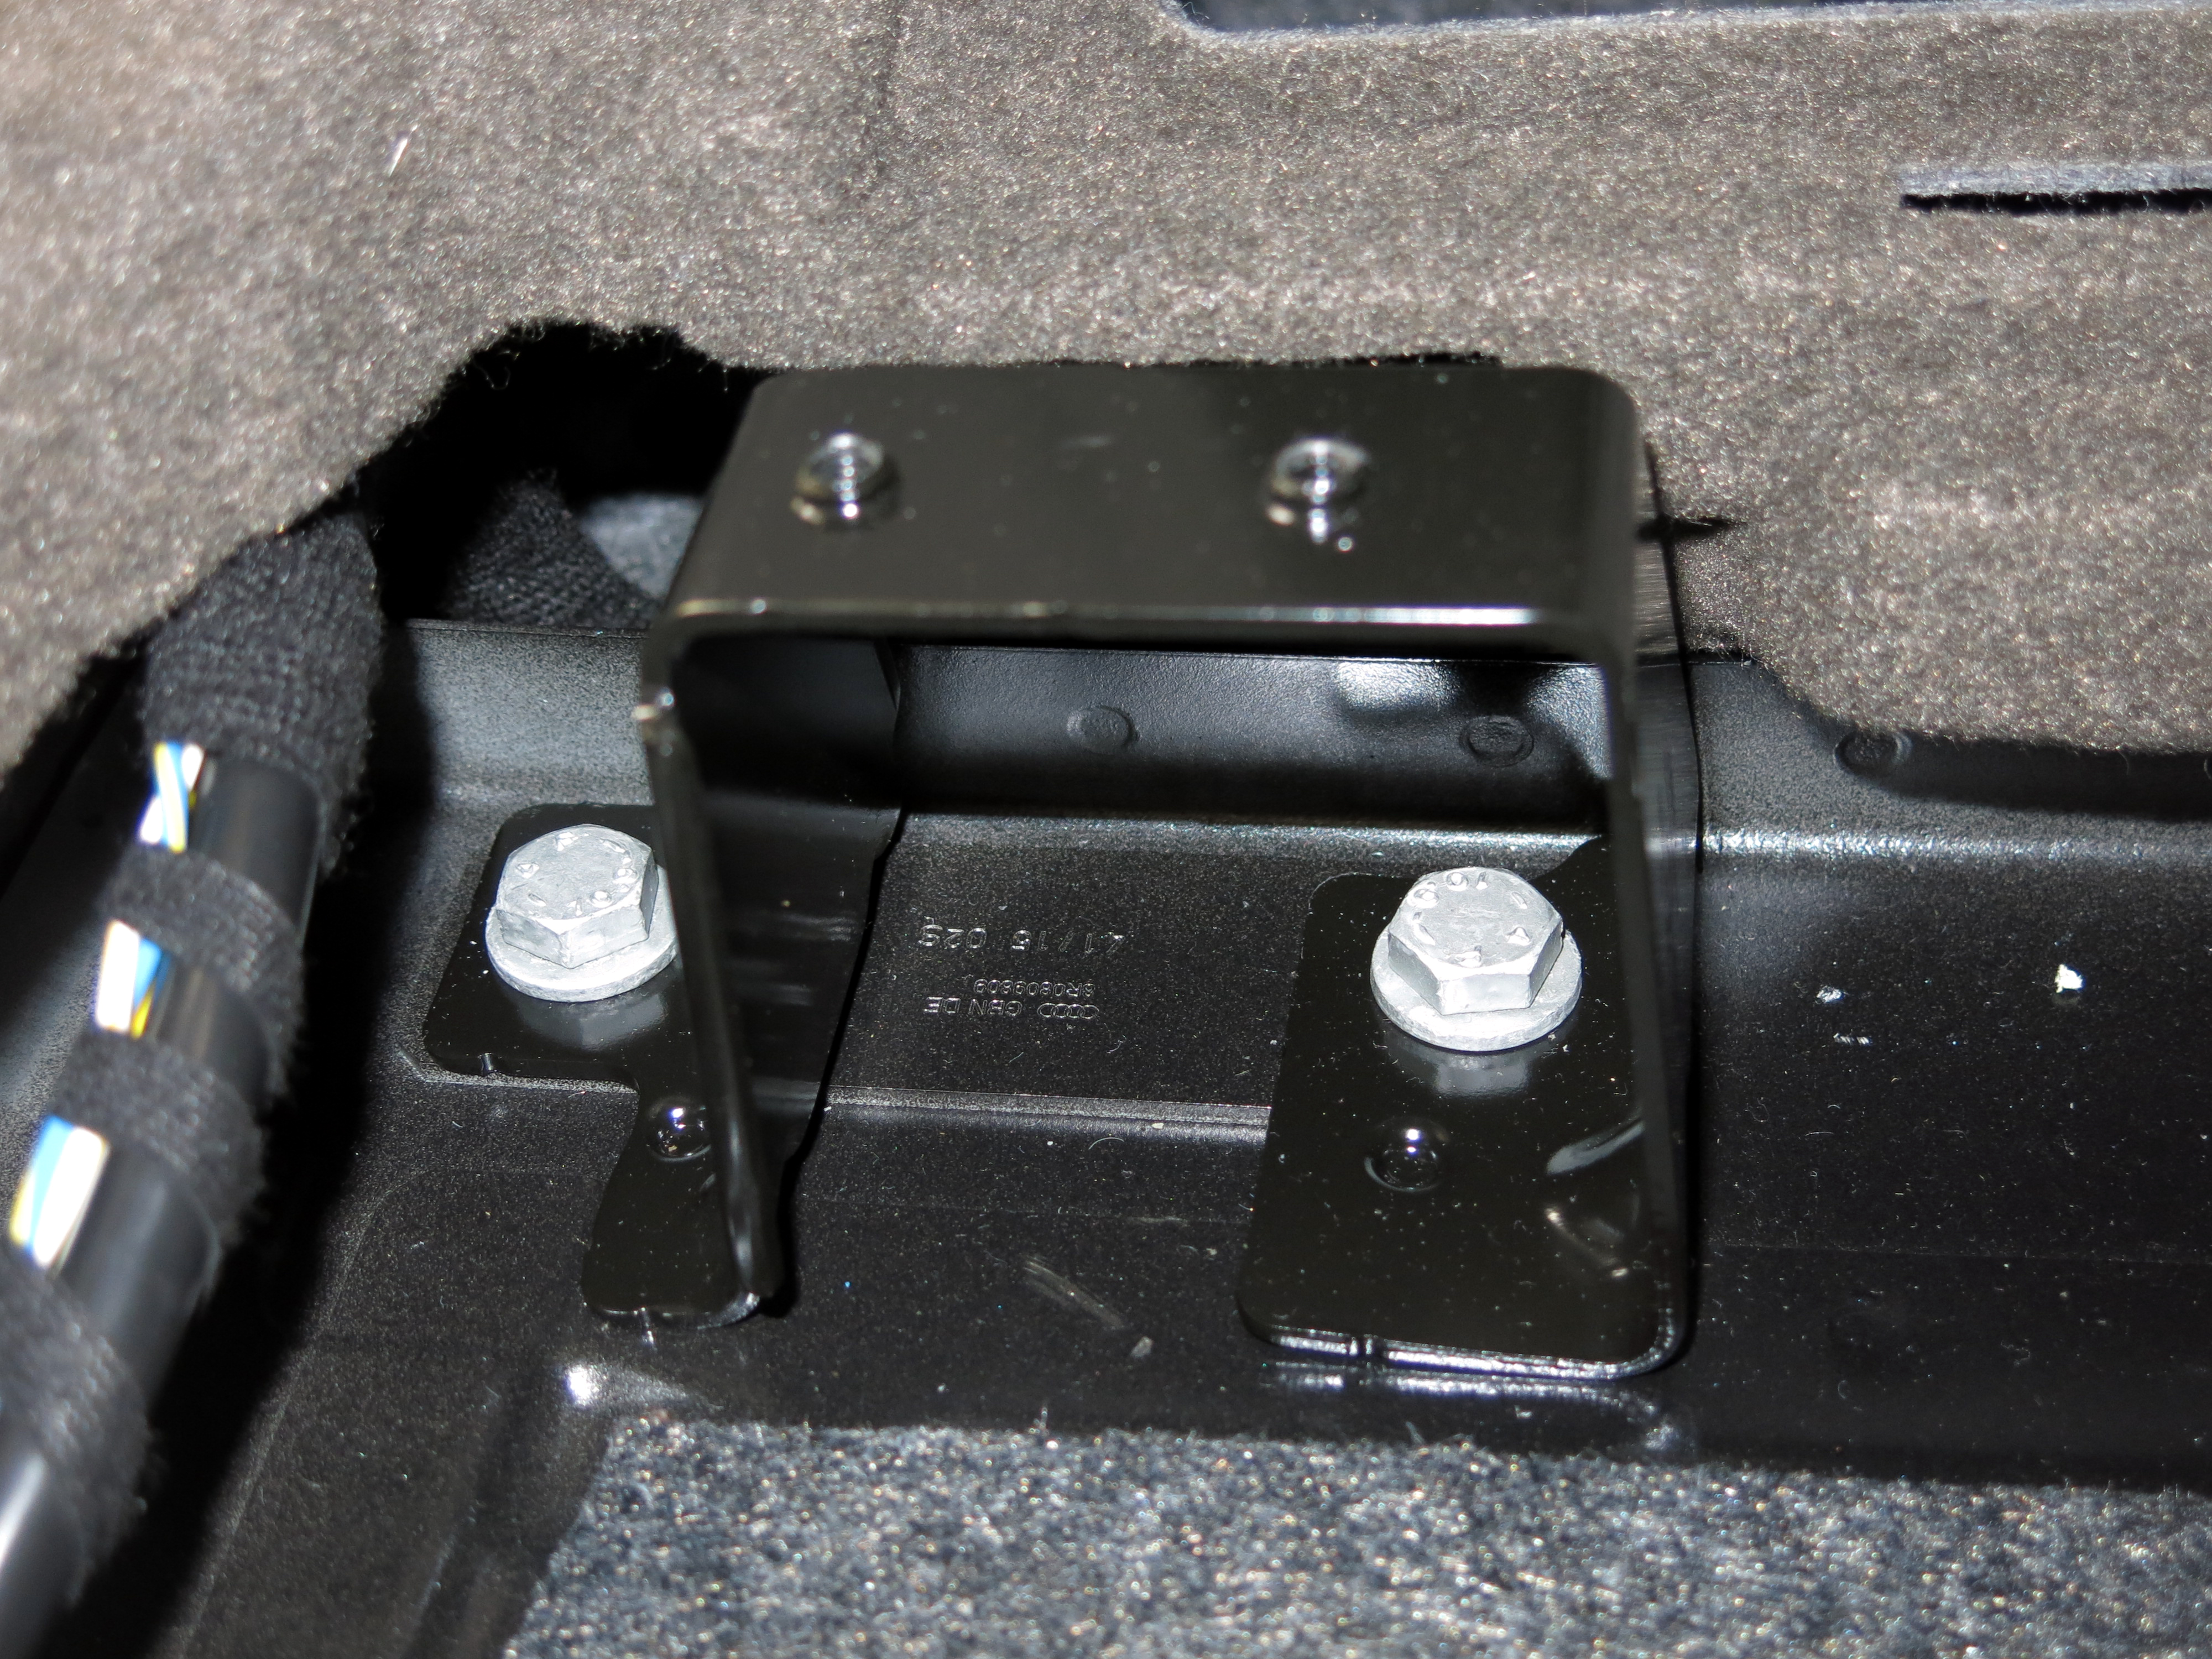
The (usually red) wire for the brakes coming from the 3-to-2 converter module is not used. Wire the power wire to the battery with a fuse, and screw ground to car as pictured.
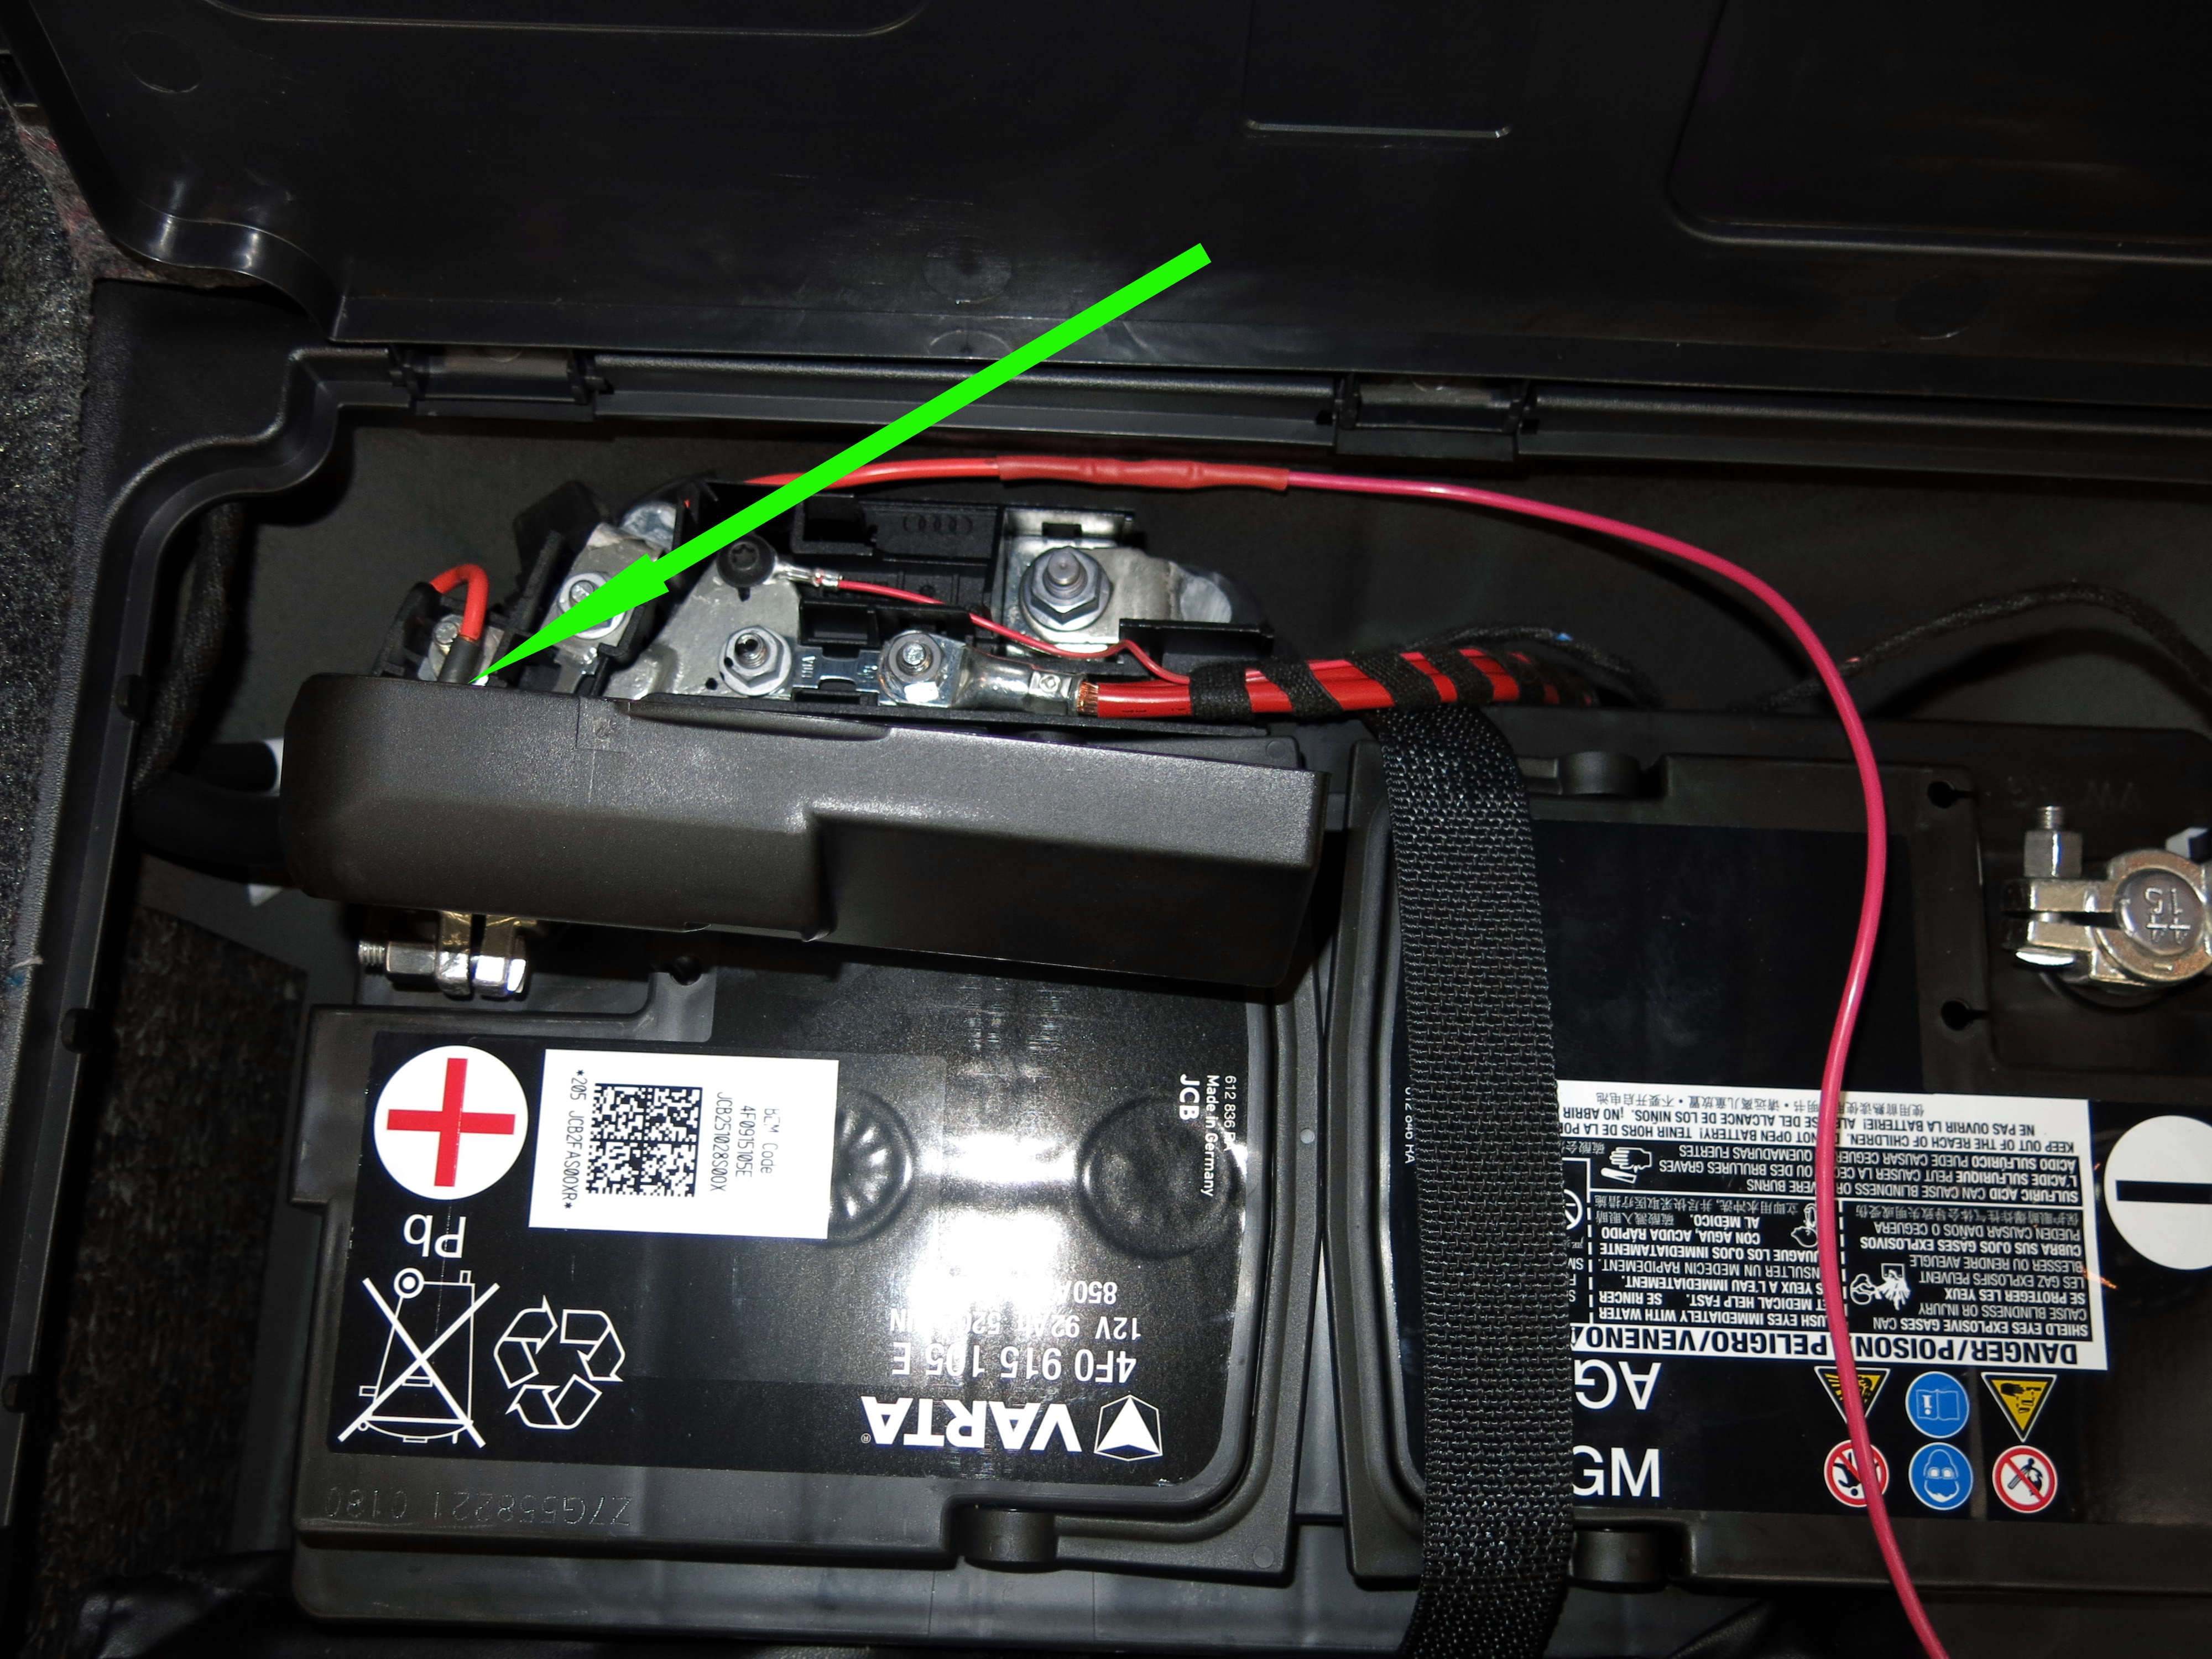

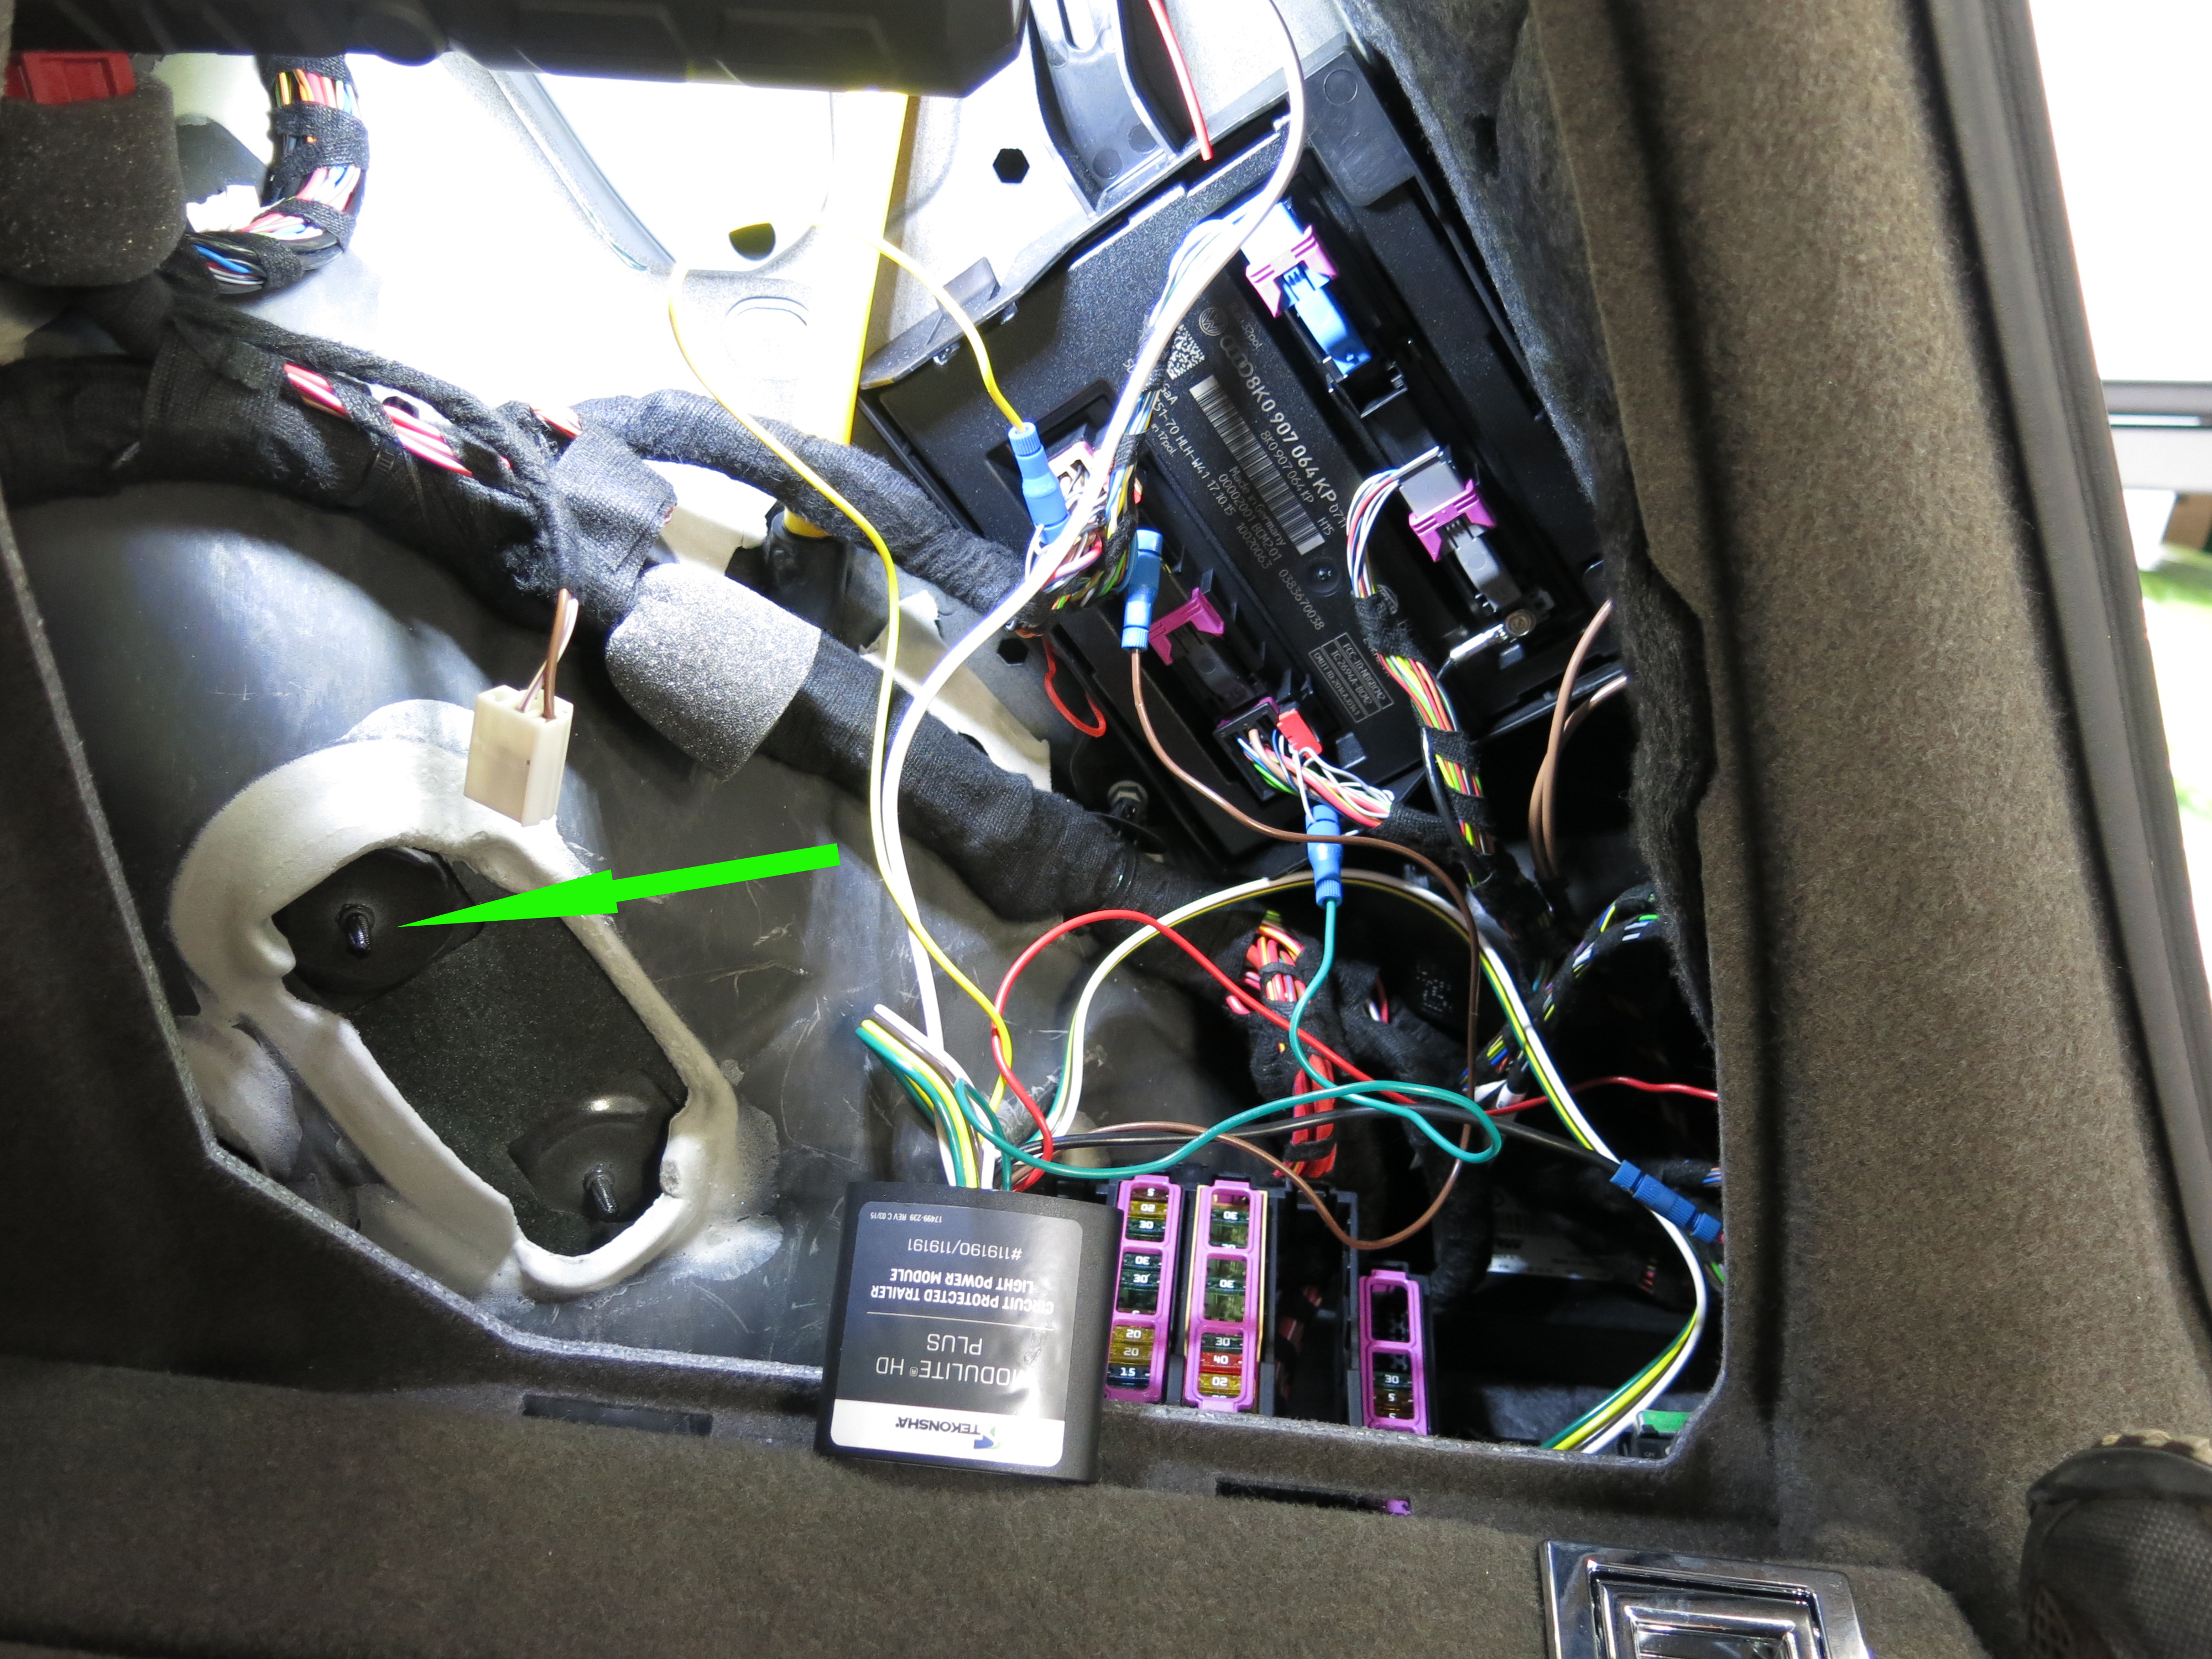
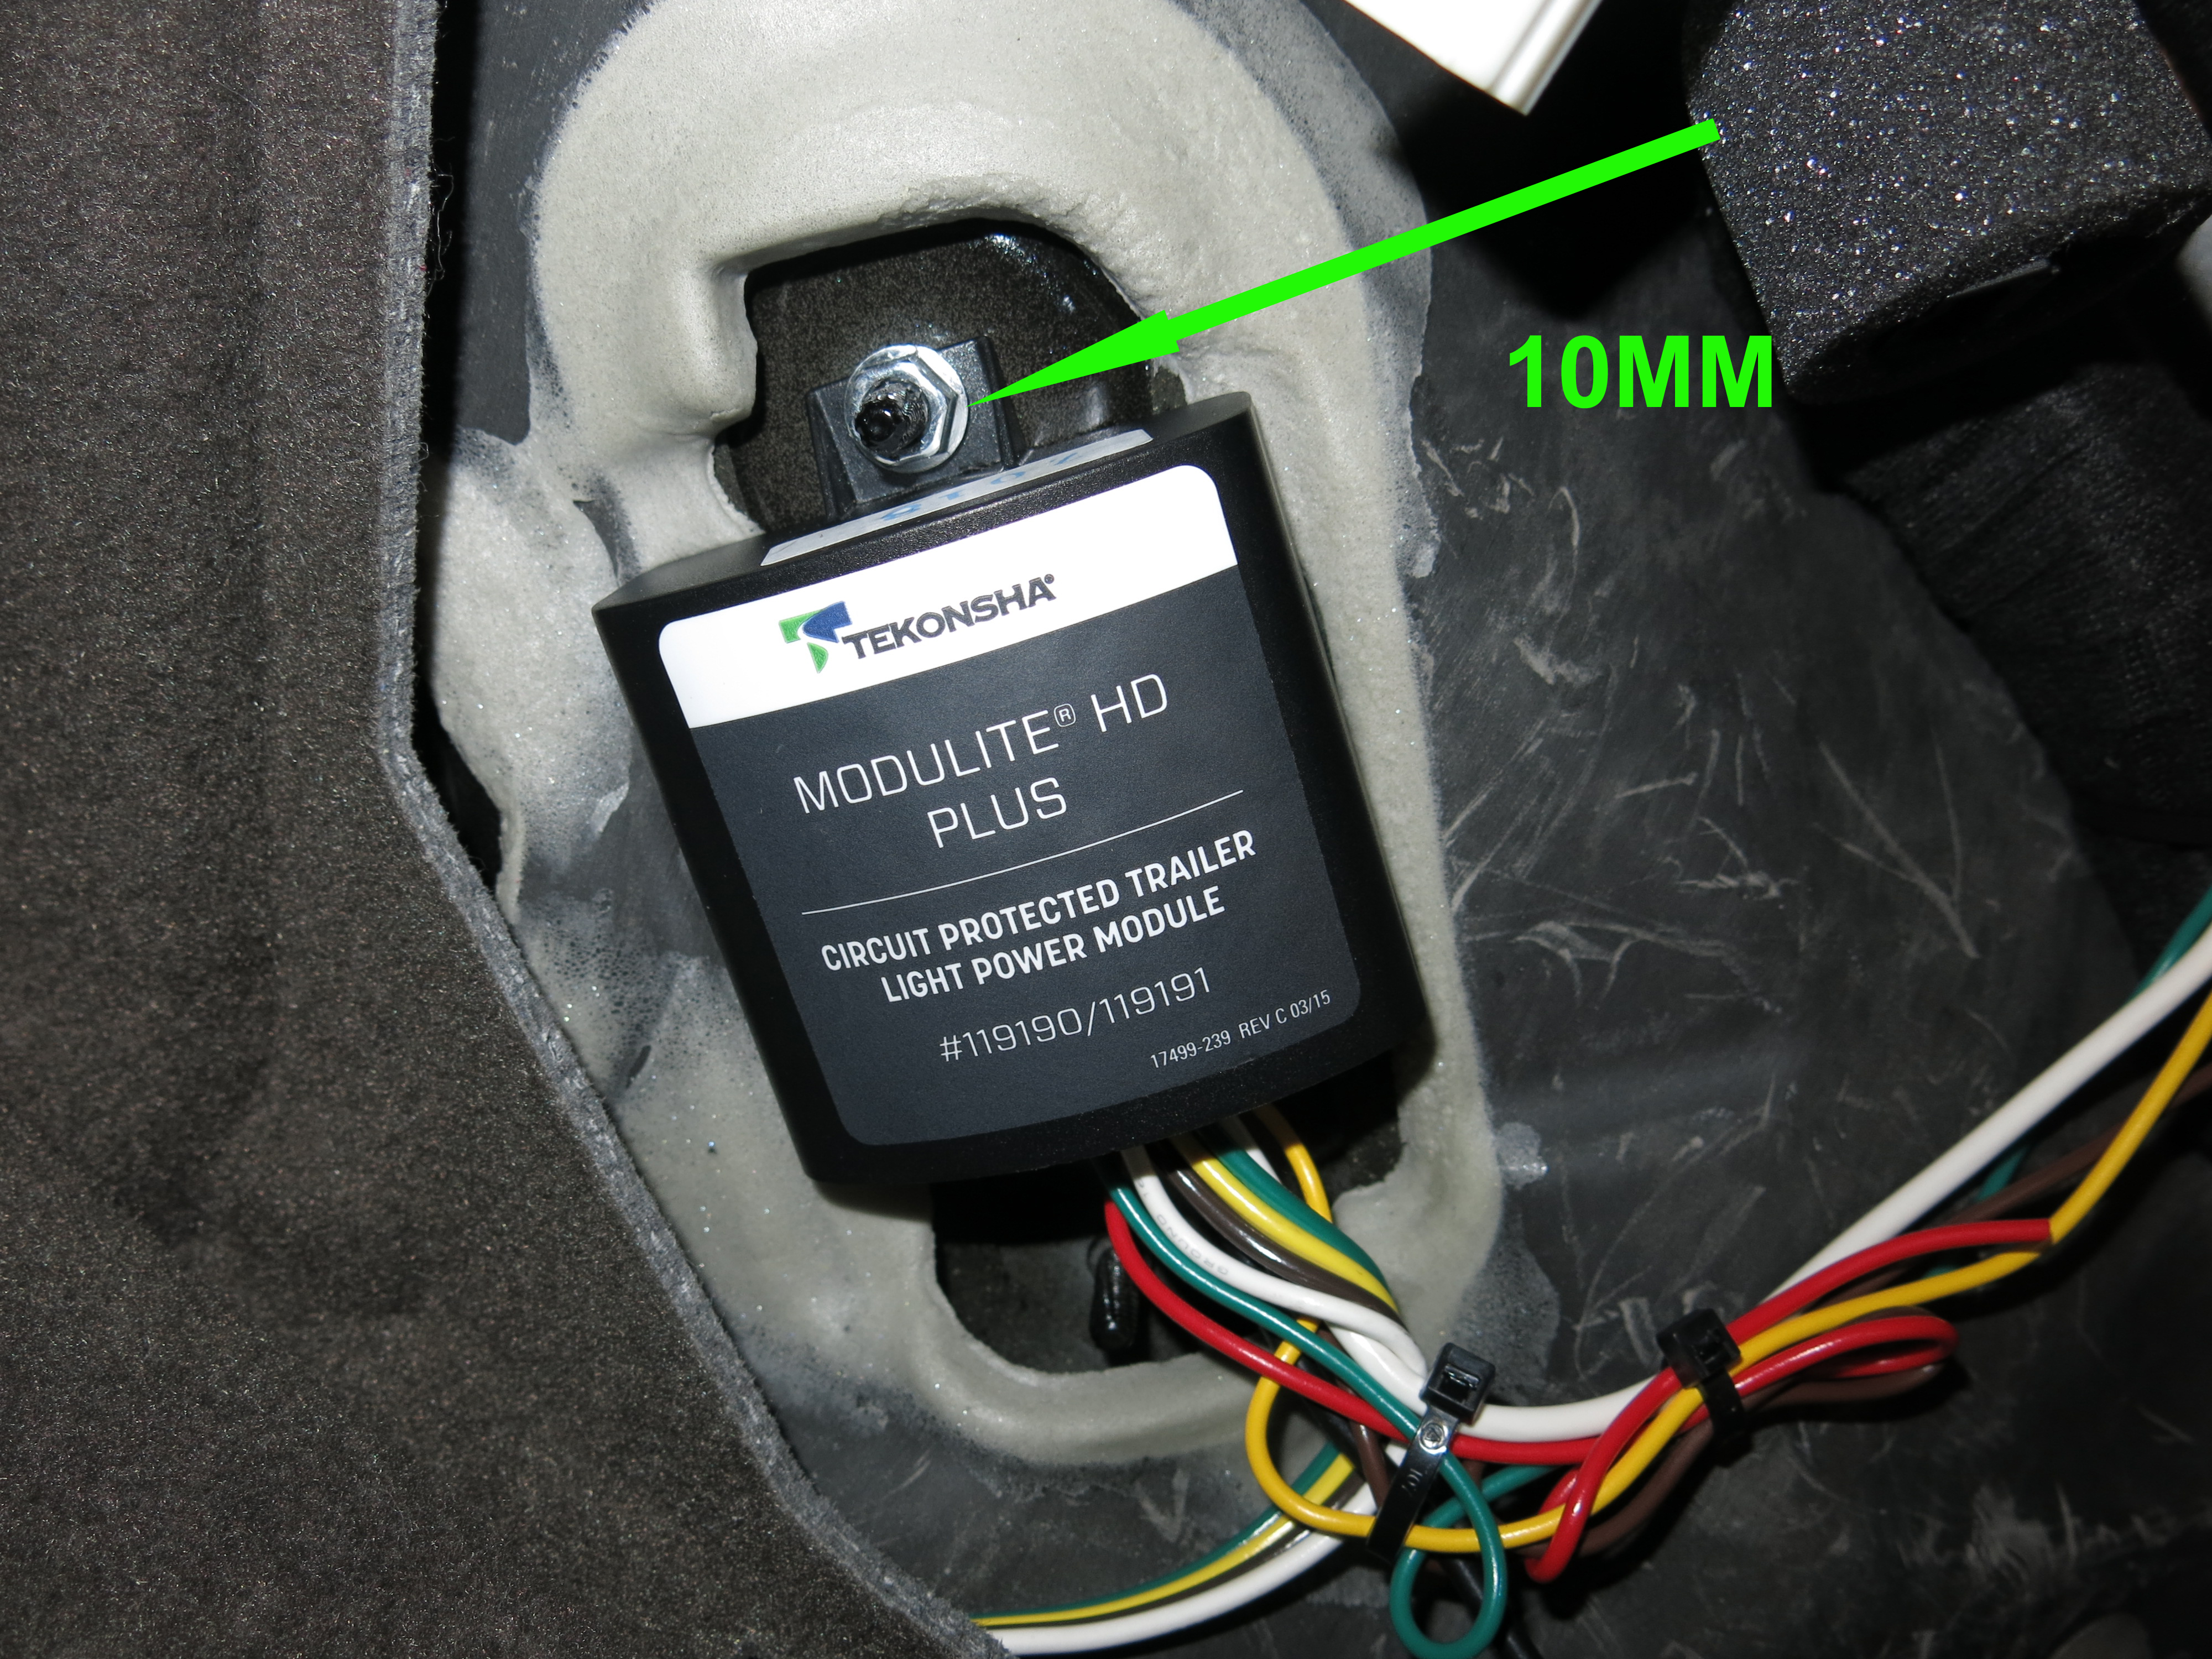
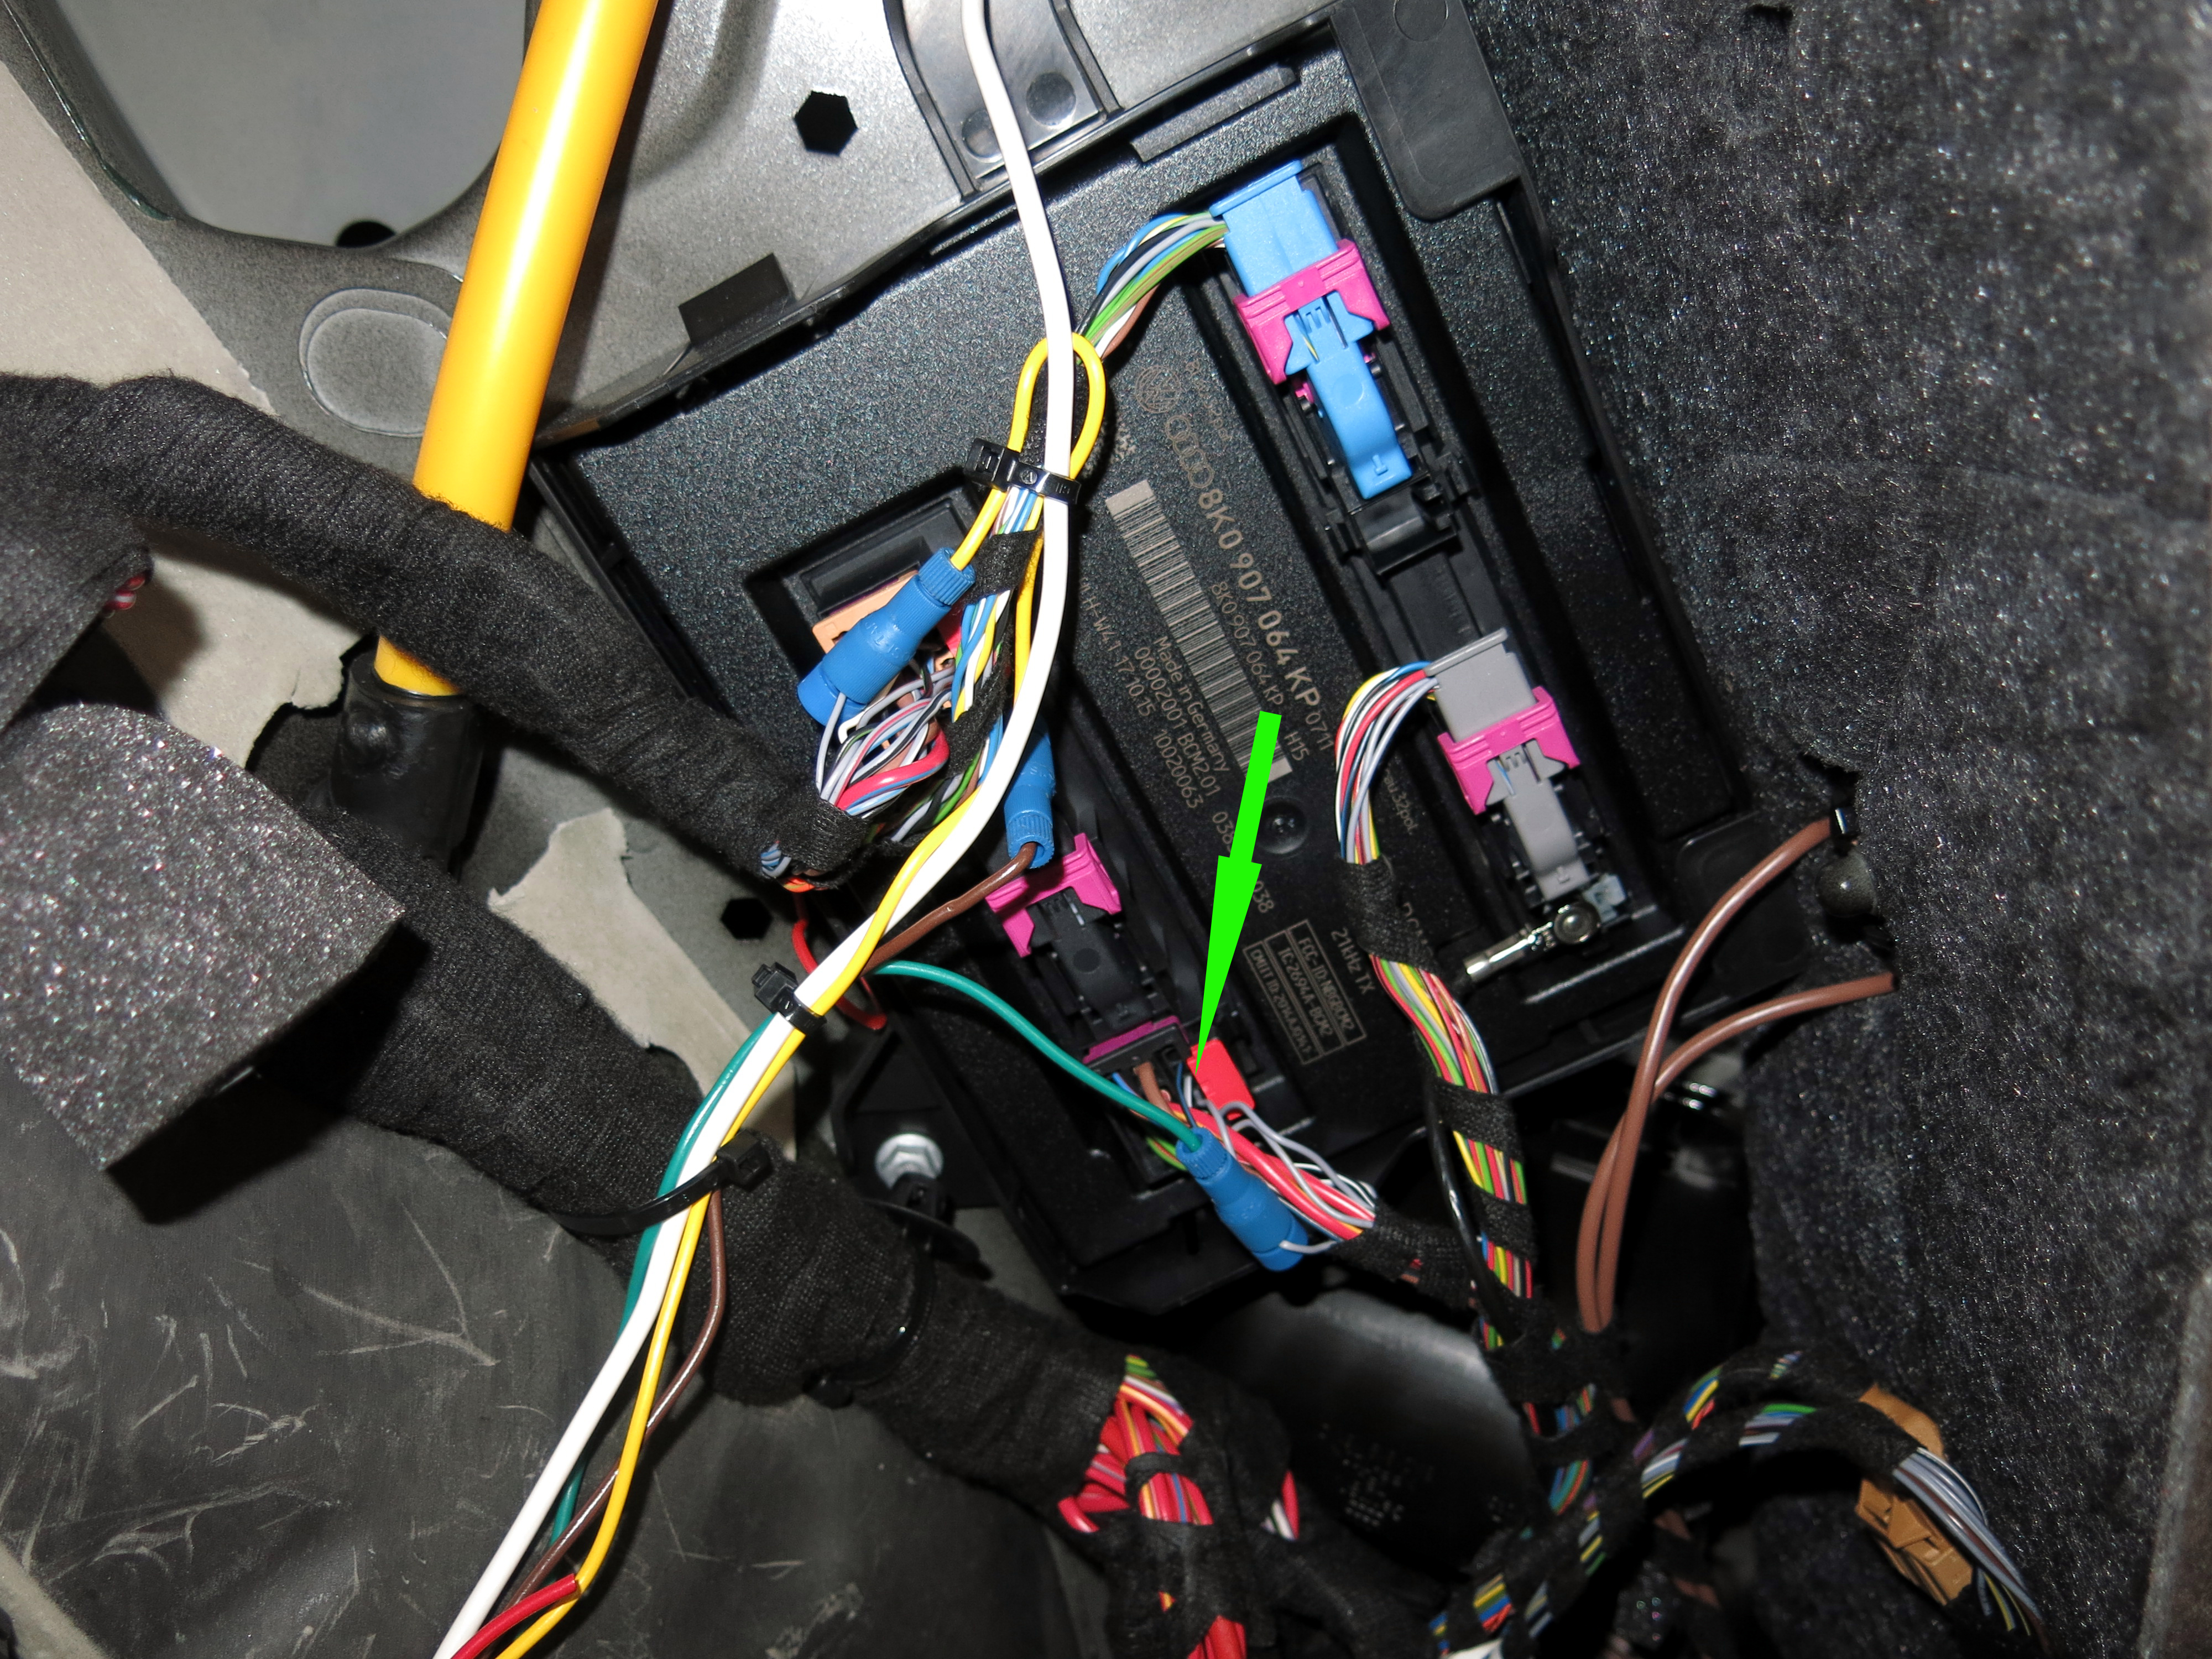
You can see that I mounted the module on an unused stud, and grounded to the fuse box mount. This worked perfectly.
TIP: Make sure you close the back hatch before testing or you will chase your tail trying to figure out why it will not work.
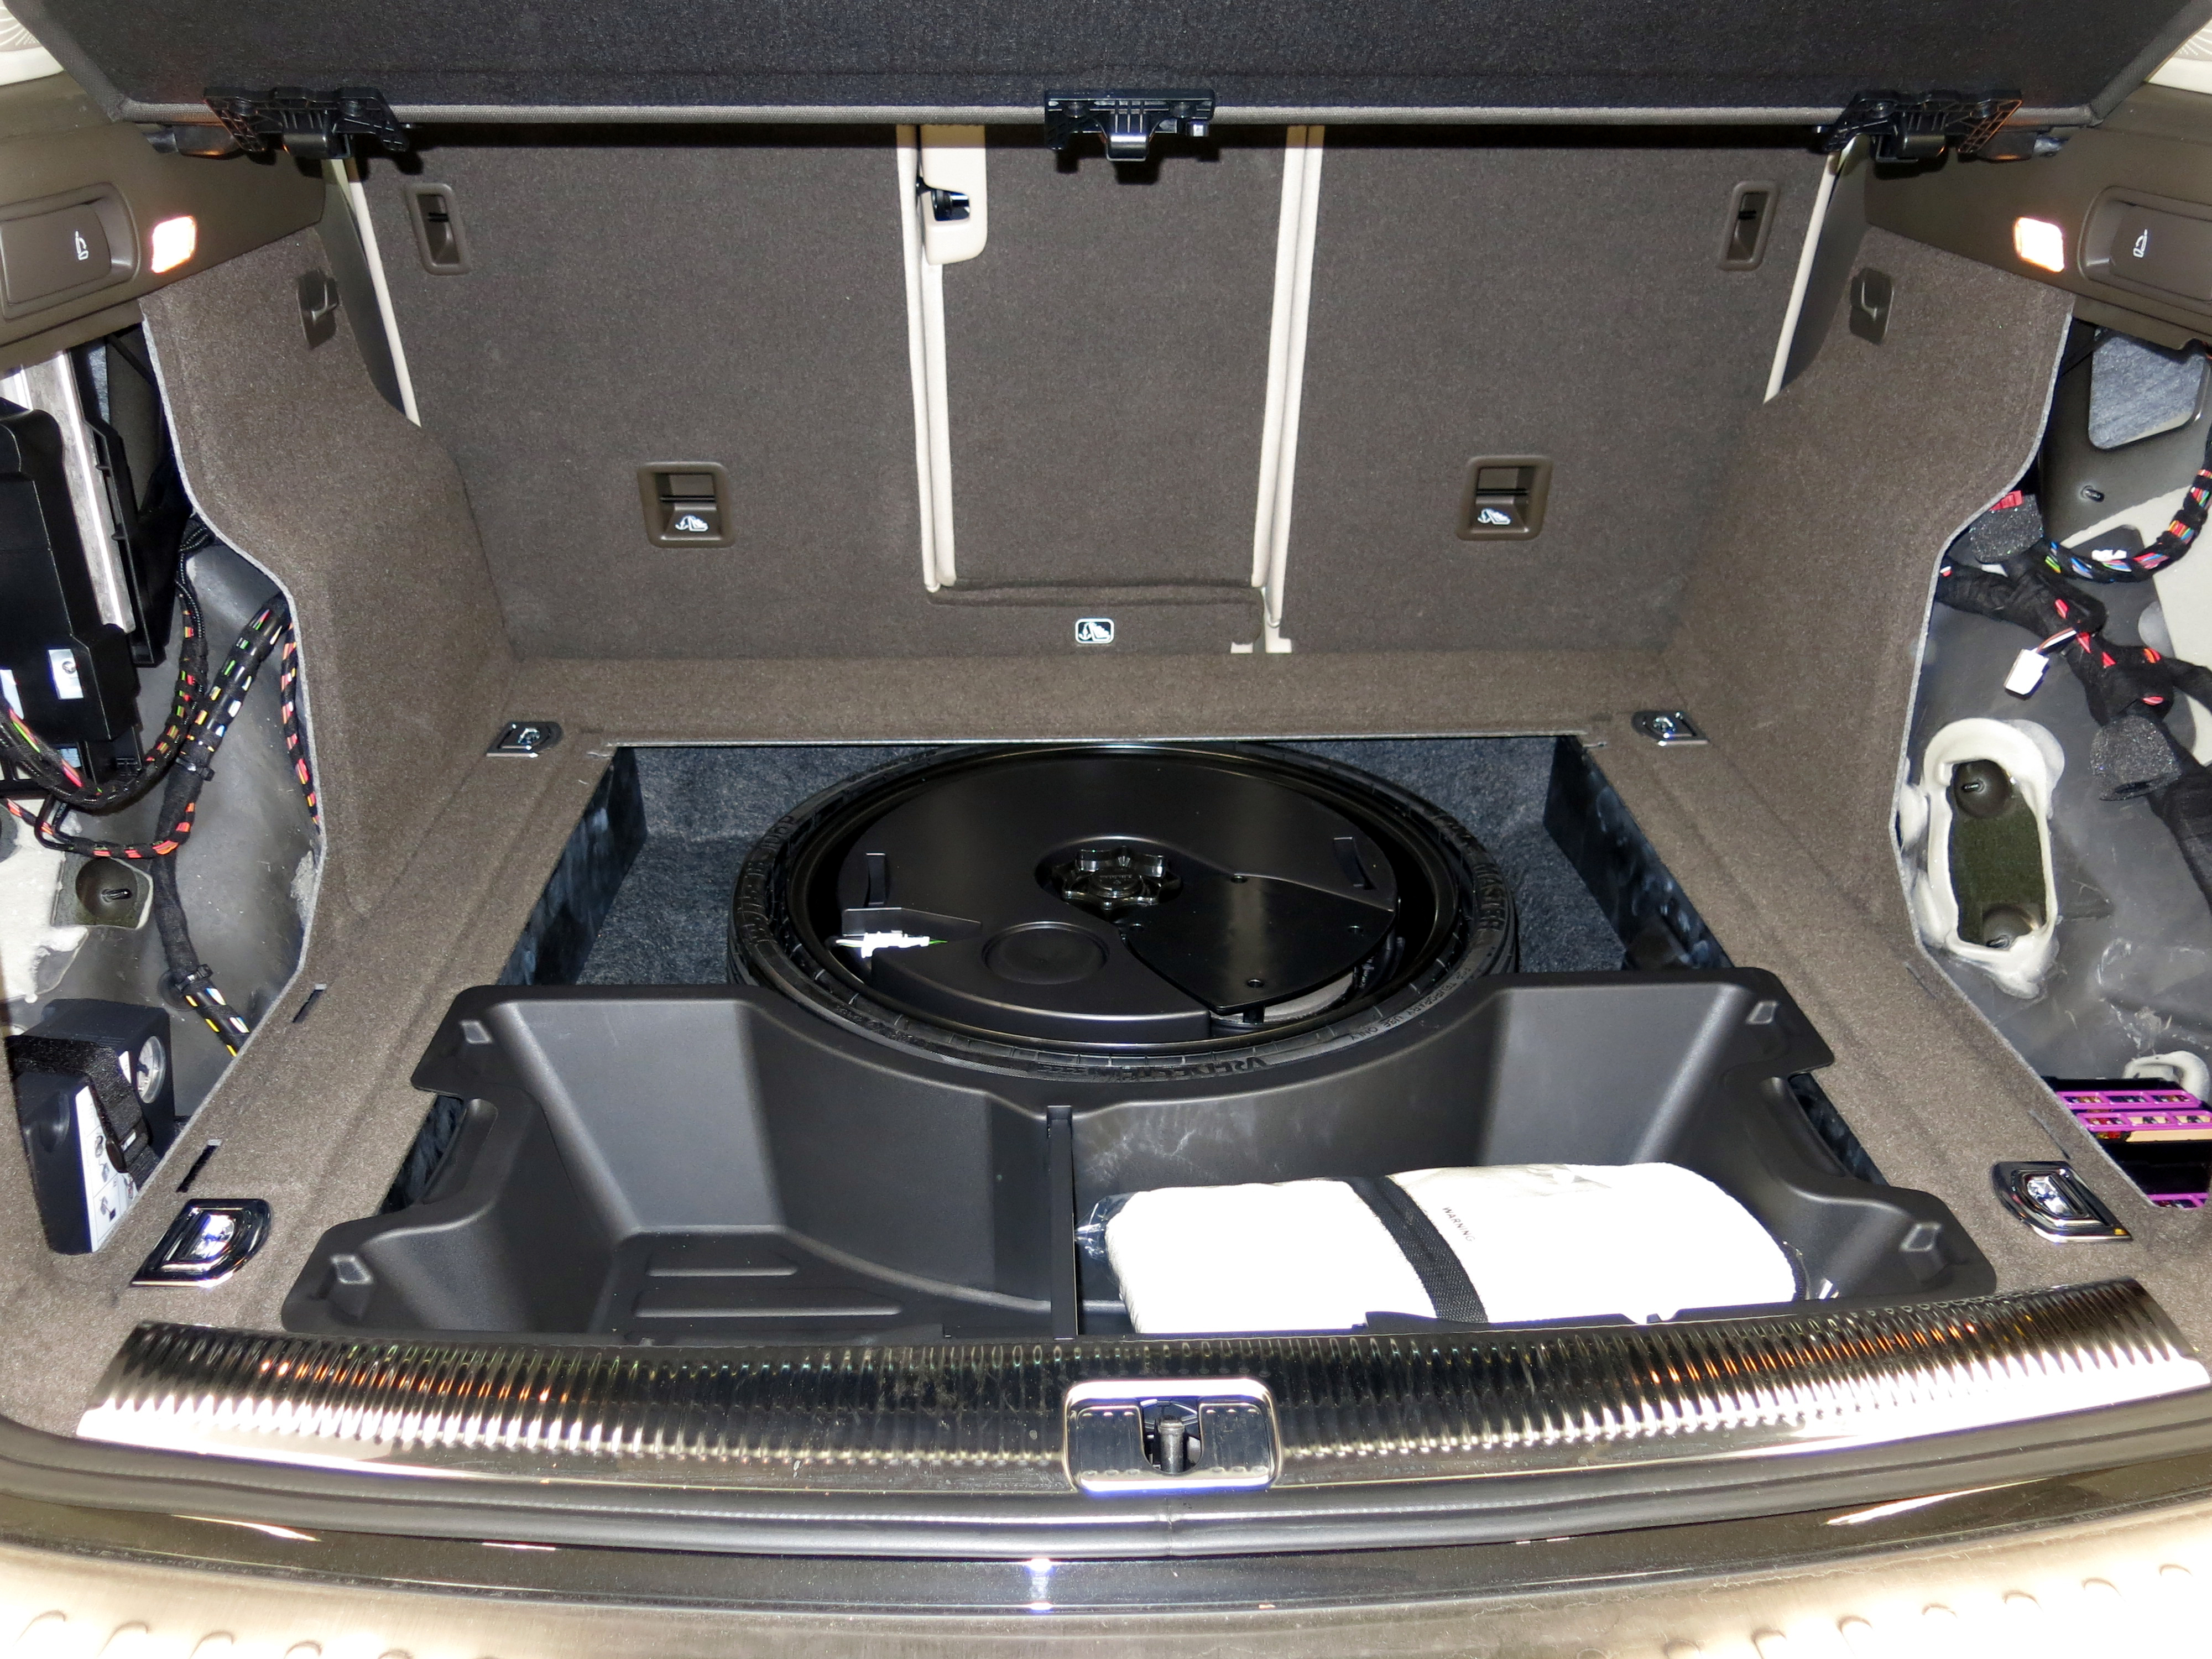
Reinstall the air compressor mount and insulation plus side cover. Then reinstall the side cover on the other side. Install the compartment rails for the tie downs, and put the interior back in fully.
Installation of the bumper cover is basically backwards of removal. However, it is important to get everything carefully lined up as you proceed. The for main studs must be fit into the holes before you proceed too far. Once you get all four in, get the nuts one and just finger tight.
Now work your way over the top of the bumper cover to snap in the tops against the body.
These just snap into place.
Now fit the lower portions of the bumper cover into the inner fender mounts:
Pop everything into place and tighten the four main nuts. Don't forget to refasten the fuse box in place. Then install the T-25 Torx screws, and the inner fender well clips. I will add photos later.
With the bumper cover in place, complete the wiring. as follows:
Gray wire with black tracer is for left signal. Solid gray wire is for right signal. solid yellow is for tail lights.
Gray with black tracer wire is on top orange plug.
Yellow wire is on middle black and pink plug.
Solid gray wire is on bottom black plug.
The (usually red) wire for the brakes coming from the 3-to-2 converter module is not used. Wire the power wire to the battery with a fuse, and screw ground to car as pictured.
You can see that I mounted the module on an unused stud, and grounded to the fuse box mount. This worked perfectly.
TIP: Make sure you close the back hatch before testing or you will chase your tail trying to figure out why it will not work.
Reinstall the air compressor mount and insulation plus side cover. Then reinstall the side cover on the other side. Install the compartment rails for the tie downs, and put the interior back in fully.
#4
05-28-2016, 09:37 PM

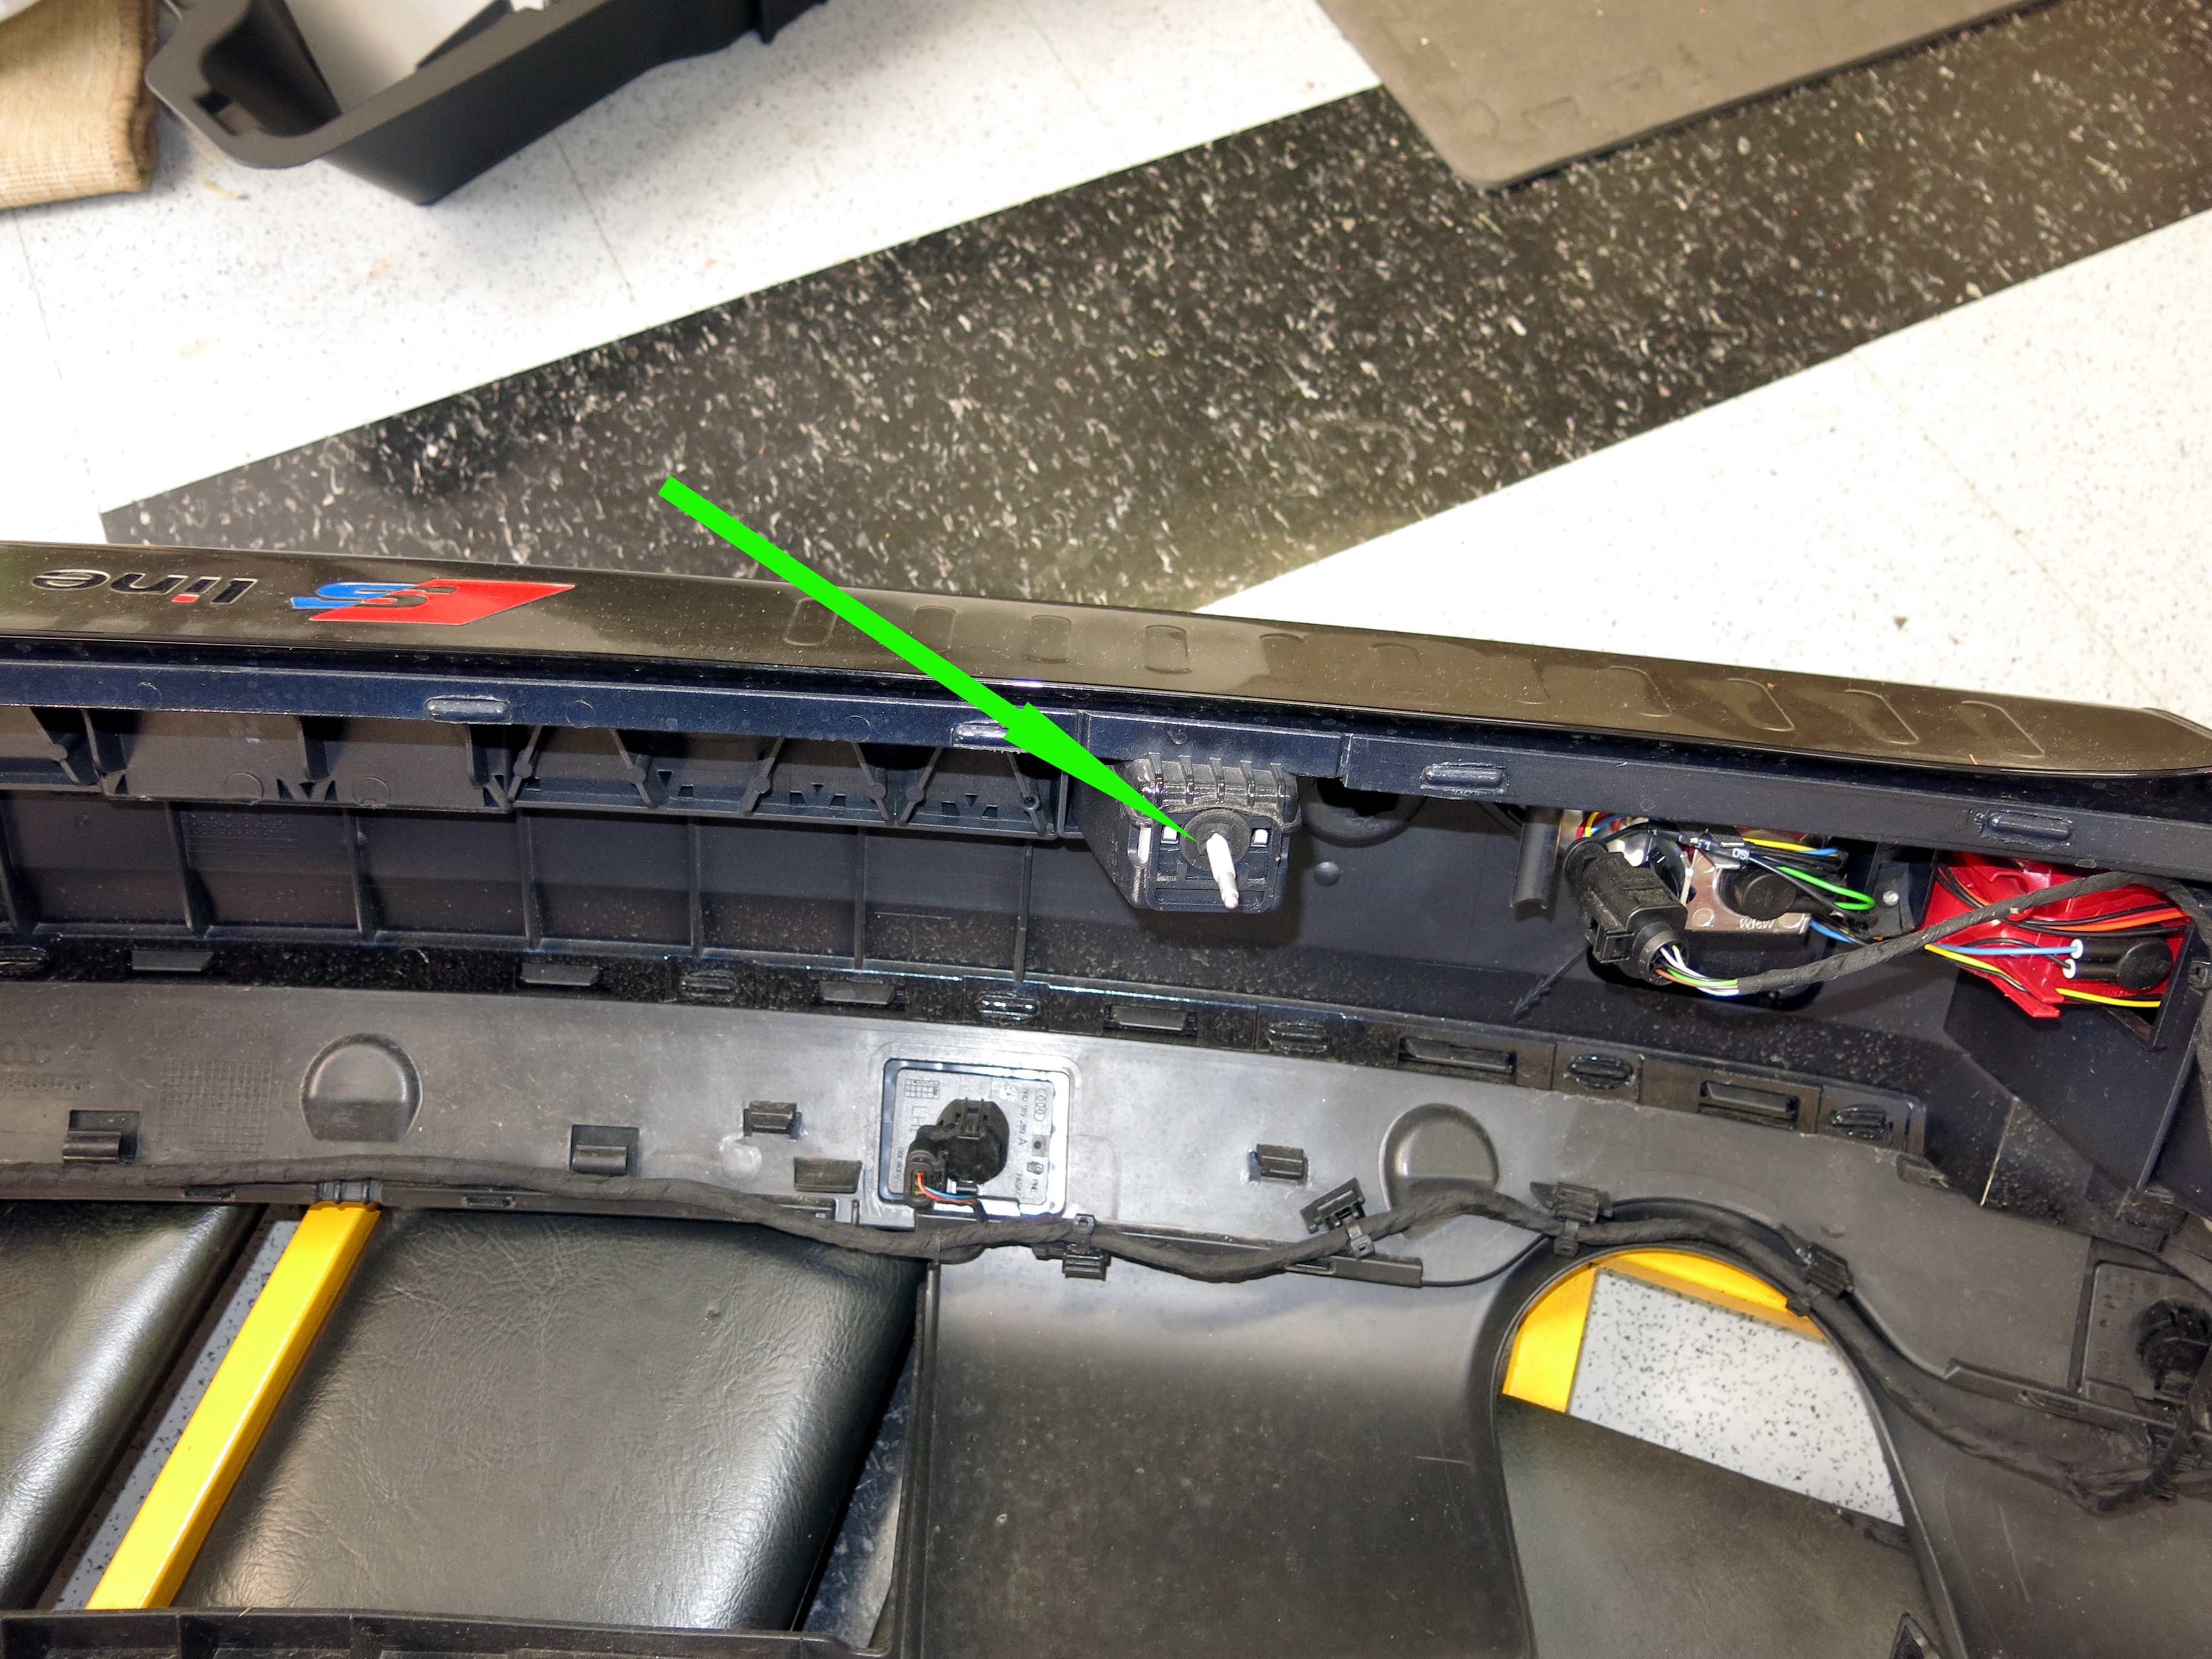
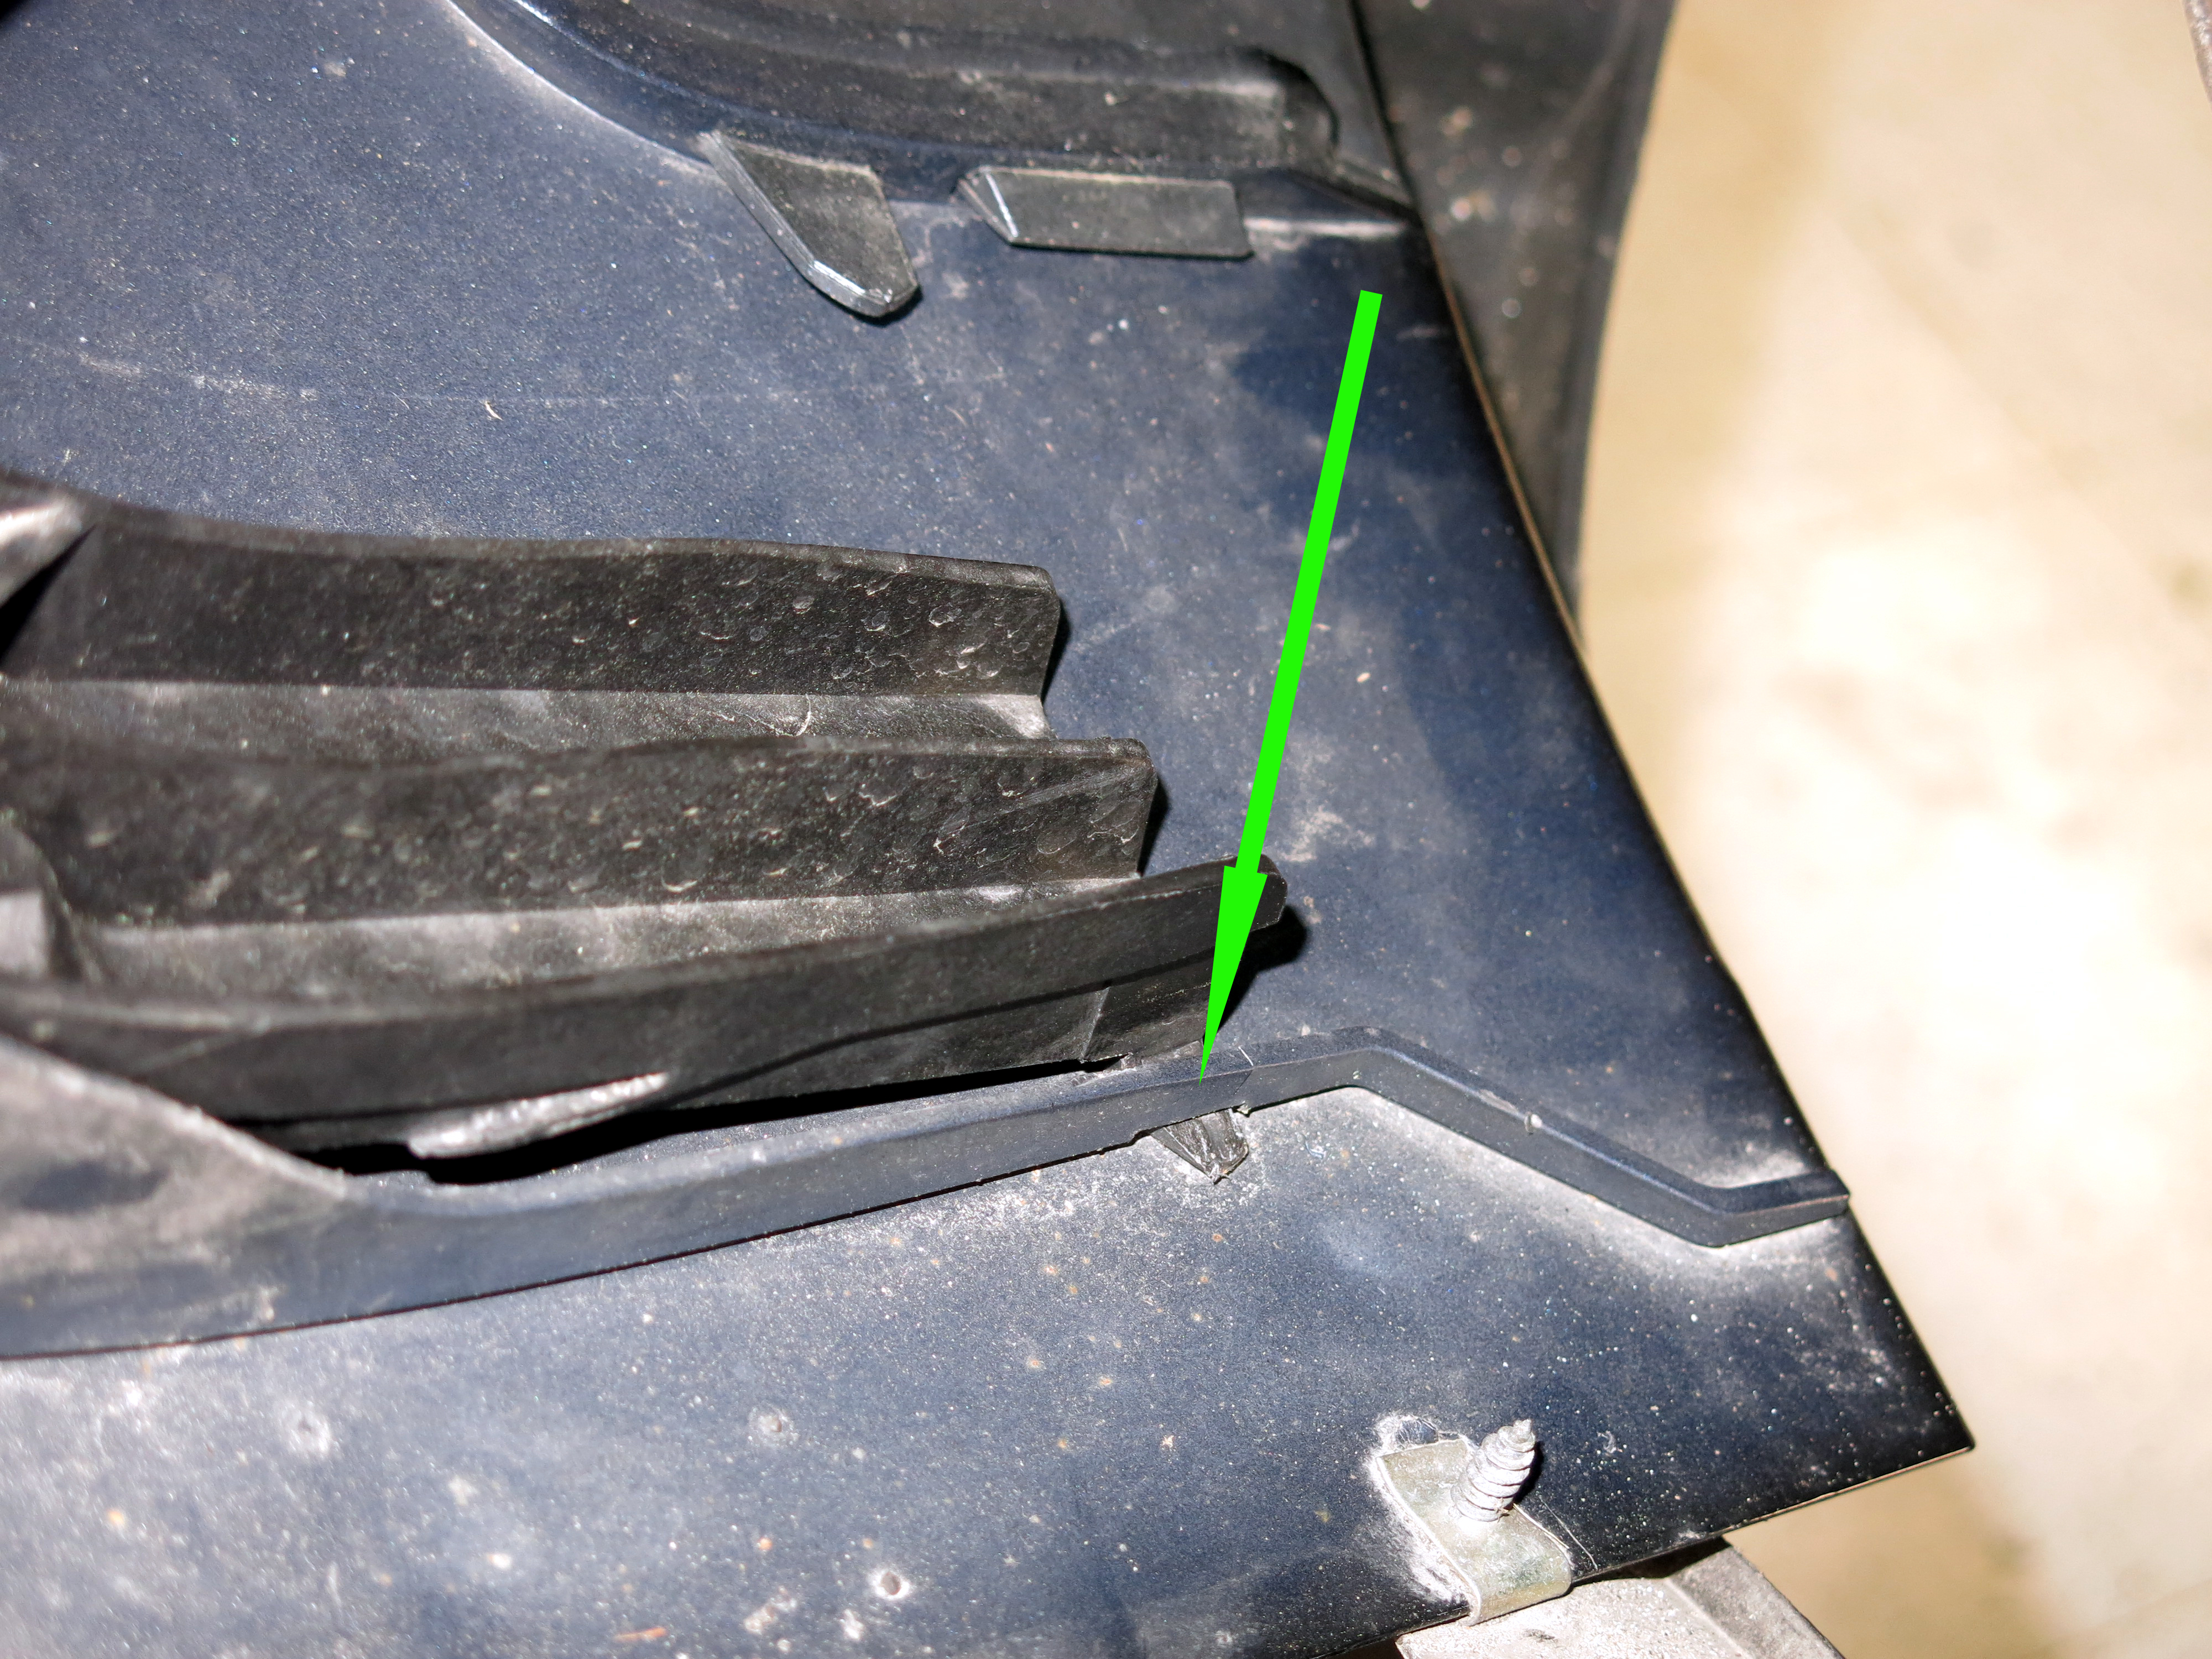
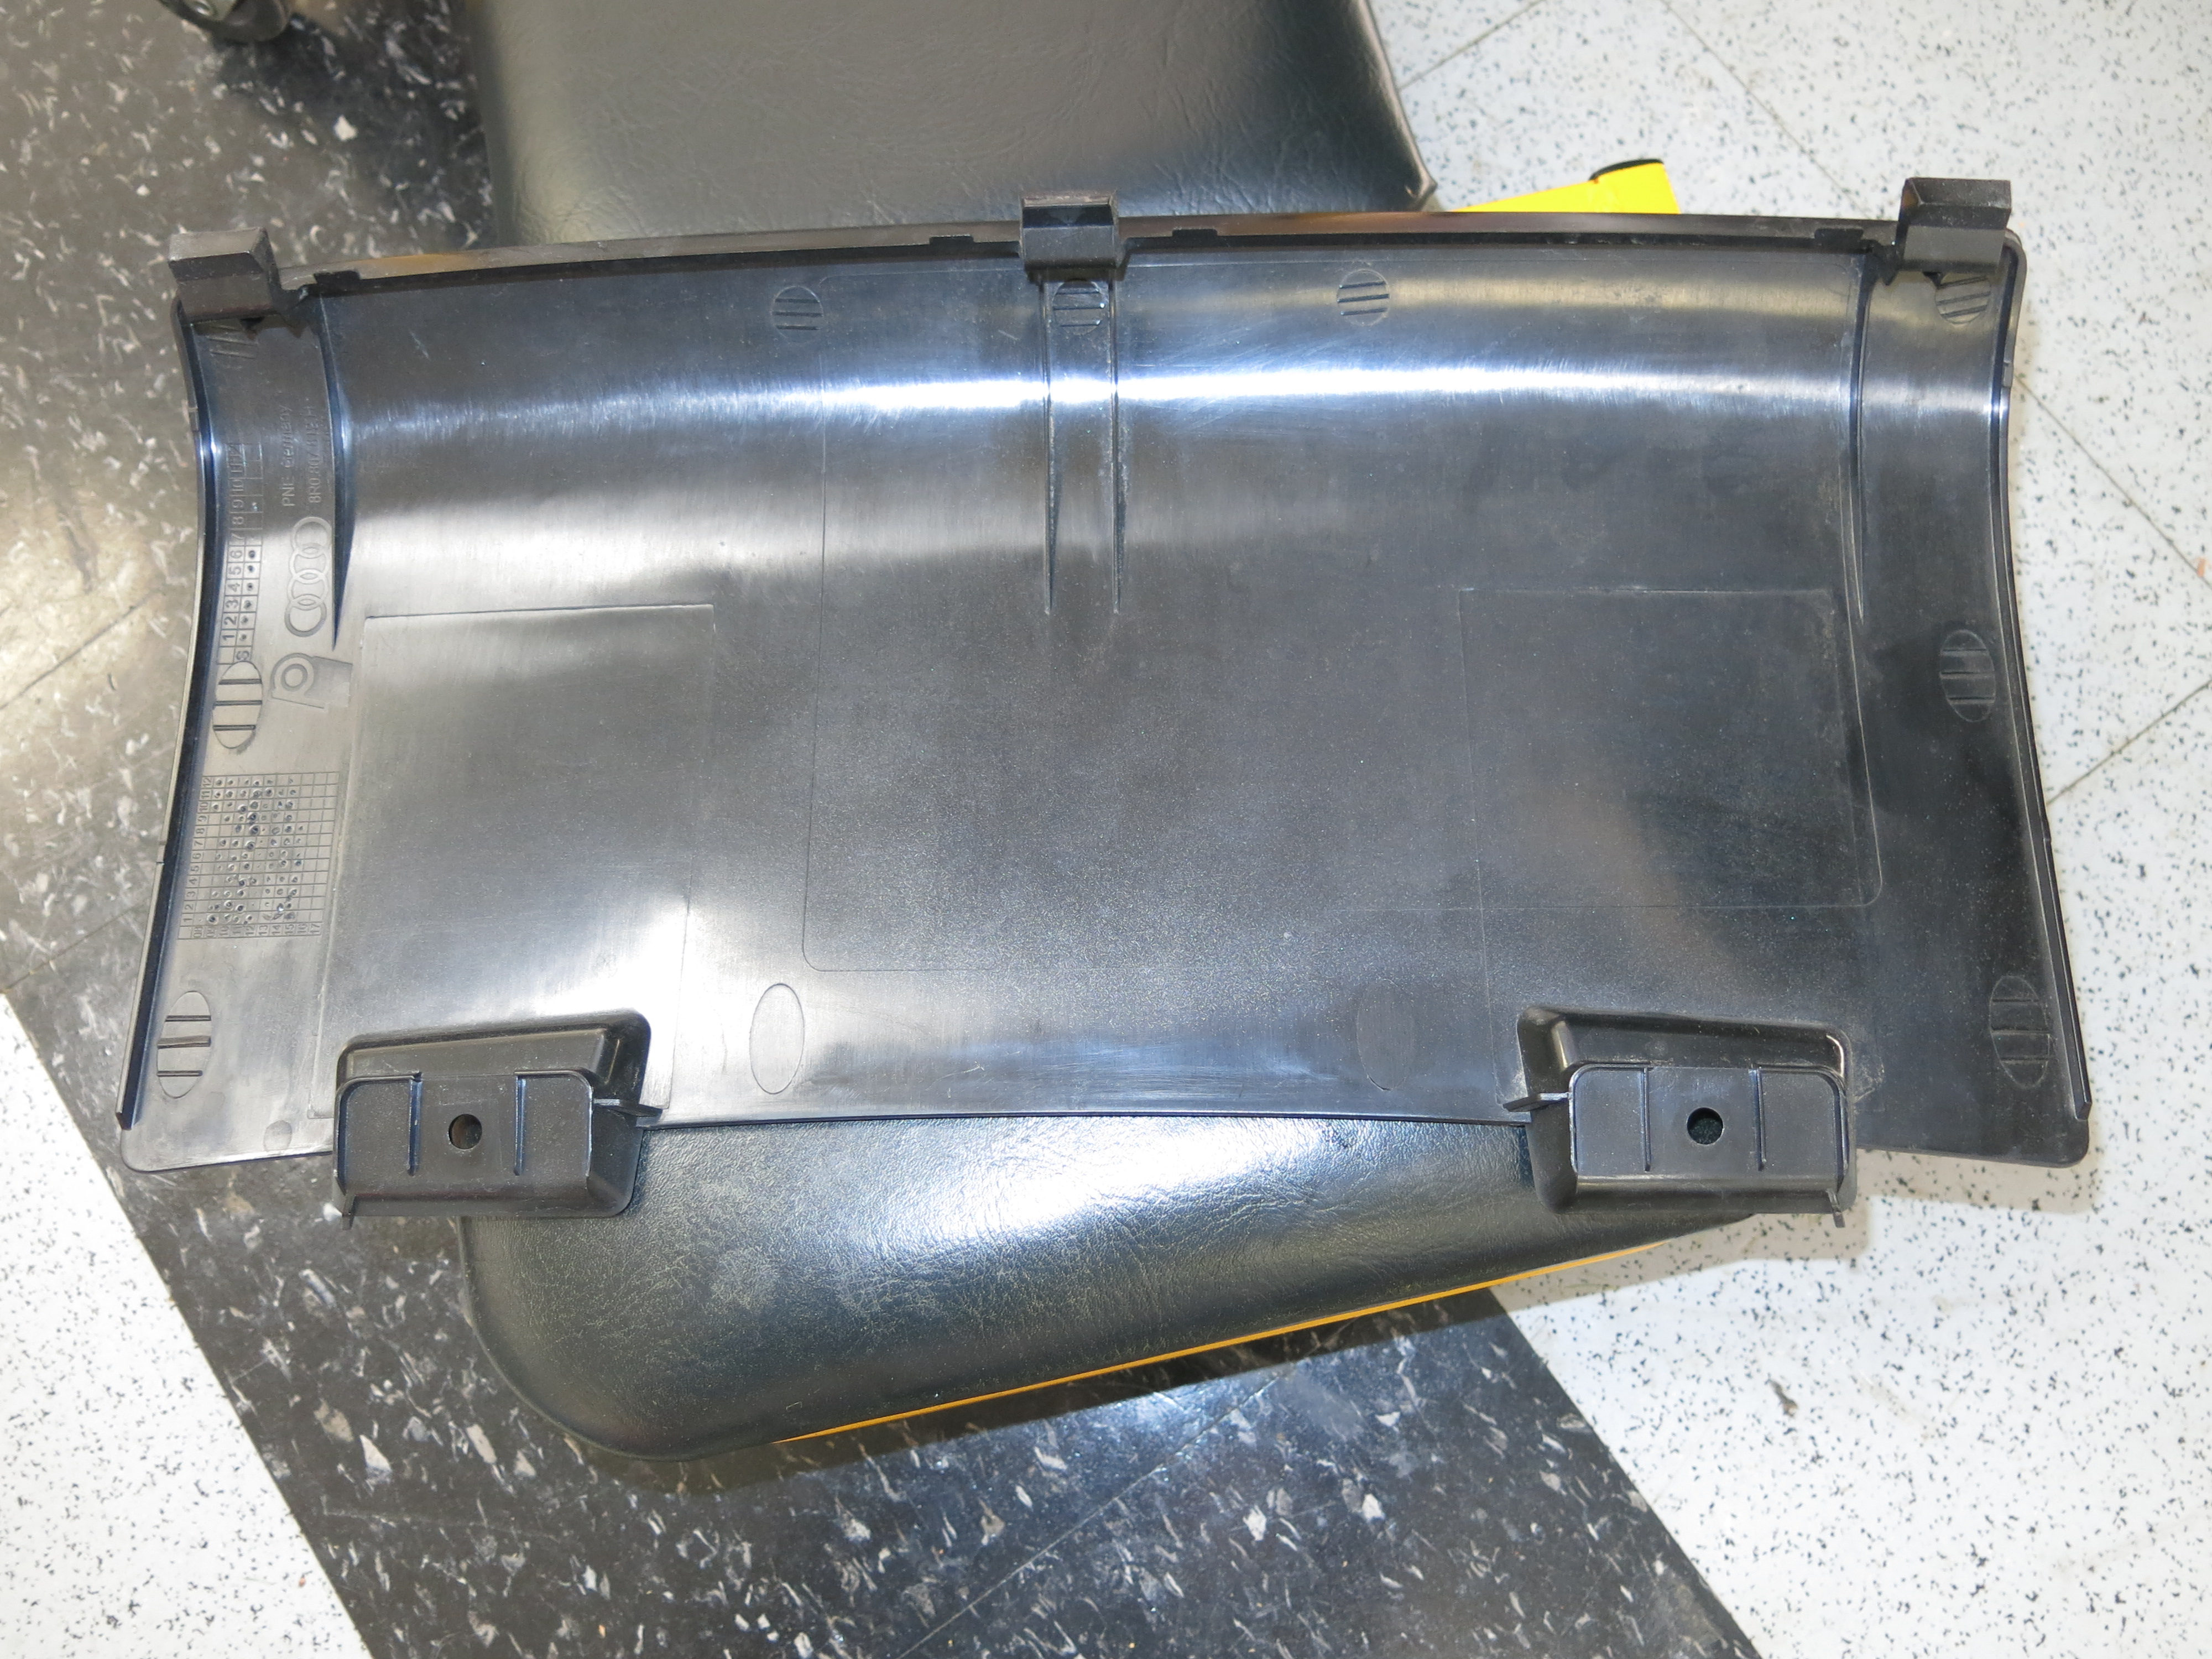
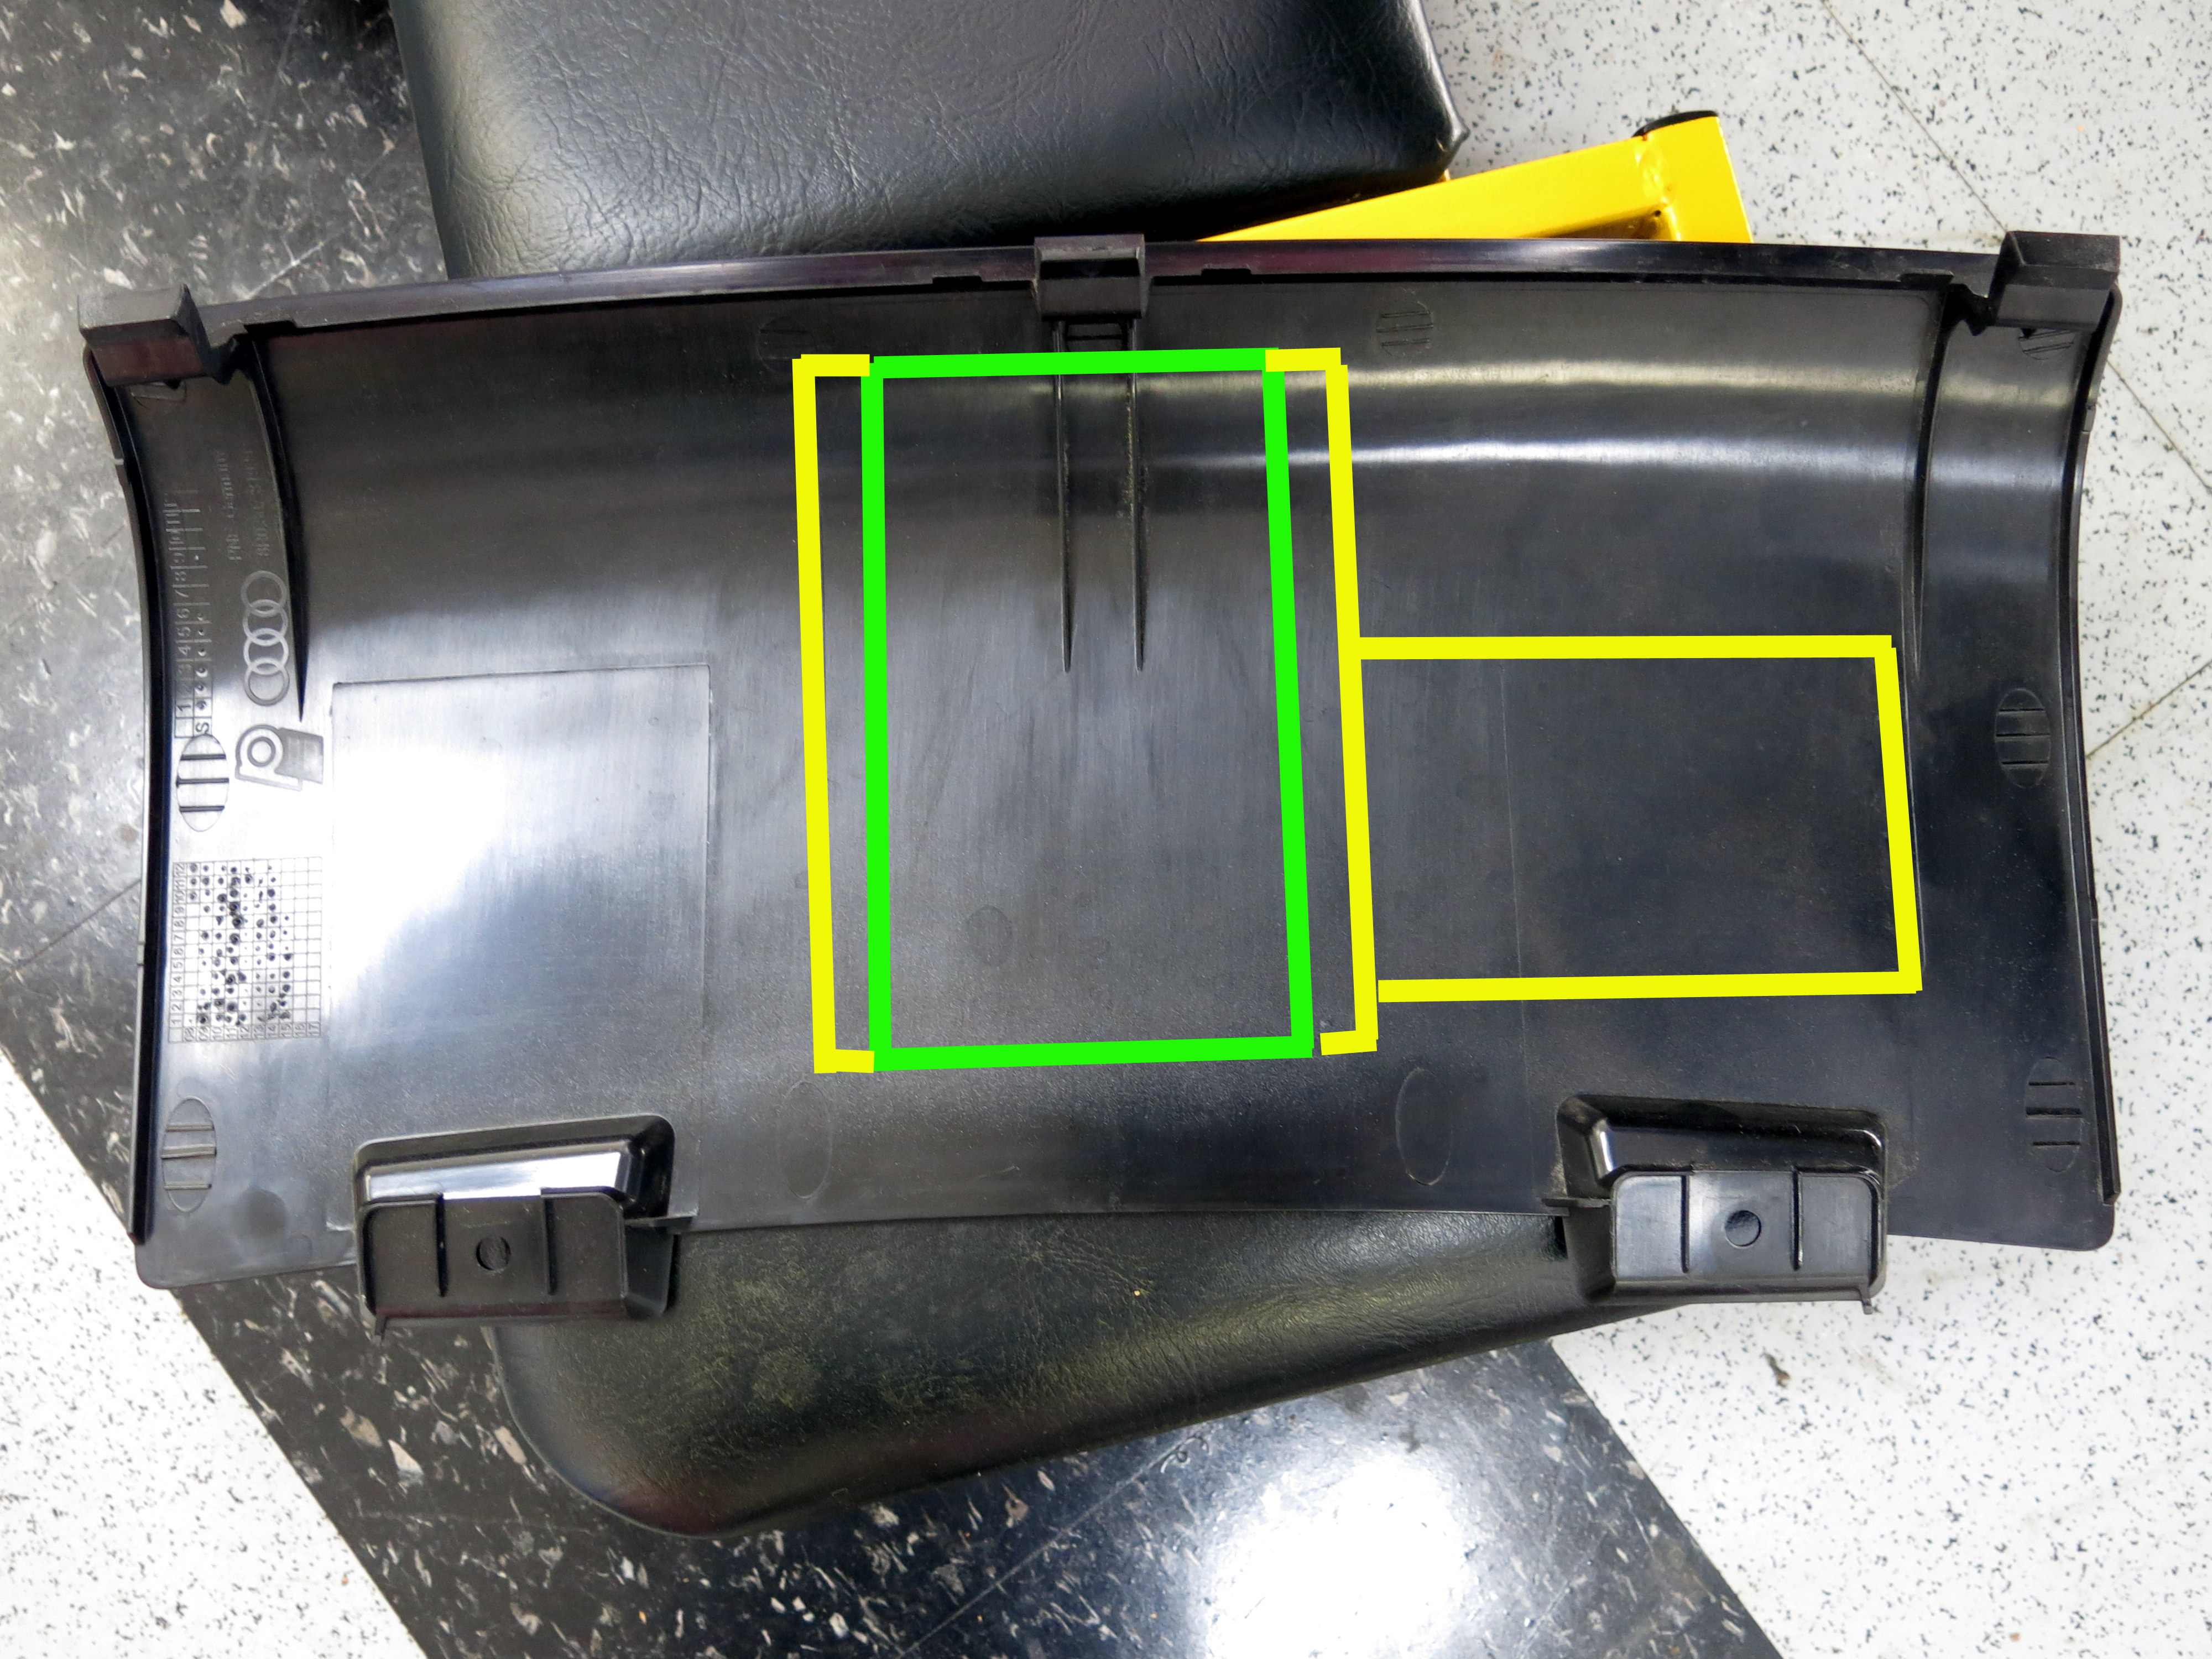
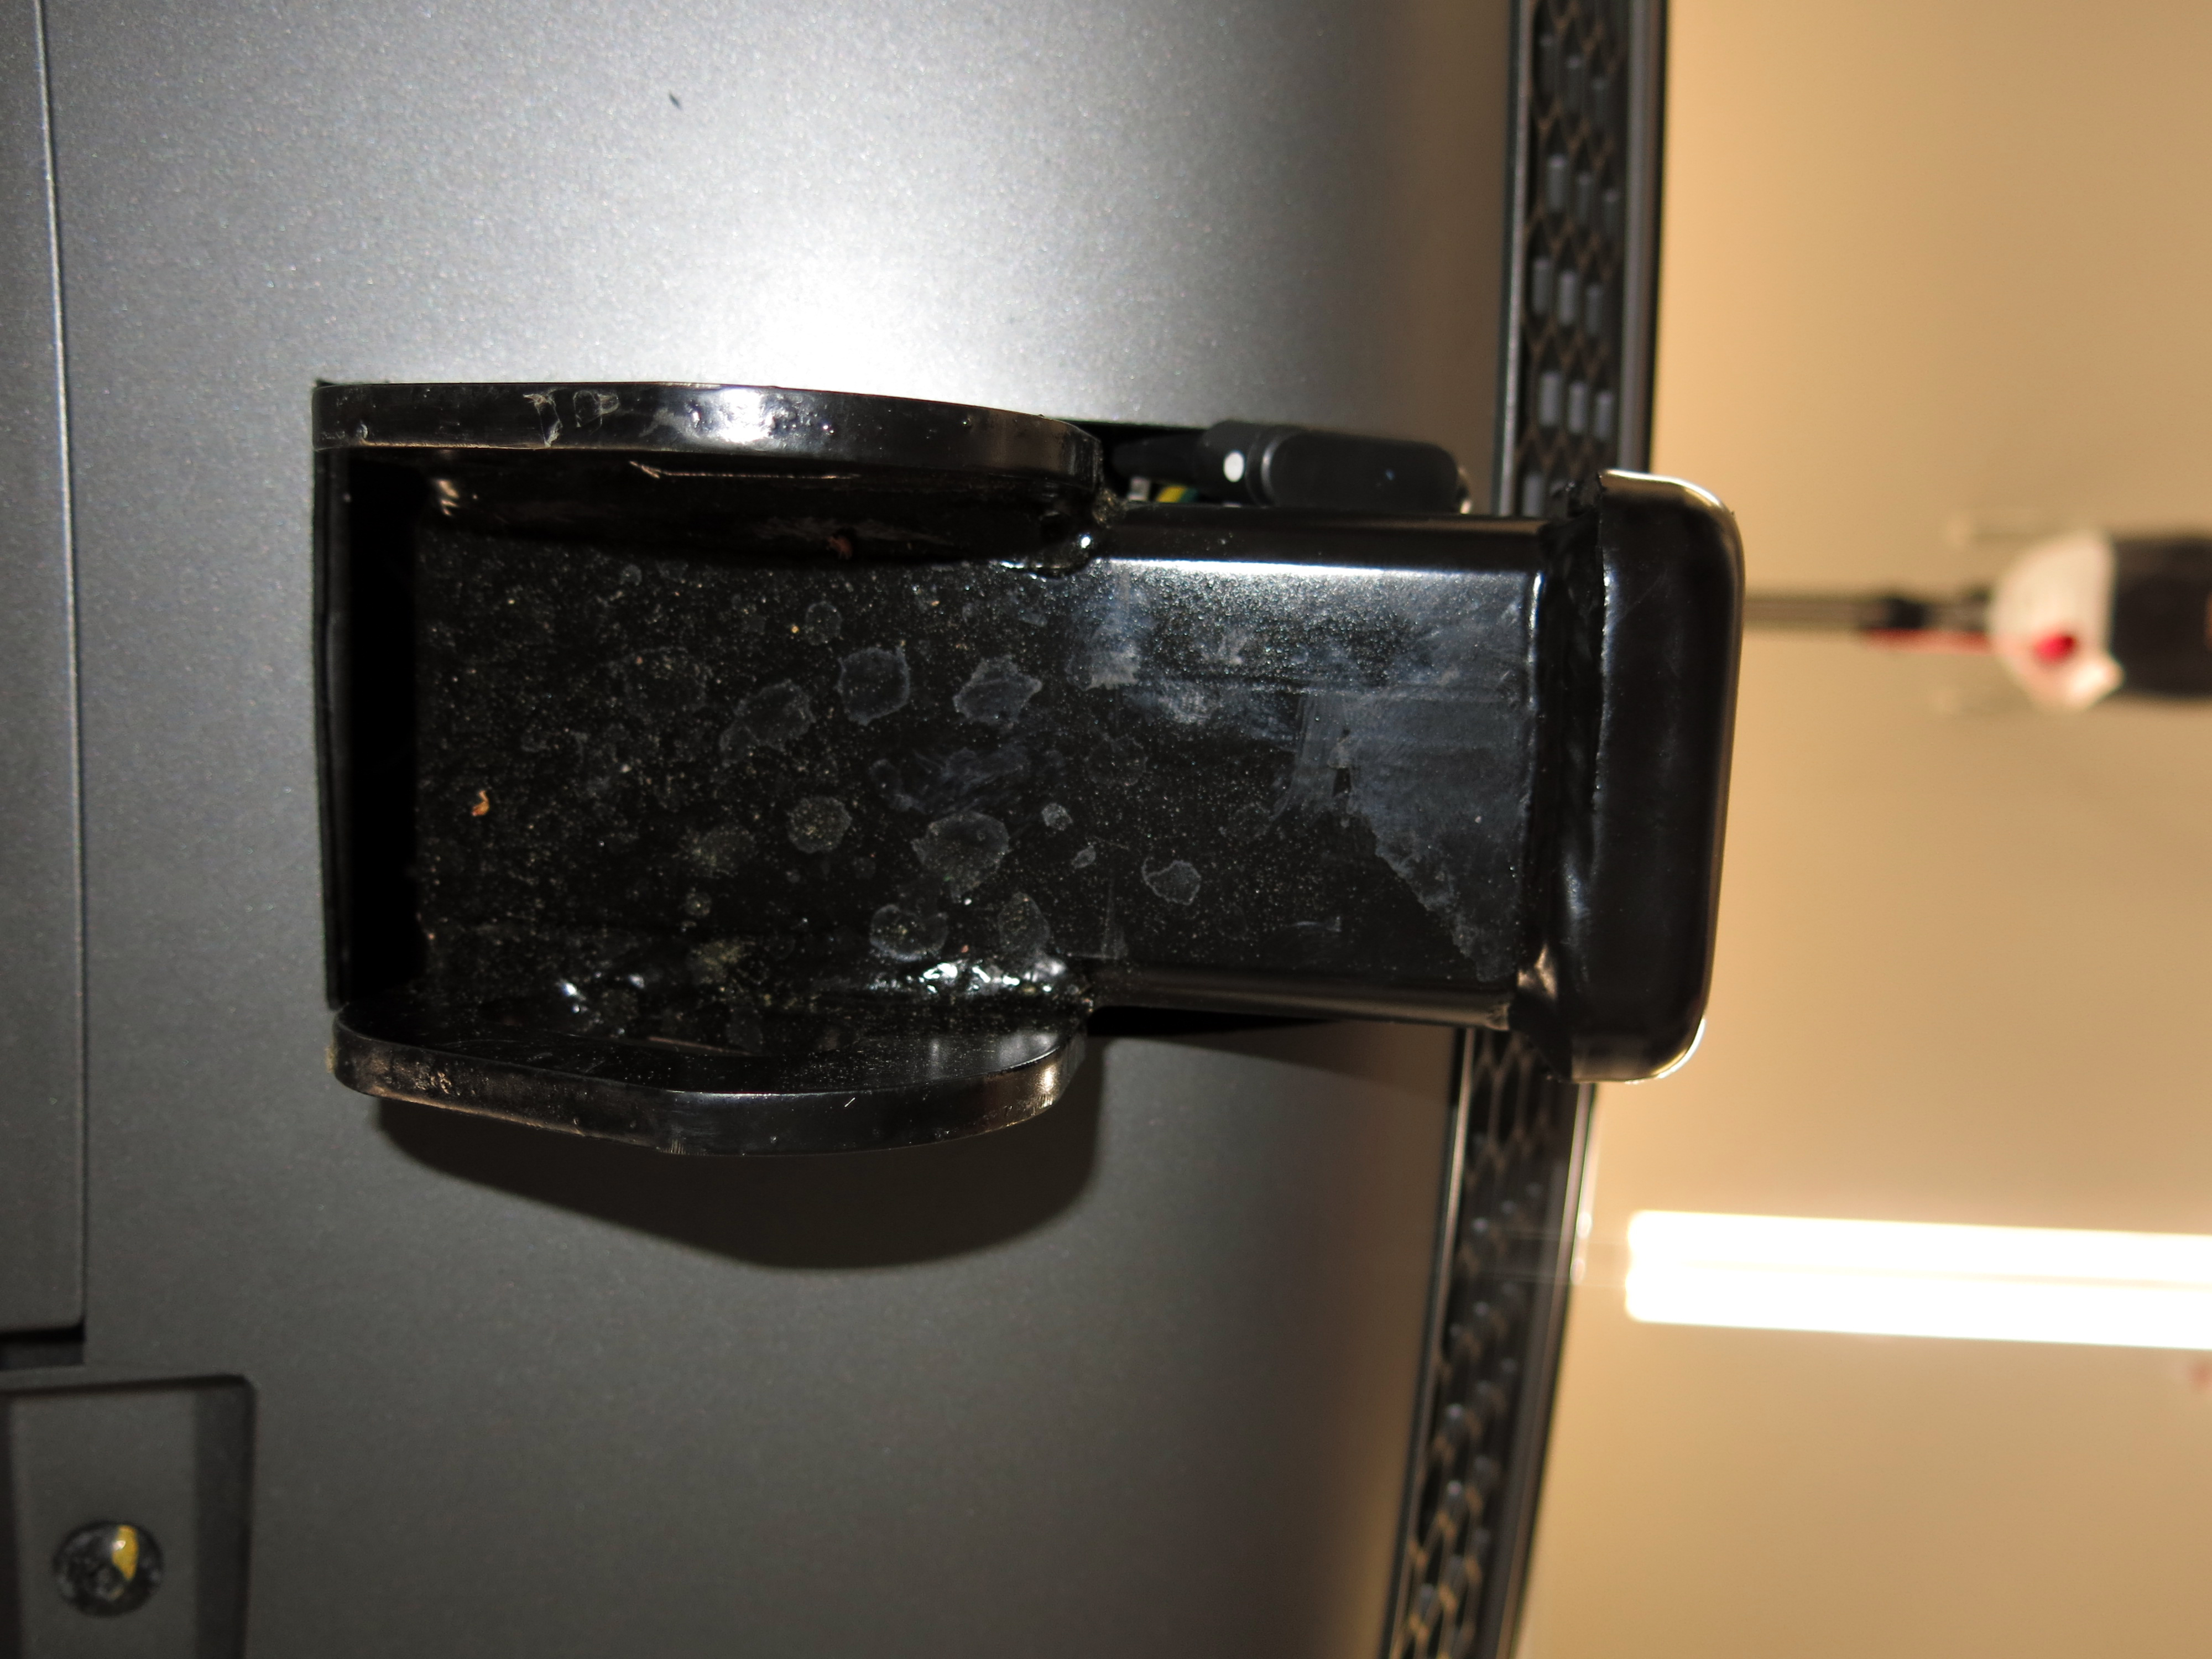
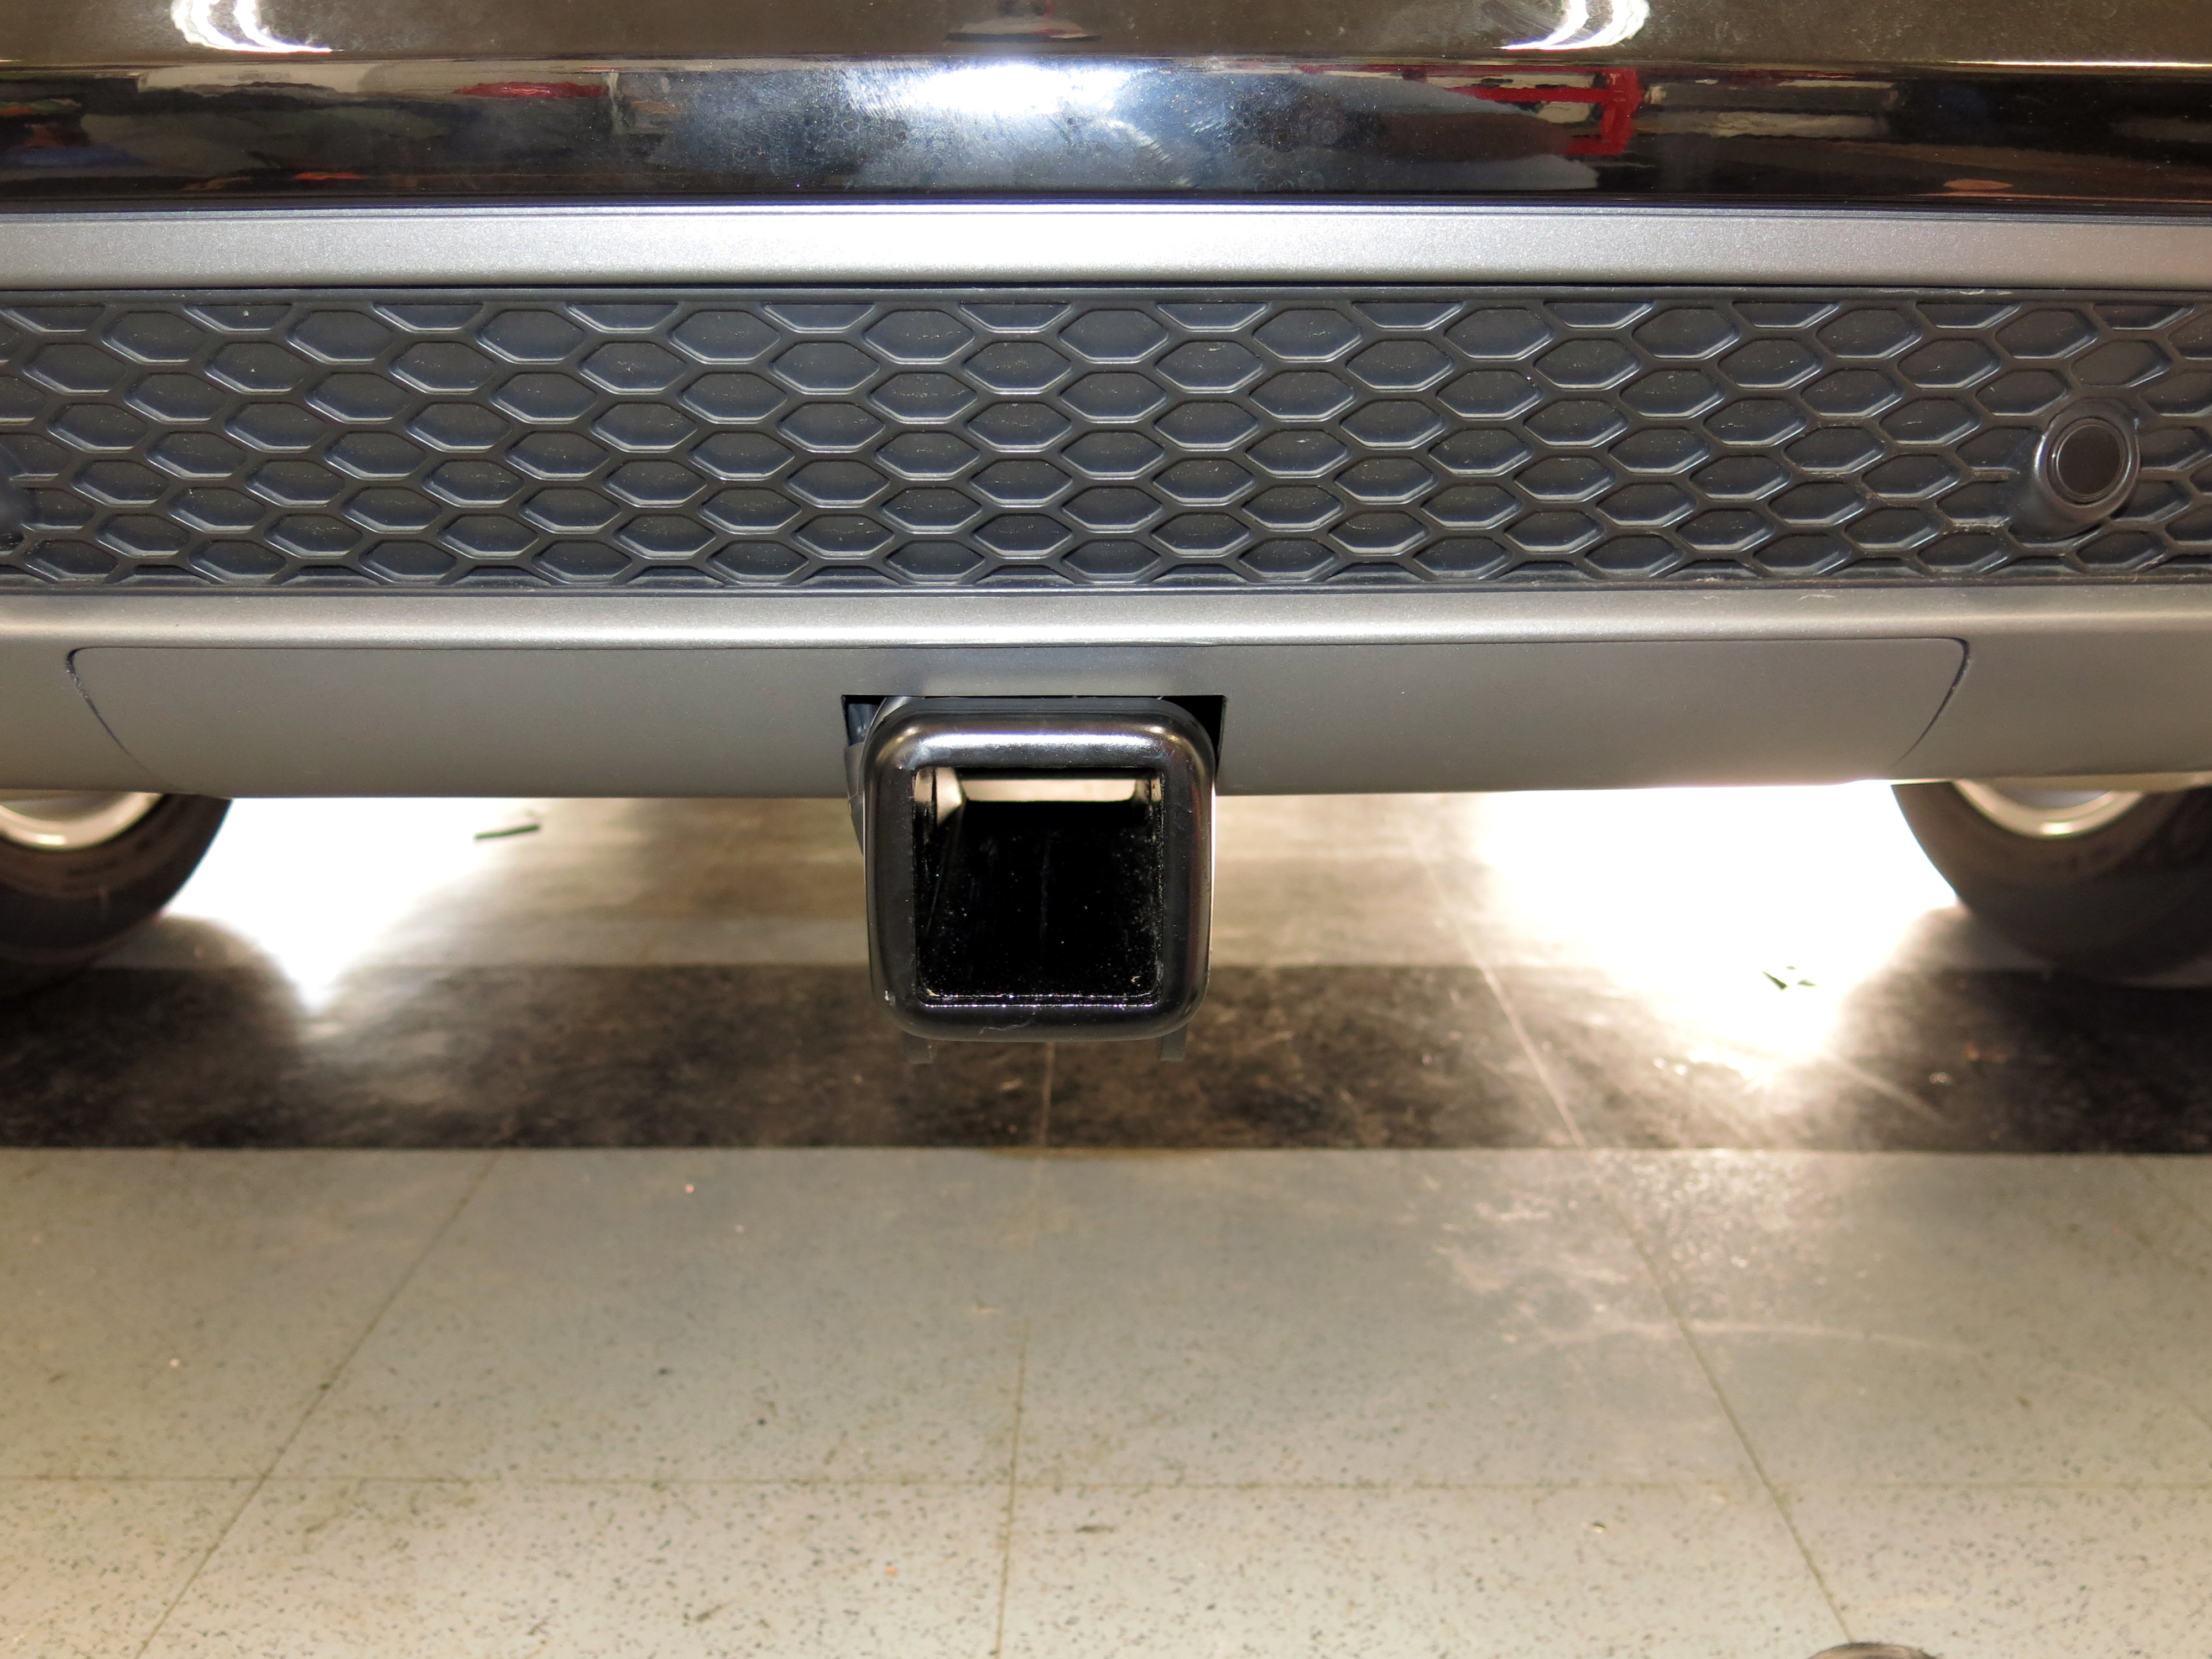
Finally, trim the hitch cover to fit the hitch receiver. (This may not be available on non-S-line or SQ models, meaning you need to trim the bumper cover before installing it. I trimmed mine as tight as possible to make it clean. The wiring fits past on the left side, but it is snug. You can see the green outline is my cut, where the yellow is the factory cut lines. I used a Dremel with a plastic cutting wheel, followed by a file to clean it up.
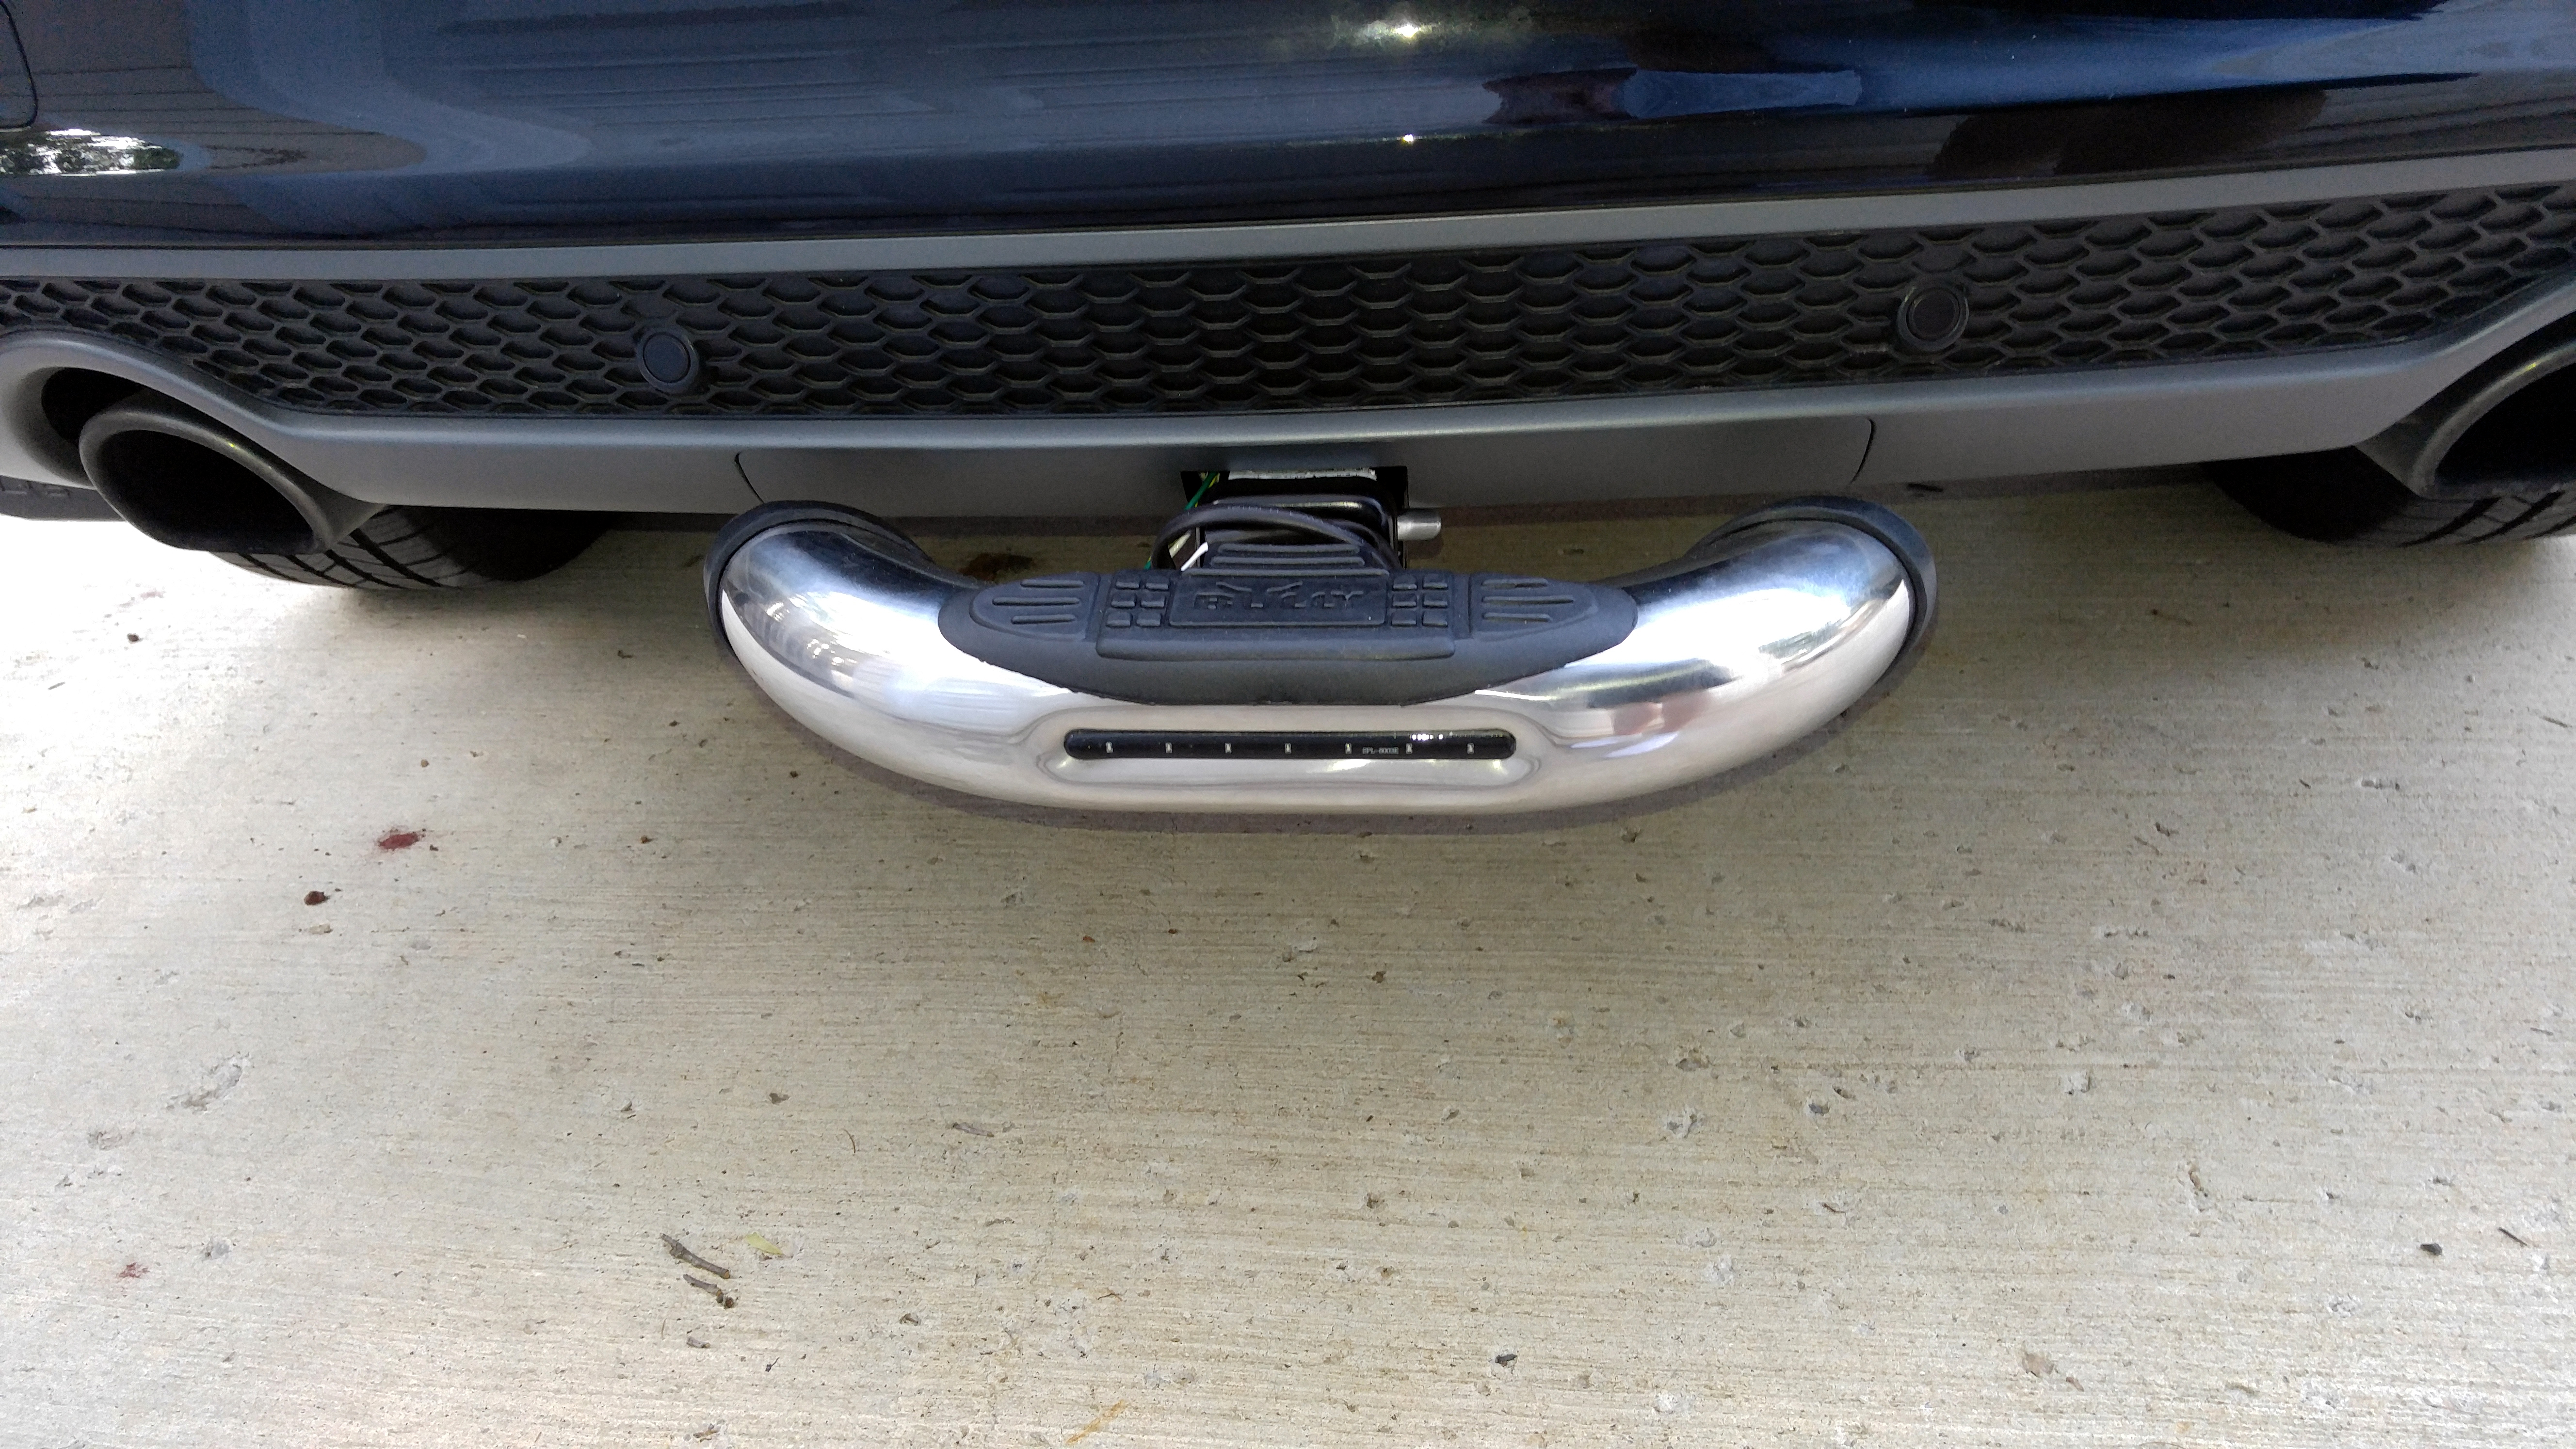
In her previous Nissan Rogue my wife was rear ended 5 times in 6 years, so we installed a little additional protection.
I have more photos, and am happy to answer any questions.
By the way, no issues with the back up sensors.
Jim


#7
04-04-2017, 03:55 PM

Thanks for taking the time to post this! Reading this reminded me that I need to install one as well!

