Audi UR Quattro Rally Build


#22
 02-19-2017, 02:17 PM
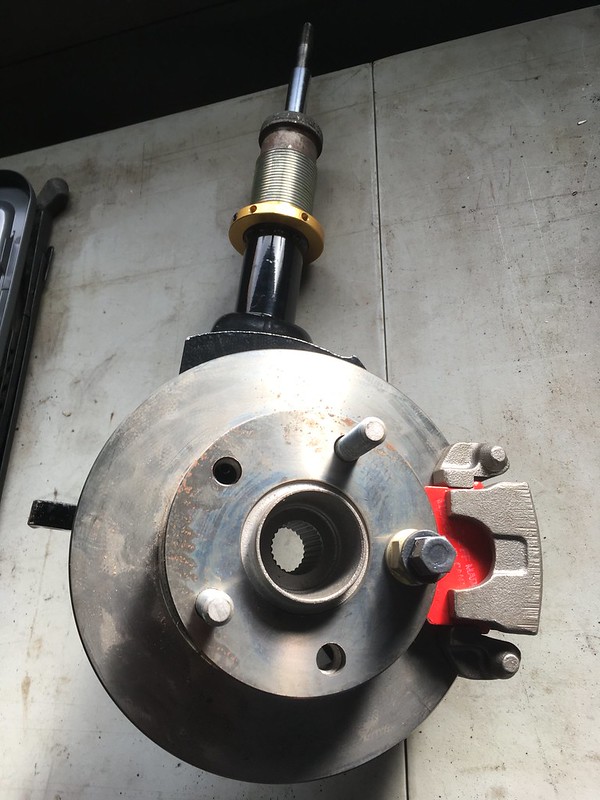
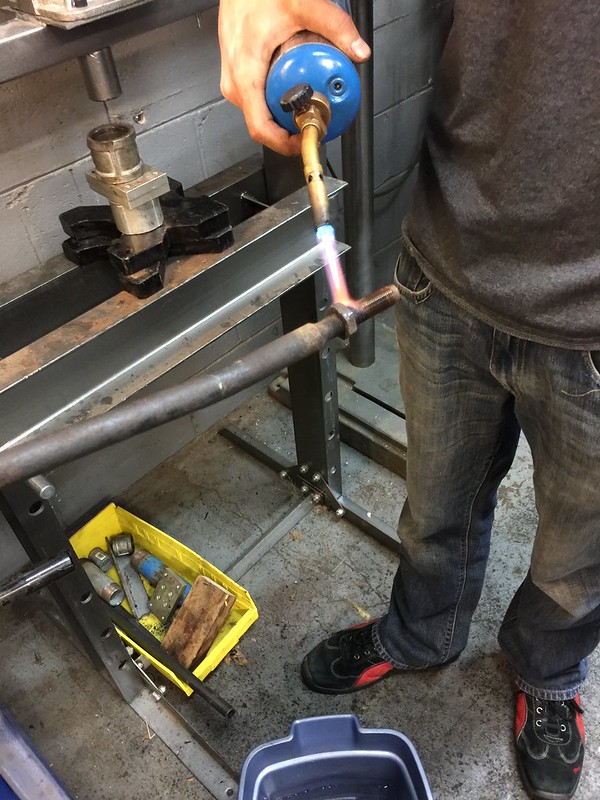
This week at Quattro Squad we started to get our head around the refurbishment projects and alocated some to a couple of the students. Matt took on the struts and brake calipers. The struts are almost complete as the previous owner installed new bearings and Koni dampers, had them powder coated and sourced a coilover kit. More on that later. He also provided varoius remanufactured brake calipers as noted earlier. We are missing caliper calipers for the front twin piston calipers so our friend Werner lent us a set he has in his parts stash to test fit. Now we know what we need and that our pads and dicss will all work together.
by https://www.flickr.com/photos/team_illuminata/, on Flickr
by https://www.flickr.com/photos/team_illuminata/, on Flickr
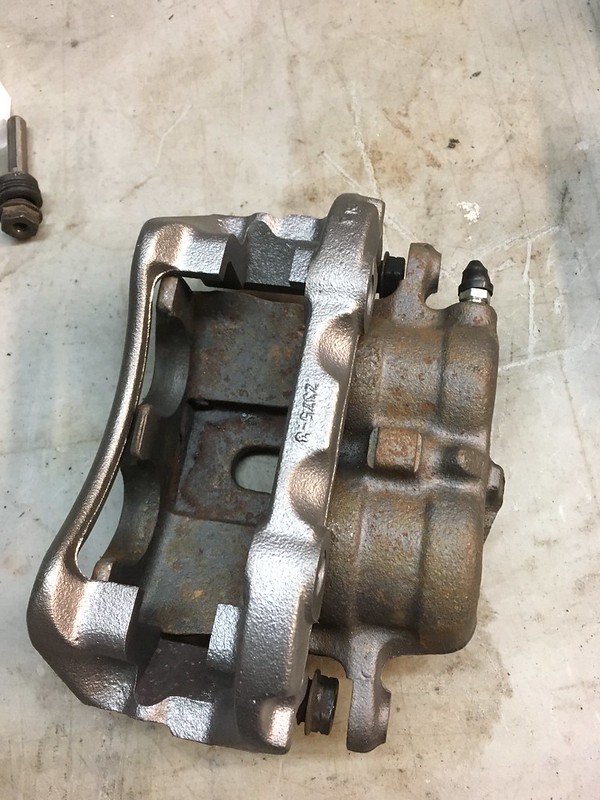
Unfortunately it seems our remanufactured rear calipers are not correct as the handbrake cable and brake line connection will both interfere with the axle. We think they are off a 4000 or similar but fortunately remanufacturd Quattro calipers seem to be still available.
by https://www.flickr.com/photos/team_illuminata/, on Flickr
by https://www.flickr.com/photos/team_illuminata/, on Flickr
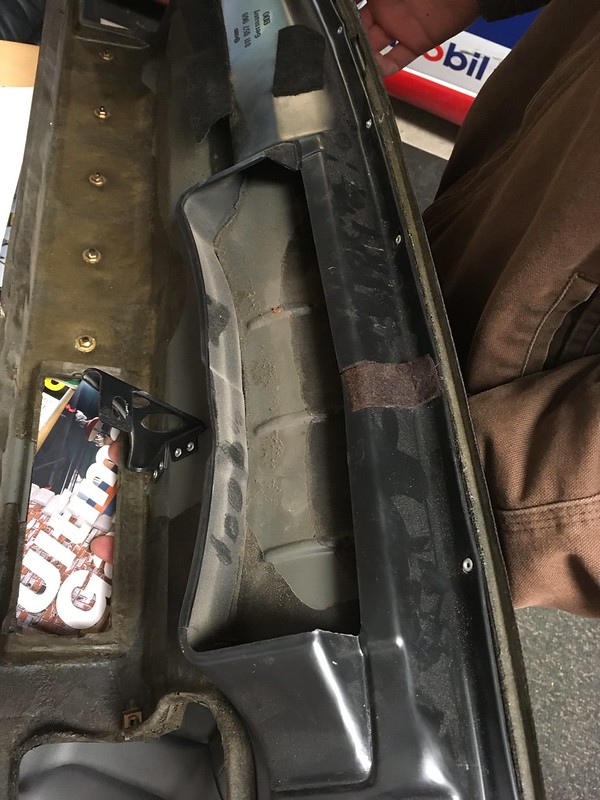
Josh started pulling the various OE parts we need to retain some sort of ventilation and heating system in the car. Apparantyl we need the patr of the dash pad adjacent to the windscreen and the heater box to do this. We spent a good 2 hours of time trying to figure out what part was missing that would connect the defrost air outlet in the heater to the defrost air inlet in the bottom of the dash pad.
by https://www.flickr.com/photos/team_illuminata/, on Flickr
by https://www.flickr.com/photos/team_illuminata/, on Flickr
We couldn't find anything in any parts diagrams nor a stray bit of plastic in our parts bins that seemd to do the job. We were stumped until we stumbled upon this picture from earlier in the build:
by https://www.flickr.com/photos/team_illuminata/, on Flickr
in it you can clearly see that the dash pad mates to the hole in the body work and the heater box mounts below. e couldn't find a missing piece because we weren't missing a piece. DOH!
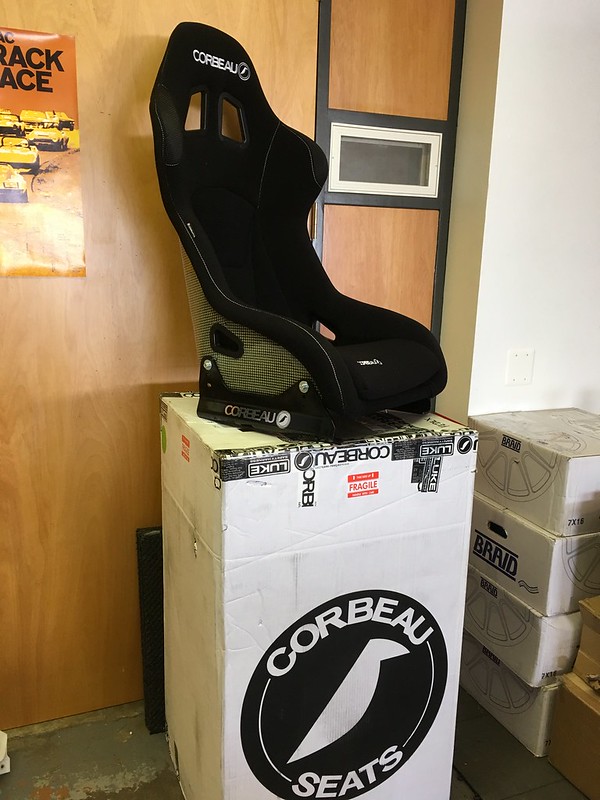
and then today our seats arrived form Corbeau USA. FIA carbon/kevlar SPRINT model in regular and wide sizes.
by https://www.flickr.com/photos/team_illuminata/, on Flickr
by https://www.flickr.com/photos/team_illuminata/, on Flickr
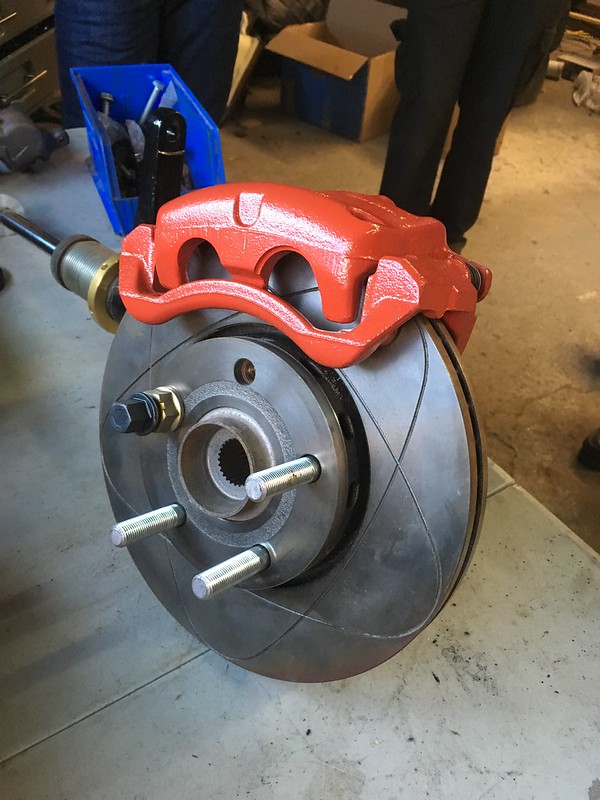
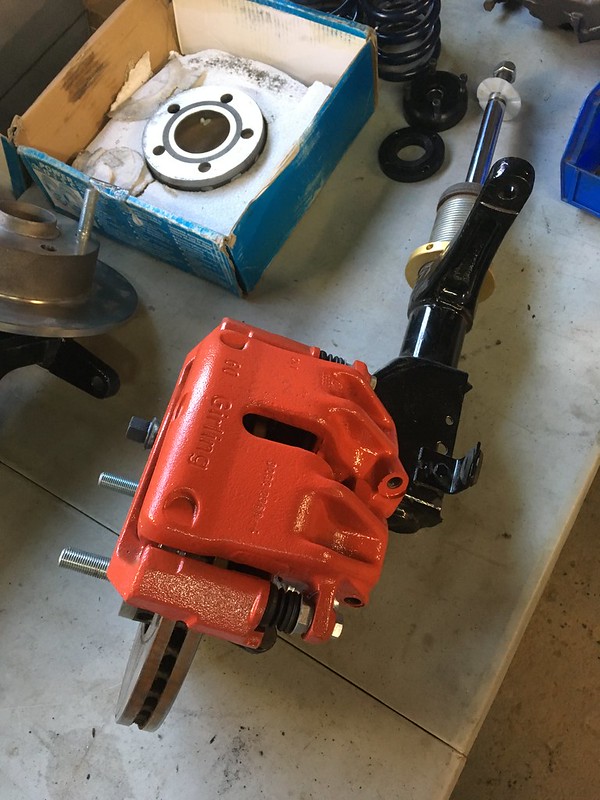
Unfortunately it seems our remanufactured rear calipers are not correct as the handbrake cable and brake line connection will both interfere with the axle. We think they are off a 4000 or similar but fortunately remanufacturd Quattro calipers seem to be still available.

Josh started pulling the various OE parts we need to retain some sort of ventilation and heating system in the car. Apparantyl we need the patr of the dash pad adjacent to the windscreen and the heater box to do this. We spent a good 2 hours of time trying to figure out what part was missing that would connect the defrost air outlet in the heater to the defrost air inlet in the bottom of the dash pad.
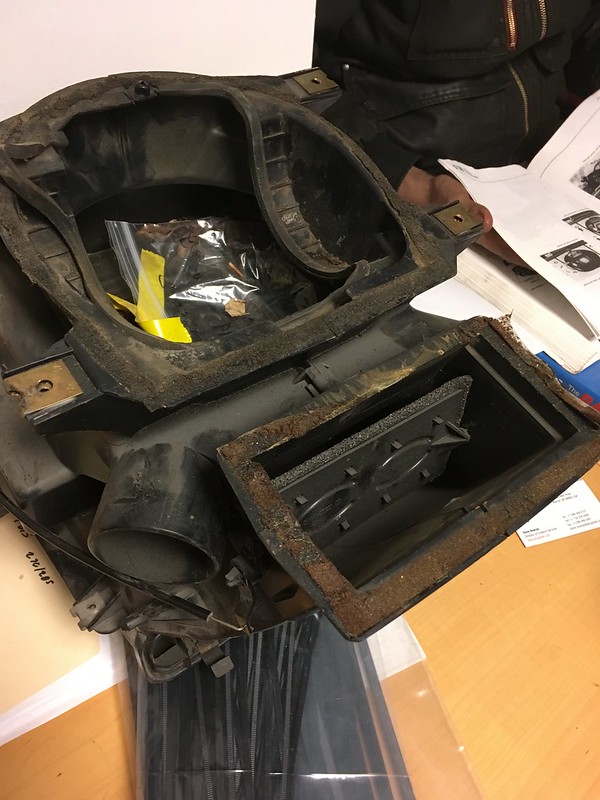
We couldn't find anything in any parts diagrams nor a stray bit of plastic in our parts bins that seemd to do the job. We were stumped until we stumbled upon this picture from earlier in the build:

in it you can clearly see that the dash pad mates to the hole in the body work and the heater box mounts below. e couldn't find a missing piece because we weren't missing a piece. DOH!
and then today our seats arrived form Corbeau USA. FIA carbon/kevlar SPRINT model in regular and wide sizes.


#26
03-09-2017, 04:27 PM
Recent Quattro Squad gatherings have looked more like meetings of the Mono Squad what with exams and scheduling conflicts. Still, we have made some progress.
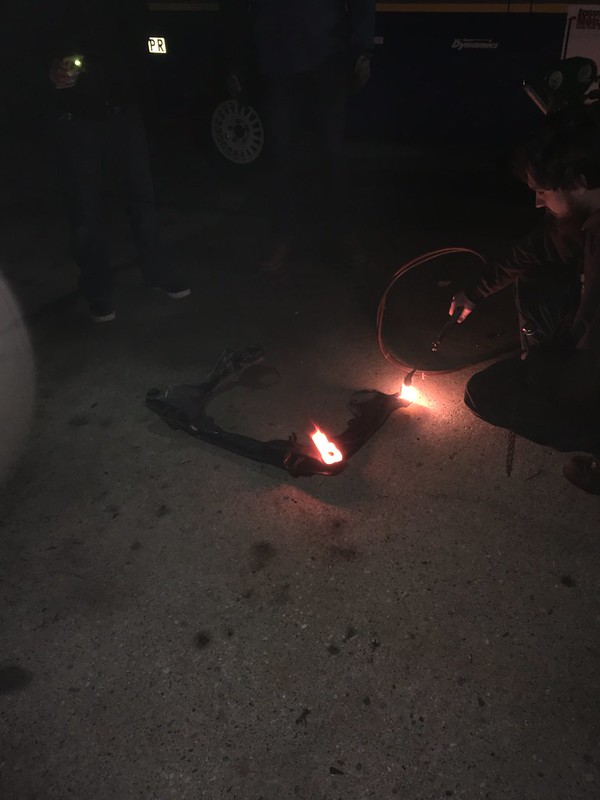
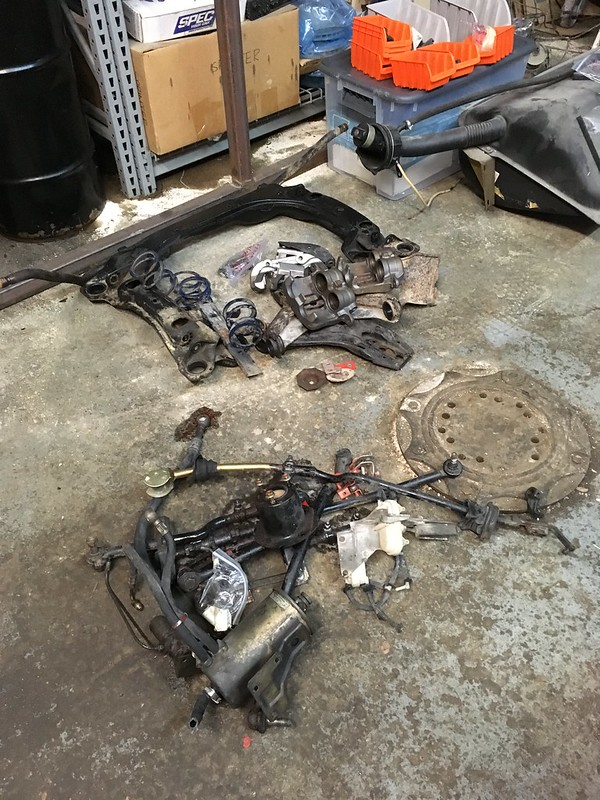
We got the bushings pressed out of the front subframe. We had to burn them first as the bolts were seized in place. Fortunately the front subframe was prepped and powder coated by the previous owner and already has solid bushings.
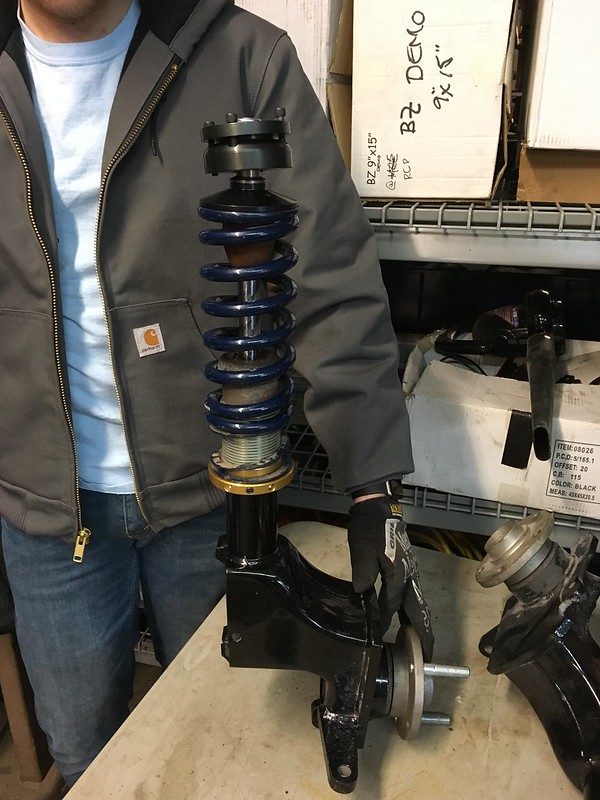
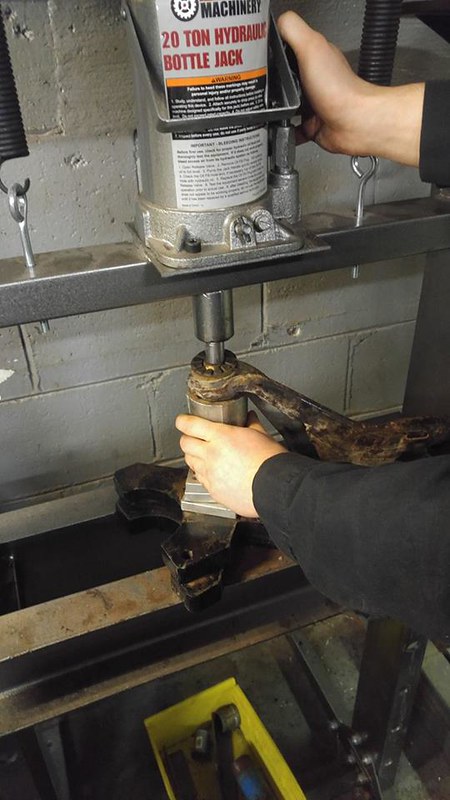
Our aircraft grade top mount bearings arrived too and with the help of the Epicenter Design adapter pieces we managed to assemble a strut.

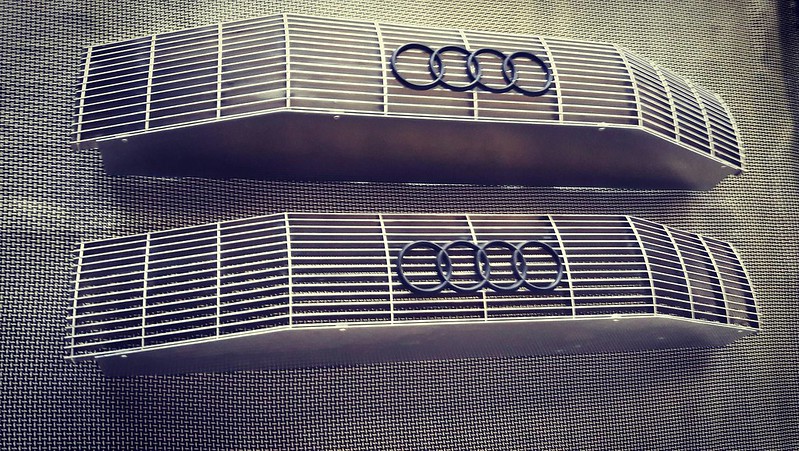
and we received a picture of our completed grill from Cool Wheels this week so that's quite exciting.
Next time we update we hope to have four fully assembled struts complete with brakes and maybe a resealed diff!

We got the bushings pressed out of the front subframe. We had to burn them first as the bolts were seized in place. Fortunately the front subframe was prepped and powder coated by the previous owner and already has solid bushings.
Our aircraft grade top mount bearings arrived too and with the help of the Epicenter Design adapter pieces we managed to assemble a strut.
and we received a picture of our completed grill from Cool Wheels this week so that's quite exciting.
Next time we update we hope to have four fully assembled struts complete with brakes and maybe a resealed diff!
Last edited by team illuminata; 03-09-2017 at 04:38 PM.
#27
03-17-2017, 04:18 PM
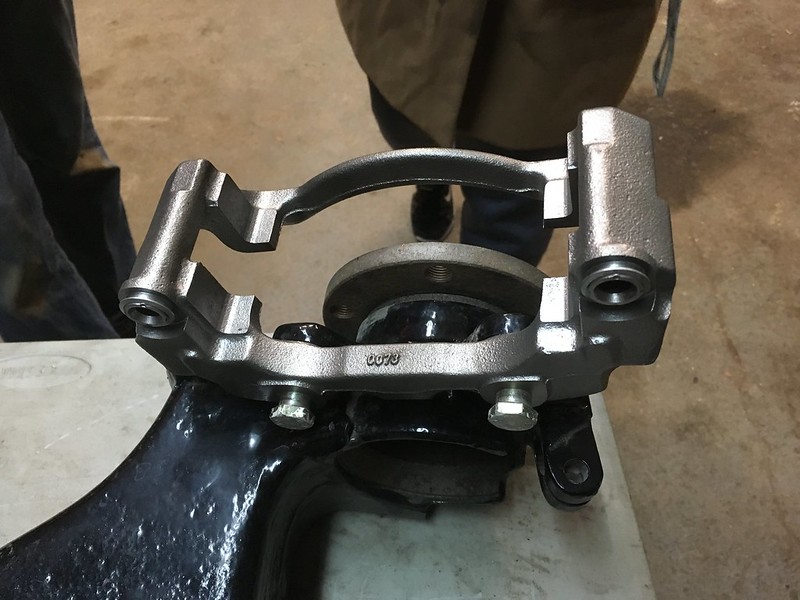
The 83 quattro squad rally build keeps inching forward. A few days ago we received these beautiful G60 brake caliper brackets from a very generous chap on the Motorgeek forum. Thanks Dave, they will be put to good use.
We offered them up to our struts and calipers and they fit perfectly.
Only question now is how to finish these and the calipers for best effect. Options are:
1. Red powder coat
2. Black powder coat
3. Yellow dichromate like OE (gold)
Feel free to weigh in.
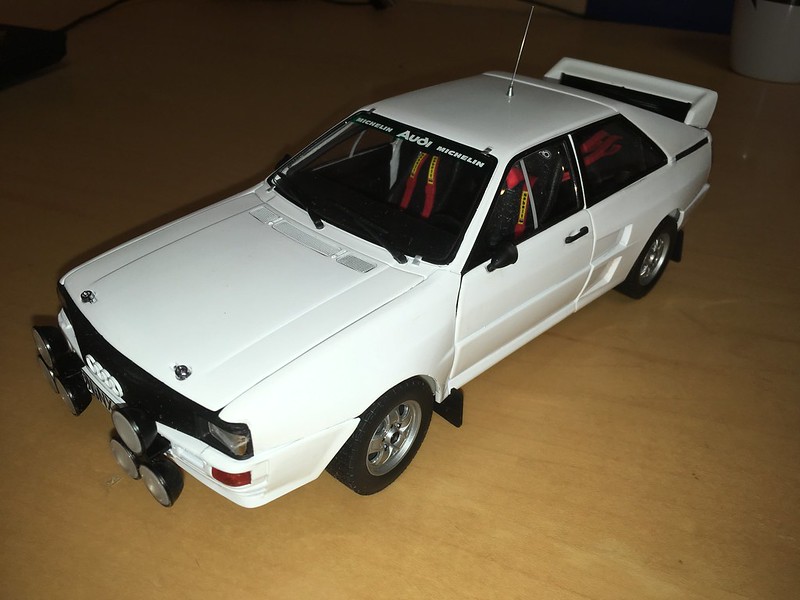
Here's an interesting aspect to the project. We found this 1:18 die-cast model on eBay. Quite cheap; probably because it is quite plain.

We thought it would be a good idea to refinish it in the same livery we are planning to finish the car in. That is, our version of Rothmans with BRAID and TIM logos.

So first we had to strip it:
We are not sure how to proceed from here however. Damn, another bloody Quattro project! Stay tuned.
We offered them up to our struts and calipers and they fit perfectly.
Only question now is how to finish these and the calipers for best effect. Options are:
1. Red powder coat
2. Black powder coat
3. Yellow dichromate like OE (gold)
Feel free to weigh in.
Here's an interesting aspect to the project. We found this 1:18 die-cast model on eBay. Quite cheap; probably because it is quite plain.
We thought it would be a good idea to refinish it in the same livery we are planning to finish the car in. That is, our version of Rothmans with BRAID and TIM logos.
So first we had to strip it:
We are not sure how to proceed from here however. Damn, another bloody Quattro project! Stay tuned.
Last edited by team illuminata; 03-17-2017 at 04:25 PM.
#28
04-05-2017, 11:00 PM
With the caliper brackets fitting well we took the opportunity to muck up a front strut before sending the calipers off to be refinished. We are still not sure what color to refinish them. Options include black or red powder coating or gold zinc dichromate like they were from the factory.

We started in on the model's livery. Tried some blue vinyl but we are not sure it is really suited to cars this small as it won't mold into the crevices well.
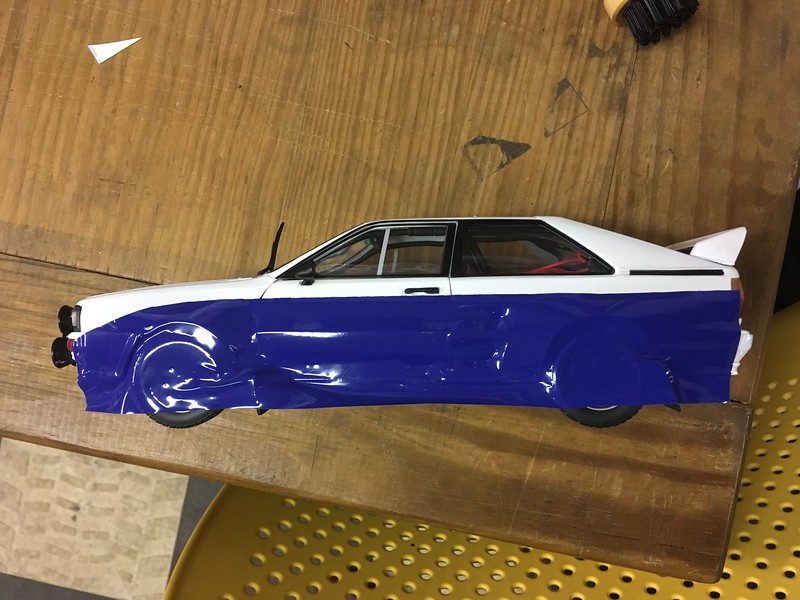
We did one side with the factory droop to the front bumper, which we have never liked, and the other with a full straight line to the back of the headlight. Which do you prefer?
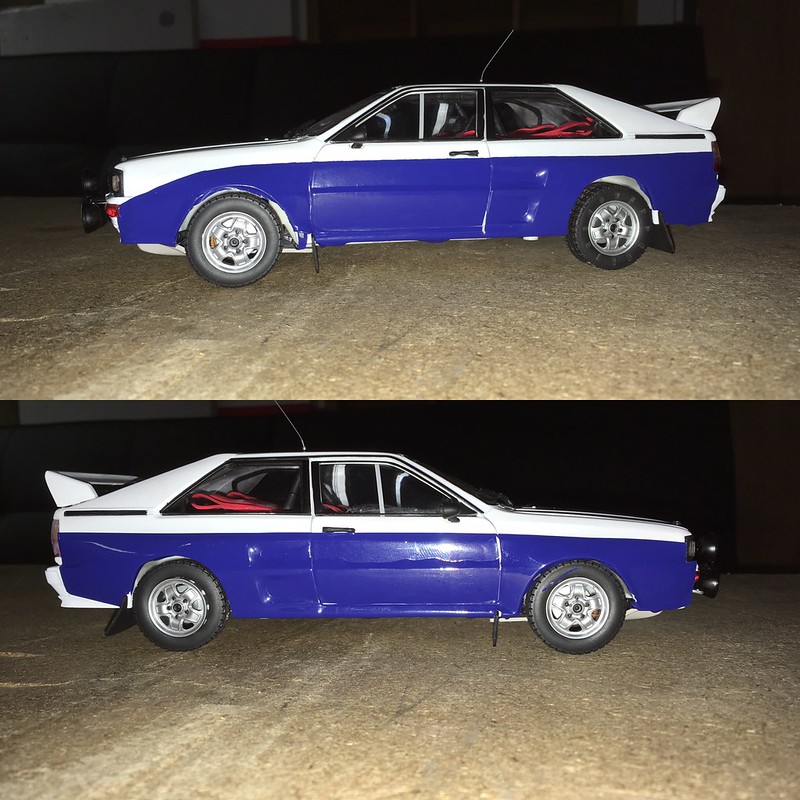
We then added some BRAID decals

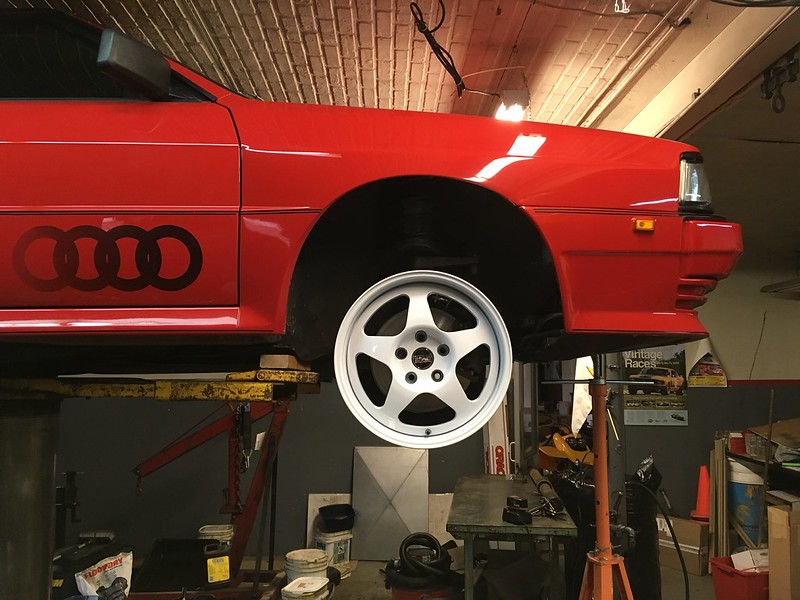
Our BRAID wheels came in from Europe. We love 'em.
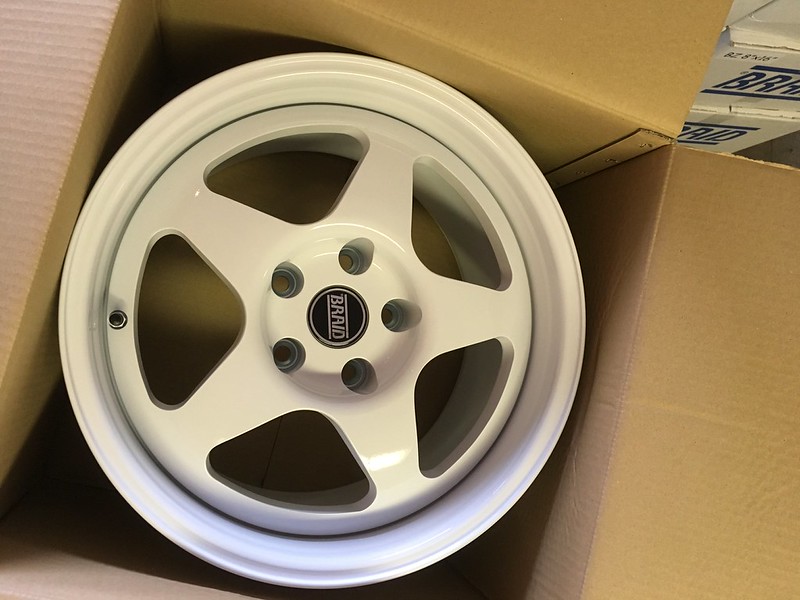
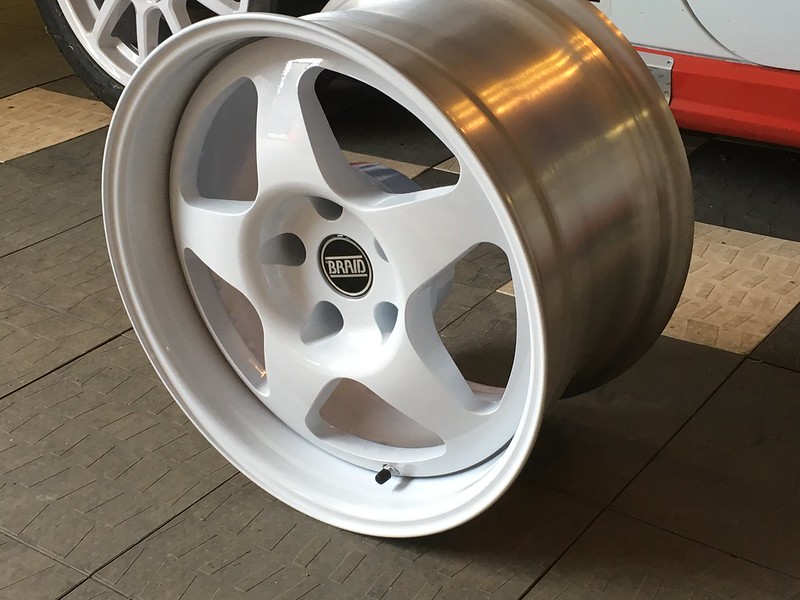
They are three piece with hidden screws and reminiscent of the factory Speedlines. Specs are 16x9, et12. We could resist throwing one on our 85 but, of course, they are way too wide for this car.
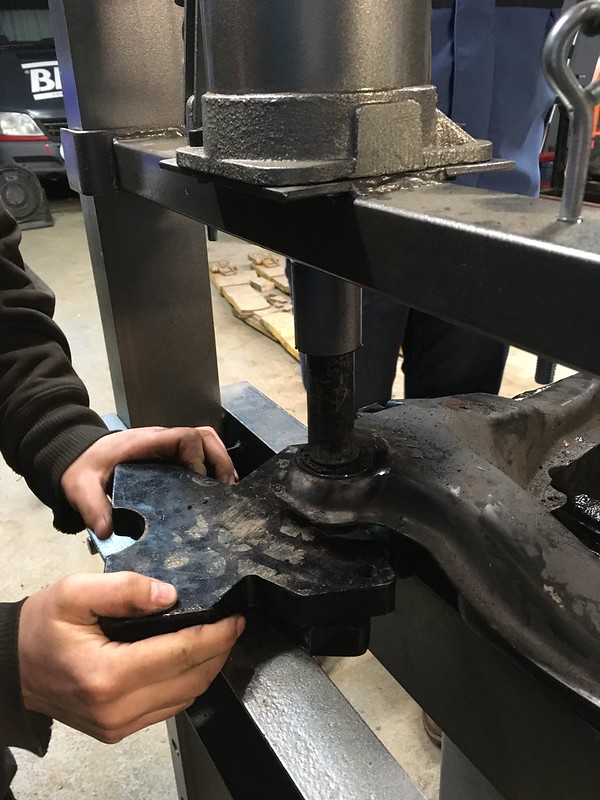
As part of our quest to prep as many parts that are going to need refinishing as possible we pressed out the bushings from the lower control arms.
and disassembled some Hella 2000 lights as we have some chrome ones that need to be black.
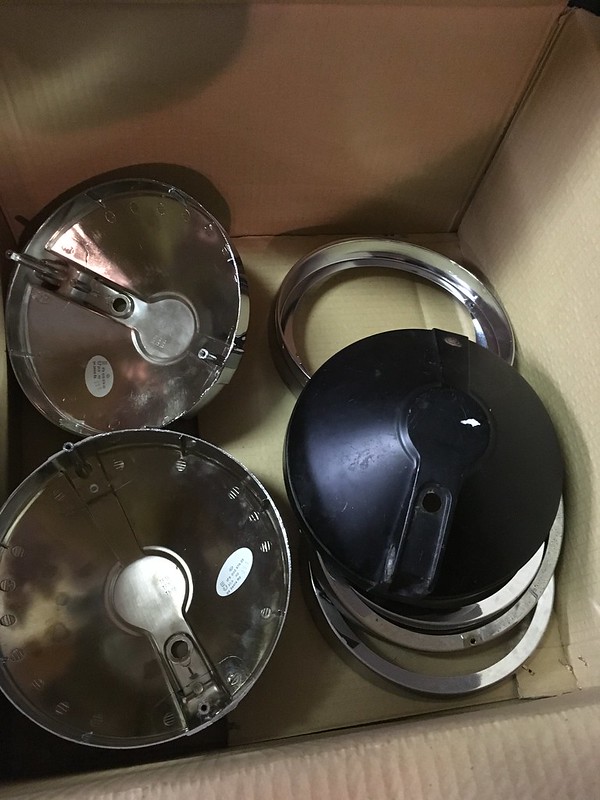
This is the pile so far. The parts in front still need disassembling.
Quattro Squad
We started in on the model's livery. Tried some blue vinyl but we are not sure it is really suited to cars this small as it won't mold into the crevices well.
We did one side with the factory droop to the front bumper, which we have never liked, and the other with a full straight line to the back of the headlight. Which do you prefer?
We then added some BRAID decals
Our BRAID wheels came in from Europe. We love 'em.
They are three piece with hidden screws and reminiscent of the factory Speedlines. Specs are 16x9, et12. We could resist throwing one on our 85 but, of course, they are way too wide for this car.
As part of our quest to prep as many parts that are going to need refinishing as possible we pressed out the bushings from the lower control arms.
and disassembled some Hella 2000 lights as we have some chrome ones that need to be black.
This is the pile so far. The parts in front still need disassembling.
Quattro Squad
Last edited by team illuminata; 04-05-2017 at 11:03 PM.
#29
05-02-2017, 01:41 PM
Scattered progress since our last update but progress non-the-less.
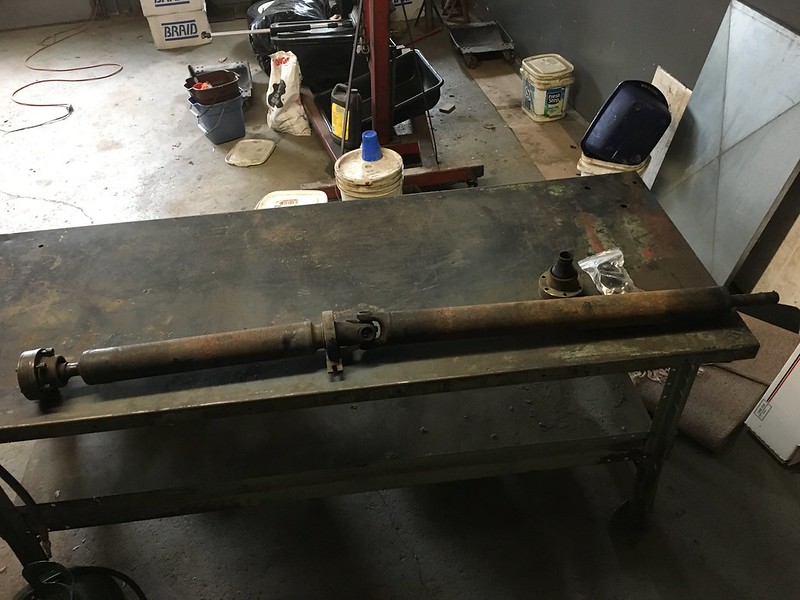
We started to attack the drive shaft last week. The CV joints seem a bit stiff so we are going to clean them out and see if we can save them. If not we think we can replace them. The universal joint in the center seems fine but we might have to destroy it removing the center support bearing which is also fine but whose rubber bushing is decidedly squishy.
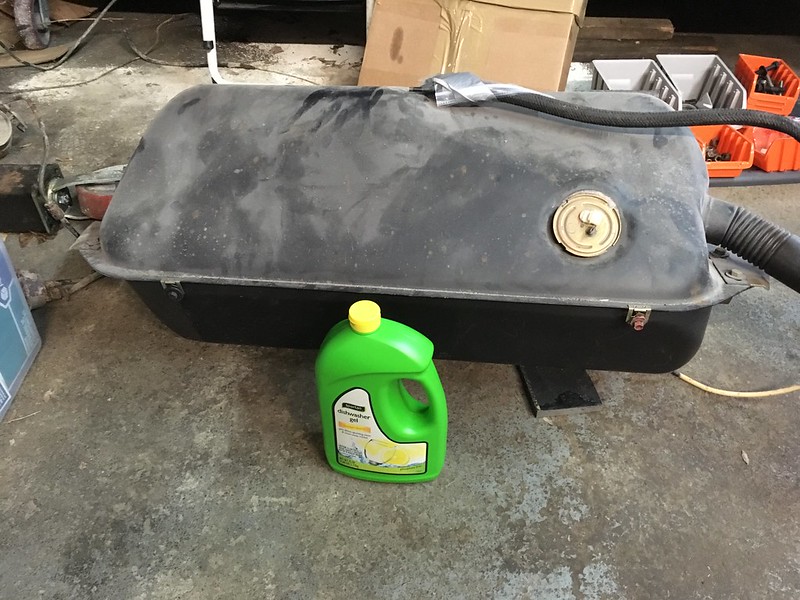
We also started refurbishing the fuel tanks. Initial inspection revealed only surface rust so we cleaned it out with some dish washer detergent.

We had a visit from the guys who run DIYAUTO.com https://www.diyauto.com/ last week, Nick and Steve Balistreri. DIYAUTO.com�s goal is to collate all the cool information in the various forum build threads on the web so the information is easy to search and the knowledge is not lost to us auto enthusiasts. We are proud they have both our quattro builds and our 911 build on their site.
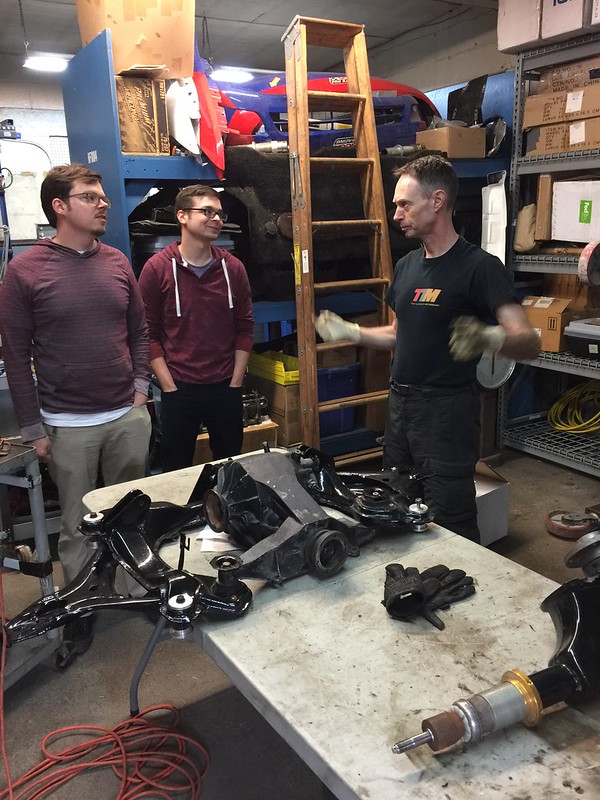
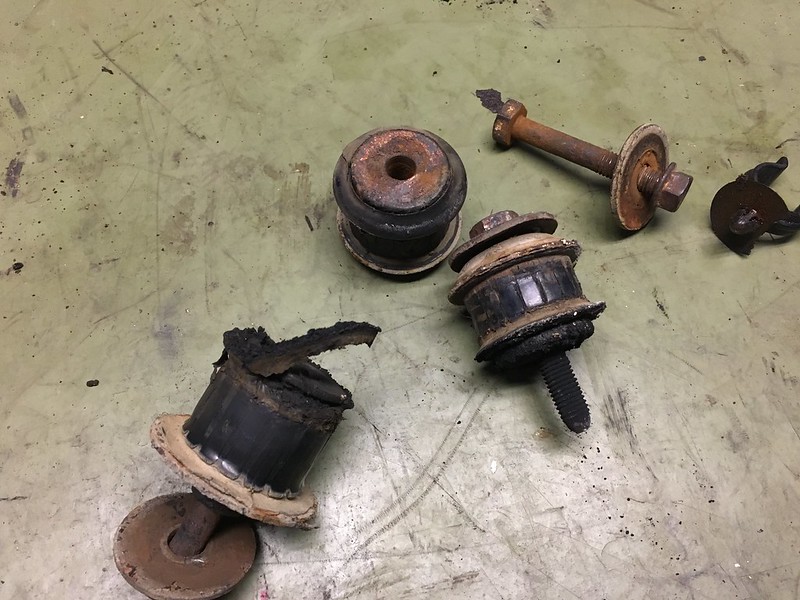
We continued to dismantle parts that are being sent out for refinishing. This week it was the turn of the suspension components. These did not want to come apart and the students learnt a great deal about persistence and the use of heat wrenches.
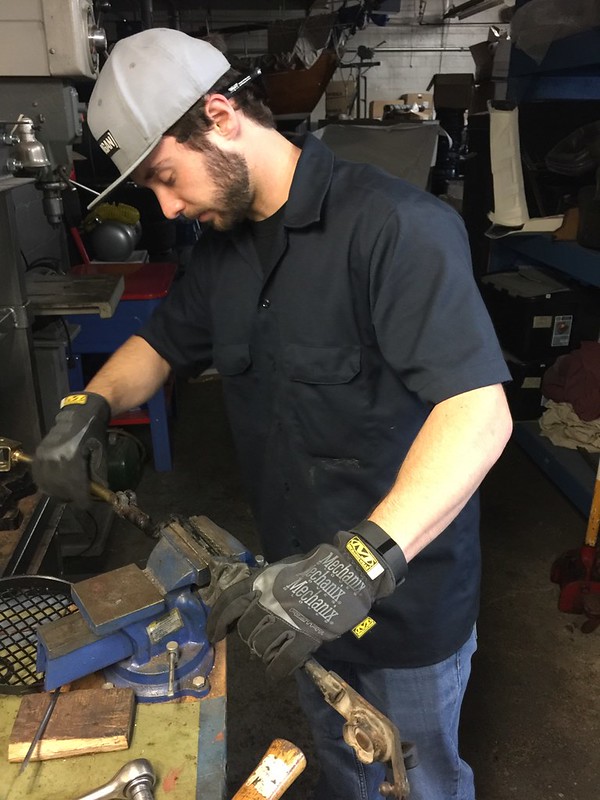
We�re not even sure we can get replacement ball joints and bushings for this stuff and may have to fabricate our own.
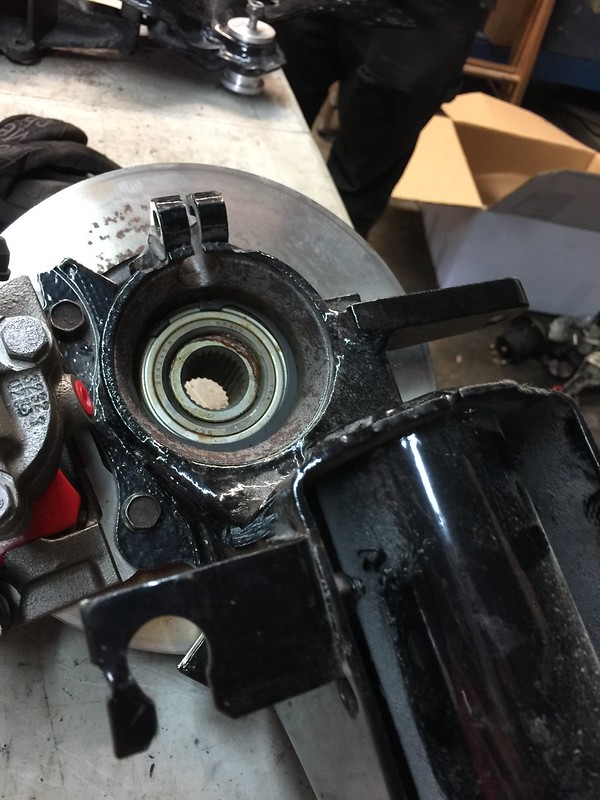
We optimistically mocked up the rear calipers again to see if we can make them work. Both the handbrake cable and the brake fluid line want to go through the rear axles but as we intend using a hydraulic handbrake we wanted to see if we could make a banjo fitting attach. Think not:
Next update we hope to share some news about the shell. Stay tuned.
We started to attack the drive shaft last week. The CV joints seem a bit stiff so we are going to clean them out and see if we can save them. If not we think we can replace them. The universal joint in the center seems fine but we might have to destroy it removing the center support bearing which is also fine but whose rubber bushing is decidedly squishy.
We also started refurbishing the fuel tanks. Initial inspection revealed only surface rust so we cleaned it out with some dish washer detergent.
We had a visit from the guys who run DIYAUTO.com https://www.diyauto.com/ last week, Nick and Steve Balistreri. DIYAUTO.com�s goal is to collate all the cool information in the various forum build threads on the web so the information is easy to search and the knowledge is not lost to us auto enthusiasts. We are proud they have both our quattro builds and our 911 build on their site.
We continued to dismantle parts that are being sent out for refinishing. This week it was the turn of the suspension components. These did not want to come apart and the students learnt a great deal about persistence and the use of heat wrenches.
We�re not even sure we can get replacement ball joints and bushings for this stuff and may have to fabricate our own.
We optimistically mocked up the rear calipers again to see if we can make them work. Both the handbrake cable and the brake fluid line want to go through the rear axles but as we intend using a hydraulic handbrake we wanted to see if we could make a banjo fitting attach. Think not:
Next update we hope to share some news about the shell. Stay tuned.
#30
05-27-2017, 07:25 PM
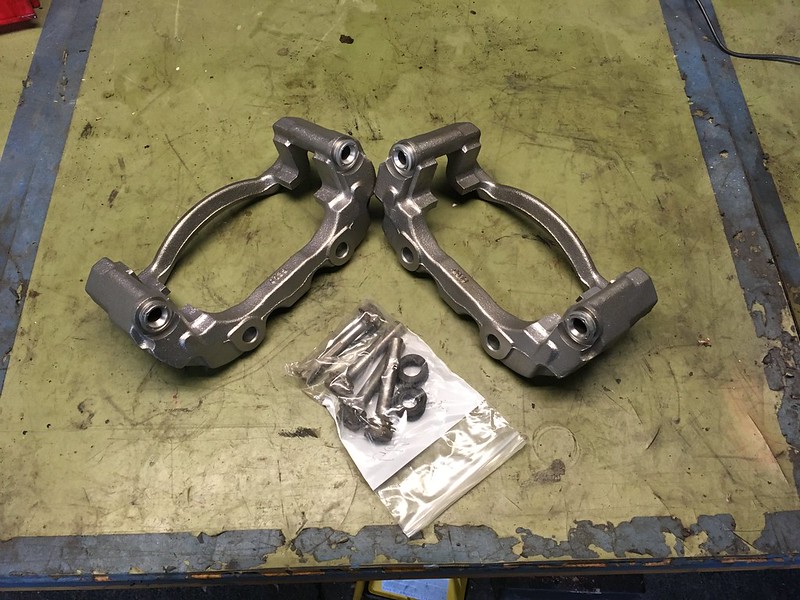
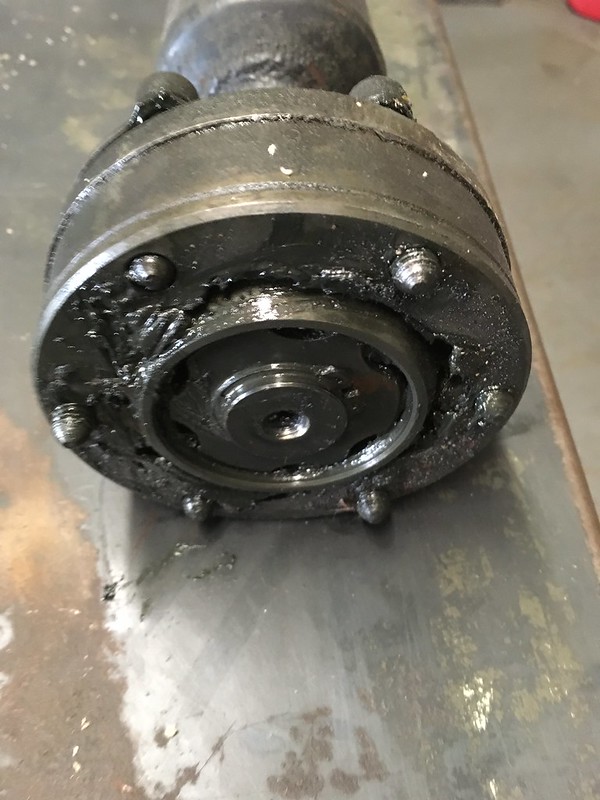
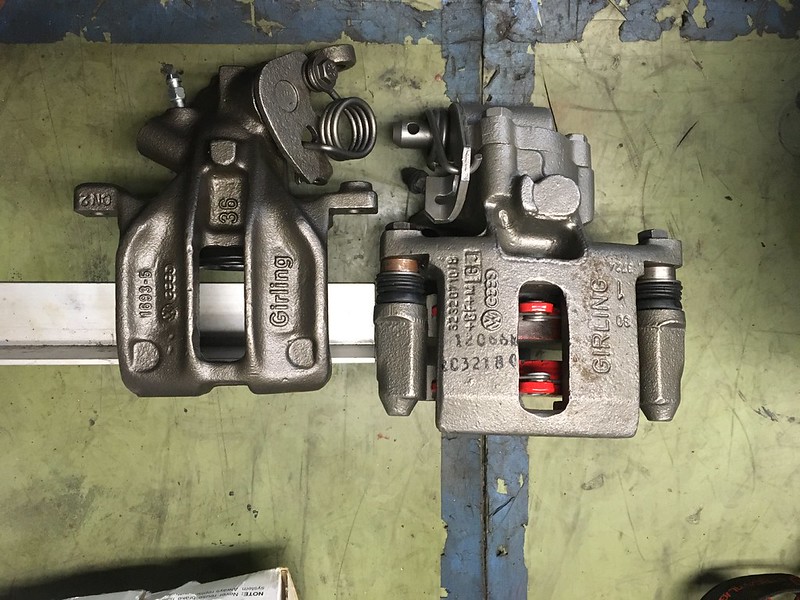
Been working on a few things but nothing too exciting. we finally found some proper UR quattro rear brake calipers
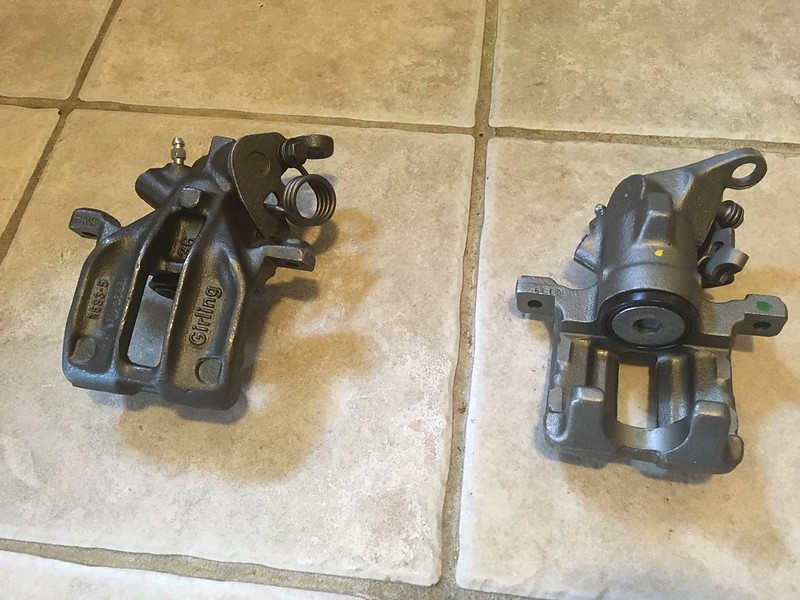
You can see how the handbrake cable and brake line come in from the back instead of the side therefor avoiding the axle.

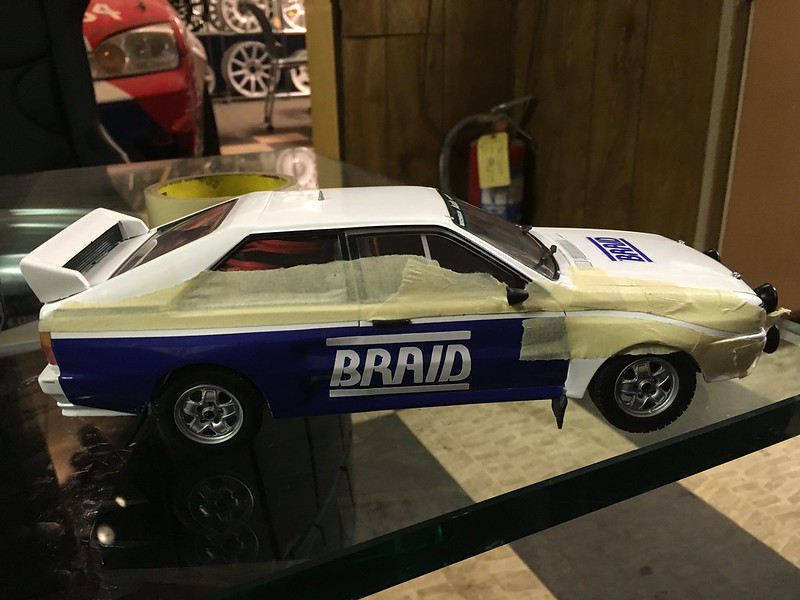
Amanda made some more incremental progress on the model. She says she's going to paint the stripes next.
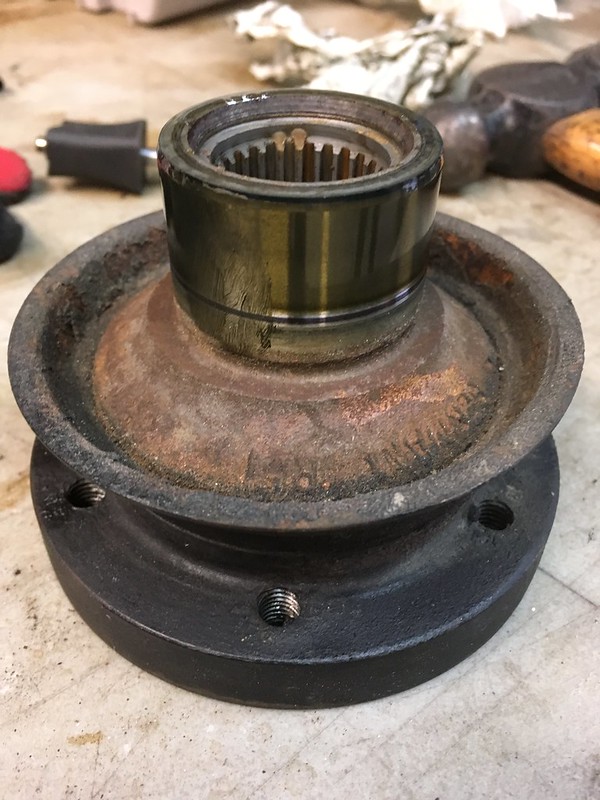
Then we started on resealing the rear differential.
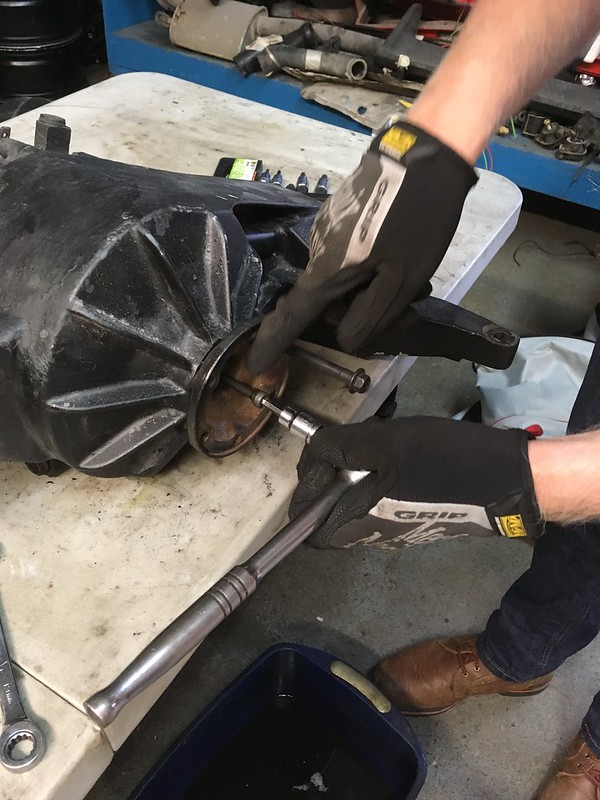

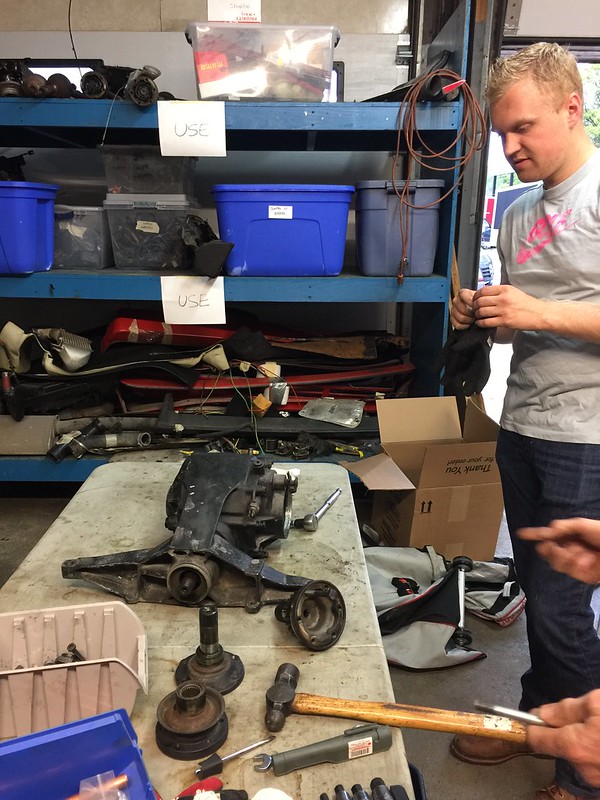
No wear groove on the input flange
You can see how the handbrake cable and brake line come in from the back instead of the side therefor avoiding the axle.
Amanda made some more incremental progress on the model. She says she's going to paint the stripes next.
Then we started on resealing the rear differential.
No wear groove on the input flange