MetalMan's 1.8T FrankenTurbo (F4H-L, F21) Build Thread
#271
 06-01-2015, 01:57 PM


On Friday I swapped out the fuel pump, and also replaced fuel filter (old one was only 12k miles old).
After cranking enough to build fuel pressure, it fired right up and has been running fine since.
Strange that the fuel pump died as it did! Tore apart the old pump and didn't see anything obviously wrong, but the commutator did look like it was wearing unevenly so perhaps the brushes simply stopped making contact with part of it.
Last edited by MetalMan; 06-29-2015 at 10:18 AM.
#272
06-29-2015, 03:11 PM
Since last update a few things have changed:
1) installed ECS Tuning stainless steel rear brake lines, and bled both rear brakes.
2) washed, clay-bar'd, and waxed.
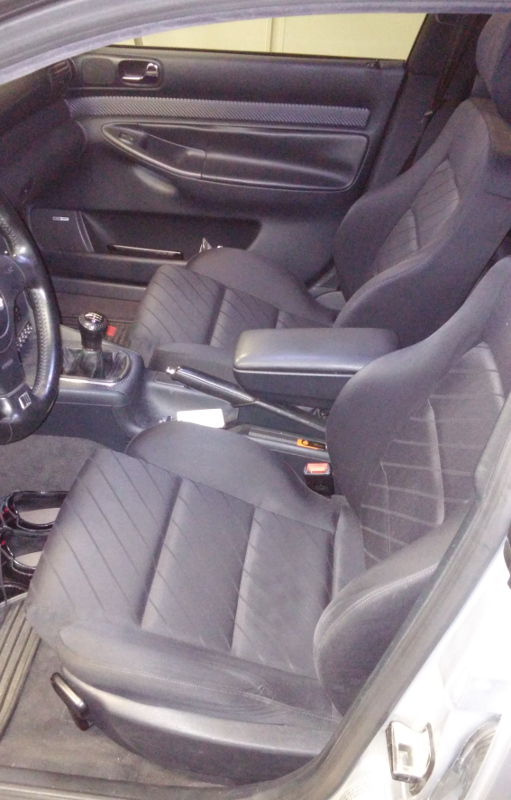
3) picked up, thoroughly cleaned, and installed a nice set of black sport cloth seats:
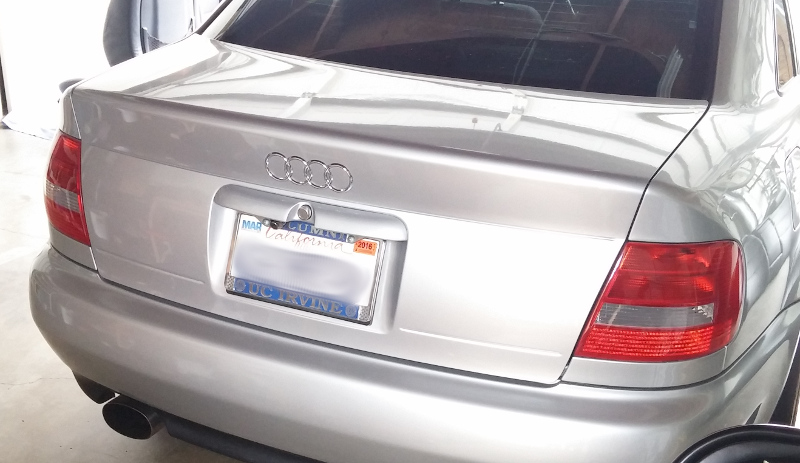
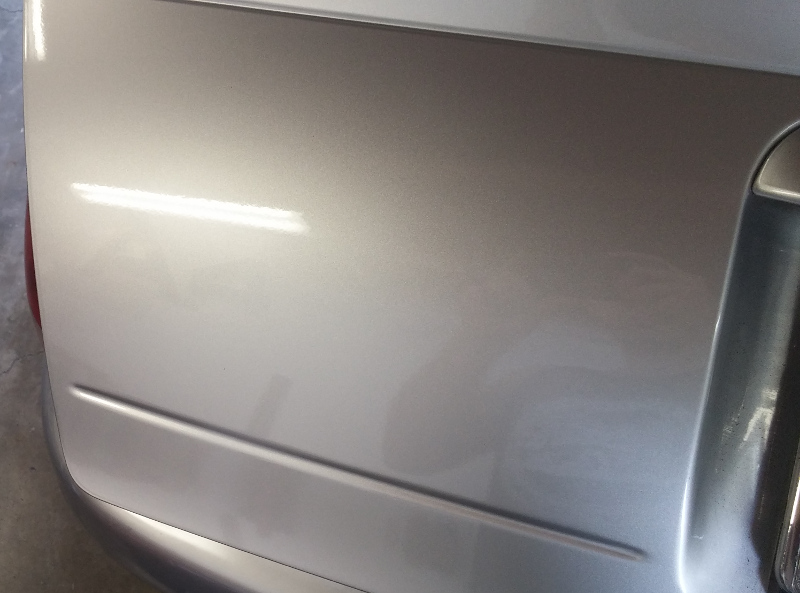
4) Debadged / removed emblems from trunk lid: A4 , 1.8T , Quattro. They left a little ghost image behind, slightly visible in the right light:
5) Began prepping the trunk lip spoiler that was on my old 1998 A4 (actually it came off due to crappy re-spray on the trunk lid lol). Might even put this on today, and give it a nice clay bar and wax job.
1) installed ECS Tuning stainless steel rear brake lines, and bled both rear brakes.
2) washed, clay-bar'd, and waxed.
3) picked up, thoroughly cleaned, and installed a nice set of black sport cloth seats:
4) Debadged / removed emblems from trunk lid: A4 , 1.8T , Quattro. They left a little ghost image behind, slightly visible in the right light:
5) Began prepping the trunk lip spoiler that was on my old 1998 A4 (actually it came off due to crappy re-spray on the trunk lid lol). Might even put this on today, and give it a nice clay bar and wax job.
#273
07-13-2015, 11:18 AM
Had a little fun over the weekend...
1) Thursday night did a Seafoam-in-vacuum-lines treatment, and a little in the oil. Planned for an oil and spark plug change the next day.
2) While Seafoam-ing, noticed plenty of white smoke exiting from the turbo area!! Closer analysis suggested it was the turbo-to-manifold gasket that needed replacement.
3) Around 2pm on Friday (day off) I drove up on ramps and started draining oil. Meanwhile began pulling off airbox, turbo support brace, turbo oil drain line, etc.
4) With engine cooled down enough, began removal of turbo mounting bolts. Too bad they didn't get the memo... 2 of the 3 bolts took forever to remove, because the threaded holes ate up the bolt threads!!
5) I wasn't planning to drain coolant, or remove the turbo from car (required separating turbo from cat), but I did both. I HATE draining coolant from turbo-to-block coolant drain banjo fitting.
6) Drilled out the 2 damaged turbo mounting bolt holes, tapped them for M10x1.5 helicoil, and installed 2 helicoils. It was 1am by this time, and way past bed time.
7) Saturday, spent ~6 hours on reassembly. Everything went together well except I wasted maybe 30mins on trying to start threading on the coolant drain line banjo fitting to the block. If only I had dropped the AC compressor in the first place...
During the whole time I was really thinking negatively about FrankenTurbo. If I had a quarter for every time I've pulled out a mangled turbo mounting bolt from a FT turbine housing, I'd be rich... and this time around I had 034 Motorsport's high-heat antiseize on the bolts!
But now without that pre-turbo exhaust leak the engine drives more smoothly, potentially curing a driveability issue I had for quite a while.
#274
08-17-2015, 03:29 PM
So a little bit has happened to my A4 lately, but not a whole lot.
1) About a month ago, I did a Seafoam treatment through the intake. Figured "why not" since I was planning to do an oil change and spark plug replacement soon. Discovered that quite a bit of smoke was exiting between exhaust manifold and turbo, at idle!
2) Shortly after, I planned to drop the turbo and simply swap out the gasket. NOPE! 2 turbo mounting studs decided they wanted to strip out inside the turbo. SH*T! Fortunately I had a helicoil kit with 2 extra helicoils from when this happened on my FrankenTurbo F4H some years prior...
So now I had to remove the turbo from car (bye-bye coolant), drill out both stripped holes, tap the holes for helicoil, and install the helicoils.
Needed to cut out the turbo bolt closest to head, since that one stripped. Fortunately I had spare studs laying around so I used one of those since normally you have to pull the manifold to install a bolt in that location.
Then I reassembled everything with a new gasket. Did another quick check with Seafoam a few days later, and noticed to smoke around the turbo area.
This had the side benefit of improving my part-throttle driveability, which previously I had attributed to my tune!
3) This past weekend I decided to tackle rear diff fluid change and replace the rear diff flange output seals. There appeared to have been a slight leak at the passenger-side seal as evidenced by a bunch of grime building up underneath the axle.
Replacing the seals with the diff in the car was a PITA. Required removing the exhaust to do the driver-side seal, and on the passenger side the gas tank is kinda in the way. Got it done at least, and with fresh gear oil (Motul Gear 300). I'd like to say that the rear end feels slightly quieter/smoother but that's probably me justifying the 6 hours I spent!
#275
08-24-2015, 11:53 AM
Got a little bit done on my day off:
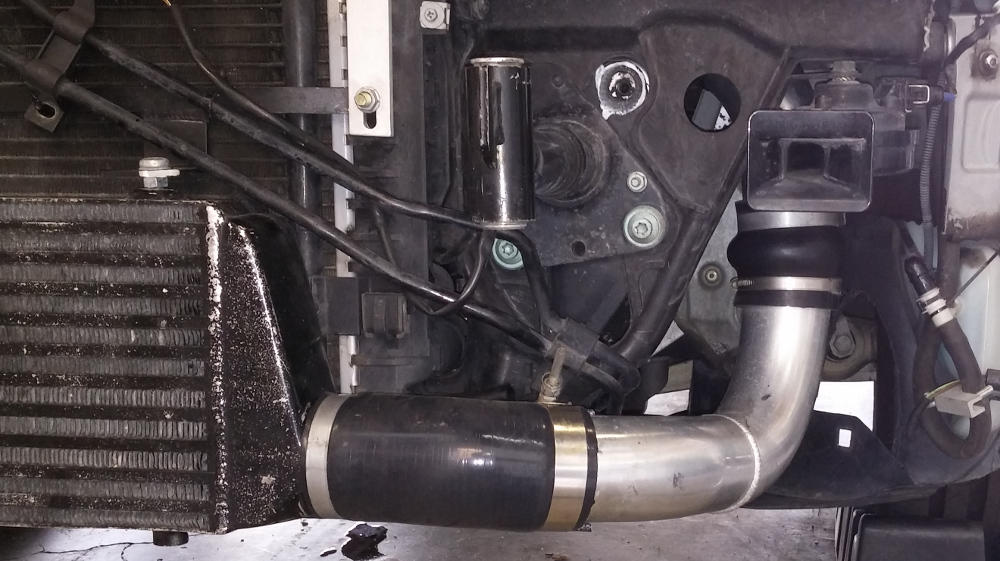
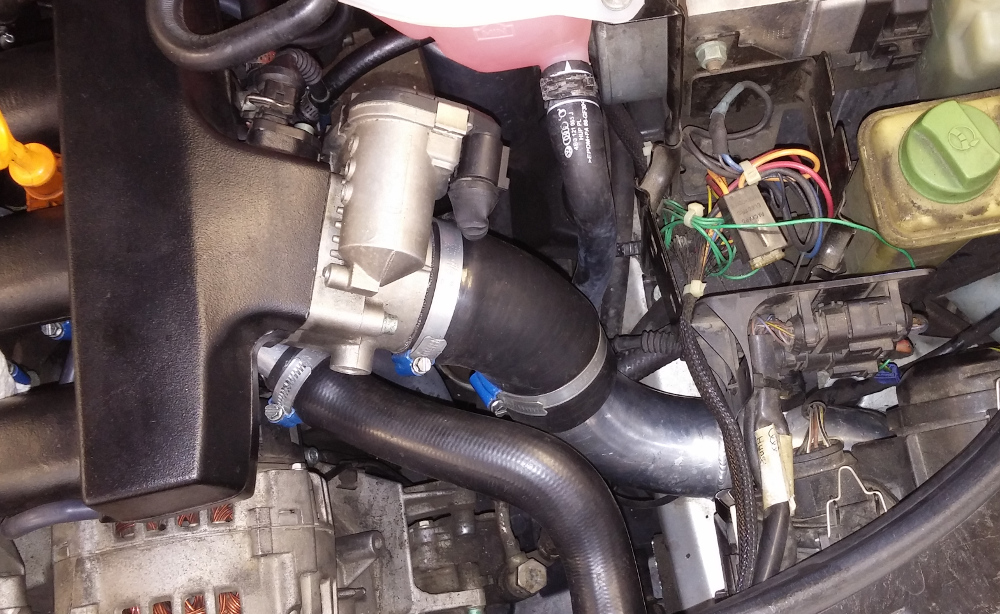
1) Spent ~4 hours playing with the hot-side FMIC piping. Original problem was: the CX Racing hot-side FMIC piping goes under the AC condenser lines, which makes it a very low point to the point where it required cutting out the bumper valence and would actually scrape the ground on occasion.
Solution: Cut the piping into two pieces, put a bead on the newly-cut ends, and reattach them with a 2" hump hose coupler. Also replaced the 45 deg. bend coupler at the turbo outlet with a straight coupler. Now the hot-side piping sits above AC lines, doesn't interfere with the fog light, and I'm happier.
Still needs a little tweaking and/or bumper trimming since the bumper fitment has been affected.
2) Drove out to a guy parting out a silver 2000 S4. Picked up the rear bumper (scrapping the bumper and only keeping its painted lower valence), the black Bose door cards with nice leather inserts, and some side skirt hardware.
#276
09-21-2015, 11:38 AM
Even though I haven't posted anything in the last month, I did LOTS to my A4.
INTERIOR: swapped S4 door cards with leather inserts. Before installing I wrapped the trim with a brushed aluminum vinyl. Also wrapped the dash trim with this vinyl.
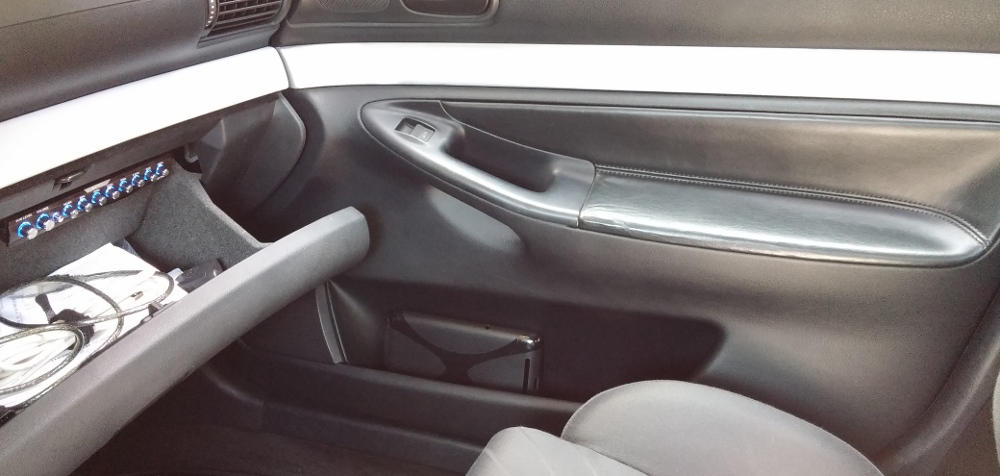
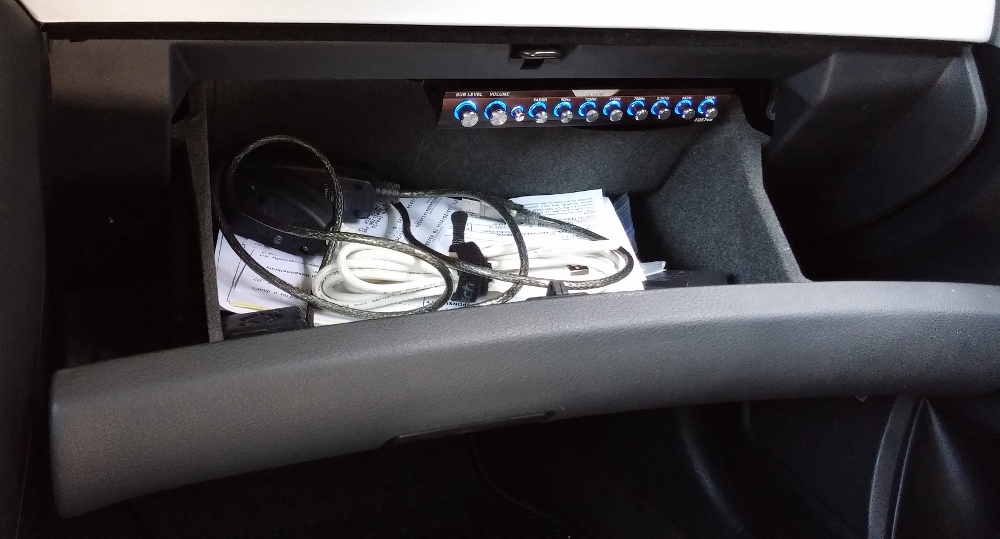
Relocated my Clarion equalizer from where the ash tray normally goes to the glove box. Lost a little glove box space but not a problem. Was able to install a normal ash tray again
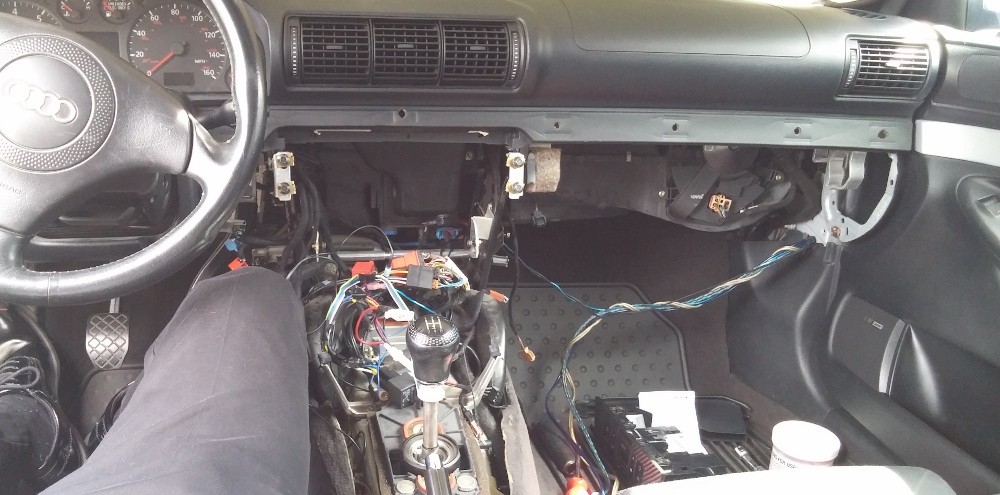
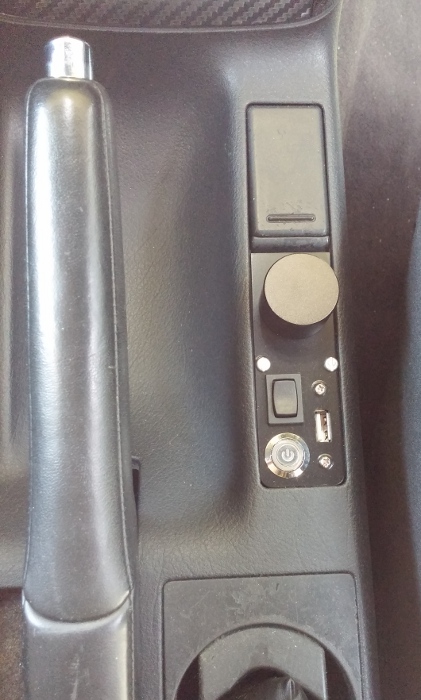
Designed/built/installed a custom audio control thing to fit in the pocket next to the E-brake. Since the Clarion unit was my audio control, with that relocated I needed a way to control volume. So I found a 2-channel digital volume controller on eBay and built it into my setup including putting the volume **** in that pocket next to the E-brake. Also there is another powered USB port, "power" button for turning tablet's screen on/off, and an up/down switch I'll use to control the tablet's output volume. This will all get integrated into new Arduino code and firmware soon enough.
EXTERIOR: Full exterior polish and 2x wax jobs, in preparation for the Big SoCal Euro car meet in San Diego a couple weeks back. Car looked GREAT. Have also done a little more trimming to the front bumper to fit the FMIC piping better.
Still planning to install S4 side skirts and rear valence some time soon.
ENGINE: Boost leak tested, fixed all leaks except for one at the IAT sensor O-ring... tried a replacement O-ring maybe 6 months ago but that's no longer working. New IAT sensor will be on order soon.
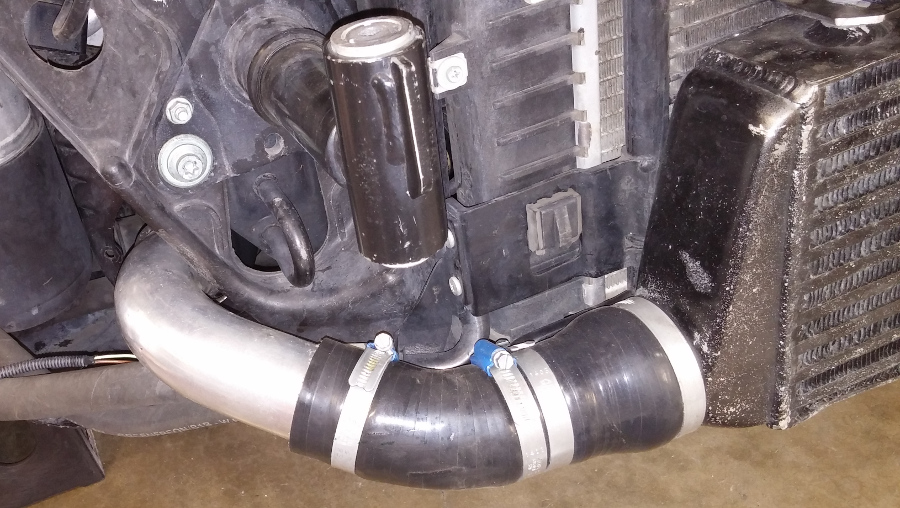
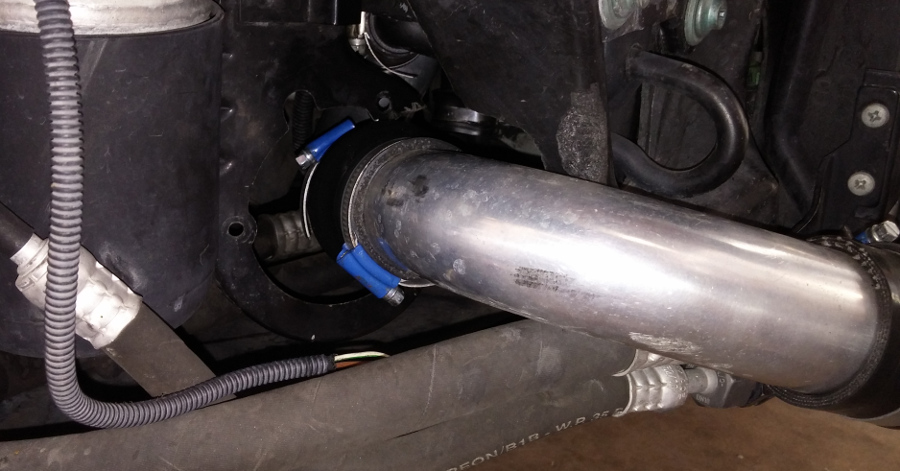
Re-did the FMIC piping AGAIN lol. On the hot-side, replaced the 45 degree coupler off the FMIC outlet with a 30 degree coupler, and trimmed it as needed.
On the cold-side, did a custom setup to fit the bumper better. Was: 45 degree 2.0 to 2.5" reducing coupler. Now: 2.0" 45 degree coupler -- >2.0" aluminum joiner pipe --> 2.0 to 2.5" straight reducing coupler.
This new FMIC cold-side piping setup allows the fog light to fit, bumper fits better, and the piping sits above the AC lines. WINNING!
I've had an intermittent coolant leak, that will leak for a while, then completely stop for a while, then return again for a while. I think it was an improperly-fitting silicone hose/hose clamp on my coolant pipe relocation setup. So I fixed that by putting a bead on the coolant pipe so the silicone hose can't slide off any more.
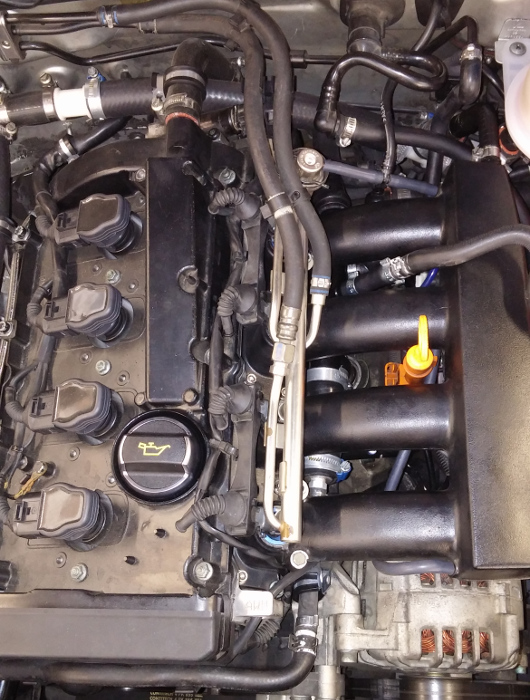
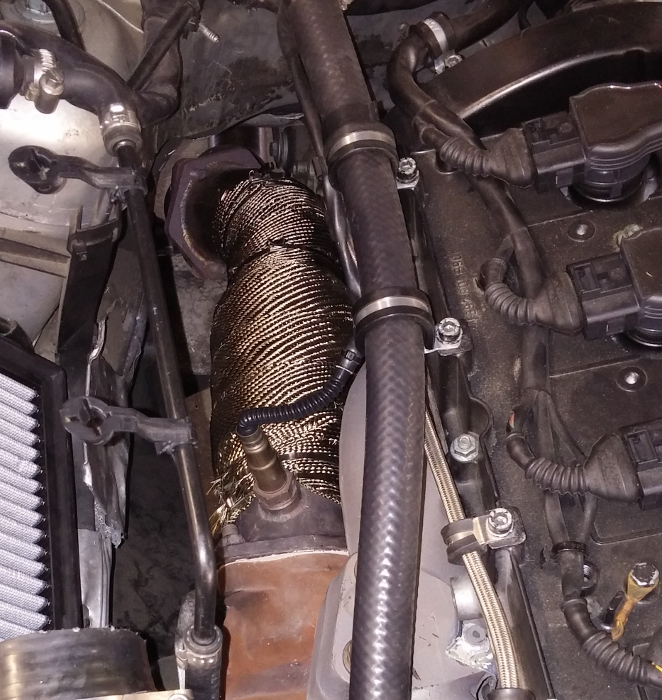
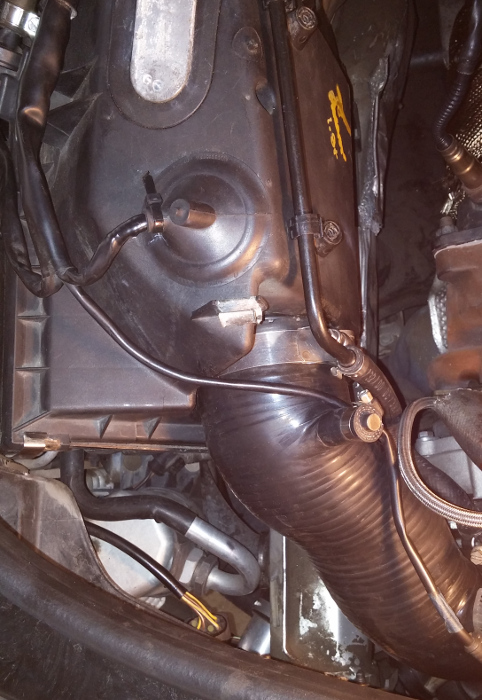
Wrapped the 034 high-flow cat with DEI exhaust wrap that was given to me. Since it was free, I figured "why not"; it certainly won't hurt anything and should help reduce engine bay temperature.
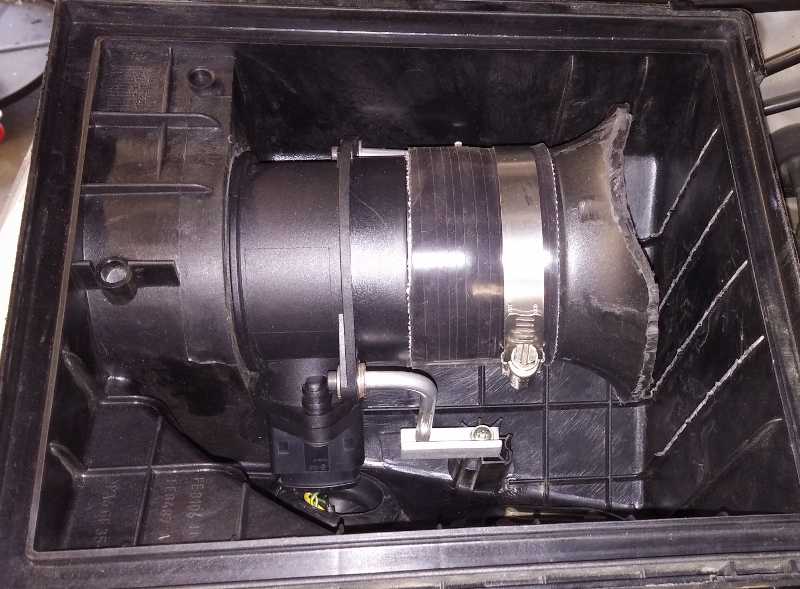
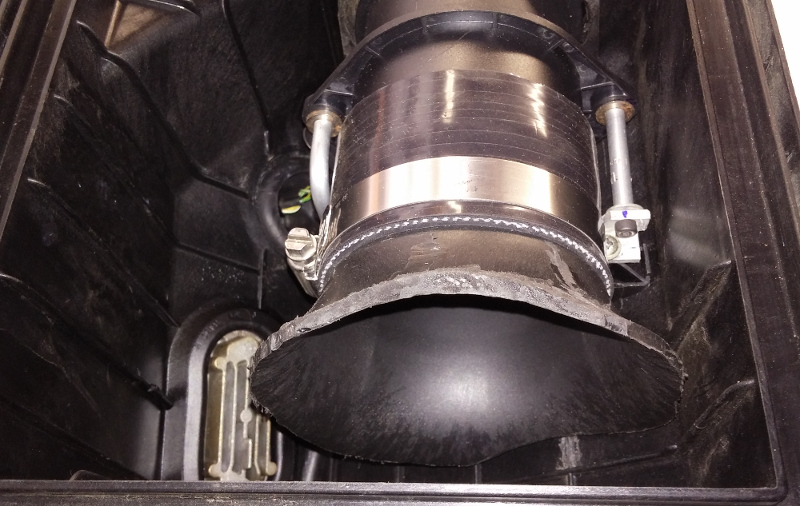
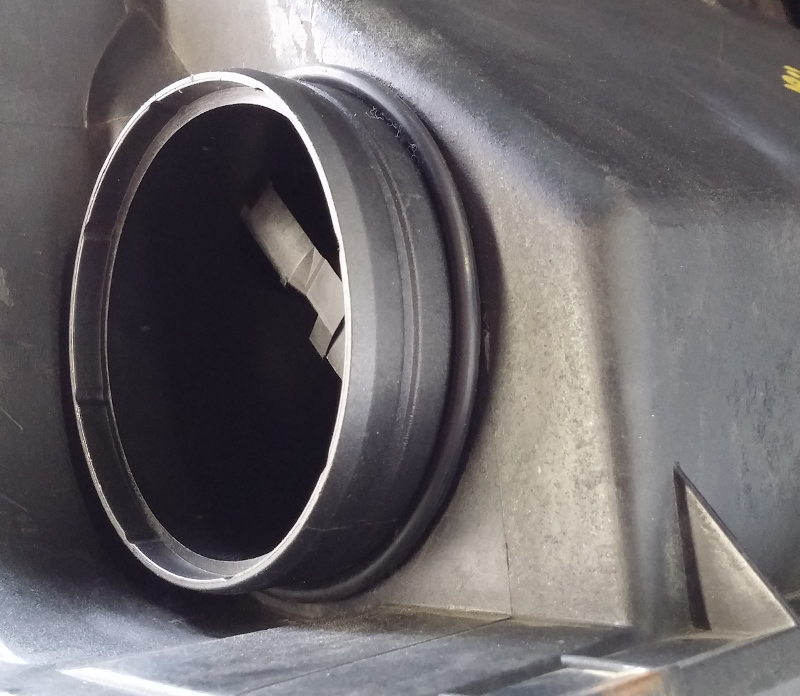
Also tooke some pictures of my 3" MAF housing fitted to the air box lid.
PICS!!
INTERIOR: swapped S4 door cards with leather inserts. Before installing I wrapped the trim with a brushed aluminum vinyl. Also wrapped the dash trim with this vinyl.
Relocated my Clarion equalizer from where the ash tray normally goes to the glove box. Lost a little glove box space but not a problem. Was able to install a normal ash tray again
Designed/built/installed a custom audio control thing to fit in the pocket next to the E-brake. Since the Clarion unit was my audio control, with that relocated I needed a way to control volume. So I found a 2-channel digital volume controller on eBay and built it into my setup including putting the volume **** in that pocket next to the E-brake. Also there is another powered USB port, "power" button for turning tablet's screen on/off, and an up/down switch I'll use to control the tablet's output volume. This will all get integrated into new Arduino code and firmware soon enough.
EXTERIOR: Full exterior polish and 2x wax jobs, in preparation for the Big SoCal Euro car meet in San Diego a couple weeks back. Car looked GREAT. Have also done a little more trimming to the front bumper to fit the FMIC piping better.
Still planning to install S4 side skirts and rear valence some time soon.
ENGINE: Boost leak tested, fixed all leaks except for one at the IAT sensor O-ring... tried a replacement O-ring maybe 6 months ago but that's no longer working. New IAT sensor will be on order soon.
Re-did the FMIC piping AGAIN lol. On the hot-side, replaced the 45 degree coupler off the FMIC outlet with a 30 degree coupler, and trimmed it as needed.
On the cold-side, did a custom setup to fit the bumper better. Was: 45 degree 2.0 to 2.5" reducing coupler. Now: 2.0" 45 degree coupler -- >2.0" aluminum joiner pipe --> 2.0 to 2.5" straight reducing coupler.
This new FMIC cold-side piping setup allows the fog light to fit, bumper fits better, and the piping sits above the AC lines. WINNING!
I've had an intermittent coolant leak, that will leak for a while, then completely stop for a while, then return again for a while. I think it was an improperly-fitting silicone hose/hose clamp on my coolant pipe relocation setup. So I fixed that by putting a bead on the coolant pipe so the silicone hose can't slide off any more.
Wrapped the 034 high-flow cat with DEI exhaust wrap that was given to me. Since it was free, I figured "why not"; it certainly won't hurt anything and should help reduce engine bay temperature.
Also tooke some pictures of my 3" MAF housing fitted to the air box lid.
PICS!!
Last edited by MetalMan; 09-21-2015 at 02:13 PM.
#277
09-21-2015, 02:18 PM
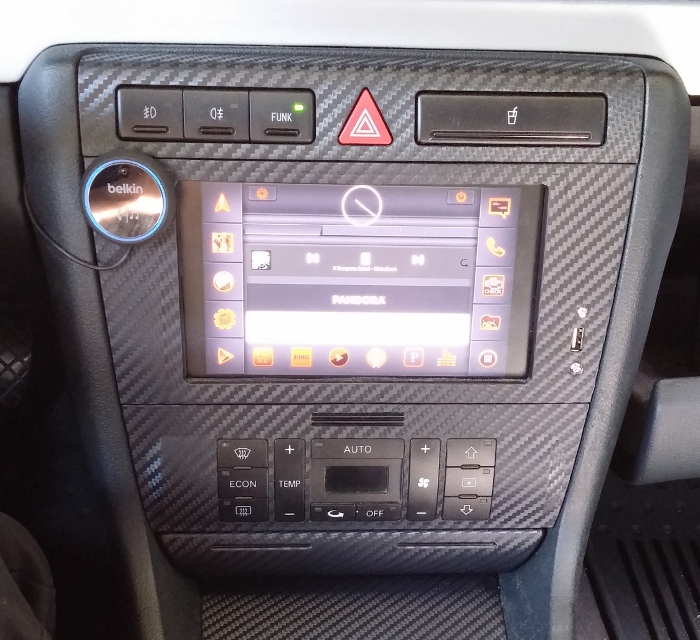
And some new pictures of the Nexus 7 / sound system changes:
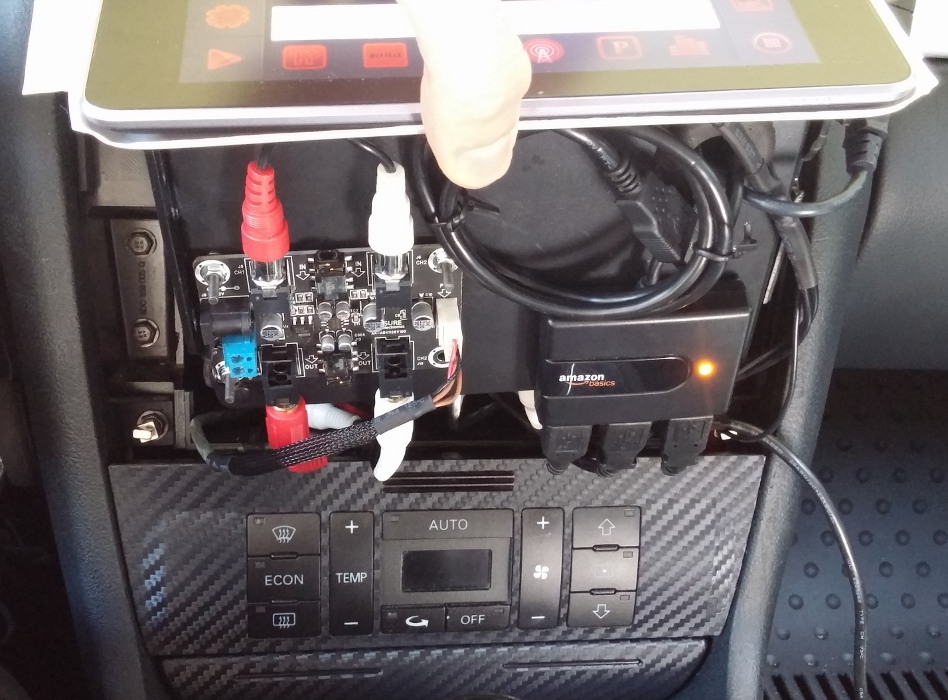
The circuit board on the box bottom is the actual volume control processor. The **** itself is attached to a smaller circuit board with what is basically a "click"-style rotary encoder.
The circuit board on the box bottom is the actual volume control processor. The **** itself is attached to a smaller circuit board with what is basically a "click"-style rotary encoder.
#278
12-10-2015, 02:24 PM
Can't believe how long it's been since the last update! I suppose a huge amount hasn't happened... but:
And I've got a lot of work planned for a couple weeks from now!!
And there's a chance my Valeo single-mass flywheel clutch kit won't hold up... so I'm evaluating options using an ECS Tuning RA4 flywheel. Could probably go with an S4 clutch, but I'm really curious to look into the option of using a B7 RS4 pressure plate (maybe clutch disk and throwout bearing too?), since it is better than B5 S4/RS4 and quite cheap for that clutch kit.
- replace IAT (intake air temperature sensor) because O-ring on old sensor was flat and causing a boost leak
- replaced crankshaft position sensor
- replaced charcoal canister with a lower-mileage used one
- swapped in Stern rear diff mount bushings, replacing the old/worn and soft Apikol Street bushings that were already on the car when I bought it
- replaced my OLD Pyramid (cheap brand) subwoofer amplifier that died, with a JBL GX-A3001 Mono amplifier. Very glad to have bass again!
- Aero wiper upgrade!! Found used Aero wiper arms from a B5.5 Passat on eBay in good shape for $37 shipped, and another $30 for Valeo brand new wiper blades from Rock Auto
- replaced the front bumper valence with the eBay polyurethane "Type L" bumper lip. Figured if I like it, I'll paint it if/when I throw on S4 side skirts and painted rear bumper valence
- removed my catch can setup, and went back to a mostly-stock PCV system including SJP (suction jet pump). This was to improve PCV operation and see if the SJP will help braking (during the time when intake manifold is not yet in vacuum)
And I've got a lot of work planned for a couple weeks from now!!
- Remove head, replace valve guide seals. So this means new head gasket, head bolts, etc.
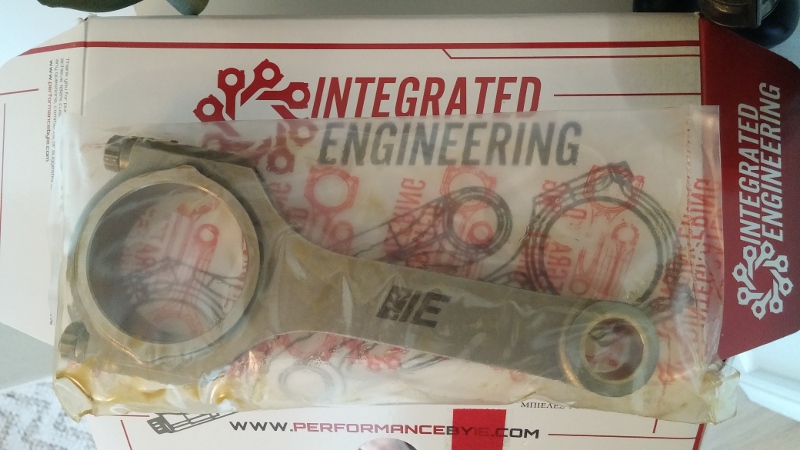
- Figured that while the head is off, I'm a decent way toward installing connecting rods... would just need to drop the oil pan. So I have Integrated Engineering 144x19mm drop-in forged connecting rods on order ($390 shipped from CTS Turbo!!).
- My tuner (Motoza Performance) is limiting my car's output on E85 and FrankenTurbo due to having stock rods. Also boost is limited to 22psi due to the stock MAP (manifold absolute pressure) sensor. So I also have a 3bar MAP sensor on order, and after connecting rods will see about upgrading my tune for MORE power.
And there's a chance my Valeo single-mass flywheel clutch kit won't hold up... so I'm evaluating options using an ECS Tuning RA4 flywheel. Could probably go with an S4 clutch, but I'm really curious to look into the option of using a B7 RS4 pressure plate (maybe clutch disk and throwout bearing too?), since it is better than B5 S4/RS4 and quite cheap for that clutch kit.
#280
12-21-2015, 11:52 AM
Getting ready to start doing some major work in a few days.
Yesterday picked up the Harbor Freight 1-ton engine hoist for $100, and my wife helped with assembly (her smaller hands came in handy).
Been doing a lot of planning to potentially install the B7 RS4 clutch kit ($144 shipped from Rock Auto) onto the ECS Tuning RA4 flywheel (I bought it for $210 lightly used). It's looking like this is a viable great and inexpensive option!