MetalMan's 1.8T FrankenTurbo (F4H-L, F21) Build Thread
#281
 02-15-2016, 12:06 PM


Well, it's been a little bit. Over my "winter break" I was a little busy...
First engine pull, first head removal, oil pan removal, first removal of piston/stock rods, and installation of I.E. rods (re-using stock AWM pistons, but cleaned up).
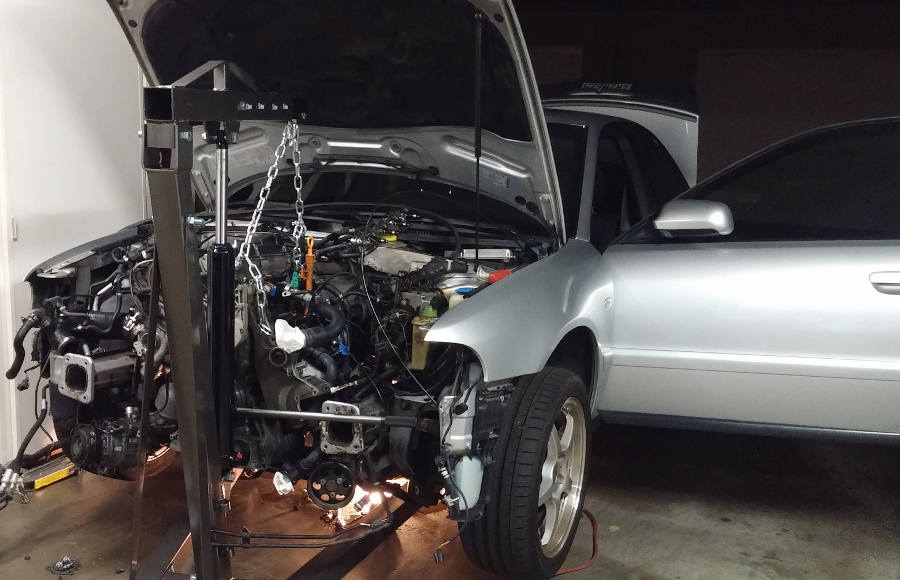

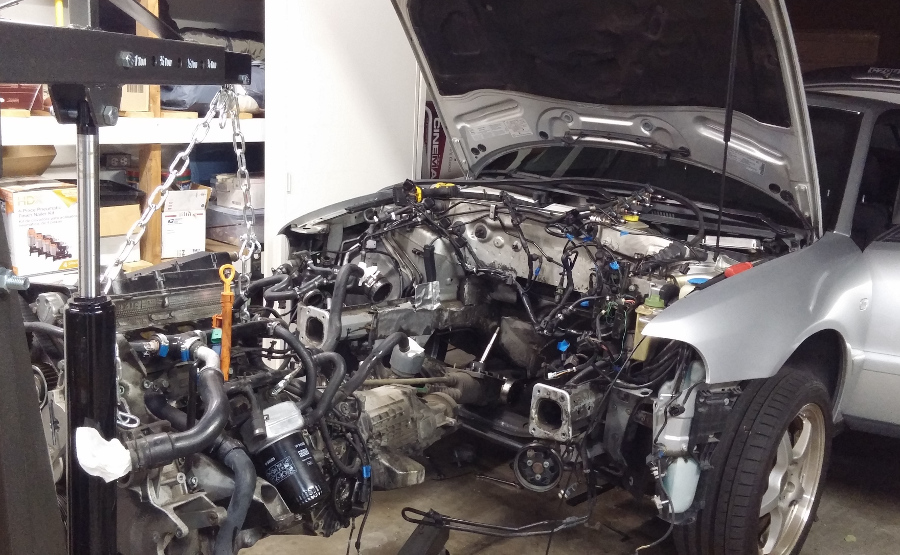
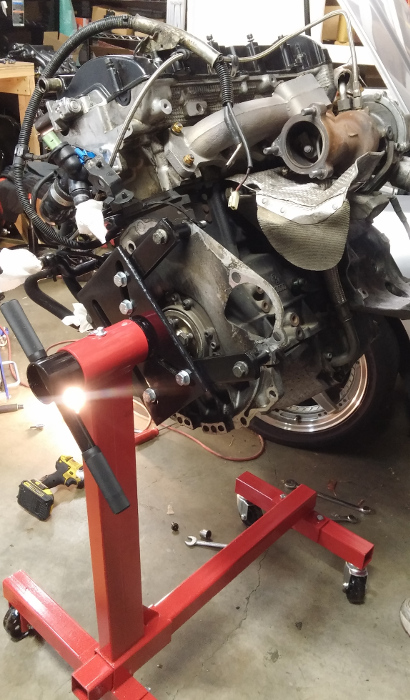
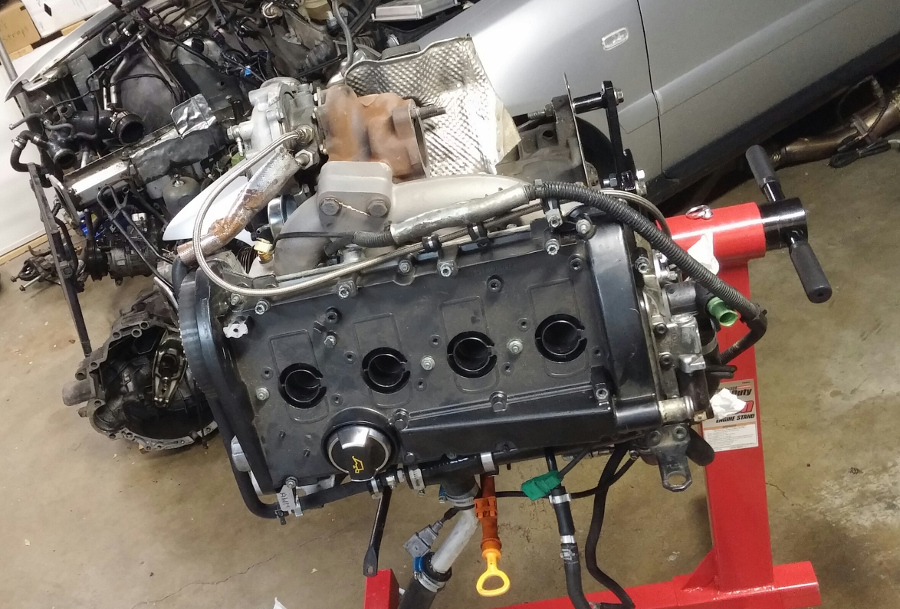

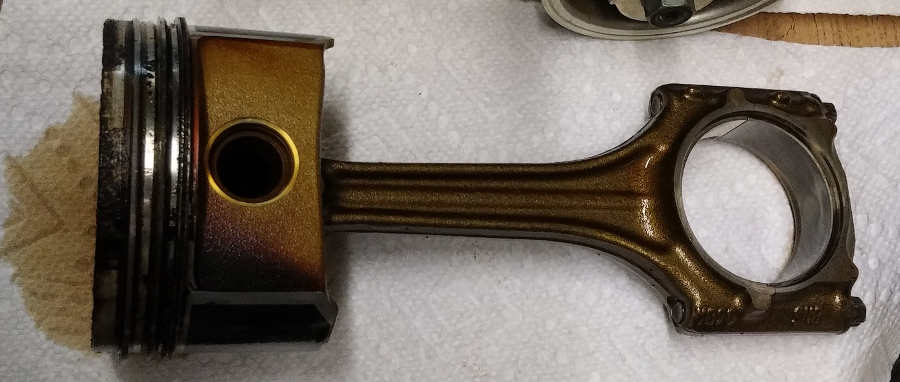
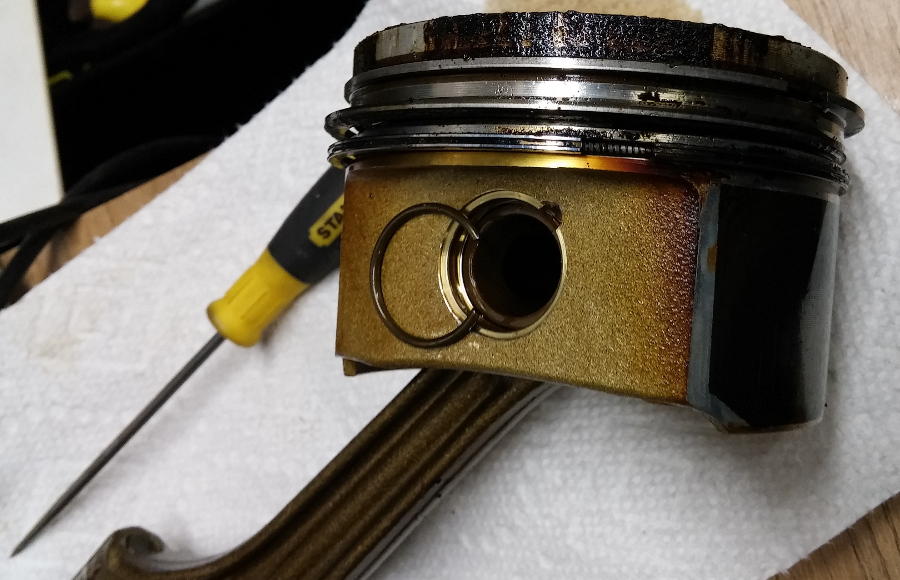
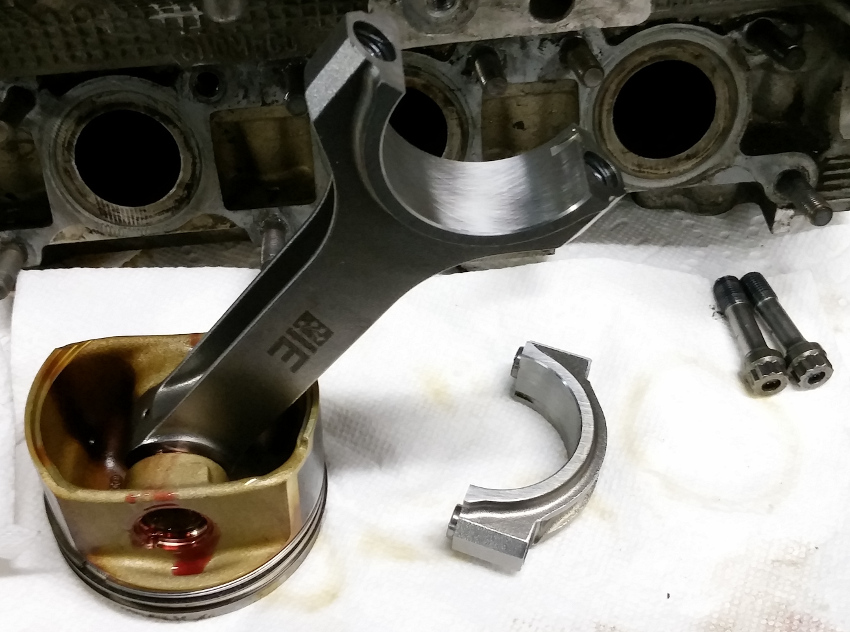
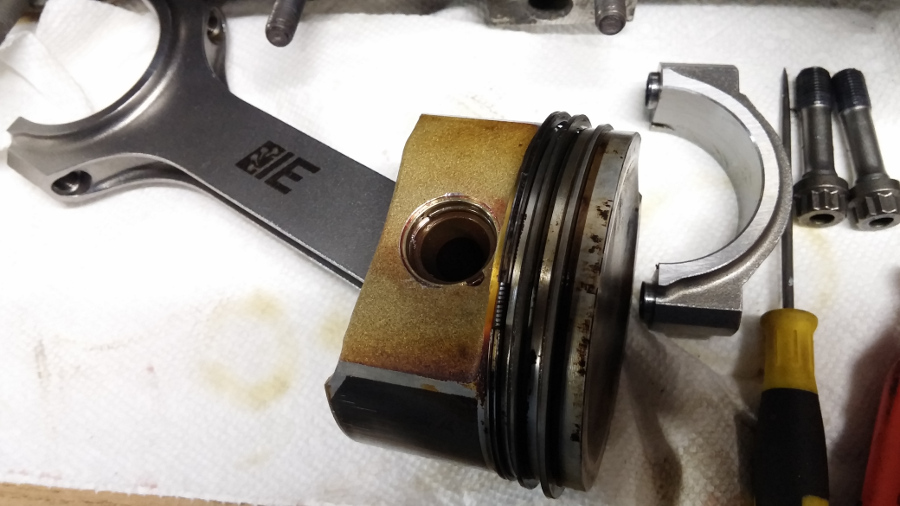
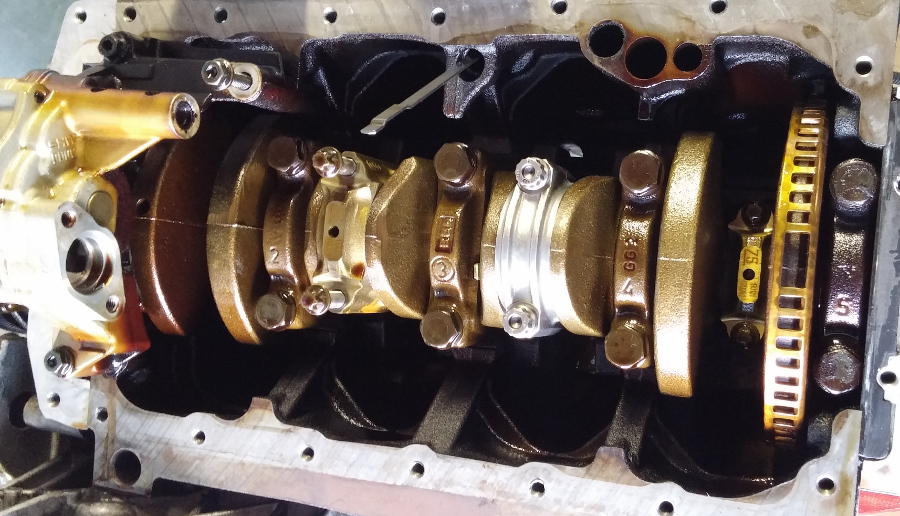
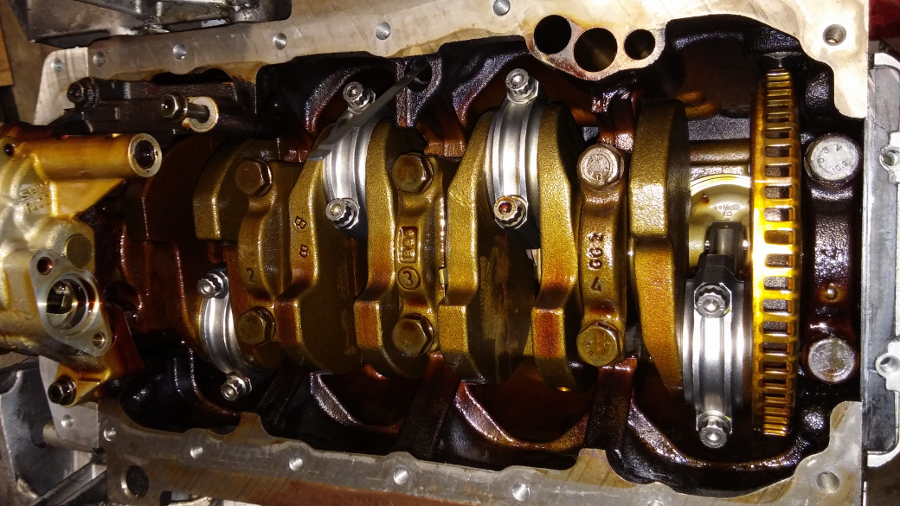
First engine pull, first head removal, oil pan removal, first removal of piston/stock rods, and installation of I.E. rods (re-using stock AWM pistons, but cleaned up).
#282
02-15-2016, 12:08 PM
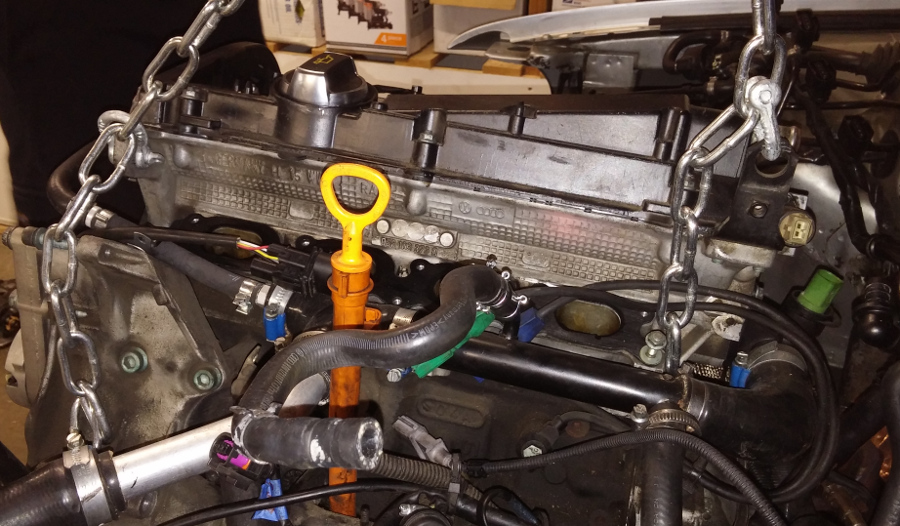
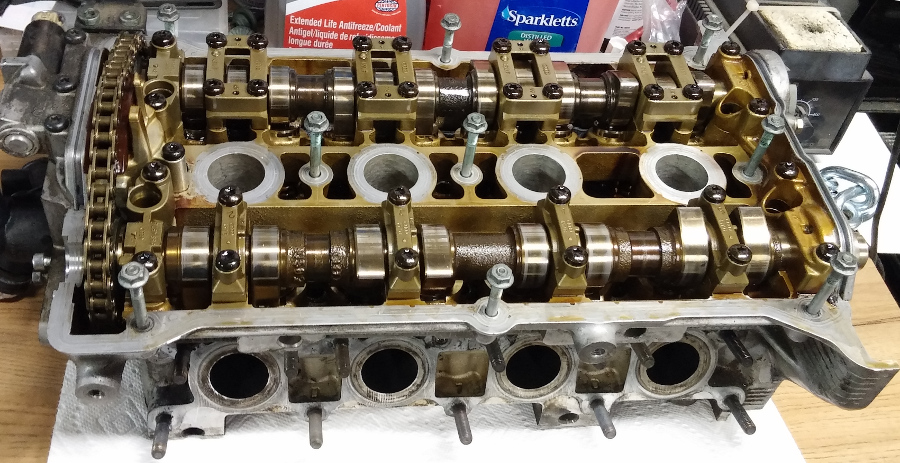
Cams/CCT removed, prepping for valve removal and replacement of valve guide seals:
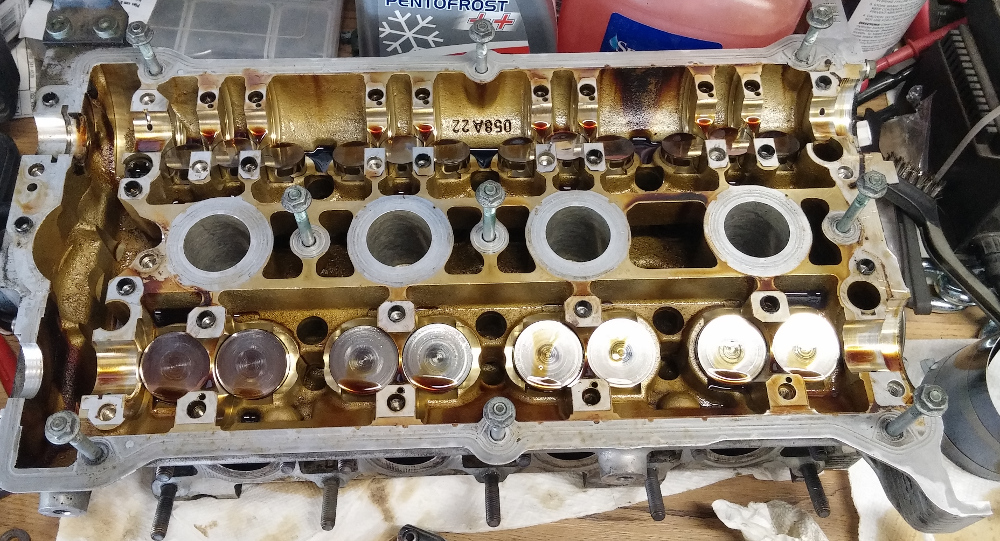
All exhaust-side valves removed and valve guide seals replaced (the little round green items). This picture shows re-installation of intake-side valves, valve springs, spring retainers, and keepers. Using a drill press and custom-modified clutch alignment tool [per walky_talky] to compress valve springs and install valve keepers. Those keepers were a major PITA for sure!

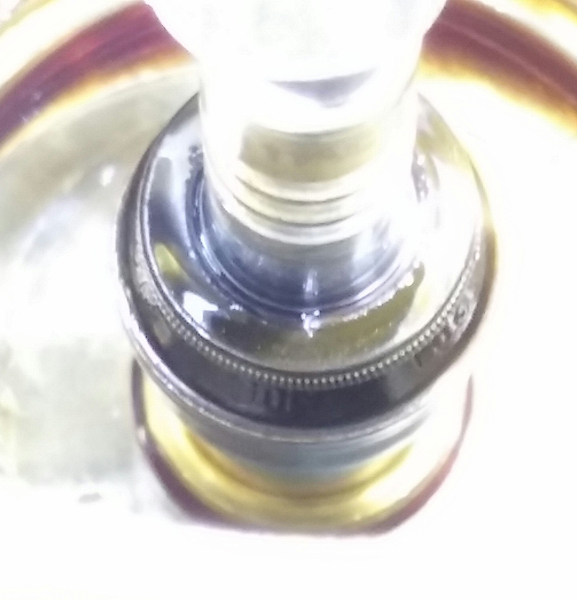
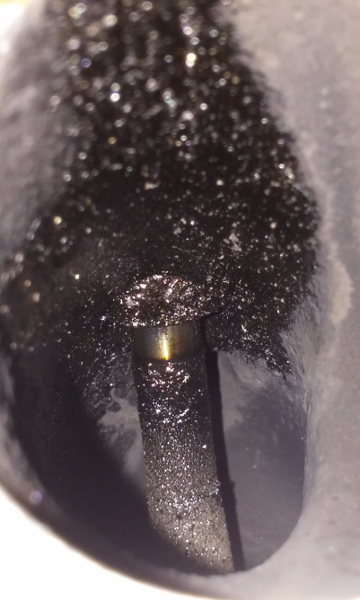
On one of the #4 exhaust valves, a valve stem seal was completely detached from the valve guide! I tried to capture a pic of this:
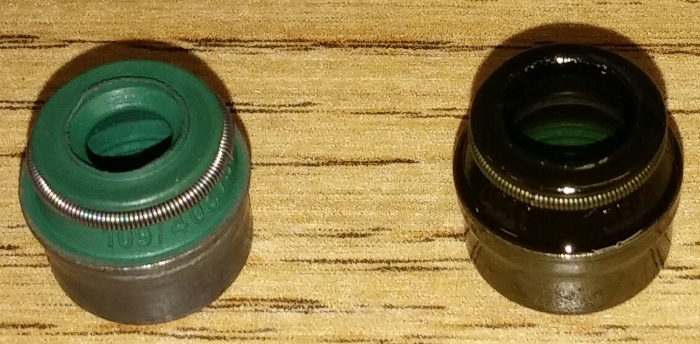
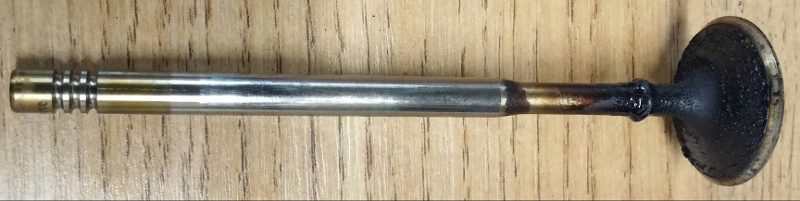
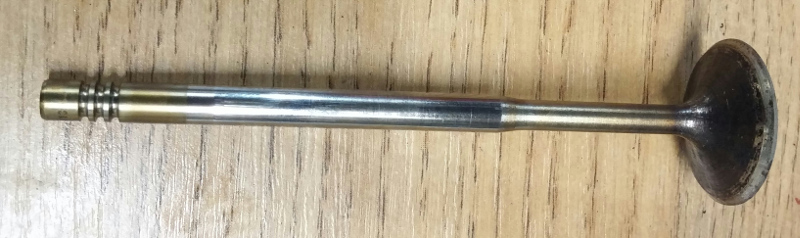
This is that same failed valve stem seal compared to a new one:
The above stem seal issue allowed oil to blow through the valve guide, and caused this:
On EVERY SINGLE INTAKE VALVE, there was this nasty black tar-like substance that built up. Some research suggests this could be a byproduct of E85.
And cleaned up:
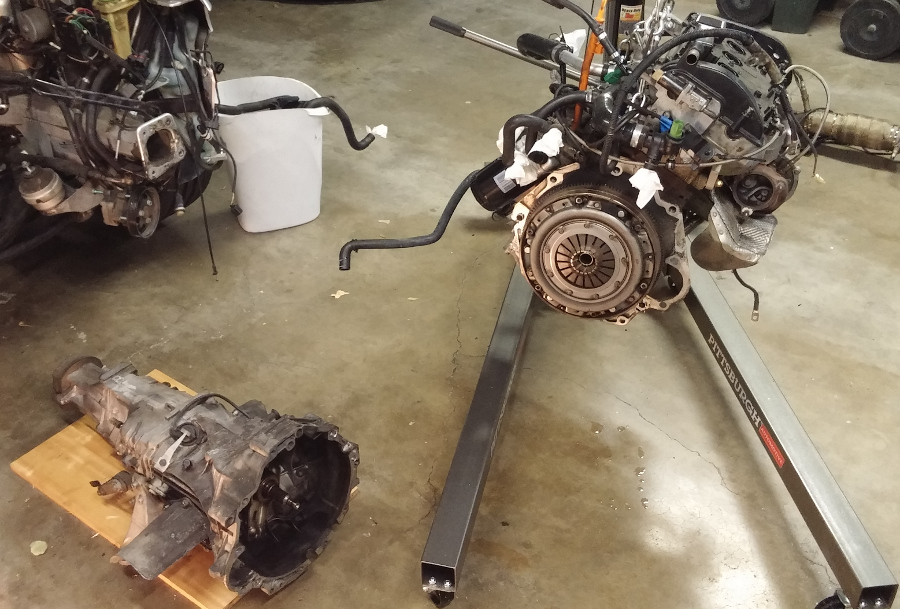
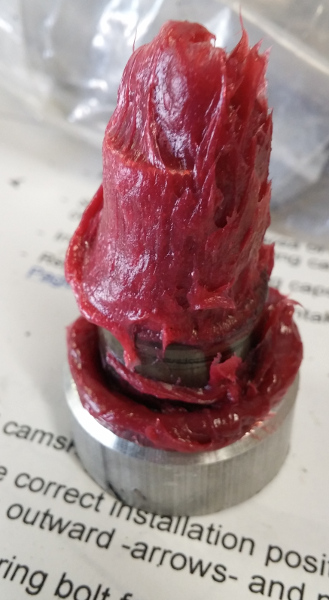
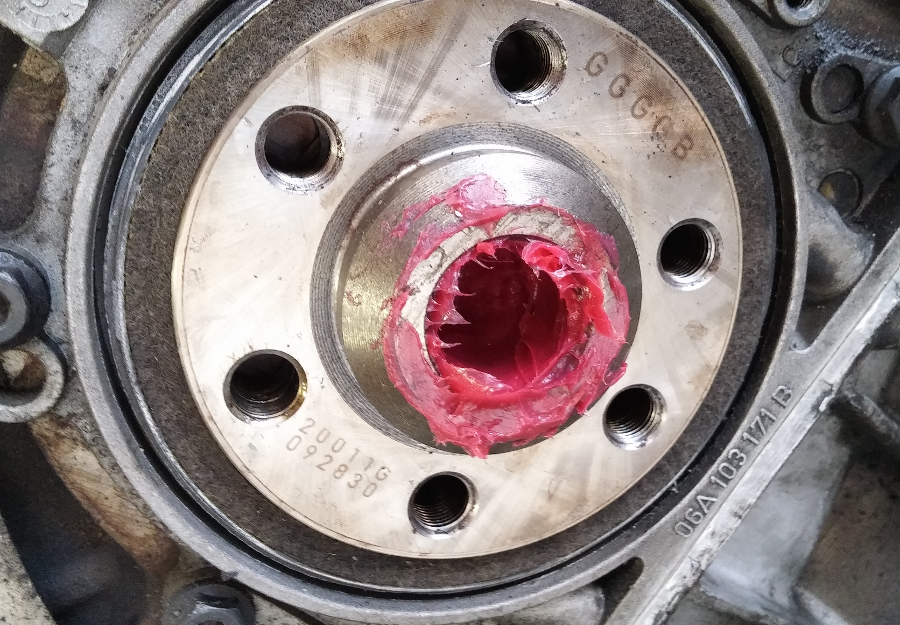
Pilot bearing removal using custom tool and Mobil 1 bearing grease, to "hydraulically" press out old pilot bearing:
And out:
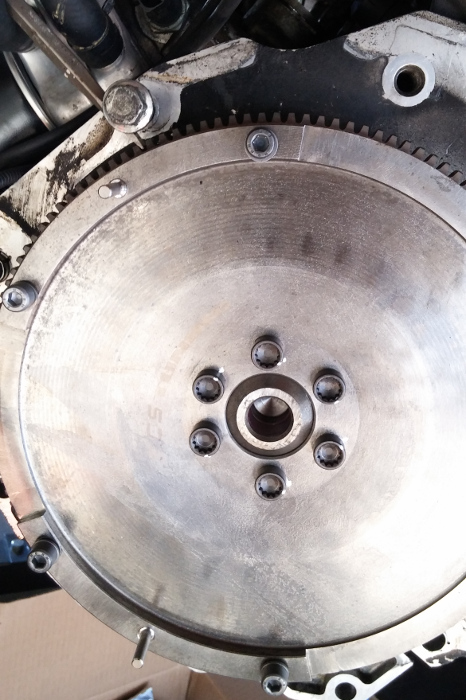
ECS Tuning RA4 flywheel installed, new FW bolts torqued to 44 ft-lbs + 90 degree turn. Used a screwdriver against FW teeth and a trans bolt to keep crank from spinning.
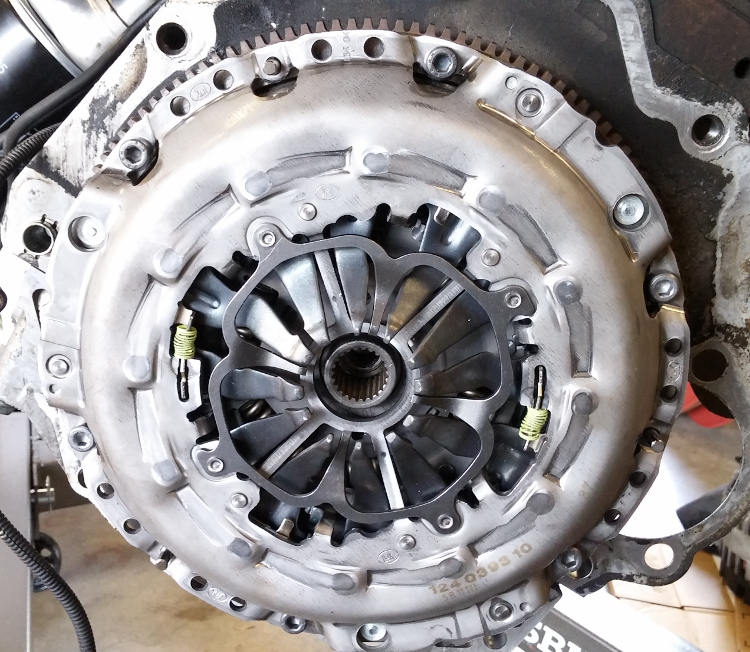
Next up was installation of a OEM B7 RS4 clutch kit. Previously I had already reset the SAC mechanism.

After filling fluids it fired right up. Let it idle until hot to help seat everything and burp coolant, and was good-to-go.
All exhaust-side valves removed and valve guide seals replaced (the little round green items). This picture shows re-installation of intake-side valves, valve springs, spring retainers, and keepers. Using a drill press and custom-modified clutch alignment tool [per walky_talky] to compress valve springs and install valve keepers. Those keepers were a major PITA for sure!
On one of the #4 exhaust valves, a valve stem seal was completely detached from the valve guide! I tried to capture a pic of this:
This is that same failed valve stem seal compared to a new one:
The above stem seal issue allowed oil to blow through the valve guide, and caused this:
On EVERY SINGLE INTAKE VALVE, there was this nasty black tar-like substance that built up. Some research suggests this could be a byproduct of E85.
And cleaned up:
Pilot bearing removal using custom tool and Mobil 1 bearing grease, to "hydraulically" press out old pilot bearing:
And out:
ECS Tuning RA4 flywheel installed, new FW bolts torqued to 44 ft-lbs + 90 degree turn. Used a screwdriver against FW teeth and a trans bolt to keep crank from spinning.
Next up was installation of a OEM B7 RS4 clutch kit. Previously I had already reset the SAC mechanism.
After filling fluids it fired right up. Let it idle until hot to help seat everything and burp coolant, and was good-to-go.
#283
03-14-2016, 12:24 PM
Nothing too major going on lately, except for planning!
Yesterday I installed new 034 Motorsport silicone pieces: "S" hose that goes from suction jet pump to PCV valve, and "L" hose that goes from intake manifold to suction jet pump.
Some time ago I decided to reinstall the suction jet pump to provide additional braking force during the transition period where the engine vacuum is still building, basically as the throttle plate is closing.
So what am I planning?
1) Replace my current CX Racing (eBay quality) FMIC with a Treadstone TR18T FMIC. Will probably have to tweak the piping [yet again] but this should really help out.
2) Tune upgrade! Since my engine now has upgraded connecting rods, I have asked Motoza to raise the boost pressure. This will work in conjunction with the addition of a 3bar MAP sensor (stock is 2.5bar). Combining a better FMIC with more boost should be an excellent combo.
3) S4 side skirts. These have been collecting dust in my garage for 14 months now. I mocked them up briefly to make sure I actually want to install them, and also see what additional parts/work will be needed. Have the S4 rear "mud flap" brackets on order, and planning to use rivnuts/screws to attach the underside of the skirts to the body. Will also have to rivet the lower metal brackets to the body.
4) S4 rear lower bumper valence: this is already silver-painted. Just need to unclip my A4 valence and clip in the S4 valence.
5) Different wheels!! Just bought them 2 days ago, from a local VW guy for $300. They are B7 A4 special edition Y-spoke wheels. 17x7.5, ET45. There are 3 downsides: ET45 (I prefer ET35), they are about 27.5 lbs each, and they are requiring some cleanup. There's a little curb rash and a few rock chips, so I'm contemplating sanding those spots down and painting with Plastidip.
I think they'll look pretty good when done and with the appropriate spacers
Last edited by MetalMan; 03-14-2016 at 01:37 PM.
#284
04-11-2016, 11:12 AM
Managed to finish installing the S4side skirts over the weekend, and also took a little time to swap in the S4 rear bumper valence. Still need to deal with the lower door moldings; currently planning to trim and paint them to match.
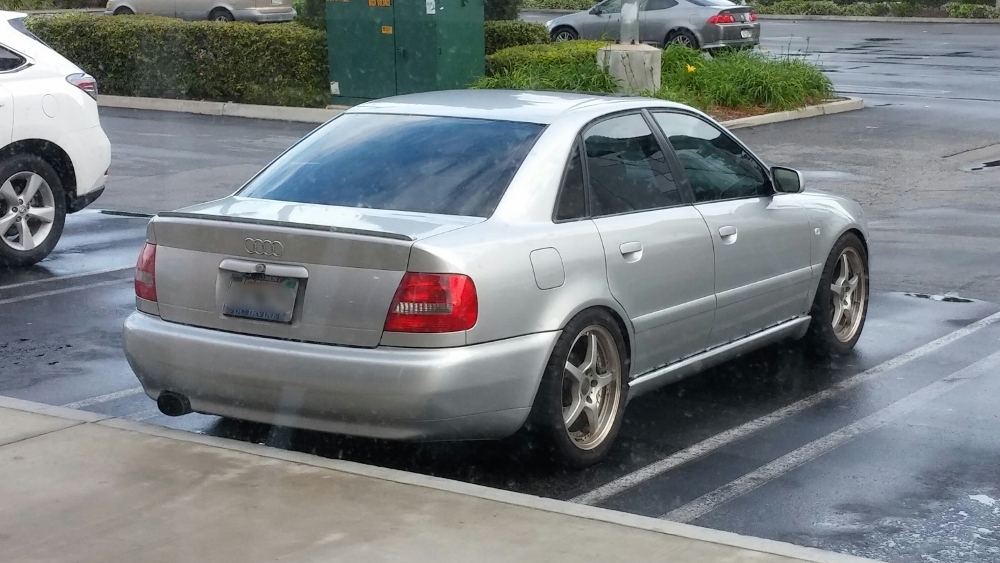
Car was a bit dirty in this picture, and picture was taken through a window that wasn't particularly clean.
Car was a bit dirty in this picture, and picture was taken through a window that wasn't particularly clean.
#285
04-18-2016, 11:52 AM
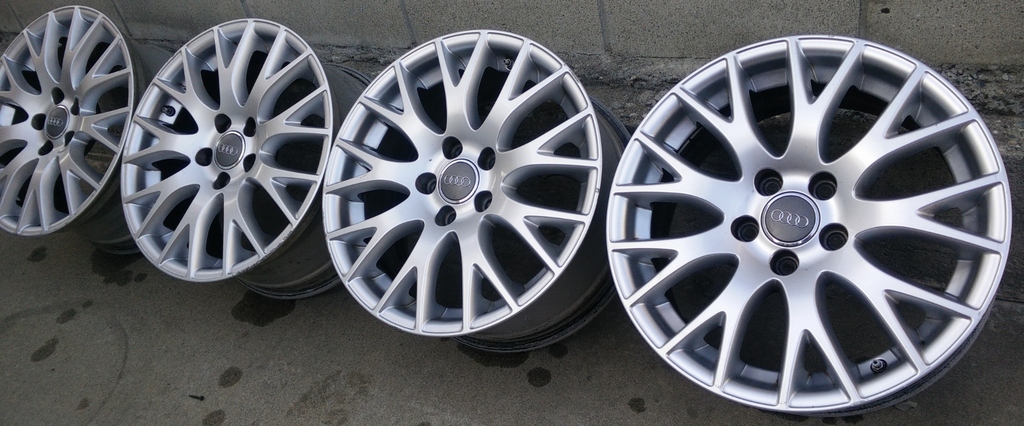
A buddy works at a local wheel refinishing shop, and made an offer to me I couldn't refuse. So I got the B7 A4 S-line wheels refinished in a medium hyper silver color, and they turned out FANTASTIC. Wheels are like-new now! This color looks really cool, and depending on lighting/direction of light you can really see the contrast of light/dark even though the color is consistent.
Now I just need ball-seat lug nuts to match with my stud conversion.
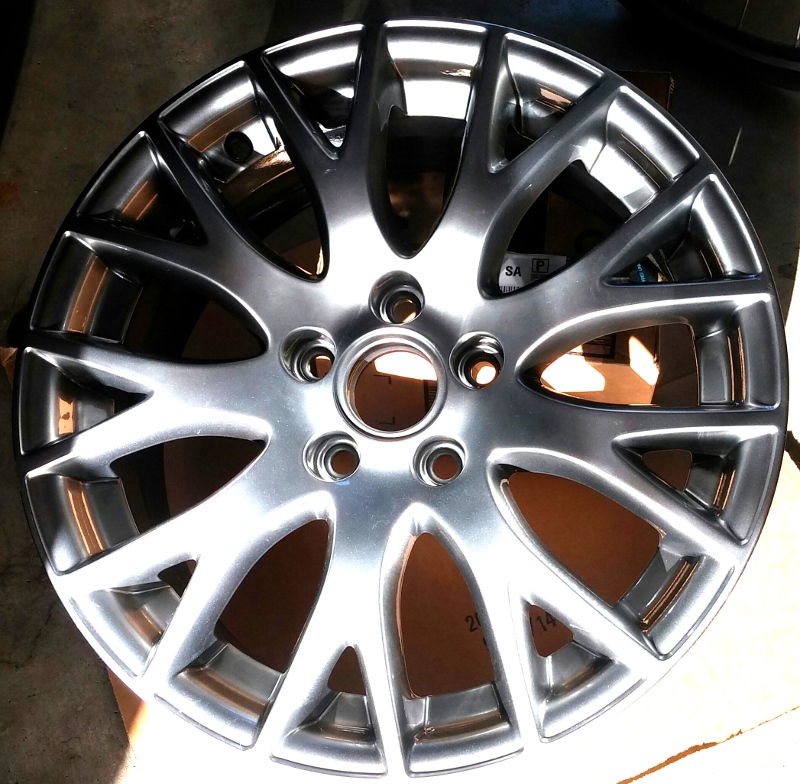
Now I just need ball-seat lug nuts to match with my stud conversion.
#286
04-21-2016, 05:43 PM
Working on checking things off my list!
Today, I paid Motoza for an invoice to upgrade my tune for the 3bar MAP sensor, increased boost/torque to take advantage of connecting rods, and take advantage of upgraded intercooler.
I also just paid an invoice to Treadstone for a group buy on their TR18T intercooler. The price including shipping saves about $35 compared to the next-cheapest option.
Also have started on trimming the A4 lower door molding to fit S4 skirts. Got the whole driver-side done, in fact. It appears I over-trimmed the front fender molding a little (because it actually tapers...) so I'm looking for a replacement.
Then I intend to paint these lower trim pieces.
#287
05-09-2016, 01:00 PM
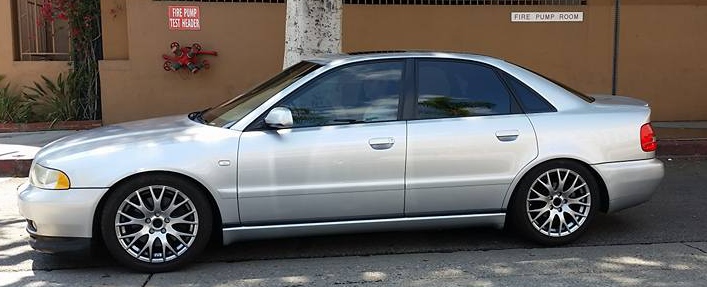
Got my freshly refinished/powdercoated wheels installed! They are B7 S-line wheels, 17x7.5 ET45 with Falken Azenis FK453 225/45/17.
Required switching to ball-seat lug nuts and swapping tires from my old wheels. Running 10mm spacer front and 15mm rear. Want to increase spacing probably to 15mm front and 20mm rear.
Also have the TR18T in my possession now, all lower door/fender trims cut to the proper size (except one needs to be re-cut), and still waiting on Motoza to send me the new file for increased power.
And... bought a 2004 Audi A4 (B6) Quattro 1.8T sedan with the UltraSport package... and lots of other upgrades including APR Stage 3.
#288
05-20-2016, 02:04 PM
Was able to put the B5 up on ramps and leave it that way for a week since I have the B6 I can commute with.
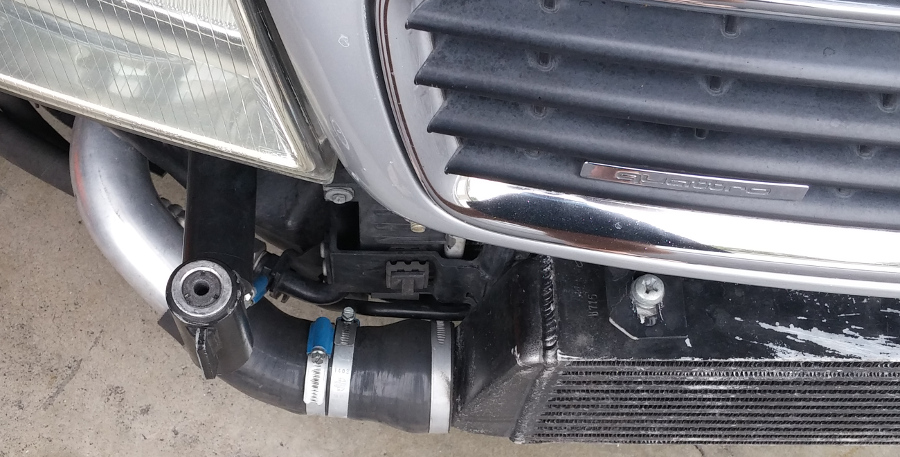
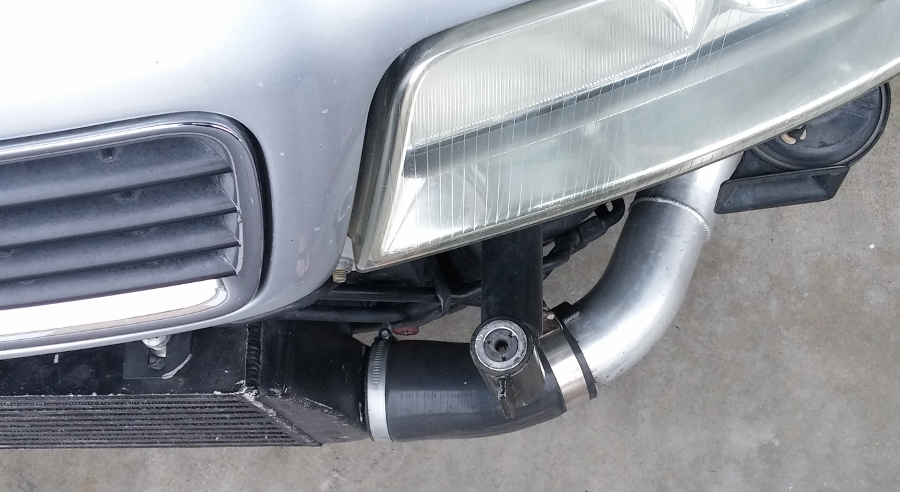
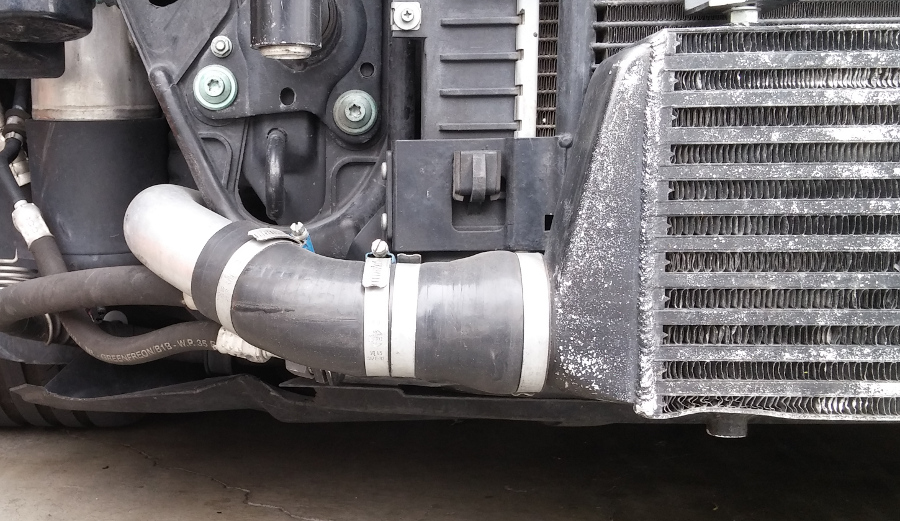
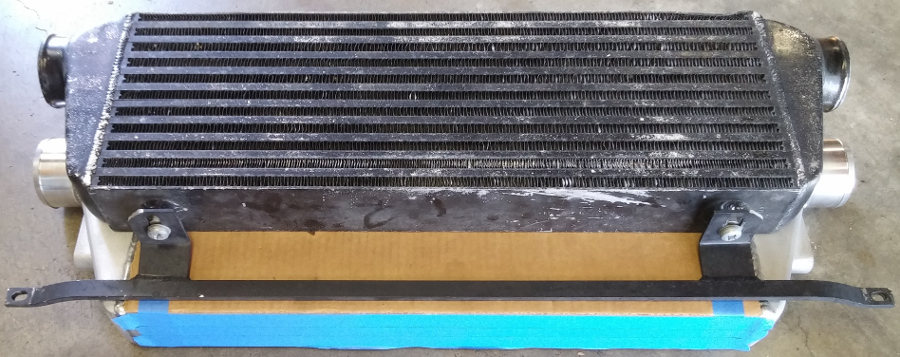
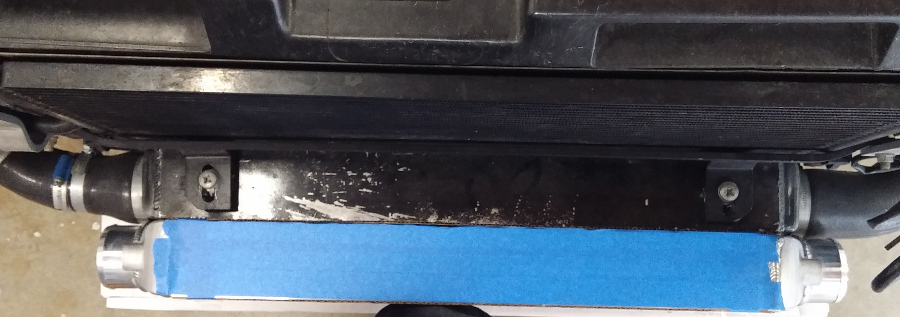
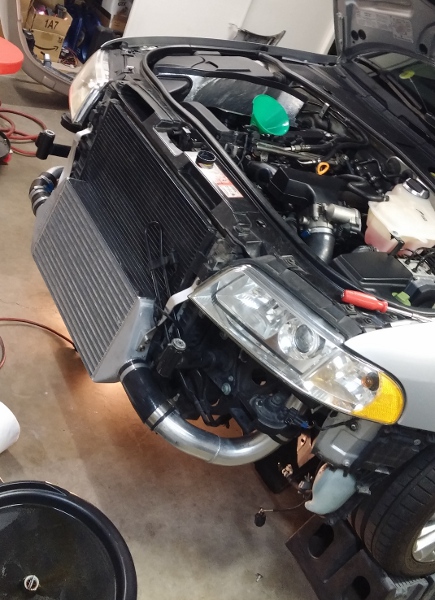
During the past week I fitted the new TR18T intercooler. Compared to my old CX Racing intercooler, the TR18T is taller and the inlet/outlet are further from the bottom of the intercooler.
This meant I needed to slightly tweak my FMIC piping, fabricate new mounting brackets, and trim a bunch more out the bumper/bumper grills/bumper valence.
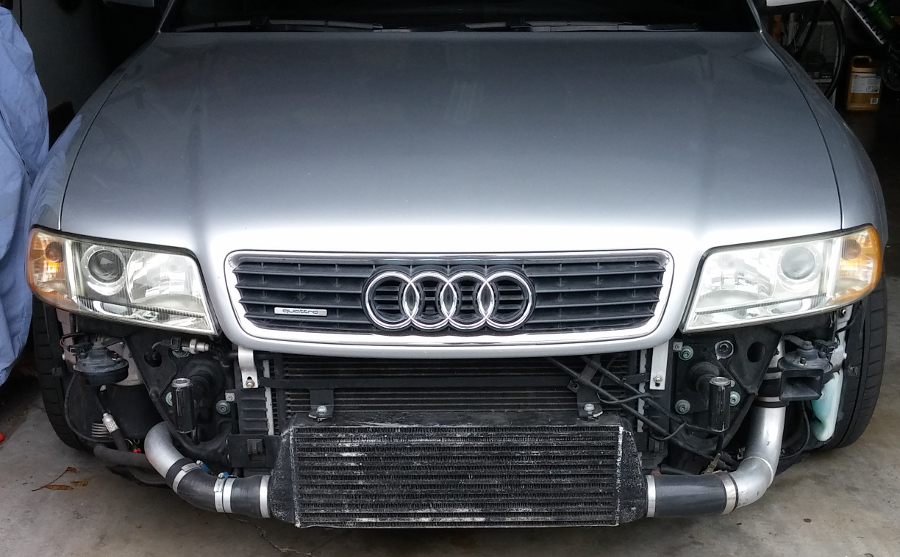
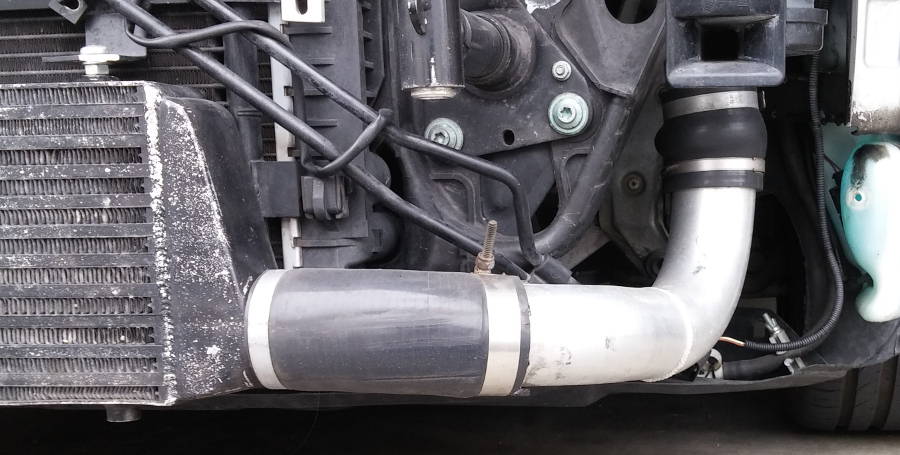
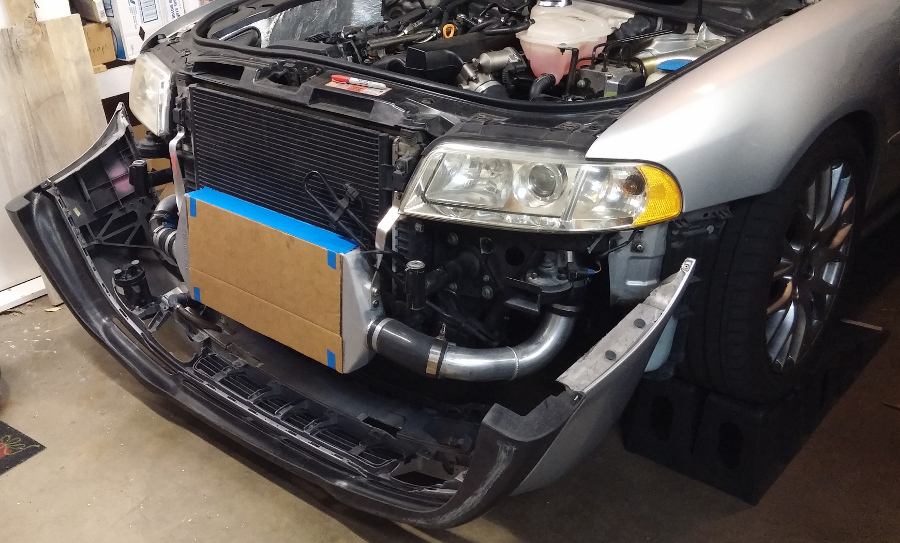
Here are pictures of my old CX Racing FMIC and piping:
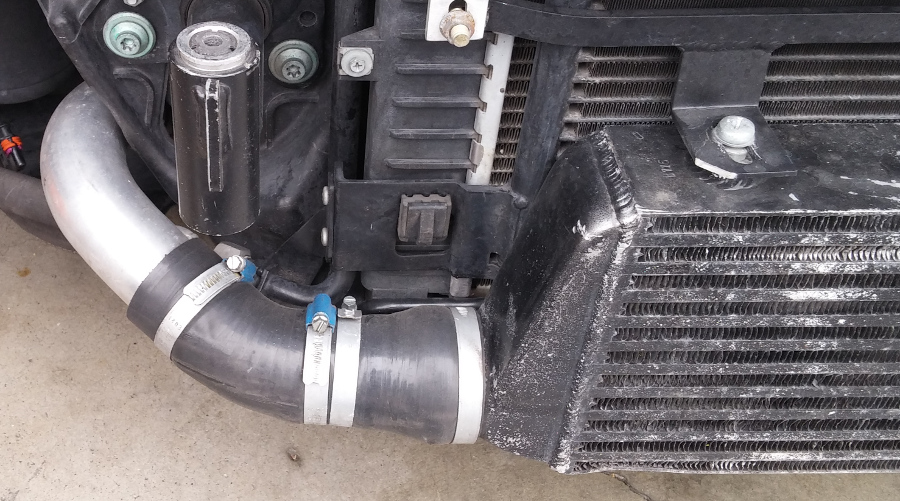
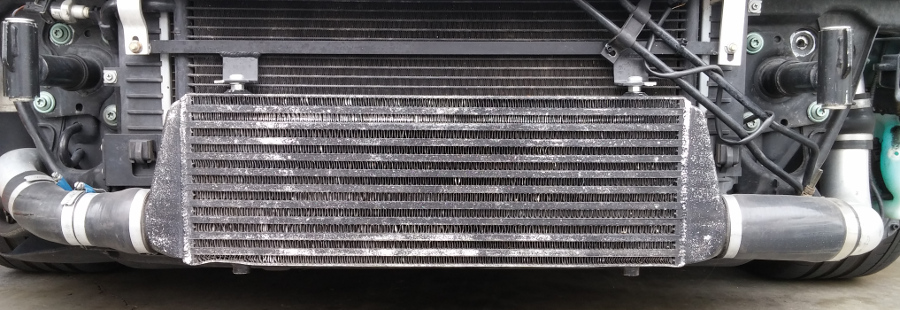
Comparing new TR18T FMIC (covered with cardboard to minimize damage to the fins) with the old CX Racing:
And a comparison of the inlet/outlet placement:
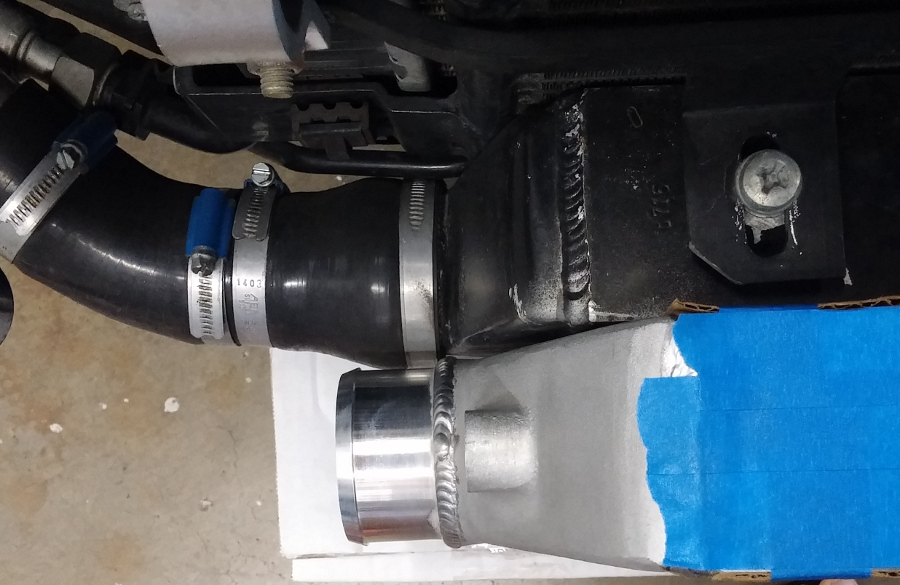
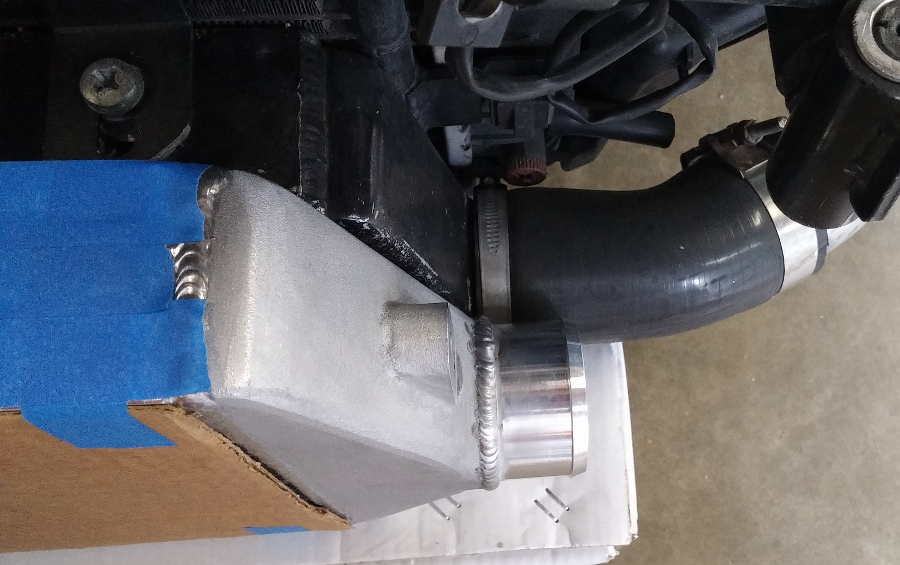
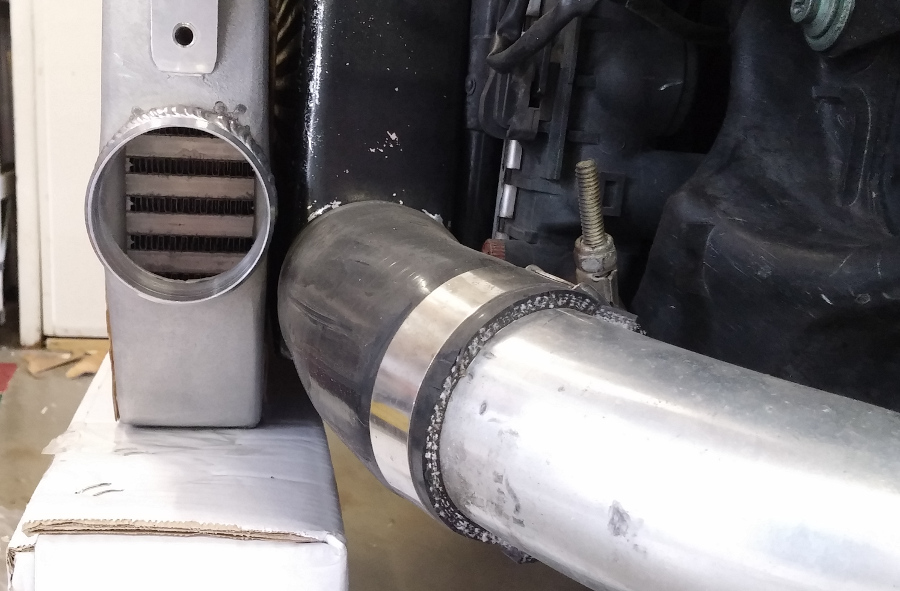
And with the TR18T fitted:
Didn't have time to take pictures of the trimmed bumper and bumper components last night.
During the past week I fitted the new TR18T intercooler. Compared to my old CX Racing intercooler, the TR18T is taller and the inlet/outlet are further from the bottom of the intercooler.
This meant I needed to slightly tweak my FMIC piping, fabricate new mounting brackets, and trim a bunch more out the bumper/bumper grills/bumper valence.
Here are pictures of my old CX Racing FMIC and piping:
Comparing new TR18T FMIC (covered with cardboard to minimize damage to the fins) with the old CX Racing:
And a comparison of the inlet/outlet placement:
And with the TR18T fitted:
Didn't have time to take pictures of the trimmed bumper and bumper components last night.
#289
05-20-2016, 02:10 PM
Also in the last week I replaced the stock 2.5bar MAP sensor with a 3bar MAP sensor, and received my new tune upgrade from Motoza! This tune upgrade covers the 3bar MAP sensor, larger FMIC, and takes advantage of the upgraded connecting rods I installed 4.5 months ago.
This tune upgrade will require some revisions but I'm quite excited for the end result.
Only bummer is that in 2 weeks I'll need to switch back to 91 octane gasoline from E85... in fact I've been running E85 exclusively for the past 1 year exactly.
Reason for the switch is going to a big car show, and there aren't any E85 stations along the way.
#290
06-23-2016, 01:08 PM
A few things have happened since my last post. Most of them were in preparation for attending Wuste European Car Festival in Las Vegas over June 3-4.
Switched to 91 octane from E85, ran 2 tanks (basically there and back), and switched back to E85 a few days ago. Still waiting on Motoza for my next E85 revision, though... it's been 3 weeks now... but that revision should increase boost to ~25psi.
Painted my lower valence and lower door/fender trims in my garage with spray cans. The biggest issue was that either the adhesion promoter didn't fully dry before I put on the primer (SEM flexible surfacer primer), or the primer isn't compatible with the adhesion promoter.
Basically in some places there were little cracks in the primer. I should have sprayed on more primer and sanded out the cracks, but I was in a rush considering the show was only 3 days away and I still had to spray the base coat and clear coat.
In the end it turned out okay, as long as you don't look at it within 3 feet!
I took off the day before the show from work also, so I could do all the last-minute detailing sort of things. Did a thorough wash, clay bar, and wax. Also changed the oil, vacuumed out the car, dusted the interior, and washed the all-weather floor mats.
Oh yeah, I also restored the headlights. Yikes!

Ah, that's better:

That marked the 3rd time I've restored these [original stock] headlights with the Sylvania kit.
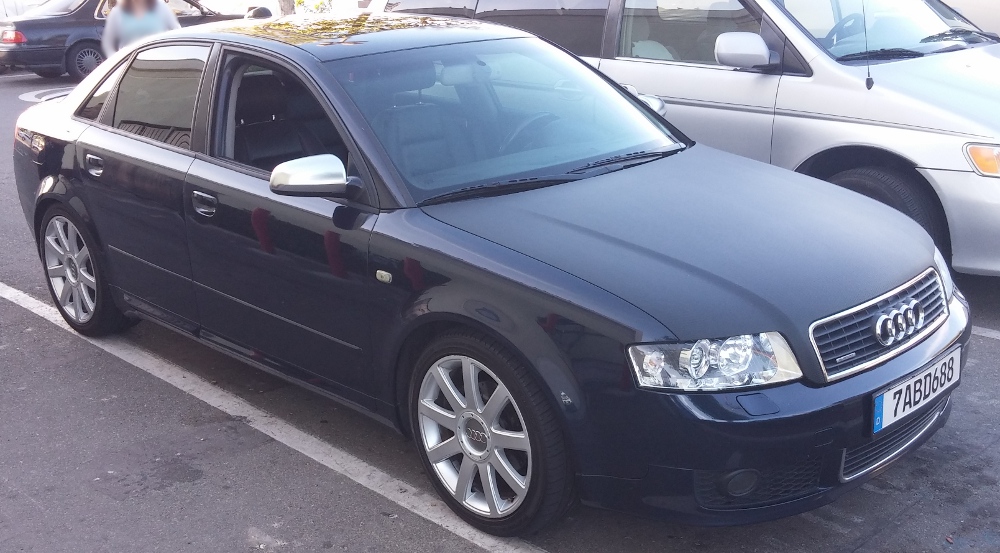
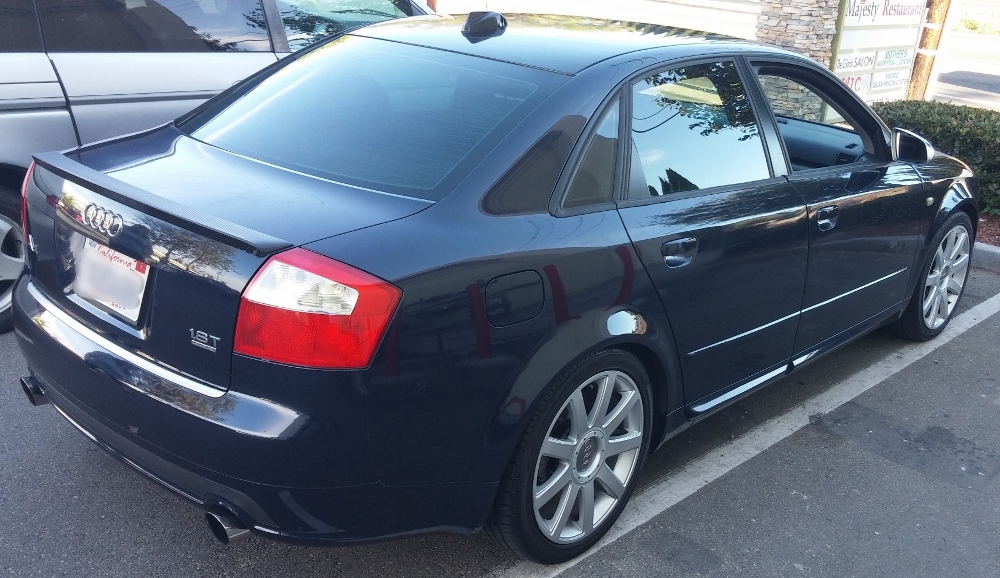
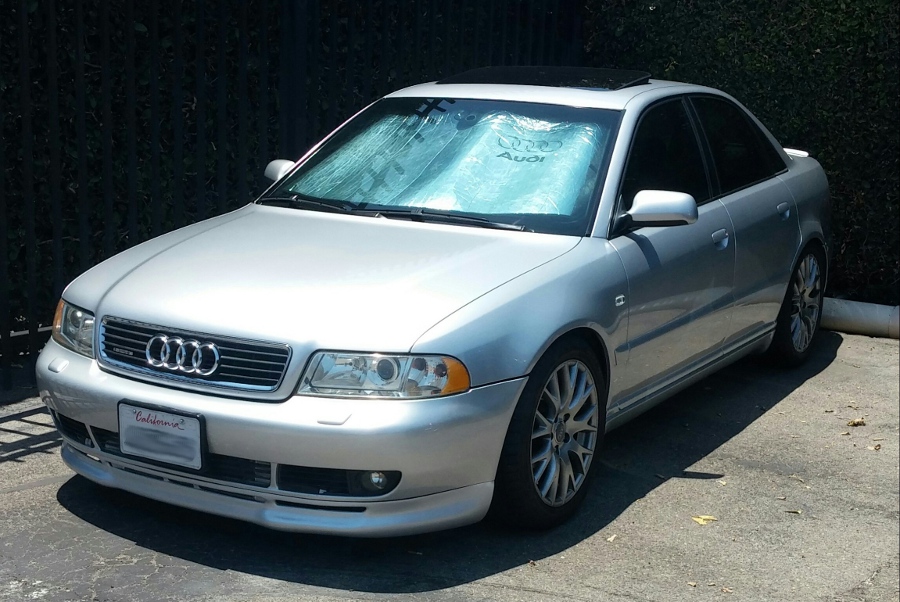
And this was my car at 11pm the night before the show, when we were leaving at 6am the following morning...
Drove out to Vegas with 3 other B5s, but they were all S4s:
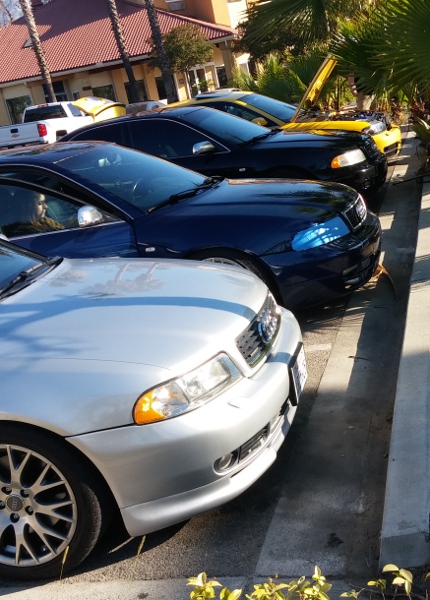
We had a great turnout at the show, and had up to 16 B5s all parked together at one time. In total there were 19-20 B5s that parked in our area at one time or another.
Switched to 91 octane from E85, ran 2 tanks (basically there and back), and switched back to E85 a few days ago. Still waiting on Motoza for my next E85 revision, though... it's been 3 weeks now... but that revision should increase boost to ~25psi.
Painted my lower valence and lower door/fender trims in my garage with spray cans. The biggest issue was that either the adhesion promoter didn't fully dry before I put on the primer (SEM flexible surfacer primer), or the primer isn't compatible with the adhesion promoter.
Basically in some places there were little cracks in the primer. I should have sprayed on more primer and sanded out the cracks, but I was in a rush considering the show was only 3 days away and I still had to spray the base coat and clear coat.
In the end it turned out okay, as long as you don't look at it within 3 feet!
I took off the day before the show from work also, so I could do all the last-minute detailing sort of things. Did a thorough wash, clay bar, and wax. Also changed the oil, vacuumed out the car, dusted the interior, and washed the all-weather floor mats.
Oh yeah, I also restored the headlights. Yikes!
Ah, that's better:
That marked the 3rd time I've restored these [original stock] headlights with the Sylvania kit.
And this was my car at 11pm the night before the show, when we were leaving at 6am the following morning...
Drove out to Vegas with 3 other B5s, but they were all S4s:
We had a great turnout at the show, and had up to 16 B5s all parked together at one time. In total there were 19-20 B5s that parked in our area at one time or another.

