
Bungled Clear Corner install with BIG pics.....
#1
 07-17-2006, 06:20 AM


This information is in addition to the info provided by joemac@dubaudi in this thread: ORIGINAL CLEAR CORNER LINK
Ok, so - after reading the thread from the link above, along with some other info on the CC mod, I decided to find someone locally to help out with the adventure.
I ended up getting a reply from OCA4-20t over at the Audizine forum and we set up a time to meet.
He lives 20 minutes south from where I live and traffic on the drive down was a nightmare.
Here is the reason why(below) , it should have served as an omen - but I had my mine set on doing the mod.

Once I got down there, it was about 1:45 pm and we decided to start immediately.
We started by looking around the headlights to locate the 3 screws. The first 2 are easy since they are on top.
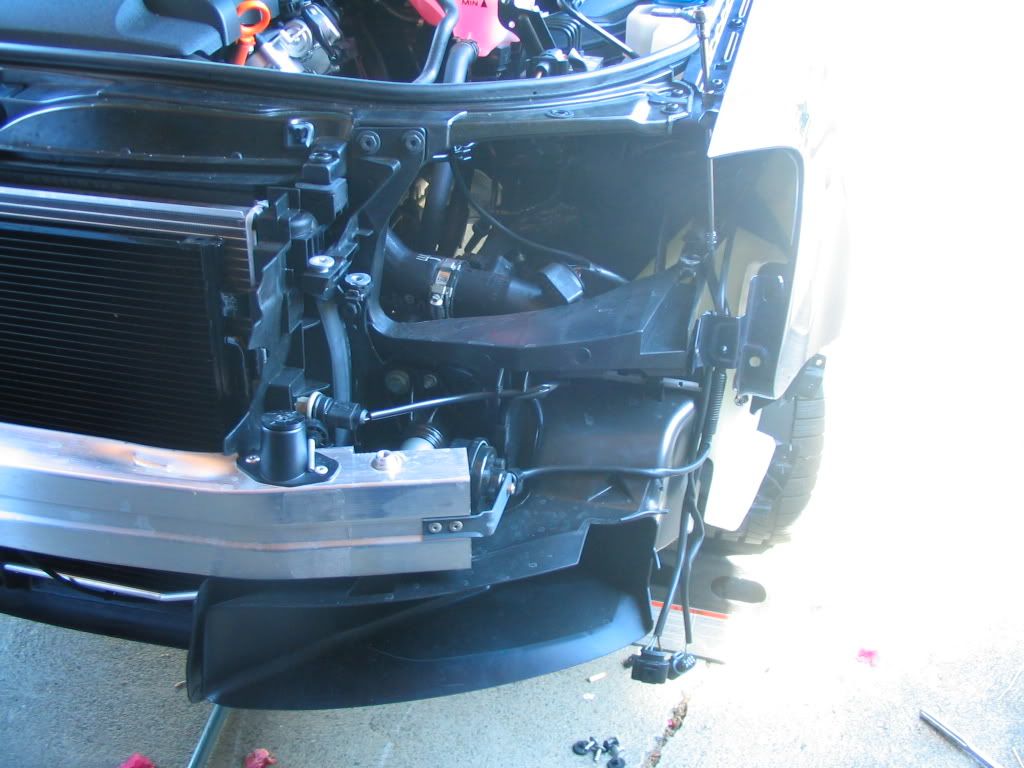
We couldn't find the 3rd and decided to take the front end off.
This was a bit of a challenge.
My car isn't lowered, so if you jack it up a bit, you do not need to take the wheels off to get to the main bolts that hold the front end on.
There are 2 bolts on each side, both behind the wheel well and about a foot and a half deep into the body of the car. Right side bolts, no problem.
Left side bolts.....nightmare. The bottom bolt is no problem. The top bolt is the one that is lots of work to get out.
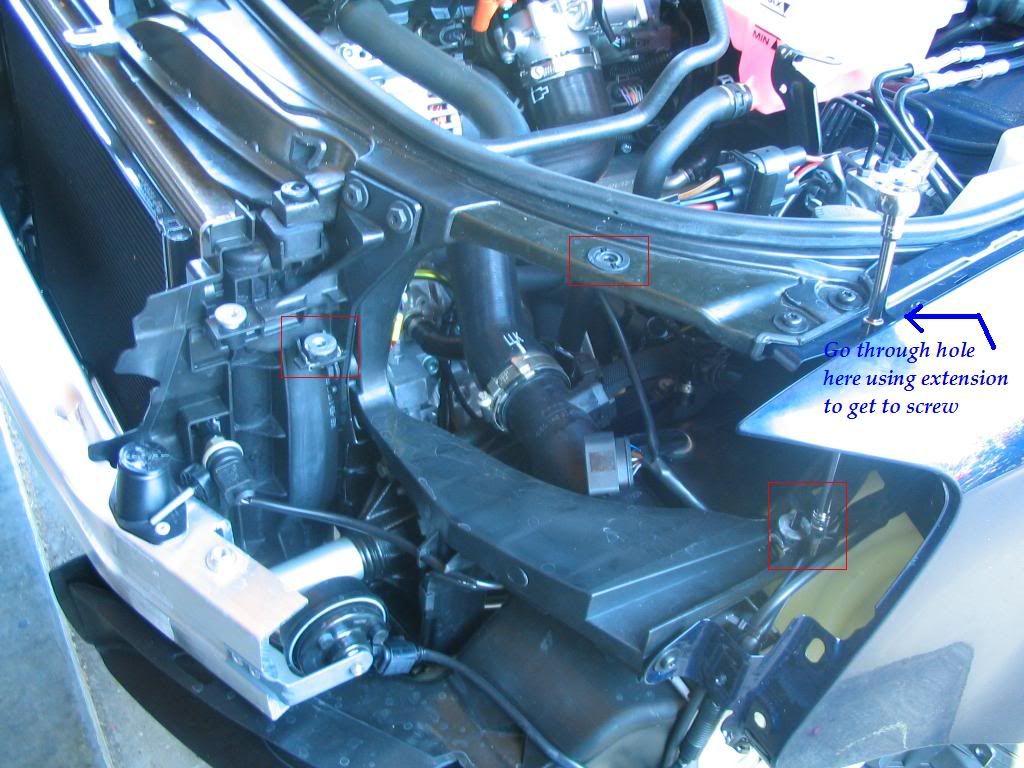
You need quite a bit of extension and a wobble socket would have come in handy here.
There is a bracket blocking part of your path to the bolt and a ridiculously located plastic fluid container in your way.
You have to squeeze your hand through the hole, get the extension onto the bolt, and then get the ratchet onto the extension.
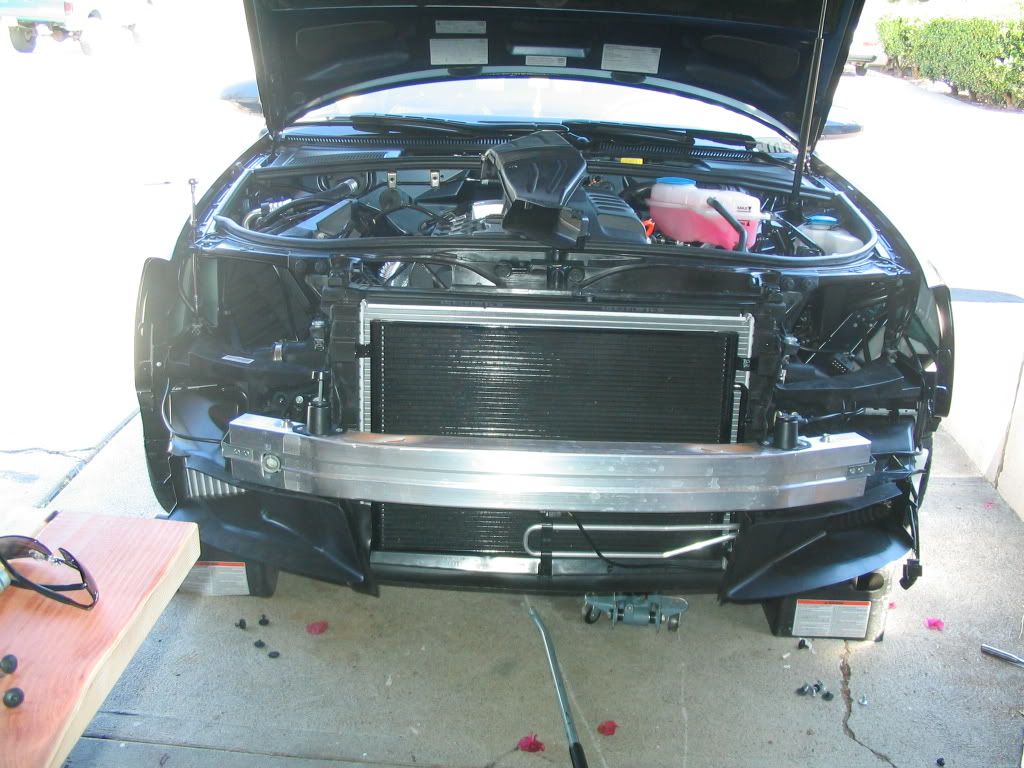
Quite difficult, you'll find out when you try yourself. Once the bumper was off, we got the headlights out, and here's where I made my mistake.
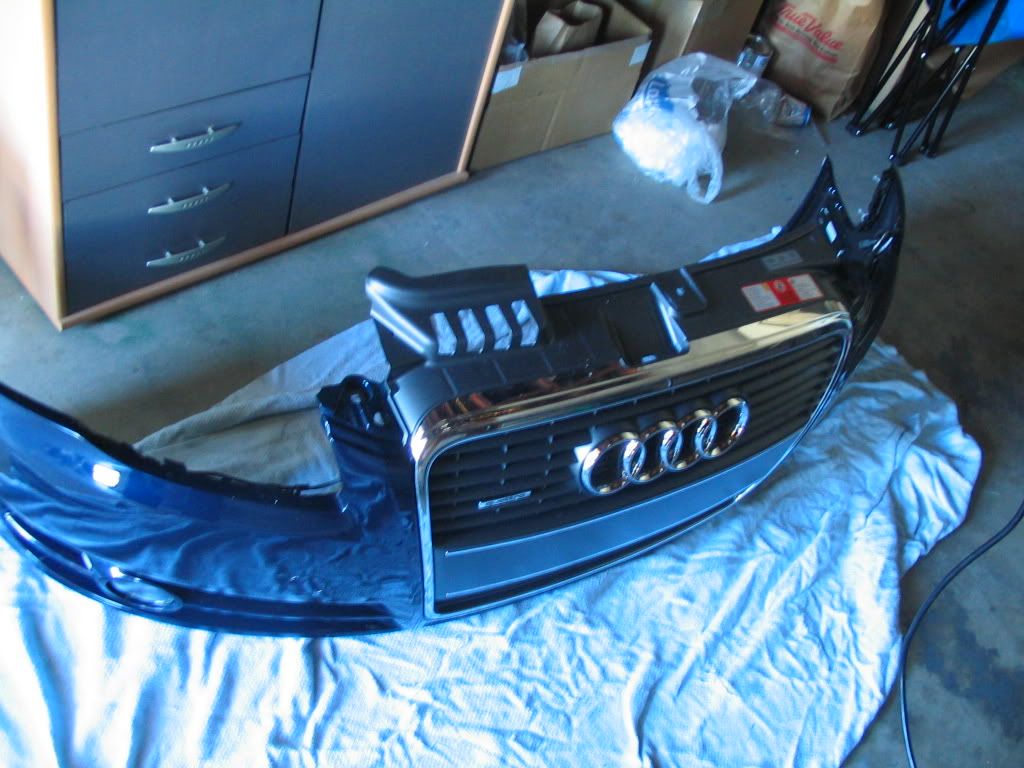
Here are some pictures before I get down to business with the rest of the story:
.
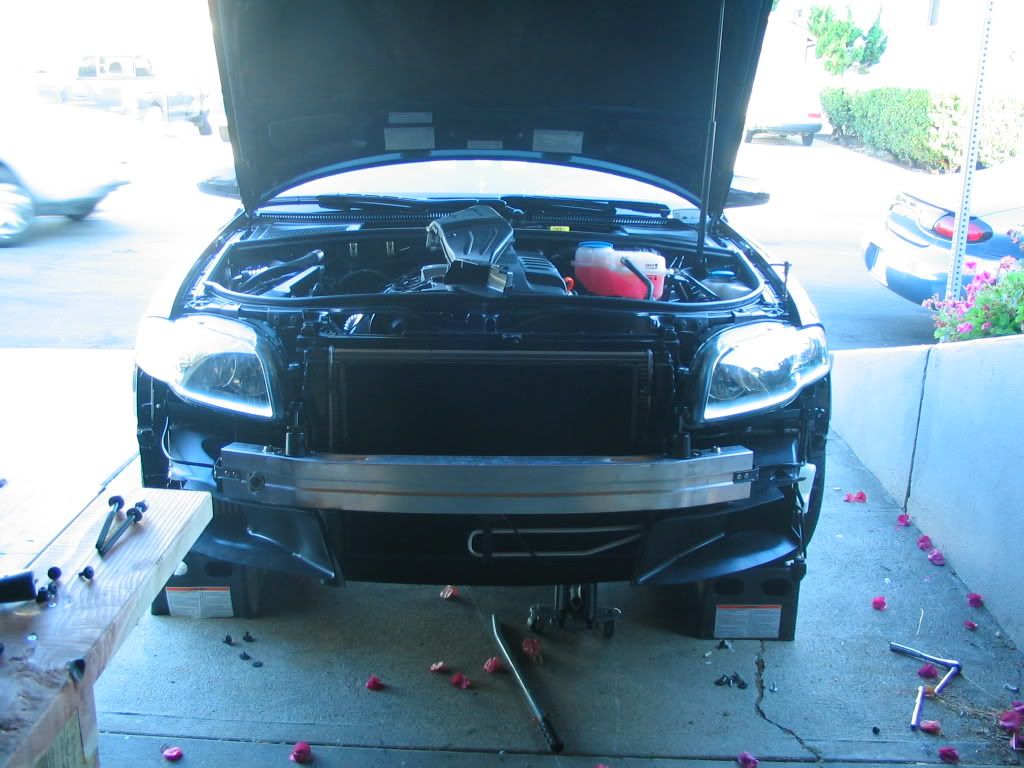
Front End
.
Headlight out
.
Both Headlights Removed
.
Headlights

.
Instructions and bolt locations
Once we had the headlight out, I decided that I wanted the ambers out before we put them in the oven......this was probably a mistake.
First off, I babied the first 3 or 4 hits.
You have to bang the SHI% out of it.
Just hit it hard as hell the first time - DO NOT BE AFRAID. [sm=trust_me.gif]
By giving it love taps, I succeeded in breaking part of the fixture.
Each tap pushed the fixture further in, the final one broke it.
If I would have hit it hard the first time, the amber would have come right off.
This is exactly what I did with the second amber after we had them in the oven and it worked like a charm.
Here's a pic of my screw-up. The shiny reflective piece you see to the right of the pic is the broken piece that had to be super-glued back in.
[sm=oopssign.gif]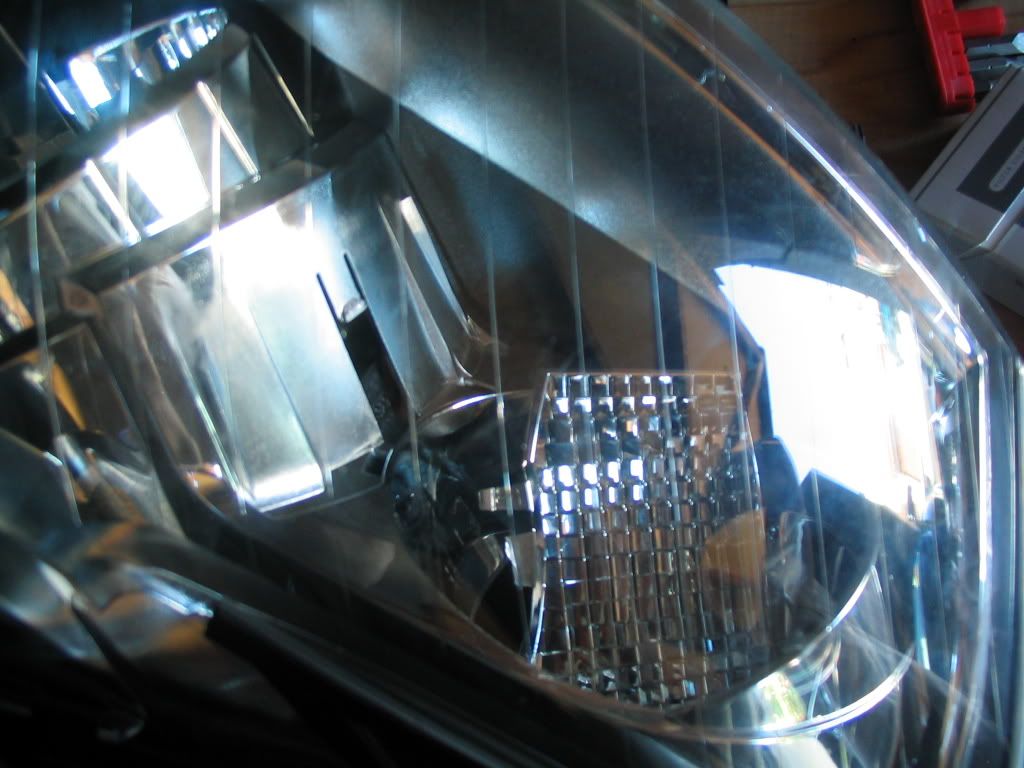 [sm=oopssign.gif]
Once I screwed the first one up, I decided we should put them in the oven first and then pop the ambers off.
Cooked 'em, popped the second amber, pulled the ambers out, reclipped them, and finished the mod.
.
Front end off, headlights back in
.
[sm=oopssign.gif]Here is the damage that my dumba$$ did[sm=oopssign.gif]
.
.
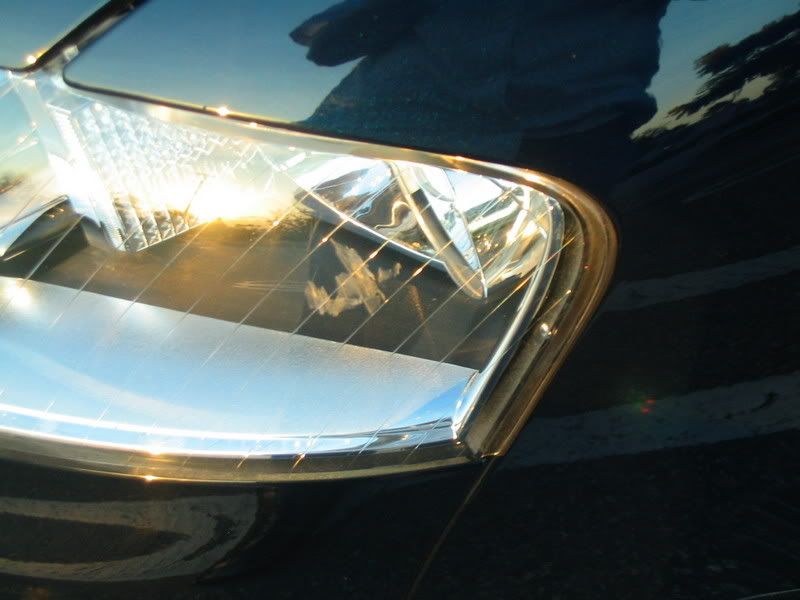
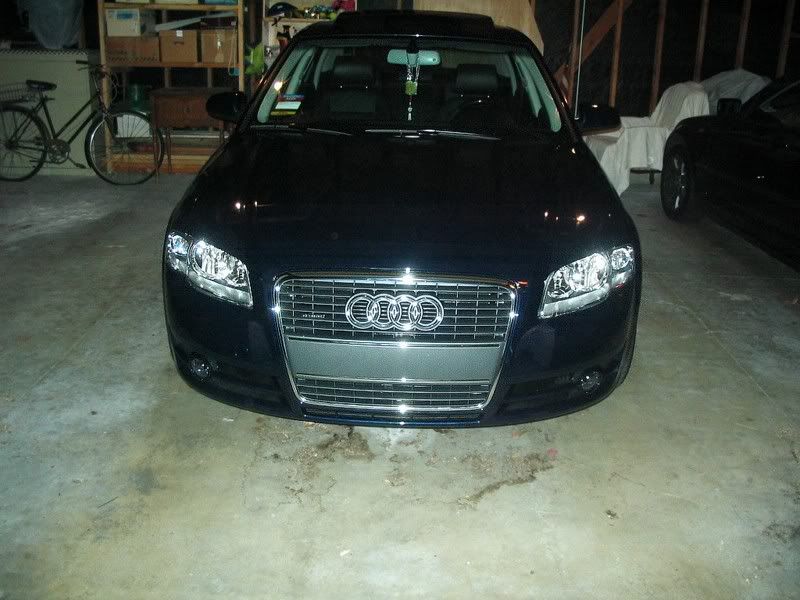
[sm=bling.gif][sm=bling.gif][sm=bling.gif]And....The finished product.[sm=bling.gif][sm=bling.gif][sm=bling.gif]
.
.
If there are any questions, I'd be happy to try to answer them.
Thanks again to Rob (OCA4-20t), who could not have been cooler if he tried......
.
.
Ok, so - after reading the thread from the link above, along with some other info on the CC mod, I decided to find someone locally to help out with the adventure.
I ended up getting a reply from OCA4-20t over at the Audizine forum and we set up a time to meet.
He lives 20 minutes south from where I live and traffic on the drive down was a nightmare.
Here is the reason why(below) , it should have served as an omen - but I had my mine set on doing the mod.
Once I got down there, it was about 1:45 pm and we decided to start immediately.
We started by looking around the headlights to locate the 3 screws. The first 2 are easy since they are on top.
We couldn't find the 3rd and decided to take the front end off.
This was a bit of a challenge.
My car isn't lowered, so if you jack it up a bit, you do not need to take the wheels off to get to the main bolts that hold the front end on.
There are 2 bolts on each side, both behind the wheel well and about a foot and a half deep into the body of the car. Right side bolts, no problem.
Left side bolts.....nightmare. The bottom bolt is no problem. The top bolt is the one that is lots of work to get out.
You need quite a bit of extension and a wobble socket would have come in handy here.
There is a bracket blocking part of your path to the bolt and a ridiculously located plastic fluid container in your way.
You have to squeeze your hand through the hole, get the extension onto the bolt, and then get the ratchet onto the extension.
Quite difficult, you'll find out when you try yourself. Once the bumper was off, we got the headlights out, and here's where I made my mistake.
Here are some pictures before I get down to business with the rest of the story:
.
Front End
.
Headlight out
.
Both Headlights Removed
.
Headlights
.
Instructions and bolt locations
Once we had the headlight out, I decided that I wanted the ambers out before we put them in the oven......this was probably a mistake.
First off, I babied the first 3 or 4 hits.
You have to bang the SHI% out of it.
Just hit it hard as hell the first time - DO NOT BE AFRAID. [sm=trust_me.gif]
By giving it love taps, I succeeded in breaking part of the fixture.
Each tap pushed the fixture further in, the final one broke it.
If I would have hit it hard the first time, the amber would have come right off.
This is exactly what I did with the second amber after we had them in the oven and it worked like a charm.
Here's a pic of my screw-up. The shiny reflective piece you see to the right of the pic is the broken piece that had to be super-glued back in.
[sm=oopssign.gif]
[sm=oopssign.gif]Once I screwed the first one up, I decided we should put them in the oven first and then pop the ambers off.
Cooked 'em, popped the second amber, pulled the ambers out, reclipped them, and finished the mod.
.
Front end off, headlights back in
.
[sm=oopssign.gif]Here is the damage that my dumba$$ did[sm=oopssign.gif]
.
.
[sm=bling.gif][sm=bling.gif][sm=bling.gif]And....The finished product.[sm=bling.gif][sm=bling.gif][sm=bling.gif]
.
.
If there are any questions, I'd be happy to try to answer them.
Thanks again to Rob (OCA4-20t), who could not have been cooler if he tried......
.
.
#3
07-17-2006, 07:06 AM
ORIGINAL: Turbo i3uddha
[sm=happybounce.gif]
corners look great!
man - that accident looks insane though...
[sm=happybounce.gif]
corners look great!
man - that accident looks insane though...
I don't think it had plates and it was shining like a diamond in the sun, although the pics don't do it justice. And it was CRUNCHED.
As far as the CC's, I love the way that it looks, but I'm going to have to figure out a way to get rid of the nasty scuff inside the lens cover.
#4
07-17-2006, 07:10 AM
looks hot man
damn i love your DSMIC, i want them so bad
damn i love your DSMIC, i want them so bad


Thread
Thread Starter
Forum
Replies
Last Post