
Valley Pan Gasket; Head Gaskets
#1
 04-10-2009, 03:08 AM

Ok gents, I did a search on "head gaskets", but I only found an article on 12v.org from which I could really get a wholesome idea on what I need to do.
I have the following:
- All the front end supplies for TB, WP, T-stat, pulleys
- 2 camshaft front seals
- 1 crankshaft front seal
- 1 cranshaft rear seal
- 4 cam plugs
- 2 freeze plugs (where are these going in?)
- Valley Pan Gasket
- 2 Head gaskets
- Intake manifold gaskets
2 -> Lower from Intake Man to Cyl Head
1 -> Upper to lower manifold
- EGR Valve gasket
- 2 Valve cover gaskets
Is it imperative I buy the 16 (8 x 2) head bolts to replace them, or the old ones are reusable?
Also, I would like to know from you guys with more experience in dealing with such repairs/replacements (Bob, AudiTech, Fred, George, Zippy, PPGoal, HXGaser, JeffLa) - of course if I don't stretch the cord too far with my inquiry and you guys don't mind offering your knowledge :
- Is there anything else I still need to purchase?
(I have also in mind an oil pan gasket-lower, and the drain plug, but that's a diff issue)
- I do need to take the camshafts out to accomplish replacing the bottom gaskets, don't I?
- Are there any concerns such as
TDC maintained at all times?
Issues to look for when reassembling everything else back together?
Do head gaskets require sealant?
Are the check valves (or non-retention valves) a dealership-only item? It doesn't seem I can a parts store to buy them from.
Please throw at me whatever you have in mind. I'm in no hurry. The 3242 and 3243 tools are safely locked in place....so far.
THANKS.
Last edited by chefro; 04-10-2009 at 01:18 PM.
#2
04-10-2009, 01:17 PM
For what is worth, tks Loach.
The head isn't bad to pull, but it is tedious. The intake manifold takes a bit of wrestling with because of number of screws and hoses, the exhaust manifold needs to have a heat shield removed which requires the O2 and EGT sensors to be extracted first. The head bolts have to be replaced with new, torque settings are typical for stretch bolts - pre-torque, then angles. Usually the head gasket has the requirements with it...Very important: drain the block of coolant first!! Draining the radiator is not sufficient and coolant will spill into your oil ways.
All can be done with engine in, no problems there.
All can be done with engine in, no problems there.
#3
04-10-2009, 09:29 PM
Uhuuuuuuu....must be a hard job and not too many digest it well. 42 views and no comments is a good testimony...Oh, well.
The engine's sound before starting the TB job
Video clip was taken with a digi photo cam, and when capturing has some constant "knocking" sound on the background, but can get a general idea about the engine's sound.
The engine's sound before starting the TB job
Video clip was taken with a digi photo cam, and when capturing has some constant "knocking" sound on the background, but can get a general idea about the engine's sound.
Last edited by chefro; 03-09-2011 at 03:55 AM.
#4
04-10-2009, 11:36 PM
Ok.. I havent done the job on this engine, yet, but here's general information I do know..
Freeze plugs are not needed unless you really wanna replace them. Most dont cause its hard to get them out while in the car.
Yes.. they are 'torque to yield' bolts and cant be reused. Even if they werent, the old bolt have been stretched for so long that they will never hold the torque setting again. And they will prolly snap.. not good. Aluminum heads, so make sure they have hardened washers.
Cant help ya there, though some do, some dont.
Nope.. just put it back before doing the timing 
Never. Niether do intake gaskets. The oil pan and valve cover gaskets could use a small, thin bead on both sides. Let it set up for 15 mins before assembling. If you only put the bead on the pan/cover side, the gasket will stay with the pan/cover when removed.
Sorry I dont know more than generalities, but I havent had mine long and havent needed to take it apart yet
I have the following:
- All the front end supplies for TB, WP, T-stat, pulleys
- 2 camshaft front seals
- 1 crankshaft front seal
- 1 cranshaft rear seal
- 4 cam plugs
- 2 freeze plugs (where are these going in?)
- All the front end supplies for TB, WP, T-stat, pulleys
- 2 camshaft front seals
- 1 crankshaft front seal
- 1 cranshaft rear seal
- 4 cam plugs
- 2 freeze plugs (where are these going in?)
Is it imperative I buy the 16 (8 x 2) head bolts to replace them, or the old ones are reusable?
- I do need to take the camshafts out to accomplish replacing the bottom gaskets, don't I?
- Are there any concerns such as TDC maintained at all times?
Do head gaskets require sealant?
Sorry I dont know more than generalities, but I havent had mine long and havent needed to take it apart yet
#5
04-11-2009, 02:43 AM
Thanks, Jim; I appreciate the willingness to help and the points made.
Probably I'm starting tomorrow to take the heads and the manifolds apart, if nothing else comes up (like wife wanting to go shopping...). I'm more "scared" of dealing with all the hosery, fuel rail, etc, etc more than taking apart something that can be screwed back on.
It looks like I'll have to order some more parts.
Tks again. Have a Happy Easter, everyone.
#6
04-11-2009, 03:37 AM
I'm more "scared" of dealing with all the hosery, fuel rail, etc, etc
One thing I've found useful is to get numbered wire markers like these here - http://cableorganizer.com/wire-marker/ - and label them. 1 to 1, 2 to 2, etc. Keep track of them on a list and check them off as you re-connect 'em. Ensures you don't miss one.
A paint marker - http://www.paintmarkersource.com/liquid.htm - or 'lumber crayon' works great for marking orientation of parts removed.
Good luck! I want pics!
#7
04-11-2009, 08:27 AM

You will also need exhaust manifold to downpipe gaskets. If you have them, it would be wise to replace the cam tensioner gaskets while you have it all apart - those do require a little sealant. And of course a gallon of G12 is needed once it's all back together. I can't count how many times I've been ready to roll but have no coolant and the dealer is closed!
It's not a bad job though, worst part in my opinion is the exhaust nuts because it is the only part that requires getting under the car. (Aside from draining coolant). Good luck!
It's not a bad job though, worst part in my opinion is the exhaust nuts because it is the only part that requires getting under the car. (Aside from draining coolant). Good luck!
#8
04-11-2009, 11:51 AM
Well, about pics...
I will try to document as I go. It may take a while since I'm working sporadically; every day a little bit, as I will find the time. I don't want to rush things, and luckily I don't need the car desperately on a daily basis.
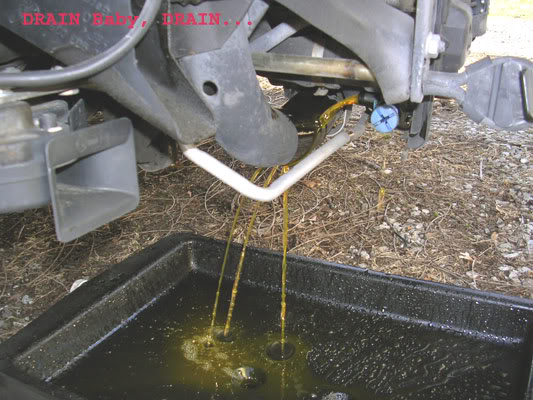
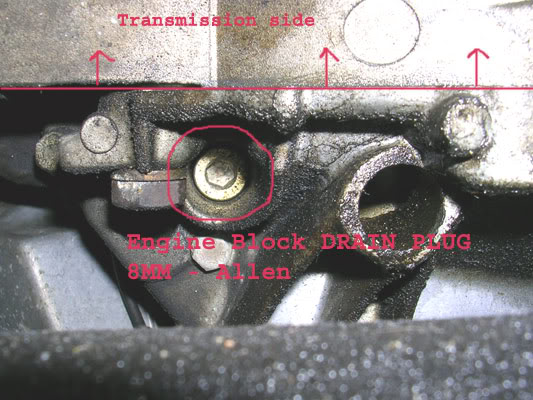
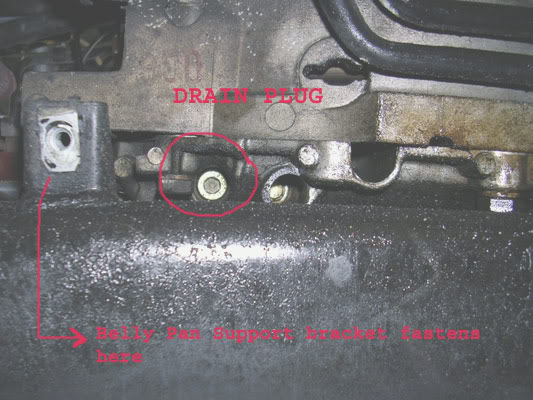
Anyway, I started a couple of days back when I was inquiring about the engine block drain plug... In the end, I got stubborn and I was able to remove it with the regullar Allen wrench... nasty position. In retrospect, the higher you have the car over your head when you work underneath, the better and easier is.
I only have a "generic" 2-ton jack + 2 stands, the kind of "kit" that you can buy at WalMart. Got it long time ago. It doesn't jack high enough and I don't like to gamble with improvised ways of adding "platforms" under the jack when starting raising the car. Could use planks of wood, but I can only have so many things around a small rented house with no garage...
Gee, I start digressing. To be shorter, I would say that I didn't have too much room under the car.
So it took me a while to try to flush twice the coolant with water, as posted in the other thread.
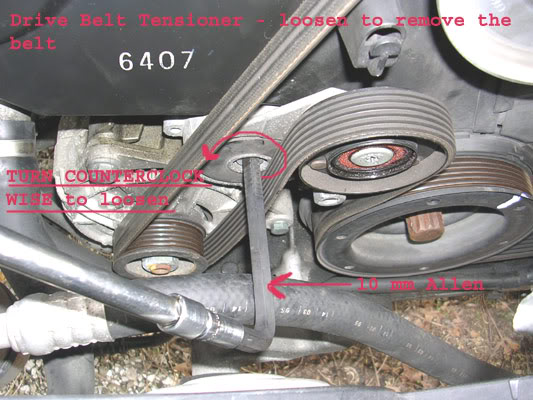
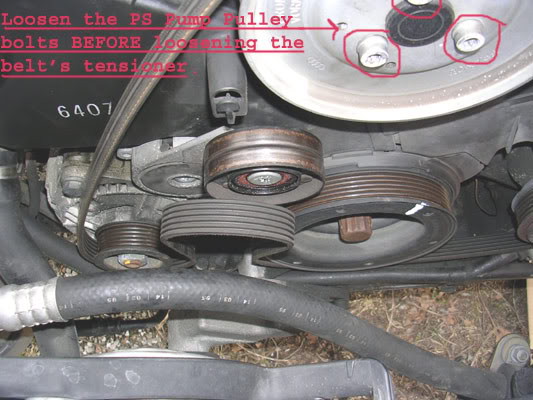
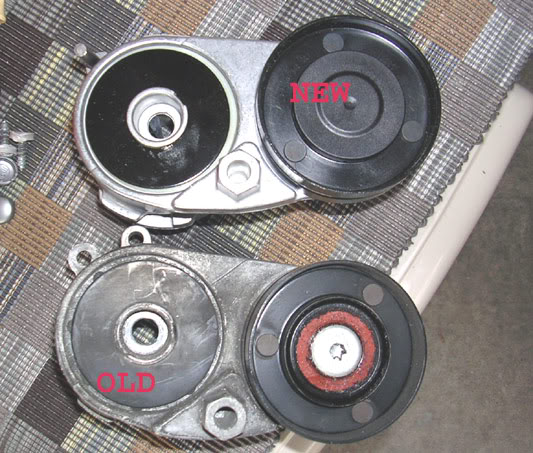
Yesterday it was raining so I couldn't do anything. I need to grab some more sockets and socket bits from the store (the drive belt dampner pulley - off the crankshaft - is a bitch to remove only with a regular Allen wrench... I undid two bolts and I had enough of it, as I busted two knuckles... damn you, Freddie! ) and replace all the front end stuff (TB, WP, T-stat, pulleys) before starting the head gaskets job.
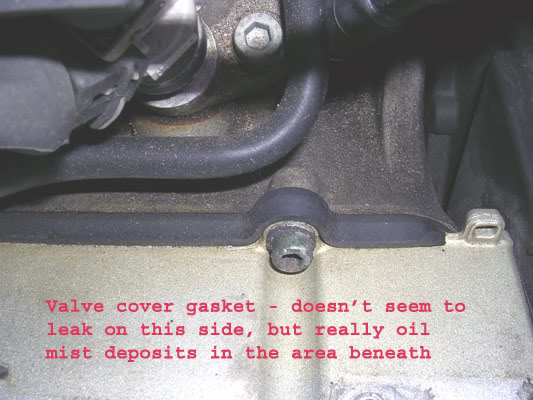
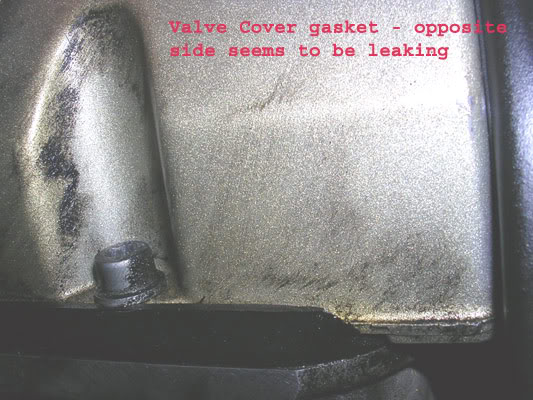
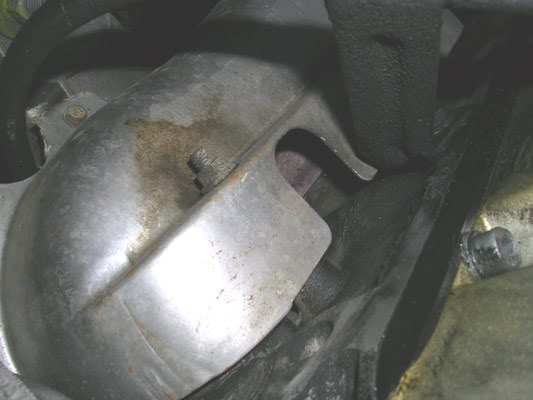
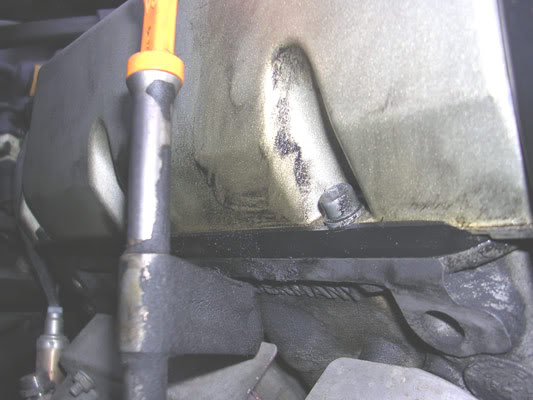
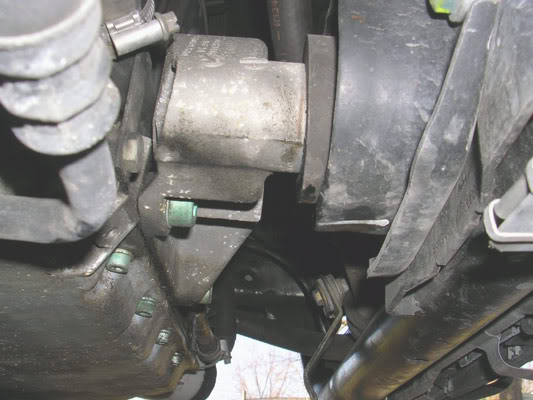
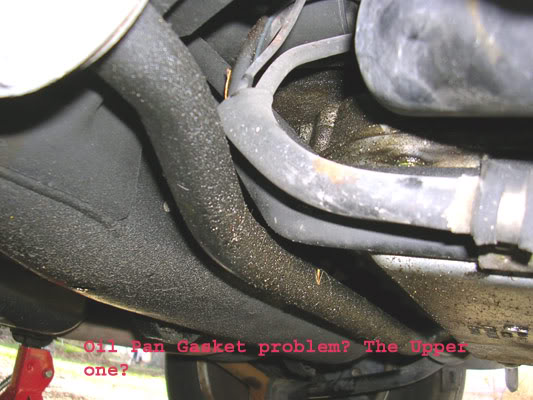
If my memory doesn't betray me, I remember saying some while back...right after I bought it... that this car does not have any apparent oil leaks. yeah, right... I apologize for lying without intent. At the time, the engine covers didn't come off yet... Boy, was I in for a surprize.
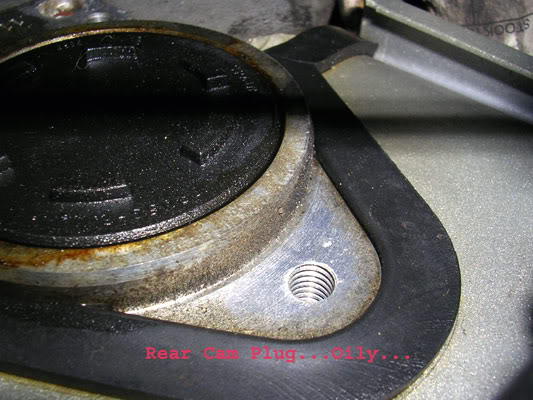
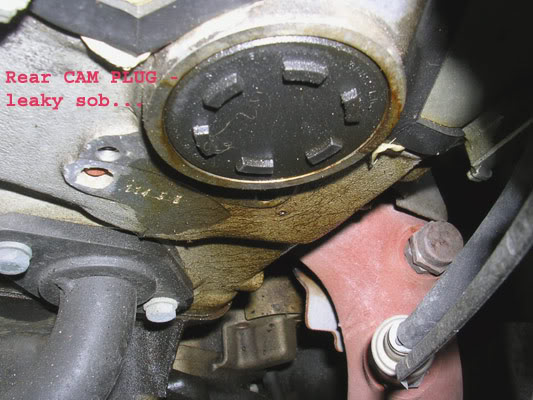
One valve cover leaks; the cam plug on the passenger side bank leaks; the oil pan needs a gasket - at least in between the lower and upper pan; I suspect at least one head gasket is leaking as well; and probably I'll find more bad stuff as I go.
I don't regret I bought it...no siree... but it is interesting how people, who otherwise appear to be the nicest and helpful people in the world, sell you a virtual piece of junk with a smile on their face. The words INSPECT, INSPECT, and INSPECT some more before you buy come to mind...
Sheesh, I start drifting again.
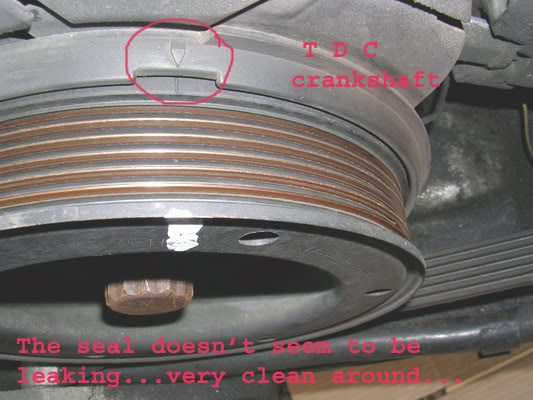
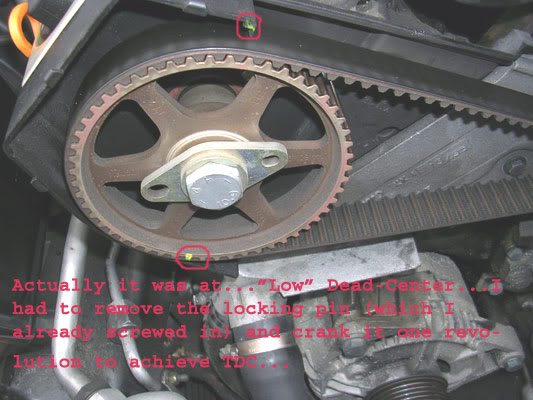
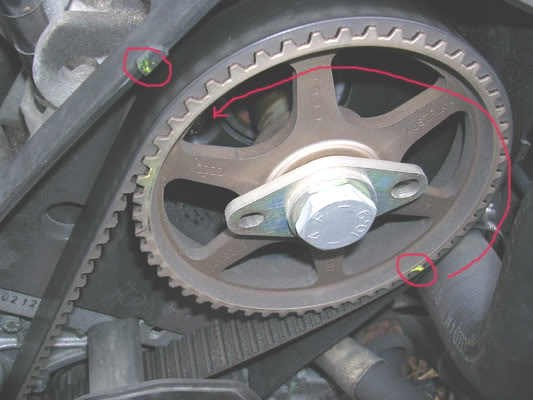
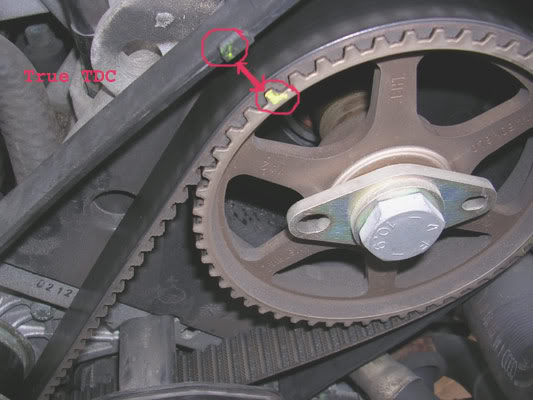
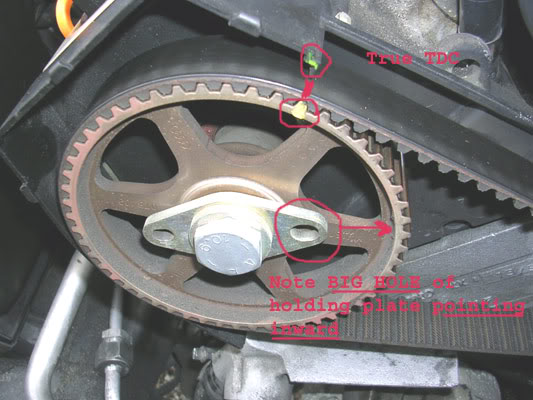
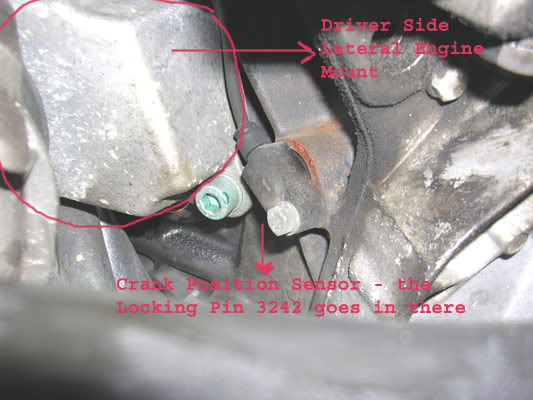
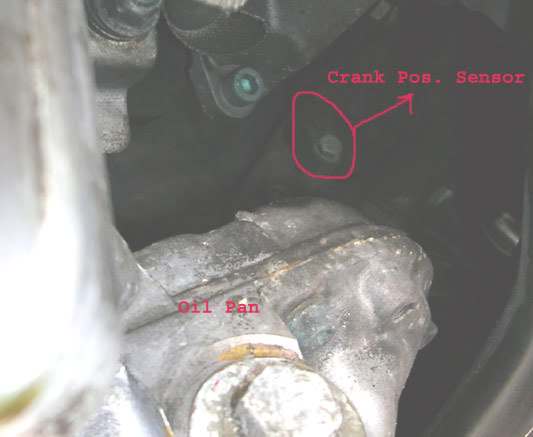
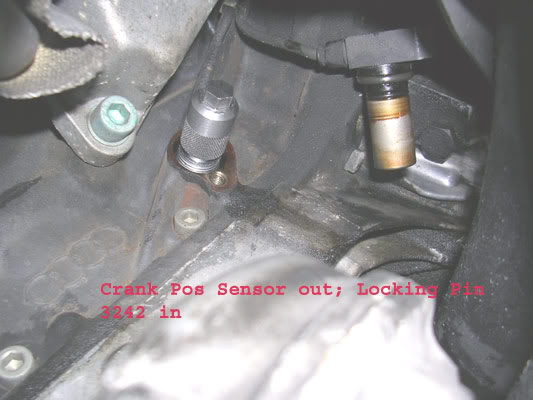
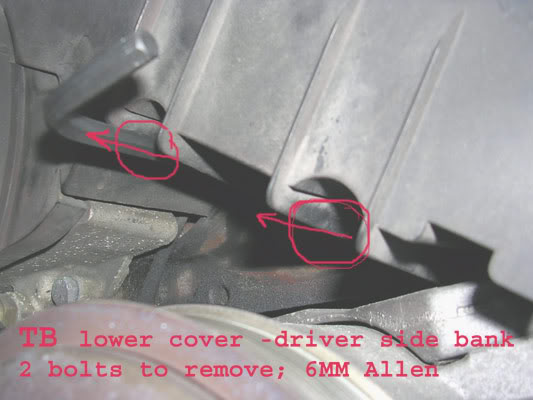
Well as far as the TB job itself, I ran into a few quirks. Draining the coolant was one. Also, I installed the crank locking pin and then I found out that the cams where one revolution off... Had to remove it, turn the crank and then re-install it... Following directions is not always straight forward or bullet proof... Adapting them to your particular case and common sense are the keys, I believe.
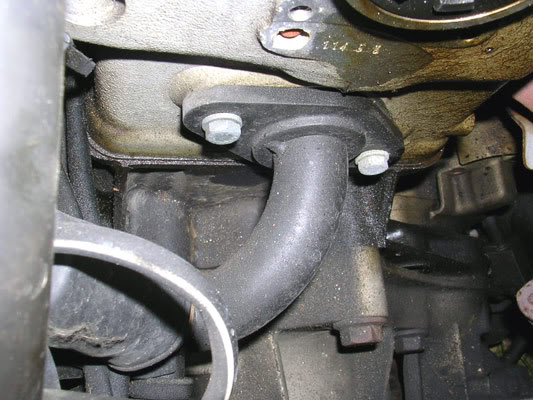
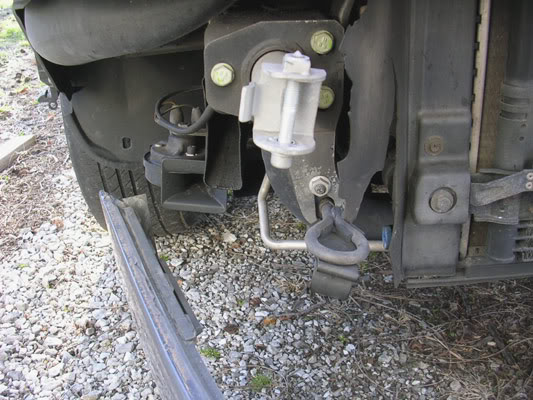
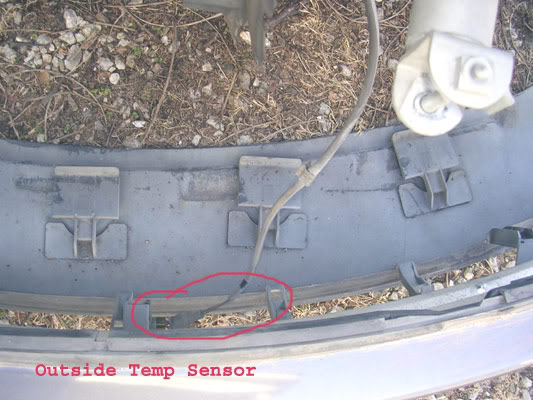
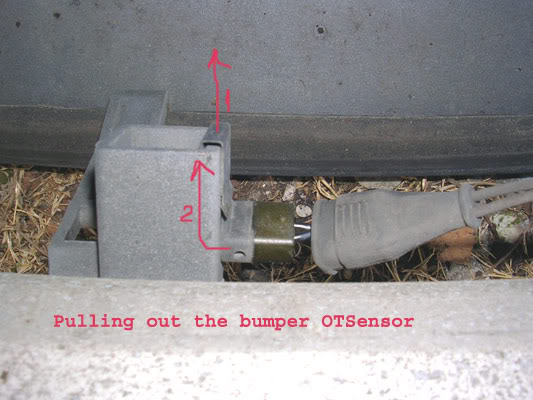
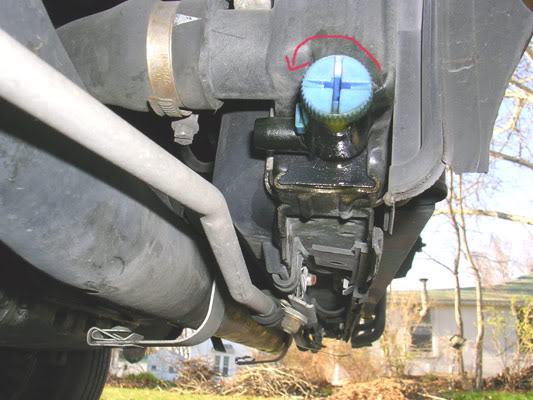
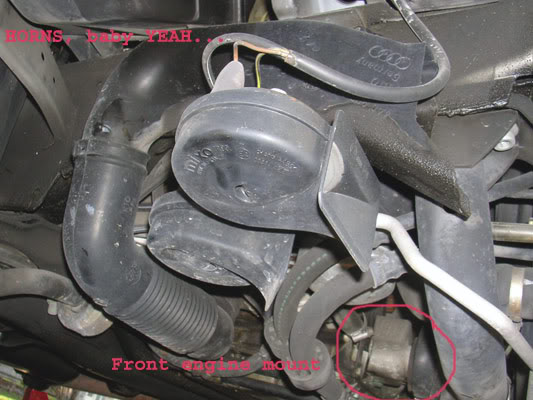
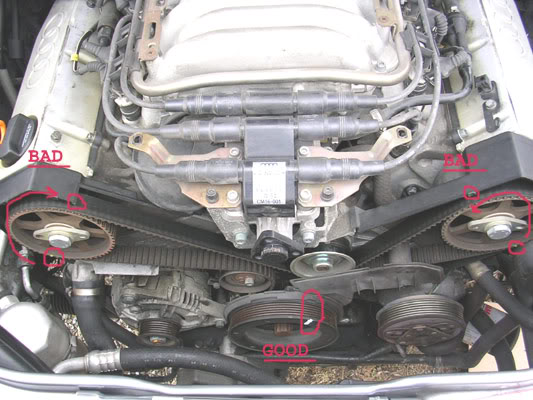
Thus far, here are some pics illustrating where I'm at this point in time (before today, when later on when I'll start replacing the front end stuff first).
I will try to document as I go. It may take a while since I'm working sporadically; every day a little bit, as I will find the time. I don't want to rush things, and luckily I don't need the car desperately on a daily basis.
Anyway, I started a couple of days back when I was inquiring about the engine block drain plug... In the end, I got stubborn and I was able to remove it with the regullar Allen wrench... nasty position. In retrospect, the higher you have the car over your head when you work underneath, the better and easier is.
I only have a "generic" 2-ton jack + 2 stands, the kind of "kit" that you can buy at WalMart. Got it long time ago. It doesn't jack high enough and I don't like to gamble with improvised ways of adding "platforms" under the jack when starting raising the car. Could use planks of wood, but I can only have so many things around a small rented house with no garage...
Gee, I start digressing. To be shorter, I would say that I didn't have too much room under the car.
So it took me a while to try to flush twice the coolant with water, as posted in the other thread.
Yesterday it was raining so I couldn't do anything. I need to grab some more sockets and socket bits from the store (the drive belt dampner pulley - off the crankshaft - is a bitch to remove only with a regular Allen wrench... I undid two bolts and I had enough of it, as I busted two knuckles... damn you, Freddie!
) and replace all the front end stuff (TB, WP, T-stat, pulleys) before starting the head gaskets job. If my memory doesn't betray me, I remember saying some while back...right after I bought it... that this car does not have any apparent oil leaks. yeah, right... I apologize for lying without intent. At the time, the engine covers didn't come off yet... Boy, was I in for a surprize.
One valve cover leaks; the cam plug on the passenger side bank leaks; the oil pan needs a gasket - at least in between the lower and upper pan; I suspect at least one head gasket is leaking as well; and probably I'll find more bad stuff as I go.
I don't regret I bought it...no siree... but it is interesting how people, who otherwise appear to be the nicest and helpful people in the world, sell you a virtual piece of junk with a smile on their face. The words INSPECT, INSPECT, and INSPECT some more before you buy come to mind...
Sheesh, I start drifting again.
Well as far as the TB job itself, I ran into a few quirks. Draining the coolant was one. Also, I installed the crank locking pin and then I found out that the cams where one revolution off... Had to remove it, turn the crank and then re-install it... Following directions is not always straight forward or bullet proof... Adapting them to your particular case and common sense are the keys, I believe.
Thus far, here are some pics illustrating where I'm at this point in time (before today, when later on when I'll start replacing the front end stuff first).


#10
04-11-2009, 02:51 PM
It may take a while since I'm working sporadically; every day a little bit, as I will find the time.
Actually, your engine looks cleaner than mine

Thanks for the pics!