G89 Fresh Air Intake Temperature Sensor Replacement
#1
 10-04-2013, 11:44 PM

So this is the procedure to replace the more often than not faulty fresh air intake temperature sensor. Common symptoms for a faulty unit would be as follows.
1. Air conditioning compressor shuts off randomly, blowing outside temperature at you.
2. The read out temperature on your lcd screen fluctuates and is often wrong by multiple degrees.
When the A/C, Climate Control system is scanned for error codes it will throw up a code for the G89 fresh air intake temperature sensor. Make sure you clear this after replacing the unit. That way you will know in the future if it throws up an error code.
First step unscrew the three outside phillip head screws on the rain tray, with the hood still closed.

Second pop the hood and unscrew the 8mm bolt in the center of the rain tray cover on the passenger side under the hood.
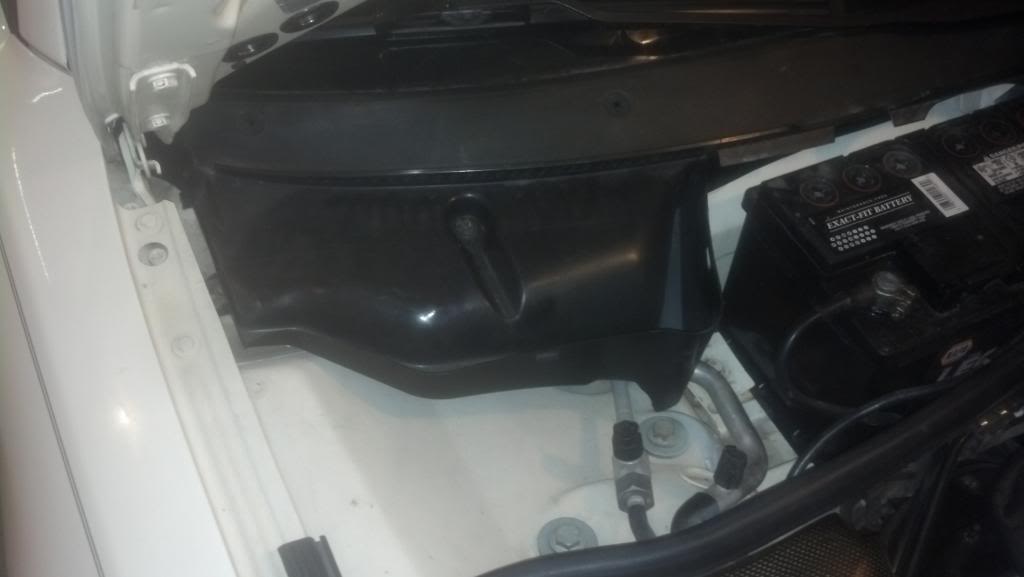
Third remove metal clip holding drivers side and passenger side rain tray assemblies together in middle of engine bay (right above the battery)(sometimes it is popped off and missing).
Fourth remove the rain tray top piece assembly, and the cabin air filter. Then remove the 3 10mm bolts from the bottom piece of the rain tray. Remove that piece.
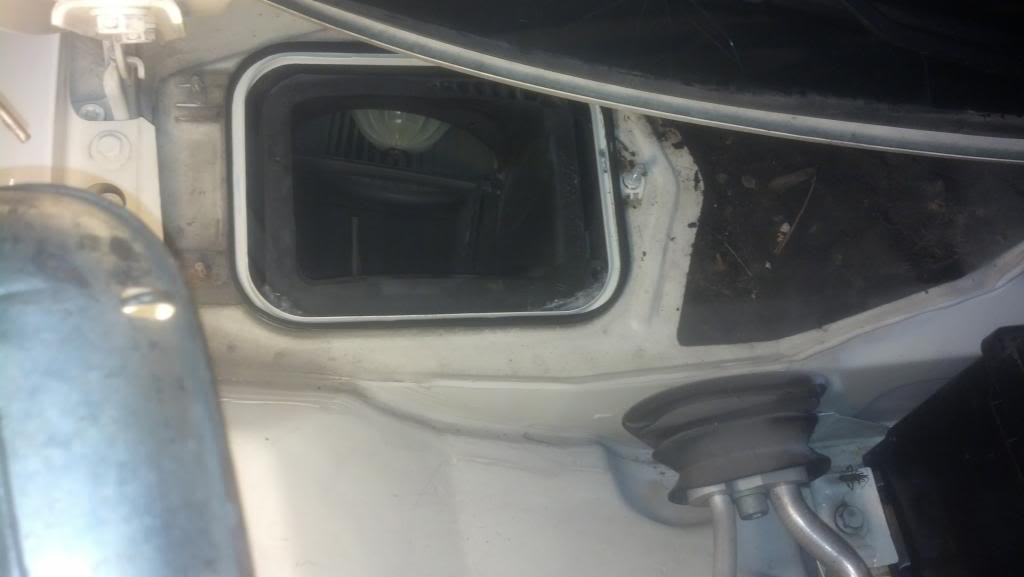
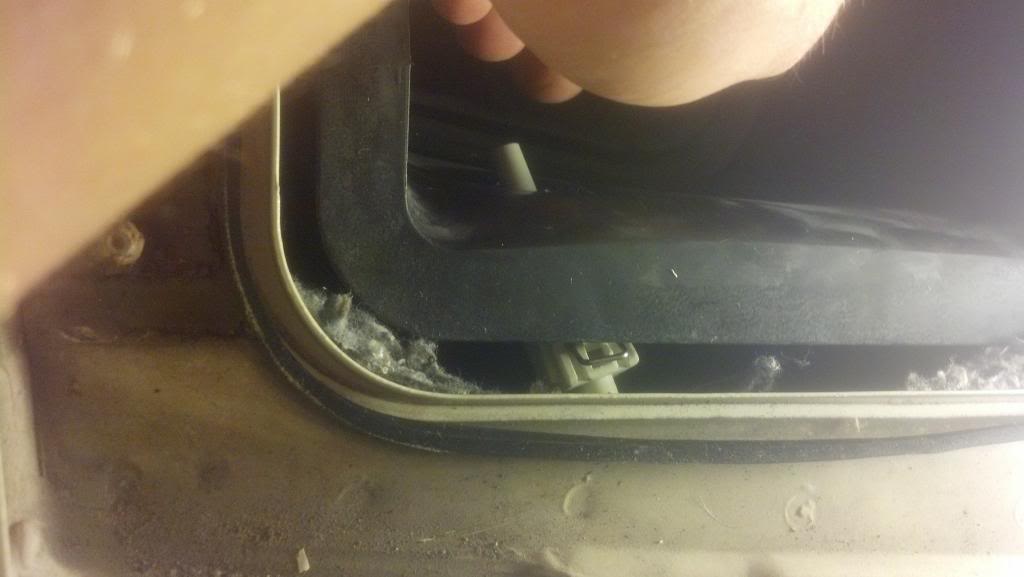
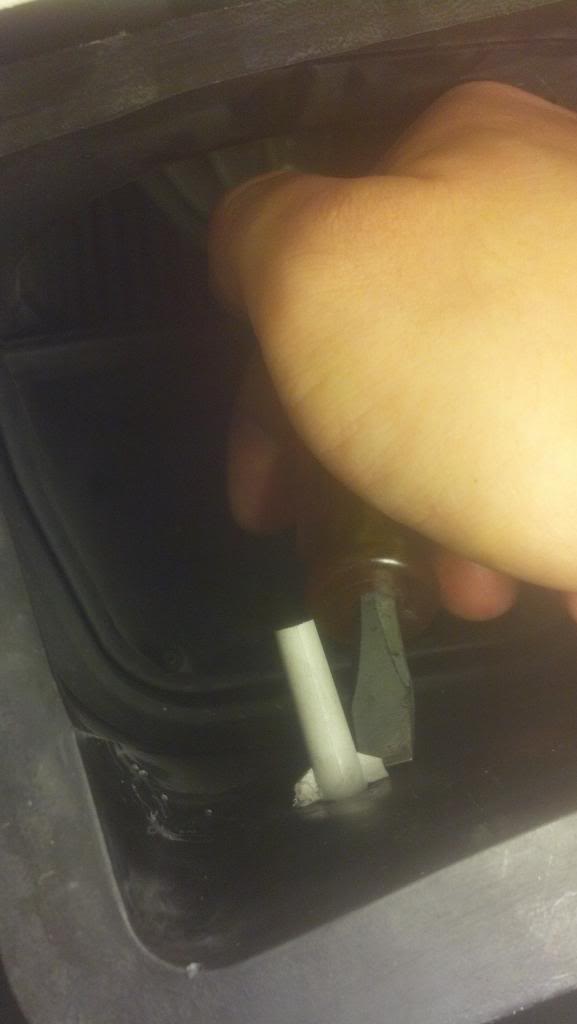
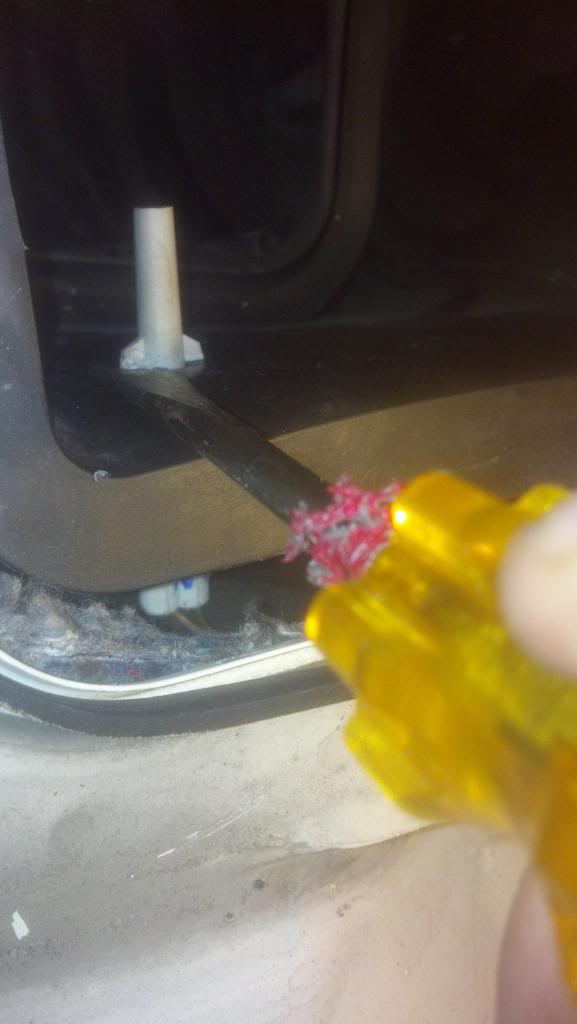
Fifth see that little plastic needle thing? You have to remove that. Don't worry about snapping the end of it. Since it is longer than the replacement, breaking it actually makes it easier to get out. It is very fragile, the replacement I got is shorter and more durable, not much though. All you have to do to remove it is turn the base 90 degrees. Once you have that free, take a long thin screwdriver and through the tiny crack where you can see connector stick it down there and fish out the connector. Try to get through the connector plug wire and pull up. Push down on the plastic lip above the plug with your fingers to give just enough clearance to pull the plug through.
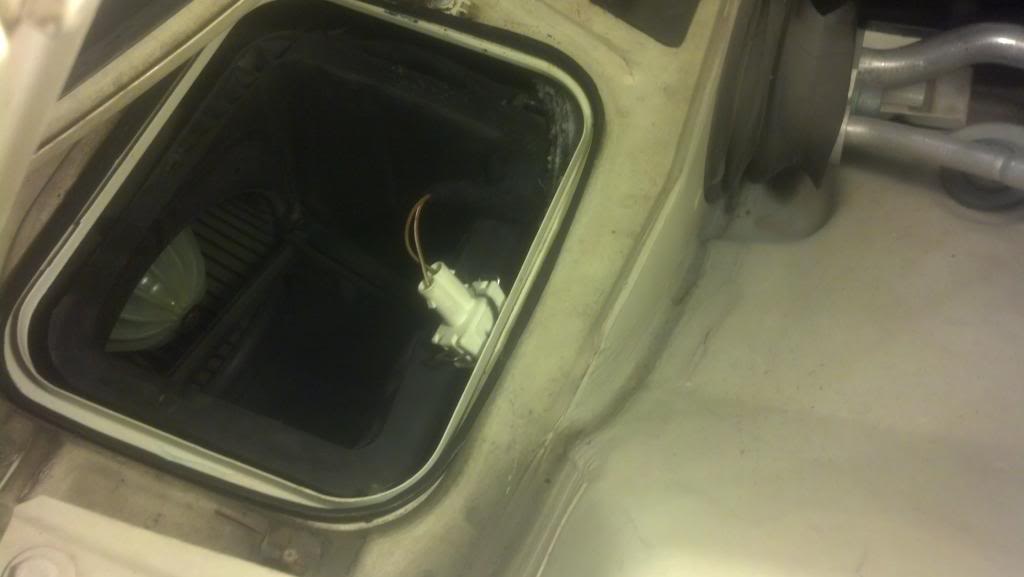
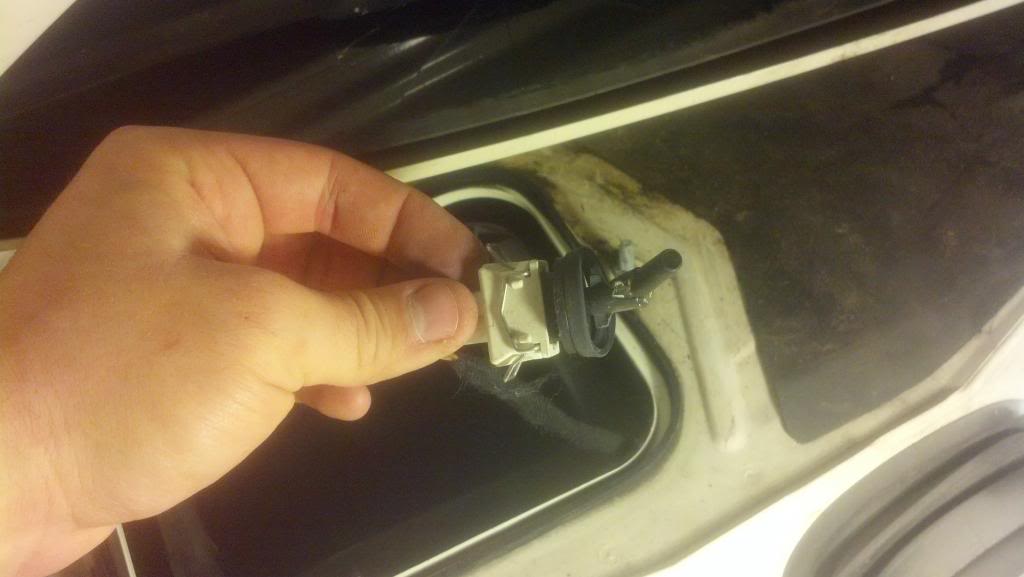
Sixth once it is pulled through connect new plug and push down between plastic and metal lip. Getting it to go through the hole again is quite the challenge and will require a bit of patience, and long screwdrivers or fingers. Once it is in the hole pull it through and twist 90 degrees by pushing up on one of the plastic bumps on the inside and down on one of the plastic bumps. I used a small flat head screwdriver to push up and a longer flat head screwdriver to push down.
Seventh reassemble in reverse order of disassembly.
You can try and go through the glove box opening like some have recommended. I tried and it is not possible without taking a lot things apart. I purchased an aftermarket sensor. Brand was Uro.
Your air conditioning should now be much more reliable.
The Audi Part # for sensor #4A0820539A
1. Air conditioning compressor shuts off randomly, blowing outside temperature at you.
2. The read out temperature on your lcd screen fluctuates and is often wrong by multiple degrees.
When the A/C, Climate Control system is scanned for error codes it will throw up a code for the G89 fresh air intake temperature sensor. Make sure you clear this after replacing the unit. That way you will know in the future if it throws up an error code.
First step unscrew the three outside phillip head screws on the rain tray, with the hood still closed.

Second pop the hood and unscrew the 8mm bolt in the center of the rain tray cover on the passenger side under the hood.
Third remove metal clip holding drivers side and passenger side rain tray assemblies together in middle of engine bay (right above the battery)(sometimes it is popped off and missing).
Fourth remove the rain tray top piece assembly, and the cabin air filter. Then remove the 3 10mm bolts from the bottom piece of the rain tray. Remove that piece.

Fifth see that little plastic needle thing? You have to remove that. Don't worry about snapping the end of it. Since it is longer than the replacement, breaking it actually makes it easier to get out. It is very fragile, the replacement I got is shorter and more durable, not much though. All you have to do to remove it is turn the base 90 degrees. Once you have that free, take a long thin screwdriver and through the tiny crack where you can see connector stick it down there and fish out the connector. Try to get through the connector plug wire and pull up. Push down on the plastic lip above the plug with your fingers to give just enough clearance to pull the plug through.


Sixth once it is pulled through connect new plug and push down between plastic and metal lip. Getting it to go through the hole again is quite the challenge and will require a bit of patience, and long screwdrivers or fingers. Once it is in the hole pull it through and twist 90 degrees by pushing up on one of the plastic bumps on the inside and down on one of the plastic bumps. I used a small flat head screwdriver to push up and a longer flat head screwdriver to push down.


Seventh reassemble in reverse order of disassembly.

You can try and go through the glove box opening like some have recommended. I tried and it is not possible without taking a lot things apart. I purchased an aftermarket sensor. Brand was Uro.
Your air conditioning should now be much more reliable.
The Audi Part # for sensor #4A0820539A
#5
02-08-2014, 03:27 PM
I am curious if this is easier, than going through the glove box? if so, is there a detailed write on the glove box method? 
I ordered a replacement G89 Fresh Air Intake Temperature Sensor, its on the way and i want to have all the information on how to replace it myself.
I ordered a replacement G89 Fresh Air Intake Temperature Sensor, its on the way and i want to have all the information on how to replace it myself.
#6
02-09-2014, 01:29 PM
You can try going behind the glove box but since I just recently did a heater core on one of these cars I can assure you even with the glove box removed it is on the other side of the hvac air box deal and is pretty much impossible to reach with out removing the dash. That is why I tried the method above and was pumped when it worked. Just felt I had to share it lol. Good luck with the install man ;]
#7
02-09-2014, 02:49 PM
You can try going behind the glove box but since I just recently did a heater core on one of these cars I can assure you even with the glove box removed it is on the other side of the hvac air box deal and is pretty much impossible to reach with out removing the dash. That is why I tried the method above and was pumped when it worked. Just felt I had to share it lol. Good luck with the install man ;]
Thanks for the tip, I'll go with your method as i am trying to keep, complications to a minimum.
what year is your B5, that you changed the sensor on? 2001 like mine? if its another year, the sensor would still be in the same location, correct? 1996-2001 ?

#8
02-22-2014, 07:50 PM
I replaced my Fresh Air intake duct Temperature Sensor, today!
It was easy, going under the cabin air filter, than going through the glove box.")
It took me about an hour, total to replace and put everything back together.
The only thing i had to do is break off a couple of pieces of plastic, near the lip of the hole, where i had to pull the sensor up, in between the metal and plastic gap.
Once i got the sensor out of the tiny hole it sticks out from, it fell down, So i had to break the plastic, so i could see down in the hole, so i can then fish it out, use a screw driver to wedge between the plastic and metal and pulled it out with a needle nose pliers. then switched the bad sensor with the new one and put everything back together.
I also changed the cabin air filter, while i was at it.
Now all i need to do is clear the code with my vag-com, connected to my laptop, then the code shouldn't come back.
Thanks for this write up, MrSnickelsnizer. It was easy as pie, i was in and out very quickly, thanks to this tutorial.
Nobody should use the glove box method to change this sensor, only if they are going to change the heater core, should they remove the glove box.
It was easy, going under the cabin air filter, than going through the glove box.
It took me about an hour, total to replace and put everything back together.
The only thing i had to do is break off a couple of pieces of plastic, near the lip of the hole, where i had to pull the sensor up, in between the metal and plastic gap.
Once i got the sensor out of the tiny hole it sticks out from, it fell down, So i had to break the plastic, so i could see down in the hole, so i can then fish it out, use a screw driver to wedge between the plastic and metal and pulled it out with a needle nose pliers. then switched the bad sensor with the new one and put everything back together.
I also changed the cabin air filter, while i was at it.
Now all i need to do is clear the code with my vag-com, connected to my laptop, then the code shouldn't come back.
Thanks for this write up, MrSnickelsnizer. It was easy as pie, i was in and out very quickly, thanks to this tutorial.
Nobody should use the glove box method to change this sensor, only if they are going to change the heater core, should they remove the glove box.
Last edited by morpheous; 02-22-2014 at 07:59 PM.
#9
02-22-2014, 08:20 PM

I did mine a couple weeks ago. I found that with my car there wasn't any room behind the box to fit a screwdriver or anything to fish out the sensor. I didn't need to remove the glove box though. I read somewhere that you can stick your hand up behind the entire dashboard without removing anything. Underneath the glove box there is a small "meshed" part of the plastic. Just behind that the plastic bends enough to fit your hand and arm behind it and reach up to get at the sensor. That ended up making my time a LOT easier. Granted, my arms aren't super huge like some peoples'.
#10
02-22-2014, 08:35 PM
I did mine a couple weeks ago. I found that with my car there wasn't any room behind the box to fit a screwdriver or anything to fish out the sensor. I didn't need to remove the glove box though. I read somewhere that you can stick your hand up behind the entire dashboard without removing anything. Underneath the glove box there is a small "meshed" part of the plastic. Just behind that the plastic bends enough to fit your hand and arm behind it and reach up to get at the sensor. That ended up making my time a LOT easier. Granted, my arms aren't super huge like some peoples'.
I'm glad your method worked for you. I knew i didn't want to take a whole dash apart, just to change that sensor or pay anyone to do it. I just got back from clearing the code but before i cleared that code, i copied another code down, before i cleared both.
Address 01 -------------------------------------------------------
Controller: 4B0 906 018 CH
Component: 1.8L R4/5VT G 0001
Coding: 16251
Shop #: WSC 63351
1 Fault Found:
16804 - Catalyst System: Bank 1: Efficiency Below Threshold
P0420 - 35-00 - -
Readiness: 0000 0000
I just got my PCV system replaced. Fuel filter replaced. Coolant Flange changed, oil changed and oil filter changed. Heater core flushed I'm thinking that P0420 code, came about from the PCV system, leaking oil and air.
I'll drive around for awhile and see if the code pops back up.
Last edited by morpheous; 02-22-2014 at 08:41 PM.