Finally, The $150 FMIC DIY!
#1
 11-04-2006, 10:38 PM

Here are the things you will need for a DIY intercooler setup.
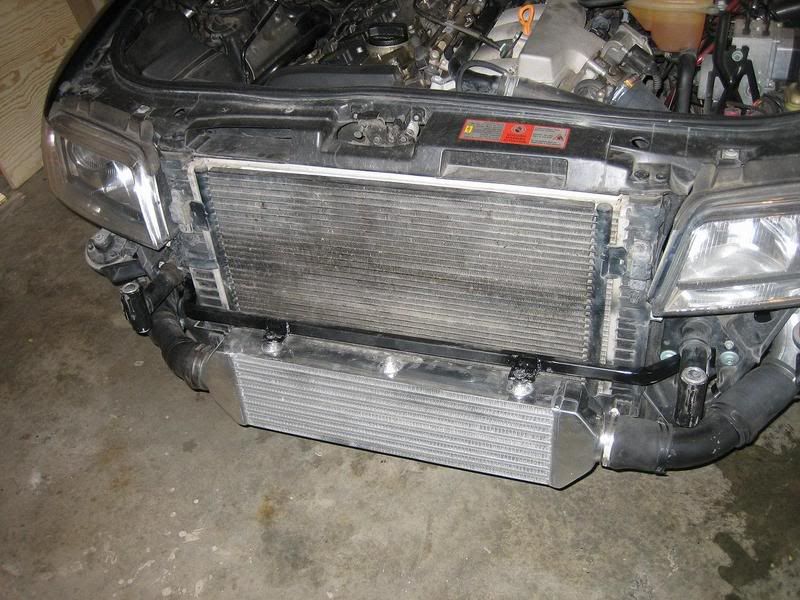
1. Ebay intercooler. (Like $80. 27”X6”X2.5” is the size I have) you can use whatever you would like, just keep it thin so it will fit behind the bumper. (Yes I had to do some bumper cutting.)
2. Mounting bracket. I made mine, it did take some welding.
3. 2.5” muffler pipe. 4 feet. (Like $25. I got mine bent in two different places at 90 degrees and 35 degrees)
4. 2.5” intercooler hose 2 feet ( $15 per foot from napa.)
5. 2" muffler pipe. 1 foot.
6. Hose clamps.
First move the power steering cooler out of the way.
Then I made a mounting bracket for the intercooler. I decided to mount it to the bumper mounting plates on the sides of the radiator. (I didn’t want to have heat from the radiator soaking through the brackets into the intercooler.) this is the time to make sure the intercooler fits in the place you want it behind the bumper.
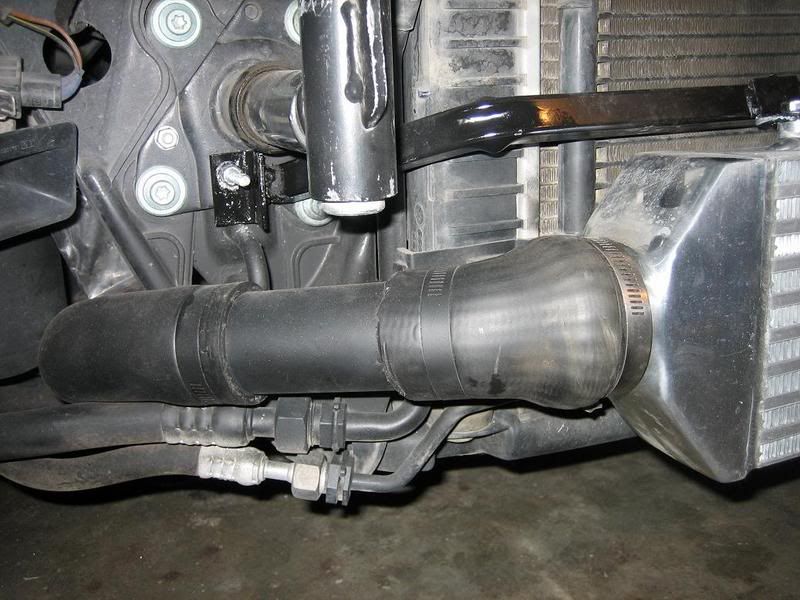
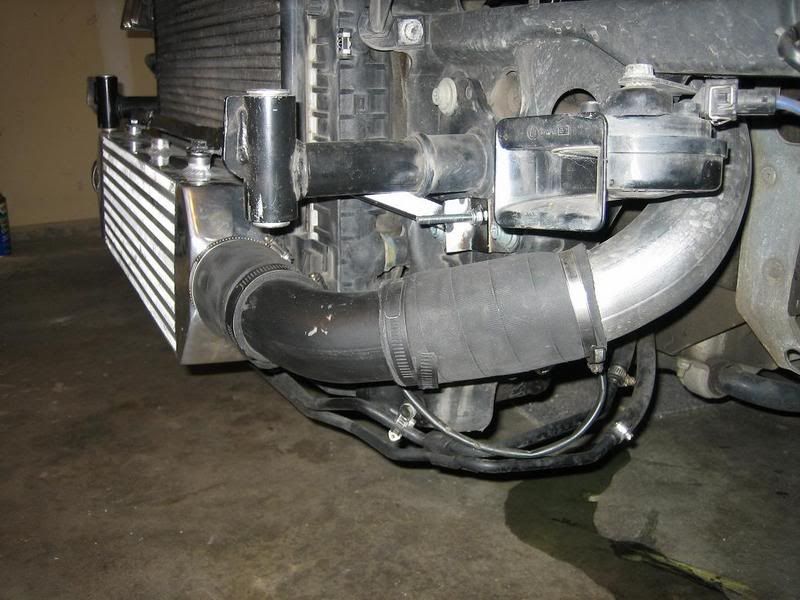
Next on the left side I used the 90 degree elbow from the pancake pipe to the stock intercooler. I used the size adapter part of the hose from the stock intercooler to the throttle. I cut the 2” piece of muffler pipe into 2 pieces and hooked it all togther.
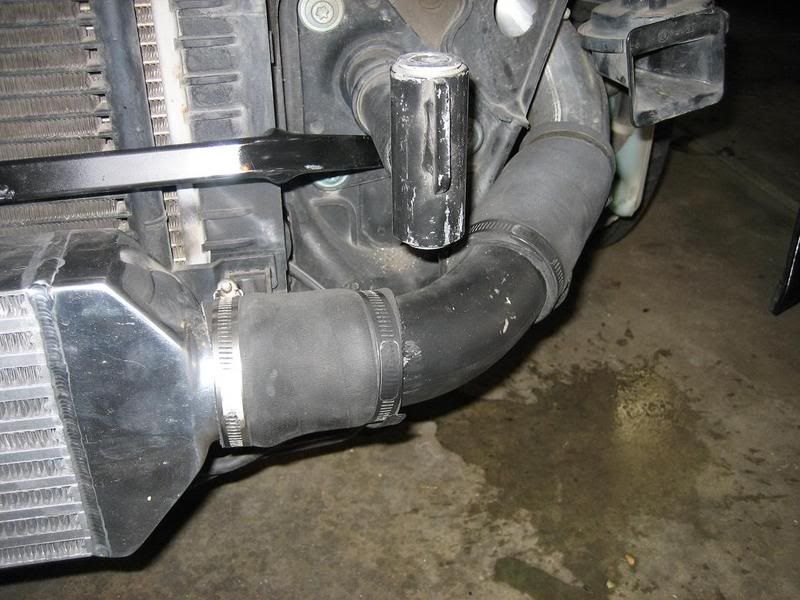
On the right side I used the 35 degree bent section of piping and the 90 degree section of pipe, cut them to the right legnths. I used some sections of the napa hose to connect the pieces.
Now rip out your stock intercooler.
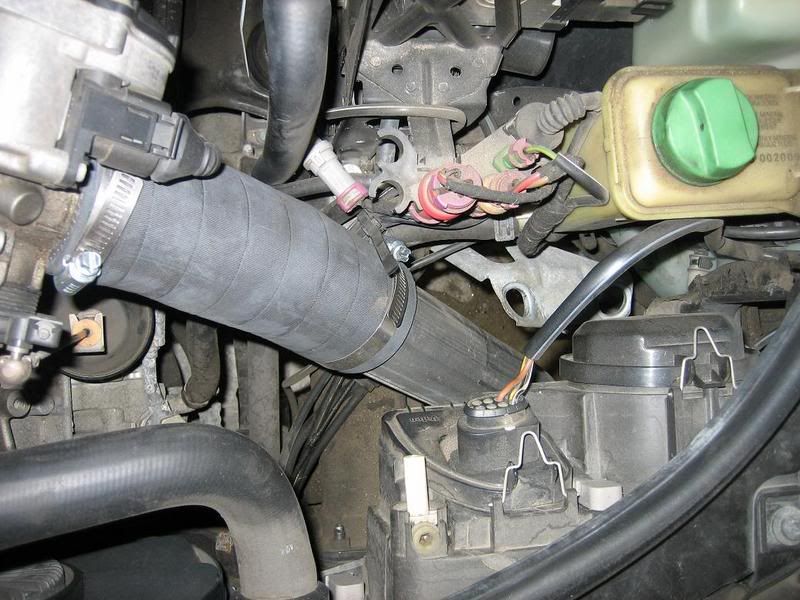
Now attach the power steering cooler to a new location, (this is also a good time to replace the hose clamps with new ones, mine started leaking when I moved it.)
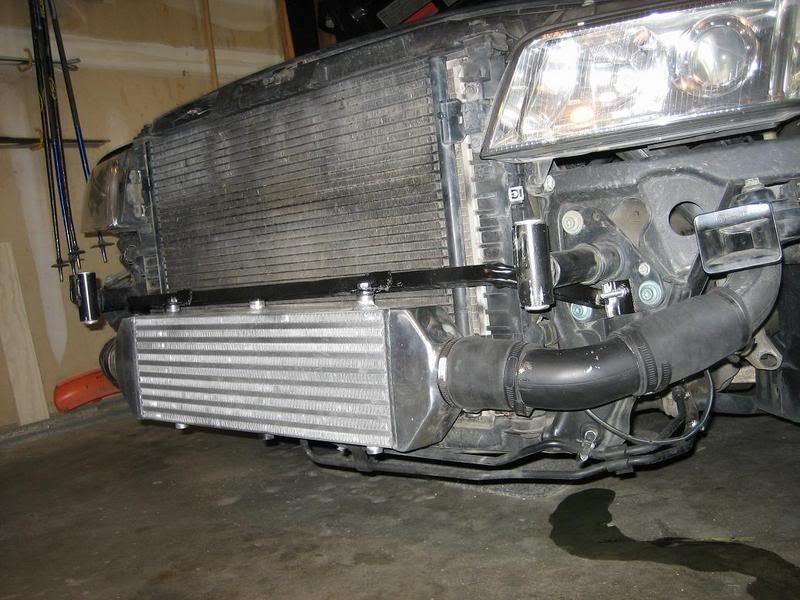
Next cut the bumper accordingly to make fit.

The hardest part of this was just getting everything to fit right, it will probably take a little while.
And if you don't like my methods, then go ahead and spend $900, but i didn't want to.
Now drive damnit.
[&:]
[IMG]local://upfiles/23901/4C3D9F4B958D4261848425B534385EEC.jpg[/IMG]
So far I have felt noticable power, especially more low end torque, the engine also runs much cooler now.
UPDATE: I have had this fmic on my car for a year now and it's still running strong. Haven't had any problems with it. Still love it.
1. Ebay intercooler. (Like $80. 27”X6”X2.5” is the size I have) you can use whatever you would like, just keep it thin so it will fit behind the bumper. (Yes I had to do some bumper cutting.)
2. Mounting bracket. I made mine, it did take some welding.
3. 2.5” muffler pipe. 4 feet. (Like $25. I got mine bent in two different places at 90 degrees and 35 degrees)
4. 2.5” intercooler hose 2 feet ( $15 per foot from napa.)
5. 2" muffler pipe. 1 foot.
6. Hose clamps.
First move the power steering cooler out of the way.
Then I made a mounting bracket for the intercooler. I decided to mount it to the bumper mounting plates on the sides of the radiator. (I didn’t want to have heat from the radiator soaking through the brackets into the intercooler.) this is the time to make sure the intercooler fits in the place you want it behind the bumper.
Next on the left side I used the 90 degree elbow from the pancake pipe to the stock intercooler. I used the size adapter part of the hose from the stock intercooler to the throttle. I cut the 2” piece of muffler pipe into 2 pieces and hooked it all togther.
On the right side I used the 35 degree bent section of piping and the 90 degree section of pipe, cut them to the right legnths. I used some sections of the napa hose to connect the pieces.
Now rip out your stock intercooler.
Now attach the power steering cooler to a new location, (this is also a good time to replace the hose clamps with new ones, mine started leaking when I moved it.)
Next cut the bumper accordingly to make fit.
The hardest part of this was just getting everything to fit right, it will probably take a little while.
And if you don't like my methods, then go ahead and spend $900, but i didn't want to.
Now drive damnit.
[&:]
[IMG]local://upfiles/23901/4C3D9F4B958D4261848425B534385EEC.jpg[/IMG]
So far I have felt noticable power, especially more low end torque, the engine also runs much cooler now.
UPDATE: I have had this fmic on my car for a year now and it's still running strong. Haven't had any problems with it. Still love it.

#3
11-04-2006, 11:50 PM
Great job! How about a driving/performacne review??? Any difference other than looking cool?
Im going to put this in the DIY section.
Im going to put this in the DIY section.


Thread
Thread Starter
Forum
Replies
Last Post