2001 A4 B5 1.8T Airbox Mod (Write-up)
#1
 12-07-2011, 03:22 PM

Alright everyone so after great lengths of research and surfing the web, I came to the conclusion that I'd like to mod my airbox instead of going with the intake kit.
*Disclaimer: I am in no way responsible for any damage done while applying this mod, although if directions are followed exactly, there should be no problems at all.*
Also, credits go to ~ DIY: B5 A4 1.8T - Air Box Mod ~ (His box was setup a little different than my 2001, and not very many pictures so I figured I'd write one up here.... audiforums for life)
What will this mod do?
Modding your airbox is a cheaper DIY project done as an alternative to an aftermarket cold air intake kit. Cold air from the outside will be used instead of the nasty hot engine air with your stock airbox.
Expect:
1. Slightly deeper engine growl
2. Better gas efficiency
3. A nice blowoff sound from your stock DV
4. Some report a gain in power, but I couldnt tell a noticeable difference
Now, on to the fun stuff
TOOLS YOU WILL NEED:
Now, we're ready to begin.
Step 1:
Remove the plastic covering on top of the airbox, located on the left side under the hood (Apologize for lack of photo) it should just pop off with a little pull
Step 2:
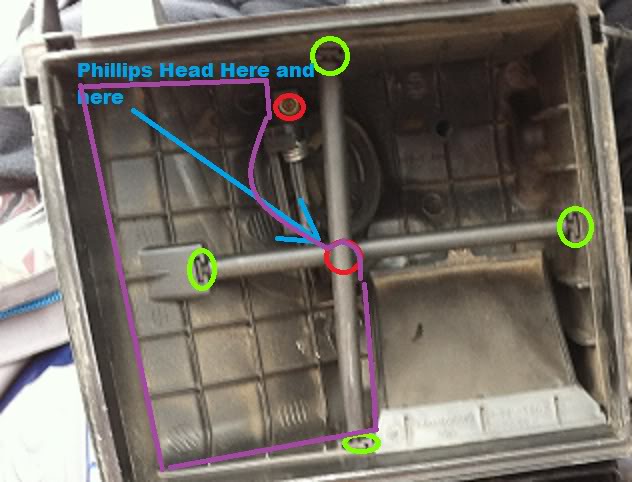
Remove the screws holding the heat shield in place (Phillips head)

Step 3:
Remove all the plugs and hoses and such keeping you from getting the top of your airbox off.
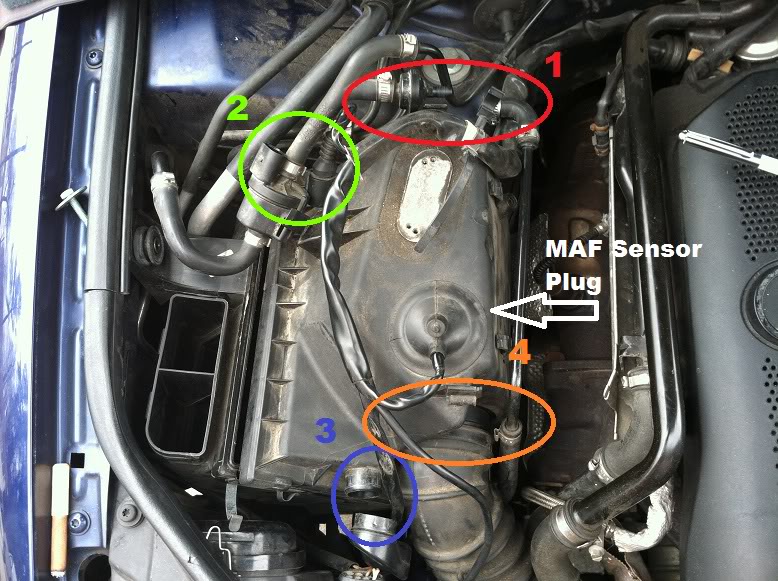
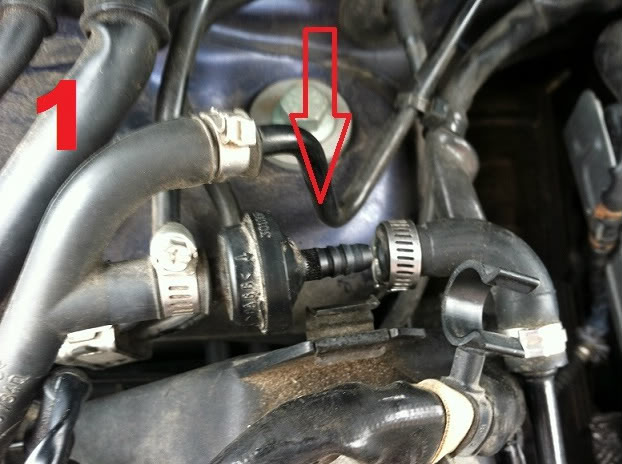
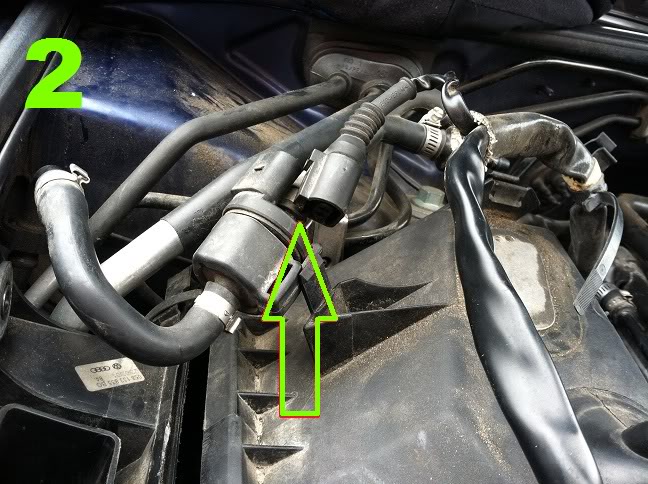
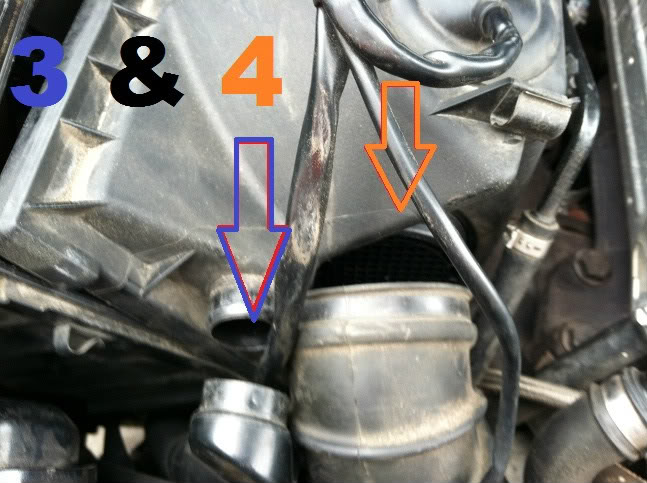
The only things that should be left keeping the airbox together are small metal clamps around the edges, very simple to remove, and the MAF Sensor plug. I found it much easier just to leave the plug in place and sort of rotate the top of the box off and rest it on the block.
Step 4:
Now you should be able to pull off the top of your airbox, move it out of the way, and remove the bottom portion out of your car. Simple pull out your filter and set it aside. You should be left with something like this:

Step 5:
Now that you have the airbox free, we can begin working on the mod. First remove the Filter support bars by simply unpopping them, next, Unscrew the two phillips head screws and pop that guy out, then you will be left with a cleaned out airbox; here comes the fun part. Where I have outlined in purple, you will use your Dremel to cut this section completely out. After you have it cut out, place the bottom portion BACK in the car, exactly as if you were putting it back for good, secured in place and then use something to outline the area you cut out, on your fender wall.
Step 6 (Optional but recommended):
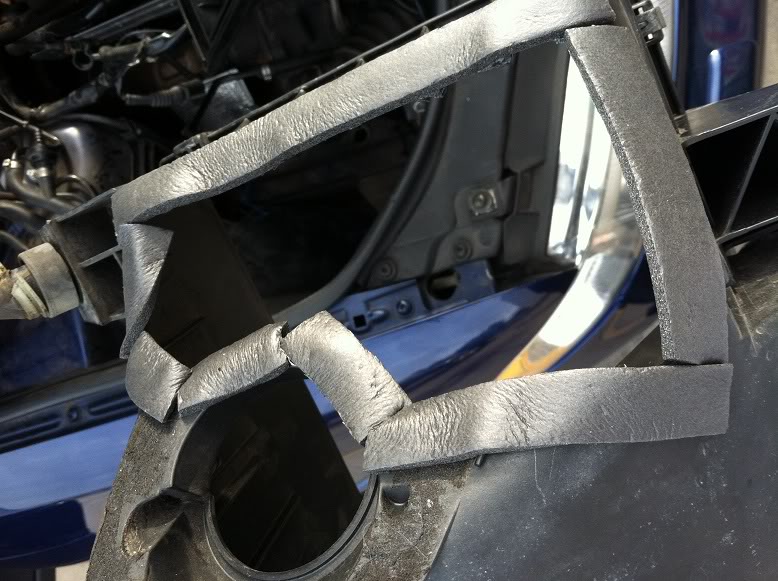
Now that you have the airbox cut out, apply the sticky side of the weather stripping to the OUTSIDE of the box like so:
Step 7 (Optional):
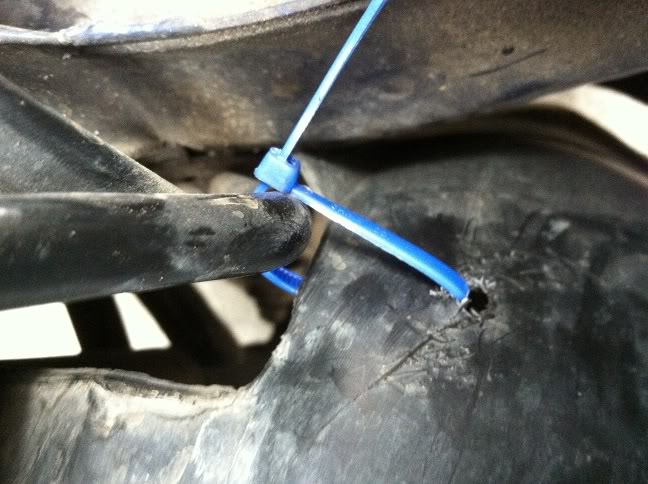
When I was about to begin cutting the holes in the fender wall, I noticed it was fairly loose, just sort of hanging there. Quick ghetto fix: Zip ties. I drilled small holes in the fender wall and zip tied it at different points , fitting it snugger up against where the airbox will be.
Step 8:
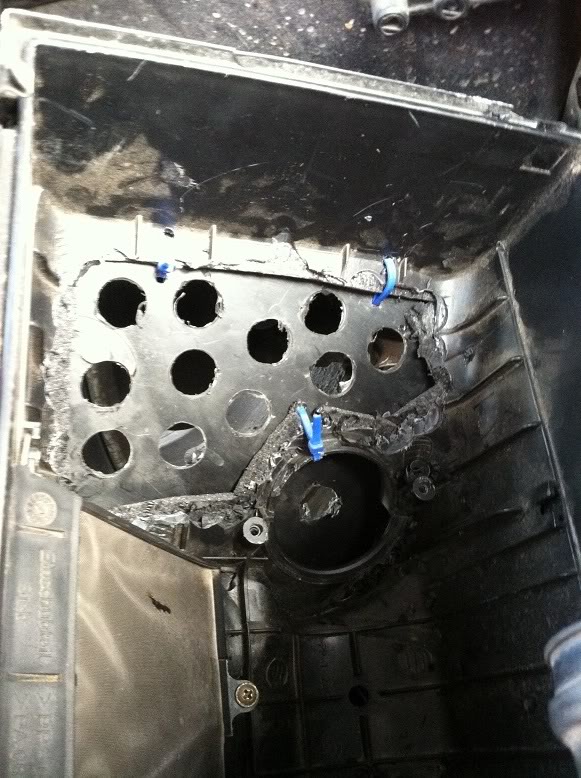
Now, you should have your cut out, weather stripped airbox, and a tightly fitting fender wall. Time to get to drillin. Drill lots of holes, basically just trying to cover your marked off area, whatever looks aesthetically pleasing.
Clean out all that plastic drill gunk, and pop your airbox back into place. It should look something like this (BTW This was pre-cleanup because I drilled the holes while the airbox was already secured in there)
As you can see, I have also drilled more zip tie holes for a tighter seal.
Now, go back and put everything JUST like it was, down to every little detail....make sure clamps are tight, screws, etc etc.
And youre done!!!
As a side note, while your already messin around in the airbox, I found it a good chance to go ahead and bite the bullet and invest in a K&N box filter
I'm extremely new to the import world, audiforums.com world, and Audi world in general! SO if anyone more experienced and knowledgeable sees something wrong with anything in this guide PLEASE let me know and I will fix it right away!
Happy Modding!
*Disclaimer: I am in no way responsible for any damage done while applying this mod, although if directions are followed exactly, there should be no problems at all.*
Also, credits go to ~ DIY: B5 A4 1.8T - Air Box Mod ~ (His box was setup a little different than my 2001, and not very many pictures so I figured I'd write one up here.... audiforums for life)
What will this mod do?
Modding your airbox is a cheaper DIY project done as an alternative to an aftermarket cold air intake kit. Cold air from the outside will be used instead of the nasty hot engine air with your stock airbox.
Expect:
1. Slightly deeper engine growl
2. Better gas efficiency
3. A nice blowoff sound from your stock DV
4. Some report a gain in power, but I couldnt tell a noticeable difference
Now, on to the fun stuff
TOOLS YOU WILL NEED:
- 1 3/4 In. Drill bit w/ power drill (or whatever desired size)
- Phillips head screwdriver
- Flathead Screwdriver
- Dremel or precision cutting instrument
- Weather Stripping (Optional)
- 11" Zip ties (Optional)
Now, we're ready to begin.
Step 1:
Remove the plastic covering on top of the airbox, located on the left side under the hood (Apologize for lack of photo) it should just pop off with a little pull
Step 2:
Remove the screws holding the heat shield in place (Phillips head)
Step 3:
Remove all the plugs and hoses and such keeping you from getting the top of your airbox off.
The only things that should be left keeping the airbox together are small metal clamps around the edges, very simple to remove, and the MAF Sensor plug. I found it much easier just to leave the plug in place and sort of rotate the top of the box off and rest it on the block.
Step 4:
Now you should be able to pull off the top of your airbox, move it out of the way, and remove the bottom portion out of your car. Simple pull out your filter and set it aside. You should be left with something like this:
Step 5:
Now that you have the airbox free, we can begin working on the mod. First remove the Filter support bars by simply unpopping them, next, Unscrew the two phillips head screws and pop that guy out, then you will be left with a cleaned out airbox; here comes the fun part. Where I have outlined in purple, you will use your Dremel to cut this section completely out. After you have it cut out, place the bottom portion BACK in the car, exactly as if you were putting it back for good, secured in place and then use something to outline the area you cut out, on your fender wall.
Step 6 (Optional but recommended):
Now that you have the airbox cut out, apply the sticky side of the weather stripping to the OUTSIDE of the box like so:
Step 7 (Optional):
When I was about to begin cutting the holes in the fender wall, I noticed it was fairly loose, just sort of hanging there. Quick ghetto fix: Zip ties. I drilled small holes in the fender wall and zip tied it at different points , fitting it snugger up against where the airbox will be.
Step 8:
Now, you should have your cut out, weather stripped airbox, and a tightly fitting fender wall. Time to get to drillin. Drill lots of holes, basically just trying to cover your marked off area, whatever looks aesthetically pleasing.
Clean out all that plastic drill gunk, and pop your airbox back into place. It should look something like this (BTW This was pre-cleanup because I drilled the holes while the airbox was already secured in there)
As you can see, I have also drilled more zip tie holes for a tighter seal.
Now, go back and put everything JUST like it was, down to every little detail....make sure clamps are tight, screws, etc etc.
And youre done!!!
As a side note, while your already messin around in the airbox, I found it a good chance to go ahead and bite the bullet and invest in a K&N box filter
I'm extremely new to the import world, audiforums.com world, and Audi world in general! SO if anyone more experienced and knowledgeable sees something wrong with anything in this guide PLEASE let me know and I will fix it right away!
Happy Modding!
#4
03-22-2012, 10:03 AM

What do you mean by "hot engine air"? The intake for our cars gets air from right behind the grille, not from the engine bay.
#5
03-22-2012, 10:41 AM
Sorry, but I have to say it; the above mod is worthless in every respect. Power and fuel economy will not be improved, and noise will be increased (I suppose some might think this is a good thing).
Then there's the whole hydrolock/water ingestion thing. I cannot think of a single reason why any sane person would destroy their factory intake in this manner.
Then there's the whole hydrolock/water ingestion thing. I cannot think of a single reason why any sane person would destroy their factory intake in this manner.
#7
04-03-2012, 04:06 PM
For better performance? Sorry, ain't gonna happen.
For better fuel economy? Nope, no chance of that either.
For more engine intake noise? Yup, you'll get that much at least.
#8
05-09-2012, 12:44 PM

maybe a better way is to cut a 3" hole in the opposite side and run a cold air feed down to behind the bumper
#9
05-09-2012, 06:42 PM
It's not gonna matter where you draw air from - its still going to heat up like crazy when it goes through that smoking hit turbo...
#10
08-24-2012, 09:26 PM

what is the name of the black part in step 1... the red arrow is pointing towards it. Mine is cracked and i would like to get a new one but i cant figure out what it is. Can you guys help me out?