
Removing the battery on a Q7


1st Gear
Joined: Oct 2014
Posts: 1
I just did this today and took pictures of the process.
Tools:
Flat Screwdriver
10mm triple square socket
10mm regular socket
Socket Wrench
Time:
Took me about 2 hours (I can probably do it faster now though).
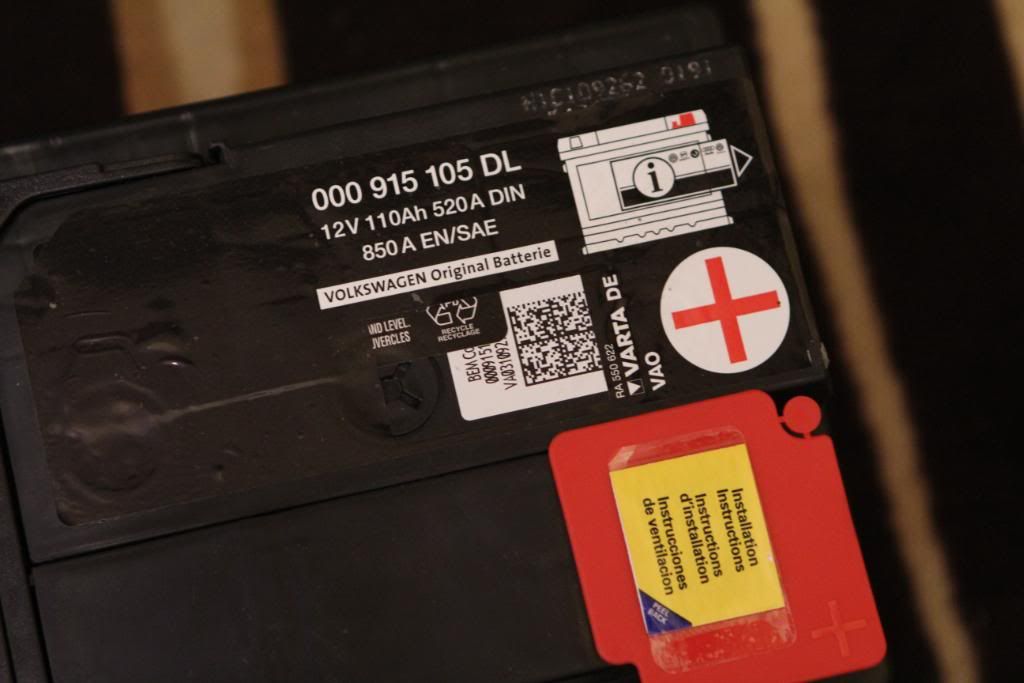
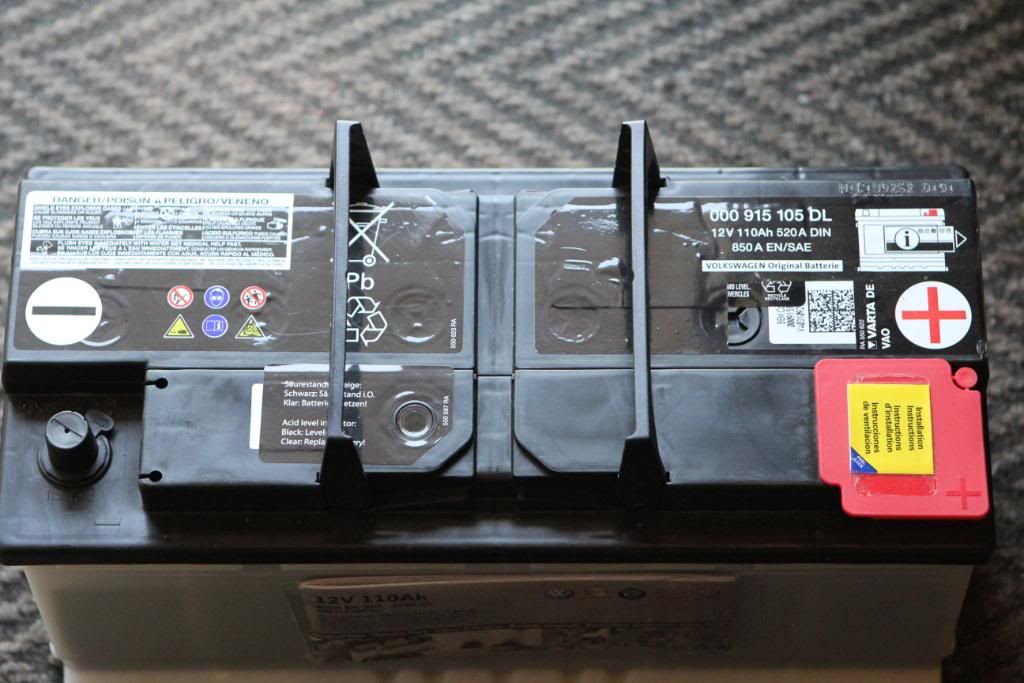
1. Buy new OEM Replacement Battery
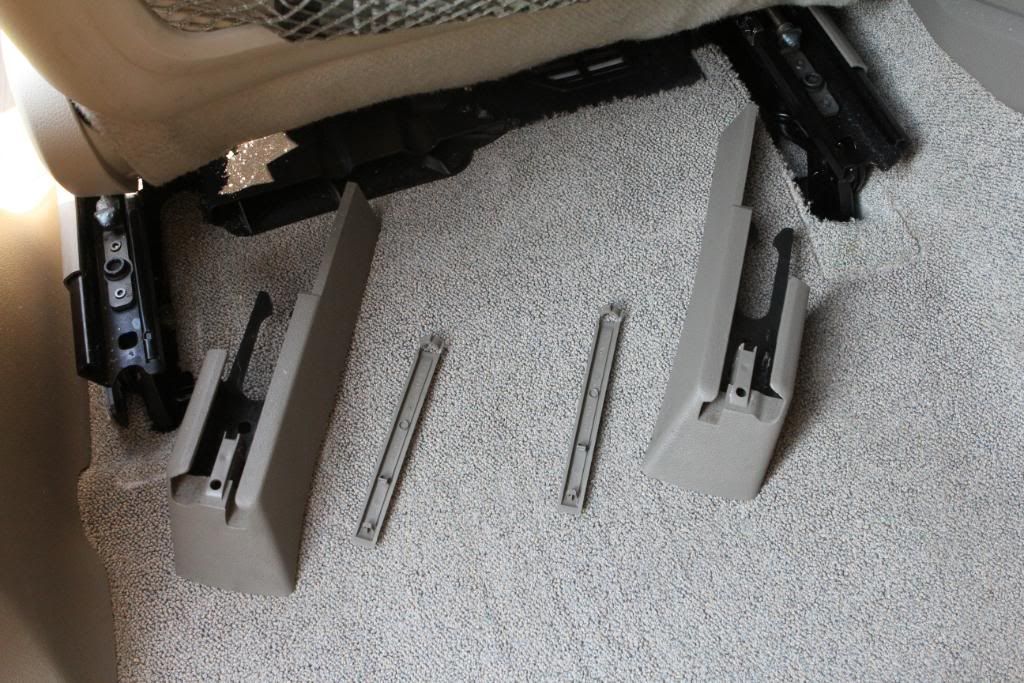
2. Remove the plastic covers under the driver's seat from the rear seat footwell
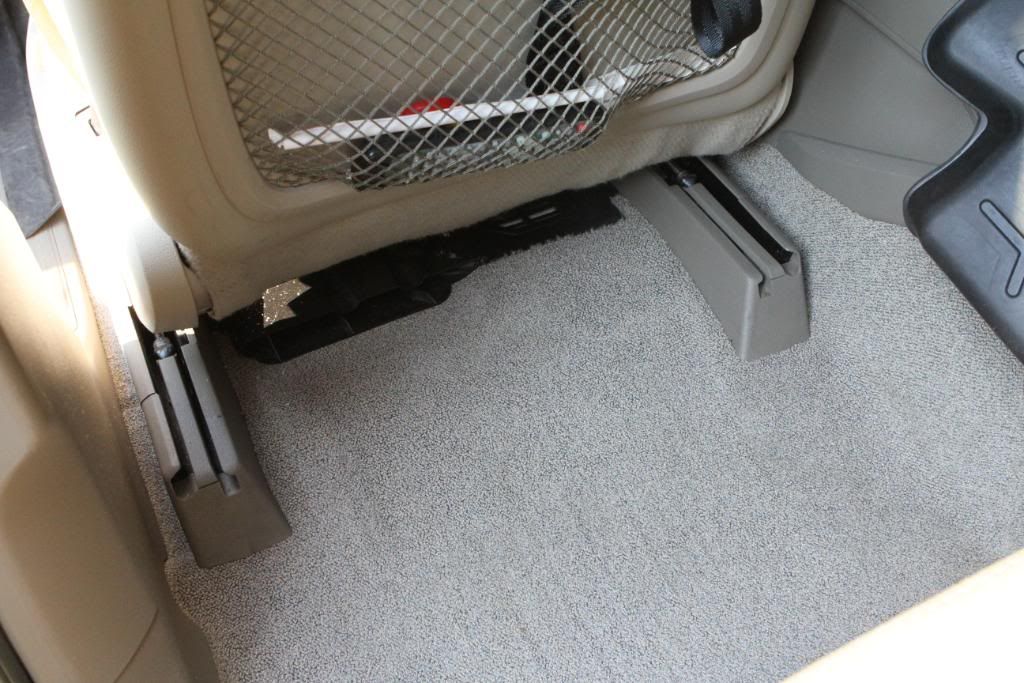
Lift the plastic trim upwards:

Slide the plastic trim backwards:
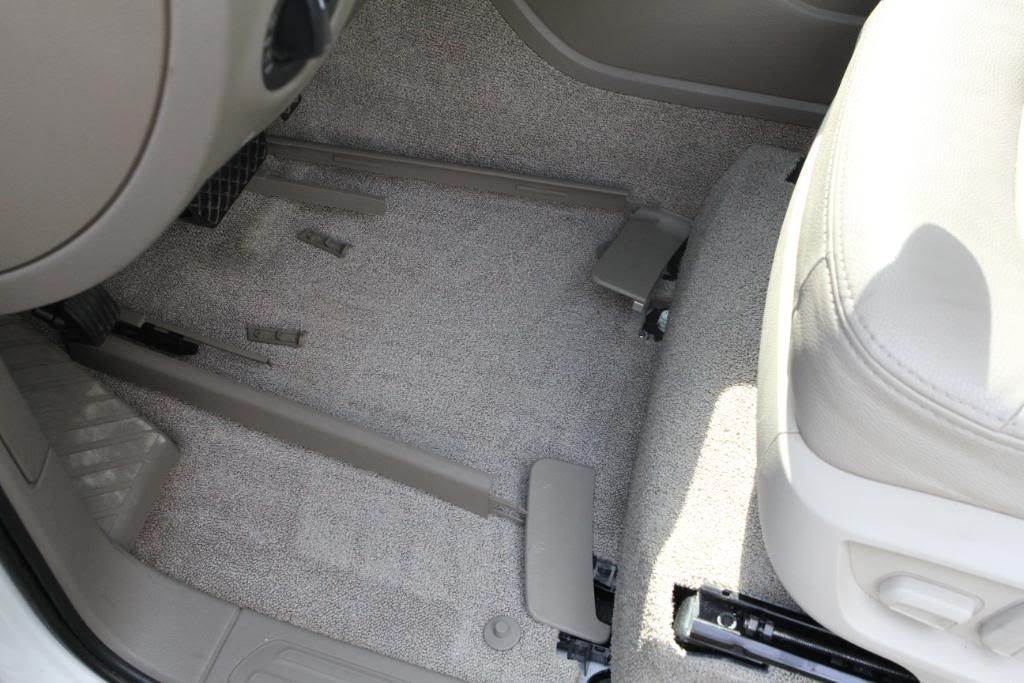
Trim pieces removed:
3. The next step is not really necessary, but I found it easier to replace the trim by removing the front completely. When reinstalling, install the back first.
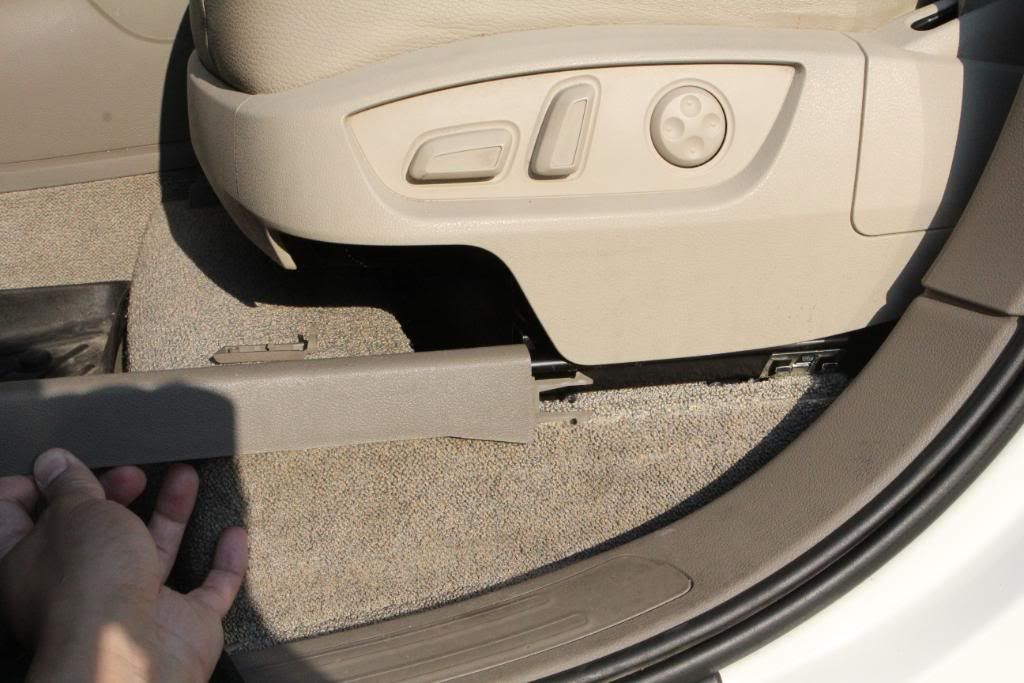
Remove the plastic trim in the front by lifting the plastic tabs (similar to rear):
Slide the trim forward:
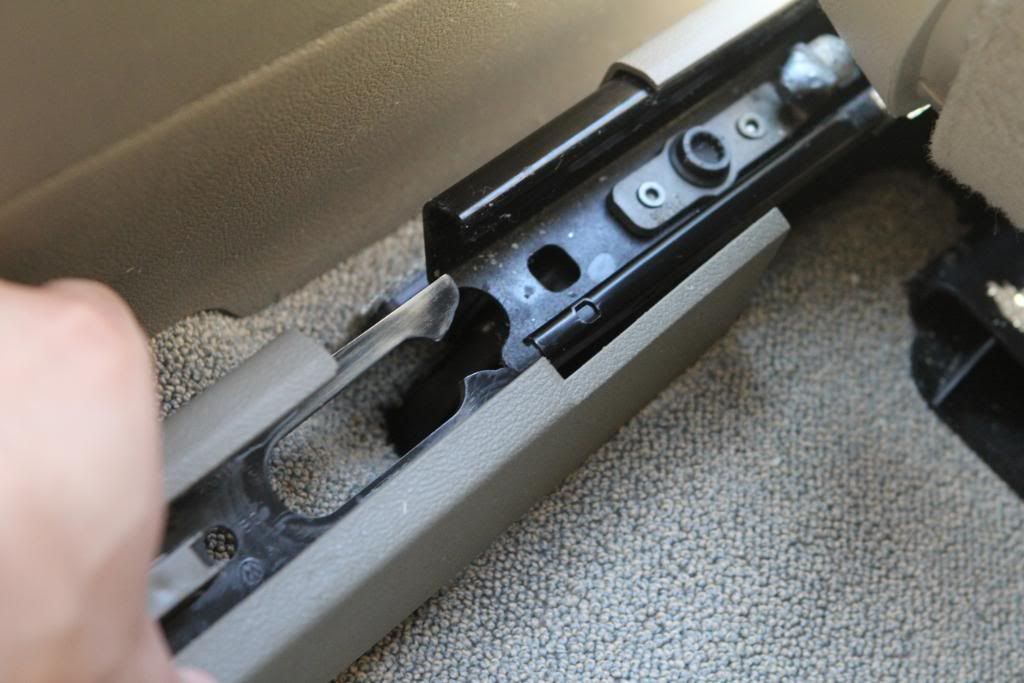
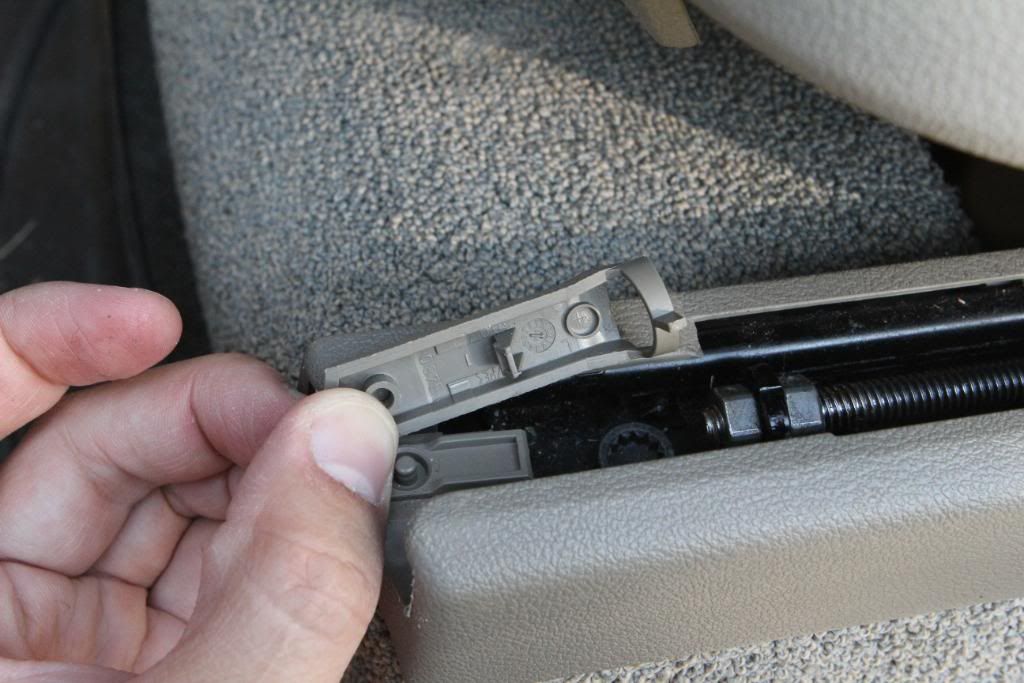
4. There are 2 covers in the driver's footwell, near the seat. Pry them upwards:
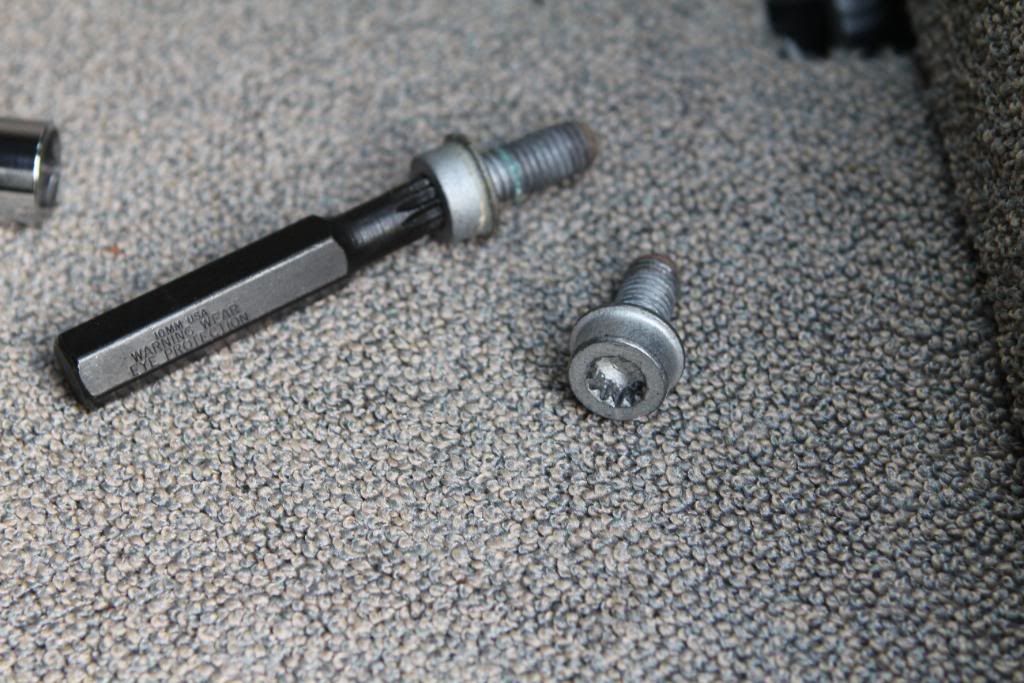
5. Under each of the 2 plastic covers, there is a 10mm triple square bolt that holds the seat down.
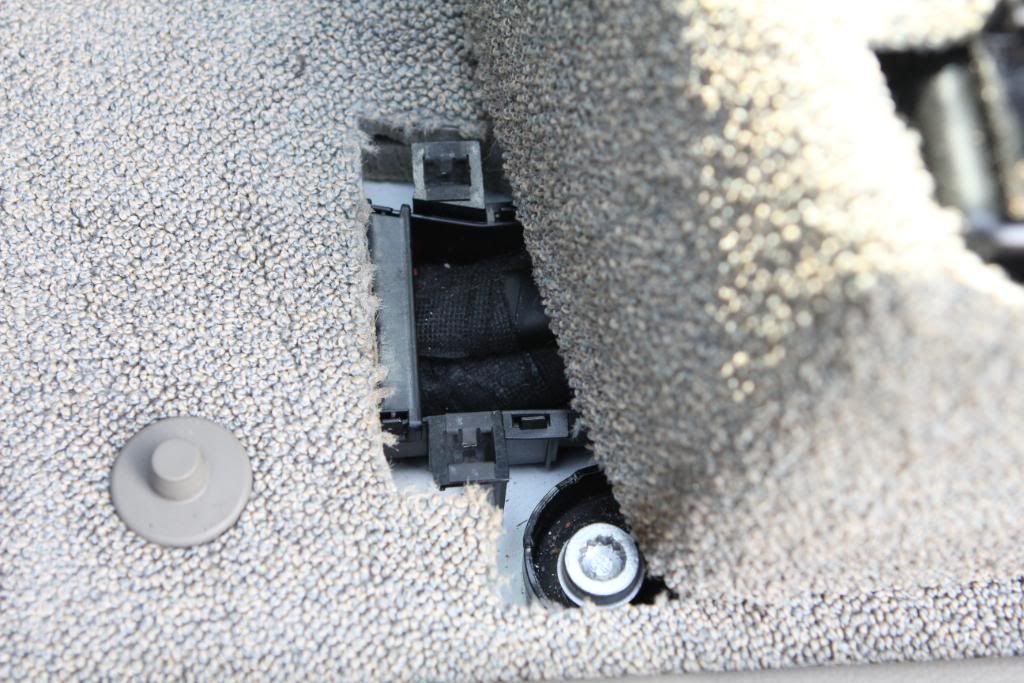
Remove both:
6. Tilt seat. Be careful not to hit your steering wheel.
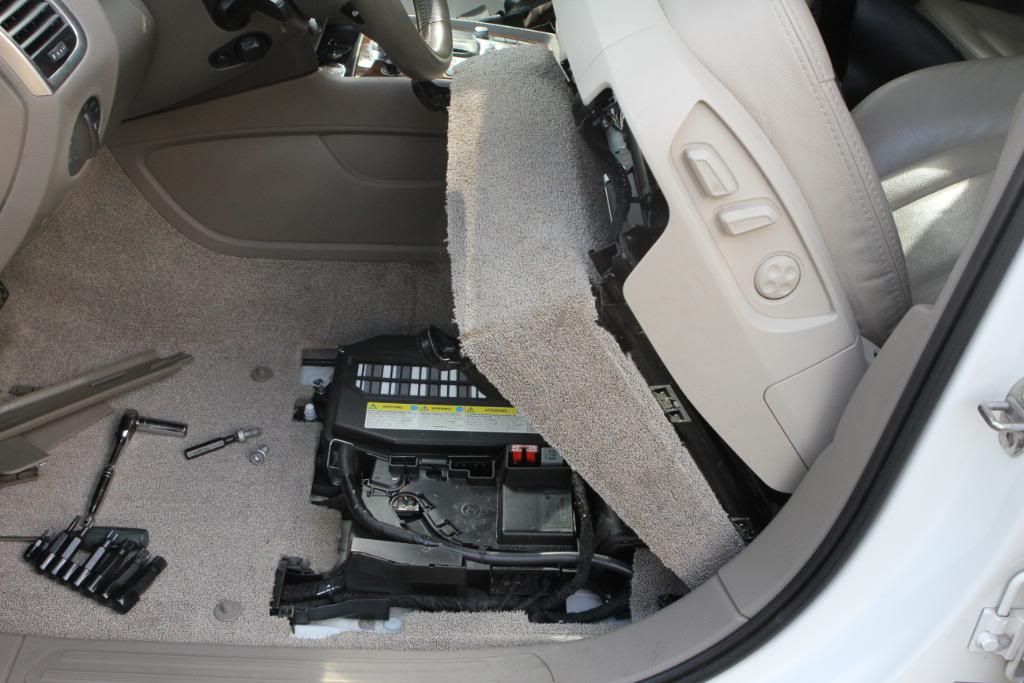
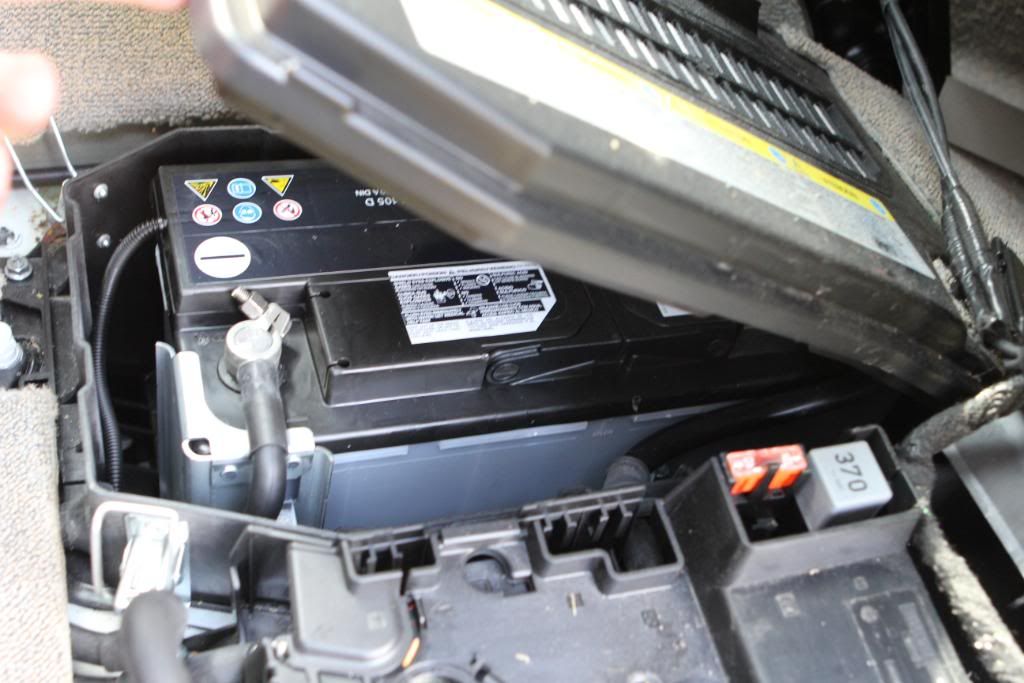
7. With the seat tilted back, the battery compartment cover is visible.
There are 2 metal clasps holding the cover down when you should release:
8. The cover can now swivel upward:
9. Disconnect the negative and postive terminals with your 10mm regular socket.
10. There are 2 clamps holding the battery down (also using 10mm).
One is in the centre, which has a long 10mm bolt sticking up.
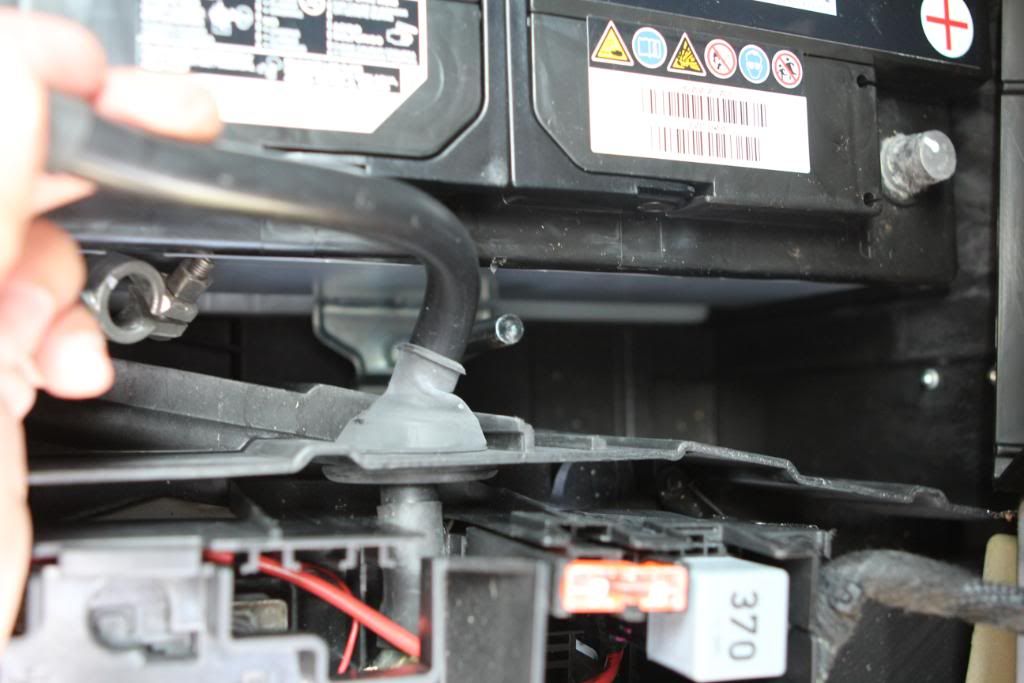
The other is the front corner of the battery closest to the door.
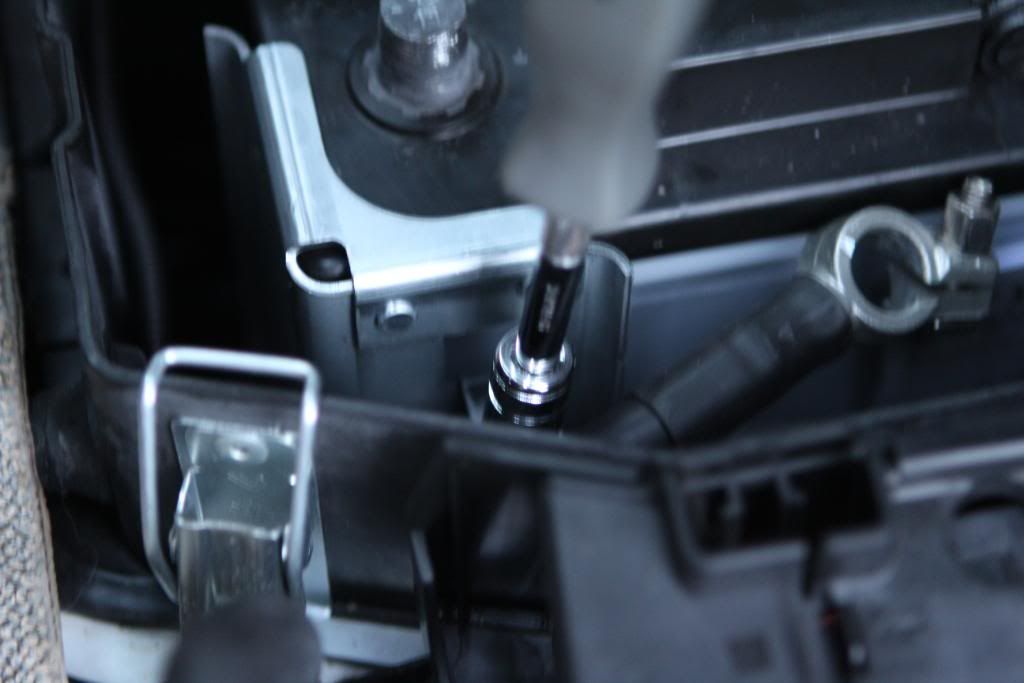
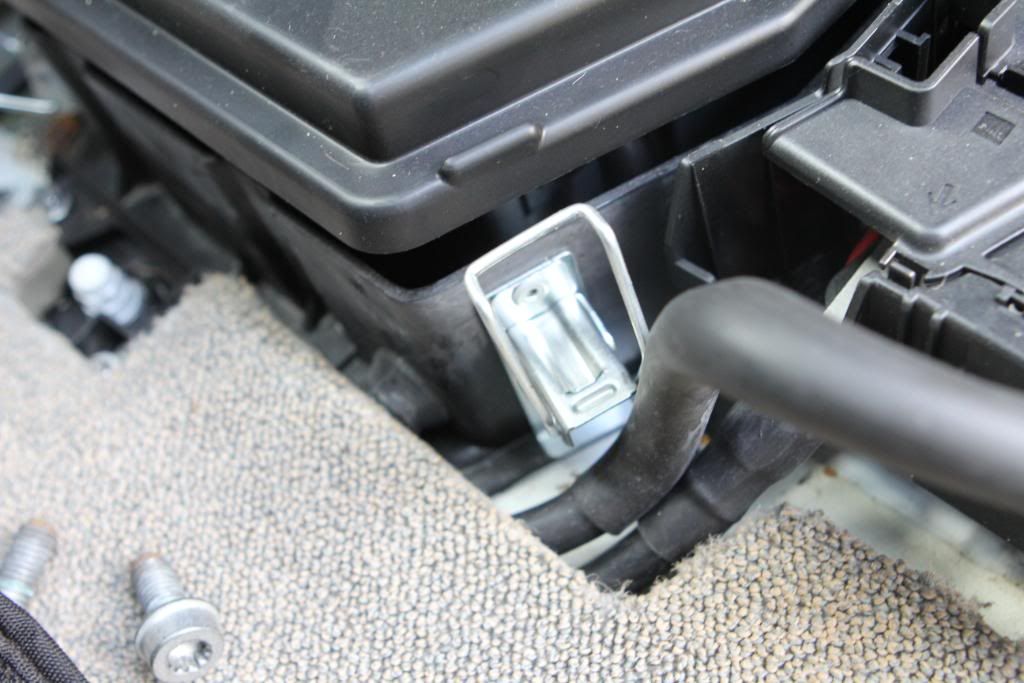
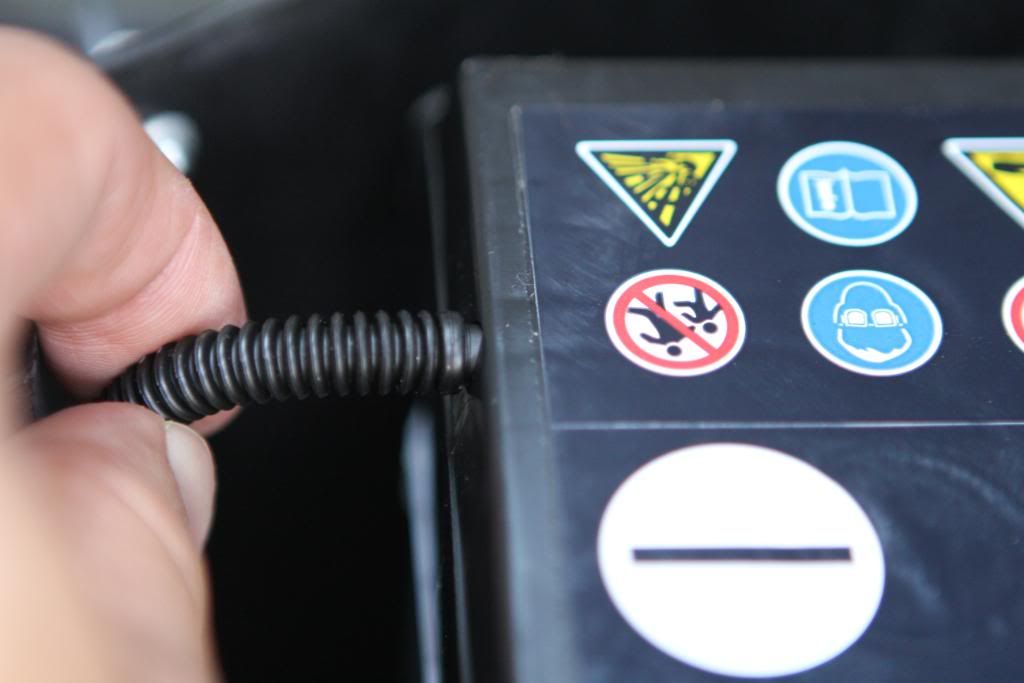
11. Disconnect the vent:
12. Once the clamps are removed and everything disconnected, the battery will lift out.
13. You can simply slide the new battery in and reverse the installation process.
Some tips:
Clamp the battery first, before connecting the terminals.
Don't forget to reconnect the vent.
Before putting the seat back, you can test it out.
I found it easier to install the trim from the rear footwell first, then slide the trim from the front footwell after. The reason is that there are clips in the front trim that slide into the back trim.
I didn't need to program anything besides resetting the clock.
Tools:
Flat Screwdriver
10mm triple square socket
10mm regular socket
Socket Wrench
Time:
Took me about 2 hours (I can probably do it faster now though).
1. Buy new OEM Replacement Battery
2. Remove the plastic covers under the driver's seat from the rear seat footwell
Lift the plastic trim upwards:
Slide the plastic trim backwards:
Trim pieces removed:
3. The next step is not really necessary, but I found it easier to replace the trim by removing the front completely. When reinstalling, install the back first.
Remove the plastic trim in the front by lifting the plastic tabs (similar to rear):
Slide the trim forward:
4. There are 2 covers in the driver's footwell, near the seat. Pry them upwards:
5. Under each of the 2 plastic covers, there is a 10mm triple square bolt that holds the seat down.
Remove both:
6. Tilt seat. Be careful not to hit your steering wheel.
7. With the seat tilted back, the battery compartment cover is visible.
There are 2 metal clasps holding the cover down when you should release:
8. The cover can now swivel upward:
9. Disconnect the negative and postive terminals with your 10mm regular socket.
10. There are 2 clamps holding the battery down (also using 10mm).
One is in the centre, which has a long 10mm bolt sticking up.
The other is the front corner of the battery closest to the door.
11. Disconnect the vent:
12. Once the clamps are removed and everything disconnected, the battery will lift out.
13. You can simply slide the new battery in and reverse the installation process.
Some tips:
Clamp the battery first, before connecting the terminals.
Don't forget to reconnect the vent.
Before putting the seat back, you can test it out.
I found it easier to install the trim from the rear footwell first, then slide the trim from the front footwell after. The reason is that there are clips in the front trim that slide into the back trim.
I didn't need to program anything besides resetting the clock.


1st Gear
Joined: Nov 2014
Posts: 1
the battery is under the pessanger seat there are total 4 Bolts you need to take it off with key M9 which is very rare to find but try on google you might find, bolts will be under the plastic covers on the sliding rail.
if you have any more question you can get our full details from
https://batteriesontheroad.com.au/
Cheers
Neil
if you have any more question you can get our full details from
https://batteriesontheroad.com.au/
Cheers
Neil


1st Gear
Joined: Jun 2015
Posts: 1
I'm not sure why you removed the plastic covers from the runners. You don't need to!! I spent more time trying to get these back in place properly than the rest of the entire process took. You do NOT have to take them off.
Thanks for the pictures though, it made it so much easier!!
Thanks for the pictures though, it made it so much easier!!

1st Gear
Joined: Jul 2015
Posts: 2
I replaced mine with an Maxx EverStart H8 battery. Since replacing the battery I get all sorts of codes on my dashboard - Adaptive light assist malfunction !!, Low Battery Charge, TPMS, Audi Hill assist malfunction. Lately after locking the car in 2 mins the alarm goes off and I have to keep unlocking every few mins to quite the alarm untill the battery is dead.
Anybody any suggestions on what to do ? How do I re-code or reprogram the battery ? Also, is the battery I installed ok.
Thanks,
Anybody any suggestions on what to do ? How do I re-code or reprogram the battery ? Also, is the battery I installed ok.
Thanks,

1st Gear
Joined: May 2016
Posts: 1
Did the anti-theft alarm going off? And did you need to use an alternate battery source (like a charger) when disconnecting the old battery so your computer settings weren't lost or did you just connect to the new battery? We're concerned the computer will lock up.

1st Gear
Joined: Jan 2019
Posts: 14
I'm not sure why you removed the plastic covers from the runners. You don't need to!! I spent more time trying to get these back in place properly than the rest of the entire process took. You do NOT have to take them off.
Thanks for the pictures though, it made it so much easier!!
Thanks for the pictures though, it made it so much easier!!