
Image Editing Techniques

Thread Starter
|
1st Gear
Joined: Dec 2008
Posts: 114
From: 219 Indiana Valpo
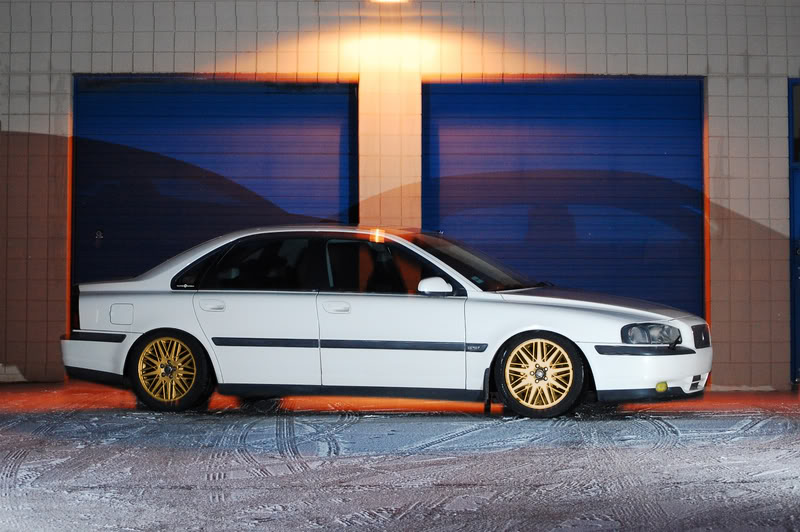
This one is for changing wheel color. Very simple and takes only a few minutes to complete. Follow these simple steps to achieve the finished product. This is a beginer technique.
After you have selected your picture you can begin. I did this in photoshop cs2, alhough the same tools are used in cs3 and cs4.
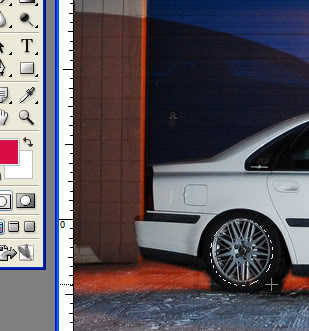
First select the "Eliptical Marquee Tool"
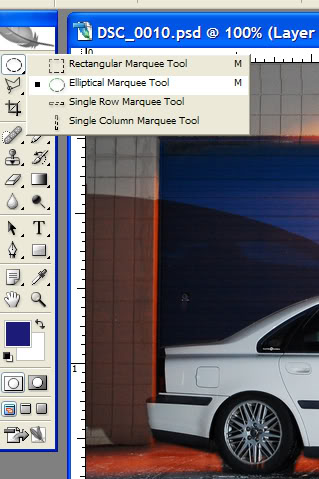
Next click the ruller tab on the picture and hold down and drag
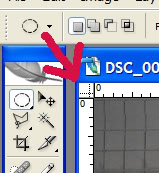
Drag the lines down to the outer edges of the wheel. This gives you the best lineup for selecting just the wheel and avoiding color change of other things such as tires etc...
Once you have got them lined up release the button. From here you click and drag again, this time allowing the tool to make it's outline around the wheel and release the button when lined up to your satisfaction.
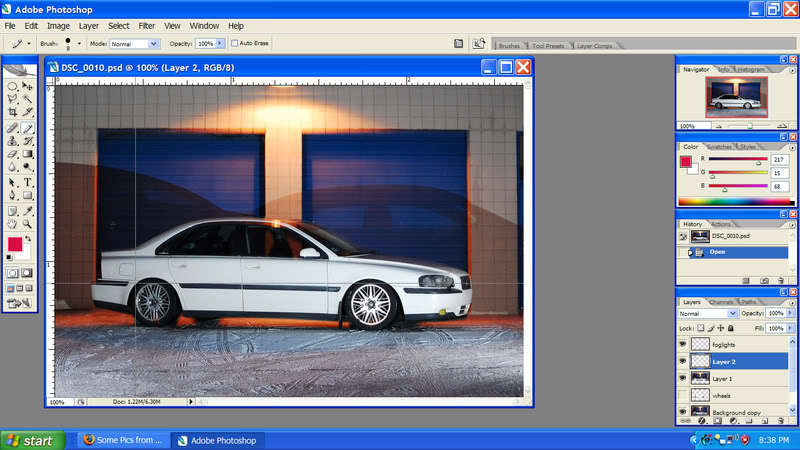
Next, simply right click and choose to make a copy of the wheel. It will put a layer down in your layers to the right.
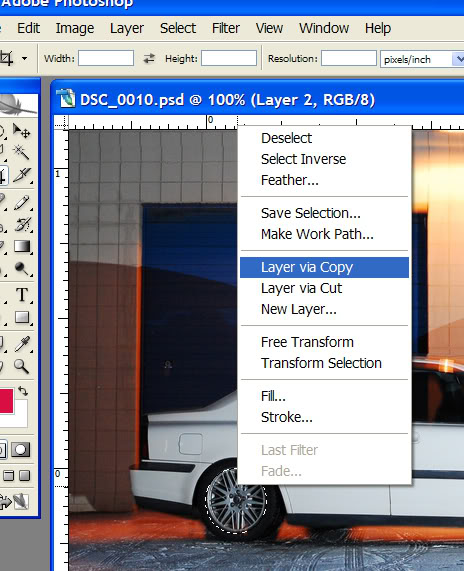
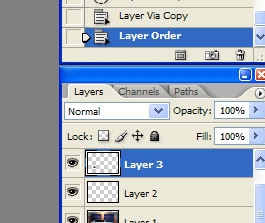
Once you have made the layer, select it by clicking on it in your "layers" window. You can rename it as well so you can easily identify it.
Ok, you are almost finished. Once you have selected your layer simply press "ctrl+u" This will bring up the hue/saturation window. You can change colors using the sliders, select colorize and play with that as well until you get the desired color of choice.
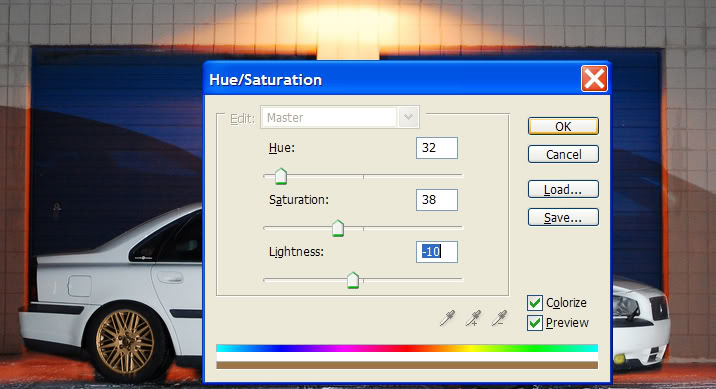
That's it, now you can simply change wheel color.
After you have selected your picture you can begin. I did this in photoshop cs2, alhough the same tools are used in cs3 and cs4.
First select the "Eliptical Marquee Tool"
Next click the ruller tab on the picture and hold down and drag
Drag the lines down to the outer edges of the wheel. This gives you the best lineup for selecting just the wheel and avoiding color change of other things such as tires etc...
Once you have got them lined up release the button. From here you click and drag again, this time allowing the tool to make it's outline around the wheel and release the button when lined up to your satisfaction.
Next, simply right click and choose to make a copy of the wheel. It will put a layer down in your layers to the right.
Once you have made the layer, select it by clicking on it in your "layers" window. You can rename it as well so you can easily identify it.
Ok, you are almost finished. Once you have selected your layer simply press "ctrl+u" This will bring up the hue/saturation window. You can change colors using the sliders, select colorize and play with that as well until you get the desired color of choice.
That's it, now you can simply change wheel color.

Thread
Thread Starter
Forum
Replies
Last Post