
85 UR quattro

Thread Starter
|
1st Gear
Joined: Apr 2011
Posts: 367
From: Birmingham, MI
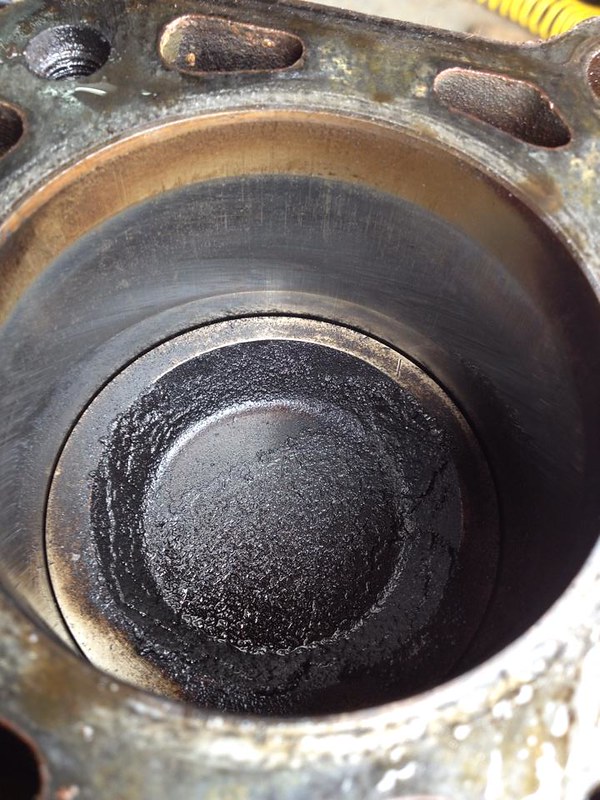
Got the head off. No problem with any fasteners or anything. Took me a while to figure out hoe to slacken the timing belt though. Never seen that before.
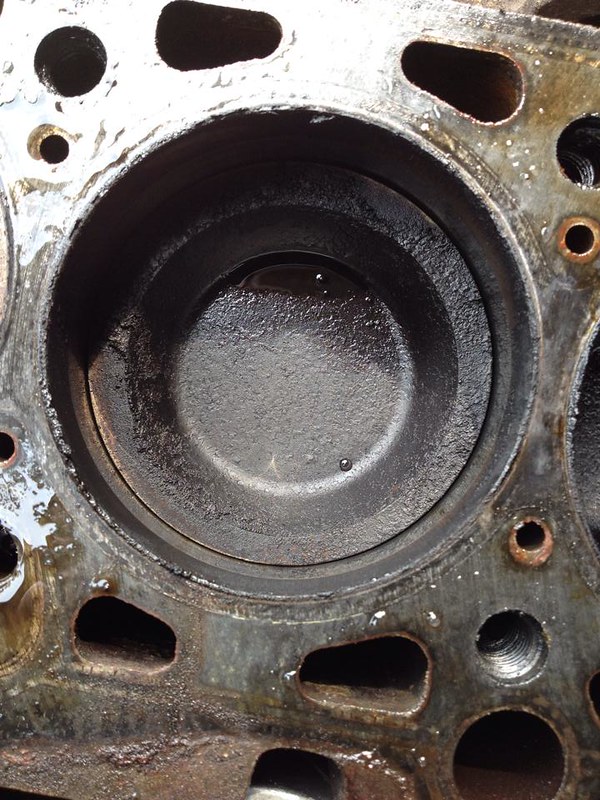
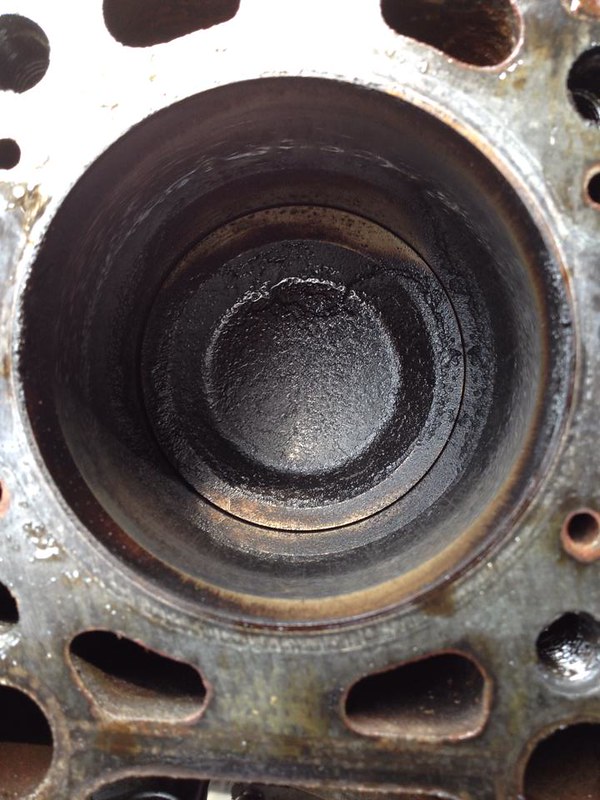
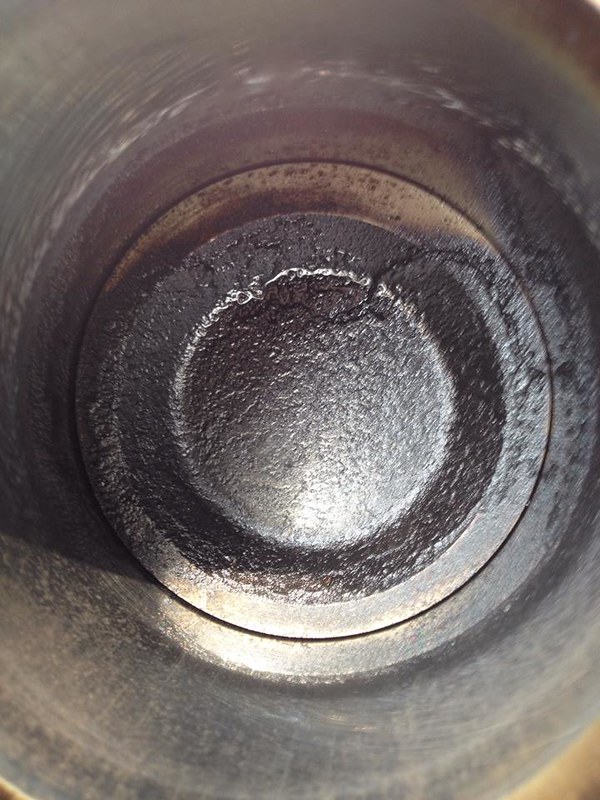
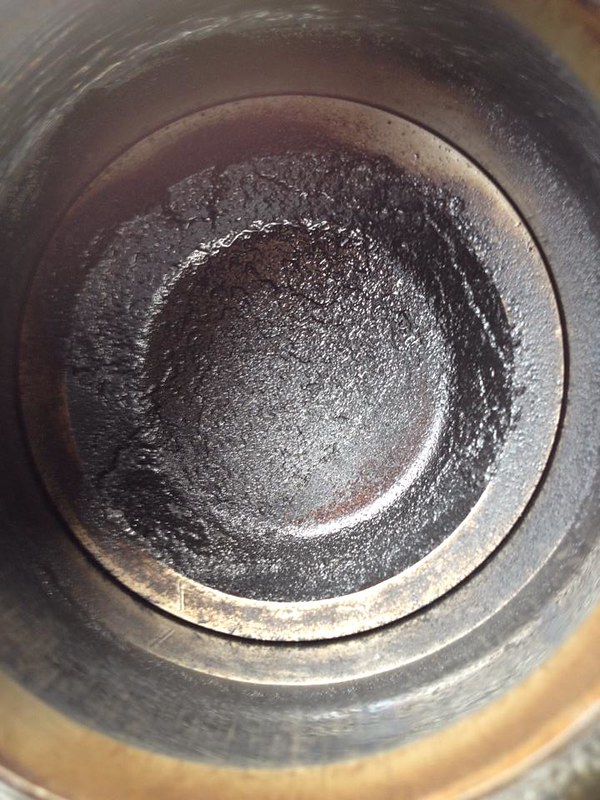
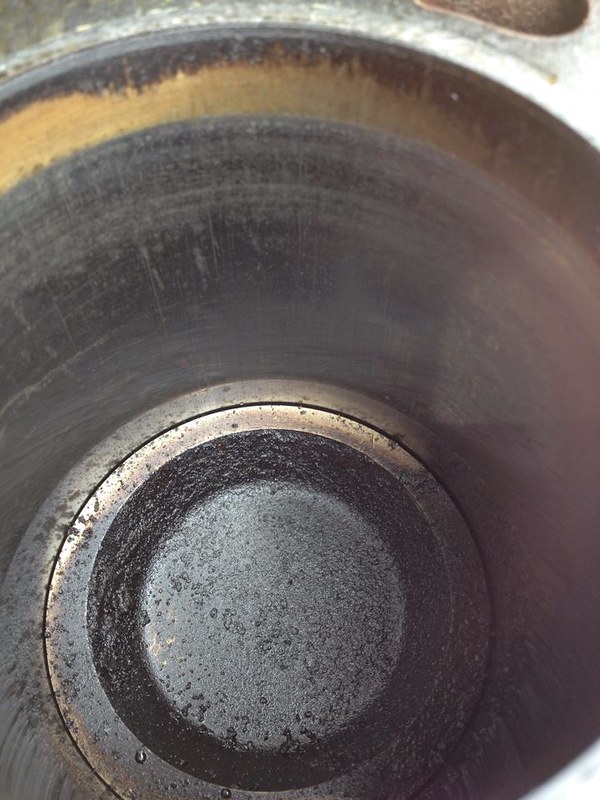
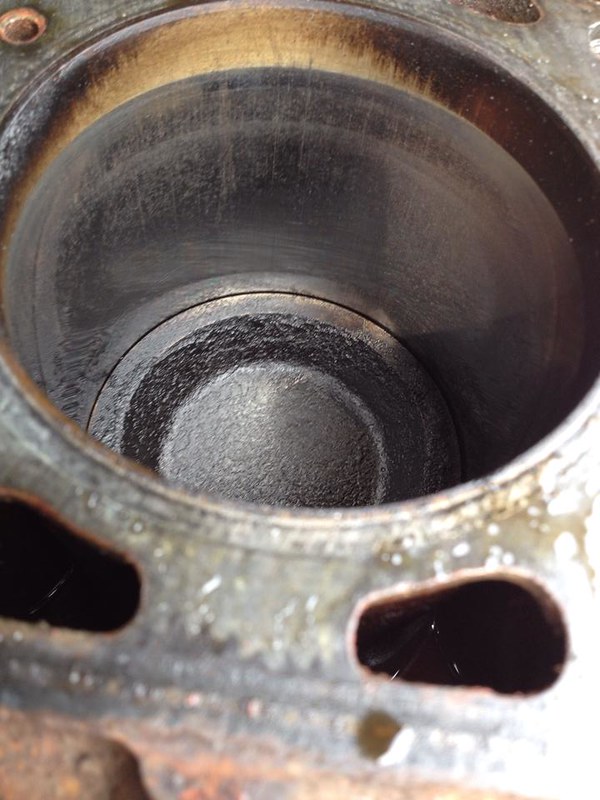
Here are some shots of the pistons and valves:
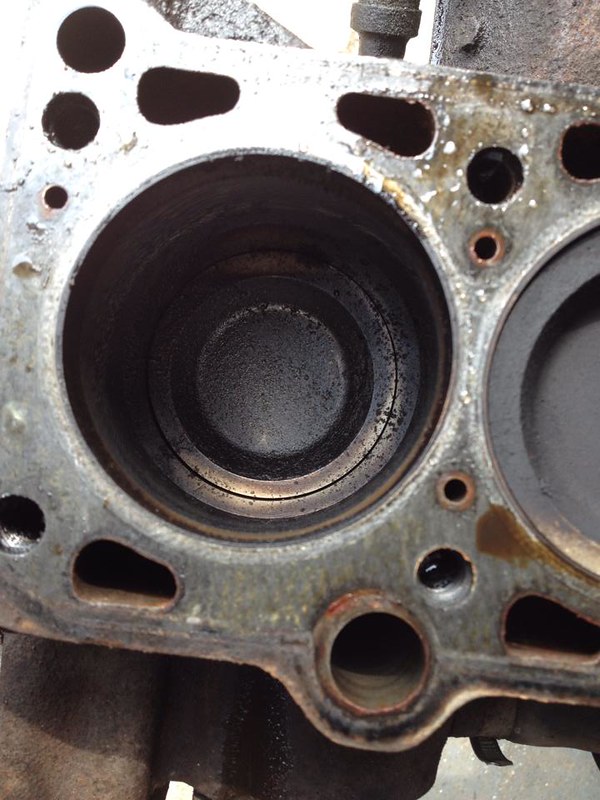 1240378_4589847960760_997257388265748875_n by Team Illuminata Motorsport, on Flickr
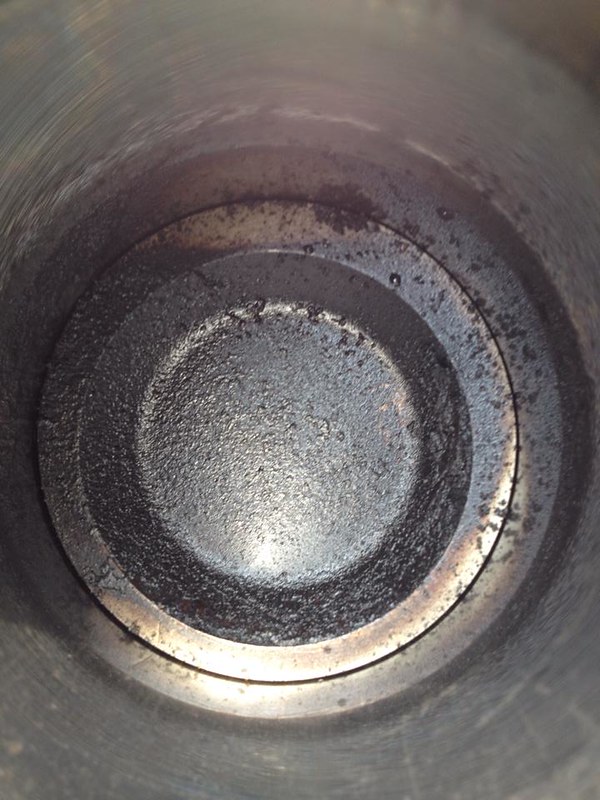 1622612_4589848280768_5447259164635422943_n by Team Illuminata Motorsport, on Flickr

 10559877_4589848640777_7957956191490443419_n by Team Illuminata Motorsport, on Flickr
 10590594_4589849040787_3552389422416382544_n by Team Illuminata Motorsport, on Flickr
 10402929_4589849240792_1519067894475350300_n by Team Illuminata Motorsport, on Flickr
 10170714_4589849400796_6939671066026195417_n by Team Illuminata Motorsport, on Flickr
 13582_4589849760805_3437682752668629591_n by Team Illuminata Motorsport, on Flickr
 10511294_4589849960810_4009478500258595522_n by Team Illuminata Motorsport, on Flickr
 10462602_4589850200816_5606671163187407647_n by Team Illuminata Motorsport, on Flickr
 10501643_4589850600826_1507296606445626367_n by Team Illuminata Motorsport, on Flickr
And the valves:
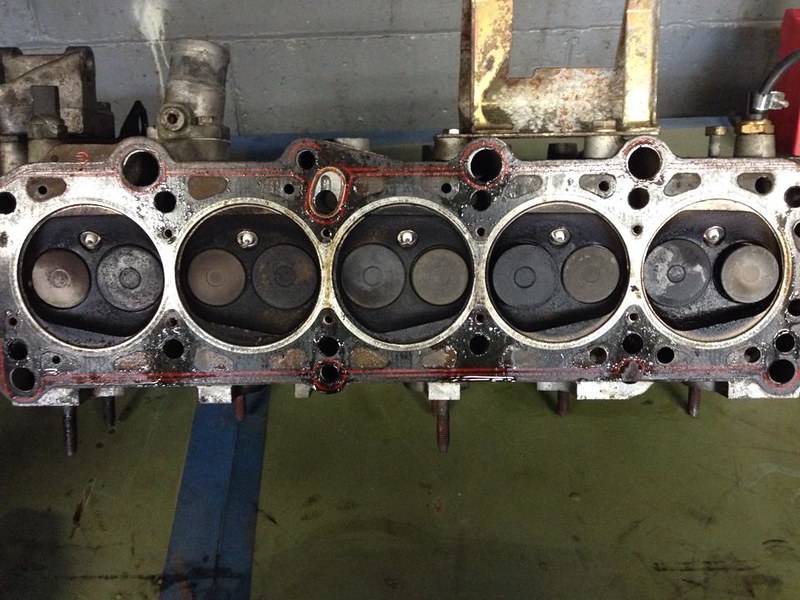 10480202_4589851200841_144939564676059940_n by Team Illuminata Motorsport, on Flickr
I filled the head with gasoline but couldn't see any leaking past the valves.
Here are some shots of the pistons and valves:
1240378_4589847960760_997257388265748875_n by Team Illuminata Motorsport, on Flickr1622612_4589848280768_5447259164635422943_n by Team Illuminata Motorsport, on Flickr10559877_4589848640777_7957956191490443419_n by Team Illuminata Motorsport, on Flickr10590594_4589849040787_3552389422416382544_n by Team Illuminata Motorsport, on Flickr10402929_4589849240792_1519067894475350300_n by Team Illuminata Motorsport, on Flickr10170714_4589849400796_6939671066026195417_n by Team Illuminata Motorsport, on Flickr13582_4589849760805_3437682752668629591_n by Team Illuminata Motorsport, on Flickr10511294_4589849960810_4009478500258595522_n by Team Illuminata Motorsport, on Flickr10462602_4589850200816_5606671163187407647_n by Team Illuminata Motorsport, on Flickr10501643_4589850600826_1507296606445626367_n by Team Illuminata Motorsport, on FlickrAnd the valves:
10480202_4589851200841_144939564676059940_n by Team Illuminata Motorsport, on FlickrI filled the head with gasoline but couldn't see any leaking past the valves.
Last edited by team illuminata; Jul 26, 2016 at 03:07 PM.

Former Sponsor
Joined: Apr 2011
Posts: 511
From: Beaverton Oregon
Did you flip the head upside down, fill a combustion cylinder with a fluid, of course with valves closed, and then use compressed air from the intake/exhaust side? Then look for bubbles seeping past the valve to seat area and that can show you leaks easier than looking for wet seepage down the valve stem.
Thread Starter
|
1st Gear
Joined: Apr 2011
Posts: 367
From: Birmingham, MI
So yesterday I did as suggested: flipped the head, filled the combustion chambers with gasoline and aimed compressed air at the valve seats from below. Results can be seen in this video.
As you can see, almost every cylinder has an issue. The worst is #1 though which is the one with bad compression. I think we'll be putting the new head on when we put this back all together.
I also did a similar thing with the piston rings. No compressed air though. I just poured some fuel into each to see if it leaked by fairly quickly. I have no benchmark for this test but in my opinion they leaked down very, very slowly. I'm thinking the pistons are OK but I need a better way to prove this before reassembly.
One thing I'm not sure about, how to remove the large pulley on the front also seems to be called "vibration damper". Big central nut or four Allen screws or all five? Any suggestion for stopping the crank rotating?
Last edited by team illuminata; Jul 28, 2016 at 09:54 AM.

2nd Gear
Joined: Jun 2011
Posts: 1,186
Capture a block of wood between the crank journal and the side of the block. This is soft enough not to damage anything and will stop the crank from turn while you get the bolts out of the front pulley. Be sure to clean the allen heads out really well and tap the allen socket deeply into the head before trying to remove them. If you round one out, it'll be a real bitch to get out then..
HTH,
Dave
HTH,
Dave
Former Sponsor
Joined: Apr 2011
Posts: 511
From: Beaverton Oregon
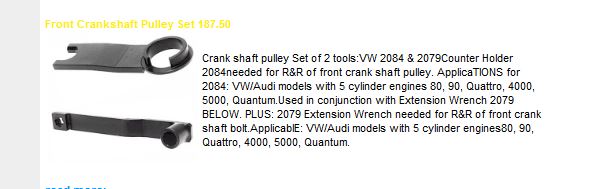
Here are the factory tools for when the engine is installed in the car. The one tool would go into the pulley, the U shaped portion goes around the snub mount to lock the crank into a fixed position. The other one with the socket on it is meant to be an extension that allows you to use a long handled 1/2 inch breaker bar to tighten that beast of a bolt down. I can't remember the torque it's supposed to be, something like 250 ft pds?? But you can't use a torque wrench with that extension tool since that throws off the actual value. If you can find the one tool online that's the way to go. Then you can bolt that down later on if you like. Engine out you could torque it down with a socket and I'm sure "not cheap" torque wrench, special tool 2x4 in place as well.

Thread Starter
|
1st Gear
Joined: Apr 2011
Posts: 367
From: Birmingham, MI
This is scary.
How about locking the crank off the flywheel, like this?
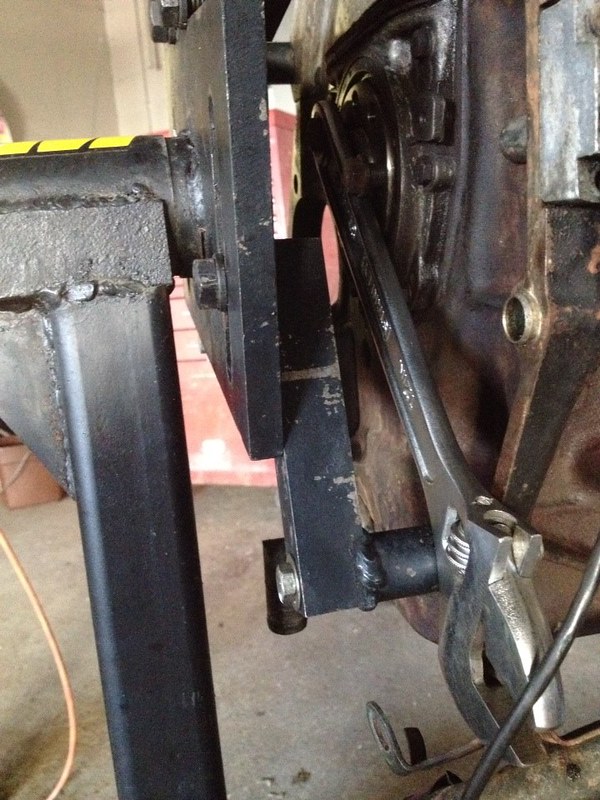 10368391_4603634625418_4989138158757684671_n by Team Illuminata Motorsport, on Flickr
The four Allen screws actually came out very easily.
So an air impact gun should free the center bolt up then? But I'll still need the tool to torque it back up when it's in the car?
How about locking the crank off the flywheel, like this?
10368391_4603634625418_4989138158757684671_n by Team Illuminata Motorsport, on FlickrThe four Allen screws actually came out very easily.
So an air impact gun should free the center bolt up then? But I'll still need the tool to torque it back up when it's in the car?
Last edited by team illuminata; Aug 25, 2016 at 04:23 PM.
Former Sponsor
Joined: Apr 2011
Posts: 511
From: Beaverton Oregon
I remember doing this job on 5000, 5000 turbos and 4000q's and not having a lot of room to get a torque wrench and socket on that large bolt. That is where the narrow depth and built in socket of the special tool came in handy. Then putting the breaker bar on the end and cranking it down. I feel like a hack when I say I, nor could anybody else in the shop I worked at, ever use a torque wrench with the engine installed in the car. Maybe your URQ has a bit more room? When you break those loose by hand, after doing a few of them you get a good idea of how tight to get that bolt.
Creative way to hold the crank. I wouldn't reuse those bolts. I would snug them up to the wrench as much as possible, and I'd make a wedge out of wood to put I'd say 60-70% of the load on the wood. And put that between the crank and block. The more support the better. Once that bolt is off, the nose of the crank is not tapered. It might be snug, but should wiggle off the crank straight out.
So if you have access to a torque wrench that is capable of high values, if you don't have room with the engine in the car, torque it on before it gets installed and before your oil pan goes on.
Thread Starter
|
1st Gear
Joined: Apr 2011
Posts: 367
From: Birmingham, MI
I remember doing this job on 5000, 5000 turbos and 4000q's and not having a lot of room to get a torque wrench and socket on that large bolt. That is where the narrow depth and built in socket of the special tool came in handy. Then putting the breaker bar on the end and cranking it down. I feel like a hack when I say I, nor could anybody else in the shop I worked at, ever use a torque wrench with the engine installed in the car. Maybe your URQ has a bit more room? When you break those loose by hand, after doing a few of them you get a good idea of how tight to get that bolt.
Creative way to hold the crank. I wouldn't reuse those bolts. I would snug them up to the wrench as much as possible, and I'd make a wedge out of wood to put I'd say 60-70% of the load on the wood. And put that between the crank and block. The more support the better. Once that bolt is off, the nose of the crank is not tapered. It might be snug, but should wiggle off the crank straight out.
So if you have access to a torque wrench that is capable of high values, if you don't have room with the engine in the car, torque it on before it gets installed and before your oil pan goes on.
Creative way to hold the crank. I wouldn't reuse those bolts. I would snug them up to the wrench as much as possible, and I'd make a wedge out of wood to put I'd say 60-70% of the load on the wood. And put that between the crank and block. The more support the better. Once that bolt is off, the nose of the crank is not tapered. It might be snug, but should wiggle off the crank straight out.
So if you have access to a torque wrench that is capable of high values, if you don't have room with the engine in the car, torque it on before it gets installed and before your oil pan goes on.
oil pan off
wood
got it.
Thread Starter
|
1st Gear
Joined: Apr 2011
Posts: 367
From: Birmingham, MI
Took the oil pan off yesterday. All the screws were very loose. That's been a feature of this project so far. Hope it extends to the crank bolt. Some screws were even missing!
 10557159_4607633725393_1965755289317236242_n by Team Illuminata Motorsport, on Flickr
 10599464_4607633565389_3177427322720607211_n by Team Illuminata Motorsport, on Flickr
 1546415_4607633805395_5644706767318884935_n by Team Illuminata Motorsport, on Flickr
While it will be nice to check the bottom end out the main reason for taking off the oil pan was to wedge the crank in preparation for the dreaded crank bolt extraction.
 10559702_4607633885397_7593363943951006681_n by Team Illuminata Motorsport, on Flickr
So I tooled up and crossed my fingers.

I needn't have worried. Came off like butter.
 10559702_4607633645391_205008138190614395_n by Team Illuminata Motorsport, on Flickr
It certainly wasn't loose but I doubt it was fully torqued.
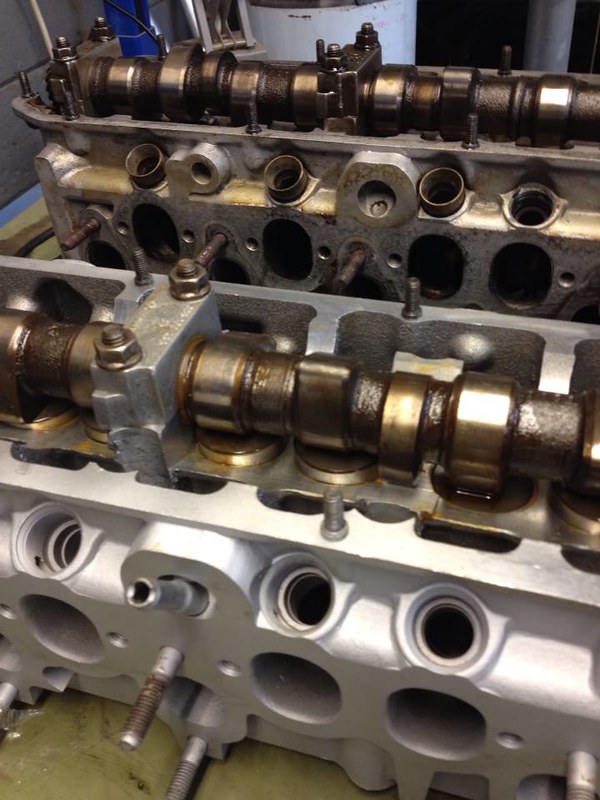
So, relieved, I put the kettle on for a well earned brew and then dug through my boxes of spares and pulled the reconditioned head I bought earlier in the year to see if it matched the old one.
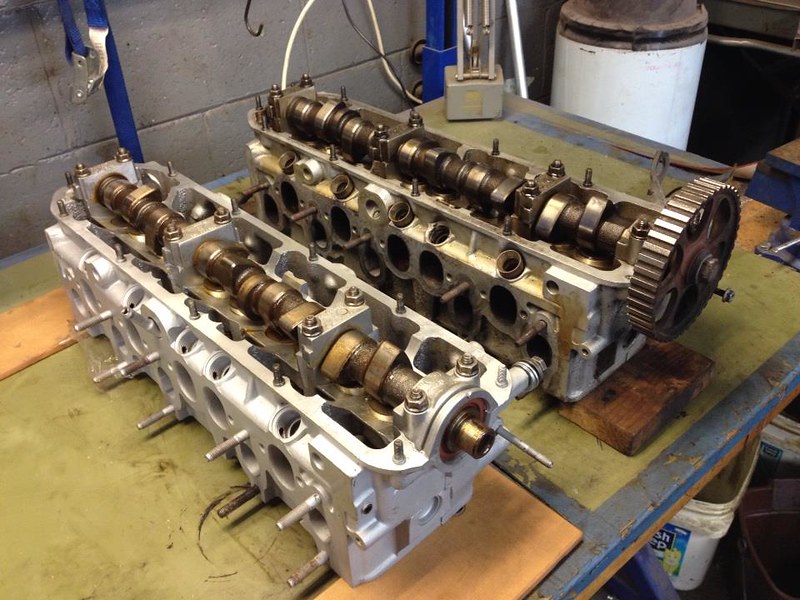 10565129_4607635405435_3823639279177941789_n by Team Illuminata Motorsport, on Flickr
Slightly different part numbers:
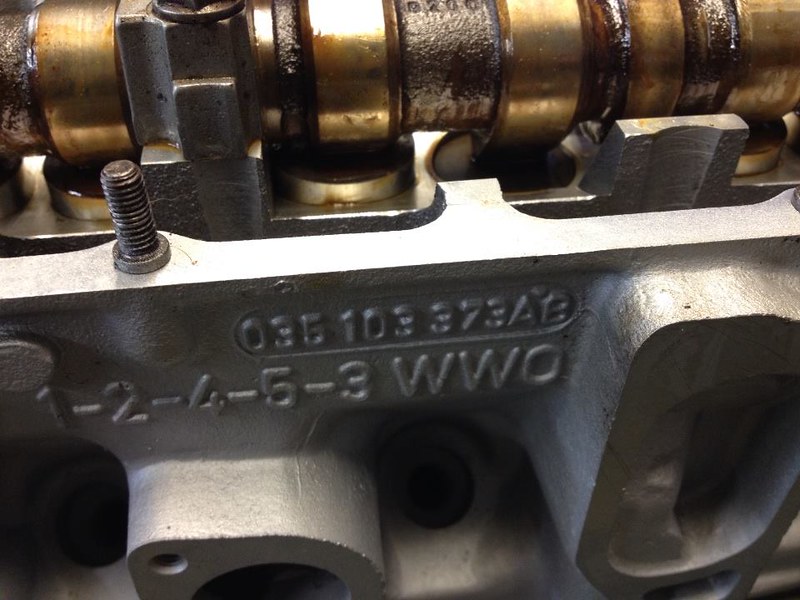 10552585_4607635445436_9158960707479556268_n by Team Illuminata Motorsport, on Flickr
 10552585_4607635565439_3539743691564270254_n by Team Illuminata Motorsport, on Flickr
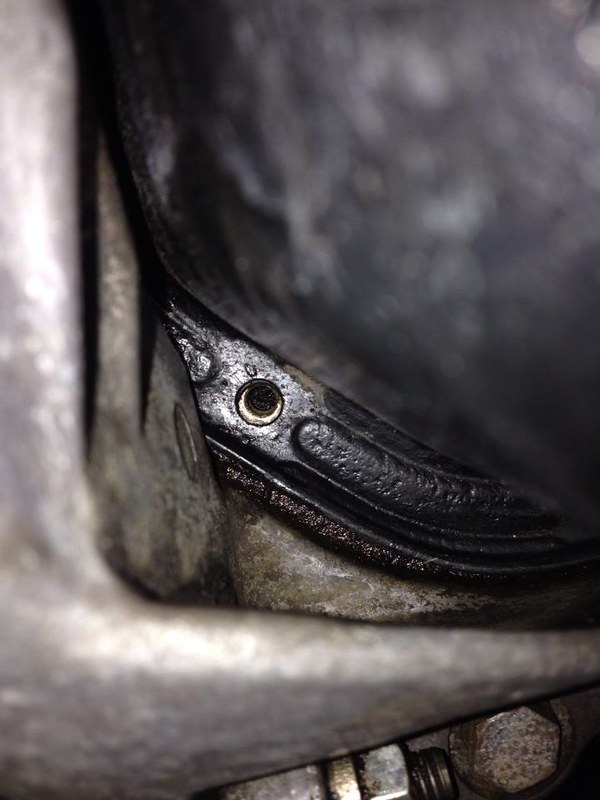
What's this tube sticking out of the side for?
 10544332_4607635485437_115982354742202958_n by Team Illuminata Motorsport, on Flickr
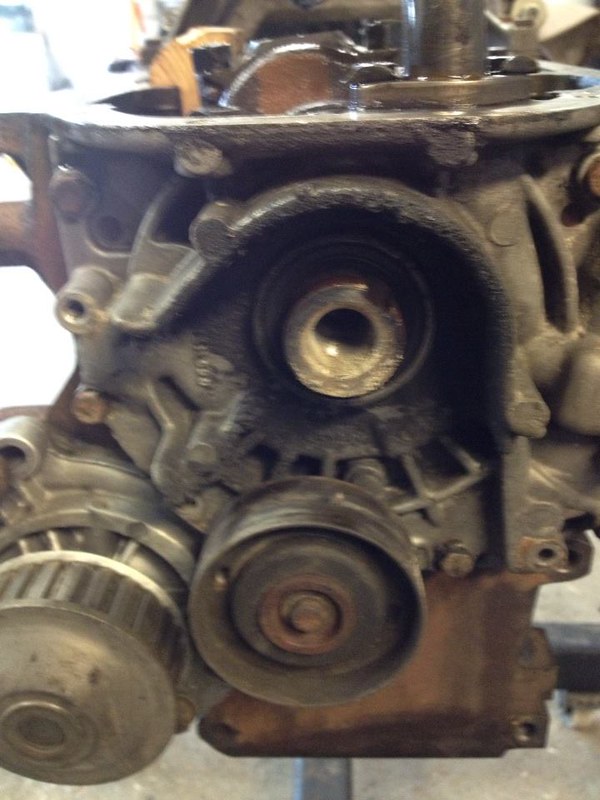
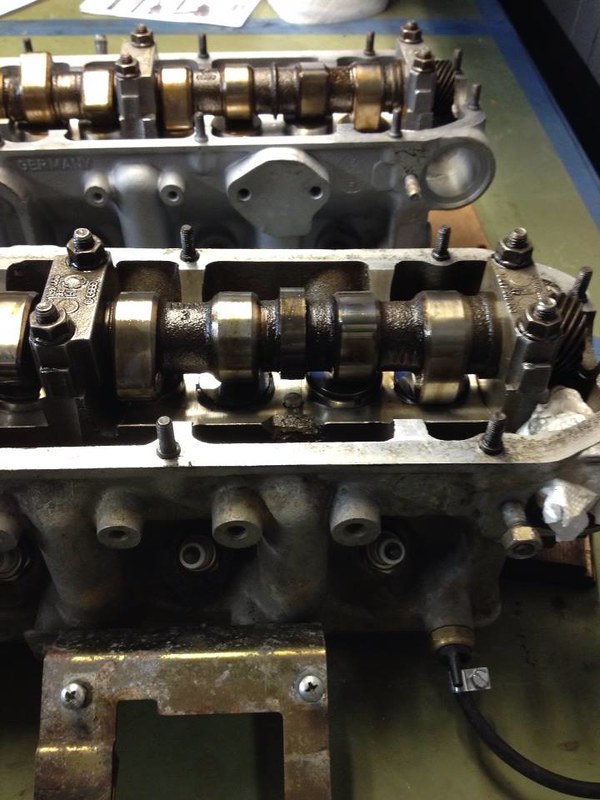
Different boss arrangement on the left side. Problem?
 10606242_4609112082351_4399206140791206893_n by Team Illuminata Motorsport, on Flickr
And the cam lobes look smaller in the refurb head.
Shall I use this one of fix the old one?
10557159_4607633725393_1965755289317236242_n by Team Illuminata Motorsport, on Flickr10599464_4607633565389_3177427322720607211_n by Team Illuminata Motorsport, on Flickr1546415_4607633805395_5644706767318884935_n by Team Illuminata Motorsport, on FlickrWhile it will be nice to check the bottom end out the main reason for taking off the oil pan was to wedge the crank in preparation for the dreaded crank bolt extraction.
10559702_4607633885397_7593363943951006681_n by Team Illuminata Motorsport, on FlickrSo I tooled up and crossed my fingers.
I needn't have worried. Came off like butter.
10559702_4607633645391_205008138190614395_n by Team Illuminata Motorsport, on FlickrIt certainly wasn't loose but I doubt it was fully torqued.
So, relieved, I put the kettle on for a well earned brew and then dug through my boxes of spares and pulled the reconditioned head I bought earlier in the year to see if it matched the old one.
10565129_4607635405435_3823639279177941789_n by Team Illuminata Motorsport, on FlickrSlightly different part numbers:
10552585_4607635445436_9158960707479556268_n by Team Illuminata Motorsport, on Flickr10552585_4607635565439_3539743691564270254_n by Team Illuminata Motorsport, on FlickrWhat's this tube sticking out of the side for?
10544332_4607635485437_115982354742202958_n by Team Illuminata Motorsport, on FlickrDifferent boss arrangement on the left side. Problem?
10606242_4609112082351_4399206140791206893_n by Team Illuminata Motorsport, on FlickrAnd the cam lobes look smaller in the refurb head.
Shall I use this one of fix the old one?
Last edited by team illuminata; Aug 25, 2016 at 04:24 PM.