
Allroad Specific CV boot replacement DIY


Thread Starter
|
1st Gear
Joined: May 2010
Posts: 10
From: Twin Cities, MN
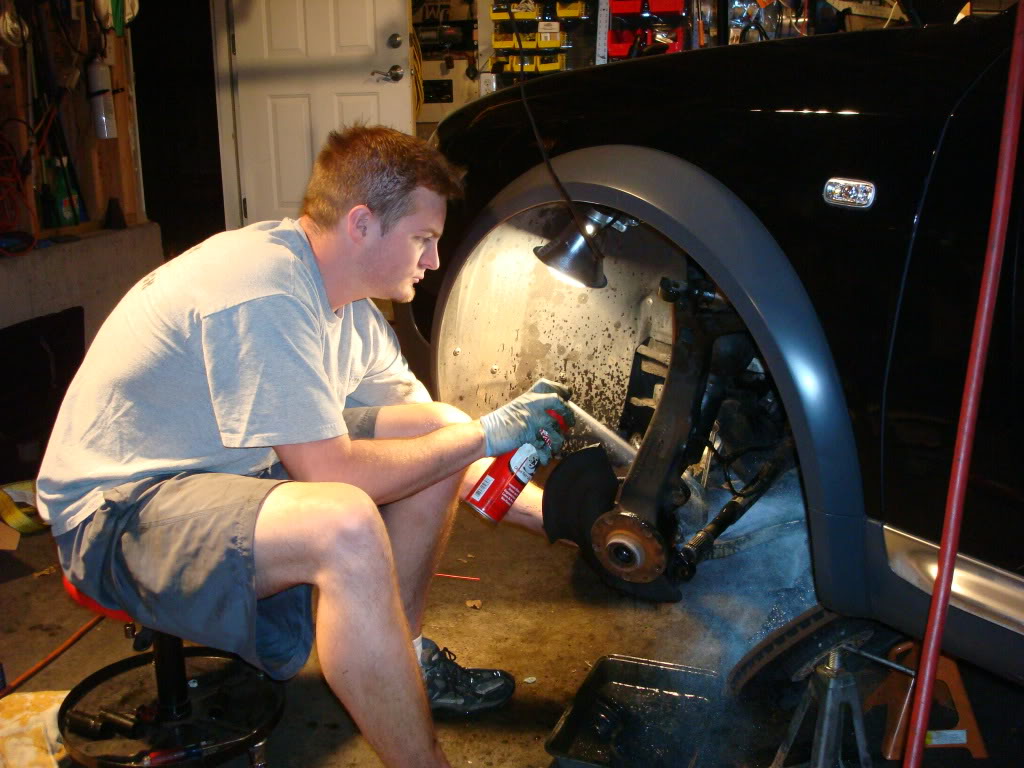
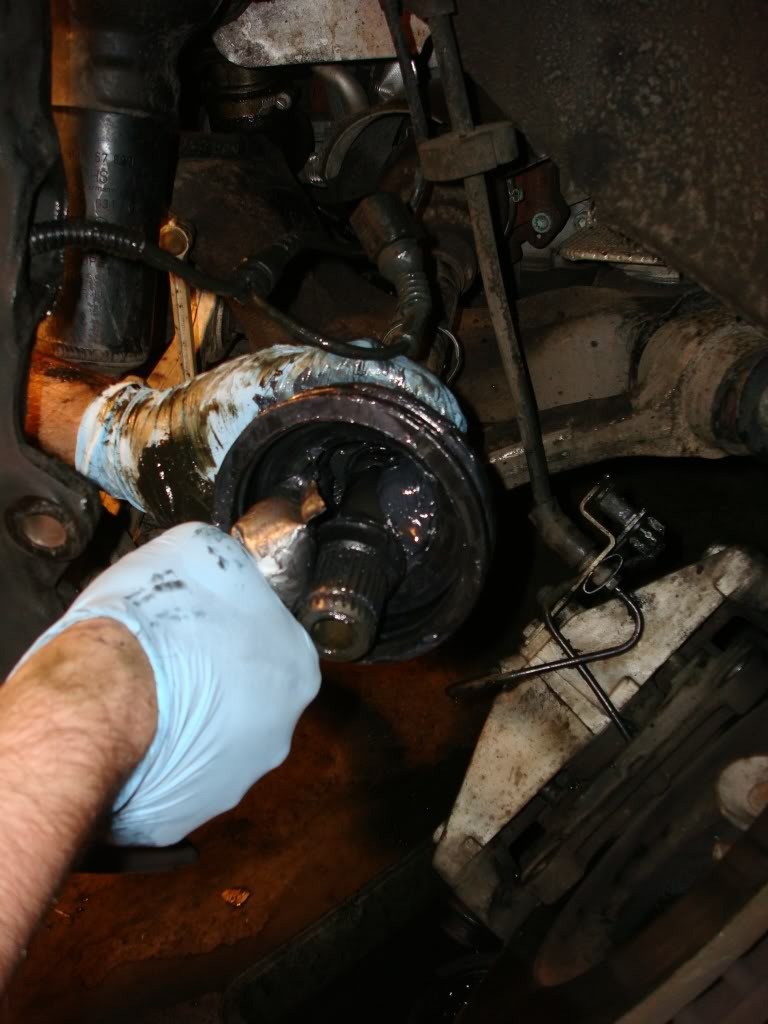
SO you have a blown CV boot
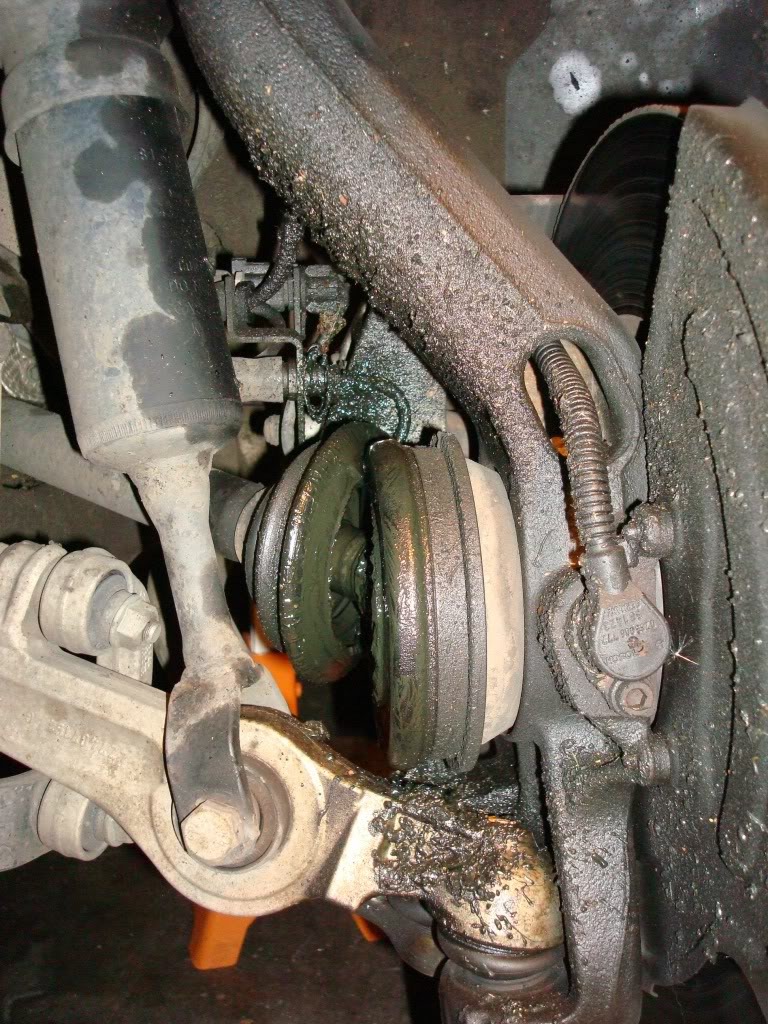
(This was the cleaner of the 2 sides…)
You go on the web trying to find some DIY's and all you find is A6 specific ones. Well, the A6 DIY's will get you started and you can fumble your way through the specifics of the allroad... Or you can just follow this one and get it done in no time!
I had both my front outer CV boots go out at the same time around 105,000mi. I did the passenger side using 5 different DIY's I found on here and other forums, and used tips from forum members. Some tips were great! Some were, well, not. It took me a good 6 hours because I was sure to try every tip, good or bad. The drivers side took under 2 hours from wheels up to wheels down AND cleaning the garage afterwards. I am certain I could do it in an hour flat knowing what I do now.
Let’s get started.
*I am making this do it yourself guide simply as a tool for people to get through their own project! I take no responsibility for any damages or injuries that may come from you working on your own car!*
Work smart, be safe!
1 - Position your ar on a flat stable surface where you can safely jack the car up and place it on jack sands.
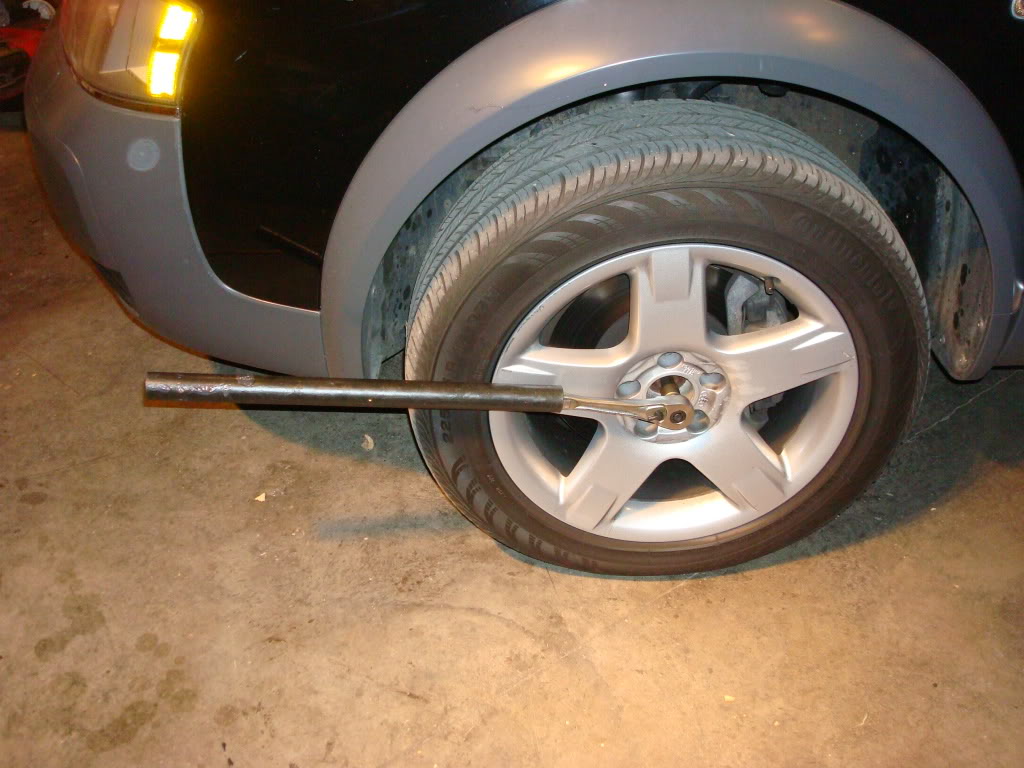
2 - Before lifting the car in the air you must crack the axle bolt while the car is on the ground, you “could” do it while the car is in the air, but the tires being on the ground help break the bold loose.
Turn the bolt ~90 degrees, no need to pull it completely out yet.
The OEM bolt is a 17mm hex
You'll need a breaker bar
3 – Set the e-brake and lift the car and place it on jack stands
4 – Remove the wheel and the axle bolt.
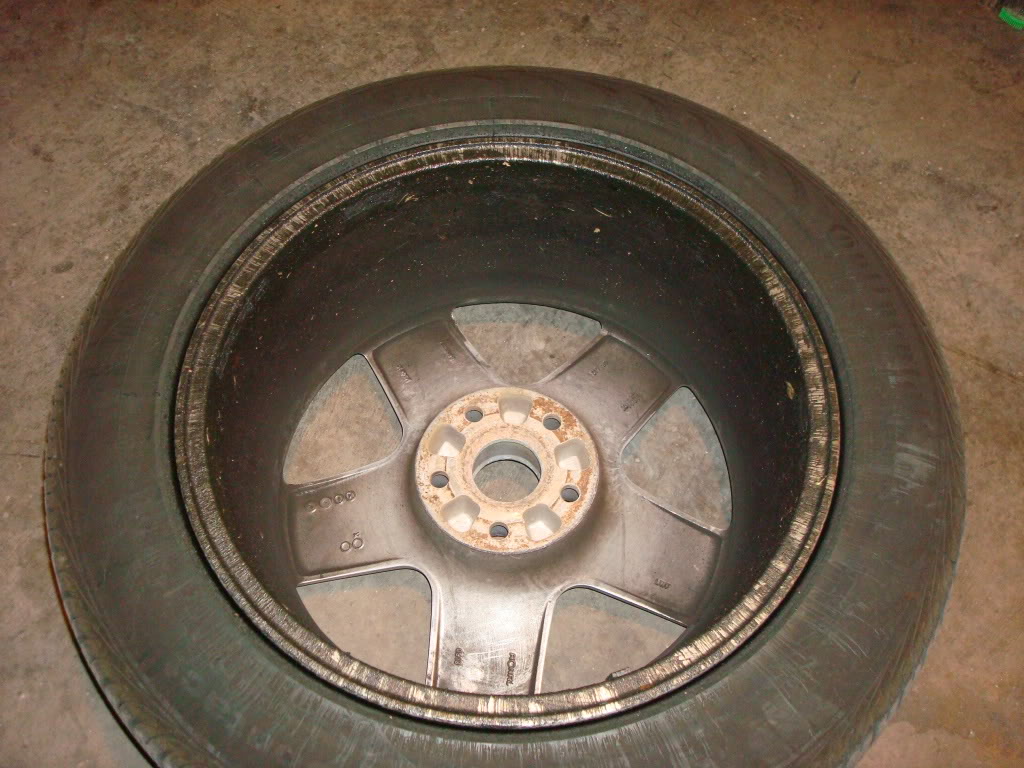
You’ll probably have some cleaning to do…
5 – The caliper/caliper bracket and rotor comes off next
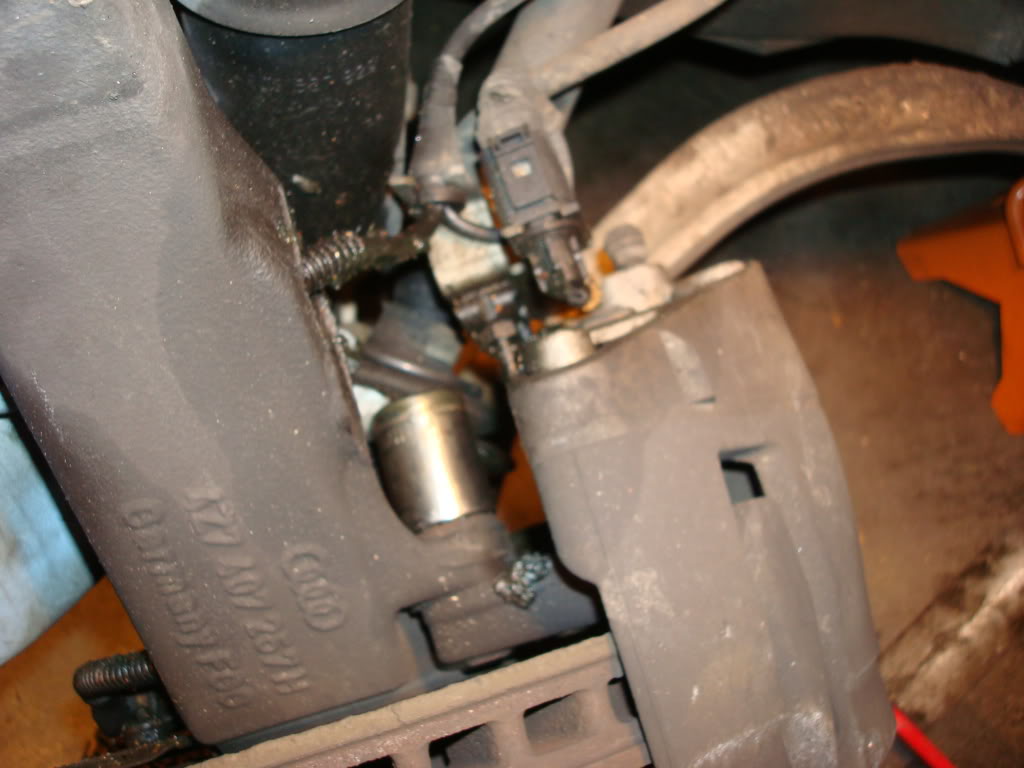
That is a 19mm bolt and it will be tight!
I used an additional jack stand to hold the caliper assembly off to the side, do not let it hang by the brake line!
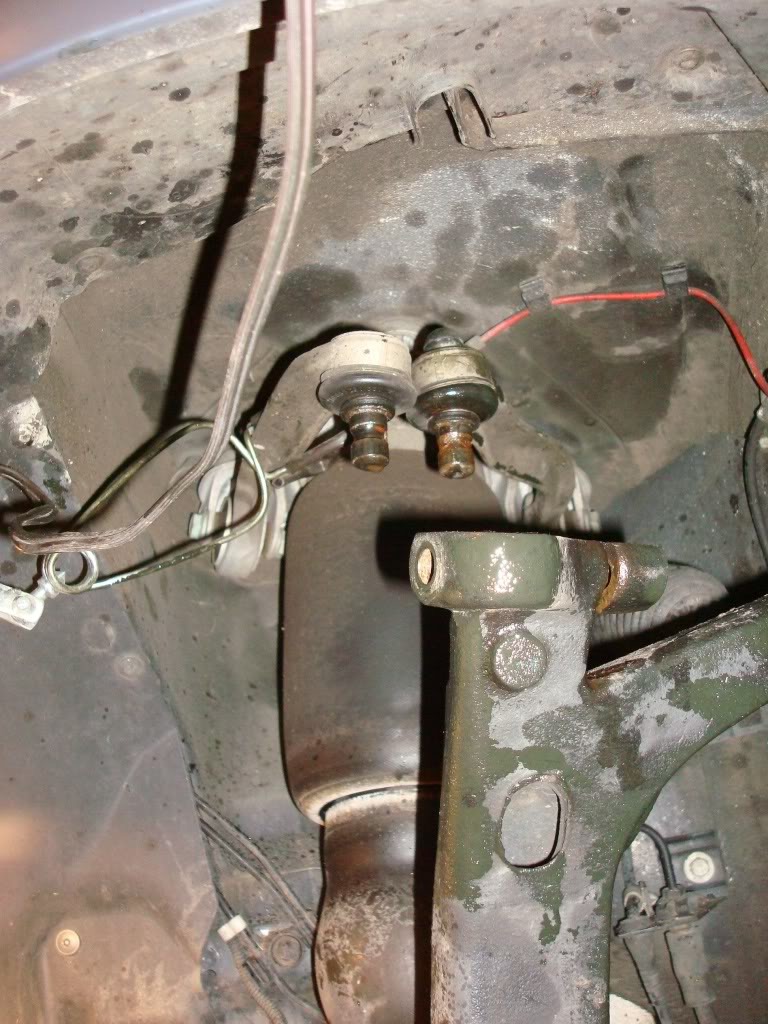
6 – Remove the infamous pinch bolt. Mine came out without a hitch. Take the nut off first, and then back the bolt out.
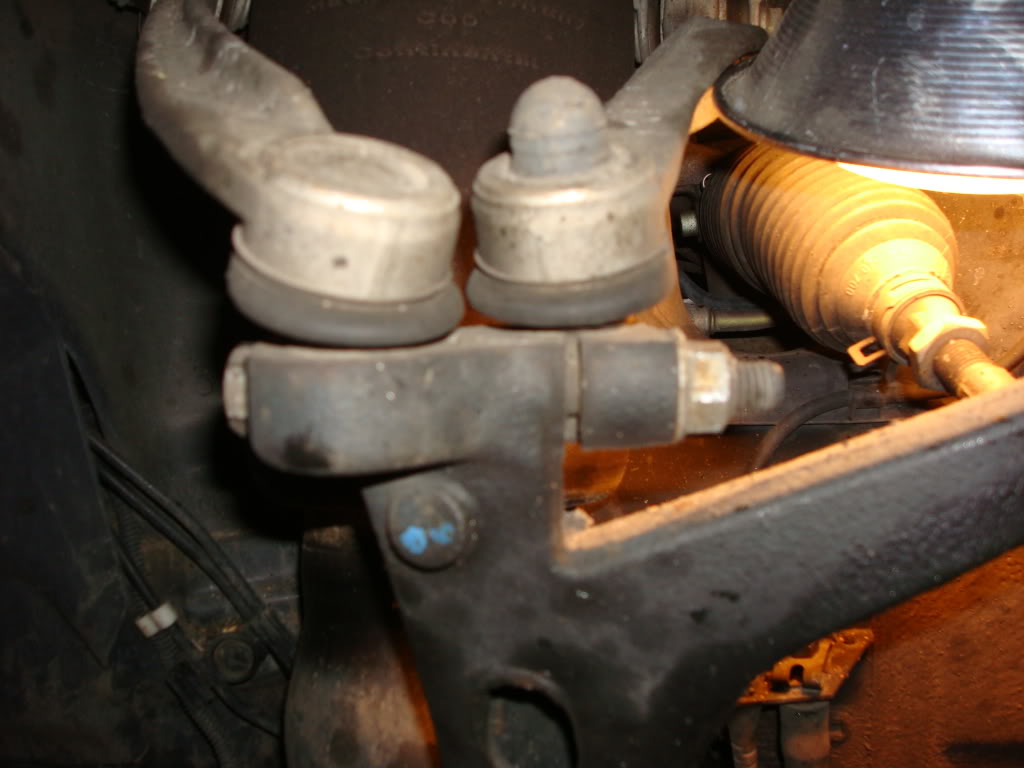
You may have to tap the control arms with a hammer (I used a plastic one) to get the upper control arms to let go.
7 – Turn the steering wheel away from the side you are working on. (if you are doing your Driver side turn the wheel to the right, Passenger side, turn it to the left) I found it easiest to wrestle the CV joint out towards the rear of the car. Be ready to use some choice non child friendly words while trying to get it out.
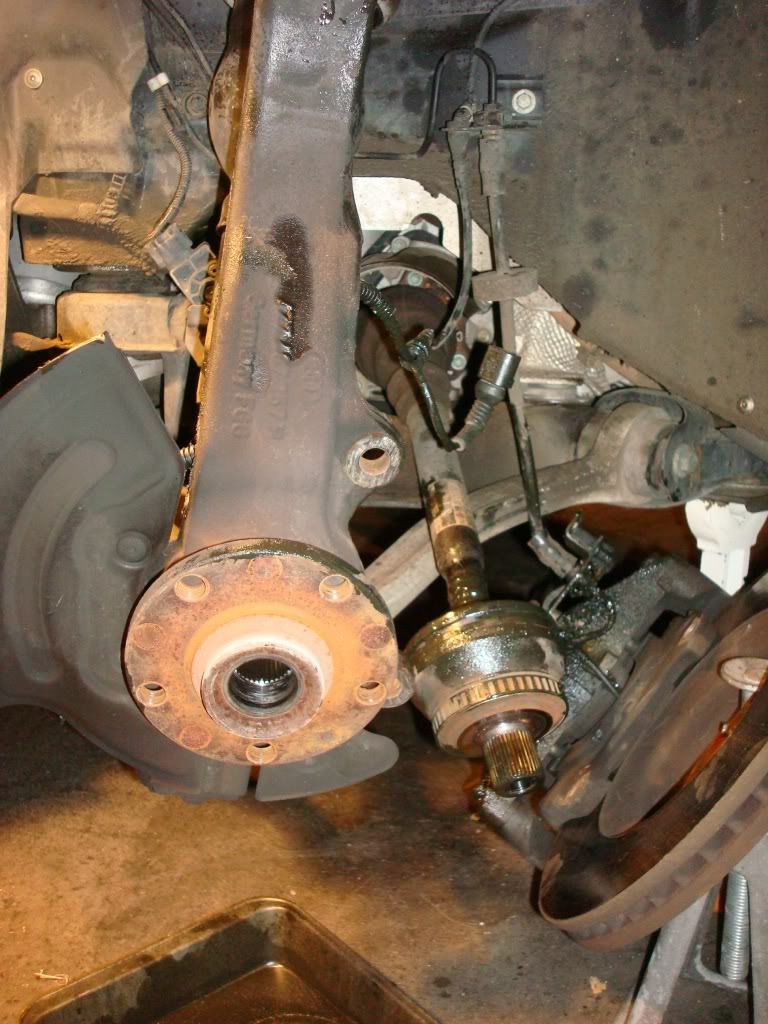
8 – No is where the non A6 part begins.
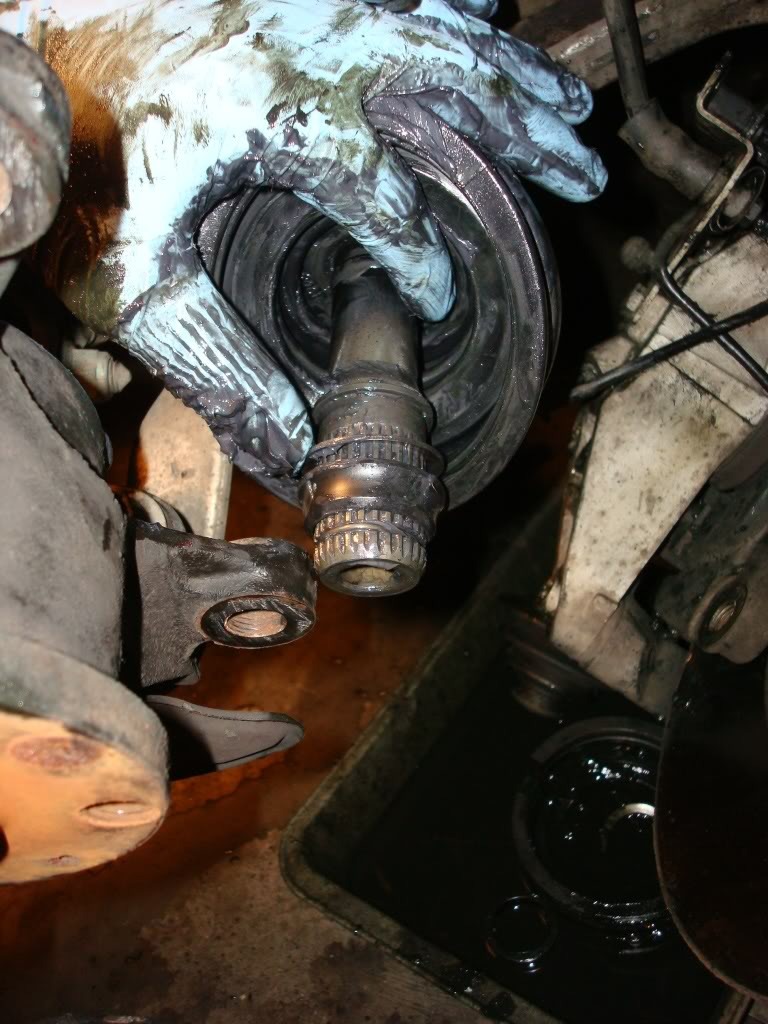
Allroads have hollow axel shafts so pullers won’t work, nor will simply re-inserting the axle bolt to press it out… This is what a axle bolt will look like if you try
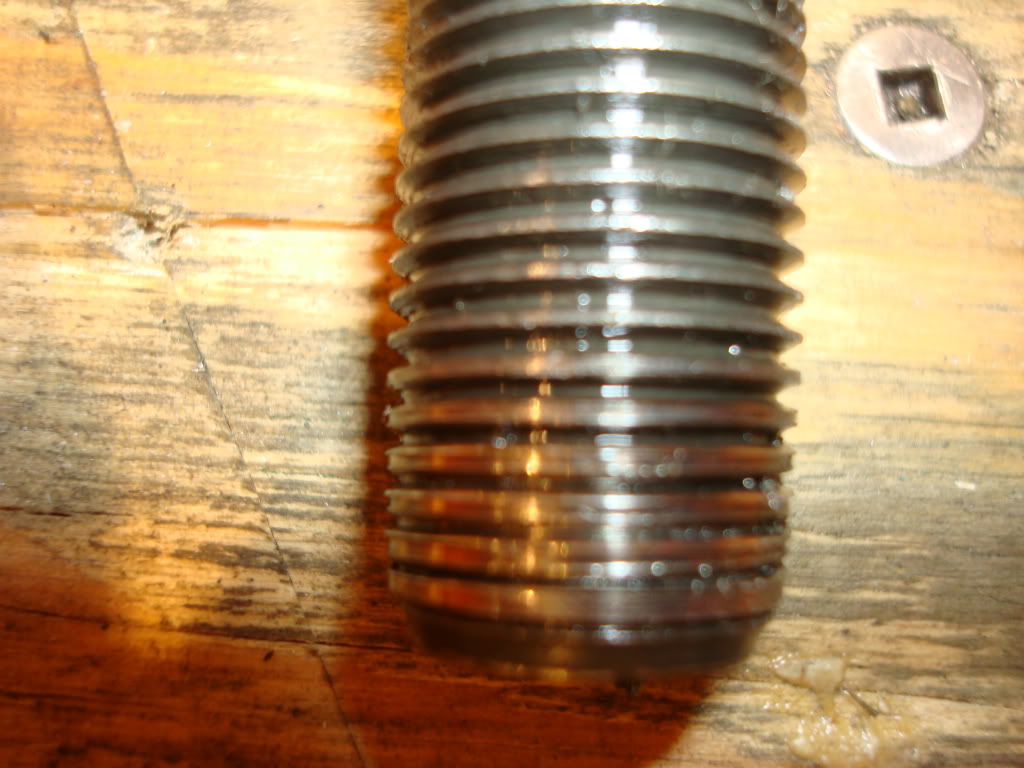
Good luck removing the bolt once the threads are all boogered up on the INSIDE of the CV joint…
Instead, a slide puller worked fantastically! Ironically my slide hammers threaded end was an exact match to the inner thread of the CV joint. It took almost no effort to pull it out

It actually surprised me how easily it let go.
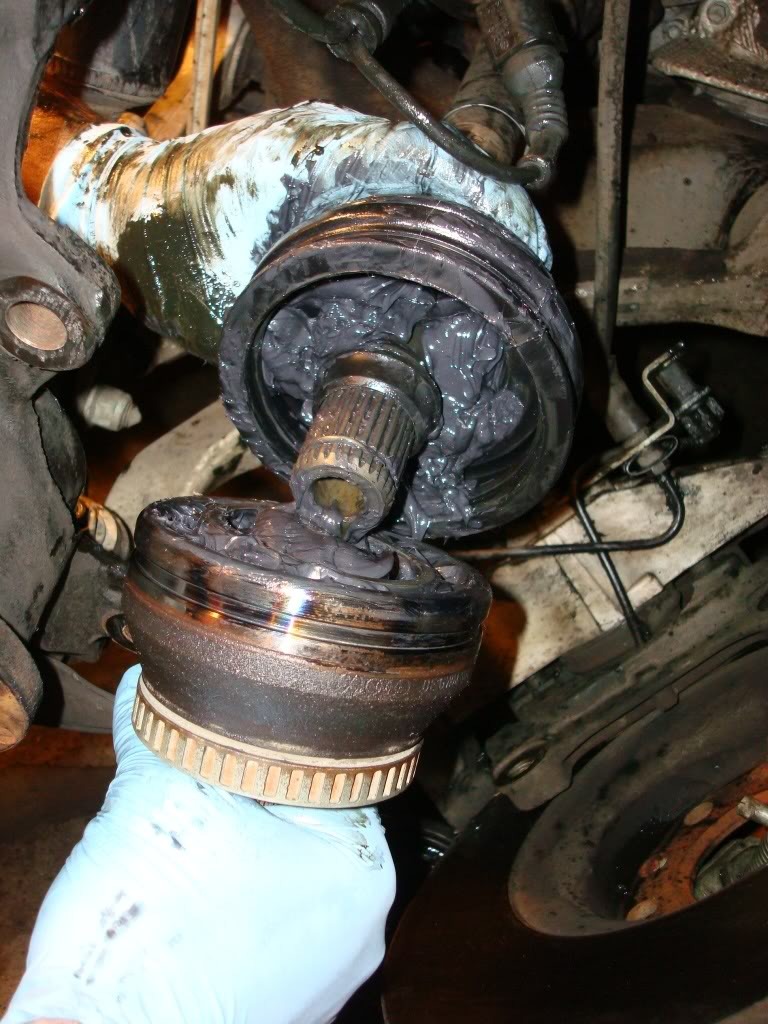
9 – Once the CV joint is off its time to clean. If the boot was torn, dirt did get into the joint! Completely clean the axle shaft, and the CV joint.

Dirty
I used a case of brake and parts cleaner between both sides…
I soaked the CV joint in a bucket of gasoline to break up the grease, then followed it up with spray cleaner to remove any residue.
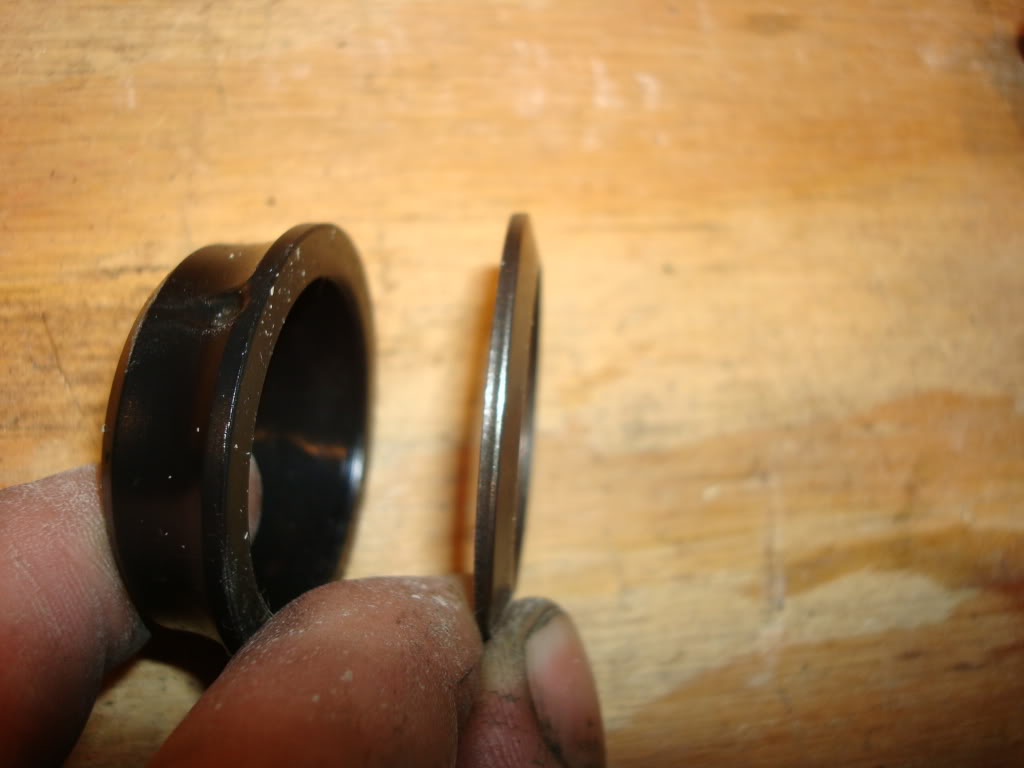
The C-clip, convex washer and the plastic spacer should all be replaced with the new ones that come in your kit, so throw the old ones away!
10 – Once everything is cleaned up install the new boot onto the shaft. Use a little new grease to lube the axel and the interior of the boot (don’t forget to slide the boot clamp on first!)
The new spacer, washer, and c-clip can be installed
This is how they should go on, spacer first, then washer, then c-clip.
My kit came with 2 tubes of grease; I used one to load up the cleaned CV joint
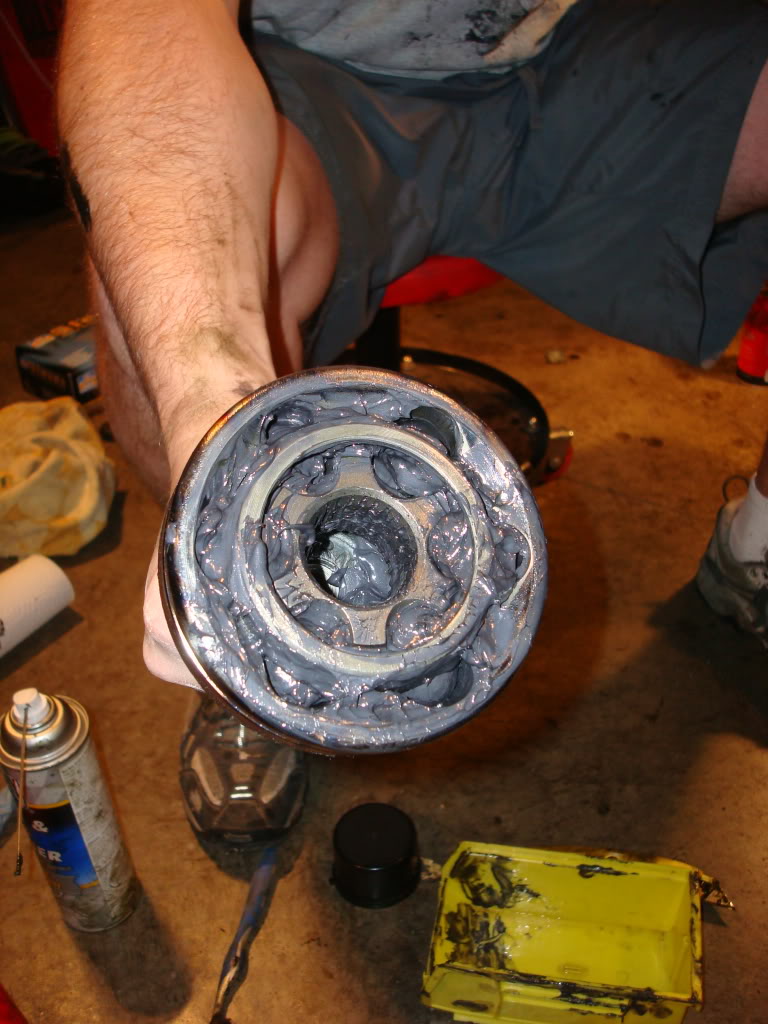
And one got loaded into the boot
11 – Install the CV joint onto the axle
The joint will need to be tapped past the c- clip. I used a block of wood and a maul to drive it past
12 – Pull the new boot onto the CV joint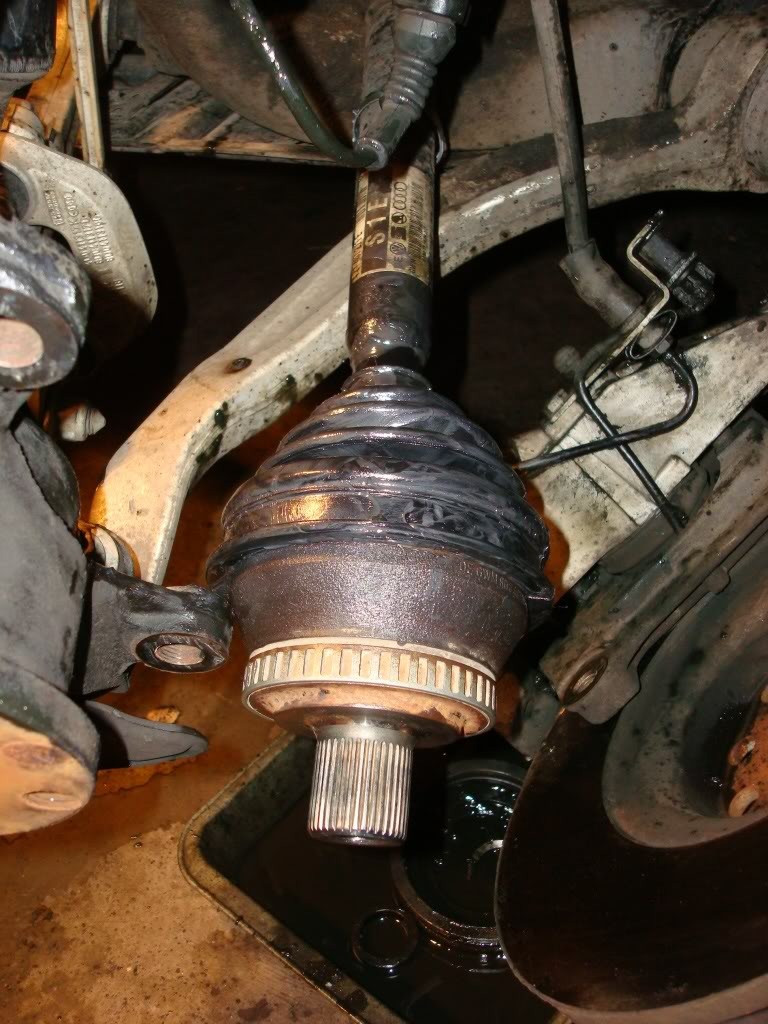
13 – Install the outer clamp and crimp it down. *do NOT use a pliers or a wire cutter to do this!* there are plenty of shops/ auto stores that will rent these crimpers out, some for free if you leave a deposit!
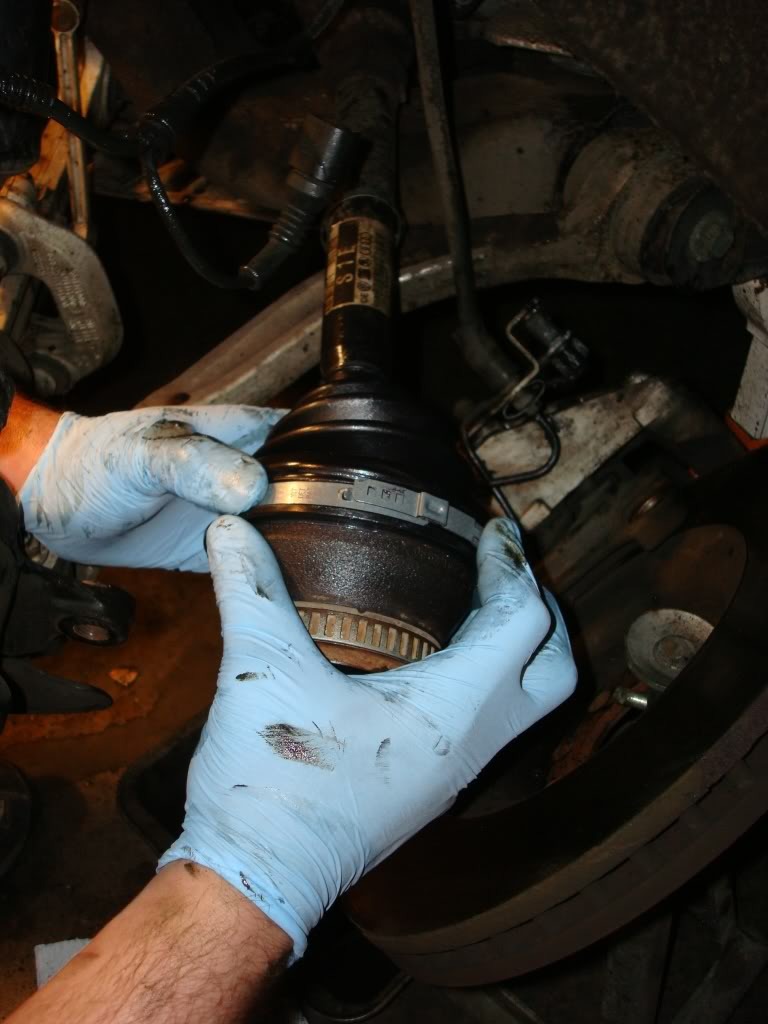
These do not have to be insanely tight, just snug enough so the boot wont spin on the joint.
DO NOT CRIMP THE INNER CLAMP YET
14 – Re insert the axle into the knuckle.
15 – Slip the inner clamp over the boot, and crimp it.

16 – Re-install the caliper bracket/caliper/rotor assembly.
Use a few drops of blue medium strength thread lock on the 19mm caliper mounting bolts. They have to be tight, but if they are over torqued, it can cause stress cracks!
17 – Your kit should have come with a new axel bolt! Use it! Audi says do not re-use the original bolt. Install it but only hand tight. You’ll torque it to 140ftlbs once the wheel is back on and the car is on the ground.
18 – Put the wheel back on and lower the car
19 – torque the new axel bolt to 140ftlbs
20 – Victory Drink
Don’t be afraid to ask for help! Thanks MN AUDI guys!
Feel free to PM me if you think I need to add or change anything on here. I’d be more than happy to help out in any way I can if someone wants to tackle theirs!
~Wes
(looks like I have to find a new host for the photos... They are all flipped to the correct orientation on photobucket, not here though...)
Link to photobucket http://s235.photobucket.com/albums/e...20replacement/
(This was the cleaner of the 2 sides…)
You go on the web trying to find some DIY's and all you find is A6 specific ones. Well, the A6 DIY's will get you started and you can fumble your way through the specifics of the allroad... Or you can just follow this one and get it done in no time!
I had both my front outer CV boots go out at the same time around 105,000mi. I did the passenger side using 5 different DIY's I found on here and other forums, and used tips from forum members. Some tips were great! Some were, well, not.
It took me a good 6 hours because I was sure to try every tip, good or bad. The drivers side took under 2 hours from wheels up to wheels down AND cleaning the garage afterwards. I am certain I could do it in an hour flat knowing what I do now.Let’s get started.
*I am making this do it yourself guide simply as a tool for people to get through their own project! I take no responsibility for any damages or injuries that may come from you working on your own car!*
Work smart, be safe!
1 - Position your ar on a flat stable surface where you can safely jack the car up and place it on jack sands.
2 - Before lifting the car in the air you must crack the axle bolt while the car is on the ground, you “could” do it while the car is in the air, but the tires being on the ground help break the bold loose.
Turn the bolt ~90 degrees, no need to pull it completely out yet.
The OEM bolt is a 17mm hex
You'll need a breaker bar
3 – Set the e-brake and lift the car and place it on jack stands
4 – Remove the wheel and the axle bolt.
You’ll probably have some cleaning to do…
5 – The caliper/caliper bracket and rotor comes off next
That is a 19mm bolt and it will be tight!
I used an additional jack stand to hold the caliper assembly off to the side, do not let it hang by the brake line!
6 – Remove the infamous pinch bolt. Mine came out without a hitch. Take the nut off first, and then back the bolt out.
You may have to tap the control arms with a hammer (I used a plastic one) to get the upper control arms to let go.
7 – Turn the steering wheel away from the side you are working on. (if you are doing your Driver side turn the wheel to the right, Passenger side, turn it to the left) I found it easiest to wrestle the CV joint out towards the rear of the car. Be ready to use some choice non child friendly words while trying to get it out.
8 – No is where the non A6 part begins.
Allroads have hollow axel shafts so pullers won’t work, nor will simply re-inserting the axle bolt to press it out… This is what a axle bolt will look like if you try
Good luck removing the bolt once the threads are all boogered up on the INSIDE of the CV joint…
Instead, a slide puller worked fantastically! Ironically my slide hammers threaded end was an exact match to the inner thread of the CV joint. It took almost no effort to pull it out
It actually surprised me how easily it let go.
9 – Once the CV joint is off its time to clean. If the boot was torn, dirt did get into the joint! Completely clean the axle shaft, and the CV joint.
Dirty
I used a case of brake and parts cleaner between both sides…
I soaked the CV joint in a bucket of gasoline to break up the grease, then followed it up with spray cleaner to remove any residue.
The C-clip, convex washer and the plastic spacer should all be replaced with the new ones that come in your kit, so throw the old ones away!
10 – Once everything is cleaned up install the new boot onto the shaft. Use a little new grease to lube the axel and the interior of the boot (don’t forget to slide the boot clamp on first!)
The new spacer, washer, and c-clip can be installed
This is how they should go on, spacer first, then washer, then c-clip.
My kit came with 2 tubes of grease; I used one to load up the cleaned CV joint
And one got loaded into the boot
11 – Install the CV joint onto the axle
The joint will need to be tapped past the c- clip. I used a block of wood and a maul to drive it past
12 – Pull the new boot onto the CV joint
13 – Install the outer clamp and crimp it down. *do NOT use a pliers or a wire cutter to do this!* there are plenty of shops/ auto stores that will rent these crimpers out, some for free if you leave a deposit!
These do not have to be insanely tight, just snug enough so the boot wont spin on the joint.
DO NOT CRIMP THE INNER CLAMP YET
14 – Re insert the axle into the knuckle.
15 – Slip the inner clamp over the boot, and crimp it.
16 – Re-install the caliper bracket/caliper/rotor assembly.
Use a few drops of blue medium strength thread lock on the 19mm caliper mounting bolts. They have to be tight, but if they are over torqued, it can cause stress cracks!
17 – Your kit should have come with a new axel bolt! Use it! Audi says do not re-use the original bolt. Install it but only hand tight. You’ll torque it to 140ftlbs once the wheel is back on and the car is on the ground.
18 – Put the wheel back on and lower the car
19 – torque the new axel bolt to 140ftlbs
20 – Victory Drink
Don’t be afraid to ask for help! Thanks MN AUDI guys!
Feel free to PM me if you think I need to add or change anything on here. I’d be more than happy to help out in any way I can if someone wants to tackle theirs!
~Wes
(looks like I have to find a new host for the photos... They are all flipped to the correct orientation on photobucket, not here though...)
Link to photobucket http://s235.photobucket.com/albums/e...20replacement/


Thread
Thread Starter
Forum
Replies
Last Post