
Rear Speaker Replacement


Thread Starter
|
1st Gear
Joined: Jul 2006
Posts: 37
Searches : 2002 audi s4 rear speakers, 2002 audi s4 rear speaker replacement, 2002 audi s4 rear speaker repair, 2002 audi s4 rear speaker fix, 2002 audi s4 rear speaker removal, 2002 audi s4 rear speaker installation
Well since I removed the rear speakers from my car today and took some pictures, I thought I'd try writing a DYI.
Objective, to remove the rear speaker, and to either fix, and / or replace speakers with new replacements.
Tools:
Ratchet at sockets for baby seat anchors
Flat head screw driver (not necessary)
Philips screwdriver (or special 90 degree philips prefered)
gloves
Please note I took the pictures as I was putting it back together, but the procedure is the same both ways.
Step 1: The seat needs to be removed, do this by simply pulling on the front of the seat, upwards, and then slide out. The side panels along the door to the seat need to be removed, The following pictures show the points where it connects on the interior piece, as well as to the car.
This piece can be bent up a bit with your hands to allow the bottom hook to slide off, use gloves to make sure you dont cut yourself.
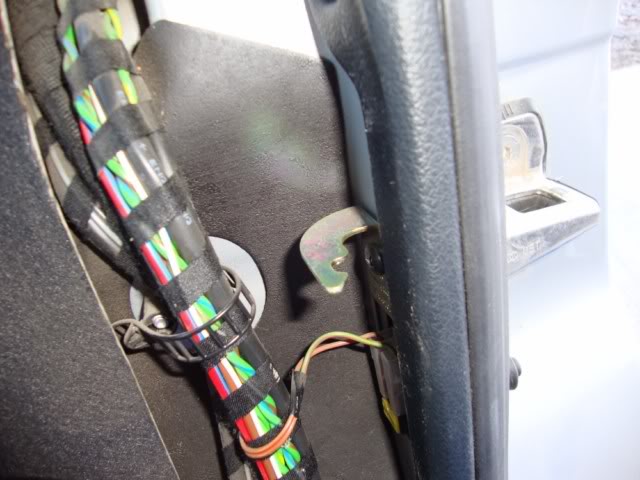
This is the middle clip, it can simply be pulled away, towards the front of the car to disconnect it,
This is the top connecting point, the piece has to be pushed back, and towards the outside, and up to get it off the hook.

This is the top hook, you can see it is bent so it needs more than 1 direction of force to get it off.
Middle connection
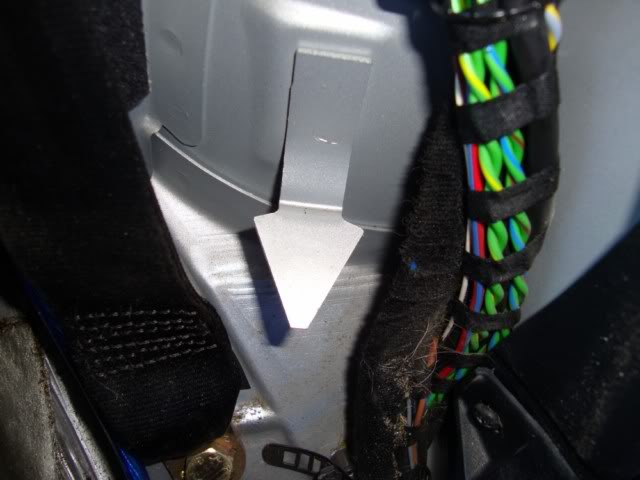
Bottom connection, the metal piece will go from the top through the hole and downwards. Simply bend the piece upwards a bit so that a little downwards force on the panel will release it.
Step 2: The baby seat anchors need to be removed
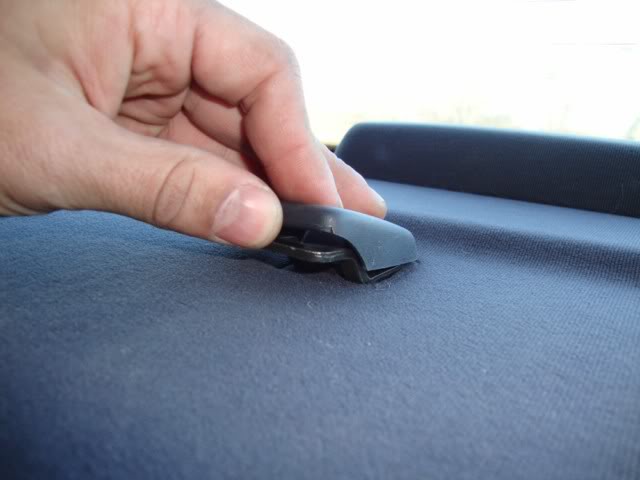
First remove these covers, I find using the flathead dug under the sides of the cover and outwards towards the front of the car means you wont damage the panel surface.
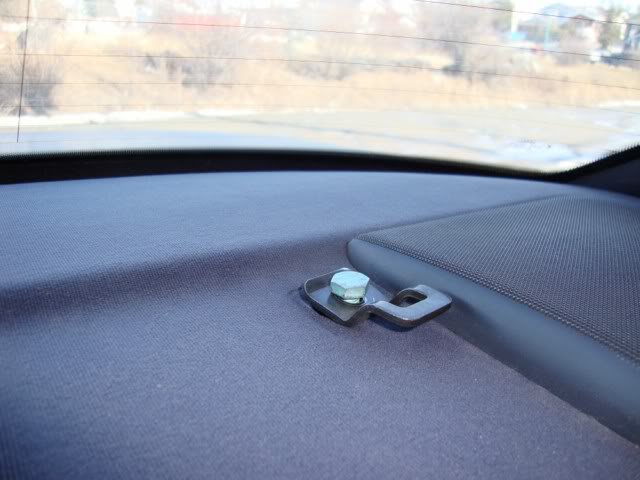
Next, take your socket and unscrew these bolts. They are very easy to remove once they are cracked.
Step 3:

Remove the cover from the brake light, comes off with a little force.
Step 4: A photo I dont have a picture of. there are 3 white plastic clips holding the front of the panel on, use your gloves for this part, as I sliced my pinky open pretty bad. Simply use some force to push up on the panel, and the clips should come free (one of mine broke, so be prepared to do without the clip or have new ones put in) There is a little bit of foam connecting the panel to the metal deck. I slowly peeled the panel up, starting from the front. I used the butt end of the screwdriver to push up from underneath, through one of the holes to get the back side of the panel. It should eventually come free. There is also a wire clip connecting to the brake light, this can be disconnected from the bottom. A flat head screwdriver will help disconnecting the clip.
Step 5: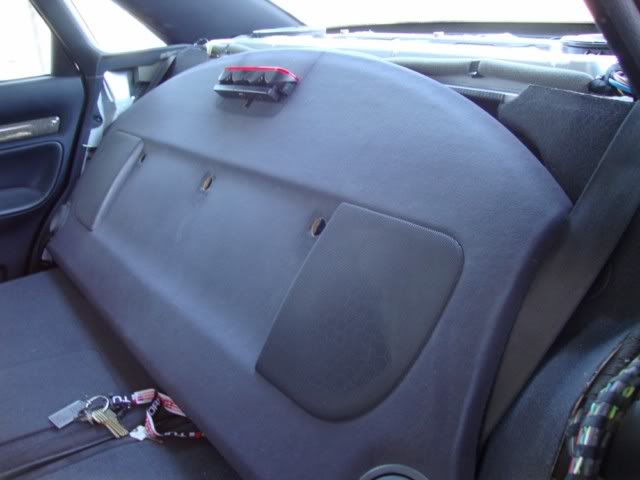
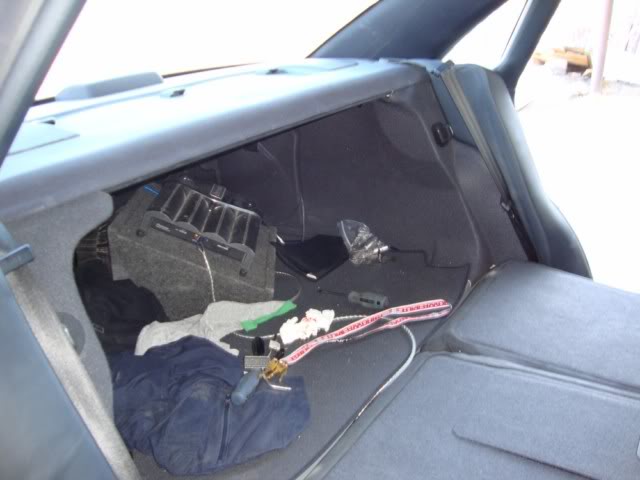
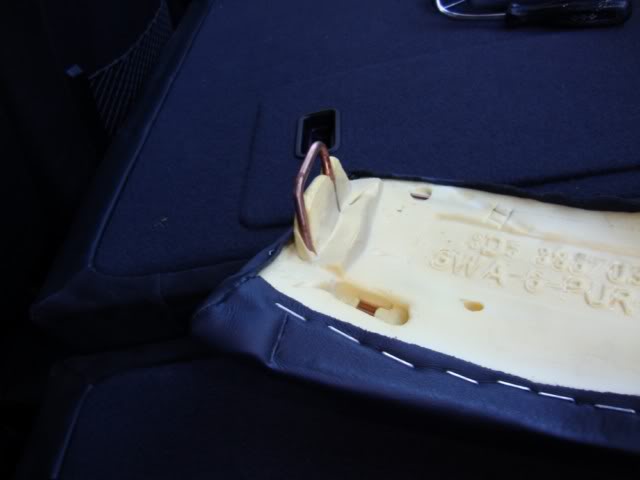
Start sliding the panel forwards, the seat belts can remain attached, you dont need to move the panel further than this picture as this will give you enough clearance to work on the speakers.
step 6: Unscrew the 2 screws holding the speakers in. the front screw isn't so bad, but the rear screw can be hard to get to.
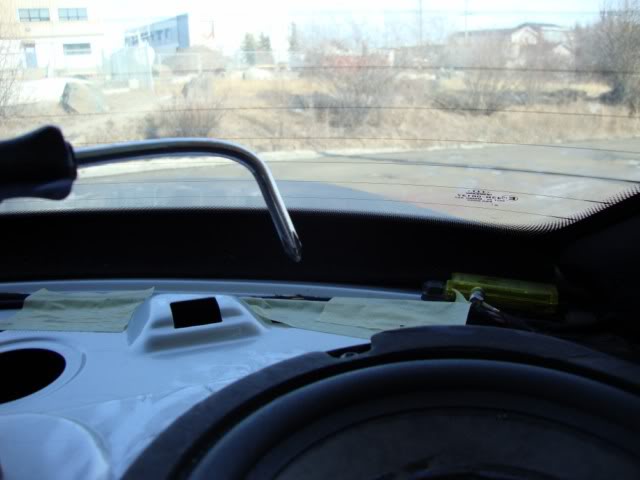
Thankfully I had a prebent screwdriver, so i bent it further to give it a 90 degree angle, this allowed me to get to the screw on the back side. Once they are both removed,
step 7: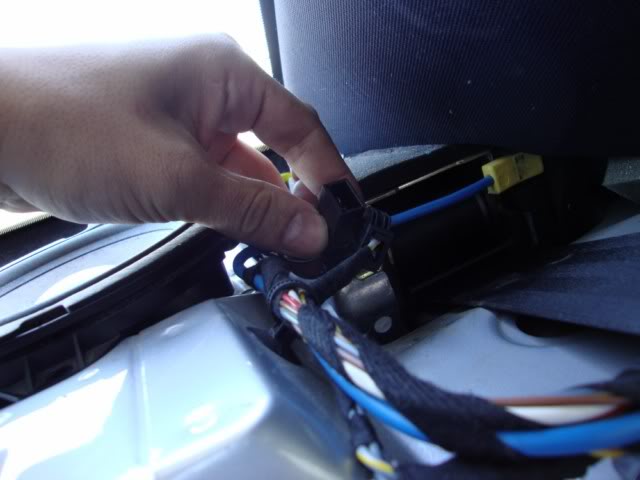
Disconnect the wire clip. This is the same as the wire clip connecting the rear brake light.
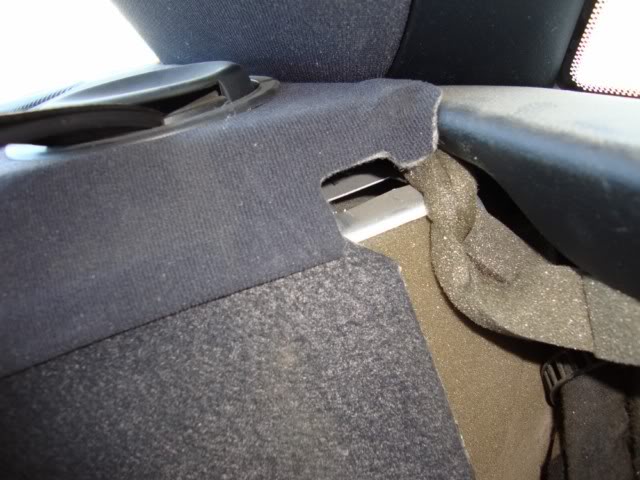
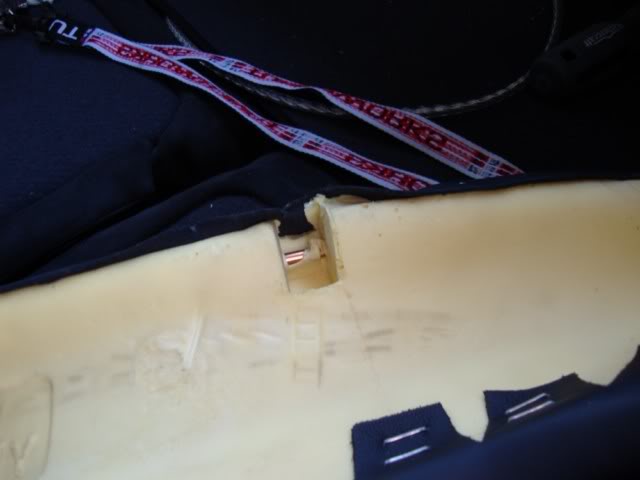
This completes the removal of the speaker. One thing to note when putting the panel back in place, is at the back bottom of the panel, are 2 clips that need to connect with the metal deck,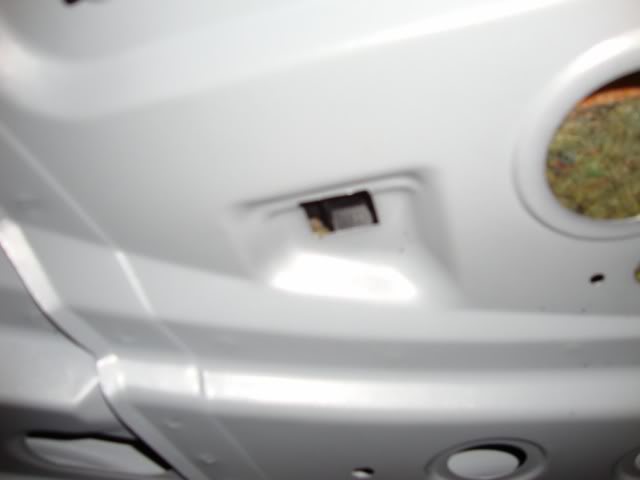
this is a photo of where the clips slides through. You will see what I mean when you put it back in place.
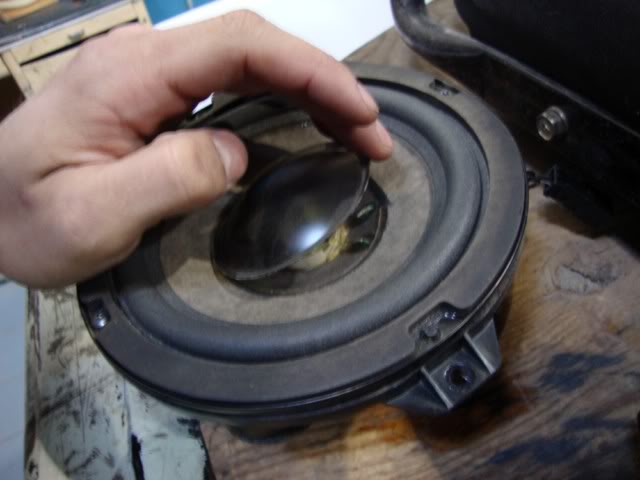
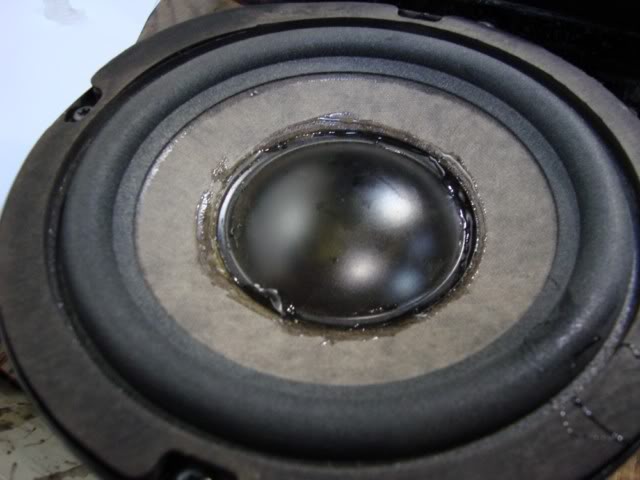
The following is what I did to fix the blown speaker. The cone had almost popped off and was creating some horrible crackling. I simply took some 2 part epoxy, applied it to the bottom of the cone, and where it connects to the speaker, put it in place, then sealed the top with some more epoxy as shown.
I reinstalled everything exactly in reverse, which I might add is alot quicker.
Some people have also modified the speaker grill to be removable to allow for easier access in the future, however I didn't feel the removal of everything took very long at all, and chose to leave everything the way it is.
I hope this helps with people in the future, as I found it difficult to find any material on the rear speakers, and how to remove them
Well since I removed the rear speakers from my car today and took some pictures, I thought I'd try writing a DYI.
Objective, to remove the rear speaker, and to either fix, and / or replace speakers with new replacements.
Tools:
Ratchet at sockets for baby seat anchors
Flat head screw driver (not necessary)
Philips screwdriver (or special 90 degree philips prefered)
gloves
Please note I took the pictures as I was putting it back together, but the procedure is the same both ways.
Step 1: The seat needs to be removed, do this by simply pulling on the front of the seat, upwards, and then slide out. The side panels along the door to the seat need to be removed, The following pictures show the points where it connects on the interior piece, as well as to the car.
This piece can be bent up a bit with your hands to allow the bottom hook to slide off, use gloves to make sure you dont cut yourself.
This is the middle clip, it can simply be pulled away, towards the front of the car to disconnect it,
This is the top connecting point, the piece has to be pushed back, and towards the outside, and up to get it off the hook.
This is the top hook, you can see it is bent so it needs more than 1 direction of force to get it off.
Middle connection
Bottom connection, the metal piece will go from the top through the hole and downwards. Simply bend the piece upwards a bit so that a little downwards force on the panel will release it.
Step 2: The baby seat anchors need to be removed
First remove these covers, I find using the flathead dug under the sides of the cover and outwards towards the front of the car means you wont damage the panel surface.
Next, take your socket and unscrew these bolts. They are very easy to remove once they are cracked.
Step 3:
Remove the cover from the brake light, comes off with a little force.
Step 4: A photo I dont have a picture of. there are 3 white plastic clips holding the front of the panel on, use your gloves for this part, as I sliced my pinky open pretty bad. Simply use some force to push up on the panel, and the clips should come free (one of mine broke, so be prepared to do without the clip or have new ones put in) There is a little bit of foam connecting the panel to the metal deck. I slowly peeled the panel up, starting from the front. I used the butt end of the screwdriver to push up from underneath, through one of the holes to get the back side of the panel. It should eventually come free. There is also a wire clip connecting to the brake light, this can be disconnected from the bottom. A flat head screwdriver will help disconnecting the clip.
Step 5:
Start sliding the panel forwards, the seat belts can remain attached, you dont need to move the panel further than this picture as this will give you enough clearance to work on the speakers.
step 6: Unscrew the 2 screws holding the speakers in. the front screw isn't so bad, but the rear screw can be hard to get to.
Thankfully I had a prebent screwdriver, so i bent it further to give it a 90 degree angle, this allowed me to get to the screw on the back side. Once they are both removed,
step 7:
Disconnect the wire clip. This is the same as the wire clip connecting the rear brake light.
This completes the removal of the speaker. One thing to note when putting the panel back in place, is at the back bottom of the panel, are 2 clips that need to connect with the metal deck,
this is a photo of where the clips slides through. You will see what I mean when you put it back in place.
The following is what I did to fix the blown speaker. The cone had almost popped off and was creating some horrible crackling. I simply took some 2 part epoxy, applied it to the bottom of the cone, and where it connects to the speaker, put it in place, then sealed the top with some more epoxy as shown.
I reinstalled everything exactly in reverse, which I might add is alot quicker.
Some people have also modified the speaker grill to be removable to allow for easier access in the future, however I didn't feel the removal of everything took very long at all, and chose to leave everything the way it is.
I hope this helps with people in the future, as I found it difficult to find any material on the rear speakers, and how to remove them

Thread
Thread Starter
Forum
Replies
Last Post
JonnyOctagon
Archive - Interior/Electrical/Stereo
3
Jul 6, 2008 11:36 PM
Big Tone
Audi A6
3
Feb 2, 2006 05:55 PM