TUTORIAL | Audi A4 B5 2.8L 12V AFC | How To Replace Valve Cover Gaskets
#1
 03-28-2013, 02:07 AM

DISCLAIMER: I am not responsible for any damages done to any vehicles repaired using this guide. I am also not responsible for any injuries occurred during any repairs or services using this guide. No pets were harmed in the making of this tutorial 
Hello peoples... you're probably reading this because you've got oil leaking from your valve covers or maybe you're just curious to see this post. anyways today i will help guide you to success with replacing your valve cover gaskets.
heres what you'll need!
- 3/8 Drive Ratchet
- 1-3 inch 3/8 Extension
- either a size 3,4, or 5 Allen socket (i forgot)
- Phillips screw Driver and Flat head screwdriver
- Short 10mm Socket or 10mm wrench
- 8mm socket or wrench
ok now that you got all your tools ready and brand new valve cover gaskets you're ready to start!
first off you want to take your flat head and twist the little clips on your engine cover 90 degrees either left or right to unlock them...
next loosen the clamp on the intake hose and also disconnect the MAF sensor and remove the 4 10mm bolts holding the MAF sensor to the air box... or if you want you can just remove the entire air box (which is more work)

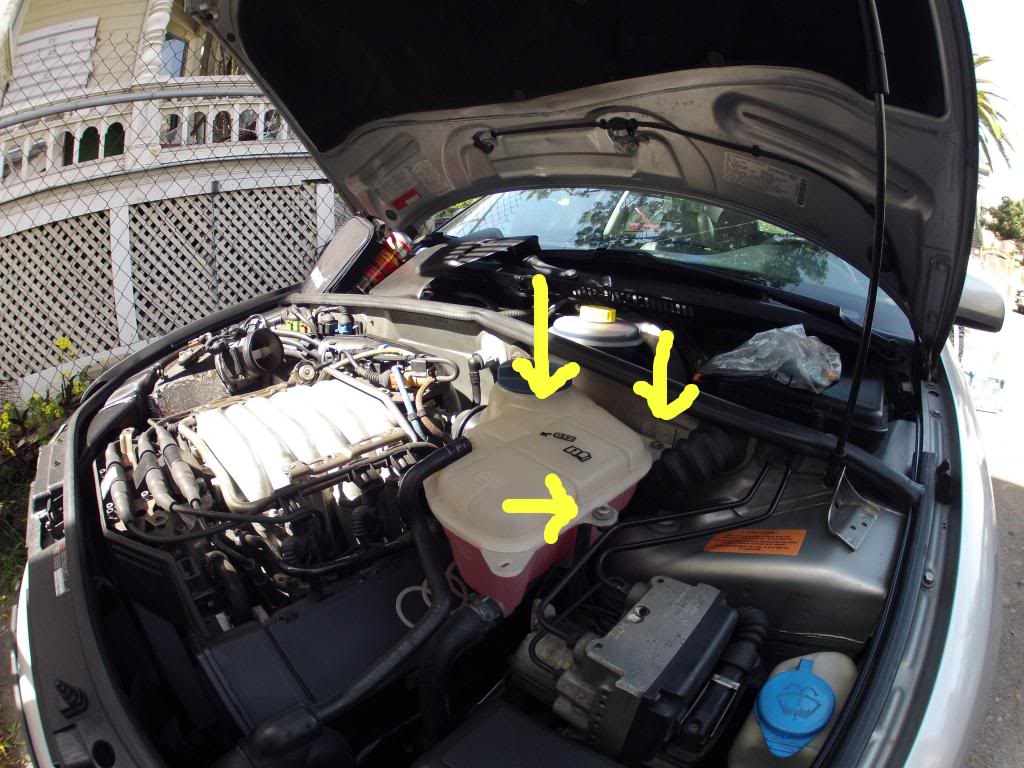
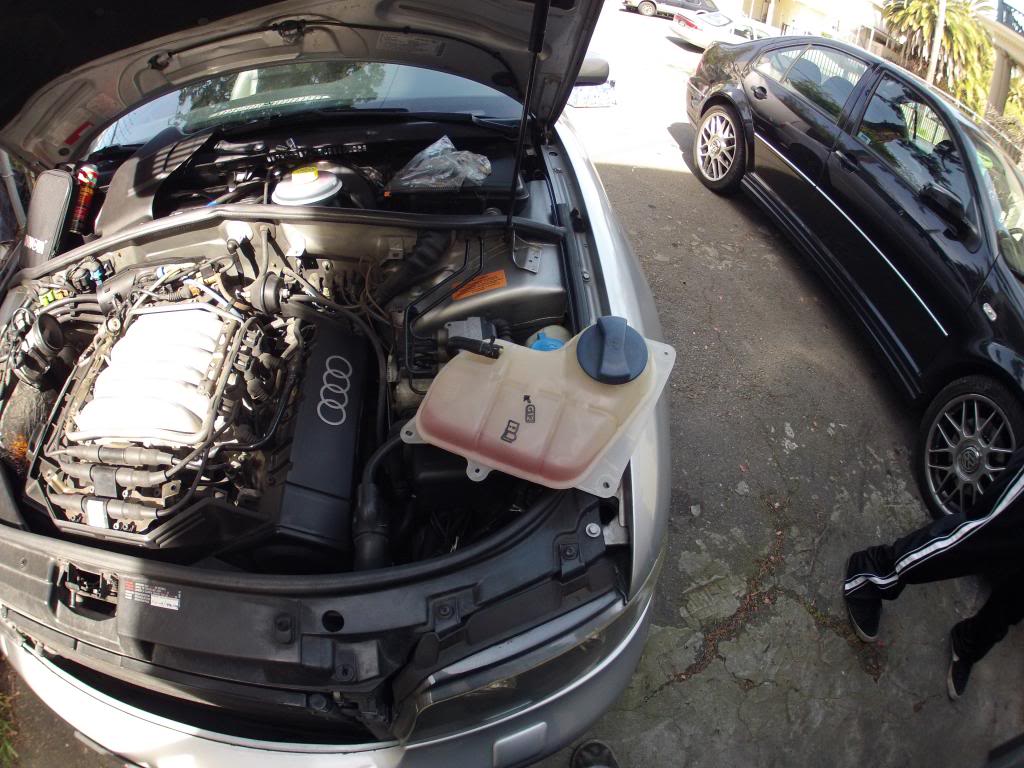
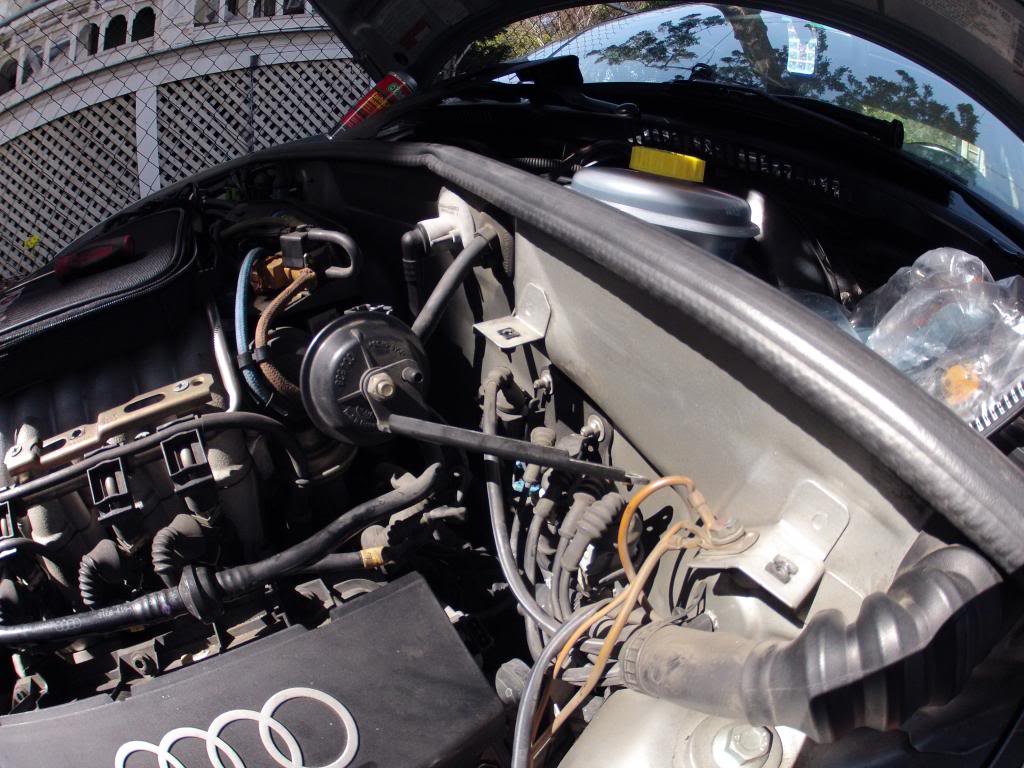
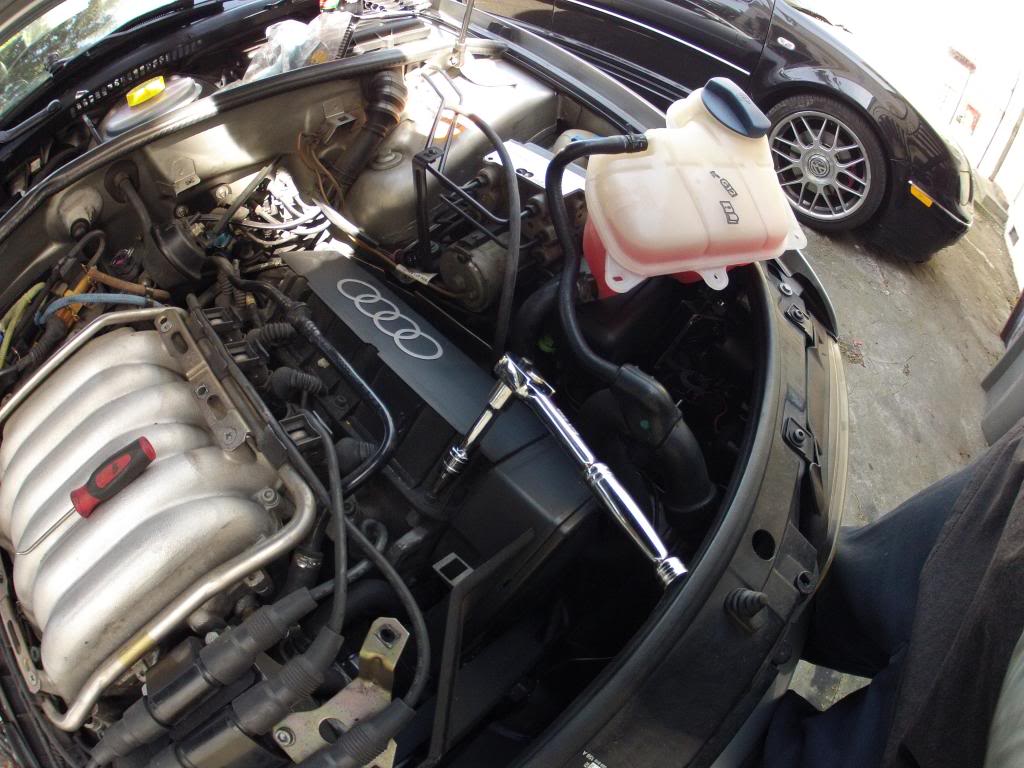
once the MAF and air tube is removed you now have room to access the bolts on the passenger side valve cover... now move over to the driver side valve cover... remove the 3 Phillips screws holding the coolant reservoir tank in place... remove the screws, lift the reservoir up a little and disconnect the sensor directly on the bottom of the tank... once the sensor is disconnected move the tank aside. do not disconnect any coolant lines!
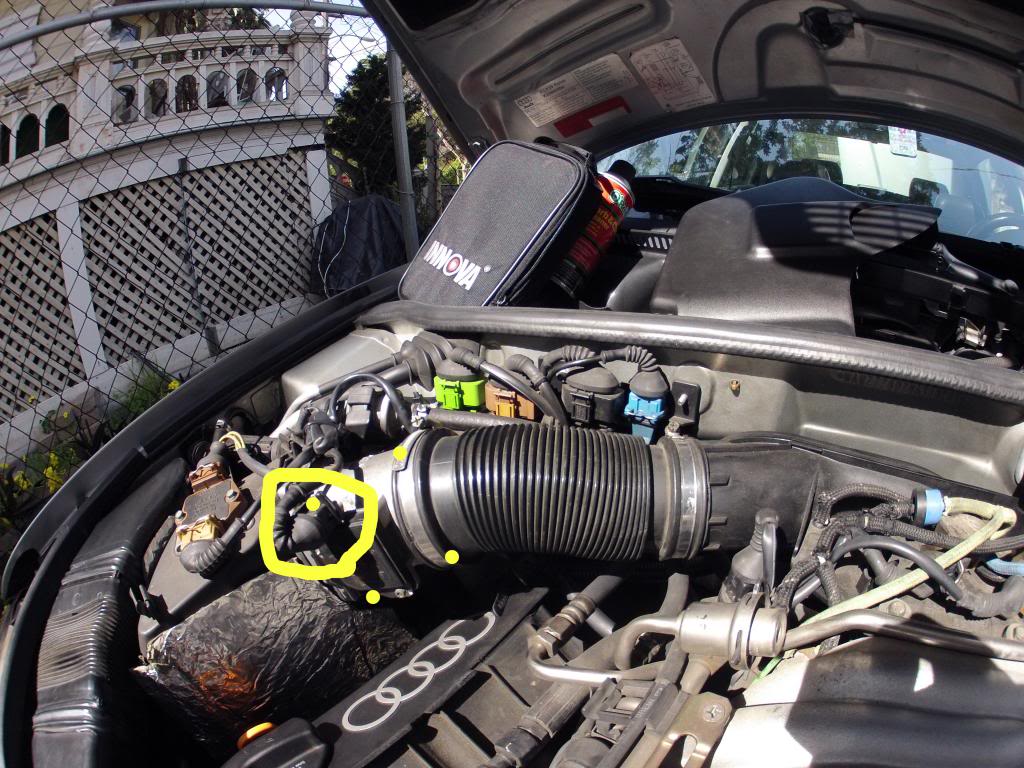
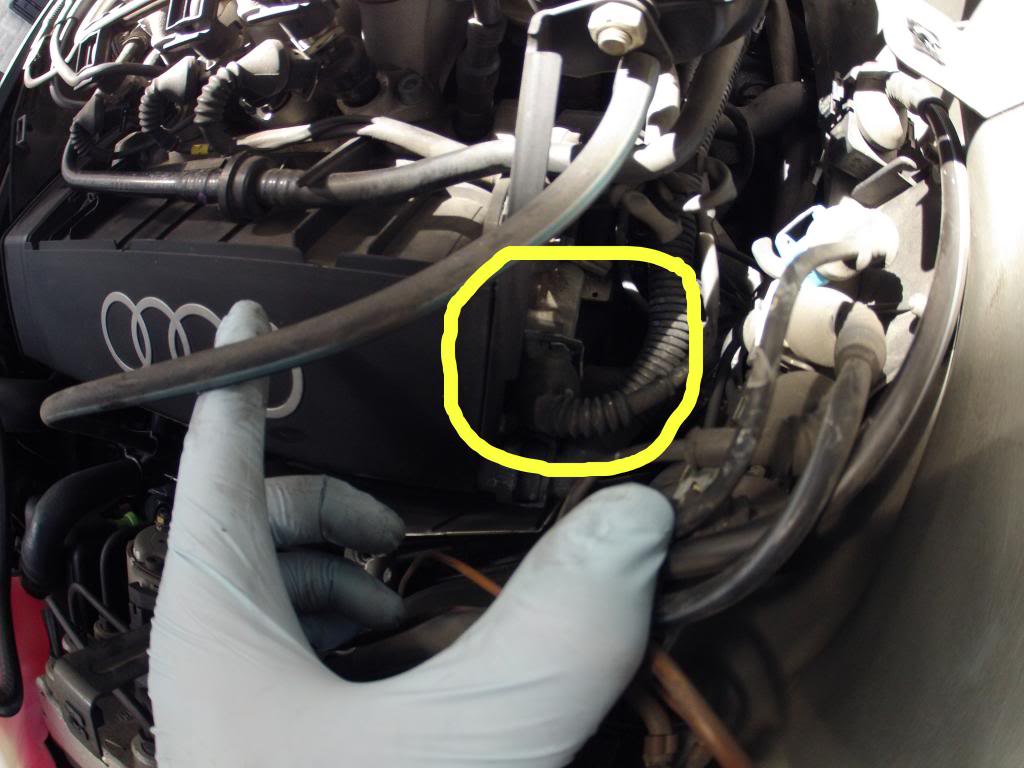
now that the coolant tank is moved aside... disconnect the camshaft sensor thing on the back of the cylinder head... just push the medal clip in and pull out!
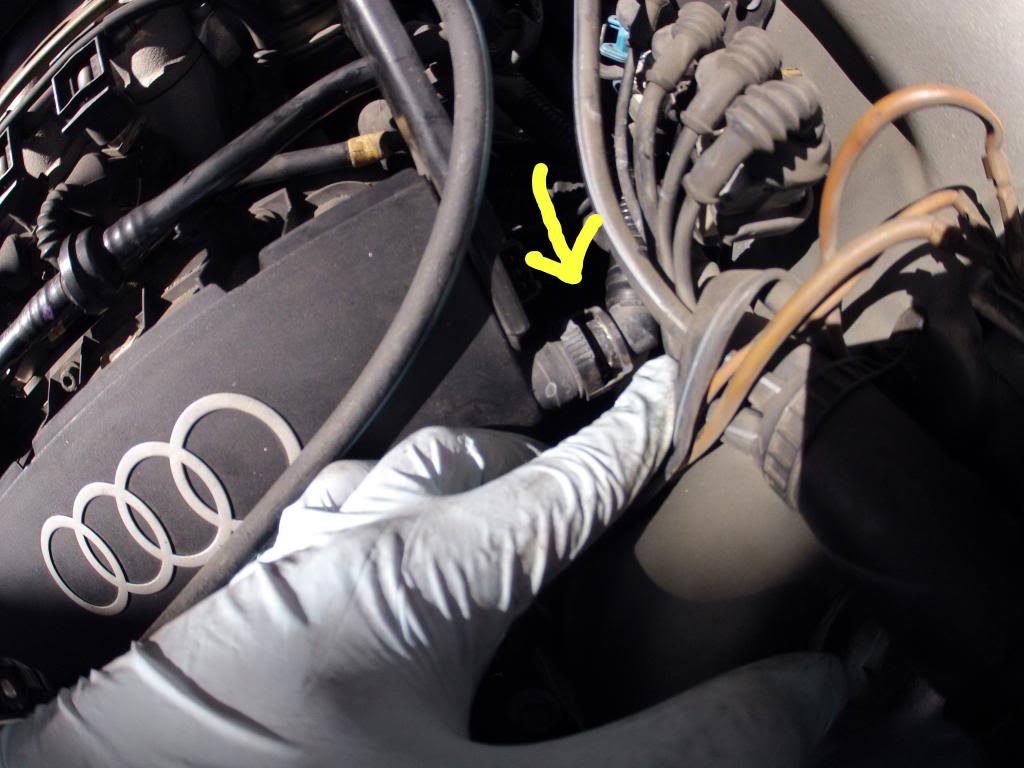
awesome... now disconnect the PCV (positive crankcase ventilation) hose and just set it aside...
Ok... now here comes the part where if you have the right tools it'll be a breeze... but if you have super long sockets or wrenches without an angle then you might struggle a bit...
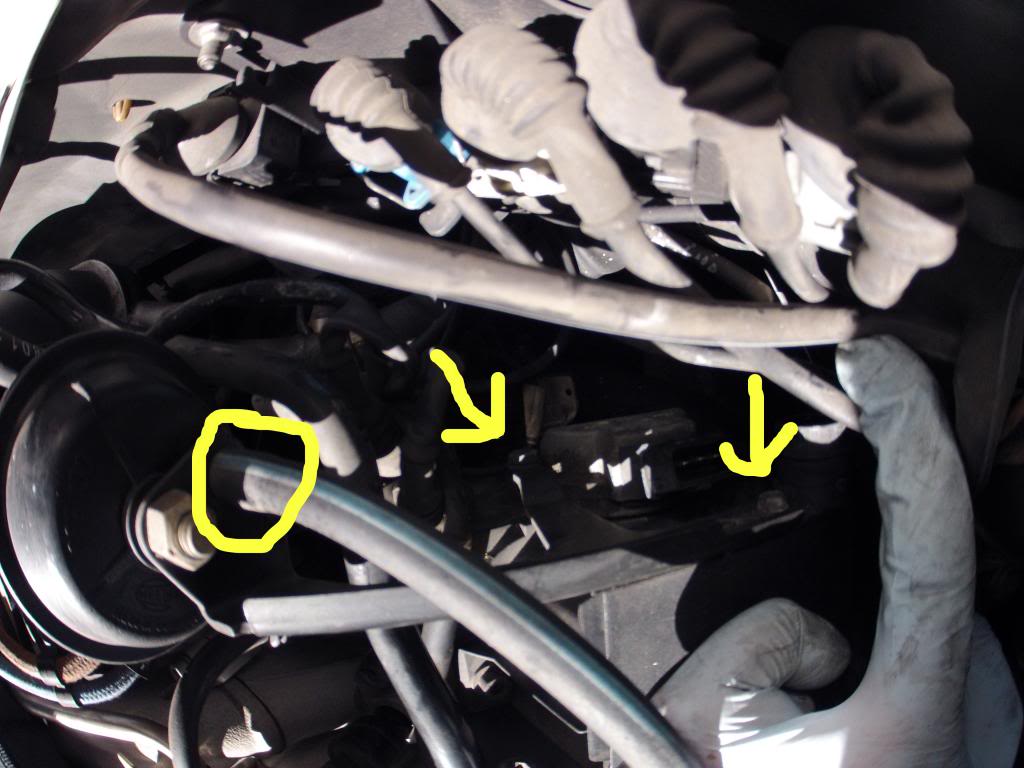
remove the 10mm bolt and 8mm bolt holding the cruise control diaphragm bracket to the valve cover and cylinder head.... just remove the two bolts and set the cruise control bracket along with the diaphragm aside... also disconnect the vacuum hose to the diaphragm (NOTE: some people don't disconnect the vacuum hose but i find it easier when stuff isn't in my way)
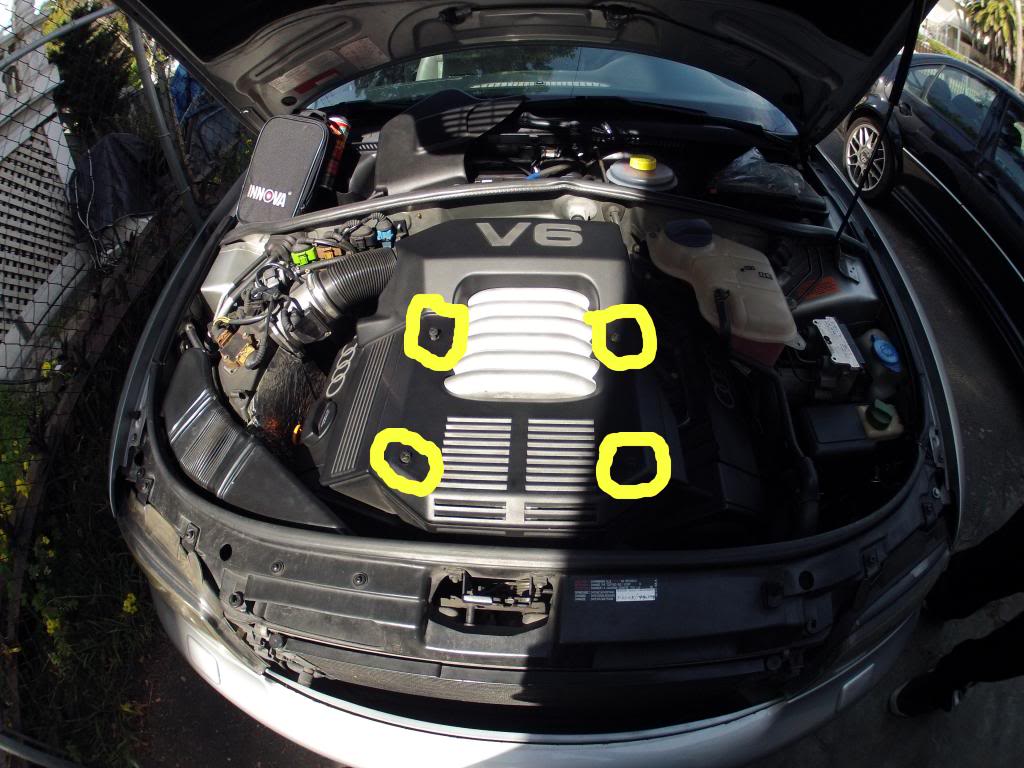
ok now that you have the camshaft sensor disconnected, PCV hose disconnected... and the cruise control bracket out of the way, your valve cover is free and good to go... you just need to remove the 6 allen bolts... 3 on top and 3 directly on the bottom of the top bolts... bottom ones are tricky but a flex ratchet and the right extensions will give you no problems...
remove the bolts and just pull the valve cover off! if you're having a hard time pulling the valve covers off use a screwdriver to lightly pry the cover off (DO NOT USE TOO MUCH FORCE!! you might break something!)

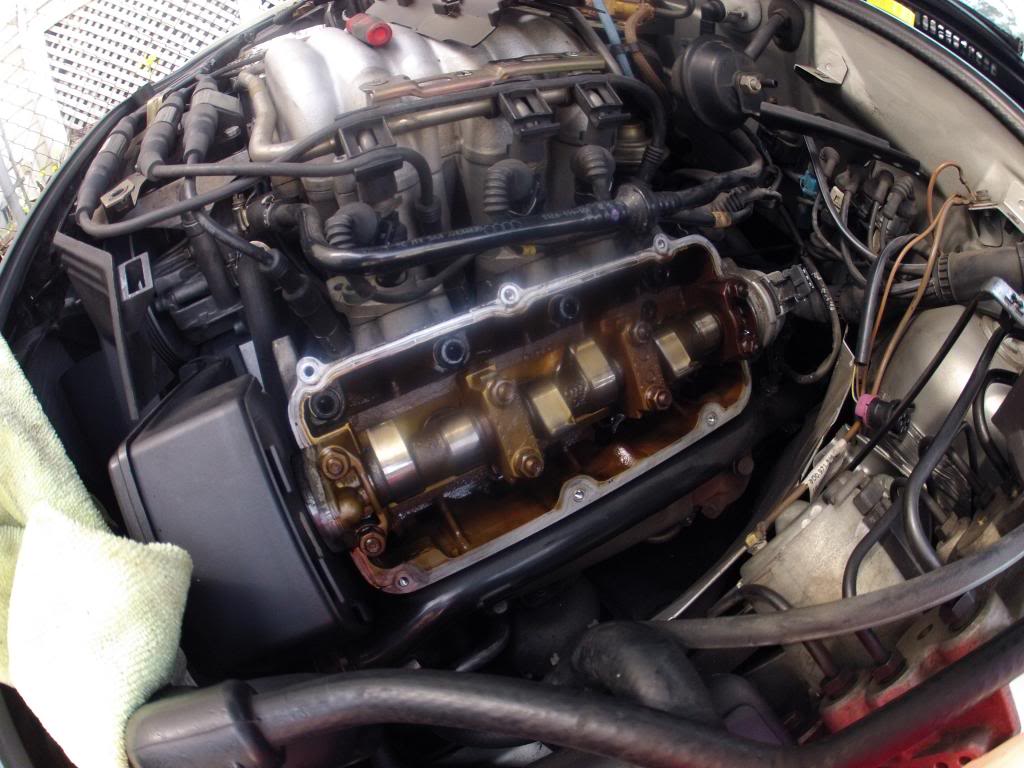
thats it! once u have the valve cover off make sure there is no gasket pieces stuck to the surface of the cylinder head... make sure the surface on the cylinder head is nice and clean and dry!!! clean up your valve cover, take the gasket off... paint your valve covers or do whatever you want to them and once you're done put the new gasket on. be careful when you put the valve covers back on, make sure the gasket is still in place... lots of times people will slap the valve covers back on, and during the process, a corner of the gasket falls out of place and you end up bolting the valve cover down while the gasket is out of place then you will end up having a leak!!
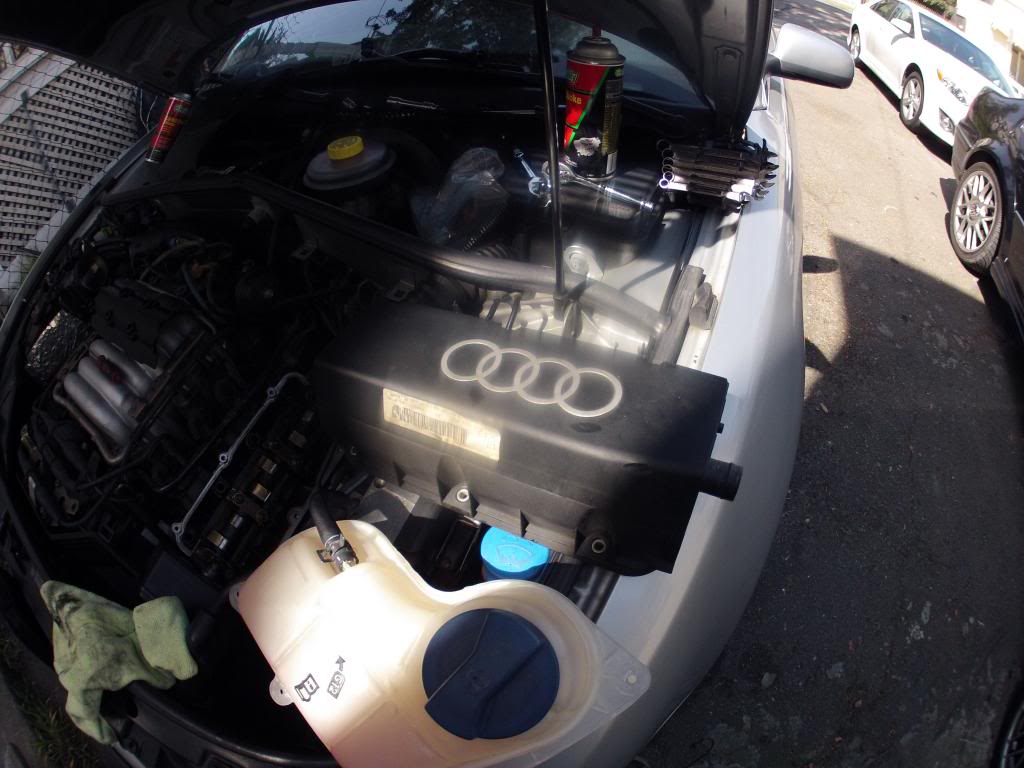
the process is exactly the same on the passenger side valve cover... except the passenger side doesnt have anything hooked up to the cylinder head/ valve cover except for another PCV hose... theres also 6 allen bolts on the passenger valve cover so the passenger side will be super easy.
TIPS!
-DO NOT APPLY ANY RTV, SEALANT, OR GLUE TO THE NEW VALVE COVER GASKET!!
-Patience is key!!
-once you replace both gaskets and reconnected everything leave the engine cover off and start up the engine and get a flash light to inspect the valve covers to make sure they're not leaking
if everything is good then that means you have successfully replaced your valve cover gaskets! congrats! now your car wont have to suffer from oily skit plates, oily under body, and oil driveways!
thanks for looking and please leave any comments or questions and i will try to answer them as soon as possible!
-Fish
Hello peoples... you're probably reading this because you've got oil leaking from your valve covers or maybe you're just curious to see this post. anyways today i will help guide you to success with replacing your valve cover gaskets.
heres what you'll need!
- 3/8 Drive Ratchet
- 1-3 inch 3/8 Extension
- either a size 3,4, or 5 Allen socket (i forgot)
- Phillips screw Driver and Flat head screwdriver
- Short 10mm Socket or 10mm wrench
- 8mm socket or wrench
ok now that you got all your tools ready and brand new valve cover gaskets you're ready to start!
first off you want to take your flat head and twist the little clips on your engine cover 90 degrees either left or right to unlock them...
next loosen the clamp on the intake hose and also disconnect the MAF sensor and remove the 4 10mm bolts holding the MAF sensor to the air box... or if you want you can just remove the entire air box (which is more work)
once the MAF and air tube is removed you now have room to access the bolts on the passenger side valve cover... now move over to the driver side valve cover... remove the 3 Phillips screws holding the coolant reservoir tank in place... remove the screws, lift the reservoir up a little and disconnect the sensor directly on the bottom of the tank... once the sensor is disconnected move the tank aside. do not disconnect any coolant lines!
now that the coolant tank is moved aside... disconnect the camshaft sensor thing on the back of the cylinder head... just push the medal clip in and pull out!
awesome... now disconnect the PCV (positive crankcase ventilation) hose and just set it aside...
Ok... now here comes the part where if you have the right tools it'll be a breeze... but if you have super long sockets or wrenches without an angle then you might struggle a bit...
remove the 10mm bolt and 8mm bolt holding the cruise control diaphragm bracket to the valve cover and cylinder head.... just remove the two bolts and set the cruise control bracket along with the diaphragm aside... also disconnect the vacuum hose to the diaphragm (NOTE: some people don't disconnect the vacuum hose but i find it easier when stuff isn't in my way)
ok now that you have the camshaft sensor disconnected, PCV hose disconnected... and the cruise control bracket out of the way, your valve cover is free and good to go... you just need to remove the 6 allen bolts... 3 on top and 3 directly on the bottom of the top bolts... bottom ones are tricky but a flex ratchet and the right extensions will give you no problems...
remove the bolts and just pull the valve cover off! if you're having a hard time pulling the valve covers off use a screwdriver to lightly pry the cover off (DO NOT USE TOO MUCH FORCE!! you might break something!)
thats it! once u have the valve cover off make sure there is no gasket pieces stuck to the surface of the cylinder head... make sure the surface on the cylinder head is nice and clean and dry!!! clean up your valve cover, take the gasket off... paint your valve covers or do whatever you want to them and once you're done put the new gasket on. be careful when you put the valve covers back on, make sure the gasket is still in place... lots of times people will slap the valve covers back on, and during the process, a corner of the gasket falls out of place and you end up bolting the valve cover down while the gasket is out of place then you will end up having a leak!!
the process is exactly the same on the passenger side valve cover... except the passenger side doesnt have anything hooked up to the cylinder head/ valve cover except for another PCV hose... theres also 6 allen bolts on the passenger valve cover so the passenger side will be super easy.
TIPS!
-DO NOT APPLY ANY RTV, SEALANT, OR GLUE TO THE NEW VALVE COVER GASKET!!
-Patience is key!!
-once you replace both gaskets and reconnected everything leave the engine cover off and start up the engine and get a flash light to inspect the valve covers to make sure they're not leaking
if everything is good then that means you have successfully replaced your valve cover gaskets! congrats! now your car wont have to suffer from oily skit plates, oily under body, and oil driveways!
thanks for looking and please leave any comments or questions and i will try to answer them as soon as possible!
-Fish
Last edited by FishEye; 03-28-2013 at 02:14 AM. Reason: Proof Reading, Corrections, & Spell checks
#3
03-28-2013, 09:43 AM

My god that tiny little camshaft is so cute, I've never seen under the valve covers of a 12v. Nice DIY though, can't see how anybody could screw up if they follow that, which is the point in the end I guess.
#4
03-28-2013, 11:24 AM

I sure wish doing the 30v was that simple. Mine started leaking a couple months after I did the timing belt job... sure wish now that I would've replaced all those topside gaskets and seals while the front end was off the car for the TB job. Now I'm dreading doing all that dis-assembly/re-assembly work all over again

#5
04-01-2013, 05:51 PM
OP, very nicely done. Glad CCA4 is gonna make it permanent in the DIY section. Checkerbird, to do your 30v gaskets, you only have to pull the covers - no front end disassembly is needed.
#6
04-02-2013, 11:29 AM
Thanks man... I appreciate the feedback... I will try and make more DIY in the future... Maybe I'll do rear axle seals next haha
#7
04-02-2013, 12:02 PM
Definitely - the more DIYs the better. We (Admins and Mods) are really trying to get this site back to a tech emphasis and away from the "what rimz be looking phat on my whip yo" angle that its leaning toward the last couple years.
#9
04-03-2013, 10:30 PM
Unfortunately, I also need to do the camshaft front and rear seals and cam chain tensioner gaskets too... which means pulling the cams off the heads, and thus front end removal too in order to get easier access to all that stuff. And while I'm at it, the TB kit I used had the cheap-o plastic impeller water pump and I might want to replace that again, with a better quality metal impeller water pump while I have everything apart. Lessons learned, eh?
Last edited by CheckerBird; 04-03-2013 at 10:32 PM.

Thread
Thread Starter
Forum
Replies
Last Post
AudiA8driver
Audi A8
1
02-19-2015 10:02 PM
AudiA8driver
General Tech
2
07-01-2014 11:20 PM
pbbg
B5 Models
0
12-03-2010 09:36 PM