
Front grills Fresh Look


Thread Starter
|
3rd Gear
Joined: Dec 2008
Posts: 1,941
From: IL
Update:
- New tires on (ContiPremierContact)
- Driver side: new CV axle + Wheel Hub + Bearing
Some while back (about the same time when painting the front grills) I wanted to fix the Audi oval signs on the body trim, as both were coming loose - weathered adhesive.
When removing them, one came out with the plastic that fastens onto.

Also on one of the trim pieces the fastening little tabs on the back just crumbled in my hand as I pulled it out.
So I attempted to fix and refresh them. I just glued the signs in place. While I couldn't find anywhere the trim pieces (Shokan and Force5Auto didn't have'm at all), the oval emblems are about $ 28 at ECSTuning. I didn't feel like spending $ 70 to have 2 unimportant pieces of plastic shipped...
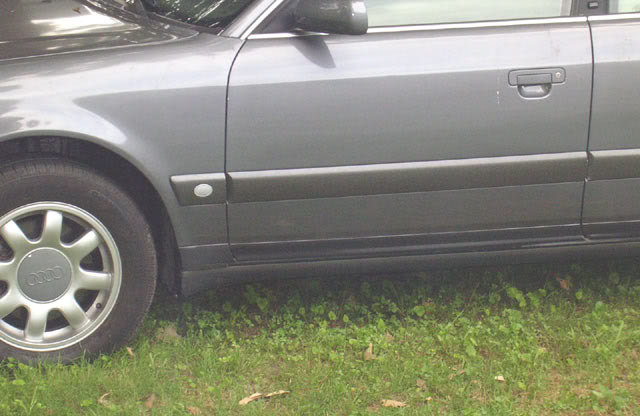
I tried to find the closest gray to the "Titanium":

Well that didn't turn out too well, so I drove the car for a while like this:

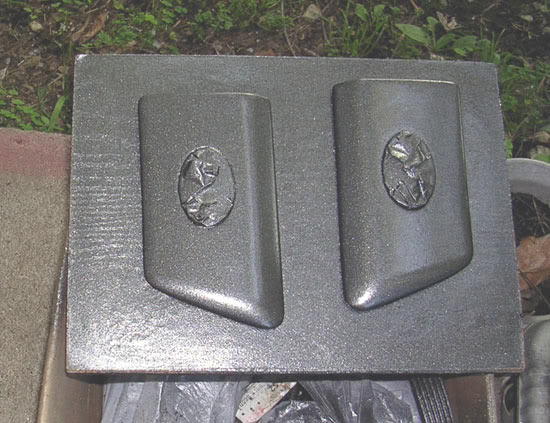
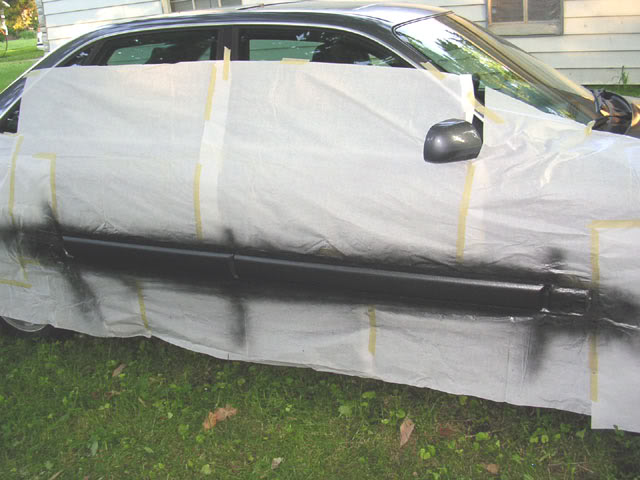
I ended up deciding to paint all the molding pieces the exact same paint as the front grills.
Therefore this is what I came up with in the end (the molding pieces are glued now at the bottom on the plastic support):
-
-

-
That's the story. If it looks like a pinata, so be it.
- New tires on (ContiPremierContact)
- Driver side: new CV axle + Wheel Hub + Bearing
Some while back (about the same time when painting the front grills) I wanted to fix the Audi oval signs on the body trim, as both were coming loose - weathered adhesive.
When removing them, one came out with the plastic that fastens onto.
Also on one of the trim pieces the fastening little tabs on the back just crumbled in my hand as I pulled it out.
So I attempted to fix and refresh them. I just glued the signs in place. While I couldn't find anywhere the trim pieces (Shokan and Force5Auto didn't have'm at all), the oval emblems are about $ 28 at ECSTuning. I didn't feel like spending $ 70 to have 2 unimportant pieces of plastic shipped...
I tried to find the closest gray to the "Titanium":
Well that didn't turn out too well, so I drove the car for a while like this:
I ended up deciding to paint all the molding pieces the exact same paint as the front grills.
Therefore this is what I came up with in the end (the molding pieces are glued now at the bottom on the plastic support):
-
-
-
That's the story. If it looks like a pinata, so be it.


1st Gear
Joined: Aug 2007
Posts: 311
From: Calgary Alberta
The krylon should last through the summer, I did mine and it lasted for 4 months, then it needed a fresh coat, looks good Chefro, I have an understanding wife too, I currently have the engine out of the car, in the driveway, high heat painted all the intake, valve covers, you name it, and heat cycled in her oven, a spare block in the basement, 2 additional sets of turbos in the hall closet,2 additional sets o HP2 cali's in the back hall closet, an entire room in the basement filled with random parts, oh yeah and a transmission, which has to go somewhere

Thread Starter
|
3rd Gear
Joined: Dec 2008
Posts: 1,941
From: IL
Changed the headlight bulbs as well.
The car had the following:
- Low beam - 51 W
- High beam - 60 w
I went with 55w and 65w, which seem to be the "standards" nowadays.
(Edit - actually the manual has the low beam bulbs as 55w, and the high beam ones as 60w; although I use very seldom the brights, hopefully the extra wattage won't pop the fuse)
--
--
-- Low Beam on

--
-- Both beams on

The car had the following:
- Low beam - 51 W
- High beam - 60 w
I went with 55w and 65w, which seem to be the "standards" nowadays.
(Edit - actually the manual has the low beam bulbs as 55w, and the high beam ones as 60w; although I use very seldom the brights, hopefully the extra wattage won't pop the fuse)
--
--
-- Low Beam on
--
-- Both beams on
Last edited by chefro; Jul 12, 2009 at 08:10 PM.
