
How do you remove climate buttons?


Thread Starter
|
2nd Gear
Joined: Mar 2009
Posts: 1,227
From: New York
ARE YOU READY?
Tools;
A utility razor
needle nose
Acetone
shop rag
Avery label
satin black paint
scissors

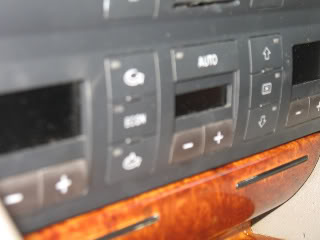
Take something and break the very tip of the razor off or it will break in the bezel just about 1/8 inch (see it in the background) also cut a few small strips from your Avery label (the fuzzy thing I'm holding)
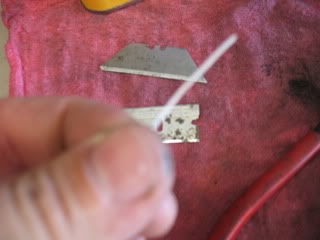
Slide the razor between the top of the button and the bezel and lift up on the razor to flick the button out. The button has 1 tiny catch on top but 2 on the bottom they won't break but you want to get the top out first.
Apply the acetone to the rag and dab it on the buttons.
Then apply some more to the rag and lay in on the counter flat. pick up a button and rub it on the acetone rag and the paint comes right off and softens up the plastic at the same time.
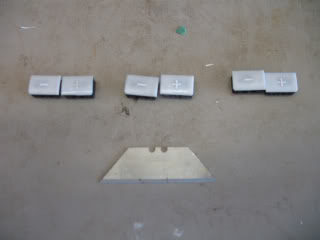
Peel the label strip 1/2 way lay it across the button in line where you want it. Take the razor just press down and remove the access with your finger. Carefully the label has a mind of it's own. The buttons have a small radius on the bottom outside corners.It will help keep track of the left and right sides.
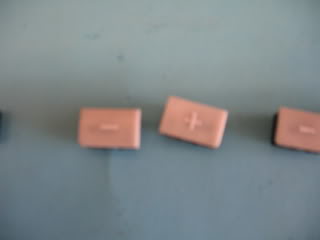
apply a couple coats of paint and let the buttons dry.
After 10 minutes use the corner of the razor to pick up the label edge then carefully grab it with the needle nose.
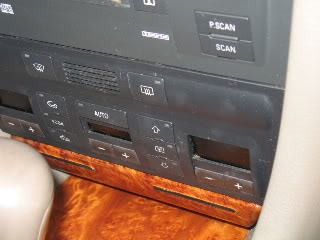
let them sit in the sun for a while to dry some more and snap them in.
My color isn't perfect but once i hit them with armor-all you won't be able to tell. The darker spots on the button are from my fingers it was 96 out when I did it. So the Armor all should even them out. The red shows through nice at night. I had all of the supplies so it cost me nothing. I guess you could pick up a few cans of satin black paint until you find the right shade but I didn't feel like going there. I saw the BBQ black and that is epoxy so I figured it would stick better. Took me 20 minutes so I can always do it again. I am also sure you can pick up small decals / lettering at staples and use them instead of going nuts with the labels, they may help if you have other buttons messed up that have a picture.
I'll edit in another picture after I clean it up
Tools;
A utility razor
needle nose
Acetone
shop rag
Avery label
satin black paint
scissors
Take something and break the very tip of the razor off or it will break in the bezel just about 1/8 inch (see it in the background) also cut a few small strips from your Avery label (the fuzzy thing I'm holding)
Slide the razor between the top of the button and the bezel and lift up on the razor to flick the button out. The button has 1 tiny catch on top but 2 on the bottom they won't break but you want to get the top out first.
Apply the acetone to the rag and dab it on the buttons.
Then apply some more to the rag and lay in on the counter flat. pick up a button and rub it on the acetone rag and the paint comes right off and softens up the plastic at the same time.
Peel the label strip 1/2 way lay it across the button in line where you want it. Take the razor just press down and remove the access with your finger. Carefully the label has a mind of it's own. The buttons have a small radius on the bottom outside corners.It will help keep track of the left and right sides.
apply a couple coats of paint and let the buttons dry.
After 10 minutes use the corner of the razor to pick up the label edge then carefully grab it with the needle nose.
let them sit in the sun for a while to dry some more and snap them in.
My color isn't perfect but once i hit them with armor-all you won't be able to tell. The darker spots on the button are from my fingers it was 96 out when I did it. So the Armor all should even them out. The red shows through nice at night. I had all of the supplies so it cost me nothing. I guess you could pick up a few cans of satin black paint until you find the right shade but I didn't feel like going there. I saw the BBQ black and that is epoxy so I figured it would stick better. Took me 20 minutes so I can always do it again. I am also sure you can pick up small decals / lettering at staples and use them instead of going nuts with the labels, they may help if you have other buttons messed up that have a picture.
I'll edit in another picture after I clean it up
Last edited by Jackmup; Jun 1, 2009 at 11:28 PM.


Thread Starter
|
2nd Gear
Joined: Mar 2009
Posts: 1,227
From: New York
Yeah, I was looking at the headlight switch but there's no way I can duplicate those markings. I wonder what they have at staples for stickers. I think I'll leave that one for now I touched up the little chips with a sharpie.
I want to paint the plastic parts that cover the rocker panel but green/olive like the dash so they won't show the dirt. I'll have to special order that paint.
I want to paint the plastic parts that cover the rocker panel but green/olive like the dash so they won't show the dirt. I'll have to special order that paint.


