
Engine Mounts

3rd Gear
Joined: Oct 2007
Posts: 2,097
From:
Ok, so the passenger side boot to the steering rack is ripped and looks like a little movement from the inner tie rod end. I dunno yet if the inner tie rods are replaceable, or if it means I need a new steering rack sometime soon. [:@]
4th Gear
Joined: Aug 2006
Posts: 5,769
From: Phoenix Arizona
HAHA Sineo does it again...
I still think thats sweet that you do all this stuff yourself. You should/can do the Timing belt pretty easy. That was my VERY first EVER engine DIY that I did. LOL What mounts did you get? The RS4 ones???
Josh
I still think thats sweet that you do all this stuff yourself. You should/can do the Timing belt pretty easy. That was my VERY first EVER engine DIY that I did. LOL What mounts did you get? The RS4 ones???
Josh
Thread Starter
|
3rd Gear
Joined: Jul 2007
Posts: 1,980
From: Houston
ORIGINAL: ThePaintballGuy
HAHA Sineo does it again...
I still think thats sweet that you do all this stuff yourself. You should/can do the Timing belt pretty easy. That was my VERY first EVER engine DIY that I did. LOL What mounts did you get? The RS4 ones???
Josh
HAHA Sineo does it again...
I still think thats sweet that you do all this stuff yourself. You should/can do the Timing belt pretty easy. That was my VERY first EVER engine DIY that I did. LOL What mounts did you get? The RS4 ones???
Josh
I got regular old OEM 30v mounts. They can handle way more horsepower than my engine puts out, so RS4 mounts are a waste of money.
Thread Starter
|
3rd Gear
Joined: Jul 2007
Posts: 1,980
From: Houston
ORIGINAL: Bogie
Congrats on finally getting the one piece headlights like I told you to a few months ago - when you said the clear corners were the "last stop", then one fell out.
Congrats on finally getting the one piece headlights like I told you to a few months ago - when you said the clear corners were the "last stop", then one fell out.
ps. For anyone considering Depos, but is worried about the light output, don't be! Compared to the Valeo headlights, the Depo light output is darn good.
3rd Gear
Joined: Oct 2007
Posts: 2,097
From:
That's cool, you'll like the one piece lights so much more than the 2 piece.
I did find out that my inner tie rod end is going to cost $35 and the boot is $15 - not worth my time either, so I'm going to see if the place that did my alignment can do it for a reasonable price.
Post pics of the new lights when they're in.
I did find out that my inner tie rod end is going to cost $35 and the boot is $15 - not worth my time either, so I'm going to see if the place that did my alignment can do it for a reasonable price.
Post pics of the new lights when they're in.
Thread Starter
|
3rd Gear
Joined: Jul 2007
Posts: 1,980
From: Houston
ORIGINAL: Bogie
That's cool, you'll like the one piece lights so much more than the 2 piece.
That's cool, you'll like the one piece lights so much more than the 2 piece.
 ! I'm going to open up the housings and paint them black. I have to open one anyway because I'm pretty sure that the car they came from was driven into a large body of water (which explains why she had so many random and intact parts from an Avant for cheap) because the inside of one is foggy and specked with various bits of flotsam. I don't like all of that chrome. I did do the clear corner mod today, so they're at least tolerable until I get the chance to paint.
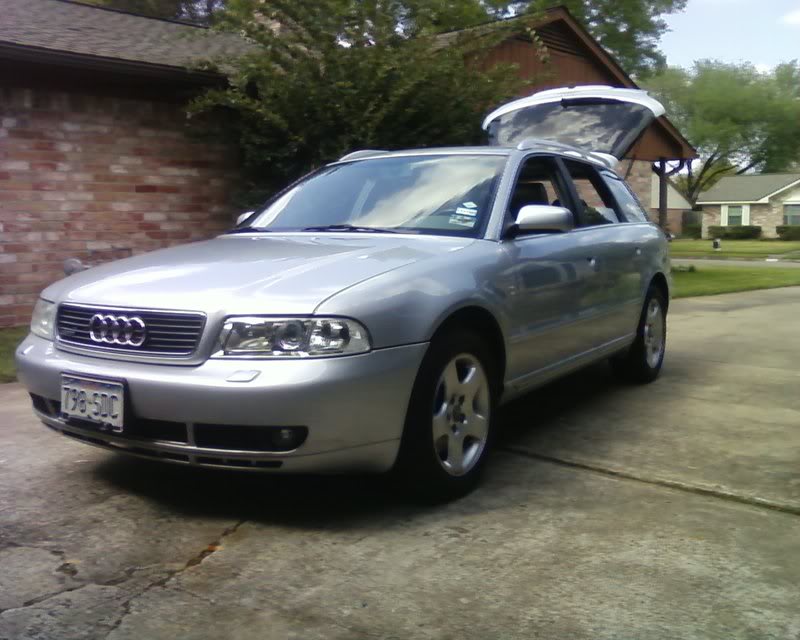
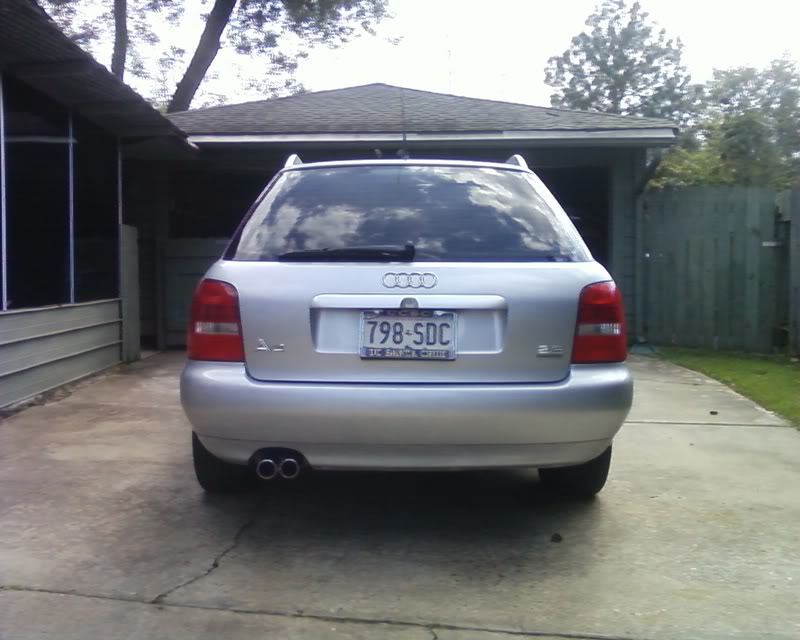
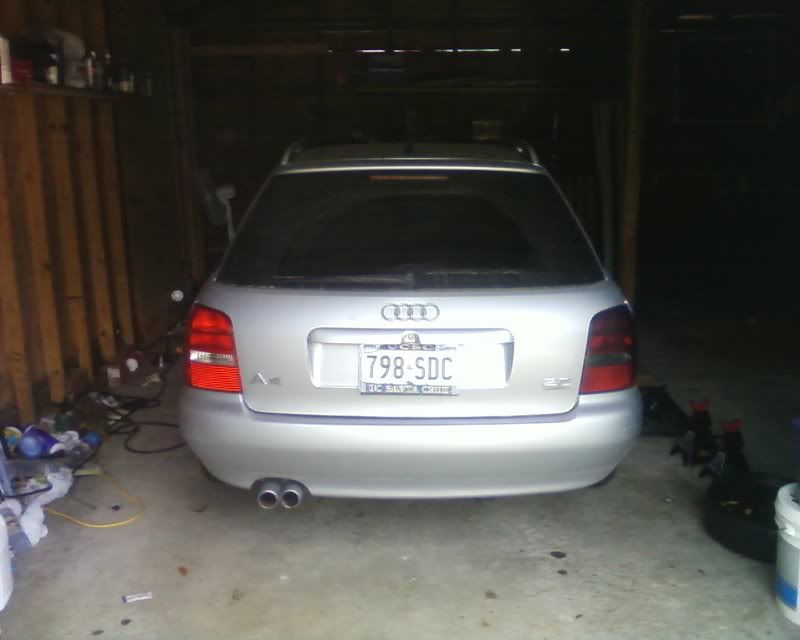
I'm glad my cell phone takes such crappy pictures...in the third pic, you can tell the car was dirty, but you can't tell how obscenely dirty.
I really like the way that the reverse light is so bright in the new tails.
Good luck with your repairs, Bogie!
Thread Starter
|
3rd Gear
Joined: Jul 2007
Posts: 1,980
From: Houston
ORIGINAL: feerocknok
Sineo, it's possible to paint the inside of the one-piece guys. You have to feel dangerous though. 200 degrees for 10 minutes in the over and the silicone'll peel apart. Paint em and put em back together. 3 more minutes in the over and the old silicone softens up enough that everything seals.
Sineo, it's possible to paint the inside of the one-piece guys. You have to feel dangerous though. 200 degrees for 10 minutes in the over and the silicone'll peel apart. Paint em and put em back together. 3 more minutes in the over and the old silicone softens up enough that everything seals.
How involved was removing the roof rails?

2nd Gear
Joined: Jul 2006
Posts: 705
From: Bend, OR
ORIGINAL: sineo
Yeah, I even started the process today...got it in the oven and everything, but then something came up and I lost steam.
How involved was removing the roof rails?
ORIGINAL: feerocknok
Sineo, it's possible to paint the inside of the one-piece guys. You have to feel dangerous though. 200 degrees for 10 minutes in the over and the silicone'll peel apart. Paint em and put em back together. 3 more minutes in the over and the old silicone softens up enough that everything seals.
Sineo, it's possible to paint the inside of the one-piece guys. You have to feel dangerous though. 200 degrees for 10 minutes in the over and the silicone'll peel apart. Paint em and put em back together. 3 more minutes in the over and the old silicone softens up enough that everything seals.
How involved was removing the roof rails?
Thread Starter
|
3rd Gear
Joined: Jul 2007
Posts: 1,980
From: Houston
ORIGINAL: feerocknok
Dropping the headliner required some patience, but I'm recovering it with a fun fabric anyways as we speak. Taking the rails off was only tricky because finding the holes is hard. Then I cut some panels to fill the holes. Front one is the size of two dimes, middle one is one and a half, back one is one dime. I dropped a dime in my A-pillar sizing it up. My car is forever worth 10 cents more than everyone else's. Then welded the panels in. Ground the welds down, and cleaned up the imperfections with bondo, then sprayed the metal/bondo down. I have to redo the bondo work, I did badly.
Dropping the headliner required some patience, but I'm recovering it with a fun fabric anyways as we speak. Taking the rails off was only tricky because finding the holes is hard. Then I cut some panels to fill the holes. Front one is the size of two dimes, middle one is one and a half, back one is one dime. I dropped a dime in my A-pillar sizing it up. My car is forever worth 10 cents more than everyone else's. Then welded the panels in. Ground the welds down, and cleaned up the imperfections with bondo, then sprayed the metal/bondo down. I have to redo the bondo work, I did badly.


