Fog Light Retrofit

Thread Starter
|
2nd Gear
Joined: Jul 2011
Posts: 843
From: Kirkland, WA
After retrofitting my H7 projectors with Bi-Xenon FX-R projectors, I was was left with what to do with the old H7's. Having done the independent fog light mod I noticed that the beam pattern of the stock fogs wasn't very good. I wanted something that would fill in the foreground behind the low beams and provide a better spread. Thus, I have begun retrofitting the H7 projectors into the fog housings.
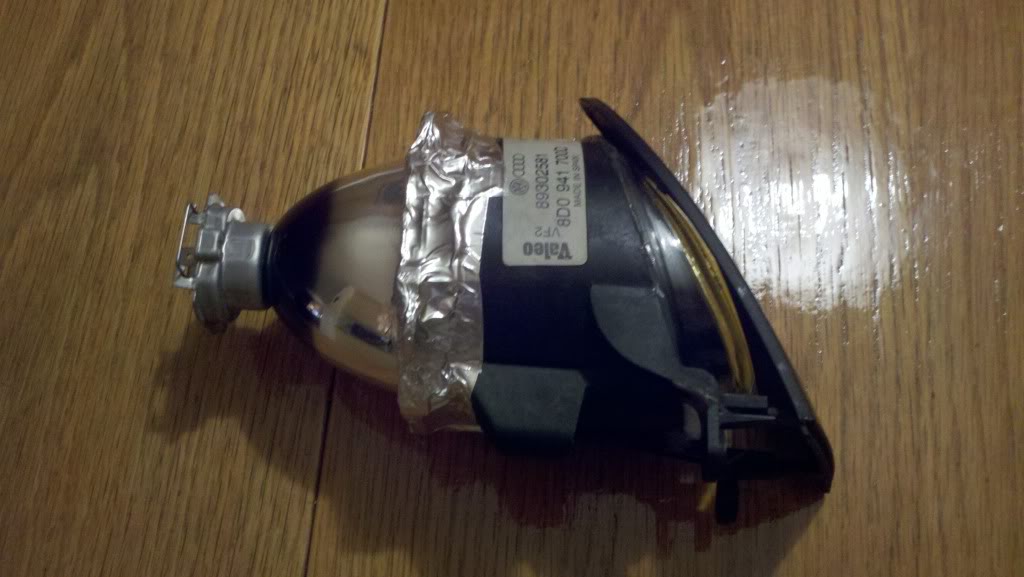
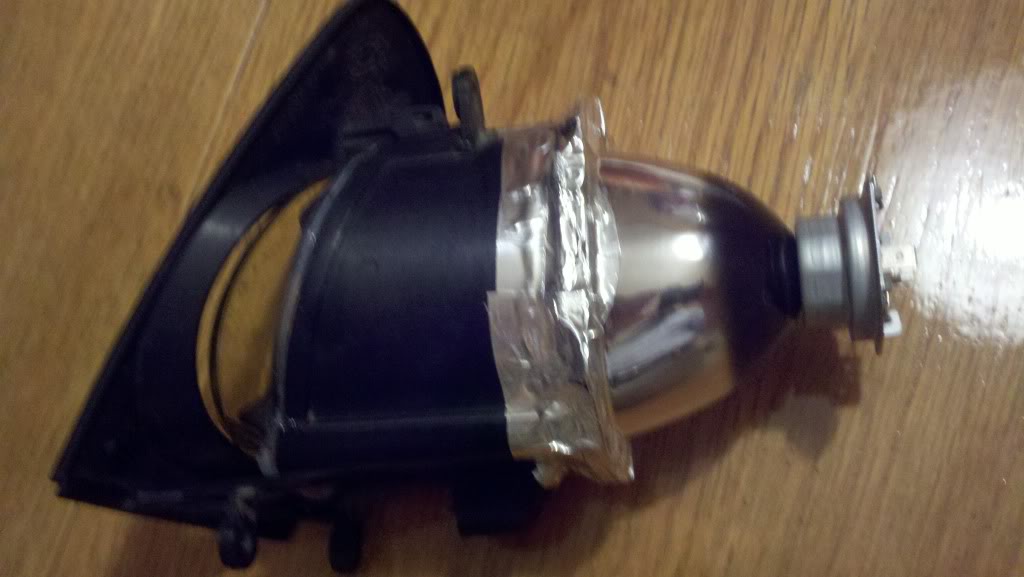
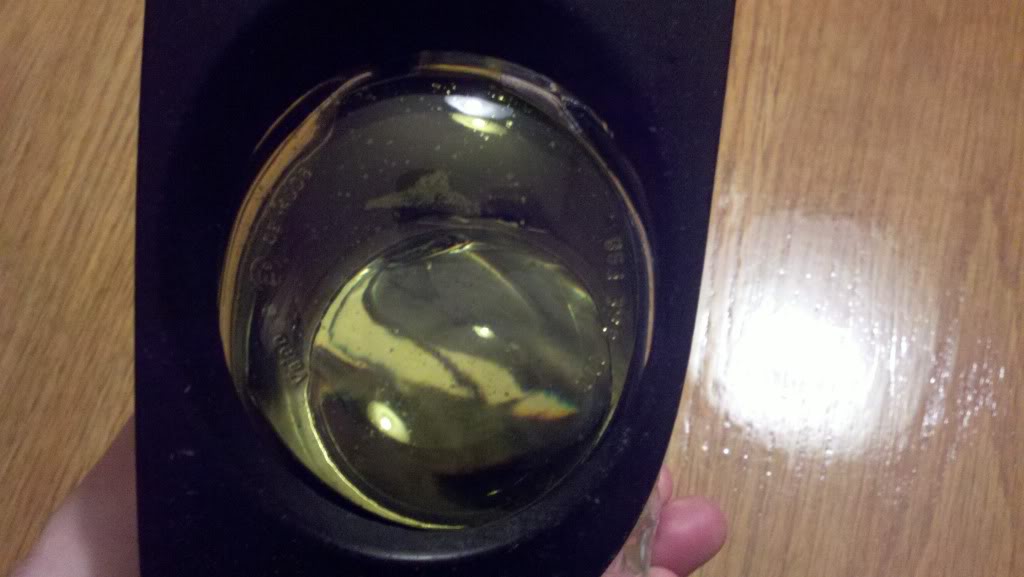
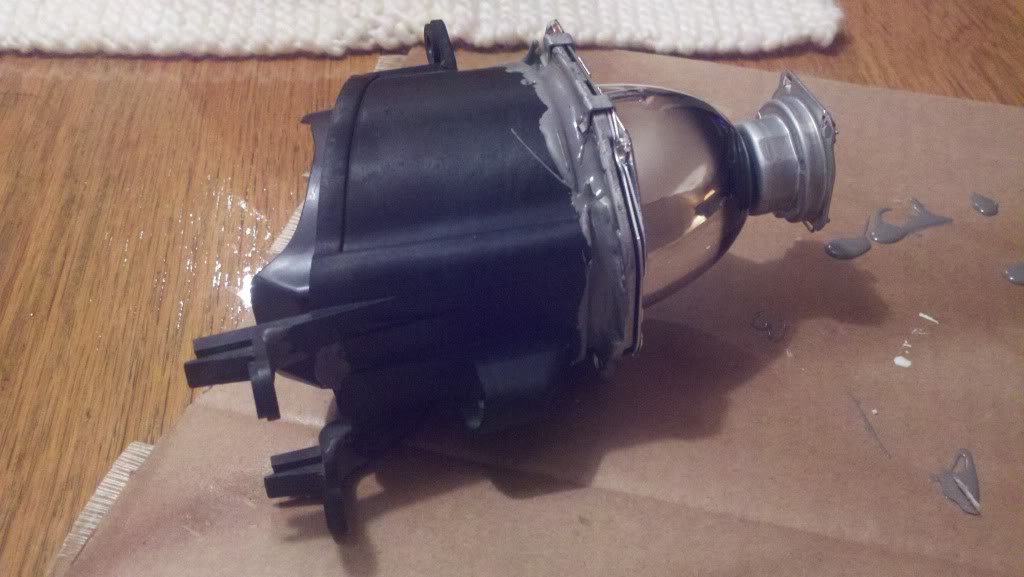
Unlike the Valeo headlights, the fog can be baked open in the oven. 8 minutes at 300* and they opened pretty easily. Once I got lens off and the bezel out I removed the reflector. The back lip of the housing required some trimming, but I'm happy with how it fits.
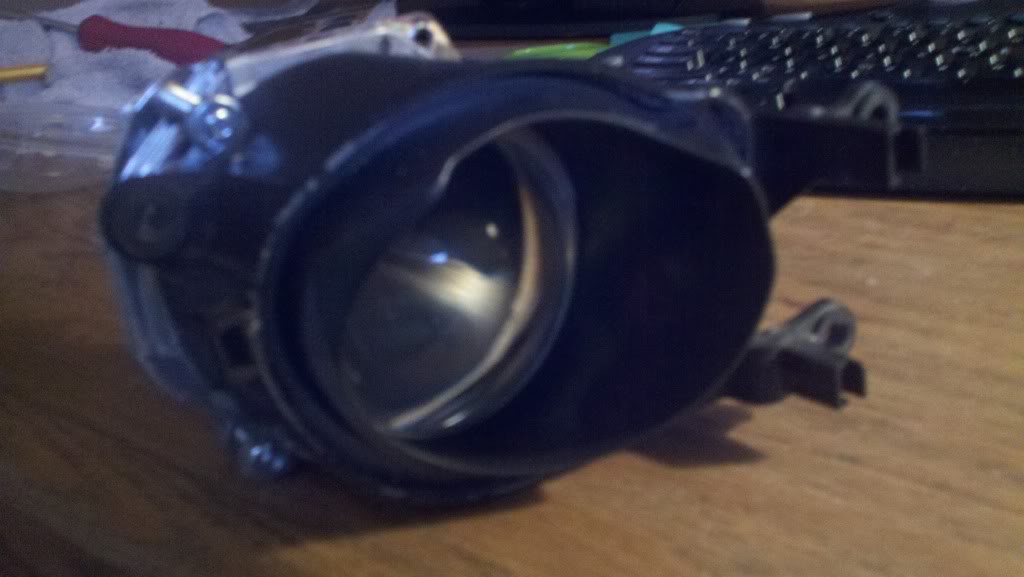
I'm working on how I want to mount it. The screws are only temporary as I test my aiming. Originally I had wanted to fabricate a new sealed cavity for the light, but space is limited. Since there isn't much room back there I may just be sealing up the gap between the reflector bowl and the housing.
I'll add some comparison shots once I get the alignment done and mounting finalized.
Unlike the Valeo headlights, the fog can be baked open in the oven. 8 minutes at 300* and they opened pretty easily. Once I got lens off and the bezel out I removed the reflector. The back lip of the housing required some trimming, but I'm happy with how it fits.
I'm working on how I want to mount it. The screws are only temporary as I test my aiming. Originally I had wanted to fabricate a new sealed cavity for the light, but space is limited. Since there isn't much room back there I may just be sealing up the gap between the reflector bowl and the housing.
I'll add some comparison shots once I get the alignment done and mounting finalized.
Thread Starter
|
2nd Gear
Joined: Jul 2011
Posts: 843
From: Kirkland, WA
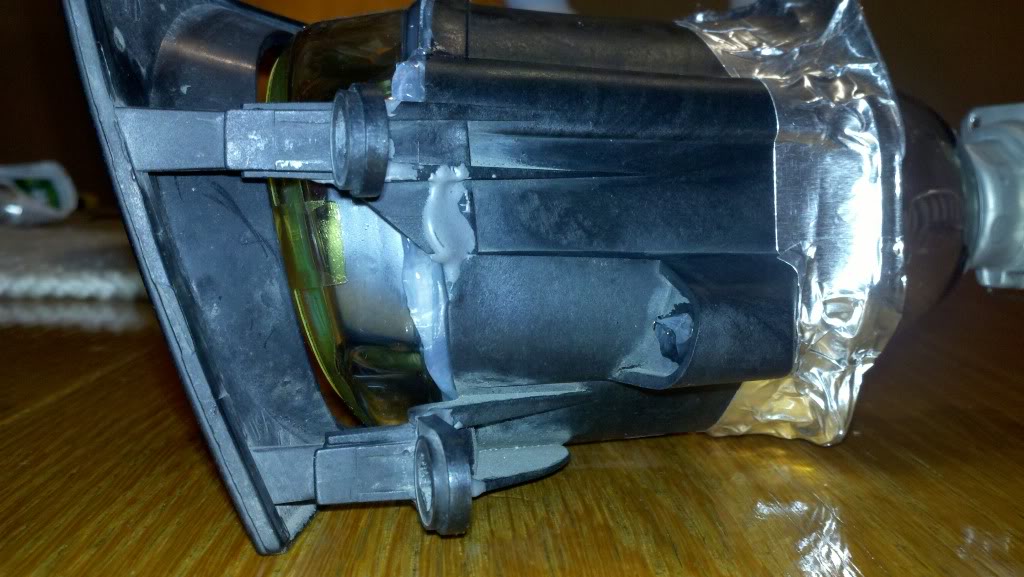
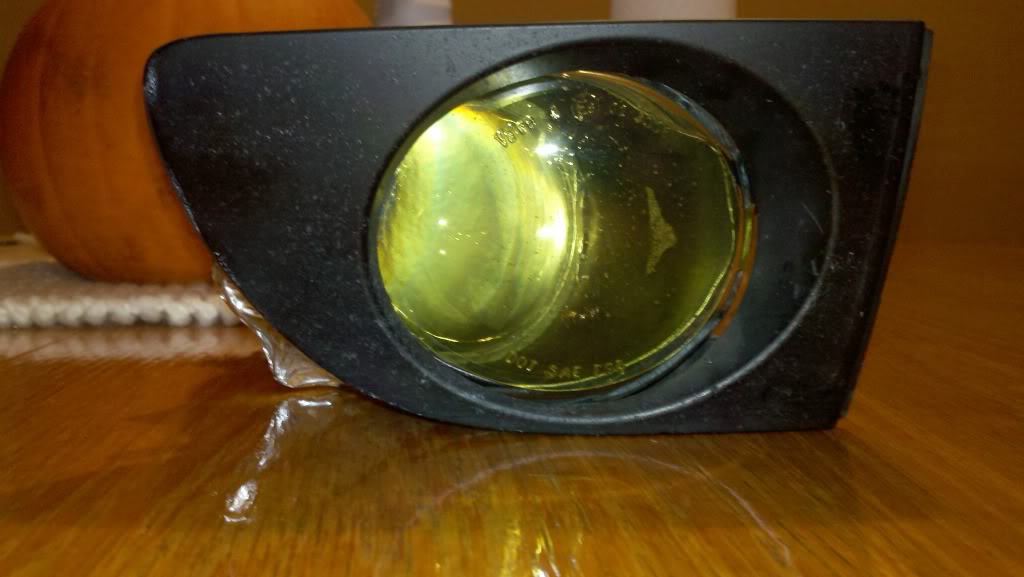
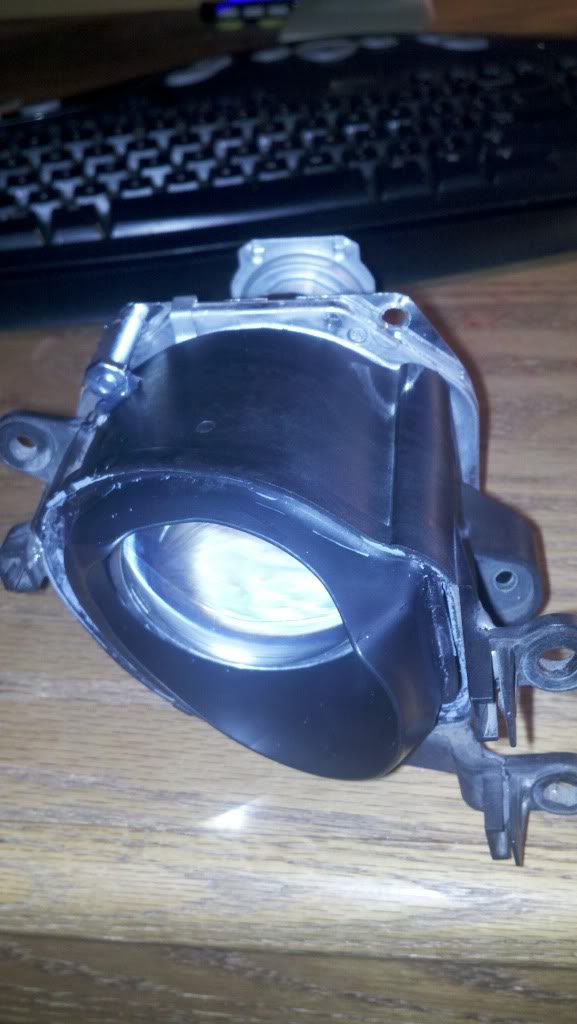
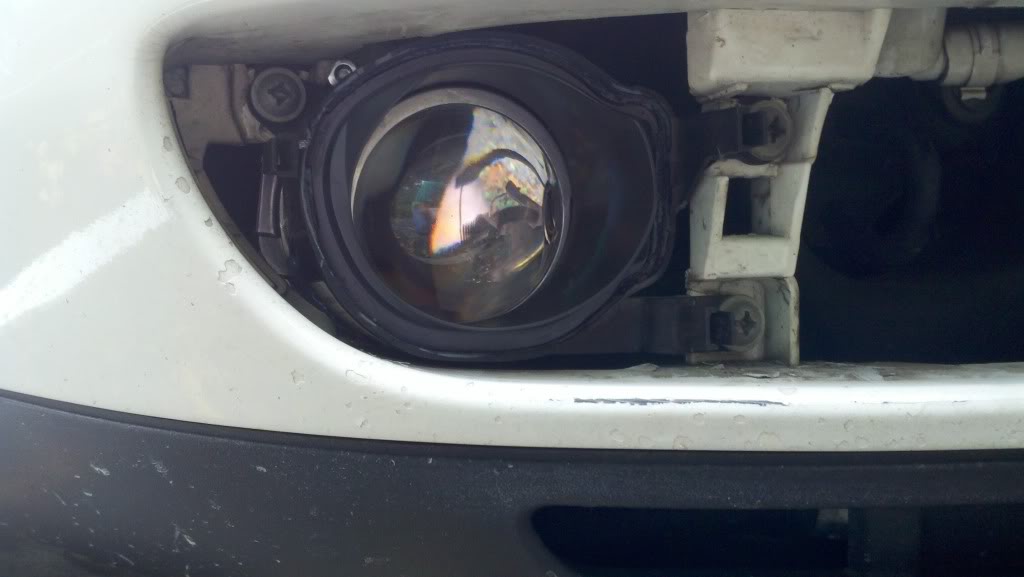
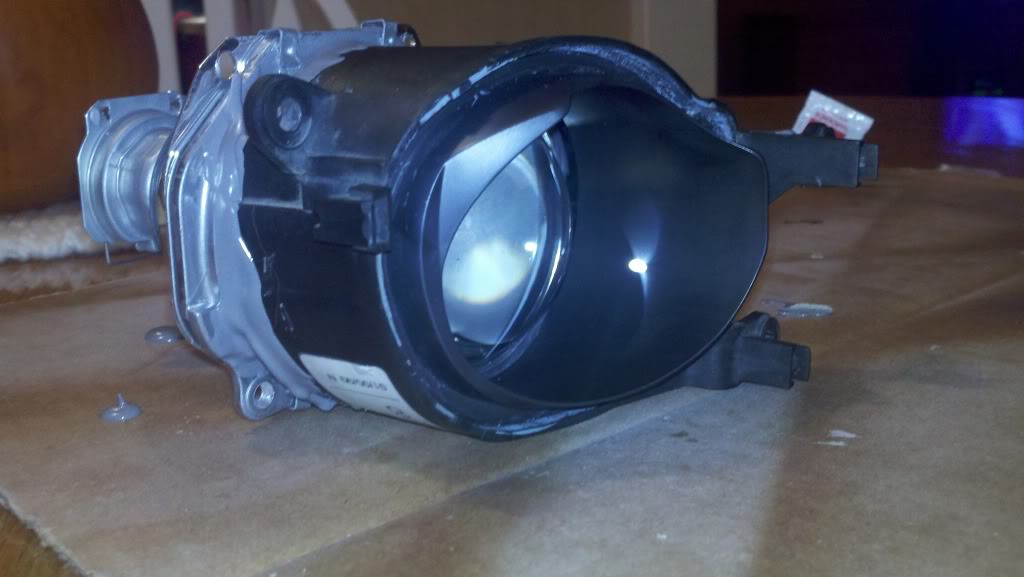
Got some more work done on this retro. I finalized the rotational alignment and then used JB weld to attach the lens holder to the fog light body. I'll cover the joint with aluminum sealing tape just to be sure. I should have output comparison shots this weekend, but the difference is impressive. I'm still debating on removing the cutoff step.


3rd Gear
Joined: Jan 2010
Posts: 1,973
From: Costa Mesa, SoCal
Lookin' good. I think you should remove the cutoff step, fogs were meant to have a flat cutoff across their whole width. Speaking of their width, you think you'll get good side visibility with a standard projector acting as a fog light?
Thread Starter
|
2nd Gear
Joined: Jul 2011
Posts: 843
From: Kirkland, WA
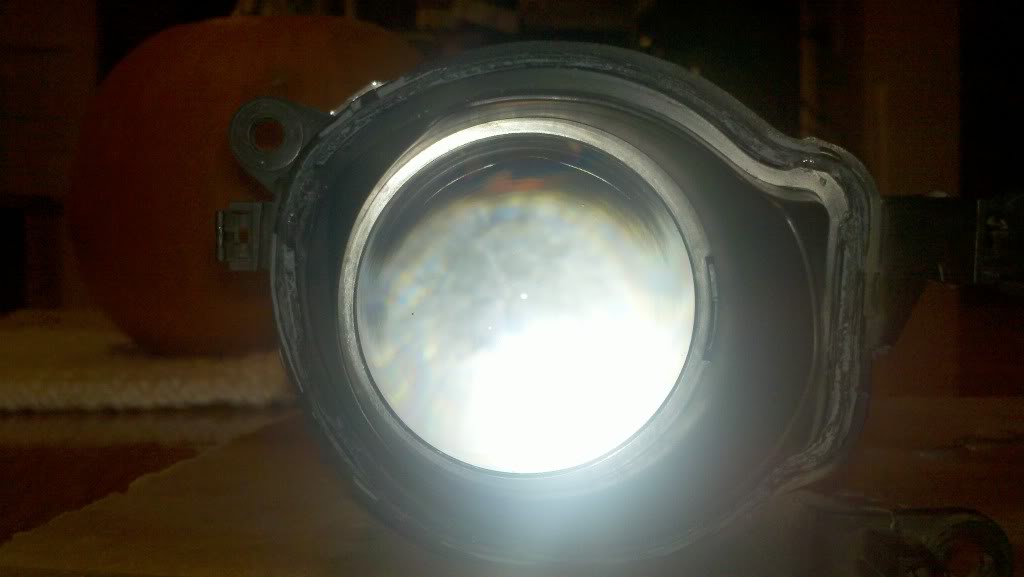
The pattern of the projector compared to the stock fog is much wider. I'll get some comparison shots of the beams later this week.
I know that I want to remove the step, but I haven't decided on how. Any grinding I do is certainly going to leave ridges in the shield and will show in the output. JVX on HIDPlanet has had some good success fabricating shields from aluminum flashing. I may try his method. The way that I've got the projector mounted, I don't have to dismantle everything in order to remove/replace the shield, so I do have some room to play with.
I know that I want to remove the step, but I haven't decided on how. Any grinding I do is certainly going to leave ridges in the shield and will show in the output. JVX on HIDPlanet has had some good success fabricating shields from aluminum flashing. I may try his method. The way that I've got the projector mounted, I don't have to dismantle everything in order to remove/replace the shield, so I do have some room to play with.
3rd Gear
Joined: Jan 2010
Posts: 1,973
From: Costa Mesa, SoCal
A while back I wanted to try making a flat cutoff for the stock projector as well. What I did was take aluminum HVAC tape and use it to extend the higher section of the cutoff shield. It wasn't perfect, but could have been much better if more time was spent on it.
As for the perfection of this line... we are talking stock projectors here. They weren't that good to begin with
As for the perfection of this line... we are talking stock projectors here. They weren't that good to begin with
Thread Starter
|
2nd Gear
Joined: Jul 2011
Posts: 843
From: Kirkland, WA
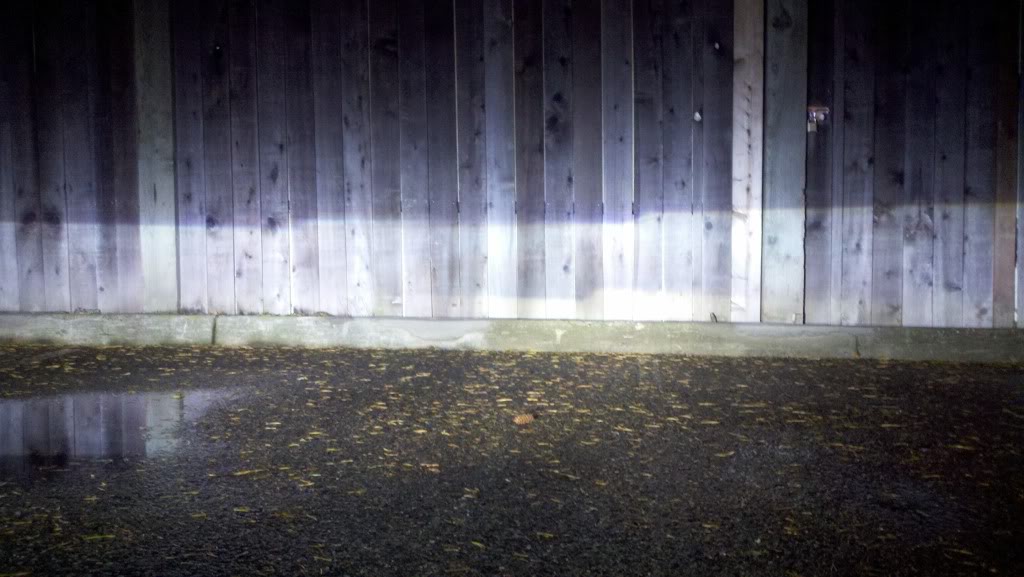
I haven't played with the cutoff step yet, but rather than extend the upper edge of the step, I'll trim down the lower edge so that more of the "hot spot" is uncovered. I was able to do some side by side comparison shots of the stock fogs with my retrofit.
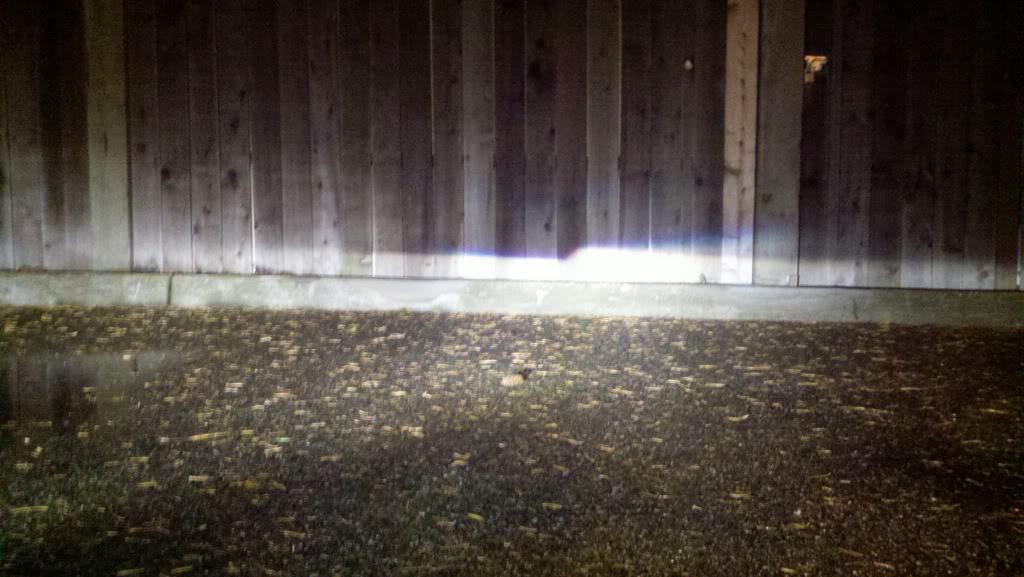
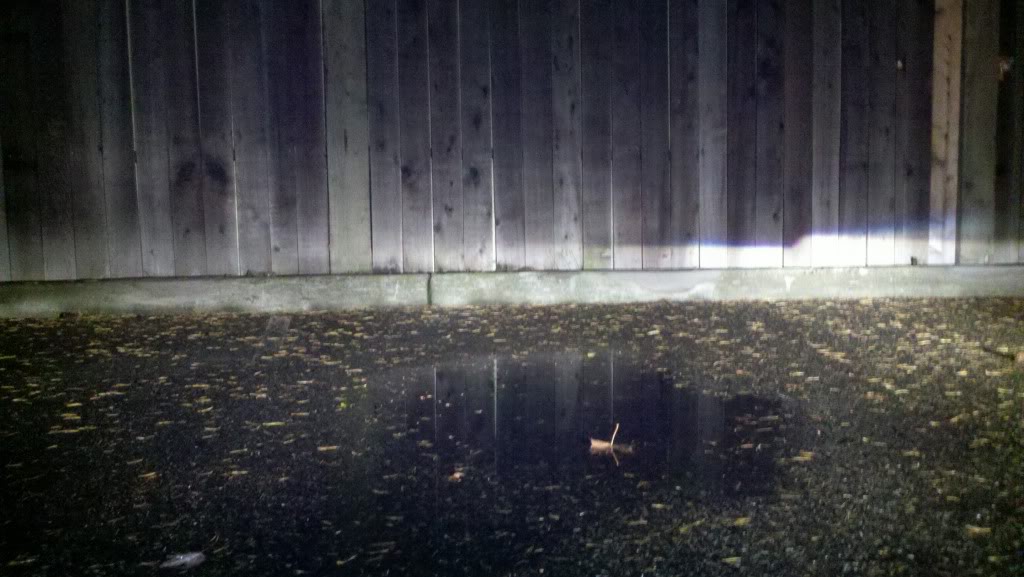
Stock is on the left, retro on the right. Pics are taken at 20ft. I have not installed the outer lens on the retro, so there will probably be a little distortion in the cutoff line once installed.
Last one with the headlights on for comparison. You can just barely see the step in the fog in the lower right.