
Heater core replacement, I'm doing it.


Former Sponsor
Joined: Apr 2011
Posts: 511
From: Beaverton Oregon
Troxel did a good job on that picture and ID. My picture is slightly different in detail but I found when I searched for part G192 etka highlighted 15(not that it really matters), and part number on that is 4A0-820-539-A, #9 should be part number 1H0-907-543-A and when I googled that part number it looks just like what you had in hand. I know this post doesn't really contribute much since you know where it goes. I only wanted to confirm a part number on it for that #9 location should you find a part number on it. But in googling it, looks like you got it covered.

1st Gear
Joined: Sep 2005
Posts: 51
Another question for you elduderino: if it turns out that I need to replace my temperature control flap door motor, which I believe is either #7 or #8 in that graphic, in your opinion is it physically possible to do that while the unit is still mounted or is more likely that the whole thing needs to come out? The temperature control flap is the *inner* flap, for what it's worth. I think it's the one with the red arm underneath.
2nd Gear
Joined: May 2012
Posts: 1,272
From: Minnesota
For what it's worth, Bentley thinks you can just pull the entire center console assembly out, then pull the floor vent ductwork and get to it that way. I really don't know, and Bentley has been wrong from time to time.

Thread Starter
|
2nd Gear
Joined: Oct 2013
Posts: 550
From: Seattle, WA
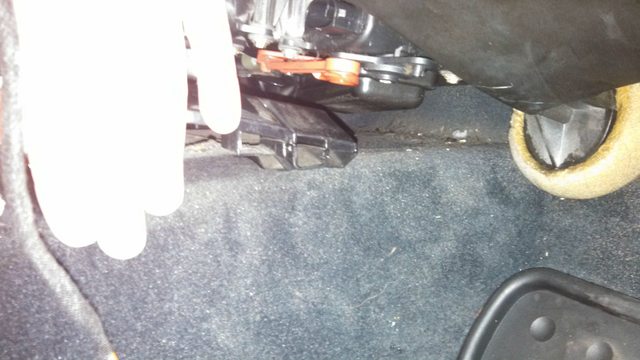
Well I may have spoke too soon and mtroxel may be right. There might be just enough room to get some tools under there. I tried taking a picture with my hand for scale (I hope it's dawning on everyone why I did so poorly in photography back when I was in school)
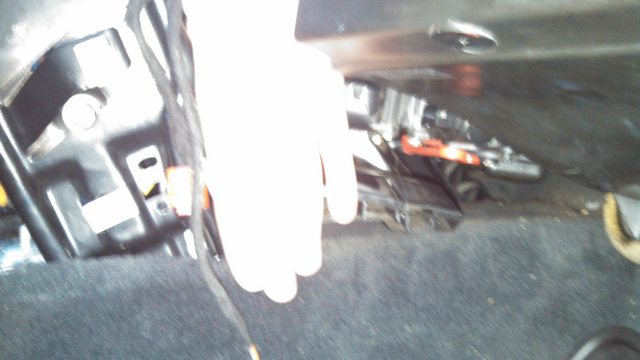
With that bottom vent out, you might be able to do some work:
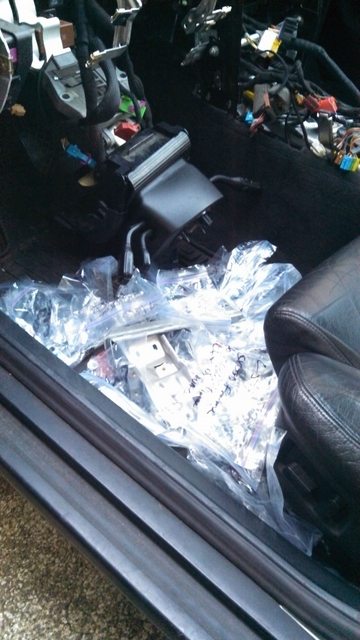
On my front, no real work today as the gf is coming over and it's my turn to cook so instead of an update pic, I'll provide you with a picture of all the pile of bags with pieces pulled off inside (each numbered and labeled):
When I finally get everything back together, I'll do a little write-up on what I think I did poorly and what I think I did well for future use by other poor souls.
I expect 1-2 more days.
OH YEAH! I forgot to say, that sensor did fit perfectly in the side of the HVAC box and the connector cable was in the bundle (or near) of those in the center console. So everything is fixed with that issue. Again many thanks to those who helped me with that.
With that bottom vent out, you might be able to do some work:
On my front, no real work today as the gf is coming over and it's my turn to cook so instead of an update pic, I'll provide you with a picture of all the pile of bags with pieces pulled off inside (each numbered and labeled):
When I finally get everything back together, I'll do a little write-up on what I think I did poorly and what I think I did well for future use by other poor souls.
I expect 1-2 more days.
OH YEAH! I forgot to say, that sensor did fit perfectly in the side of the HVAC box and the connector cable was in the bundle (or near) of those in the center console. So everything is fixed with that issue. Again many thanks to those who helped me with that.
Thread Starter
|
2nd Gear
Joined: Oct 2013
Posts: 550
From: Seattle, WA
update #5
elapsed time: about 14 hours
thoughts: almost there! dash is back in and I'm working on getting all the electrical cables into their right homes.
I do have (hopefully) one last question:
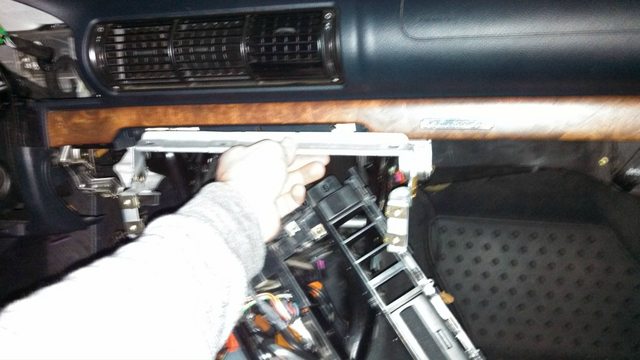
This piece I can NOT find how it went. I have pictures of me holding it up just as I took off the black plastic frame-piece that holds the radio/climate controls, but I can't figure out how it goes back in! Any ideas?
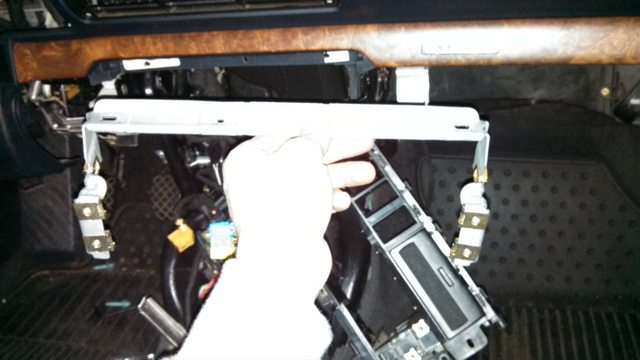
This picture is roughly how it fits but I can't determine anything aside from that. Does it go behind the black METAL frame with the bar through it?!
and of course an update:
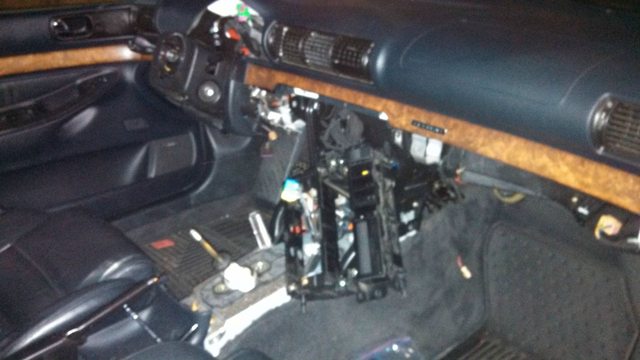
as an aside: I swear that steering column gets exponentially heavy the higher you lift it up. MAN that was tough. It didn't help that the bolts did NOT want to catch and you can't see what youre doing. Get a friend I suppose.
elapsed time: about 14 hours
thoughts: almost there! dash is back in and I'm working on getting all the electrical cables into their right homes.
I do have (hopefully) one last question:
This piece I can NOT find how it went. I have pictures of me holding it up just as I took off the black plastic frame-piece that holds the radio/climate controls, but I can't figure out how it goes back in! Any ideas?
This picture is roughly how it fits but I can't determine anything aside from that. Does it go behind the black METAL frame with the bar through it?!
and of course an update:
as an aside: I swear that steering column gets exponentially heavy the higher you lift it up. MAN that was tough. It didn't help that the bolts did NOT want to catch and you can't see what youre doing. Get a friend I suppose.
2nd Gear
Joined: May 2012
Posts: 1,272
From: Minnesota
I remember that piece you're fighting with. As I recall it bolts right up to the bottom of the dashboard skin, right behind the wood trim. In fact it might even use three of the bolts that hold the dash skin on right there, I don't remember for sure. The black plastic framework for the radio & climate control bolts right through those threaded holes in your picture, so that should help you locate it a bit too.
Thread Starter
|
2nd Gear
Joined: Oct 2013
Posts: 550
From: Seattle, WA
I remember that piece you're fighting with. As I recall it bolts right up to the bottom of the dashboard skin, right behind the wood trim. In fact it might even use three of the bolts that hold the dash skin on right there, I don't remember for sure. The black plastic framework for the radio & climate control bolts right through those threaded holes in your picture, so that should help you locate it a bit too.
Too be honest I was trying last night at about 9pm after doing the roughly four-thousand bolts from the airbag so maybe with a clear head I'll get it when I check tonight.
Thanks yet again.
And Clayson, thanks! I am still planning on a more comprehensive write-up when I get done, mostly with what I did well and what I did not. Just some helpful hints for anybody else doing this in the future.