
85 UR quattro

Thread Starter
|
1st Gear
Joined: Apr 2011
Posts: 367
From: Birmingham, MI

Thread Starter
|
1st Gear
Joined: Apr 2011
Posts: 367
From: Birmingham, MI
It's been over a month since I updated this thread so, even though not much has happened I will document it anyway. Actually, looking at my Flickr album there's been quite a lot of little incremental progress 
First off I received a new and spare bushing from Germany and wasted no time pressing the last one home. You just have to make sure it is being pressed true then squeeze with confidence, after first lubing the sh*t out of it.
 image by Team Illuminata Motorsport, on Flickr
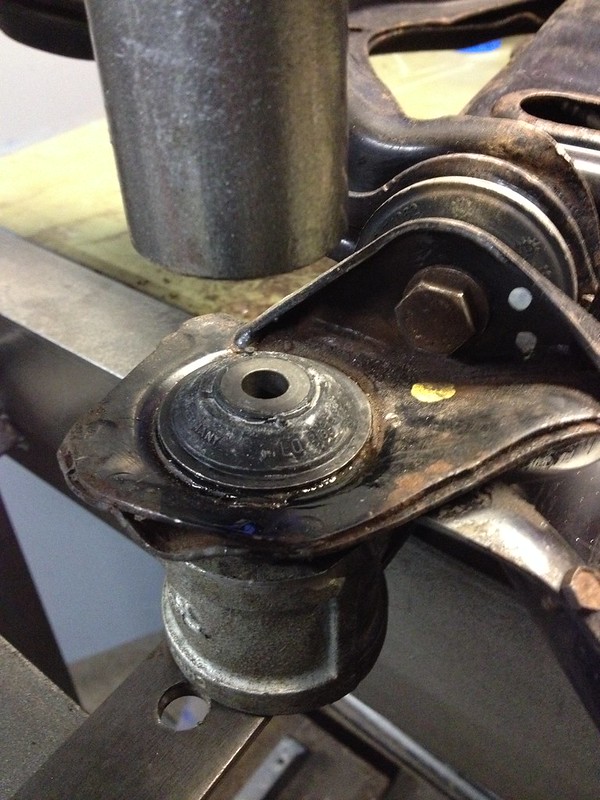 image by Team Illuminata Motorsport, on Flickr
Then I replace the front strut bellows which arrived the same day as the bushings. Incidentally these are for a Porsche 944! Same part though.
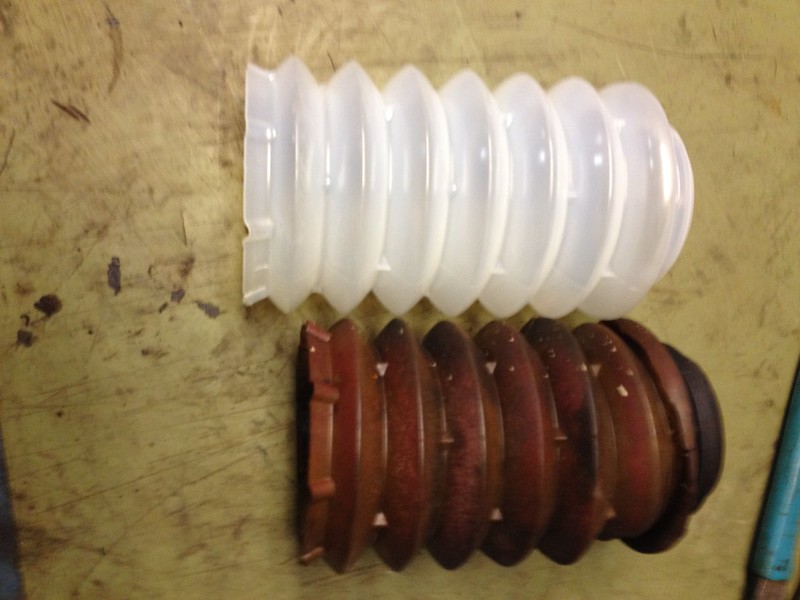 image by Team Illuminata Motorsport, on Flickr
More bloody squeezing. GGRRR
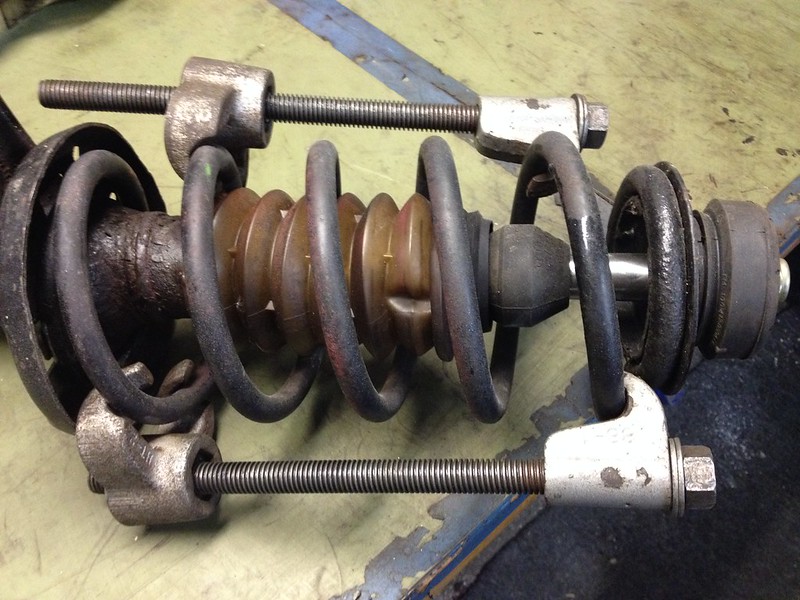 image by Team Illuminata Motorsport, on Flickr
 image by Team Illuminata Motorsport, on Flickr
Then I installed the turbo, manifold and down pipe.
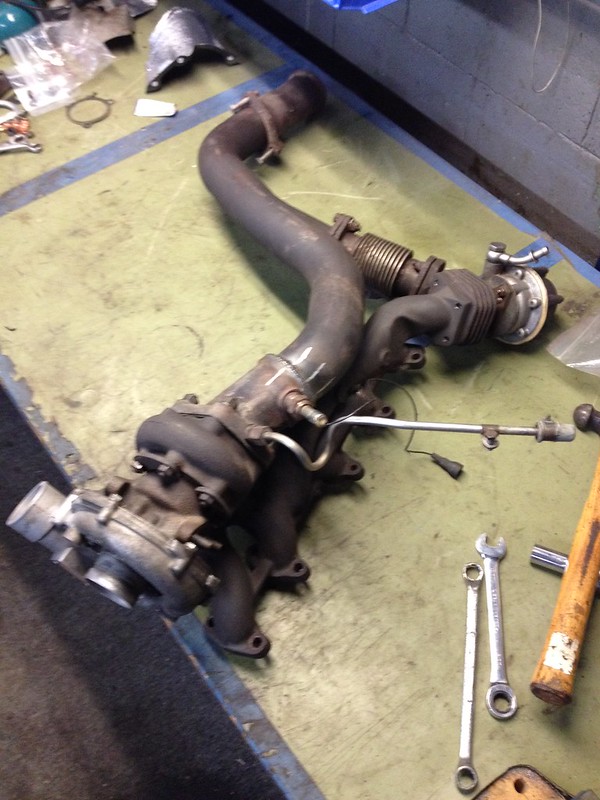 image by Team Illuminata Motorsport, on Flickr
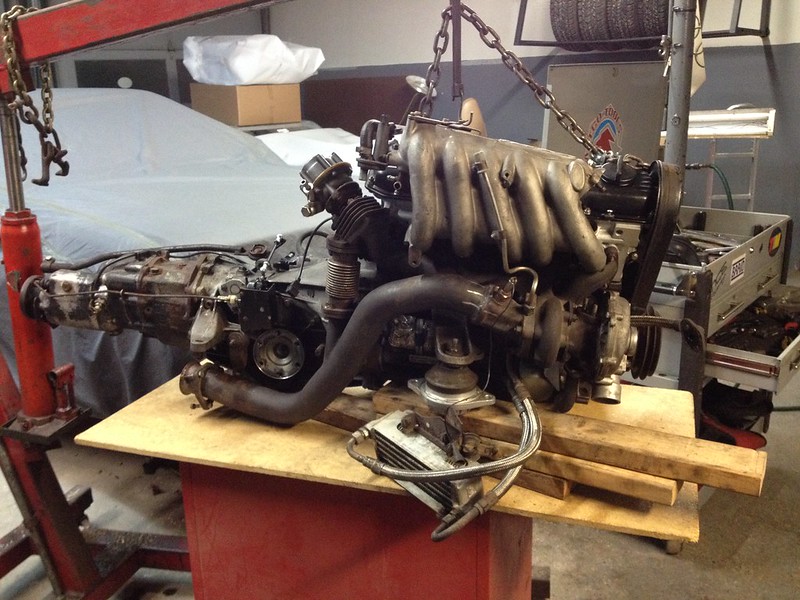 image by Team Illuminata Motorsport, on Flickr
Need to find a suitable hanger for here.
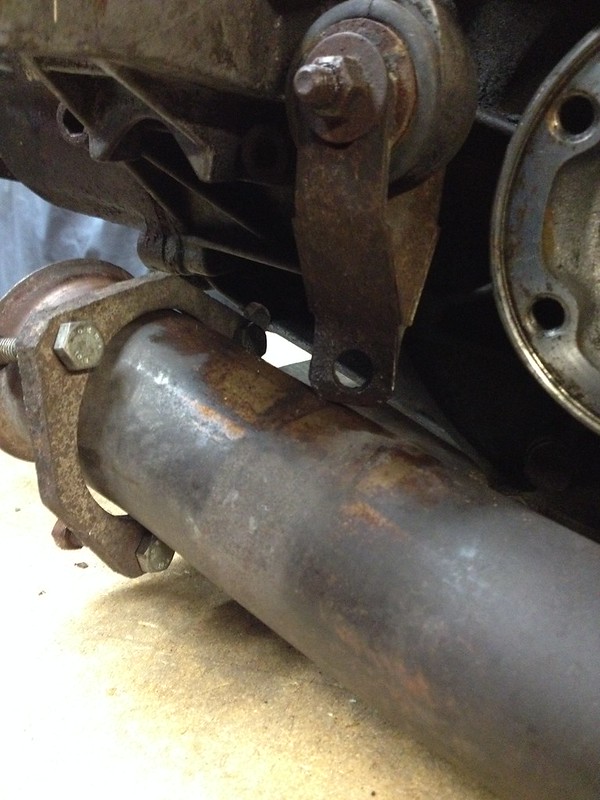 image by Team Illuminata Motorsport, on Flickr
This stainless steel beauty from Vibrant should do the trick.
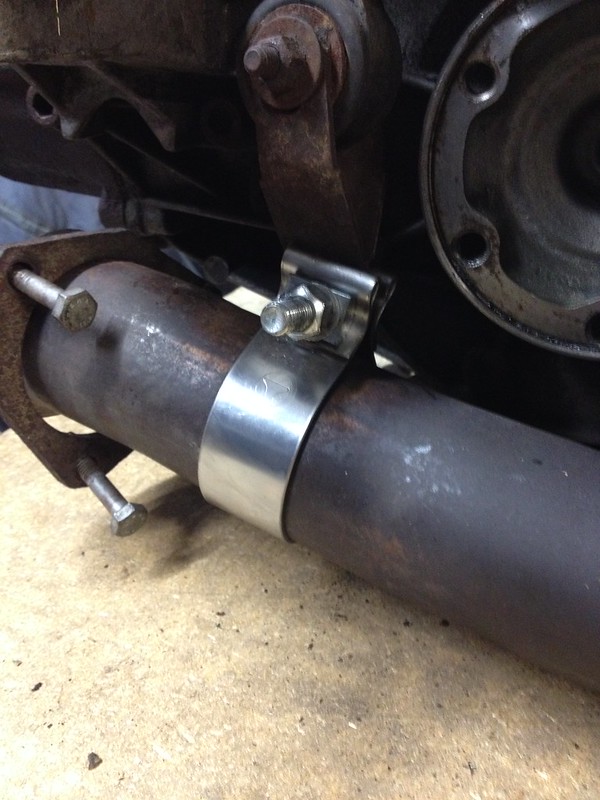 image by Team Illuminata Motorsport, on Flickr
Next job is to attache the subframe then it's ready to go back in the engine bay. However, the engine bay is not yet ready to accept it as I still need to reinstall the steering rack and refurbish the CIS system. I may reuse the existing hydraulic lines as my supplier's are not in production yet and I want to be driving this in April.
First off I received a new and spare bushing from Germany and wasted no time pressing the last one home. You just have to make sure it is being pressed true then squeeze with confidence, after first lubing the sh*t out of it.
image by Team Illuminata Motorsport, on Flickrimage by Team Illuminata Motorsport, on FlickrThen I replace the front strut bellows which arrived the same day as the bushings. Incidentally these are for a Porsche 944! Same part though.
image by Team Illuminata Motorsport, on FlickrMore bloody squeezing. GGRRR
image by Team Illuminata Motorsport, on Flickrimage by Team Illuminata Motorsport, on FlickrThen I installed the turbo, manifold and down pipe.
image by Team Illuminata Motorsport, on Flickrimage by Team Illuminata Motorsport, on FlickrNeed to find a suitable hanger for here.
image by Team Illuminata Motorsport, on FlickrThis stainless steel beauty from Vibrant should do the trick.
image by Team Illuminata Motorsport, on FlickrNext job is to attache the subframe then it's ready to go back in the engine bay. However, the engine bay is not yet ready to accept it as I still need to reinstall the steering rack and refurbish the CIS system. I may reuse the existing hydraulic lines as my supplier's are not in production yet and I want to be driving this in April.
Thread Starter
|
1st Gear
Joined: Apr 2011
Posts: 367
From: Birmingham, MI
I went through my parts bin to see what still needs to bolt on the engine before it goes back in the car. I was worried I might miss something and I was right. Found this heat shield
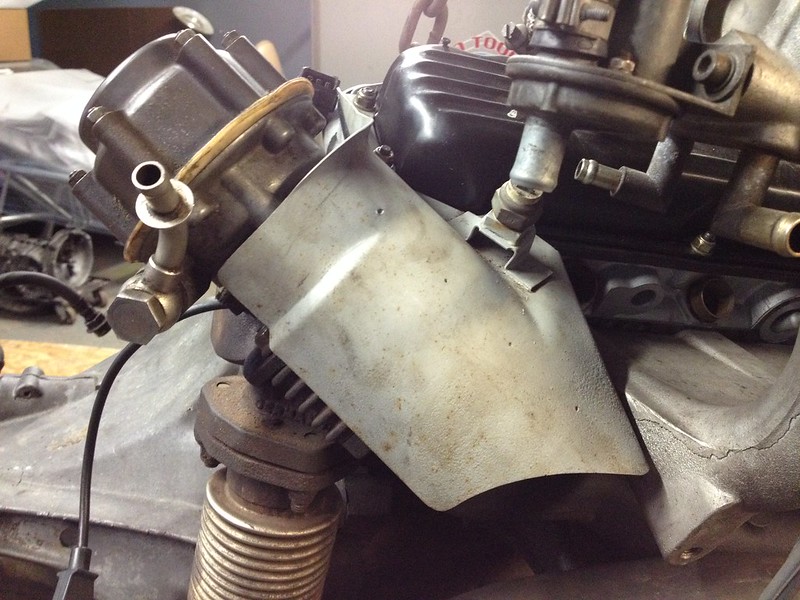 image by Team Illuminata Motorsport, on Flickr
and a temperature sensor that goes in the back of the refurbished head but this plug won't come out and I'm afraid of rounding out the Allen socket. Worst case I have to drill it out and retap it but then the head would have to come off!
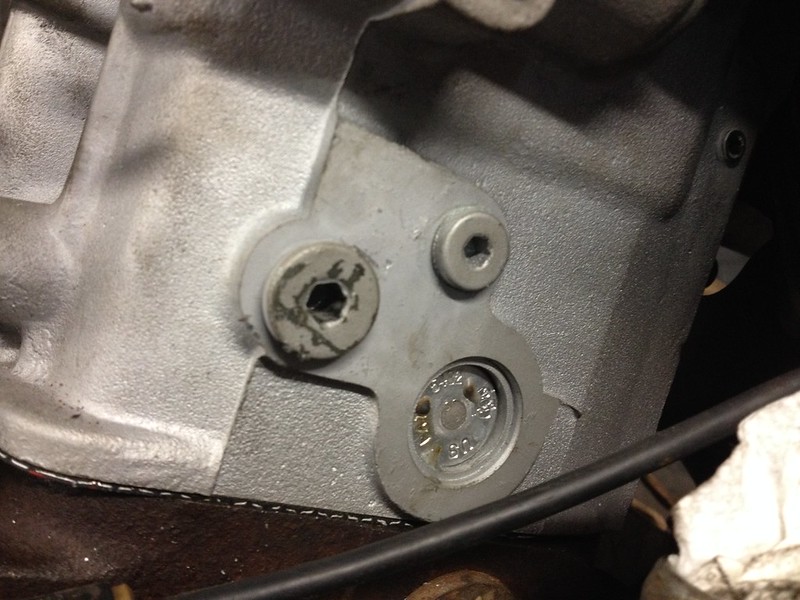 image by Team Illuminata Motorsport, on Flickr
Tried this to no avail
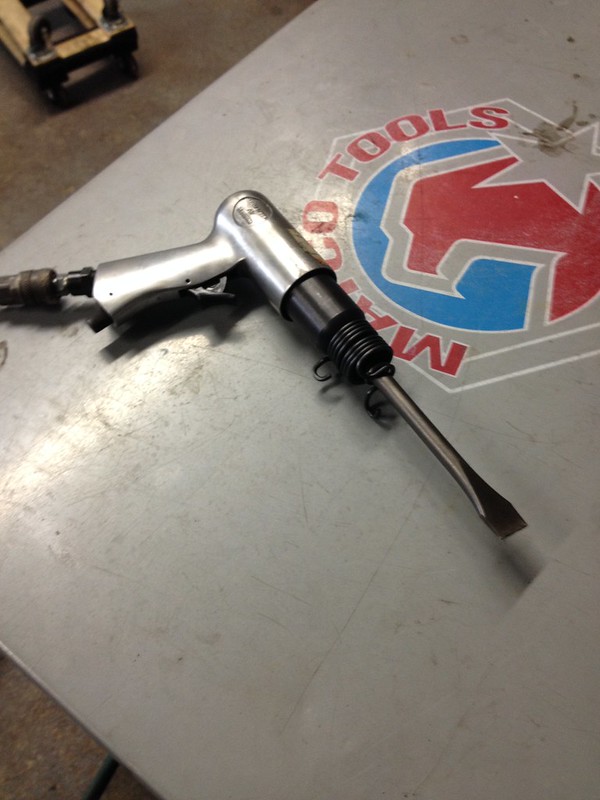 image by Team Illuminata Motorsport, on Flickr
So resorted the the impact gun which thankfully worked. I forget how effective they can be.
 image by Team Illuminata Motorsport, on Flickr
Then I celebrated by reinstalling the subframe.
 image by Team Illuminata Motorsport, on Flickr
image by Team Illuminata Motorsport, on Flickrand a temperature sensor that goes in the back of the refurbished head but this plug won't come out and I'm afraid of rounding out the Allen socket. Worst case I have to drill it out and retap it but then the head would have to come off!
image by Team Illuminata Motorsport, on FlickrTried this to no avail
image by Team Illuminata Motorsport, on FlickrSo resorted the the impact gun which thankfully worked. I forget how effective they can be.
image by Team Illuminata Motorsport, on FlickrThen I celebrated by reinstalling the subframe.
image by Team Illuminata Motorsport, on Flickr
Last edited by team illuminata; Mar 26, 2016 at 09:47 AM.
Thread Starter
|
1st Gear
Joined: Apr 2011
Posts: 367
From: Birmingham, MI
Bought some inspiration over the weekend.
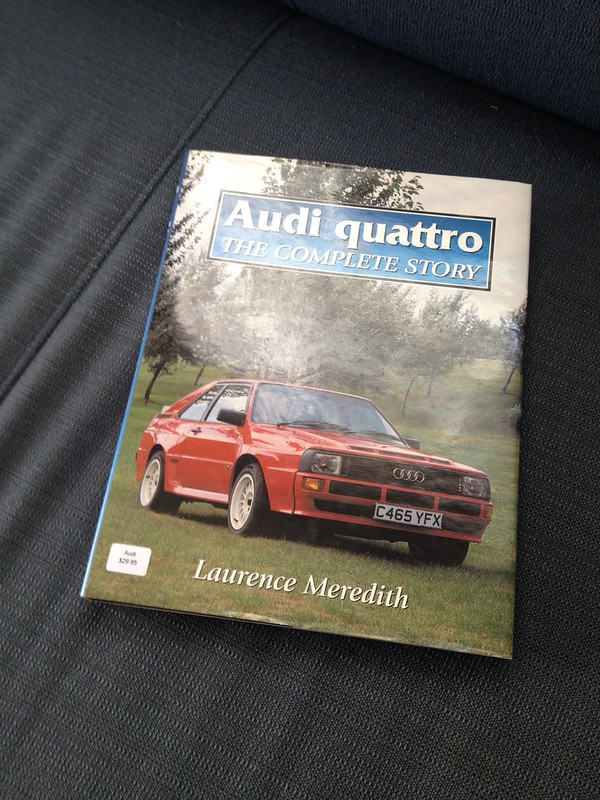 image by Team Illuminata Motorsport, on Flickr
It inspired me to go on a spending spree. Ordered air box grommets/mounts and filter.
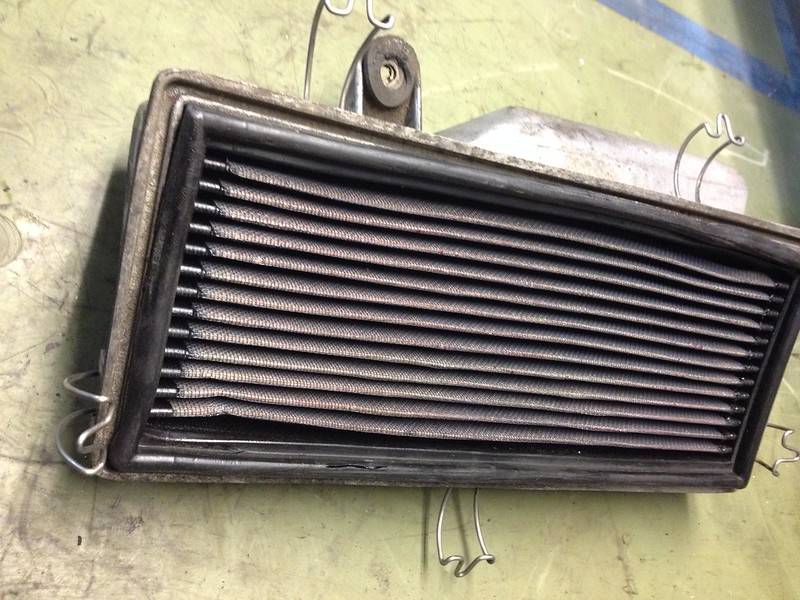 image by Team Illuminata Motorsport, on Flickr
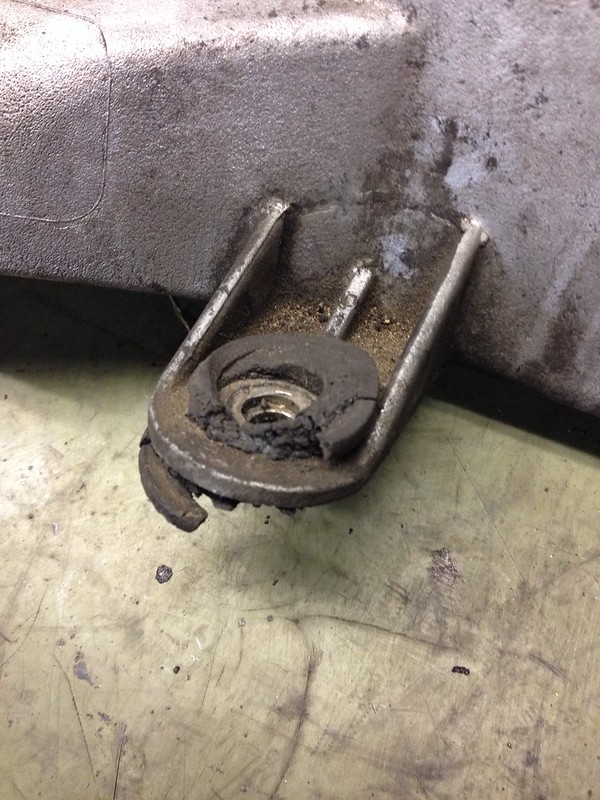 image by Team Illuminata Motorsport, on Flickr
Oil can gasket
 image by Team Illuminata Motorsport, on Flickr
Bomb mounts
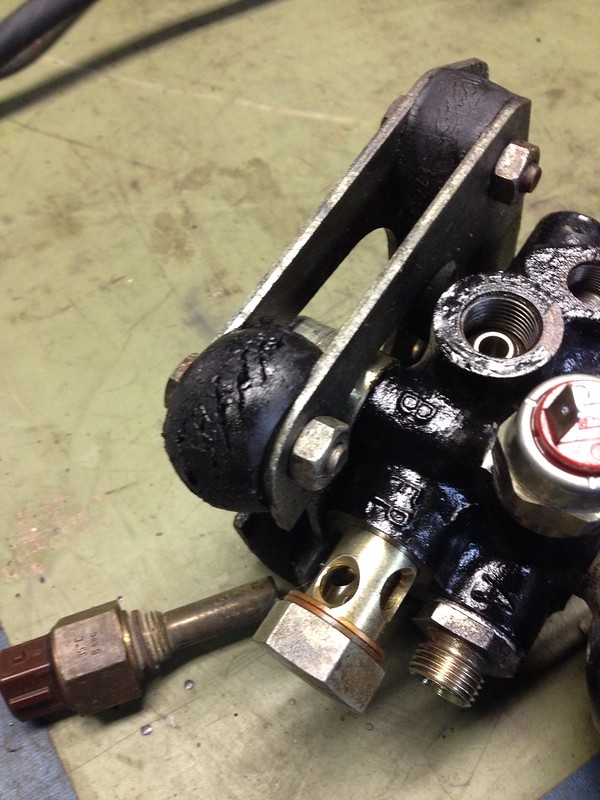 image by Team Illuminata Motorsport, on Flickr
Trans oil
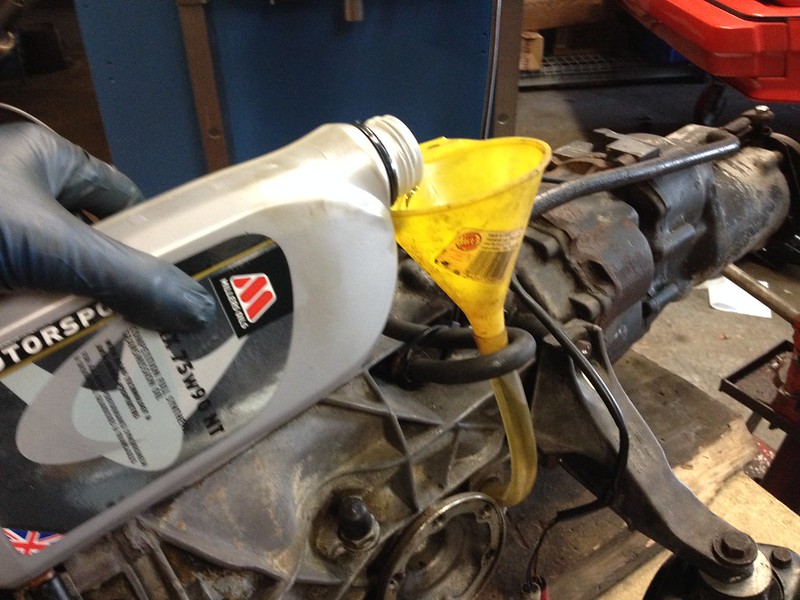 image by Team Illuminata Motorsport, on Flickr
and about $300 worth of vacuum hose, clips and copper washers!
As I can now see light at the end of the tunnel I also turned the engine round on the hoist so it's ready to go in. A little optimistic perhaps?
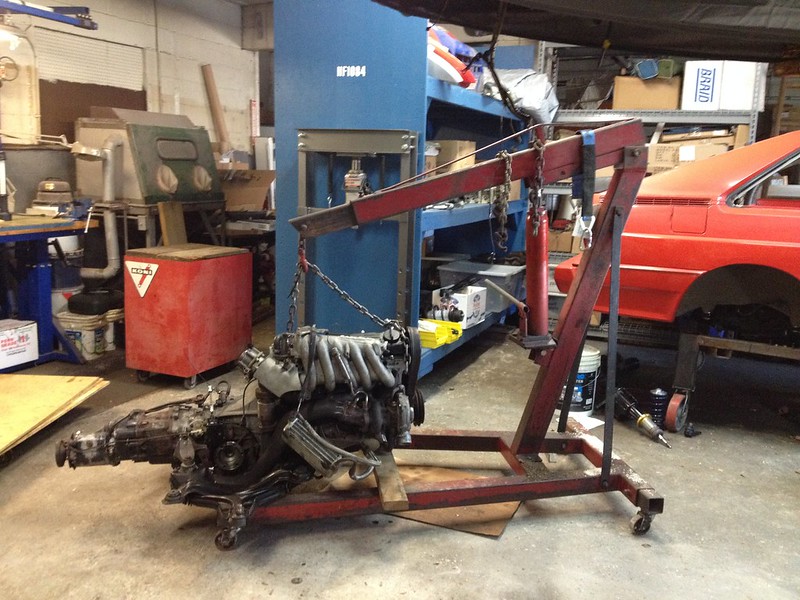 image by Team Illuminata Motorsport, on Flickr
image by Team Illuminata Motorsport, on FlickrIt inspired me to go on a spending spree. Ordered air box grommets/mounts and filter.
image by Team Illuminata Motorsport, on Flickrimage by Team Illuminata Motorsport, on FlickrOil can gasket
image by Team Illuminata Motorsport, on FlickrBomb mounts
image by Team Illuminata Motorsport, on FlickrTrans oil
image by Team Illuminata Motorsport, on Flickrand about $300 worth of vacuum hose, clips and copper washers!
As I can now see light at the end of the tunnel I also turned the engine round on the hoist so it's ready to go in. A little optimistic perhaps?
image by Team Illuminata Motorsport, on Flickr
Thread Starter
|
1st Gear
Joined: Apr 2011
Posts: 367
From: Birmingham, MI
I thought I'd check as many sensors as I could before popping the engine back in. Seems like a reasonable plan. There are like twenty separate temperature sensors on this engine! OK, there's six but still........
Fortunately Audi stamped the range or trigger point on them. Well, most of them.
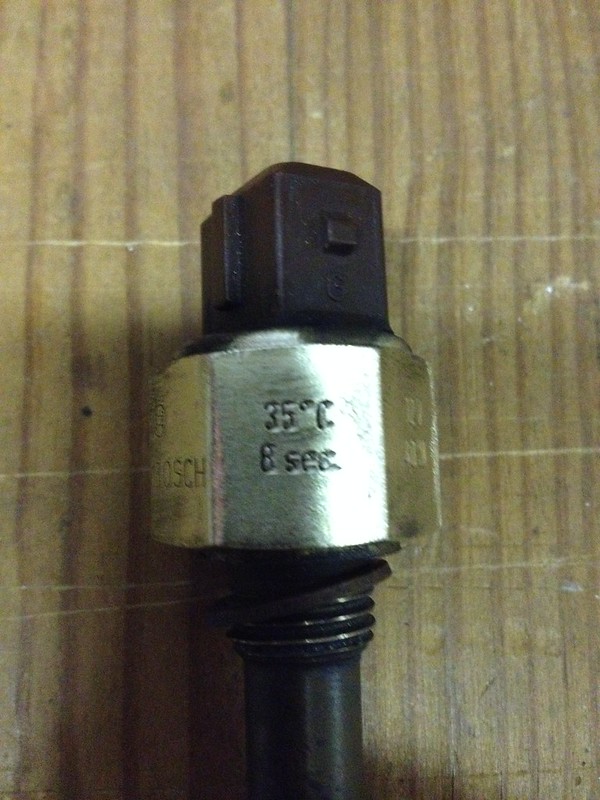 image by Team Illuminata Motorsport, on Flickr
I didn't check change over temperature. I just had hot water or no water but I think I proved they all do something so I'm going with that.
 image by Team Illuminata Motorsport, on Flickr
 image by Team Illuminata Motorsport, on Flickr
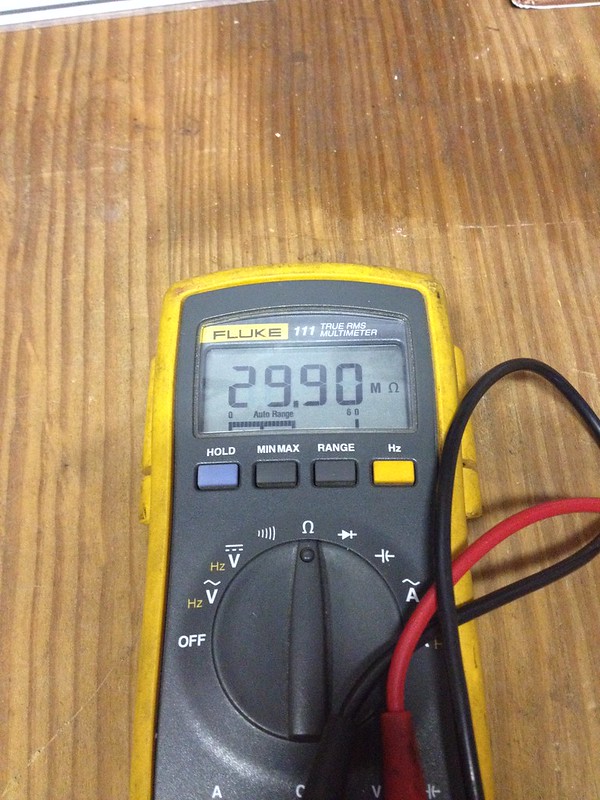 image by Team Illuminata Motorsport, on Flickr
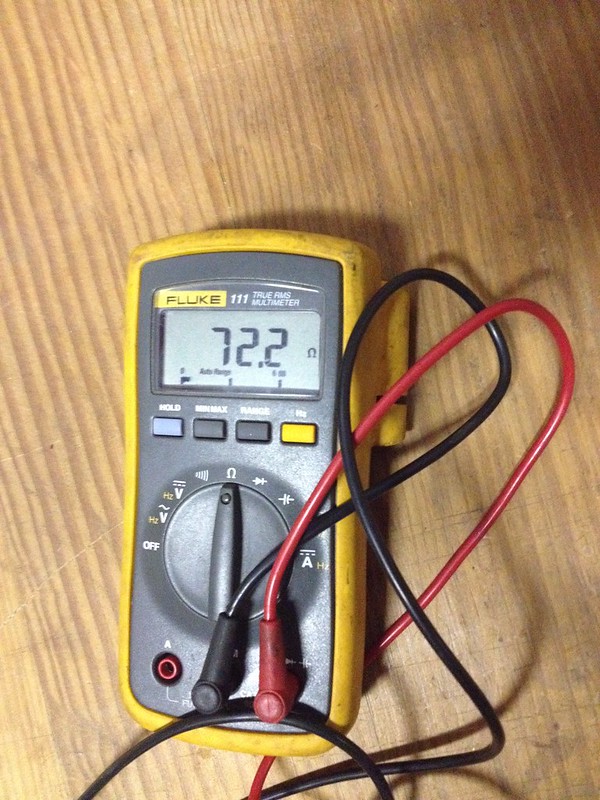 image by Team Illuminata Motorsport, on Flickr
This one tested good too but didn't want to go home
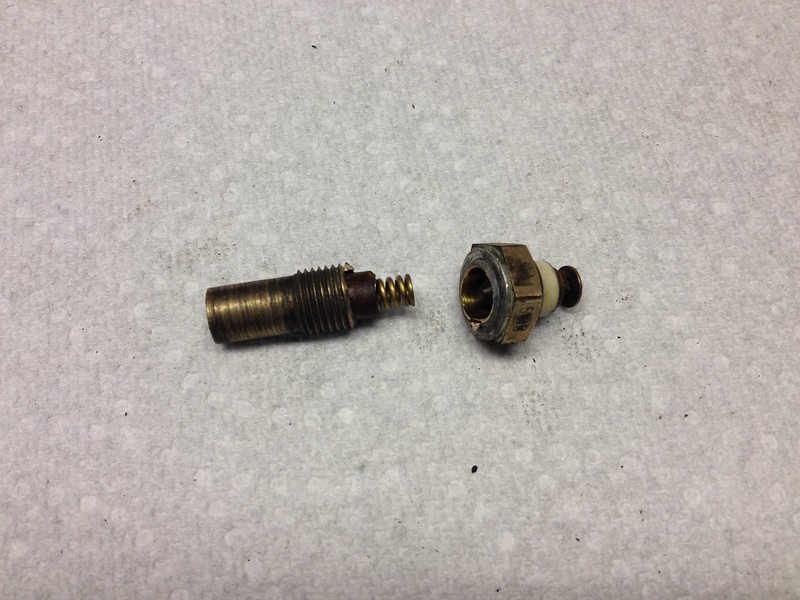 image by Team Illuminata Motorsport, on Flickr
Need to find a seal washer for this one. How hard could that be?
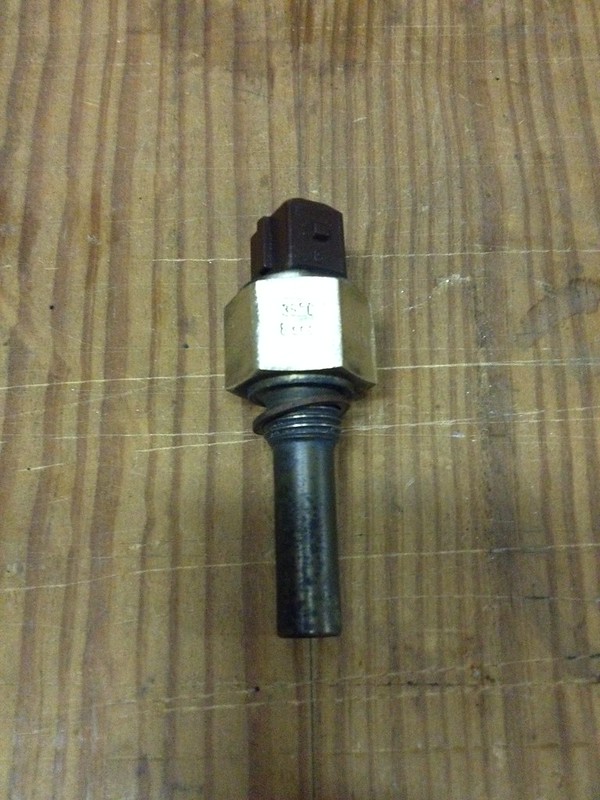 image by Team Illuminata Motorsport, on Flickr
Fortunately Audi stamped the range or trigger point on them. Well, most of them.
image by Team Illuminata Motorsport, on FlickrI didn't check change over temperature. I just had hot water or no water but I think I proved they all do something so I'm going with that.
image by Team Illuminata Motorsport, on Flickrimage by Team Illuminata Motorsport, on Flickrimage by Team Illuminata Motorsport, on Flickrimage by Team Illuminata Motorsport, on FlickrThis one tested good too but didn't want to go home
image by Team Illuminata Motorsport, on FlickrNeed to find a seal washer for this one. How hard could that be?
image by Team Illuminata Motorsport, on Flickr

2nd Gear
Joined: Jun 2011
Posts: 1,186
I'm hoping to get back on my 87 5000SQ rebuild soon. I've sand blasted and painted all the suspension parts that were starting to rust. Engine is about completely rebuilt. Still need to do the head. Going to go ahead and replace the guides since all of the exhaust valves were show a bit of deflection when I checked them.
Thread Starter
|
1st Gear
Joined: Apr 2011
Posts: 367
From: Birmingham, MI
It's the little things that take the most time. I thought I hadn't made a lot of progress but when I looked at all the photos I've taken lately I realise I've done a lot of small things including spending hundreds of Dollars on tiny pipe clips, vacuum hose and aluminium sealing washers! But first...
I installed the ground cable after stripping the threads and fixing with a Helicoil
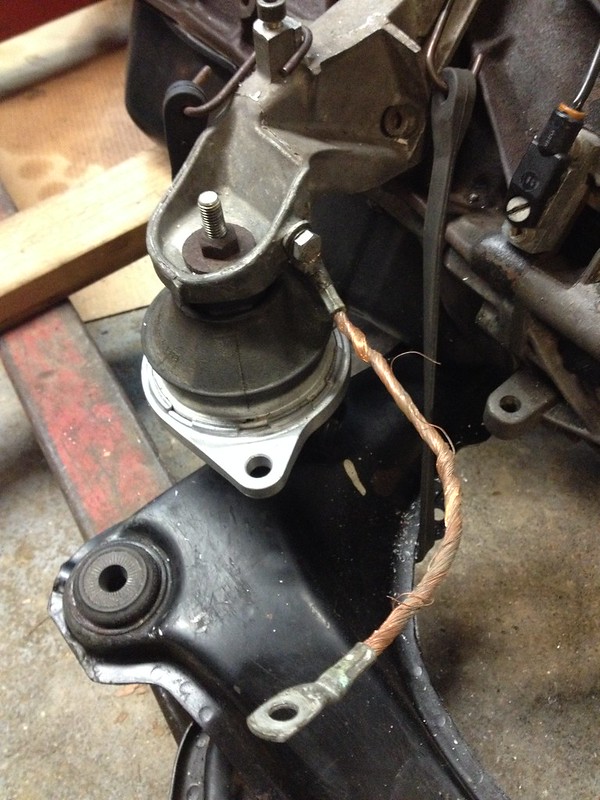 image by Team Illuminata Motorsport, on Flickr
 image by Team Illuminata Motorsport, on Flickr
Then went to install the steering rack but found one of the bulkhead plugs (top one of the three) and previously been pierced and bunged up with some sort of putty!
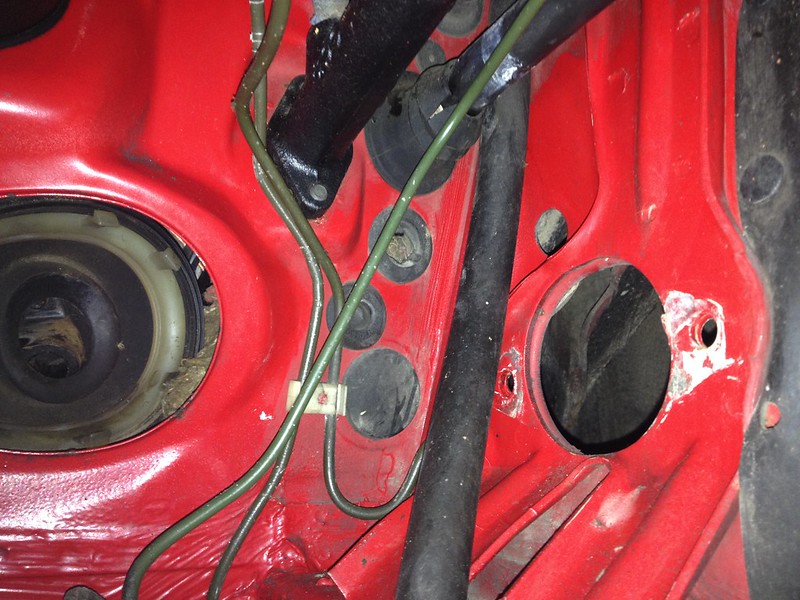 image by Team Illuminata Motorsport, on Flickr
 image by Team Illuminata Motorsport, on Flickr
So I had to source a new one. Thankfully they are still available as Audi still use them.
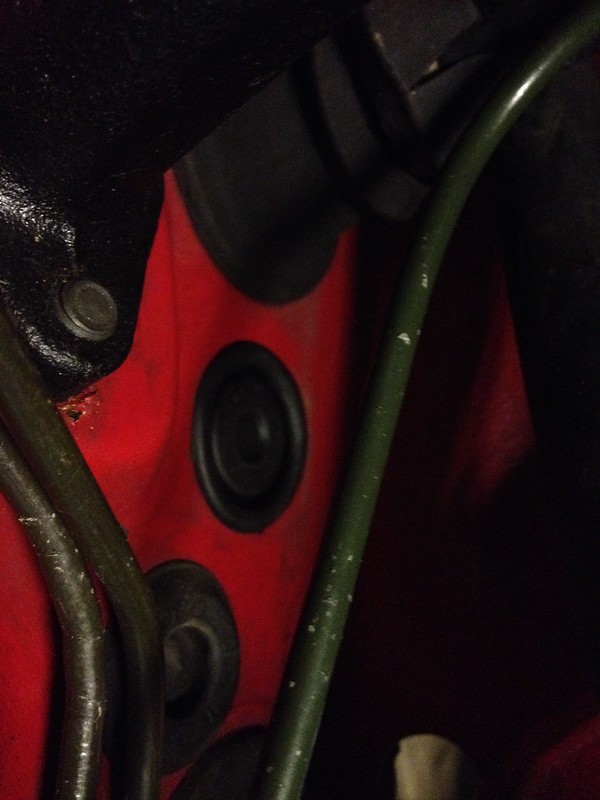 image by Team Illuminata Motorsport, on Flickr
I realized it would be a lot easier to attach the hoses to the steering rack on the bench but how to determine the orientation so they line up later? It helps to have a 83 quattro project in the other bay to reference!
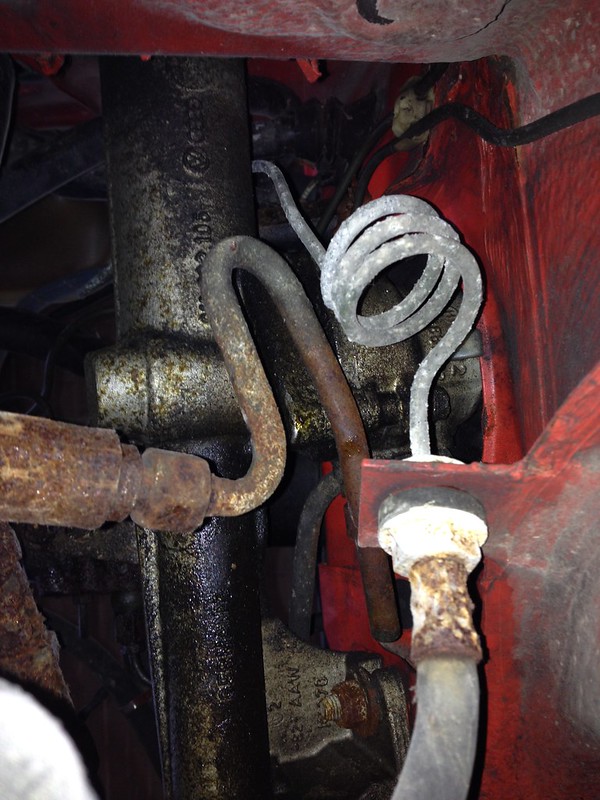 image by Team Illuminata Motorsport, on Flickr
 image by Team Illuminata Motorsport, on Flickr
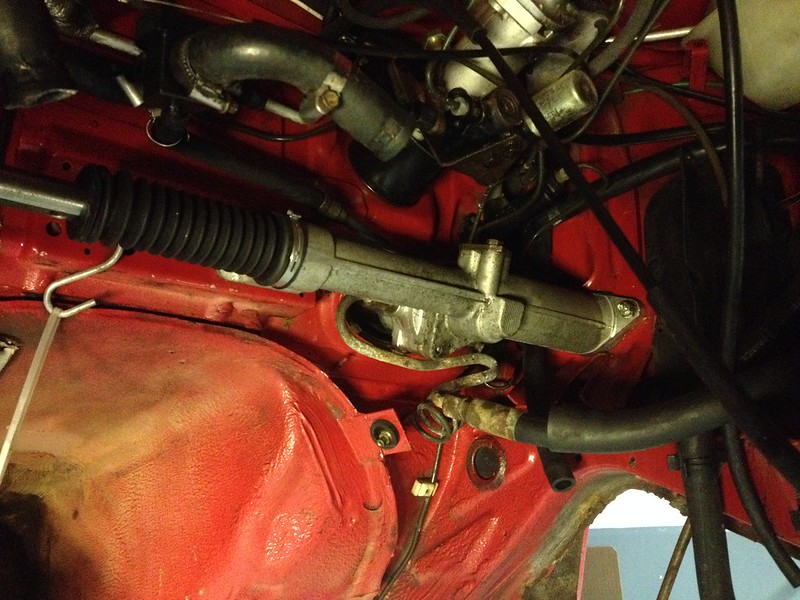 image by Team Illuminata Motorsport, on Flickr
Then hooked up the steering column inside the footwell. I think I may have got the steering wheel 180 degrees off but it was always going to need re-clocking anyway.
I think the next job is to replace all the vacuum hoses and clips but maybe I can find something else to do.
I installed the ground cable after stripping the threads and fixing with a Helicoil
image by Team Illuminata Motorsport, on Flickrimage by Team Illuminata Motorsport, on FlickrThen went to install the steering rack but found one of the bulkhead plugs (top one of the three) and previously been pierced and bunged up with some sort of putty!
image by Team Illuminata Motorsport, on Flickrimage by Team Illuminata Motorsport, on FlickrSo I had to source a new one. Thankfully they are still available as Audi still use them.
image by Team Illuminata Motorsport, on FlickrI realized it would be a lot easier to attach the hoses to the steering rack on the bench but how to determine the orientation so they line up later? It helps to have a 83 quattro project in the other bay to reference!
image by Team Illuminata Motorsport, on Flickrimage by Team Illuminata Motorsport, on Flickrimage by Team Illuminata Motorsport, on FlickrThen hooked up the steering column inside the footwell. I think I may have got the steering wheel 180 degrees off but it was always going to need re-clocking anyway.
I think the next job is to replace all the vacuum hoses and clips but maybe I can find something else to do.
Thread Starter
|
1st Gear
Joined: Apr 2011
Posts: 367
From: Birmingham, MI
Replacing the vacuum hoses and clips is a PITA so I found something else to do. I replaced the air box mounts.
 image by Team Illuminata Motorsport, on Flickr
Of course that didn't take very long so it was back to replacing vacuum hoses and clips. Step one, I think. Is to figure what hoses and clips to buy from Audi. Just look at the parts diagrams and the car and figure out what applies. How hard could it be? How about "Bloody impossible!"? OK, not that bad but quite a lot does not match my car. I think I'm going to order as much vacuum line and hose clips as I think I need and just start replacing what physically matches. Of course allof the shaped rubber hose are NLA.
The parts diagrams:
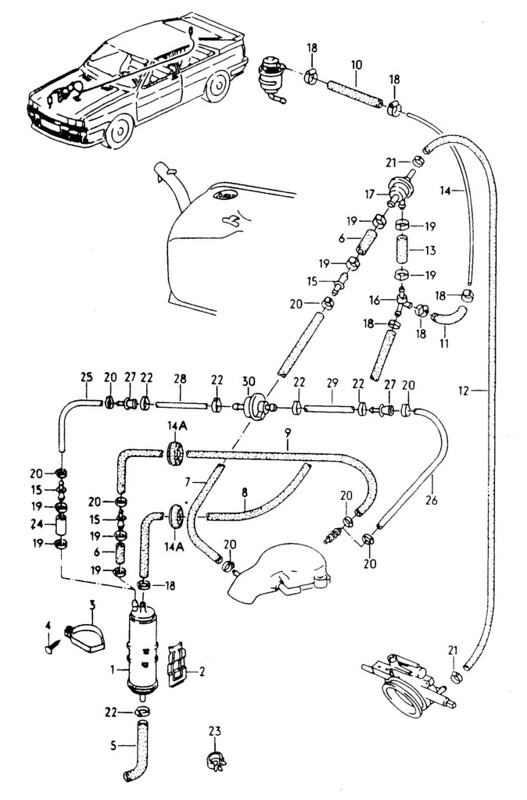 ACTIVATED CHARCOAL CONTAINER by Team Illuminata Motorsport, on Flickr
 4. VACUUM HOSES; VALVE HOUSING; BREATHER VALVE by Team Illuminata Motorsport, on Flickr
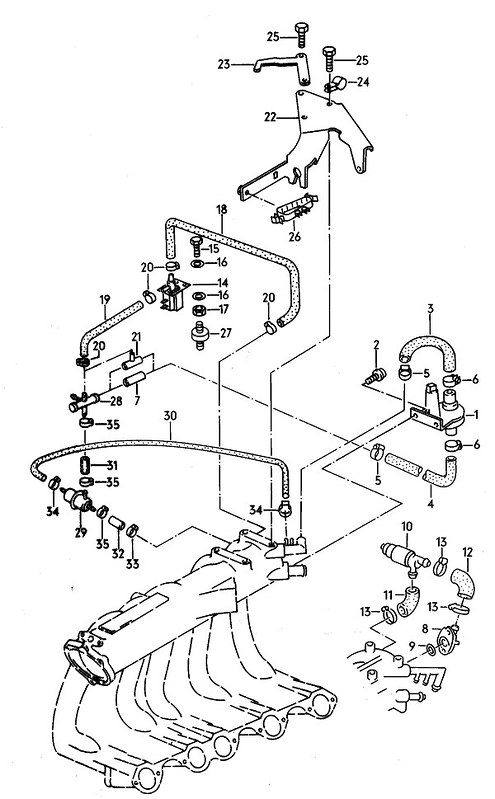 15. AUXILIARY AIR SLIDE; COLD STARTING VALVE by Team Illuminata Motorsport, on Flickr
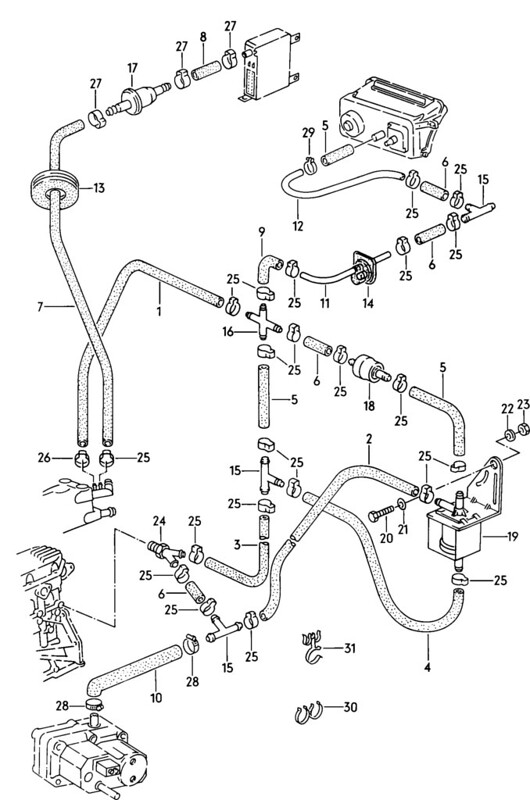 1320. VACUUM HOSES WITH; CONNECTING PARTS; FOR PNEUMATIC DIFFERENTIAL; LOCK by Team Illuminata Motorsport, on Flickr
and the car:
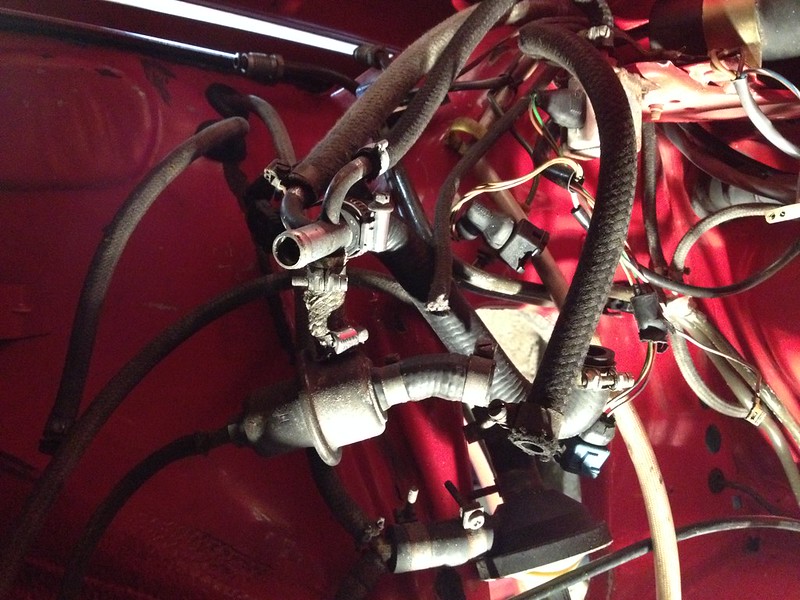 image by Team Illuminata Motorsport, on Flickr
 image by Team Illuminata Motorsport, on Flickr
This should be interesting.
image by Team Illuminata Motorsport, on FlickrOf course that didn't take very long so it was back to replacing vacuum hoses and clips. Step one, I think. Is to figure what hoses and clips to buy from Audi. Just look at the parts diagrams and the car and figure out what applies. How hard could it be? How about "Bloody impossible!"? OK, not that bad but quite a lot does not match my car. I think I'm going to order as much vacuum line and hose clips as I think I need and just start replacing what physically matches. Of course allof the shaped rubber hose are NLA.
The parts diagrams:
ACTIVATED CHARCOAL CONTAINER by Team Illuminata Motorsport, on Flickr4. VACUUM HOSES; VALVE HOUSING; BREATHER VALVE by Team Illuminata Motorsport, on Flickr15. AUXILIARY AIR SLIDE; COLD STARTING VALVE by Team Illuminata Motorsport, on Flickr1320. VACUUM HOSES WITH; CONNECTING PARTS; FOR PNEUMATIC DIFFERENTIAL; LOCK by Team Illuminata Motorsport, on Flickrand the car:
image by Team Illuminata Motorsport, on Flickrimage by Team Illuminata Motorsport, on FlickrThis should be interesting.
Last edited by team illuminata; Apr 29, 2016 at 04:58 PM.
Thread Starter
|
1st Gear
Joined: Apr 2011
Posts: 367
From: Birmingham, MI
In a moment of inspiration I found this on the underside of the hood. Doesn't help.
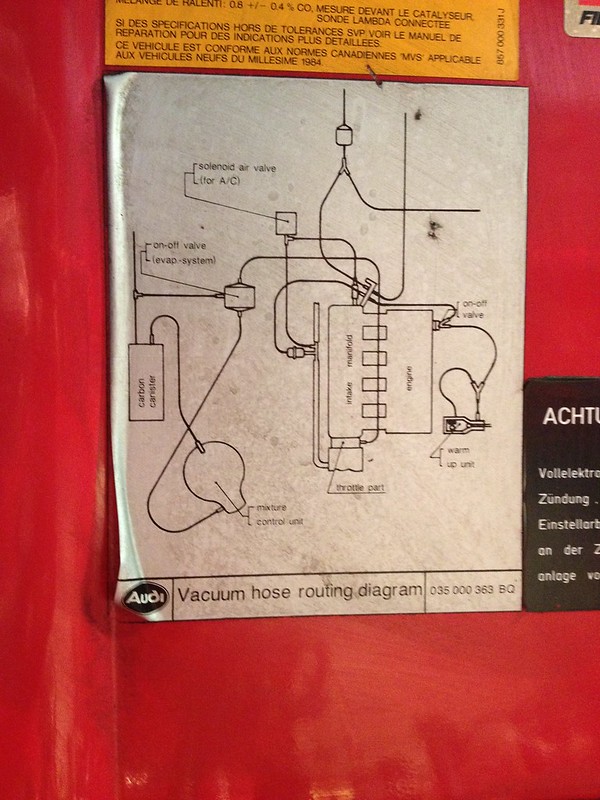 image by Team Illuminata Motorsport, on Flickr
I marked up the parts of the diagrams that resemble my car and went for it.
 image by Team Illuminata Motorsport, on Flickr
The approach is going to be to reinstate everything that's missing in line with the parts diagrams, replace everything thats still there in line with the diagrams and just replace everything that's not in line with the diagrams with the best guess parts and assume it's right as it worked before.
Started with the vent flap as it was the most accessible and matches a diagram. The adjacent lines I tackled next do not match anything. It seems to help disconnecting them if you first cut the old tube along its length to free it from the fragile plastic connectors.
 image by Team Illuminata Motorsport, on Flickr
Et voila! Piece of cake.
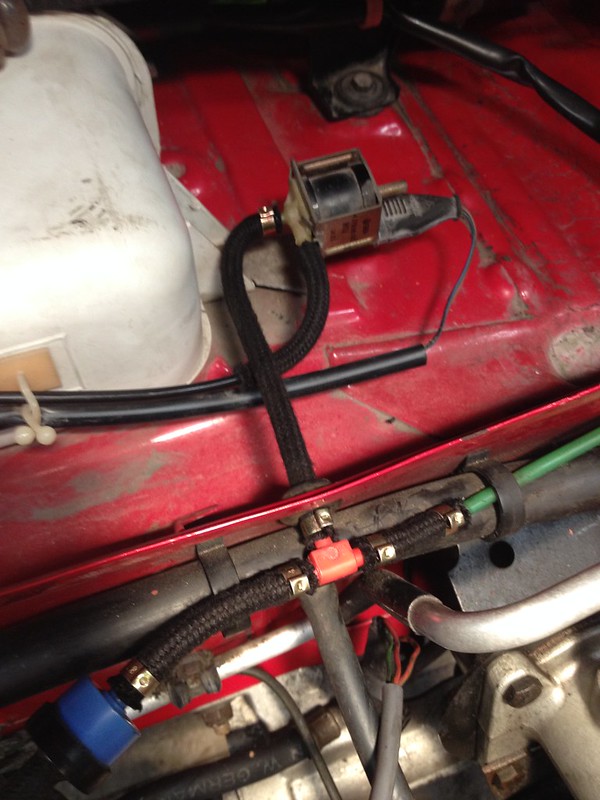 image by Team Illuminata Motorsport, on Flickr
Inspired by my success and the fact that I appear to only have purchased a fraction of what is needed I decided to tackle the charcoal canister. This appeared to want to be on the bench though so, not wanting to annoy it I obliged.
 image by Team Illuminata Motorsport, on Flickr
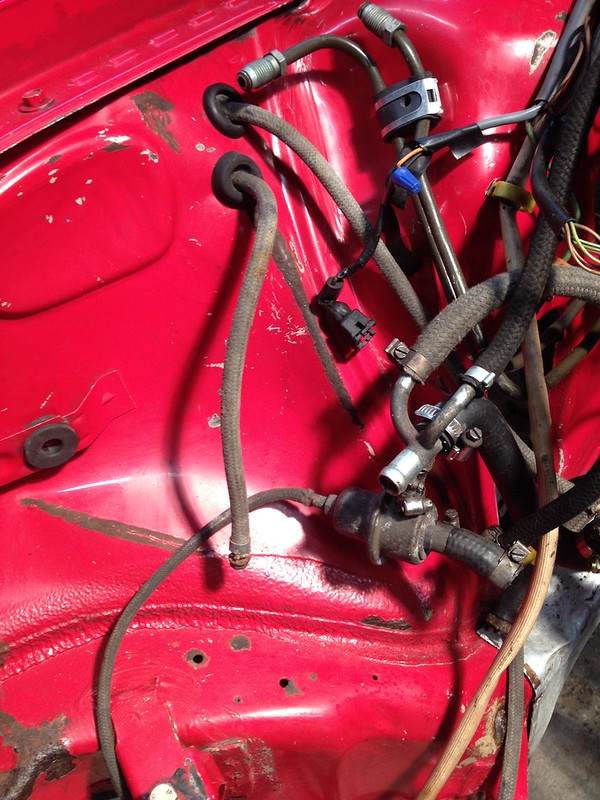 image by Team Illuminata Motorsport, on Flickr
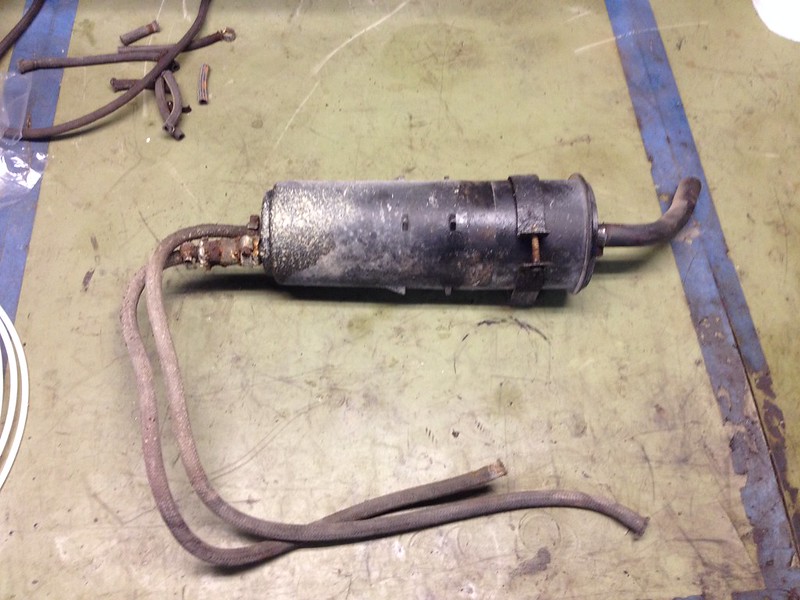 image by Team Illuminata Motorsport, on Flickr
of course I'm missing the clamps so progress has halted, again.
image by Team Illuminata Motorsport, on FlickrI marked up the parts of the diagrams that resemble my car and went for it.
image by Team Illuminata Motorsport, on FlickrThe approach is going to be to reinstate everything that's missing in line with the parts diagrams, replace everything thats still there in line with the diagrams and just replace everything that's not in line with the diagrams with the best guess parts and assume it's right as it worked before.
Started with the vent flap as it was the most accessible and matches a diagram. The adjacent lines I tackled next do not match anything. It seems to help disconnecting them if you first cut the old tube along its length to free it from the fragile plastic connectors.
image by Team Illuminata Motorsport, on FlickrEt voila! Piece of cake.
image by Team Illuminata Motorsport, on FlickrInspired by my success and the fact that I appear to only have purchased a fraction of what is needed I decided to tackle the charcoal canister. This appeared to want to be on the bench though so, not wanting to annoy it I obliged.
image by Team Illuminata Motorsport, on Flickrimage by Team Illuminata Motorsport, on Flickrimage by Team Illuminata Motorsport, on Flickrof course I'm missing the clamps so progress has halted, again.