
Drivers rear seat panel and lumbar support FIX! Under $20!


Thread Starter
|
1st Gear
Joined: Jan 2012
Posts: 8
2002 Audi A4 1.8T B6 (should work for most models)
If you're like me, one day you got in your car and *SNAP* something in the seat broke! I'm a big guy (6'8 300 lbs) so immediately I was like... CRAP, this is going to be expensive! The bottom of the rear seat panel had popped out because the brackets had broke. After doing some research I found out that the replacement clips were $50! INSANE! For two small little plastic pieces. After even more research I found out that this is more than likely due to my lumbar support bracket breaking (which is true). After taking it all apart the lumbar support bracket was indeed broke. A new lumbar support system was around $130 dollars. So all in all you're looking at around $180 dollars to fix this annoying problem.
There was no way I was going to pay $180 dollars for something so small. I bought all of the tools I needed to fix this at Lowe's for under $20 and it works beautifully! Follow this DIY and you can do the same.
What you'll need:
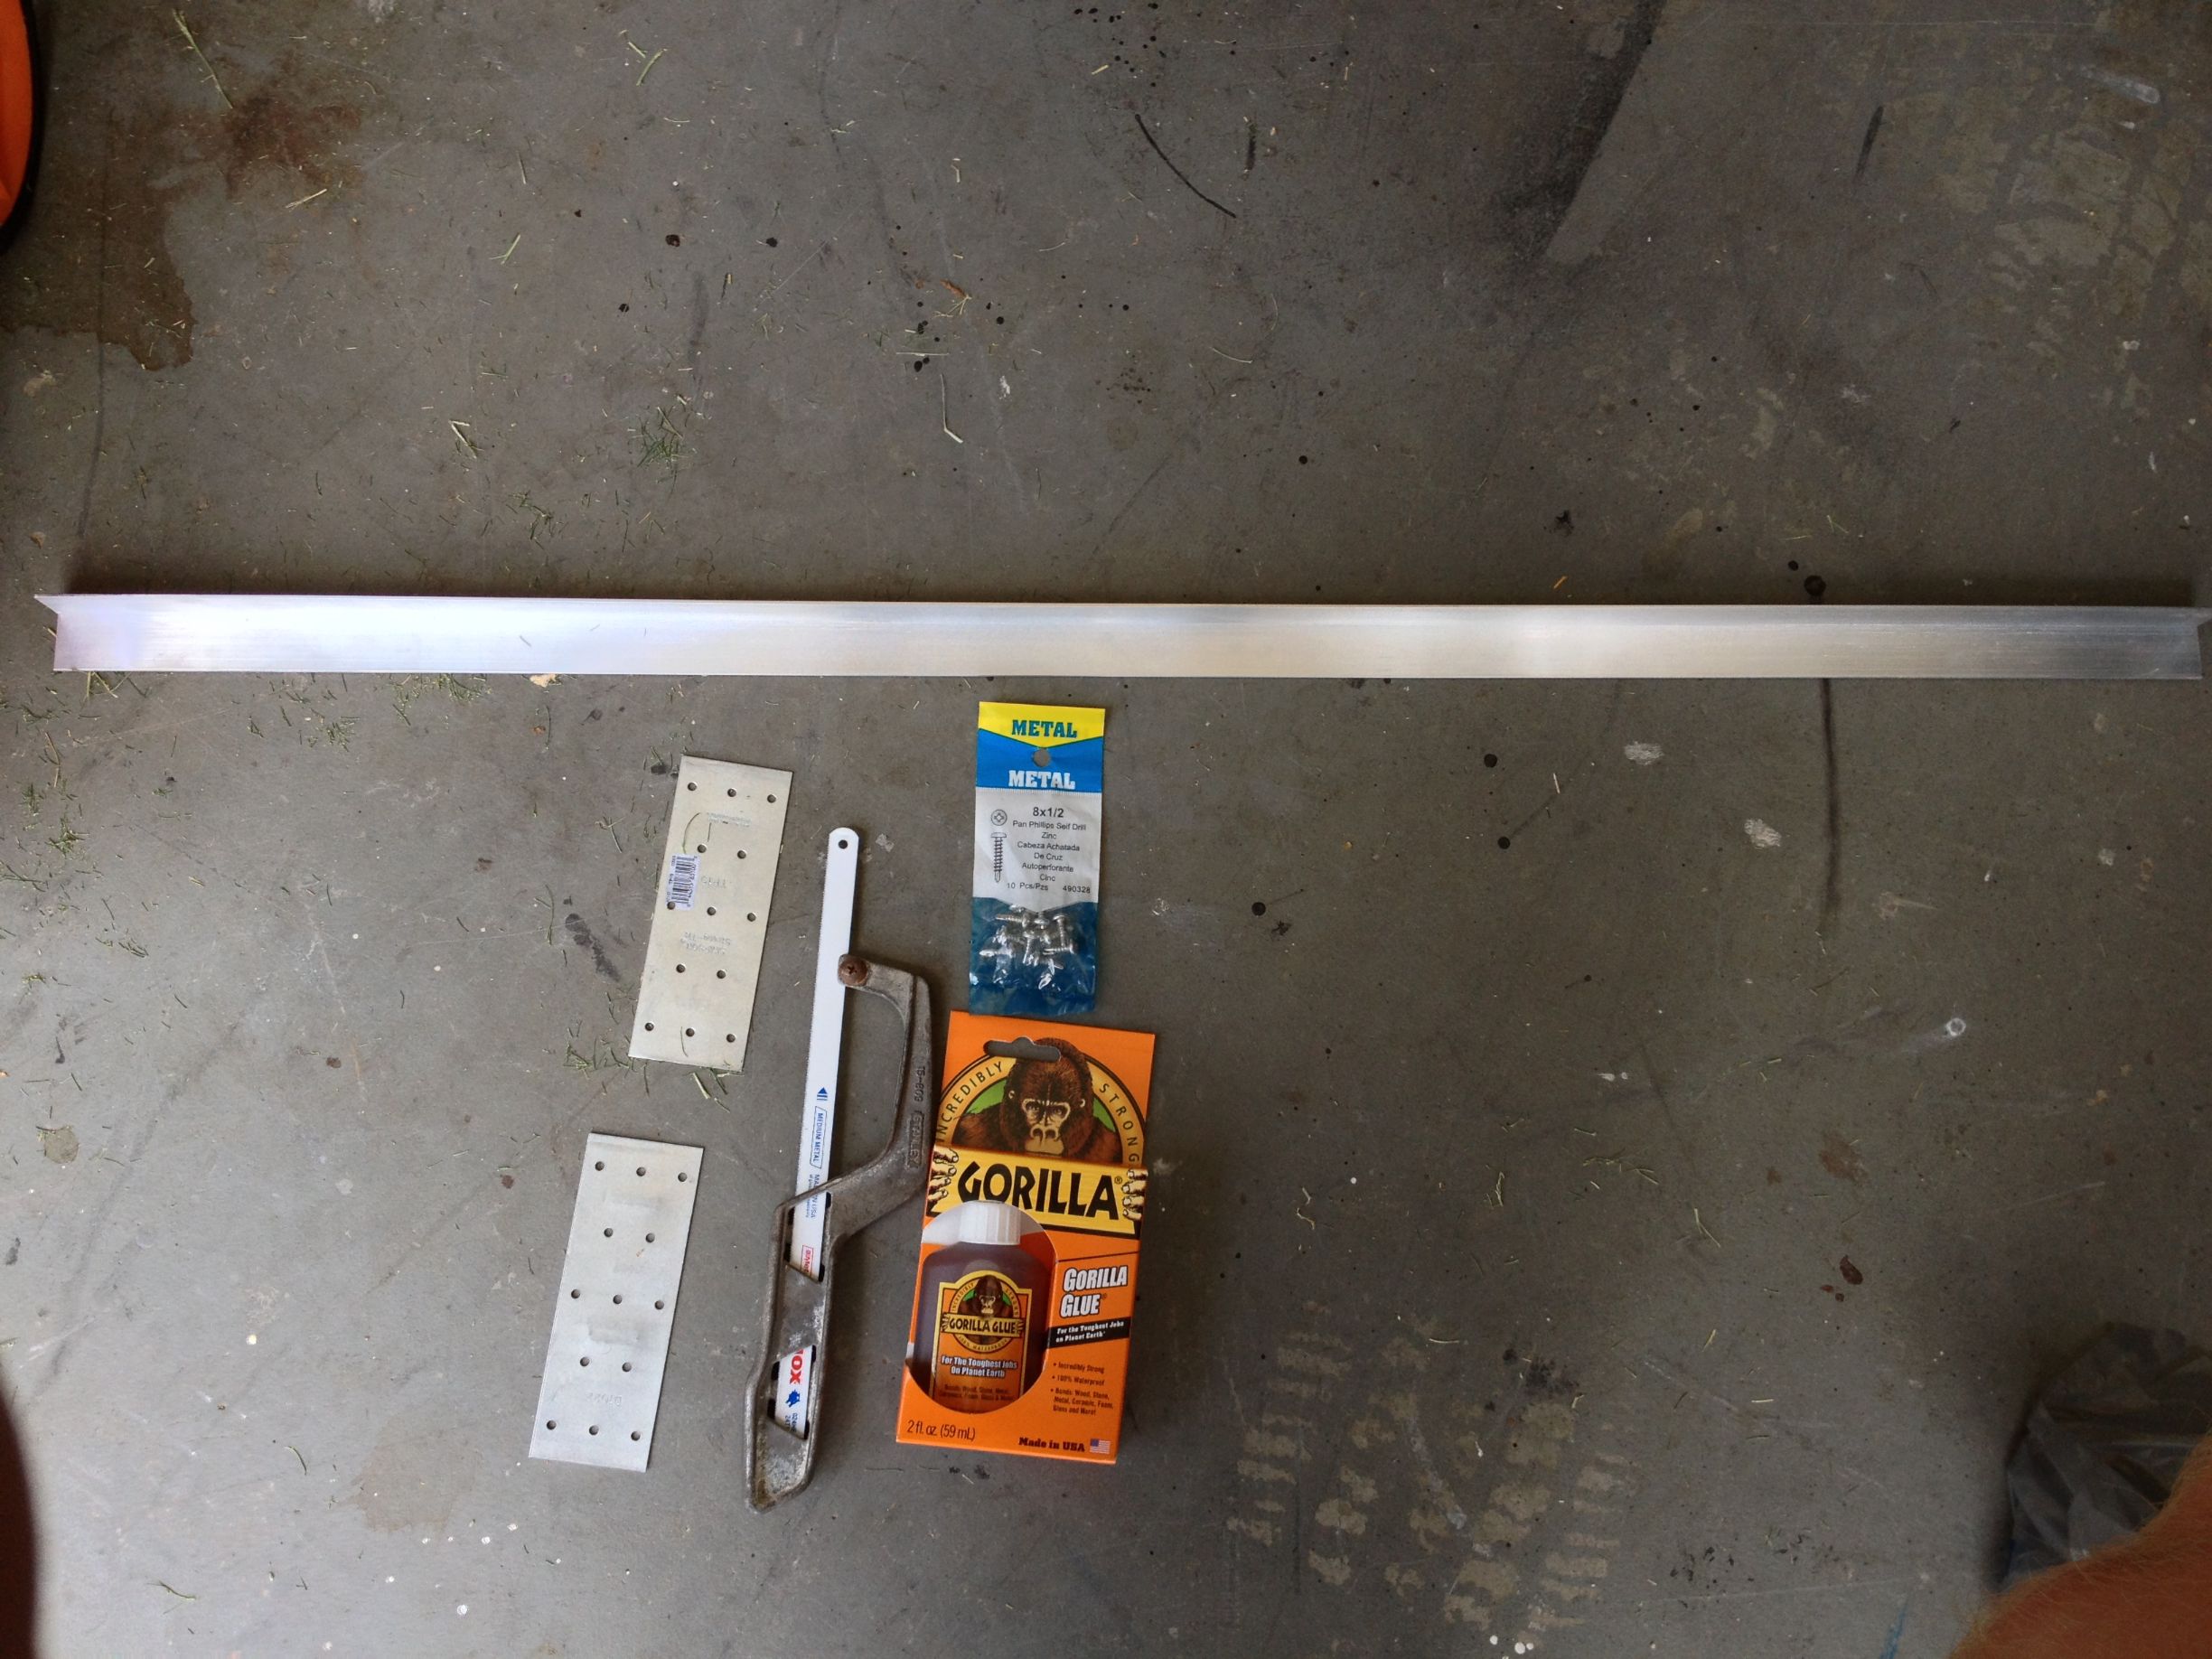
1/16 x 1 inch x 4 ft angle iron
2 tie plate brackets (the flat metal pieces with the holes in them. Same aisle as the angle iron)
Hacksaw
3 half inch self tapping screws
Gorilla Glue
Duct Tape
Drill
Dremel Tool
Paint Scraper
Clamps
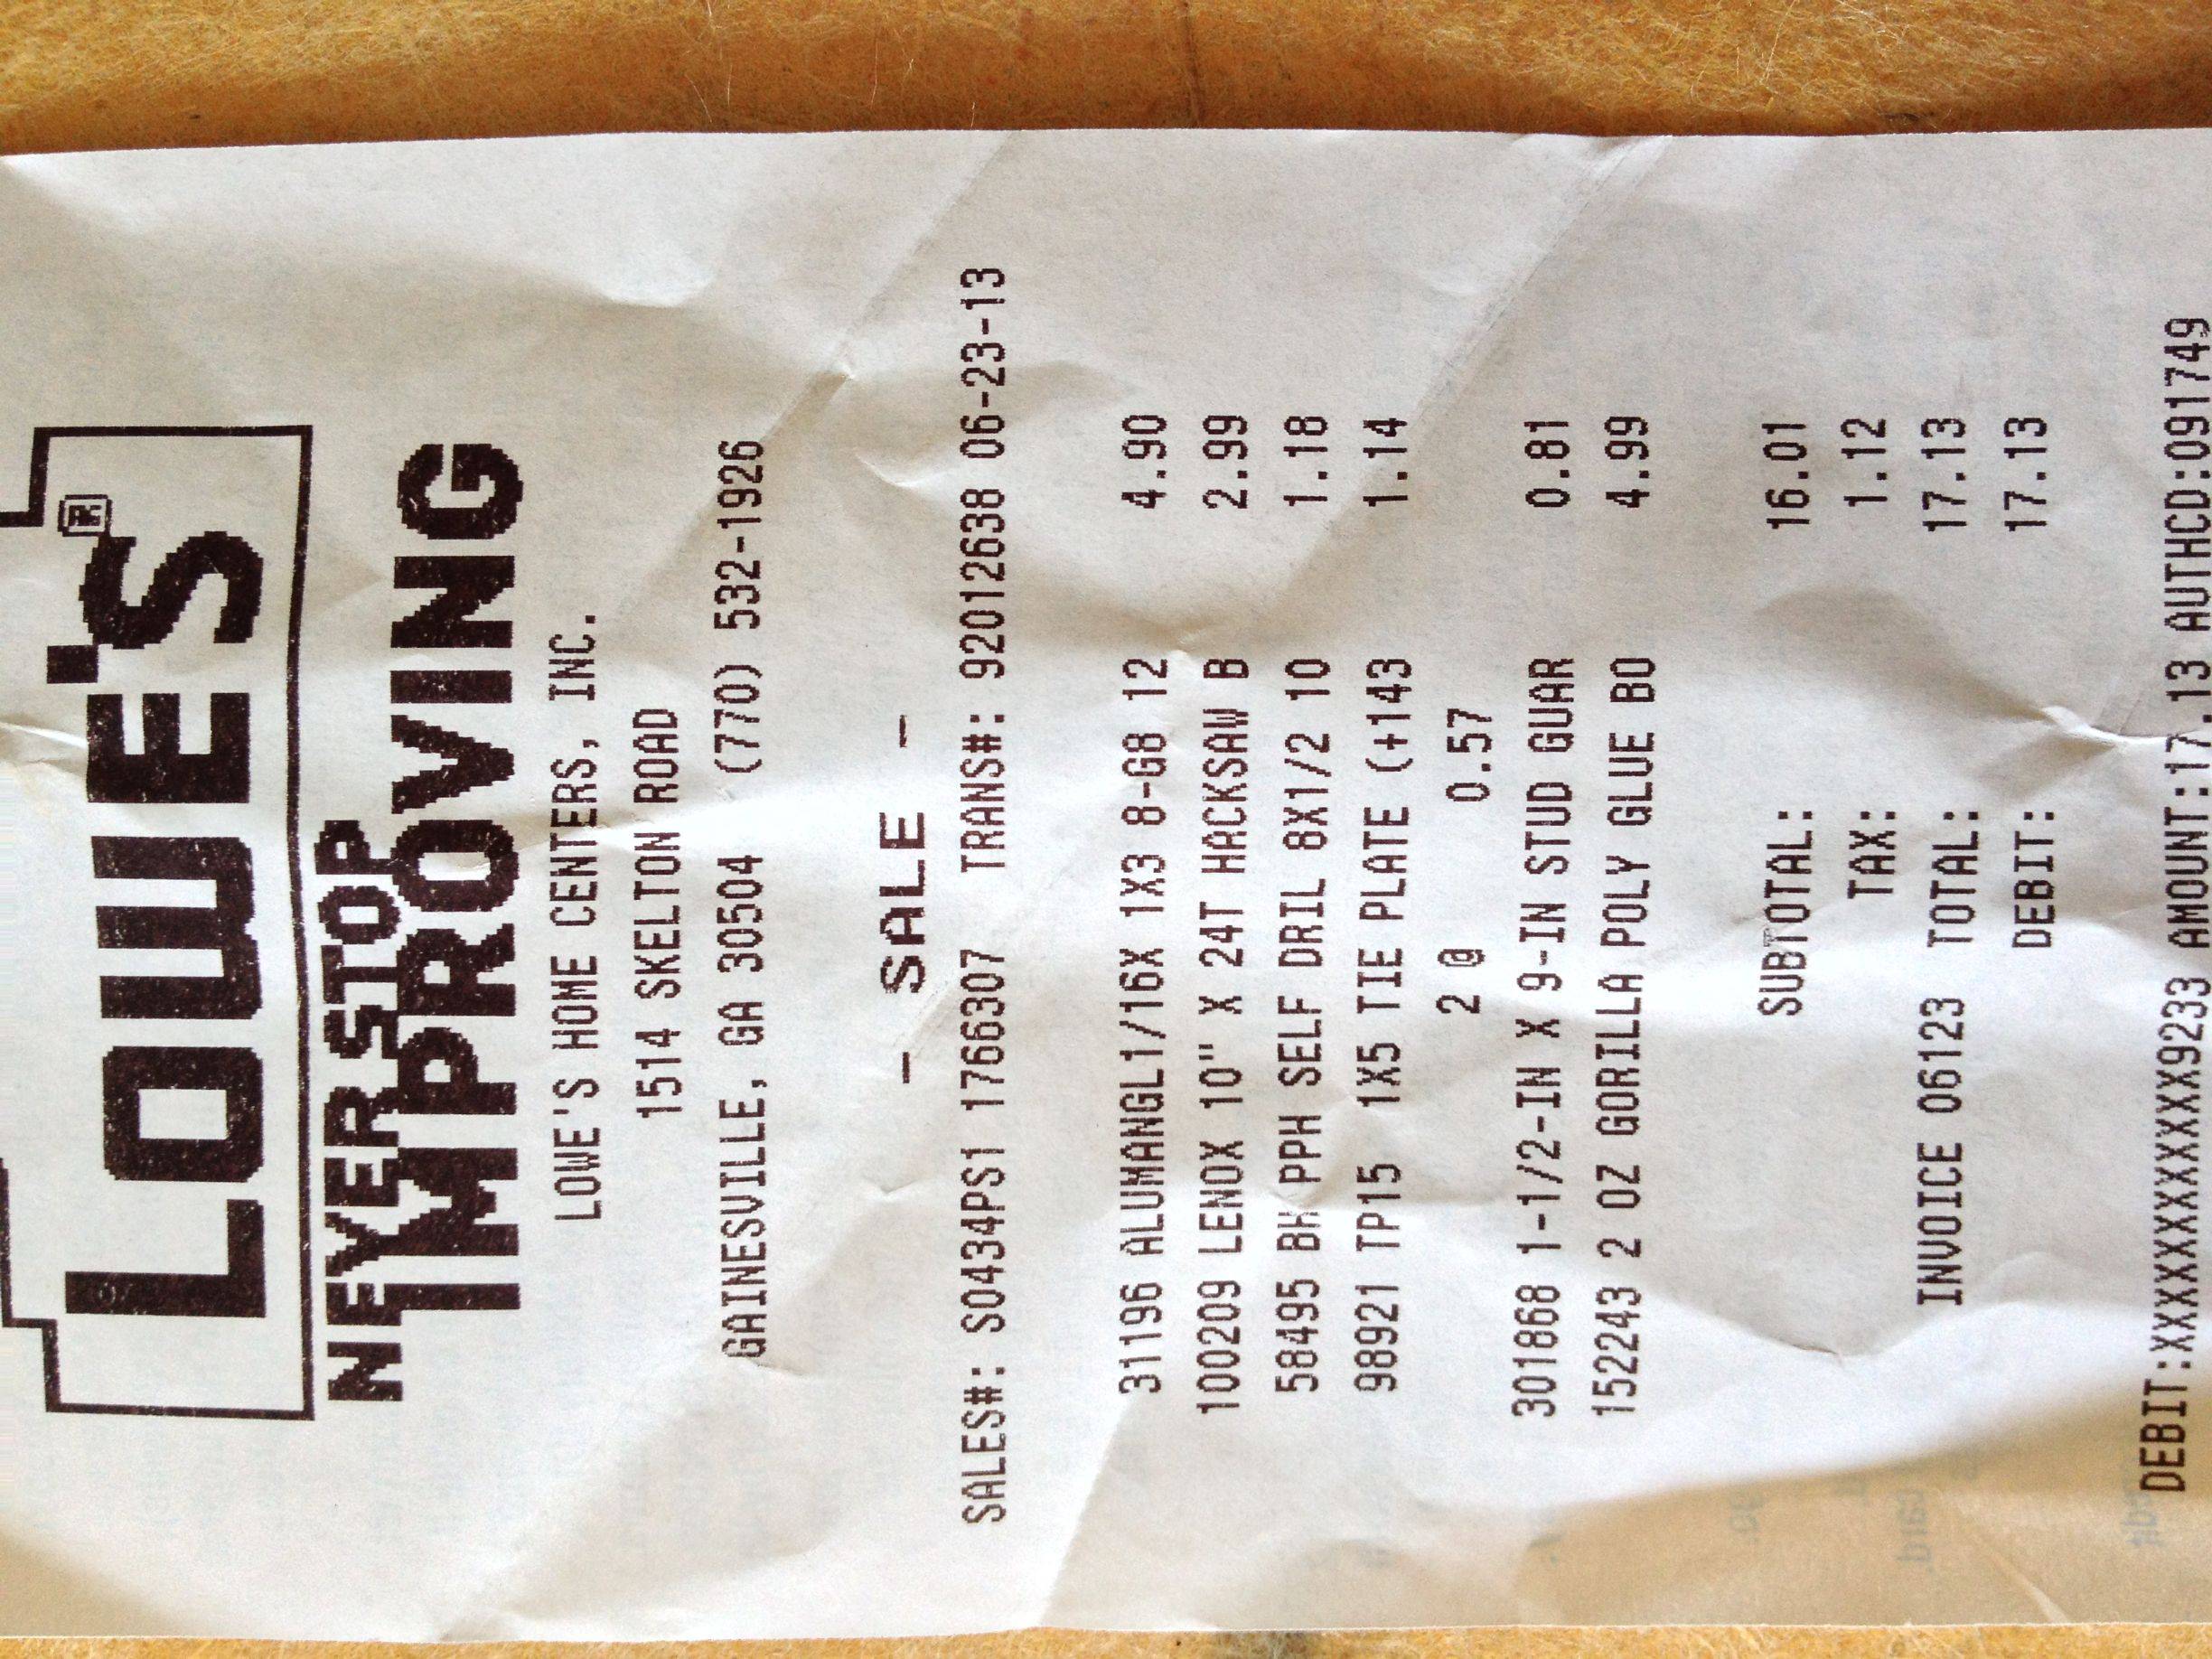
My receipt (not sure why it's sideways):
TO FIX SEAT PANEL CLIPS:
Step 1:
Remove the seat panel entirely. Do this by slowly but sternly pulling outward on the top of the seat panel. The clips come straight out, not down or up. Straight out. I ended up sliding a flat head screw driver in and twisting it to get the clips to pop out. Two of the clips ended up coming unglued (not a big deal).
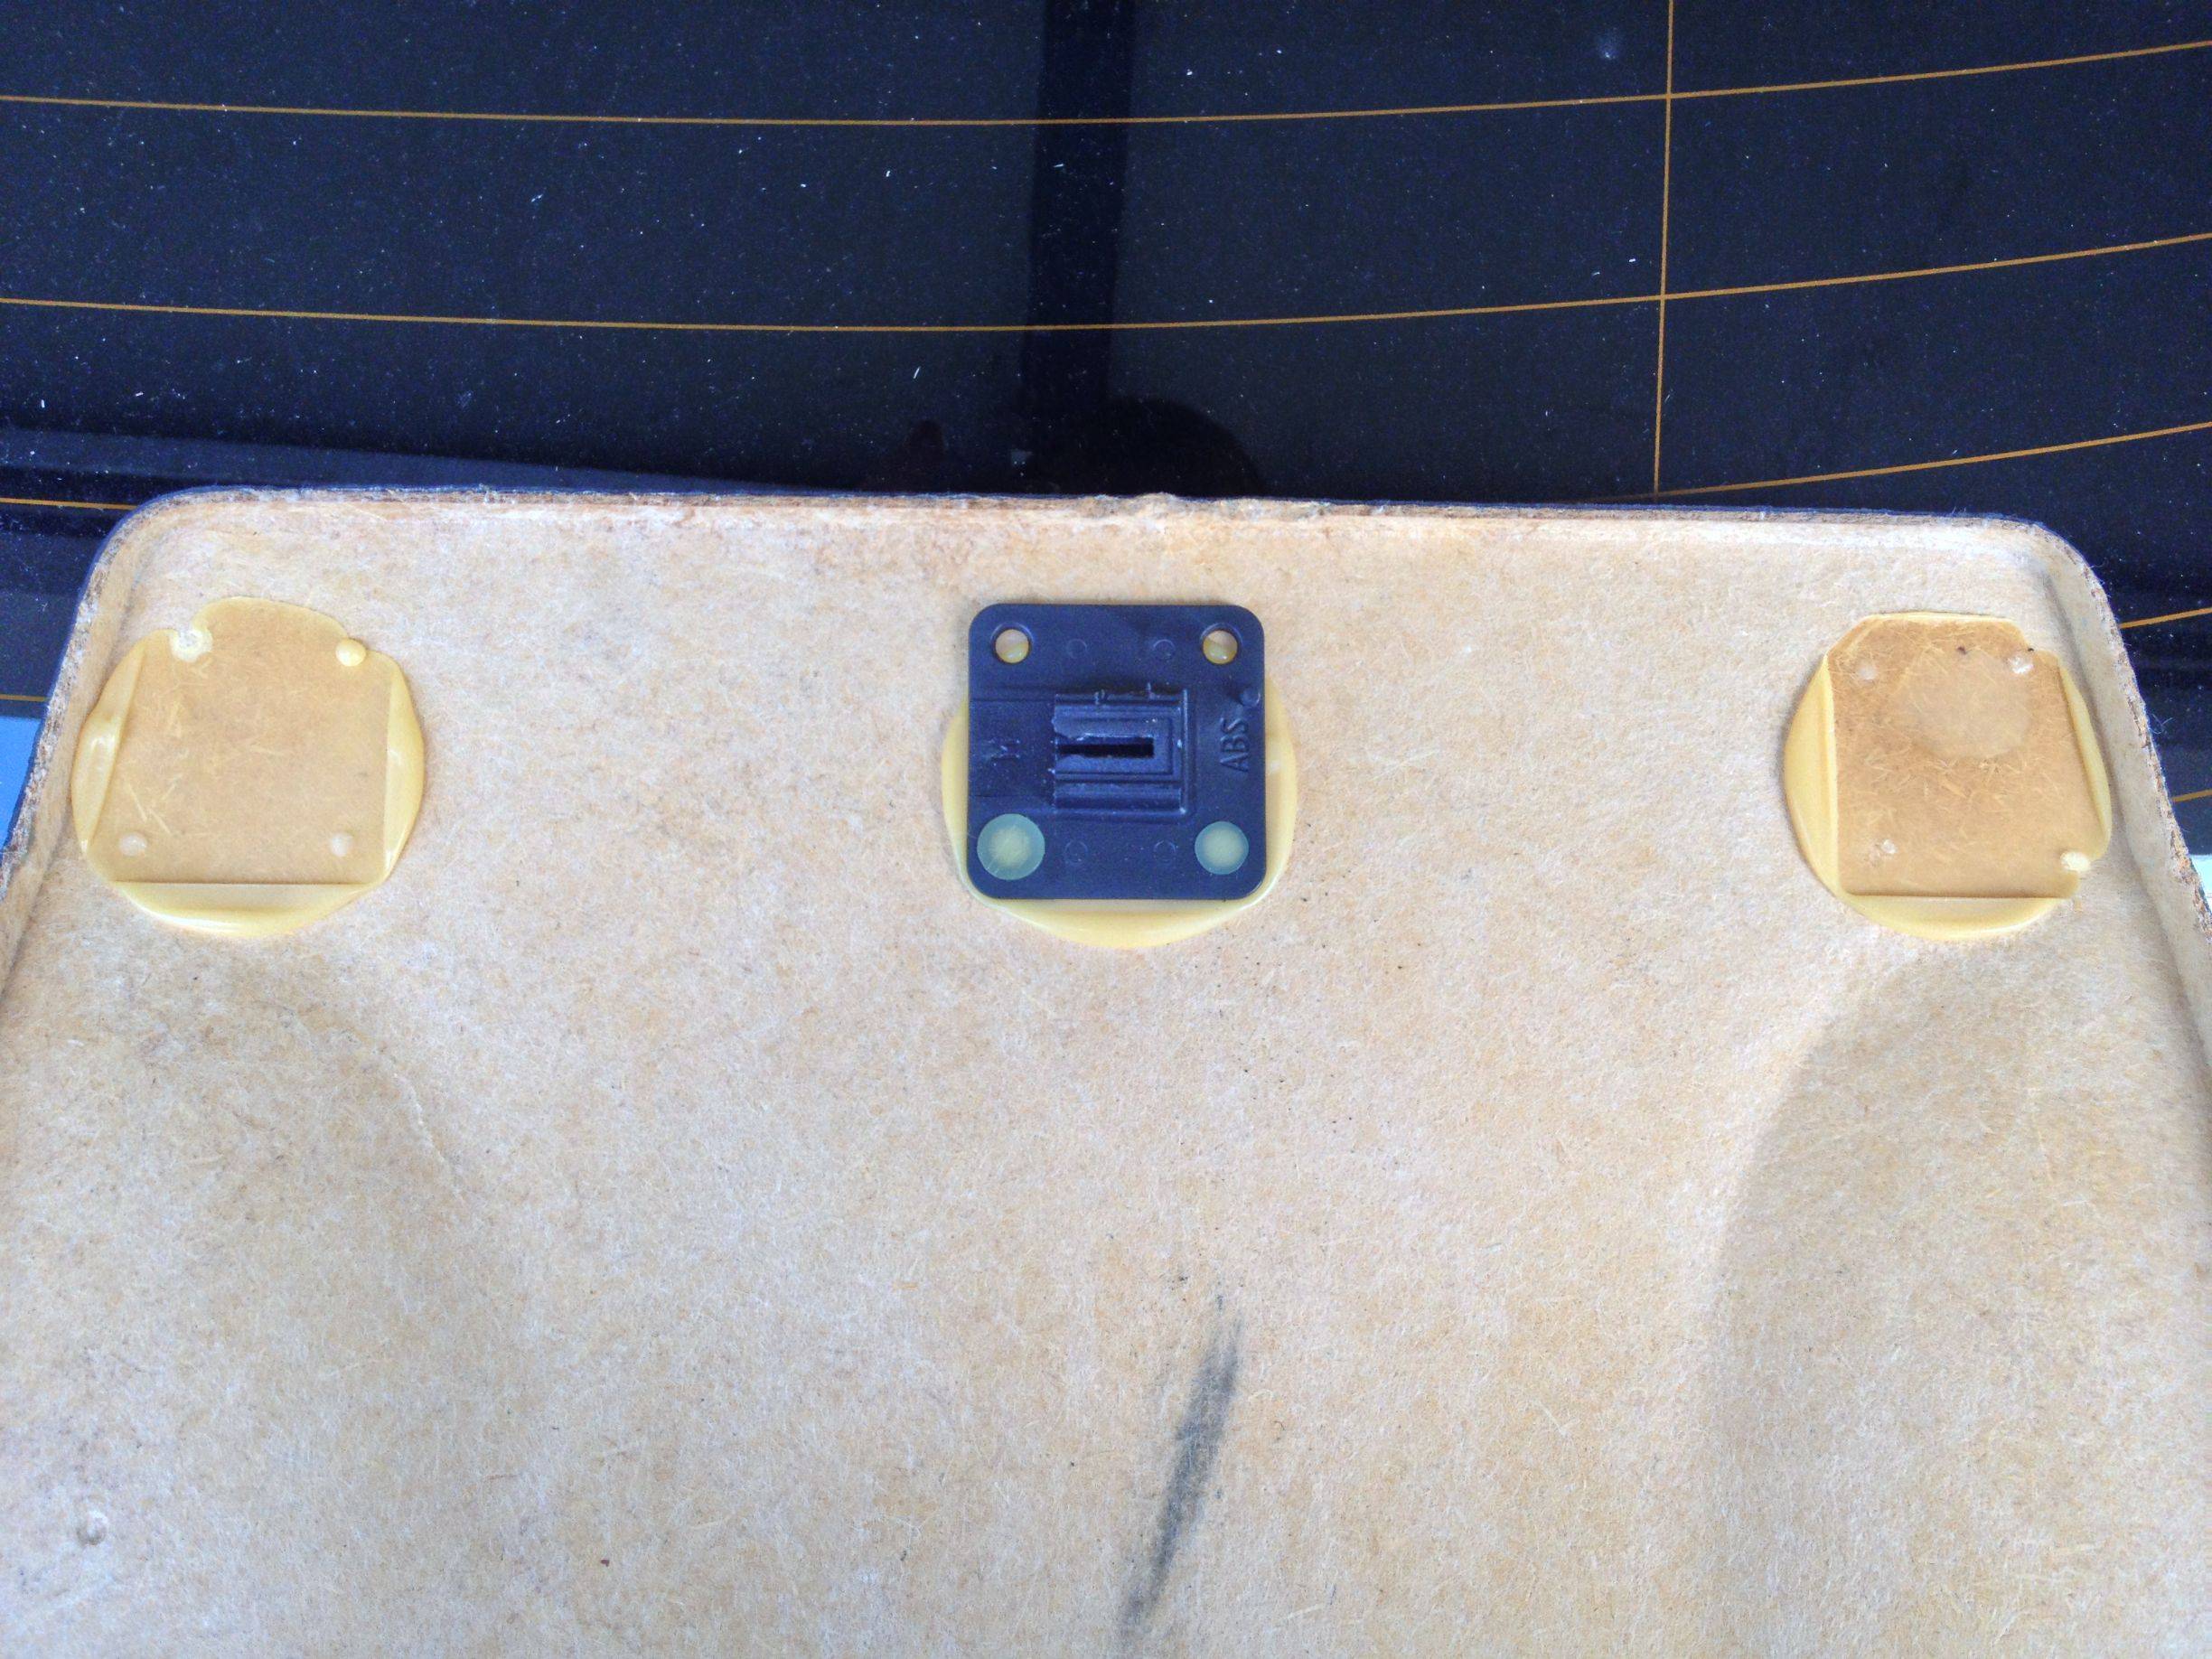
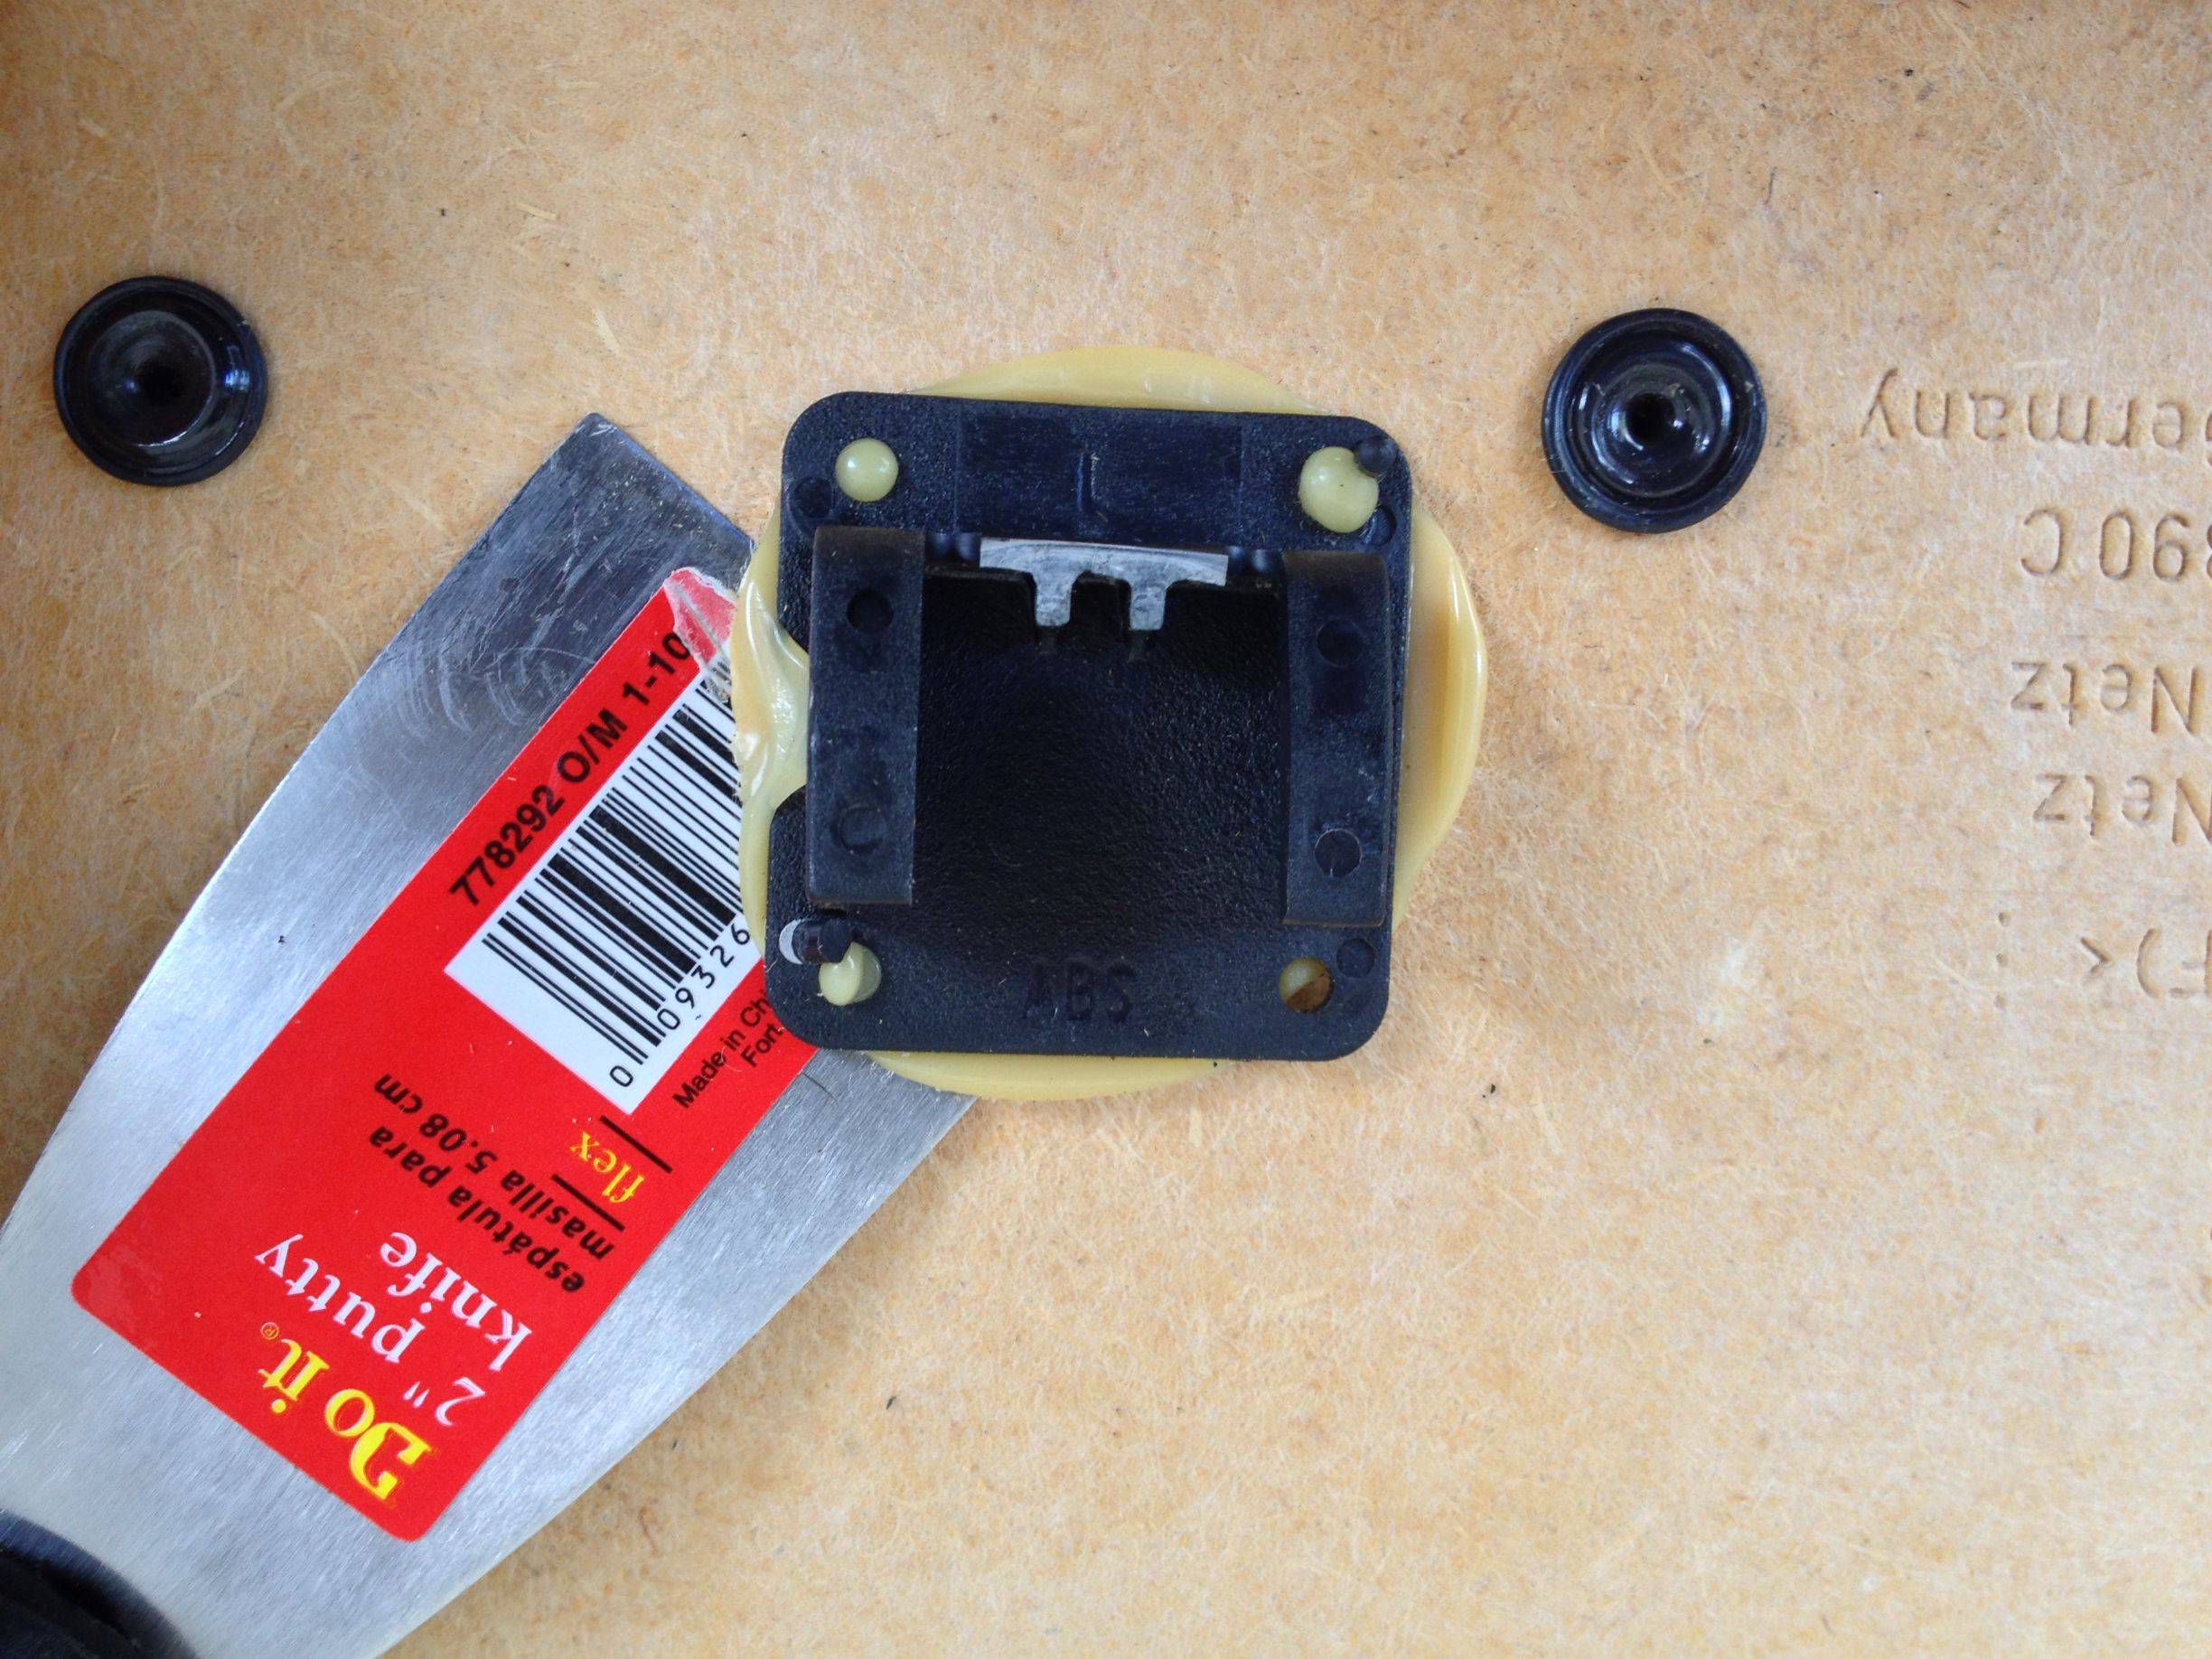
^ This is what the top part looked like after the panel came off. The middle clip is the only one that stayed glued.
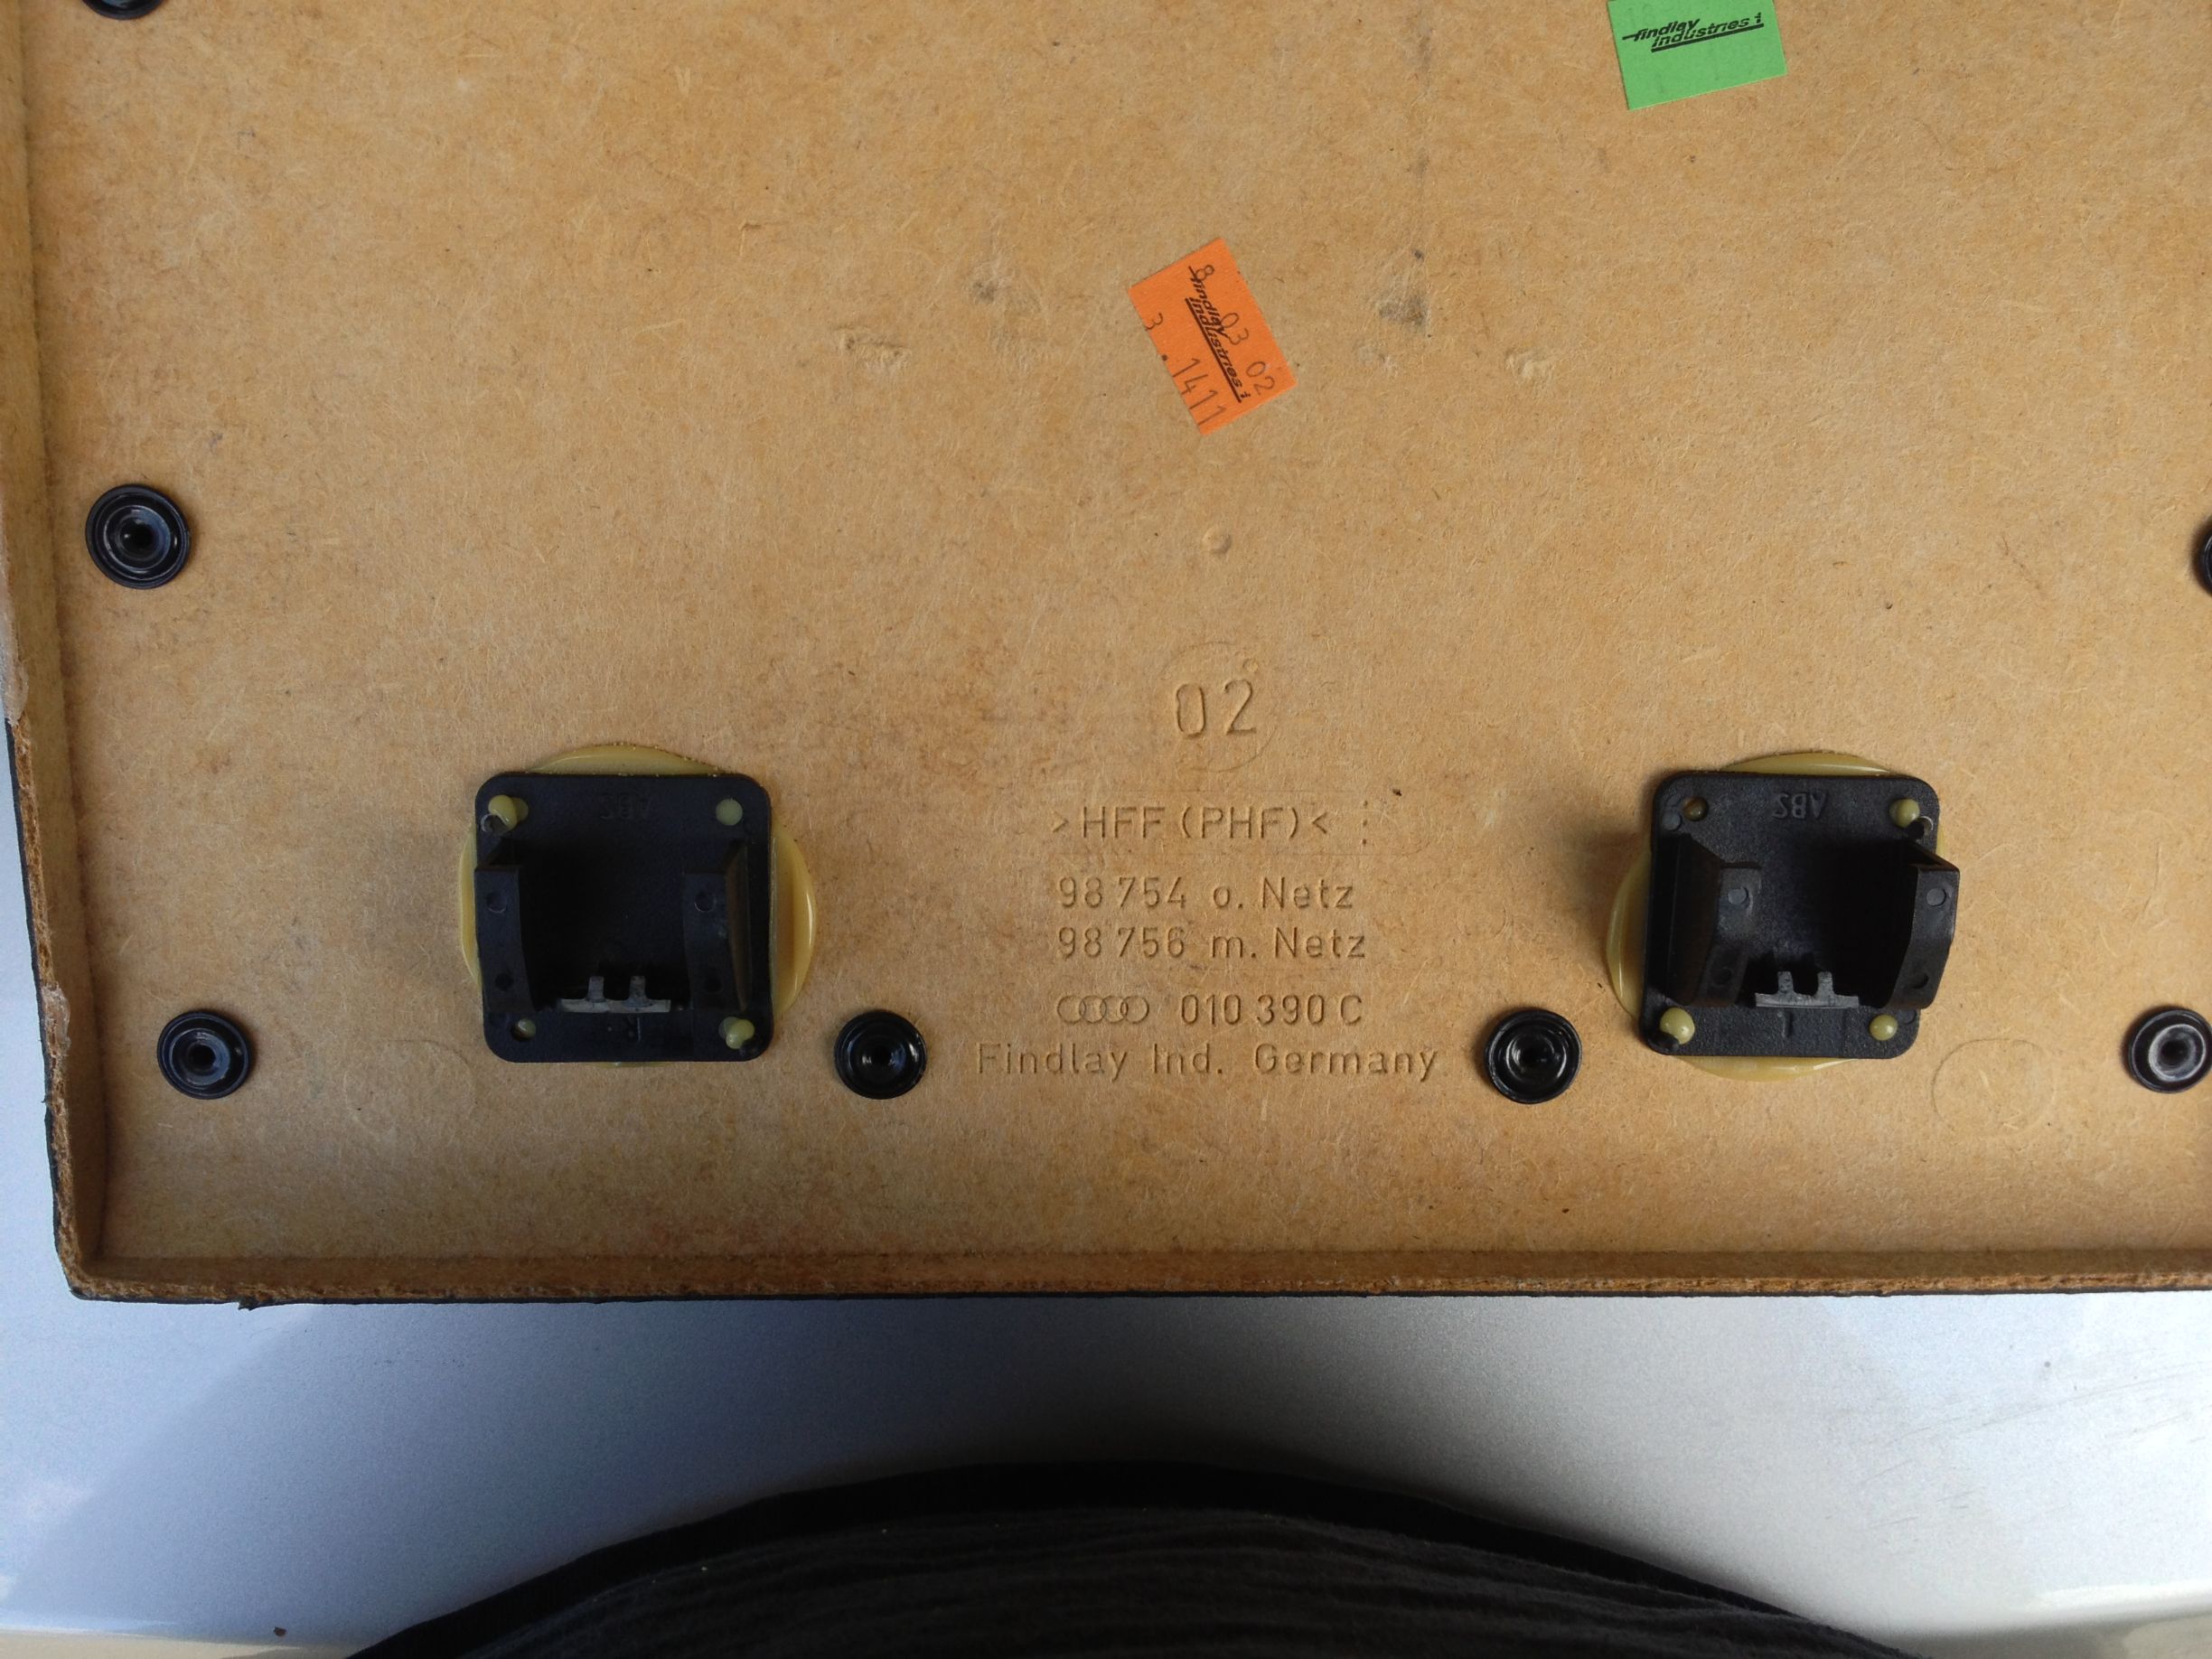
^ This is what the bottom clips that broke off look like.
Take the paint scraper and slowly peel off the adhesive under the old clips and any clips that may have come off.
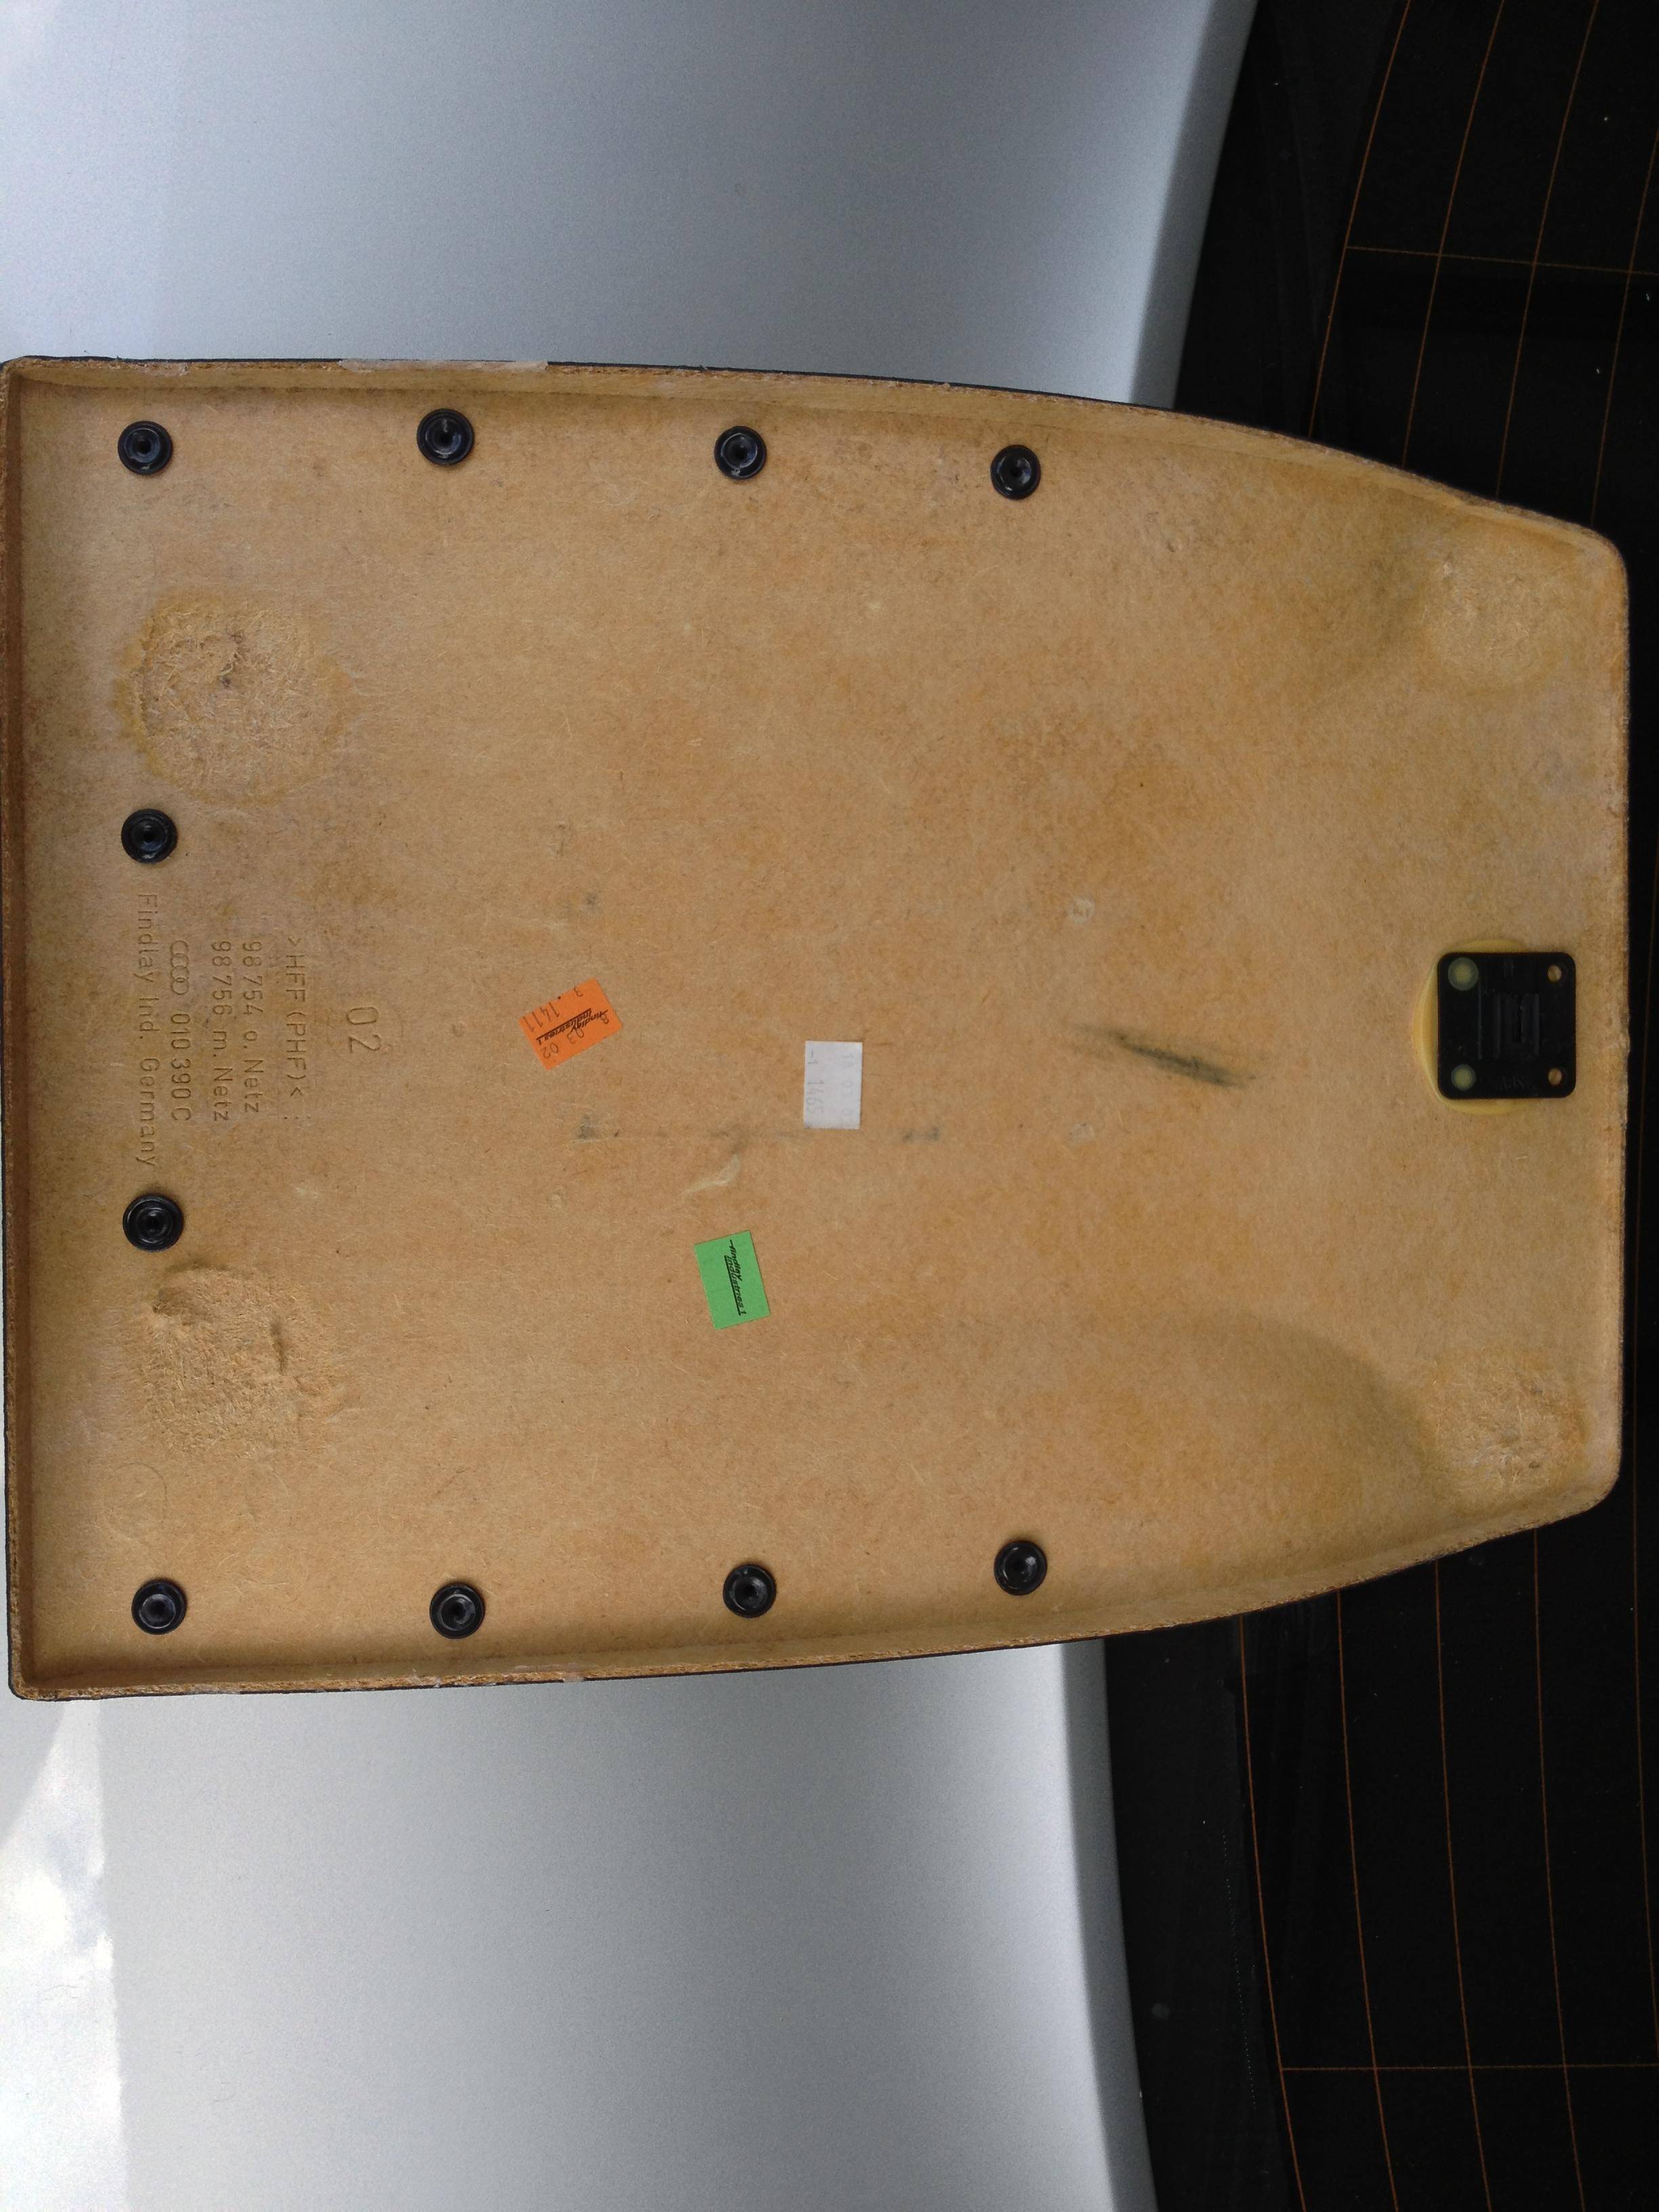
After you finish, the seat panel will look similar to this (give or take clips that may not have come unglued):
Step 2:
Glue the clips that came unglued during removal back in their original position using Gorilla Glue (a generous amount). Clamp them down to ensure a solid adhesion.
Step 3:
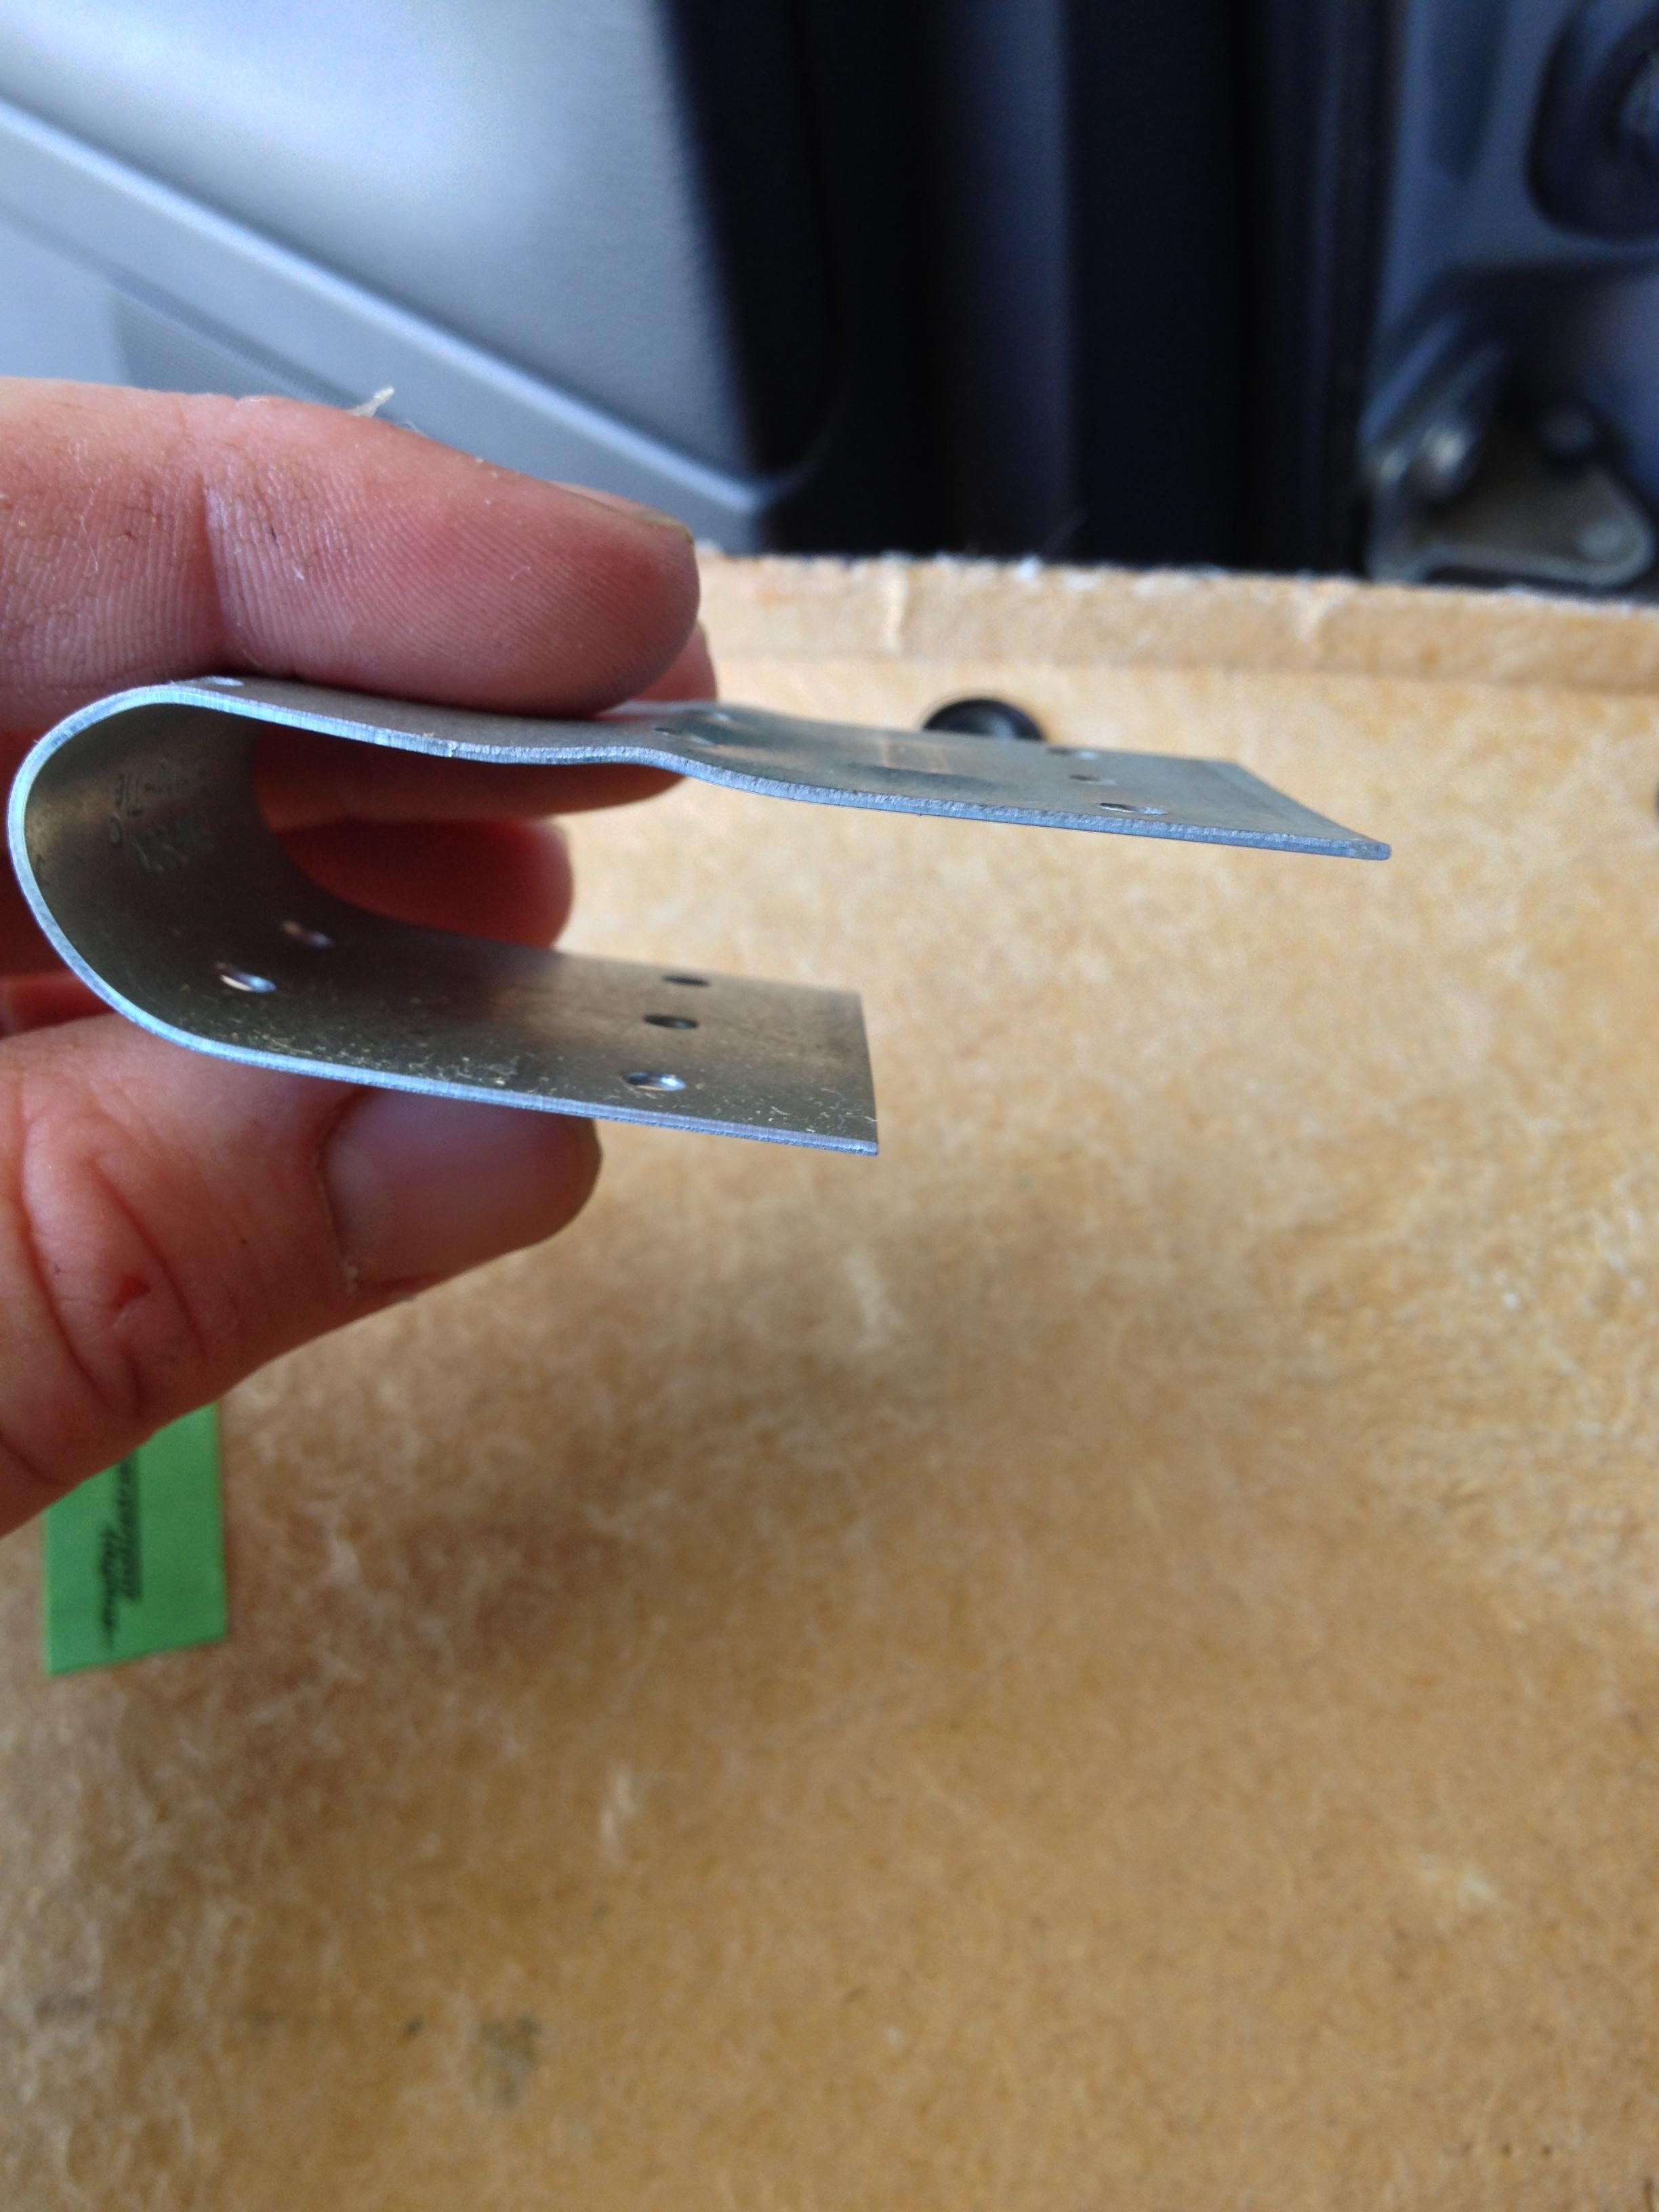
Bend the tie plate brackets so that they can slide over where the original clips were before they broke. It should look like this:
Side view:
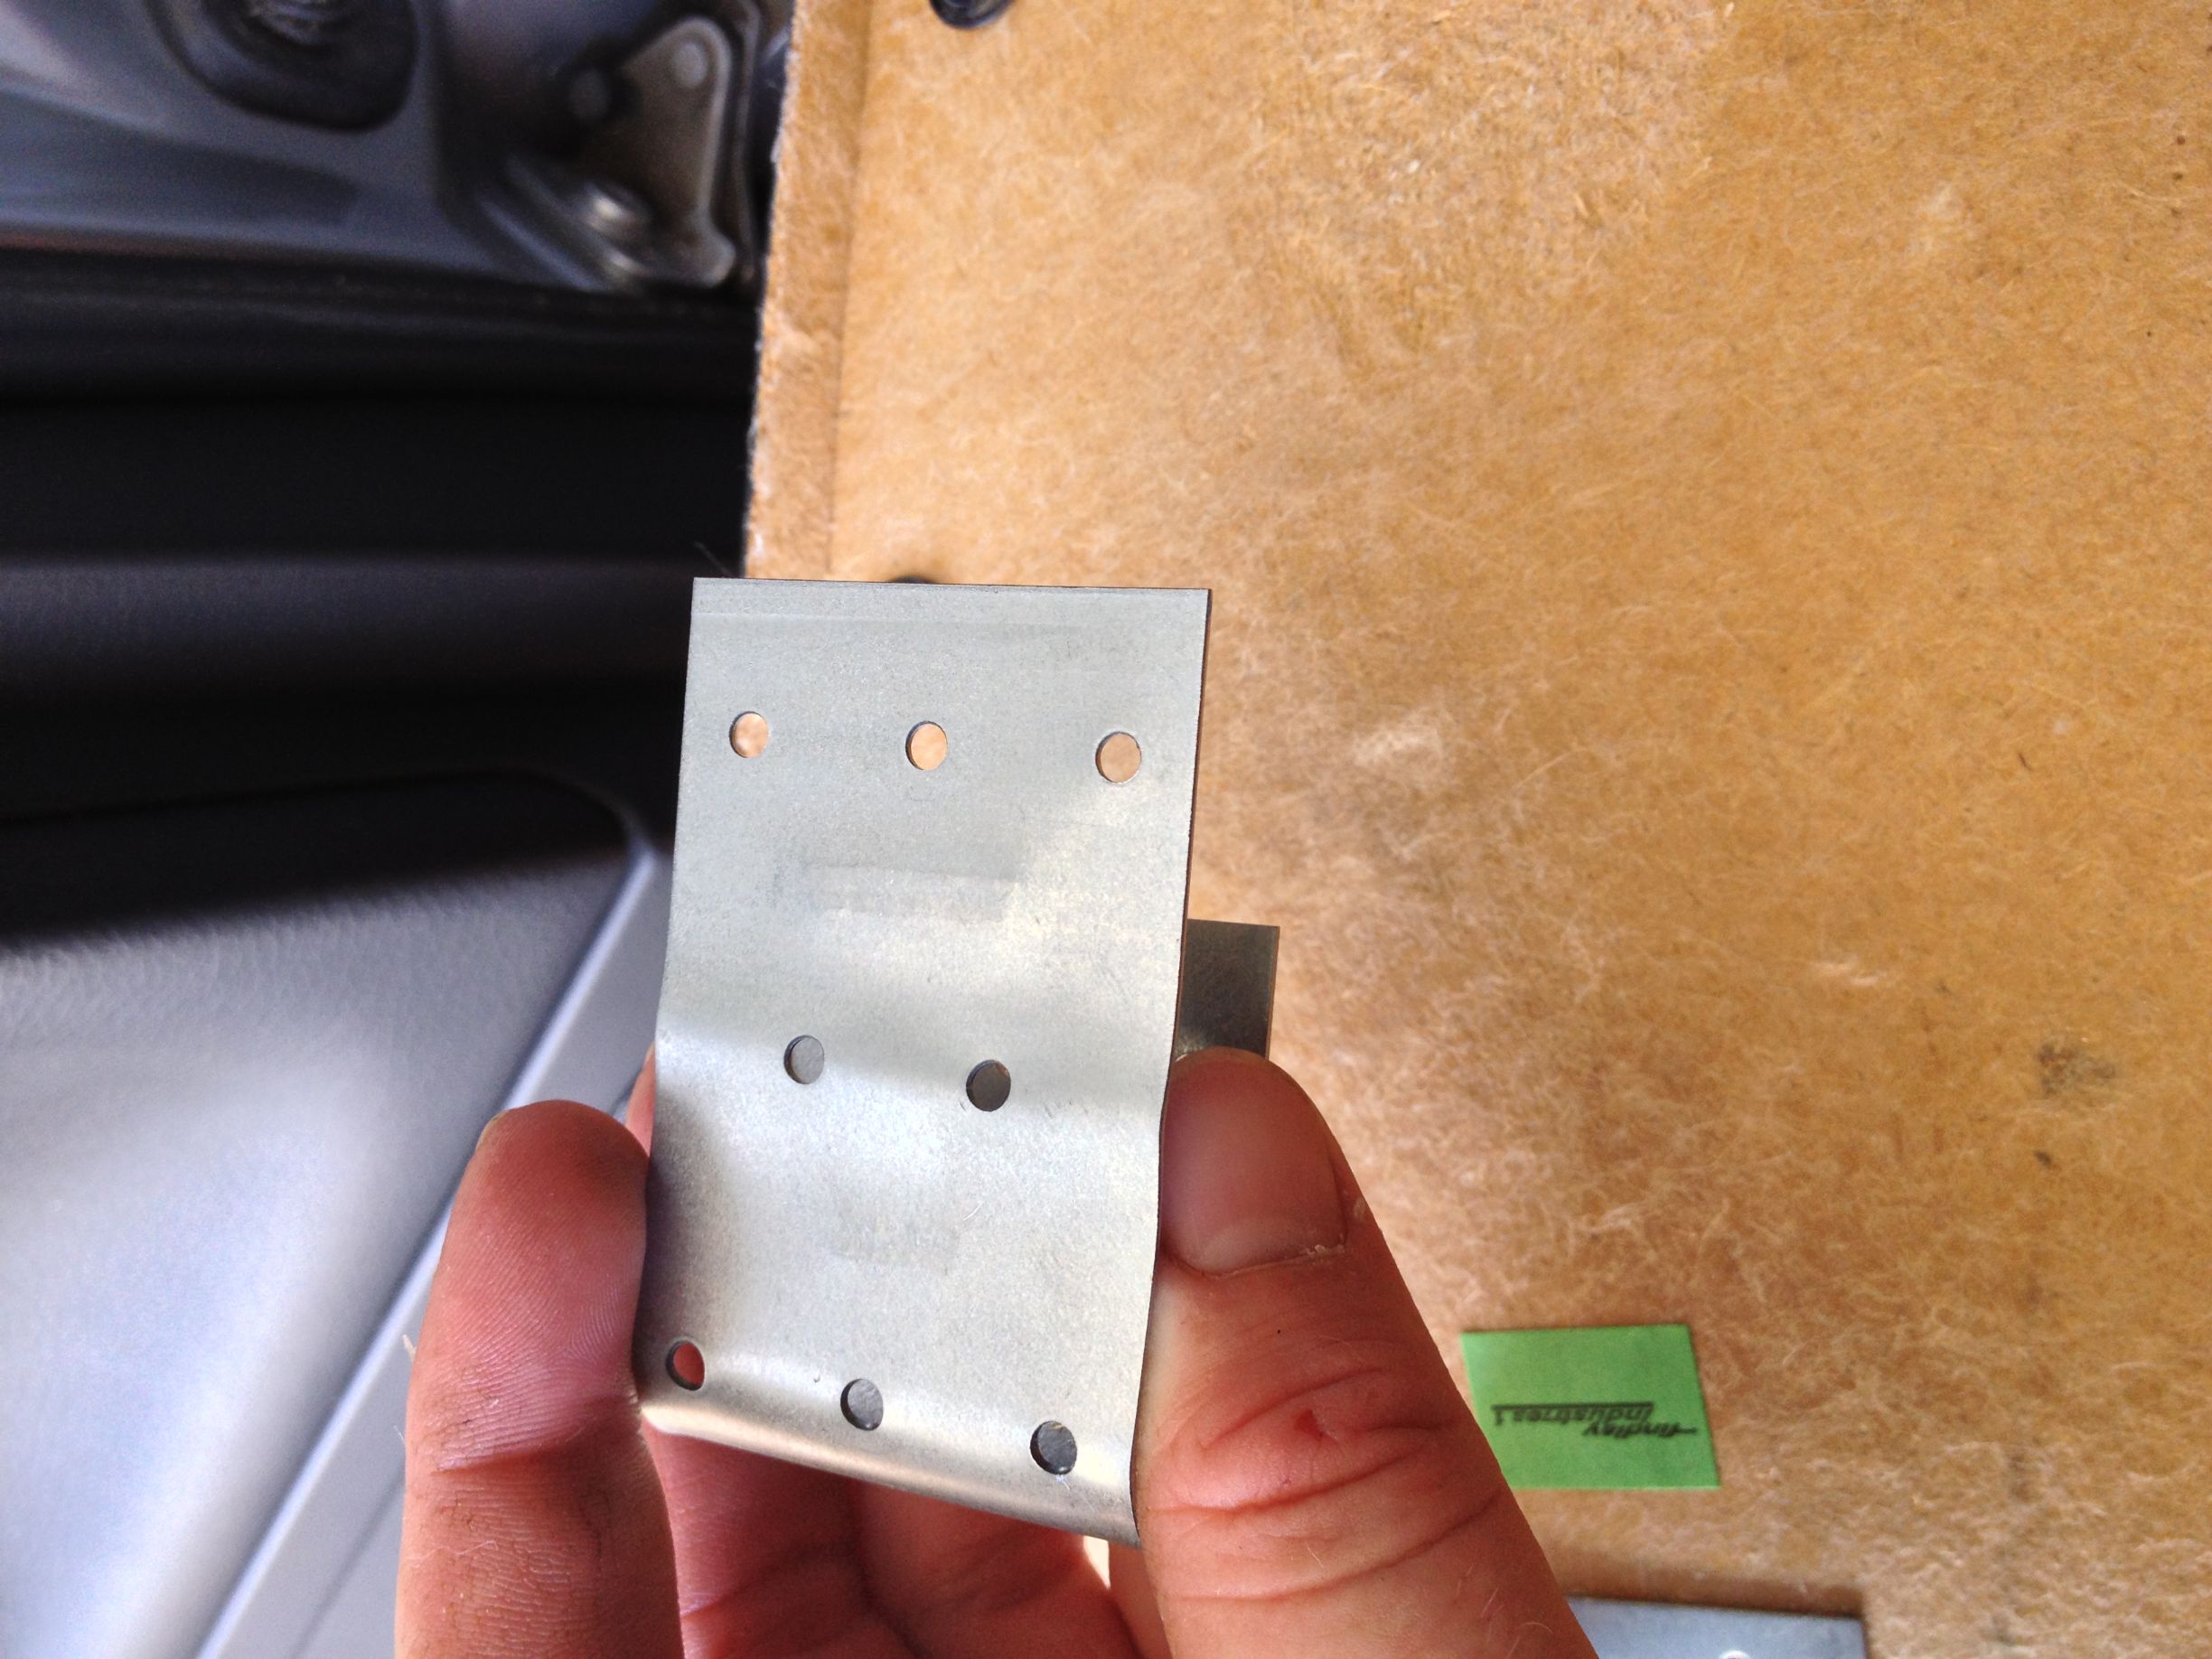
Top view:
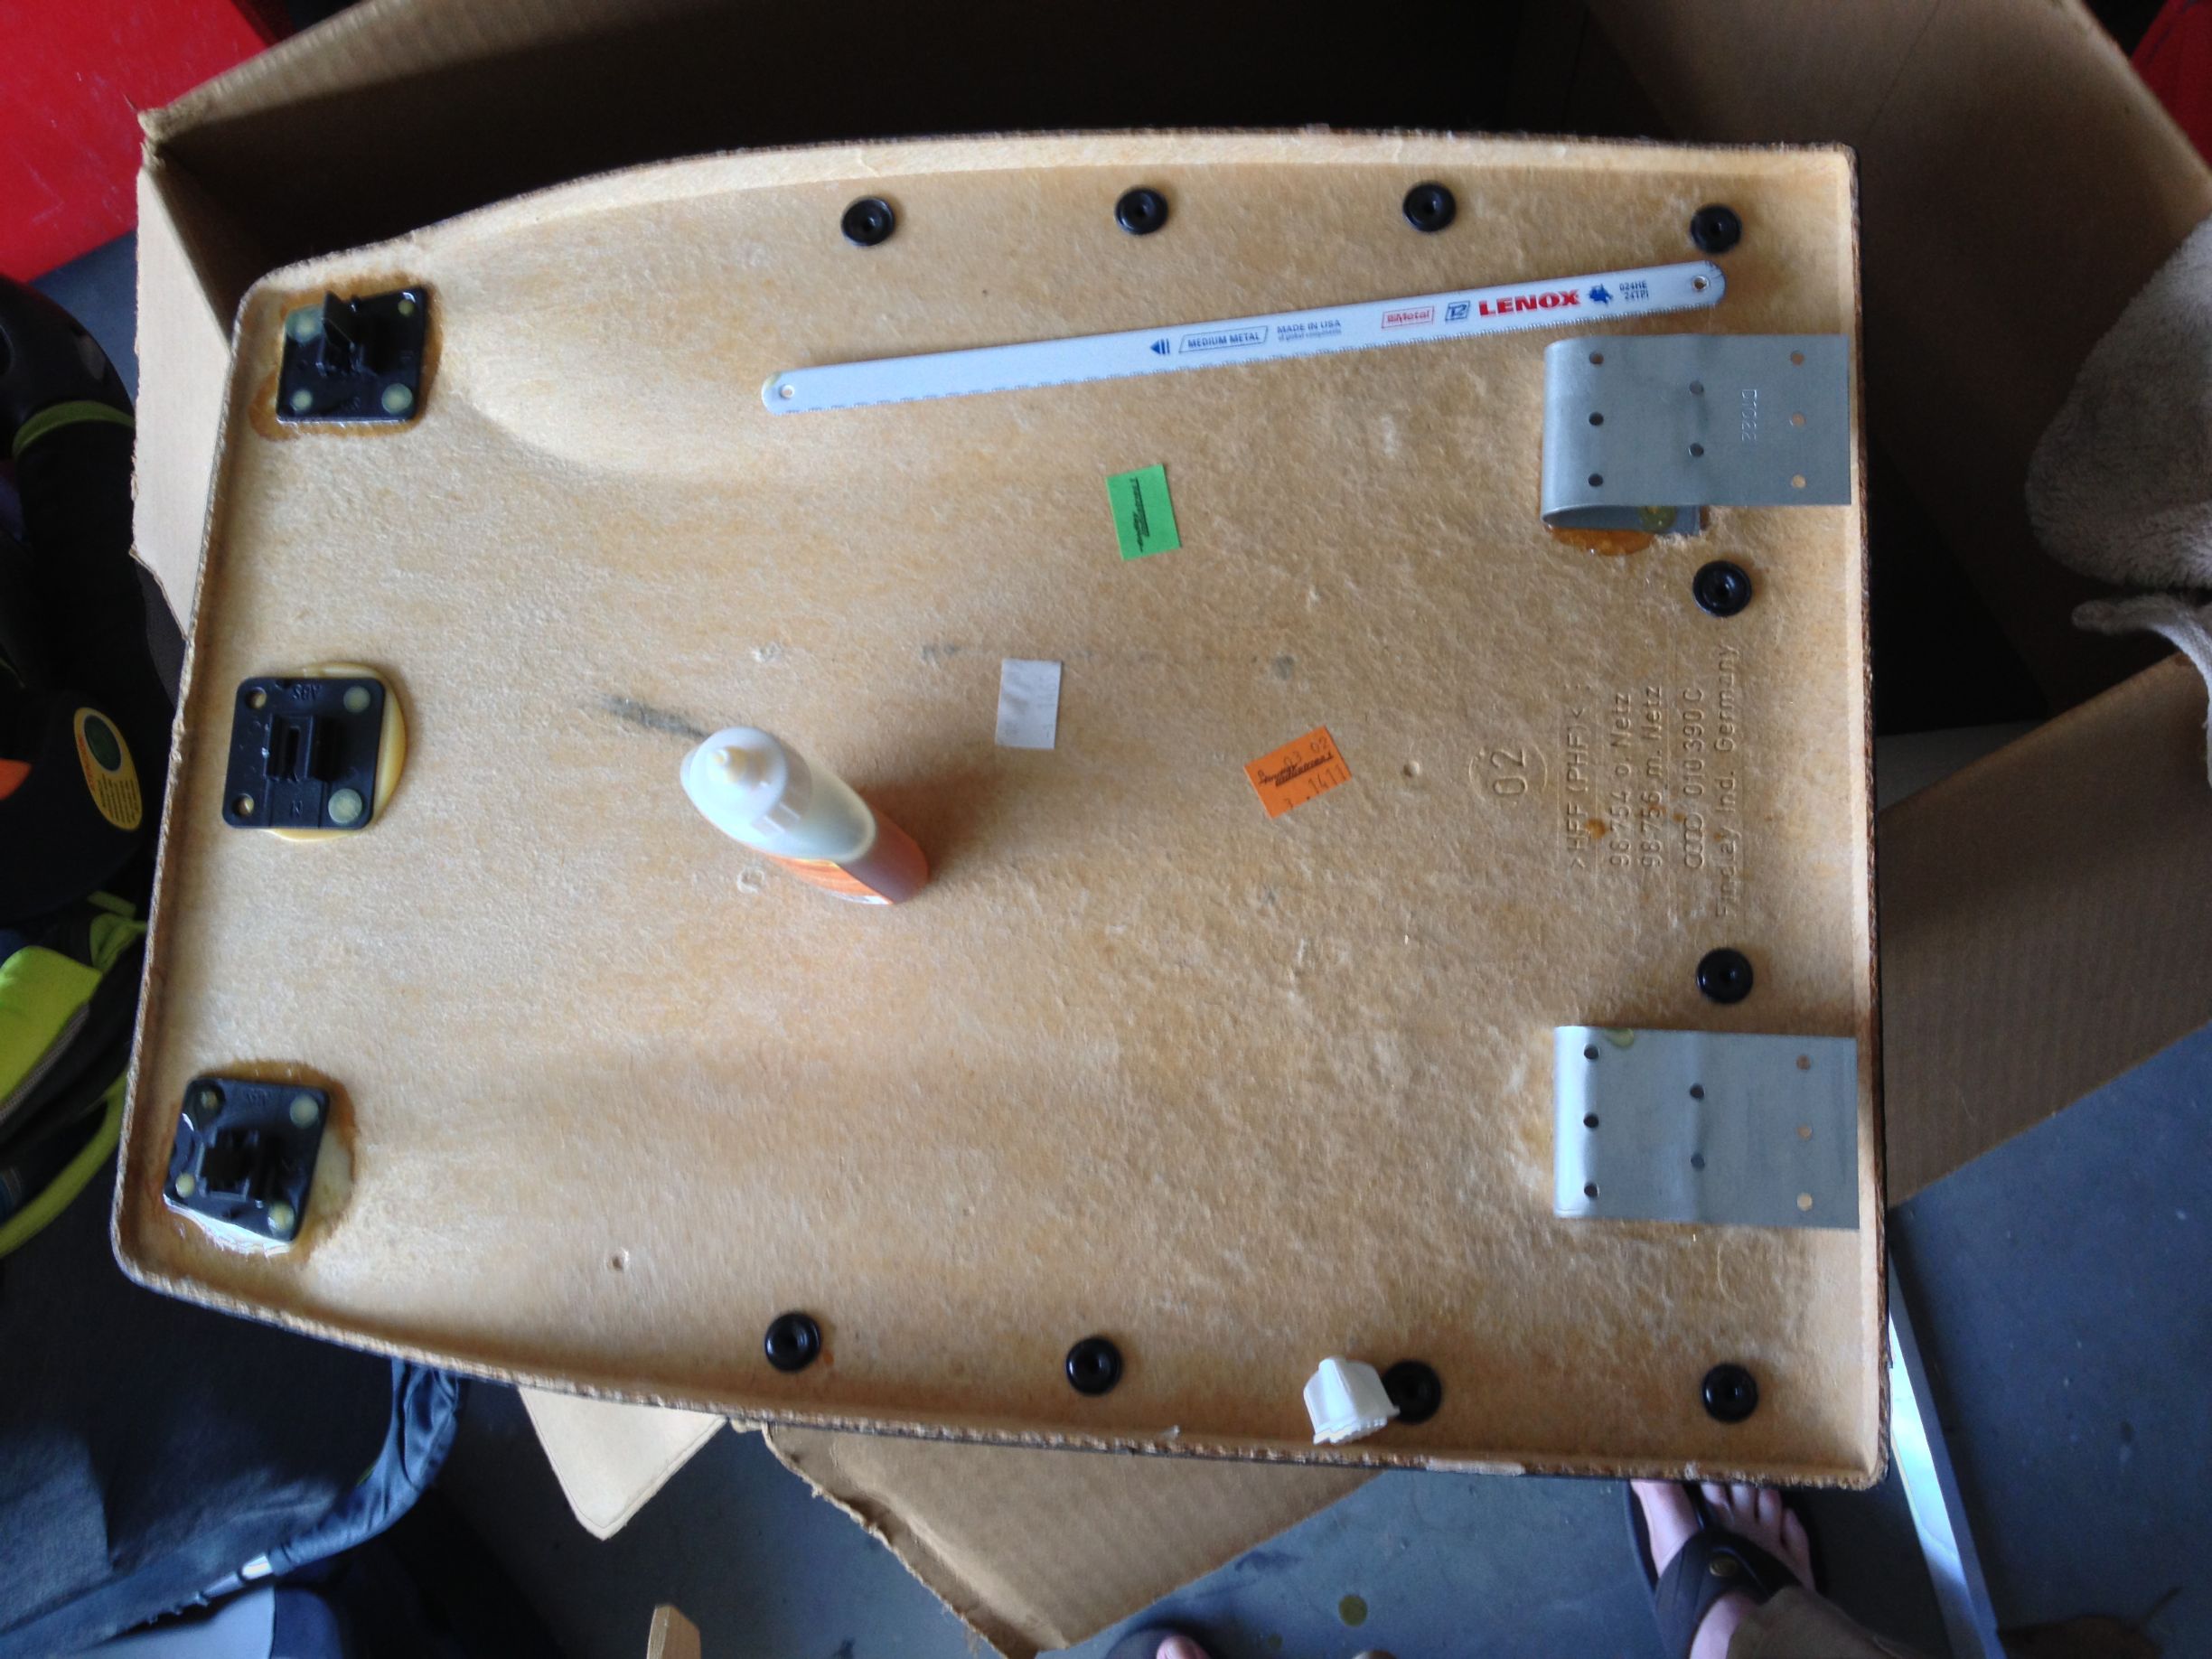
(Using gorilla glue) Glue the short side of the tie plate brackets in the place where the original bottom brackets where glued. The open side should aim toward the bottom. Clamp these brackets so they don't move while they're drying. This is what it should look like:
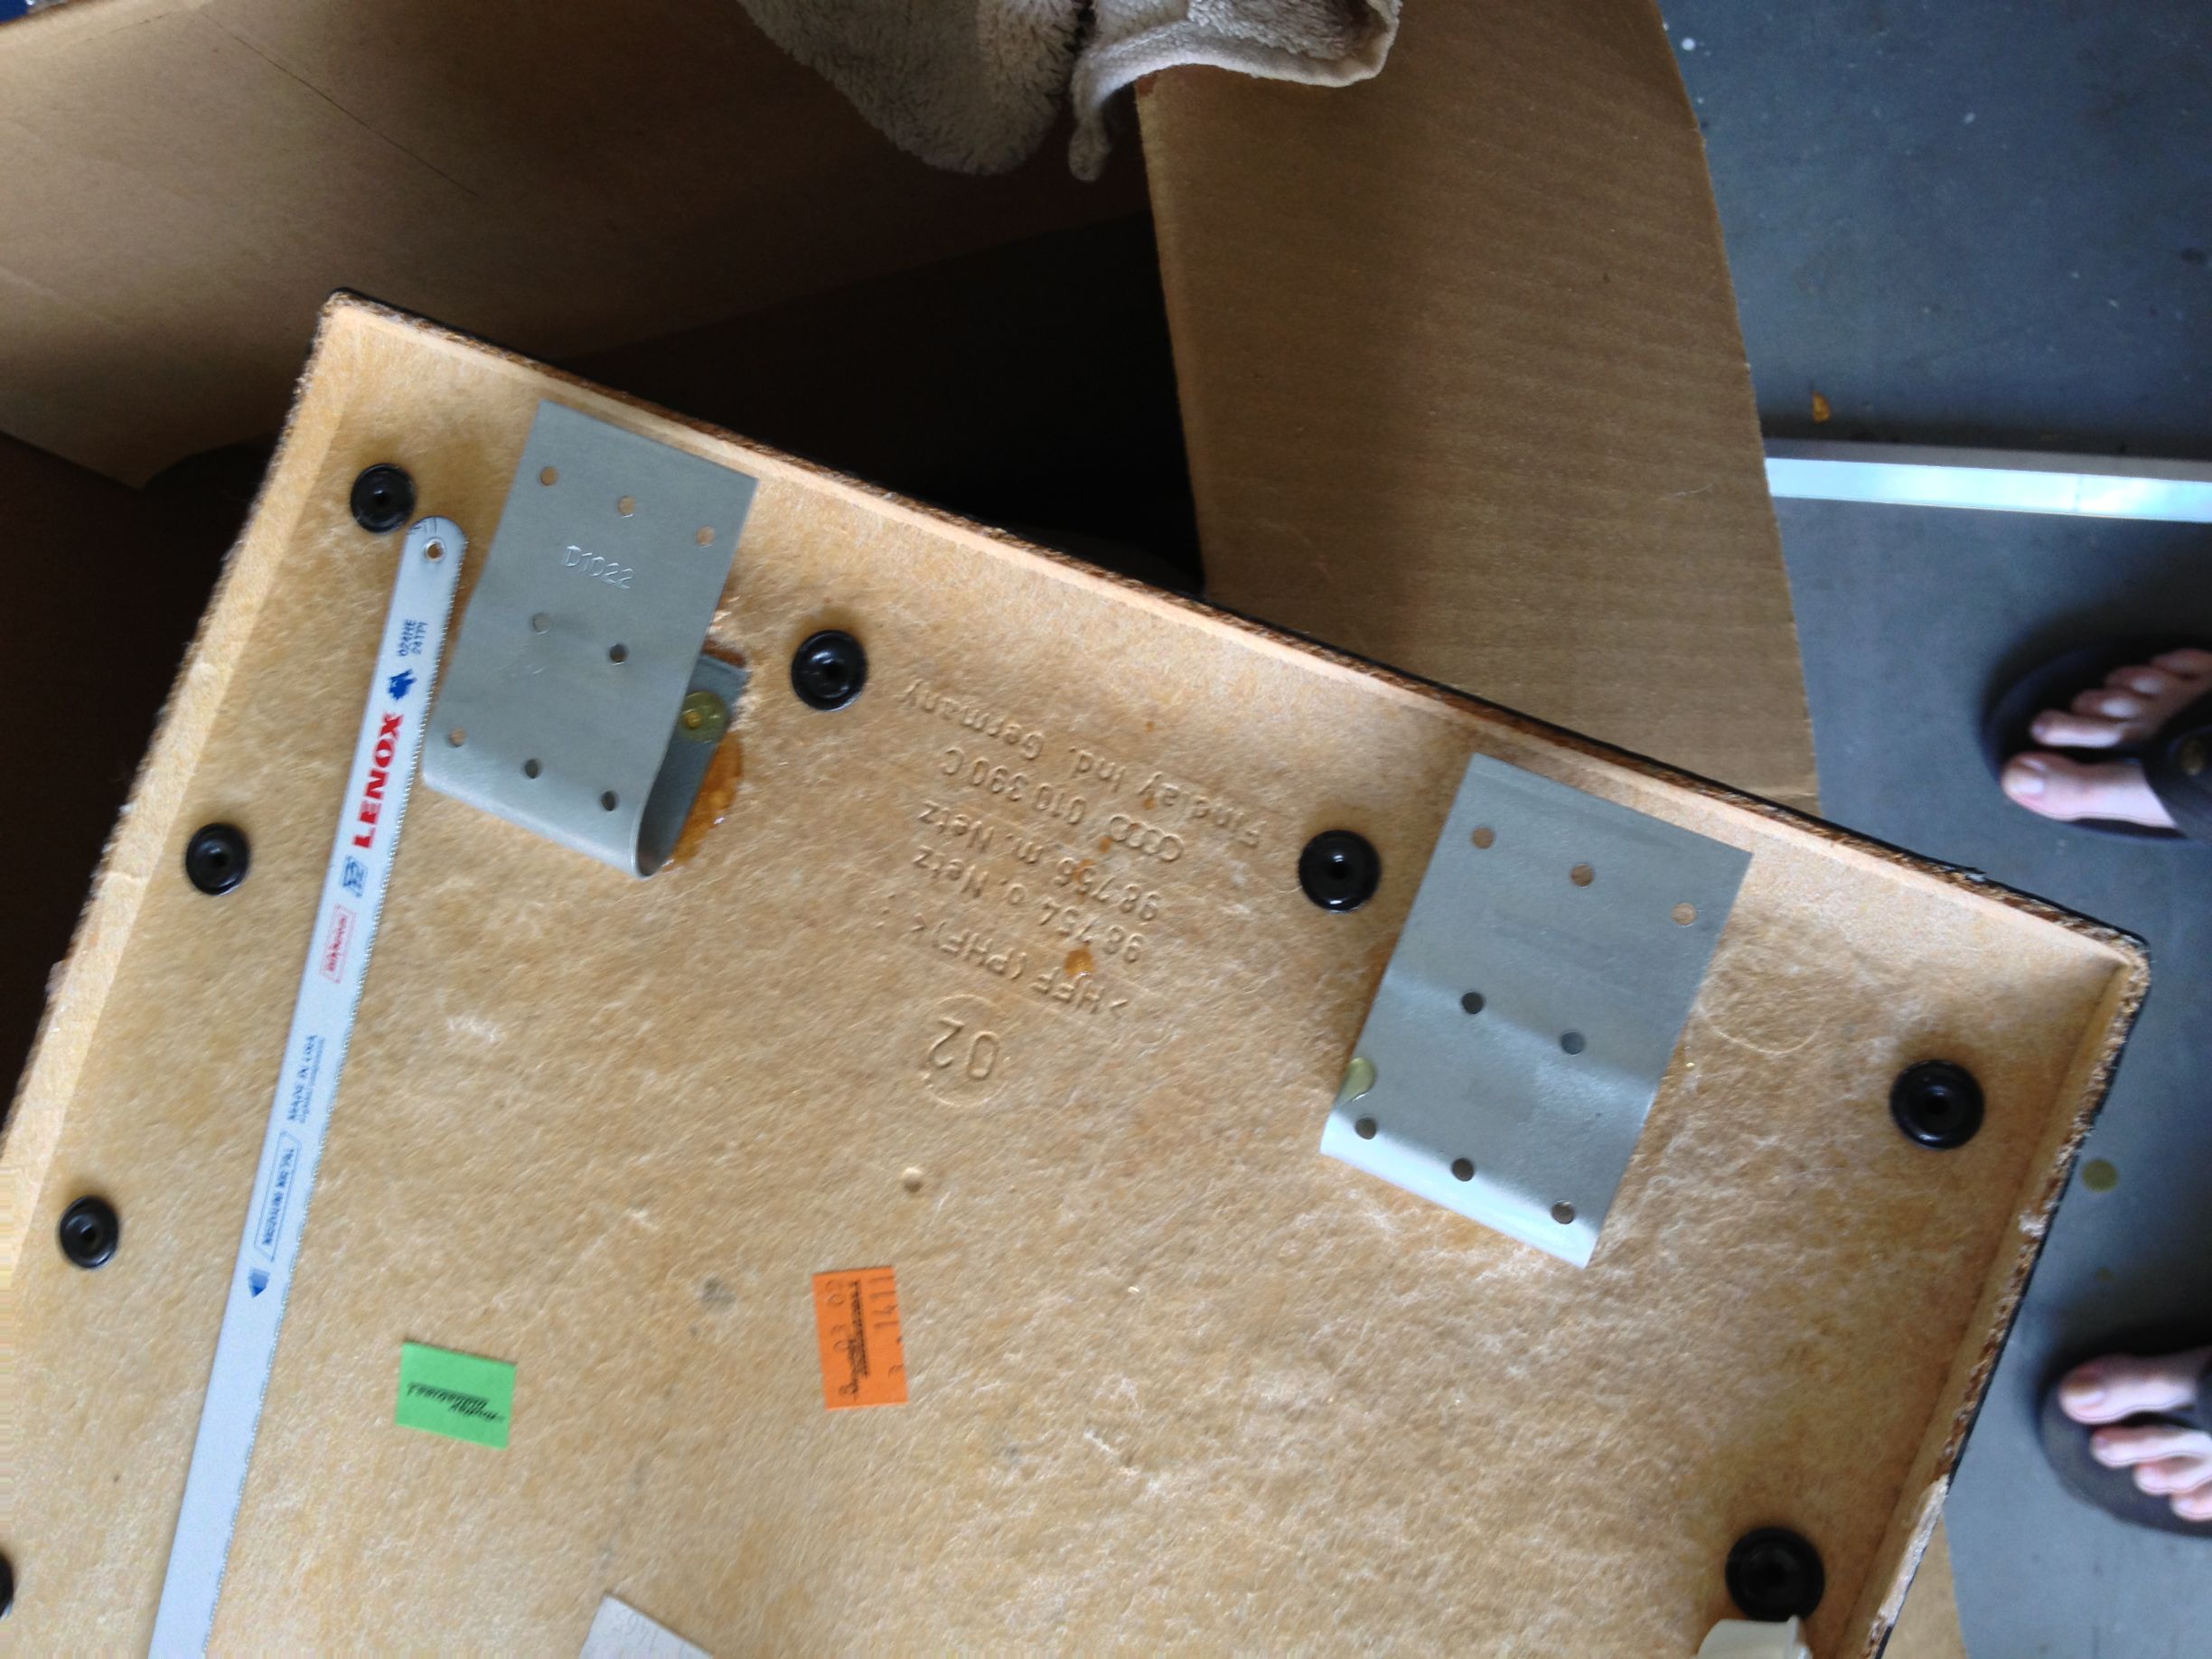
These new tie plate brackets will just slide over where the old brackets were and then you will clip the top clips into place.
All in all, this is what the inside of the panel will look like after everything is glued:
TO FIX LUMBAR SUPPORT:
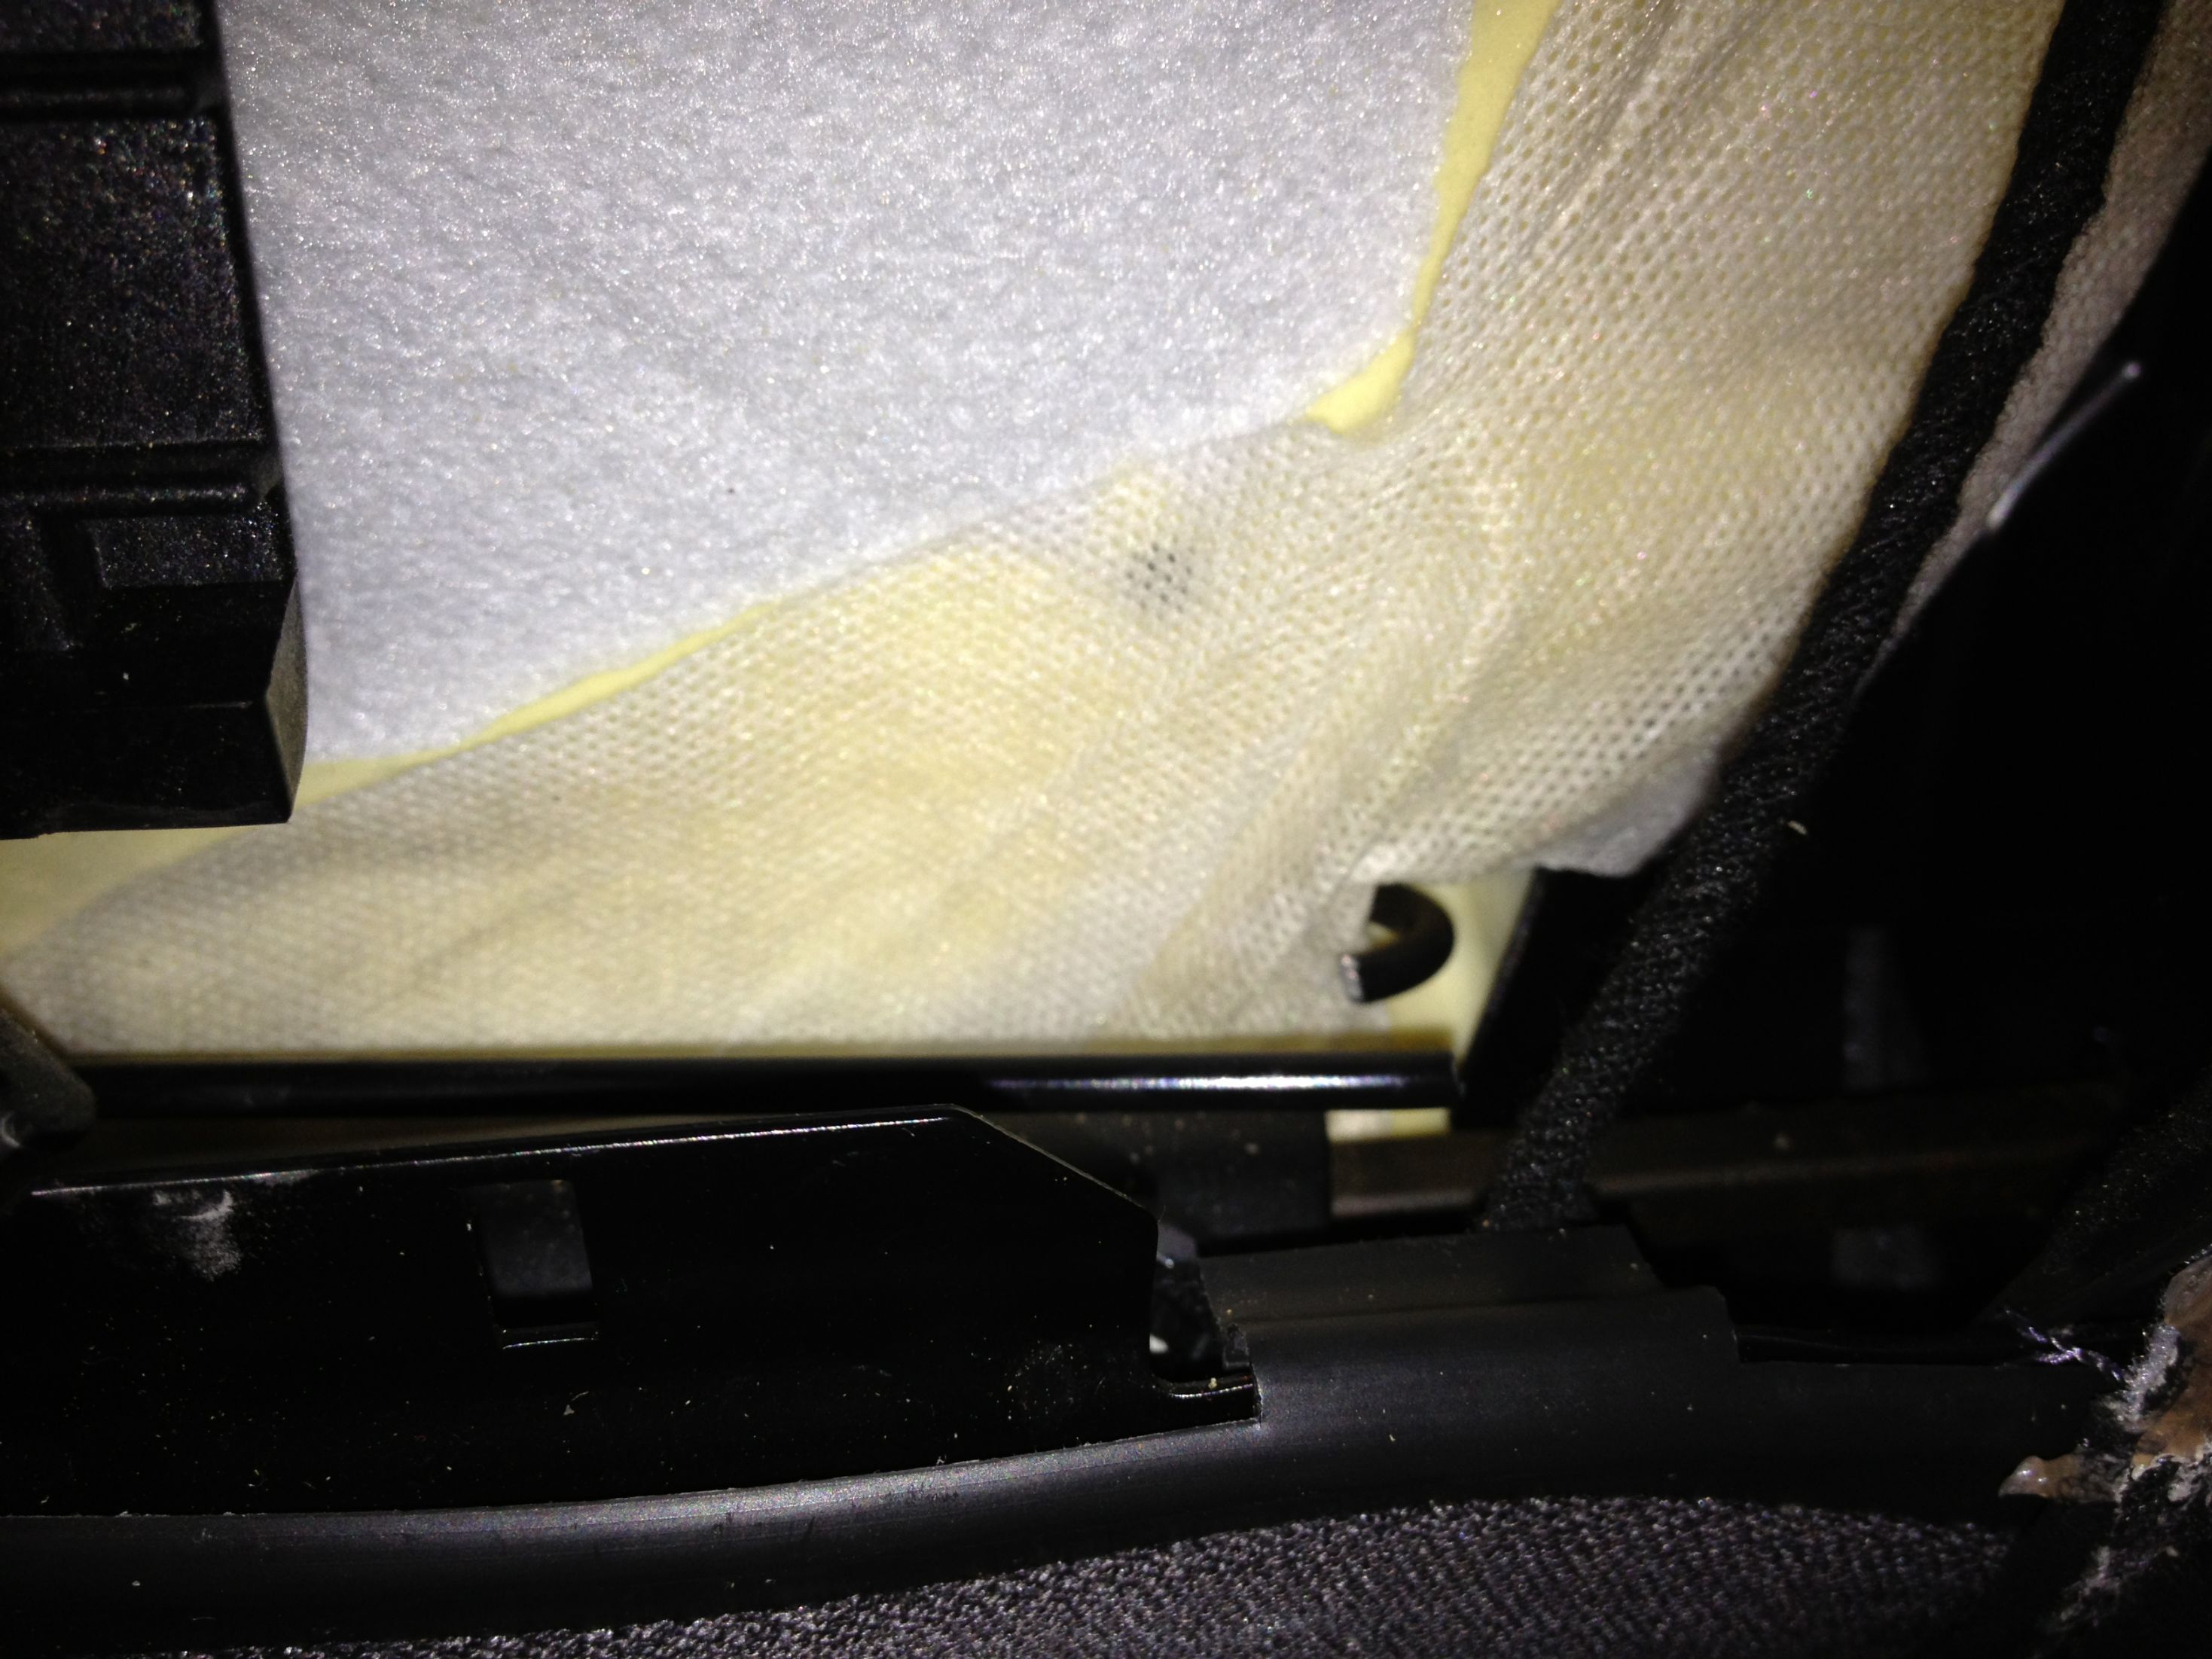
When the lumbar support bracket breaks this is where it usually breaks:
Step 1:
Cut the opposite side of where the support bracket broke with a dremel tool. It should look like this after you cut it:
The bottom portion of the lumbar support will now float freely.
Step 2:
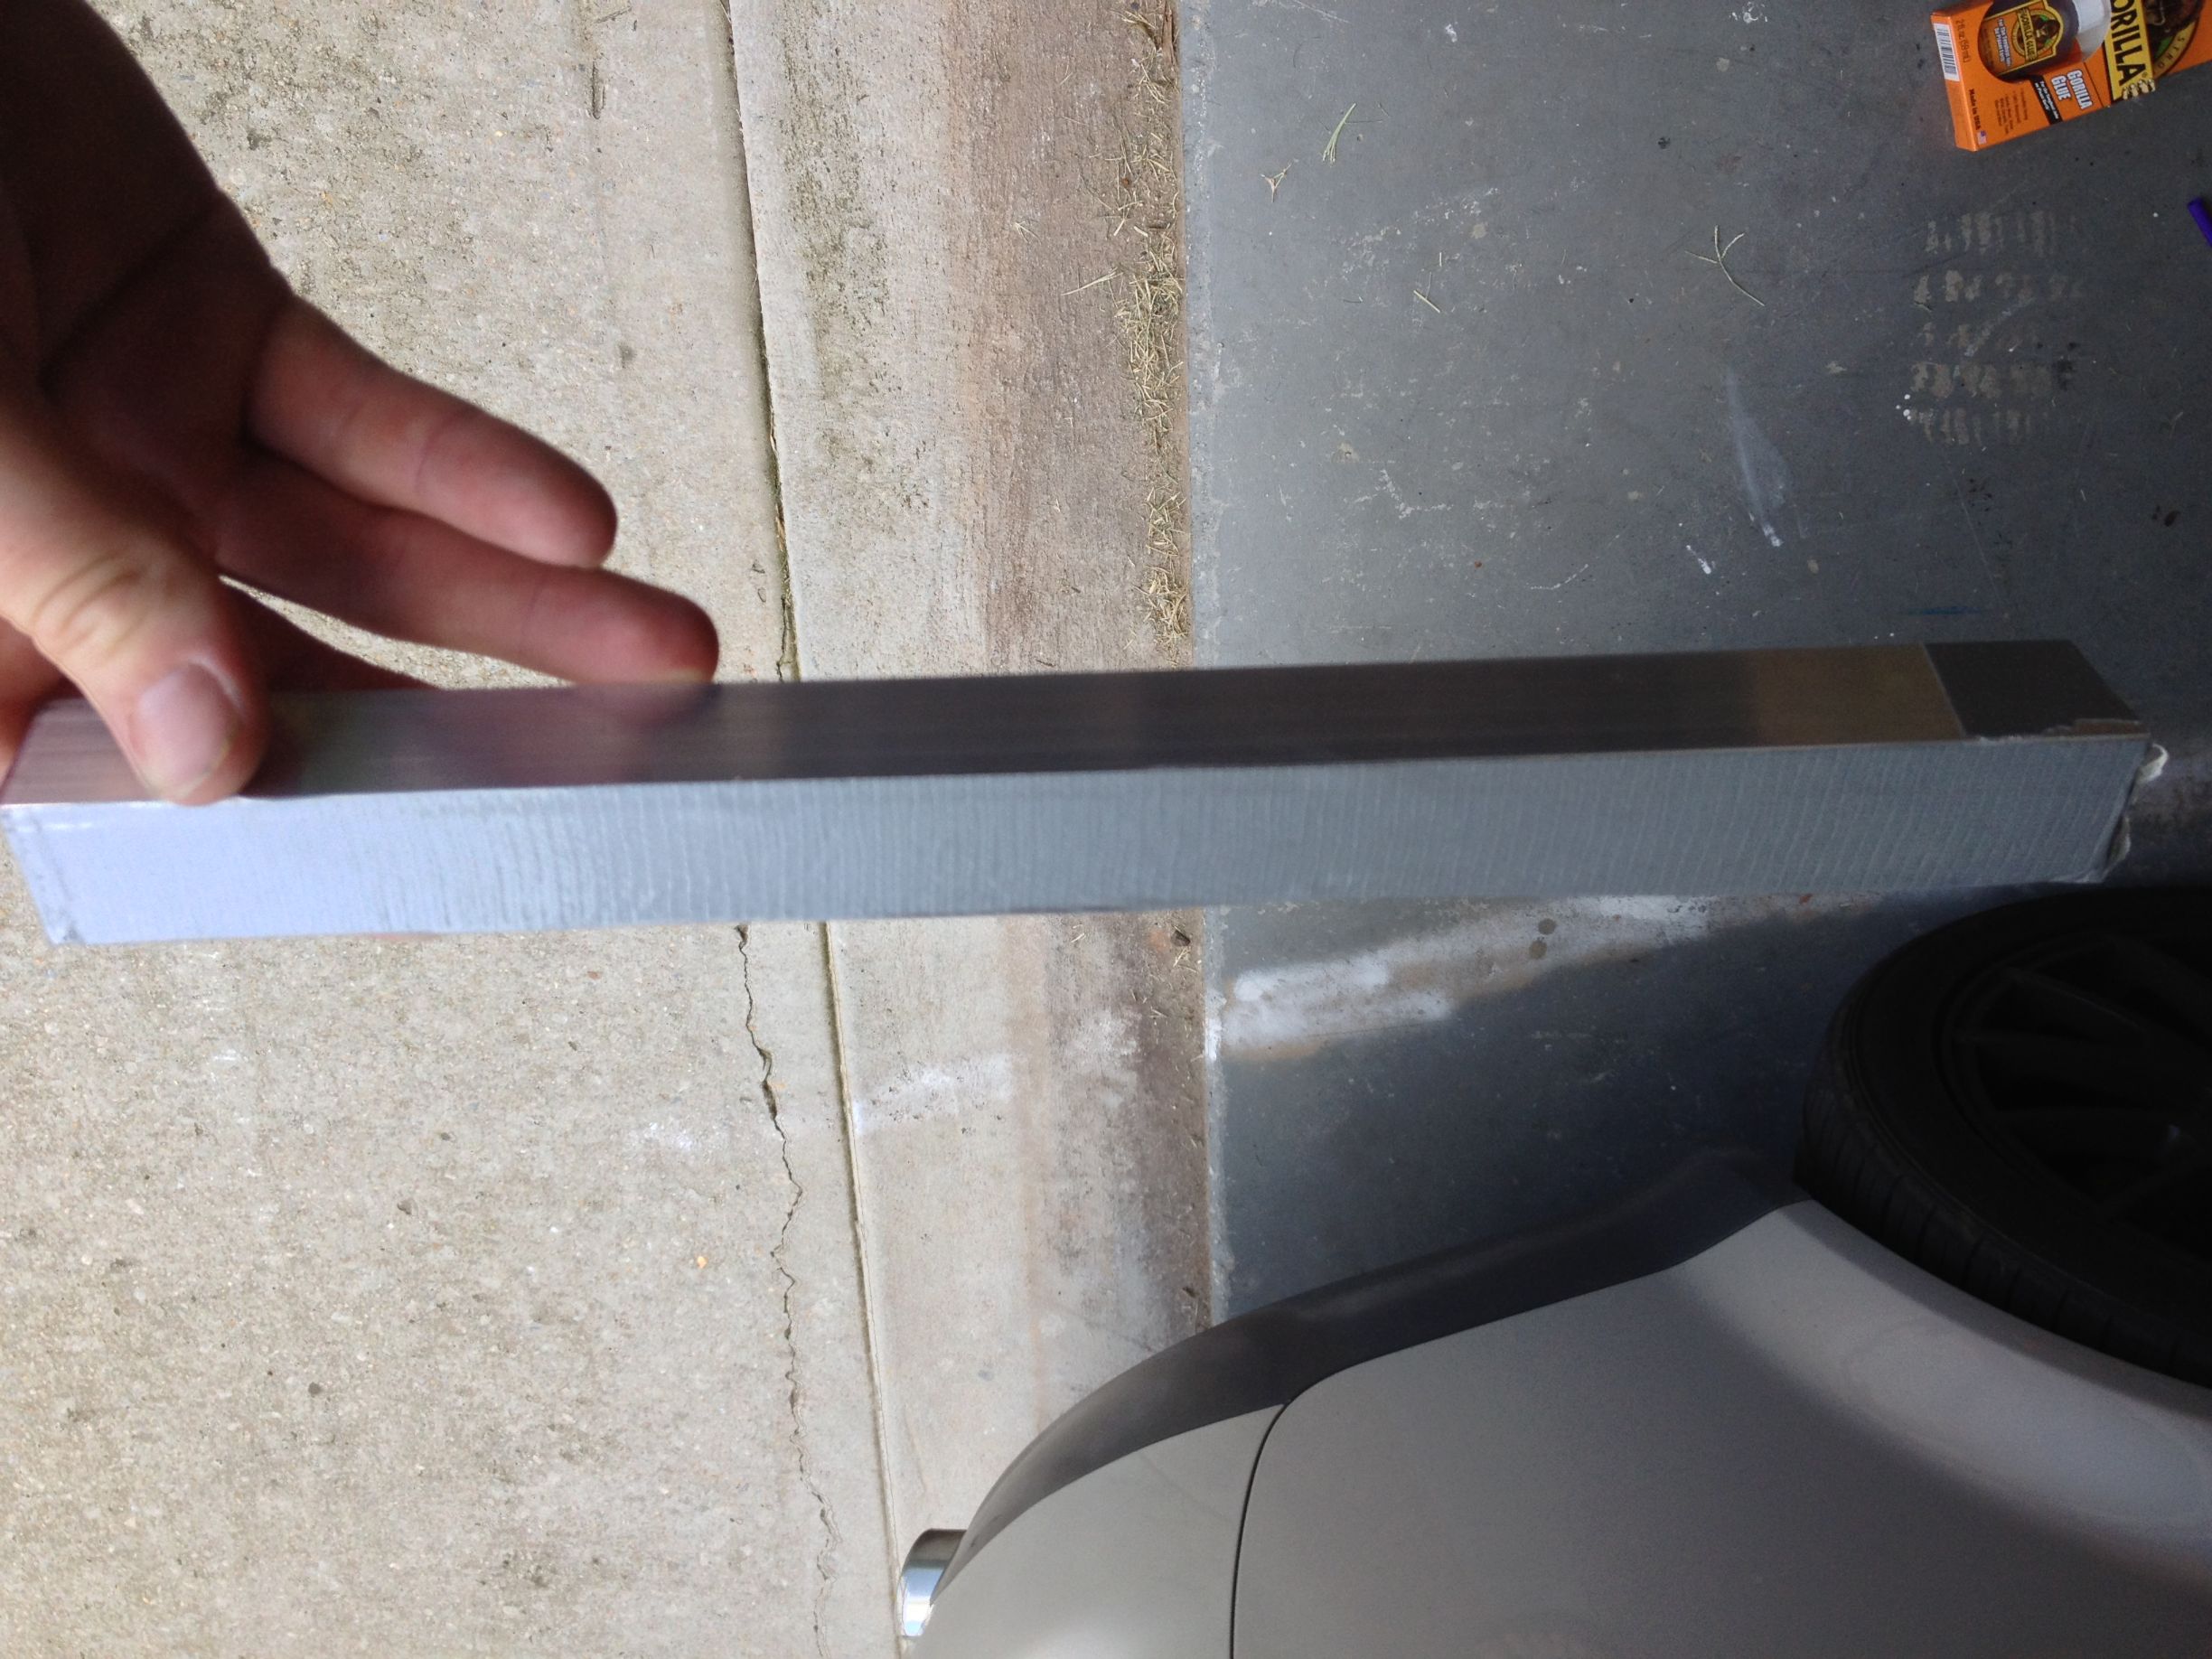
Cut the angle iron with a hacksaw to 12 inches long.
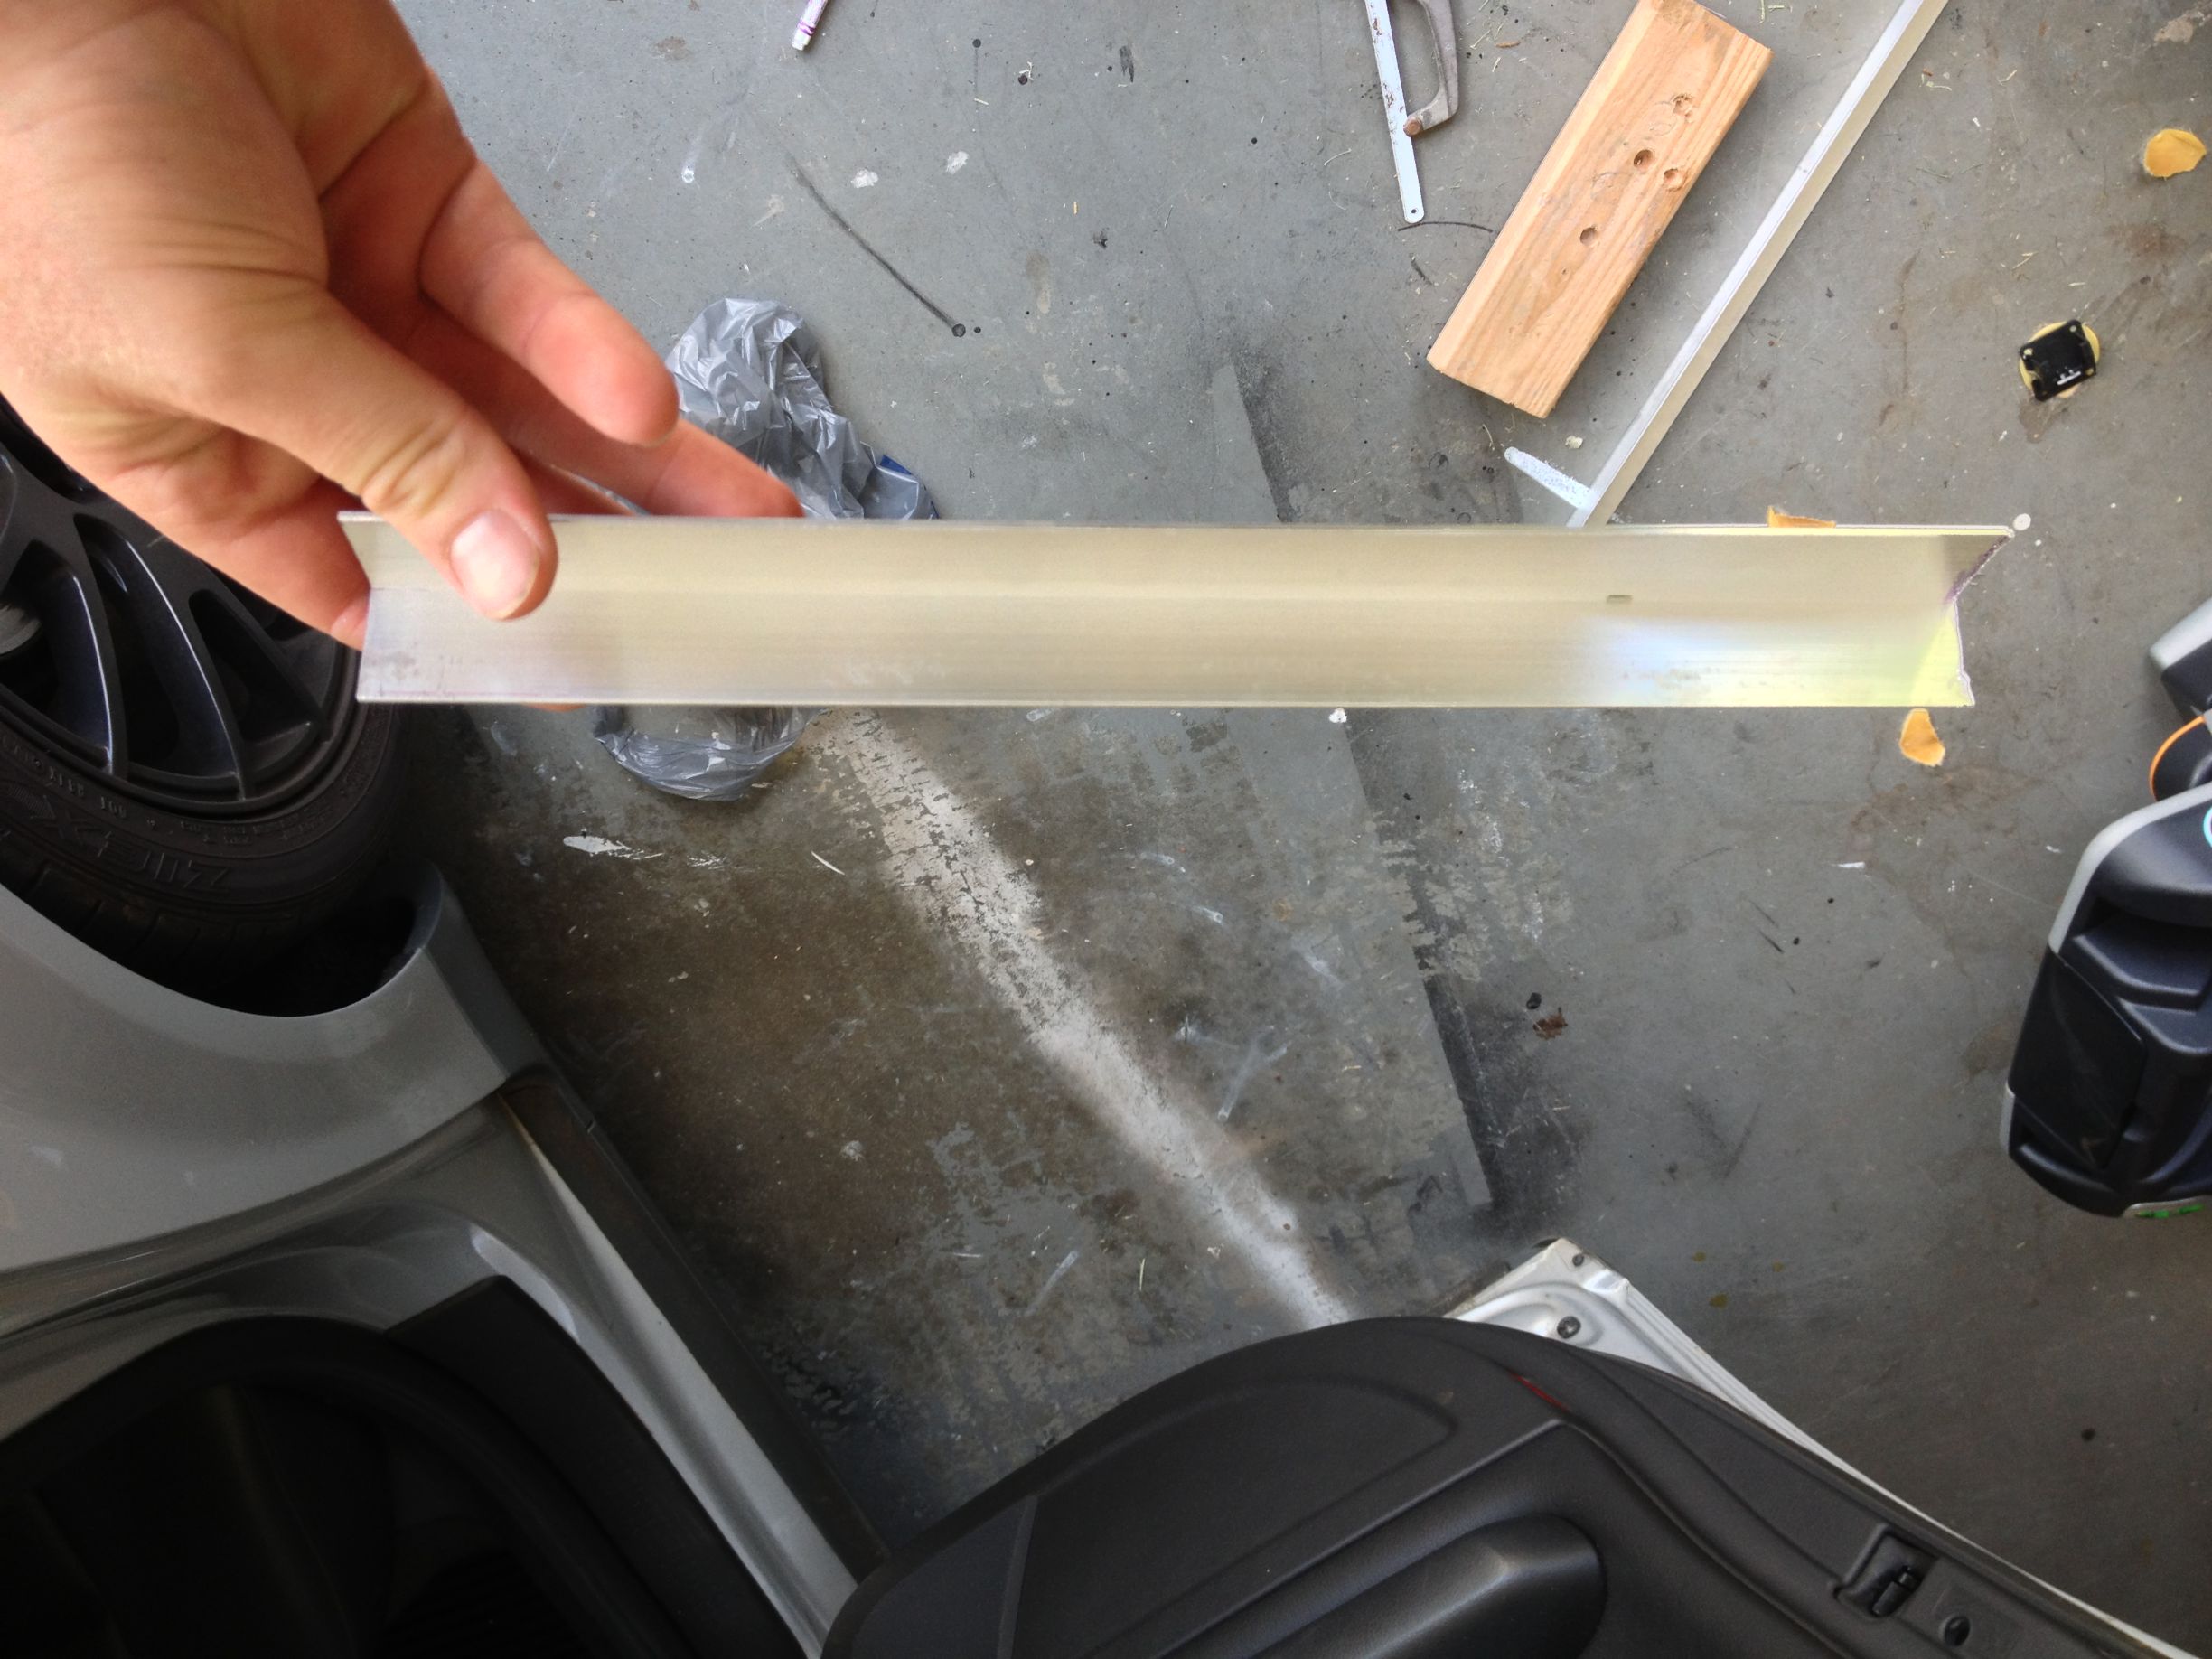
Now wrap duct tap around one side of the angle iron. (This is to avoid a metal on metal sound when the lumbar support rests on the angle iron). Like this:
Step 3:
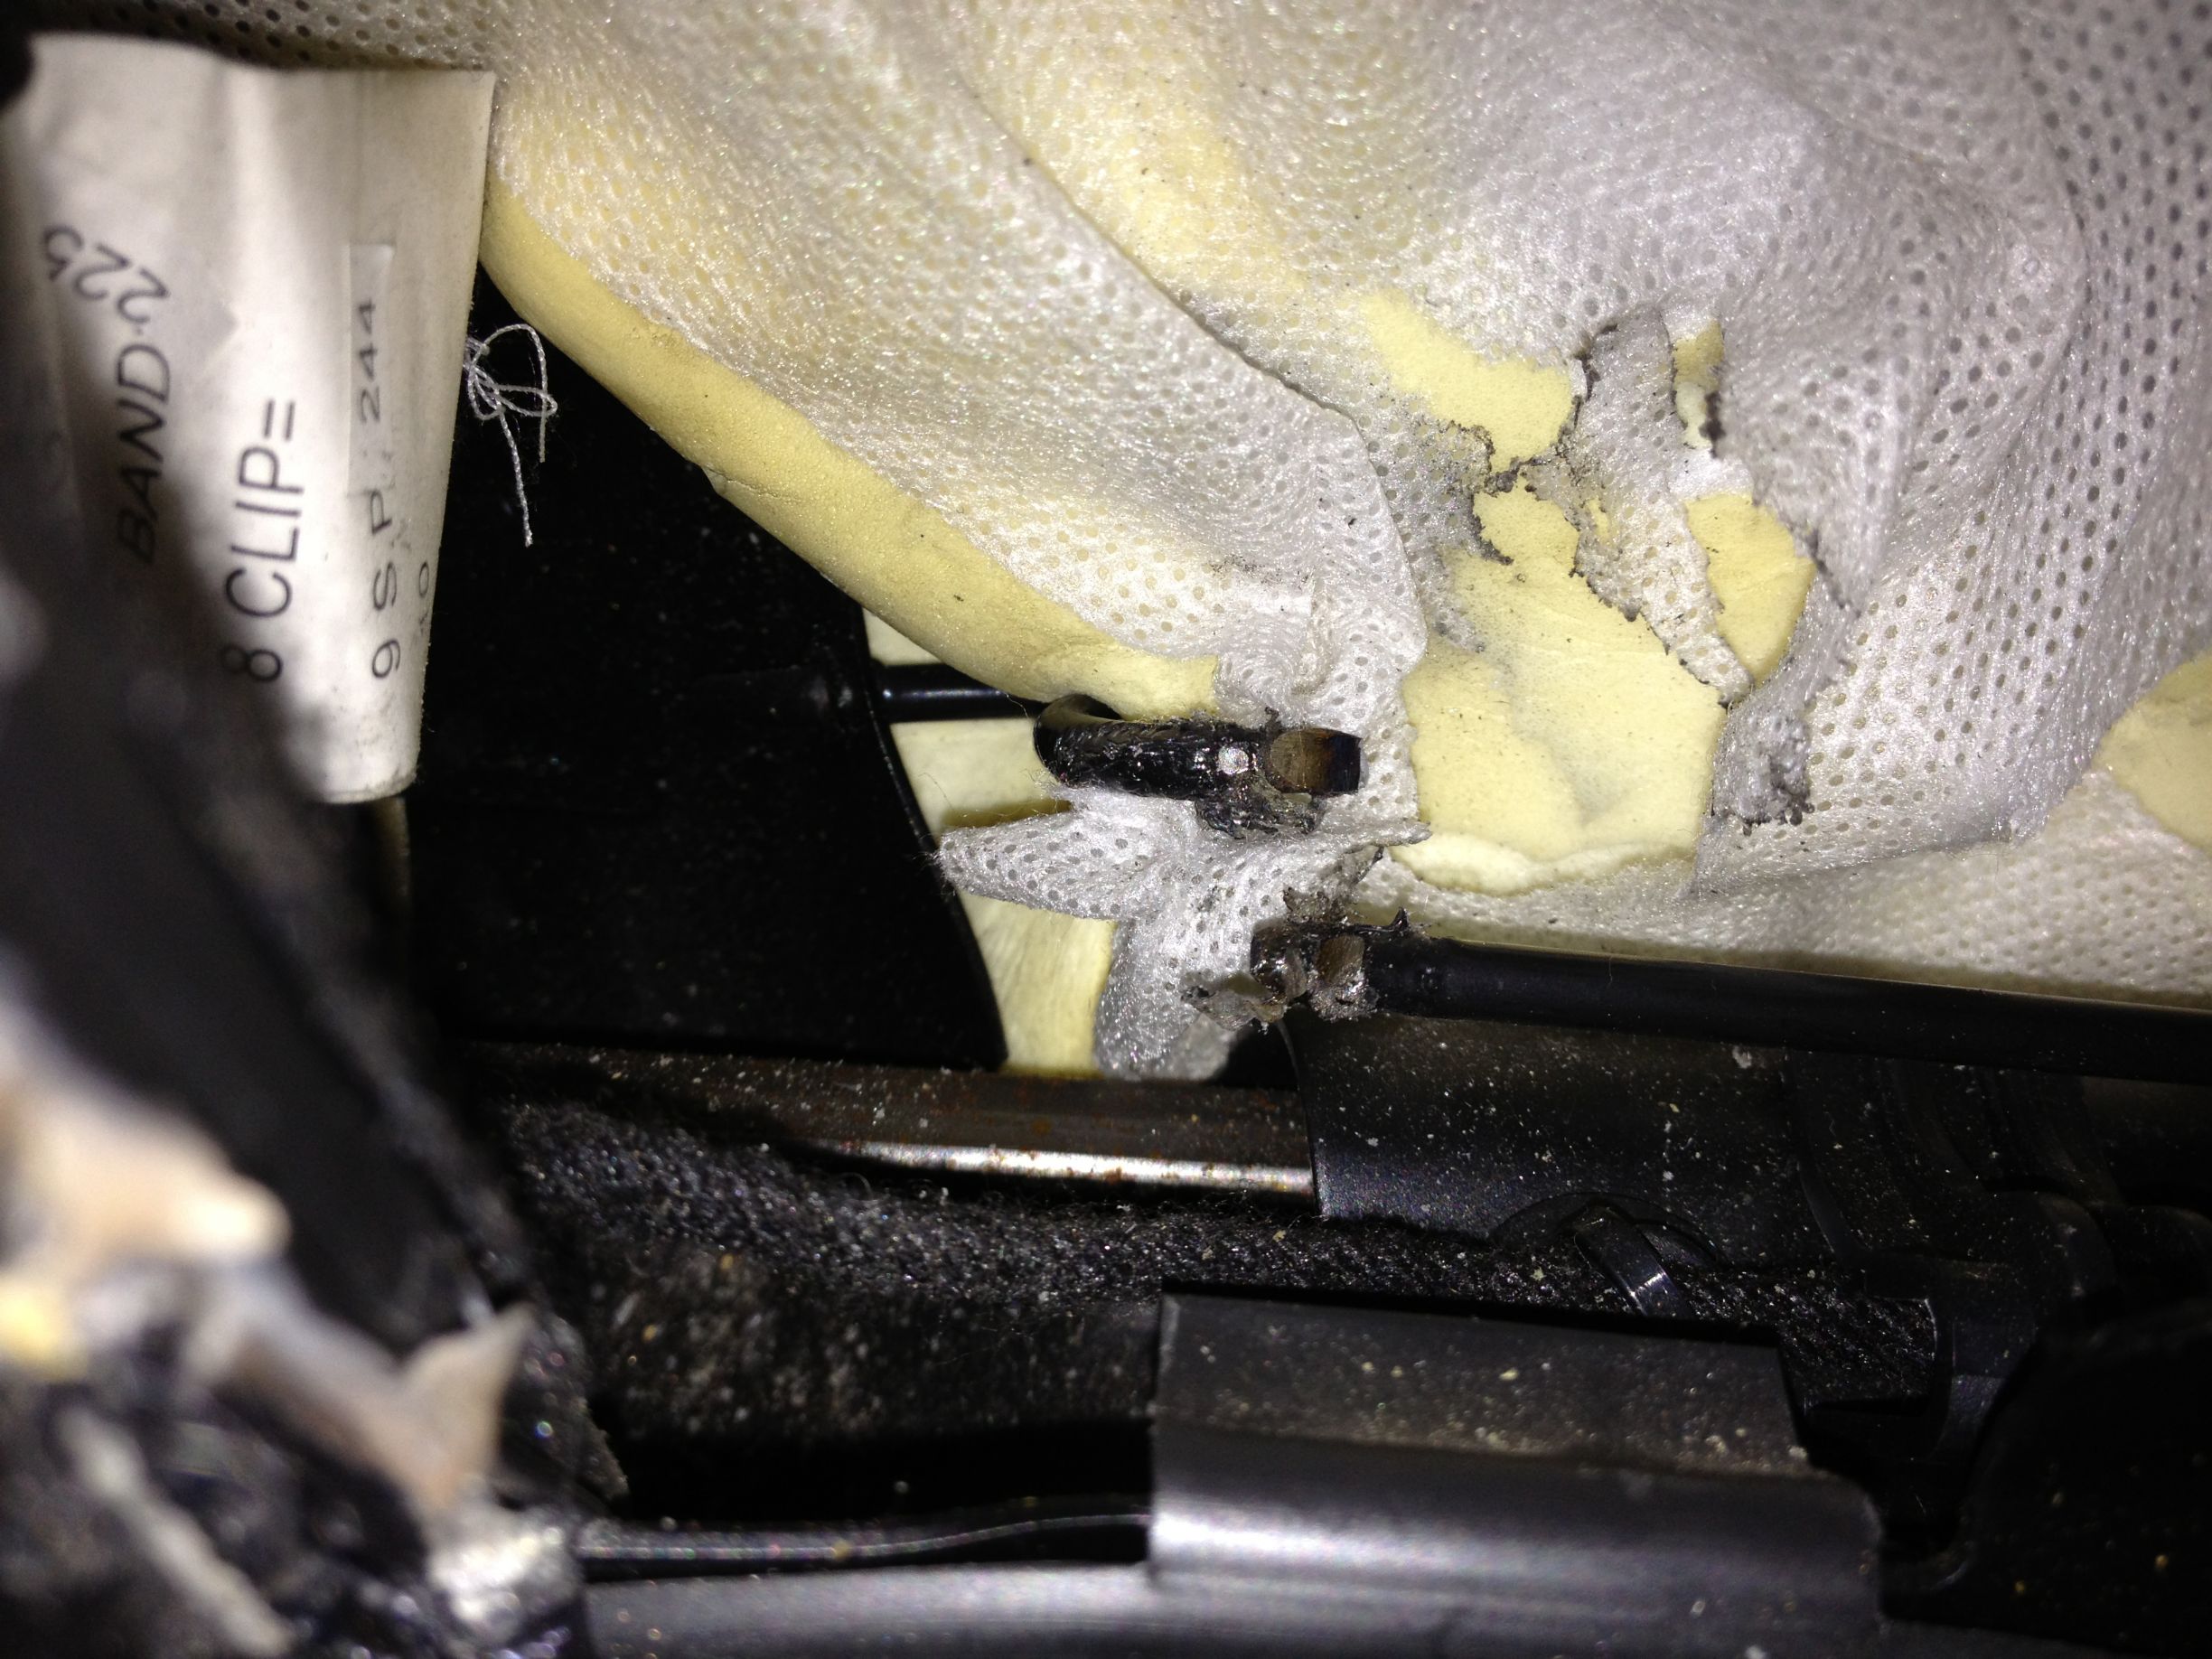
Use 3 self tapping screws to attach the angle iron to the seat frame. You may choose to pre-drill the holes but I didn't need too. The lumbar support should be resting on the duct taped side like so:
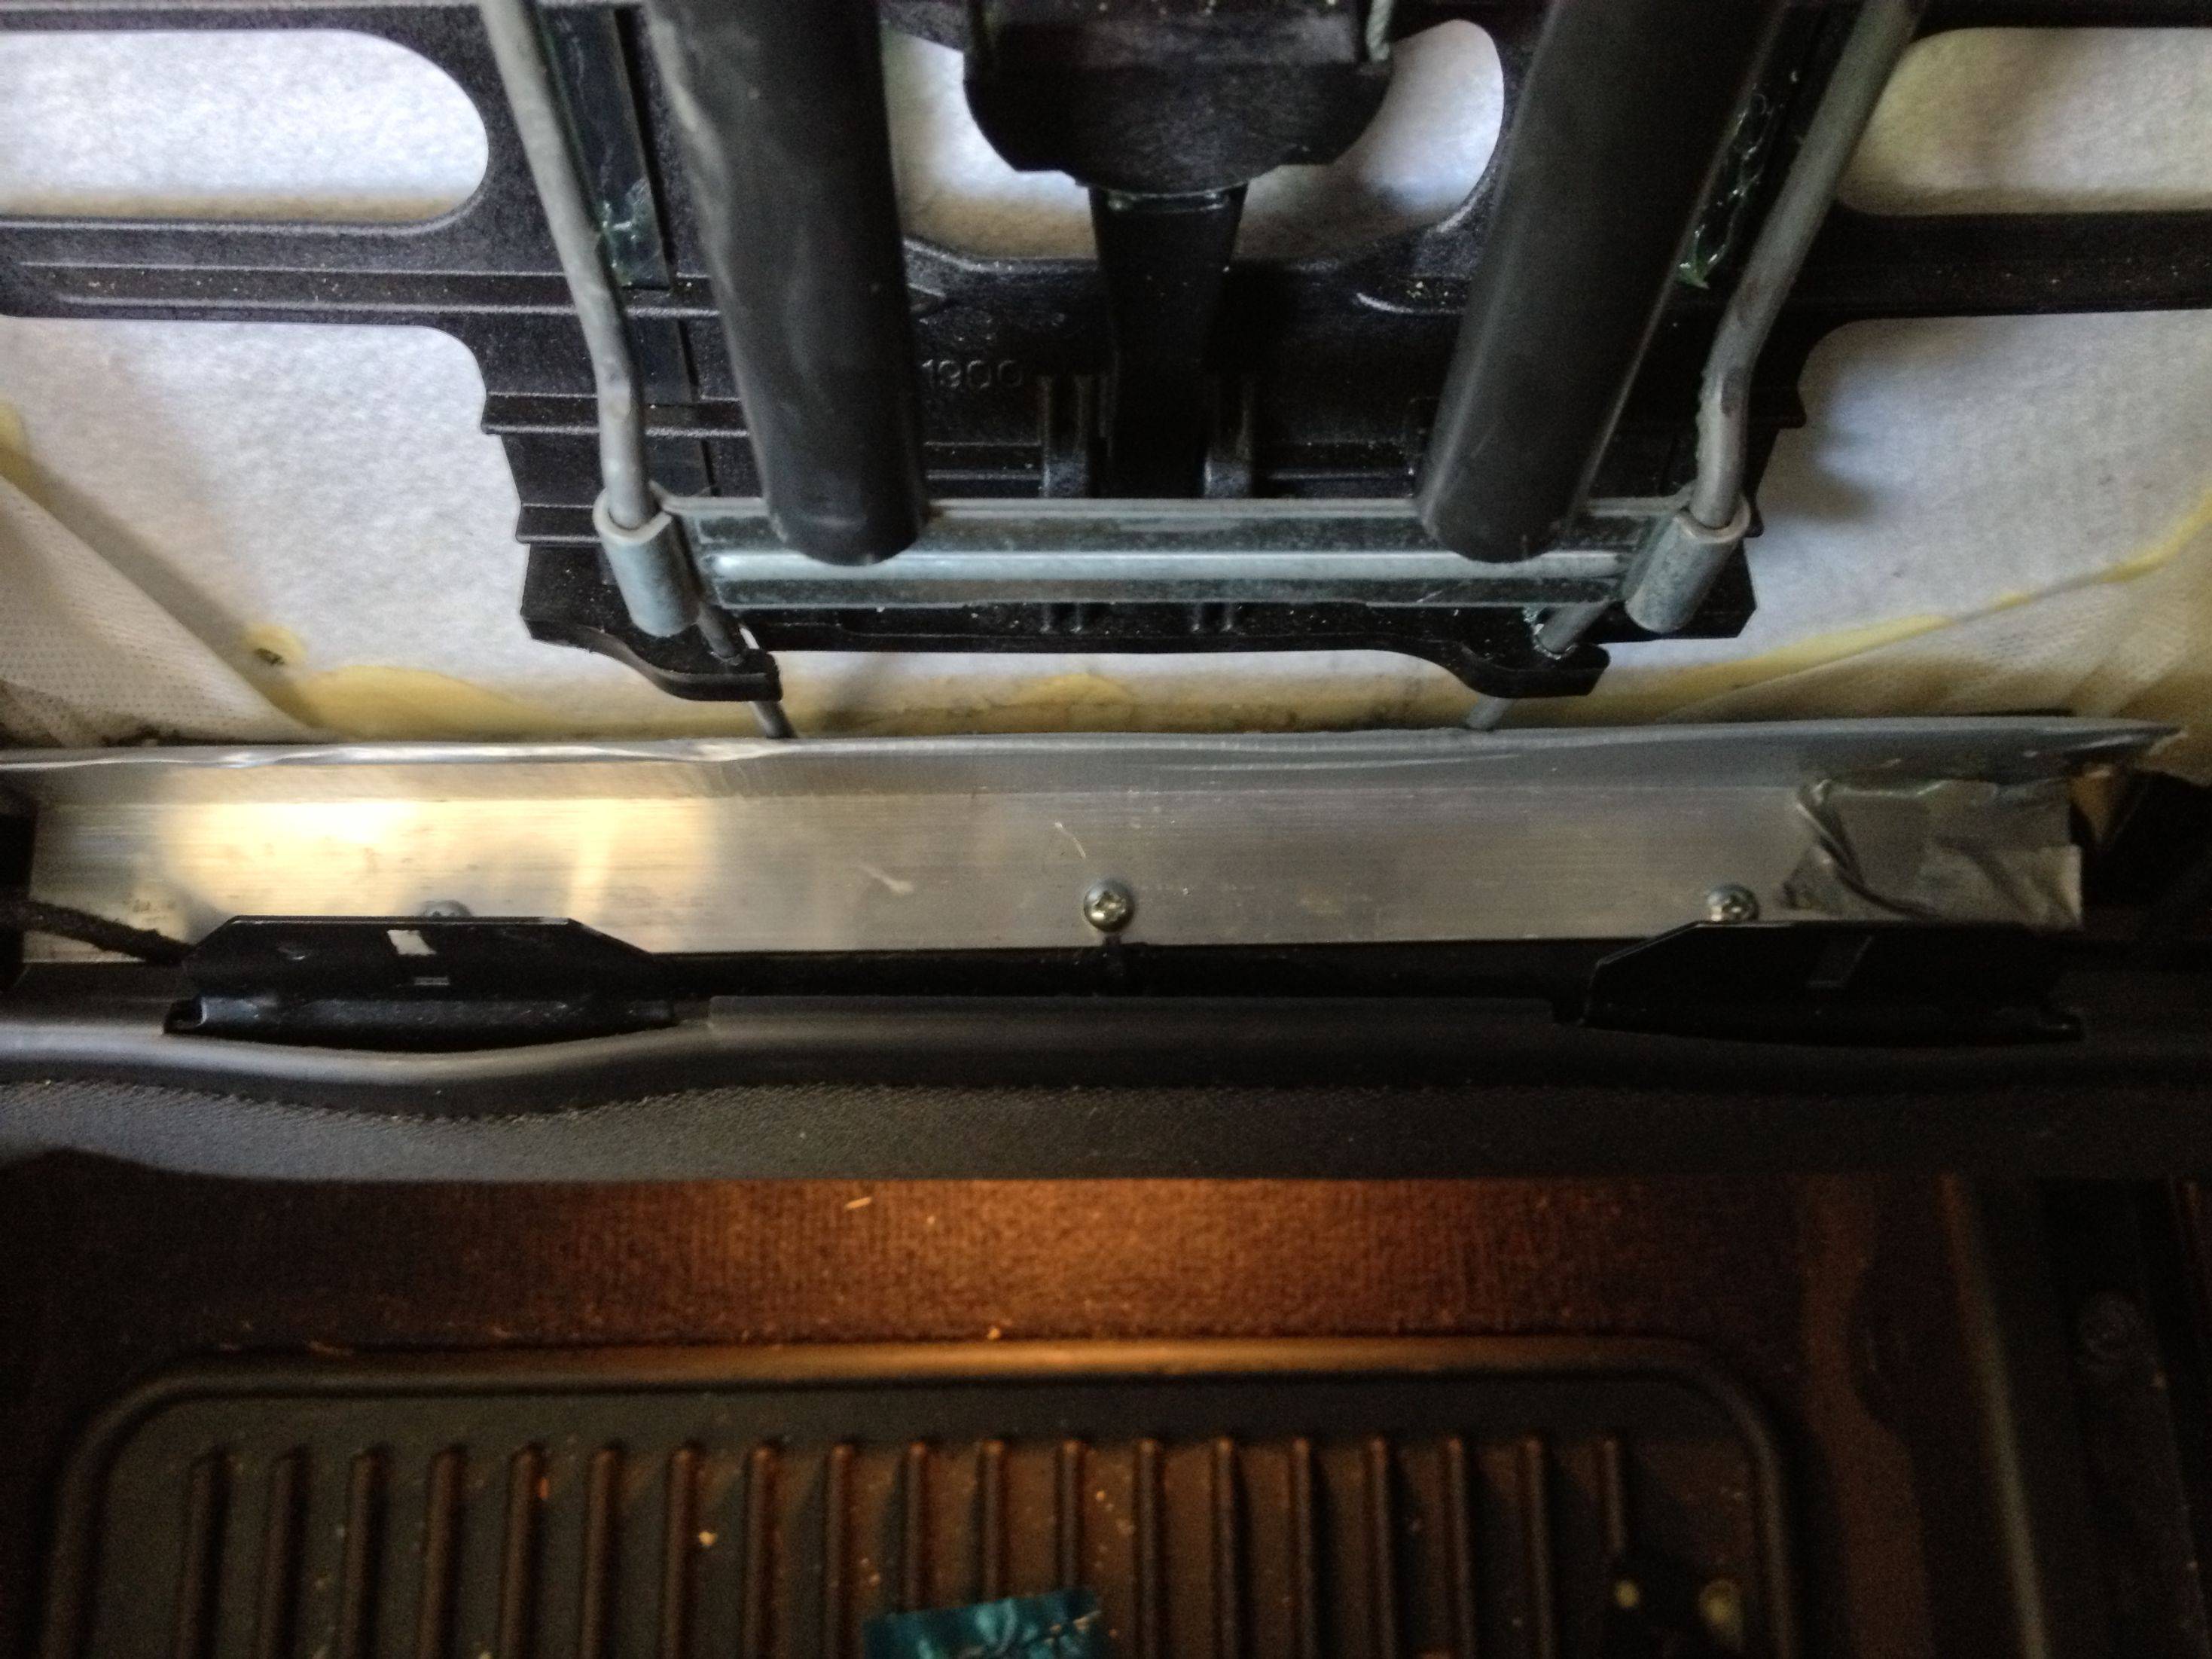
The angle iron gives the lumbar support something to push back against. It works like a charm!
Finish up:
After your clips are all dry you can put the seat panel back on. Slide the new tie plate brackets on first and then pop the top brackets back in and you are good to go! You just saved upwards of $180!
Sources:
I got some ideas from this video but I made a lot of this fabrication on my own. The video was dark and shakey so I thought I would do a write up.
If you're like me, one day you got in your car and *SNAP* something in the seat broke! I'm a big guy (6'8 300 lbs) so immediately I was like... CRAP, this is going to be expensive! The bottom of the rear seat panel had popped out because the brackets had broke. After doing some research I found out that the replacement clips were $50! INSANE! For two small little plastic pieces. After even more research I found out that this is more than likely due to my lumbar support bracket breaking (which is true). After taking it all apart the lumbar support bracket was indeed broke. A new lumbar support system was around $130 dollars. So all in all you're looking at around $180 dollars to fix this annoying problem.
There was no way I was going to pay $180 dollars for something so small. I bought all of the tools I needed to fix this at Lowe's for under $20 and it works beautifully! Follow this DIY and you can do the same.
What you'll need:
1/16 x 1 inch x 4 ft angle iron
2 tie plate brackets (the flat metal pieces with the holes in them. Same aisle as the angle iron)
Hacksaw
3 half inch self tapping screws
Gorilla Glue
Duct Tape
Drill
Dremel Tool
Paint Scraper
Clamps
My receipt (not sure why it's sideways):
TO FIX SEAT PANEL CLIPS:
Step 1:
Remove the seat panel entirely. Do this by slowly but sternly pulling outward on the top of the seat panel. The clips come straight out, not down or up. Straight out. I ended up sliding a flat head screw driver in and twisting it to get the clips to pop out. Two of the clips ended up coming unglued (not a big deal).
^ This is what the top part looked like after the panel came off. The middle clip is the only one that stayed glued.
^ This is what the bottom clips that broke off look like.
Take the paint scraper and slowly peel off the adhesive under the old clips and any clips that may have come off.
After you finish, the seat panel will look similar to this (give or take clips that may not have come unglued):
Step 2:
Glue the clips that came unglued during removal back in their original position using Gorilla Glue (a generous amount). Clamp them down to ensure a solid adhesion.
Step 3:
Bend the tie plate brackets so that they can slide over where the original clips were before they broke. It should look like this:
Side view:
Top view:
(Using gorilla glue) Glue the short side of the tie plate brackets in the place where the original bottom brackets where glued. The open side should aim toward the bottom. Clamp these brackets so they don't move while they're drying. This is what it should look like:
These new tie plate brackets will just slide over where the old brackets were and then you will clip the top clips into place.
All in all, this is what the inside of the panel will look like after everything is glued:
TO FIX LUMBAR SUPPORT:
When the lumbar support bracket breaks this is where it usually breaks:
Step 1:
Cut the opposite side of where the support bracket broke with a dremel tool. It should look like this after you cut it:
The bottom portion of the lumbar support will now float freely.
Step 2:
Cut the angle iron with a hacksaw to 12 inches long.
Now wrap duct tap around one side of the angle iron. (This is to avoid a metal on metal sound when the lumbar support rests on the angle iron). Like this:
Step 3:
Use 3 self tapping screws to attach the angle iron to the seat frame. You may choose to pre-drill the holes but I didn't need too. The lumbar support should be resting on the duct taped side like so:
The angle iron gives the lumbar support something to push back against. It works like a charm!
Finish up:
After your clips are all dry you can put the seat panel back on. Slide the new tie plate brackets on first and then pop the top brackets back in and you are good to go! You just saved upwards of $180!
Sources:
I got some ideas from this video but I made a lot of this fabrication on my own. The video was dark and shakey so I thought I would do a write up.
Last edited by BaseDrifter; Nov 28, 2014 at 10:43 PM.
Thread Starter
|
1st Gear
Joined: Jan 2012
Posts: 8
Sorry I am just now seeing this. Thanks for the input. It's holding up nicely even after over a year!

Thread
Thread Starter
Forum
Replies
Last Post
5ln
Audi A6
5
Feb 23, 2009 05:19 PM