
My very own update thread

Thread Starter
|
Site Moderator/B5 Tech Guru
Joined: Feb 2010
Posts: 1,745
From: Bay Area, CA
I'm not sure why the chipped ECU spontaneously went bad. Have you contacted the tuning company?
The fuse block looks good, though it's a bummer to have to remove the knee bolster to access it in the result of a blown fuse. If I understand your circuitry correctly, you may want to re-evaluate your fuse sizes. If you're running the stock 55W bulbs in your fogs, the 10A fuse you have used will be cutting it too close.
At 12V, the current will be ~9.1A. Generally fuse sizing is 1.5x the expected current. It looks like you've used 14 awg wire, which has an ampacity of 20A, so you're nowhere near exceeding the wire. I would probably run a 15A fuse for the fog power.
Thanks for the tip on the fuse, I'll switch it out. I am running stock 55w bulbs right now. With the amount of modifications I've made to the car it makes sense to start carrying a more complete tool kit with me. I've got an 8mm socket and ratchet which is all I need to pull off the knee bolster. I don't anticipate blowing fuses on a regular basis.
I don't mean to take you off subject of your ECU gone bad, but did you use this DIY below to install your fogs? what did you make your prackets out of and how are your brackets mounted from the back?
AudiWorld Tech Articles
AudiWorld Tech Articles
I did use that as a guide, but it is relatively straight forward. I was lucky in that my bumper already had OEM mounting points for the fogs. This car was in an accident before I owned it and the bumper cover was replaced. It is possible it was replaced with a newer style cover since I was under the impression prefacelift bumpers would need some fabrication.

1st Gear
Joined: Nov 2012
Posts: 172
From: Richmond, VA
I did use that as a guide, but it is relatively straight forward. I was lucky in that my bumper already had OEM mounting points for the fogs. This car was in an accident before I owned it and the bumper cover was replaced. It is possible it was replaced with a newer style cover since I was under the impression prefacelift bumpers would need some fabrication.
Thread Starter
|
Site Moderator/B5 Tech Guru
Joined: Feb 2010
Posts: 1,745
From: Bay Area, CA
Eh, not having the mounts for fog lights is relatively low on the list of concerns if the rest of the car was in good shape.
Got bored, so I did the one touch up rear window mod. Super simple, works great, I wish I had done it sooner.
Got bored, so I did the one touch up rear window mod. Super simple, works great, I wish I had done it sooner.
1st Gear
Joined: Nov 2012
Posts: 172
From: Richmond, VA
when I bought it i needed new tires, it had a rear axle leak, took care of the timing belt and water pump, had to replace the valve cover gasket and cam chain tensioner gasket, the LCD Screen is like everyone else's. worthless. i think i have a coolant leak somewhere, i need a new windshield, the driver side rear speaker has never worked. I'm sure there's more. I paid $3100 for it. I may have paid to much. the timing belt and rear axle job would have cost around $2000 if I didn't have a hook up. paid around $1000 for that.

Thread Starter
|
Site Moderator/B5 Tech Guru
Joined: Feb 2010
Posts: 1,745
From: Bay Area, CA
")
The switch above will be for a fuel pump kill switch. Still working out where I'll be mounting it.
Today's haul from the junkyard...

I'm going to start putting together a couple headlight relay kits and see if there is any interest.
Thread Starter
|
Site Moderator/B5 Tech Guru
Joined: Feb 2010
Posts: 1,745
From: Bay Area, CA
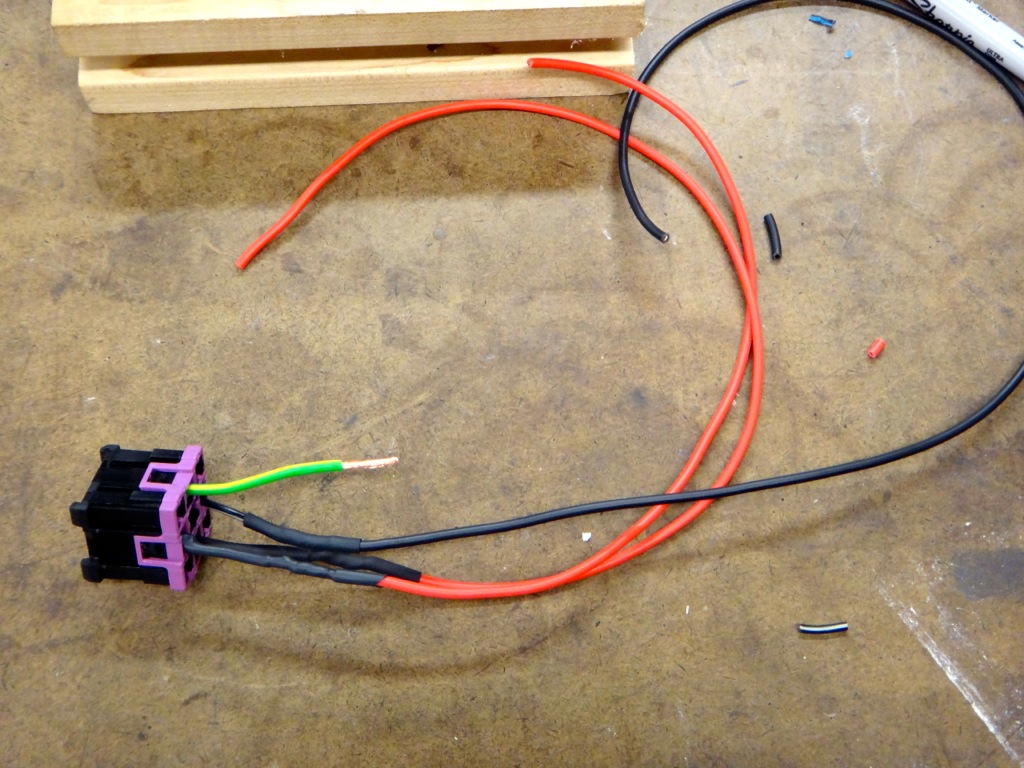
I updated the wiring for the fog light relay and added a second load reduction relay last night.
Instead of having the fog light relay be activated by the 75x post and receive power from the fog light switch, I reversed the wires and have it functioning like a normal relay now. 75x supplies power, the fog switch activates the relay. The two pins are different and requires replacing the pins.
Here is the old 86 wire removed.
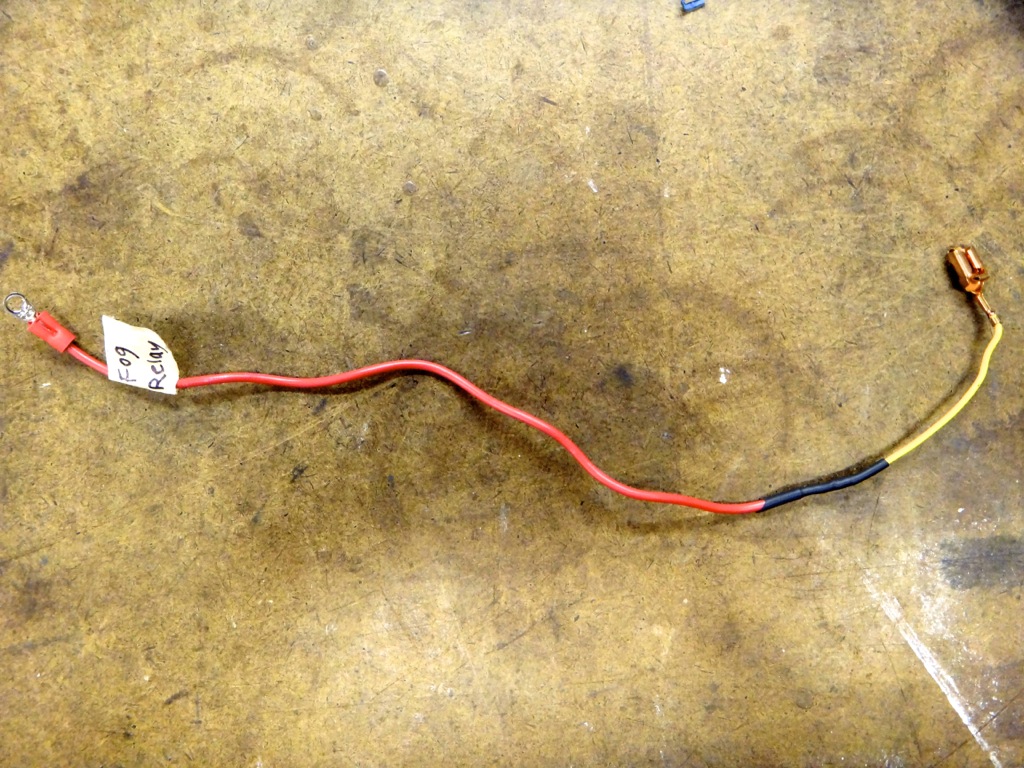
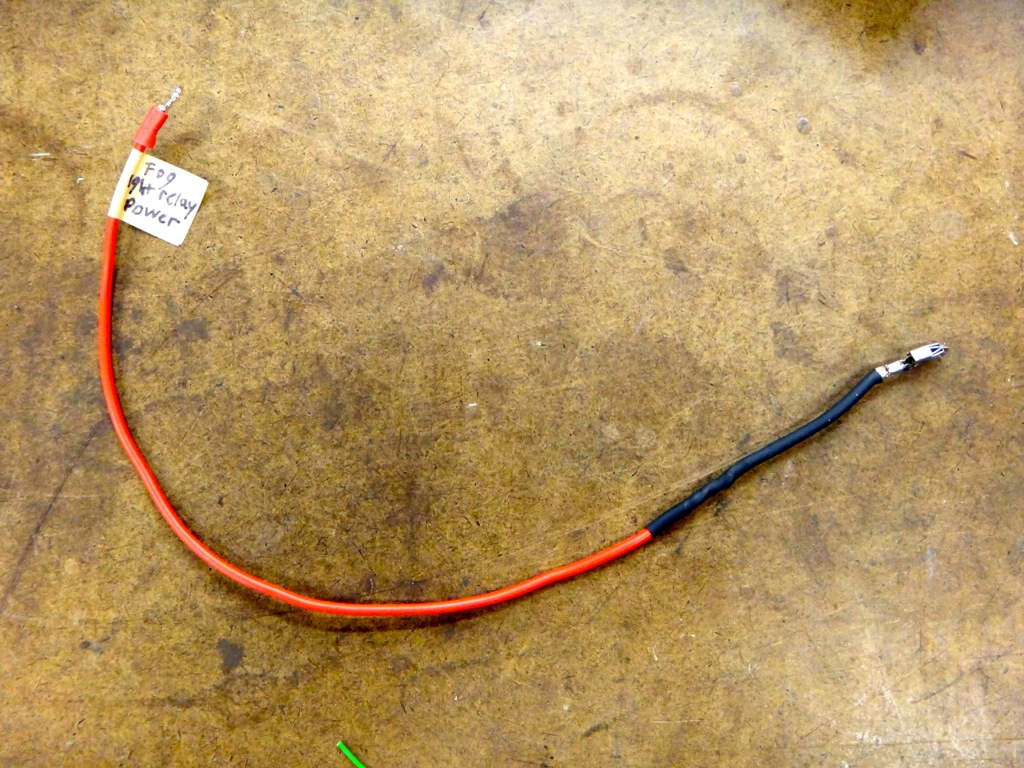
And the new wire with the correct pin.
Old 86 wire removed from the relay and the old 30 wire hanging off the side. That wire did NOT want to come out...good thing that pin gets cut off.
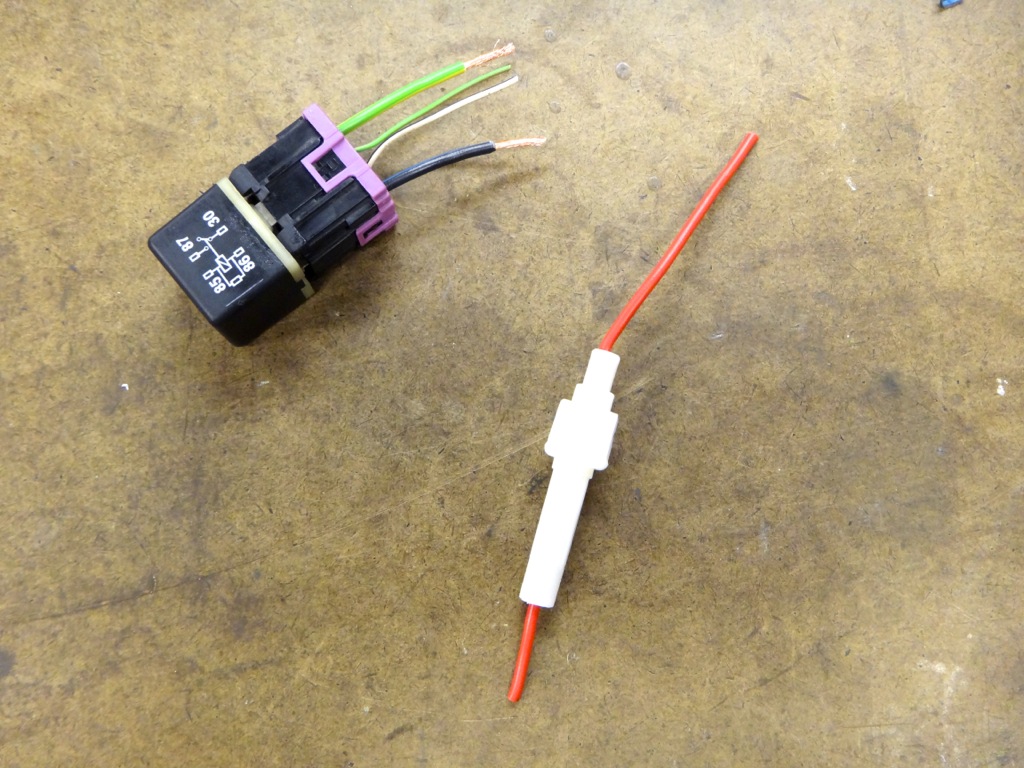
Next up was the new load reduction relay. This relay will power the distribution box that is powering all of my accessories. The relay will get its power from terminal 30 and be activated by 75x.
Relay and in line fuse for the terminal 30 wire.
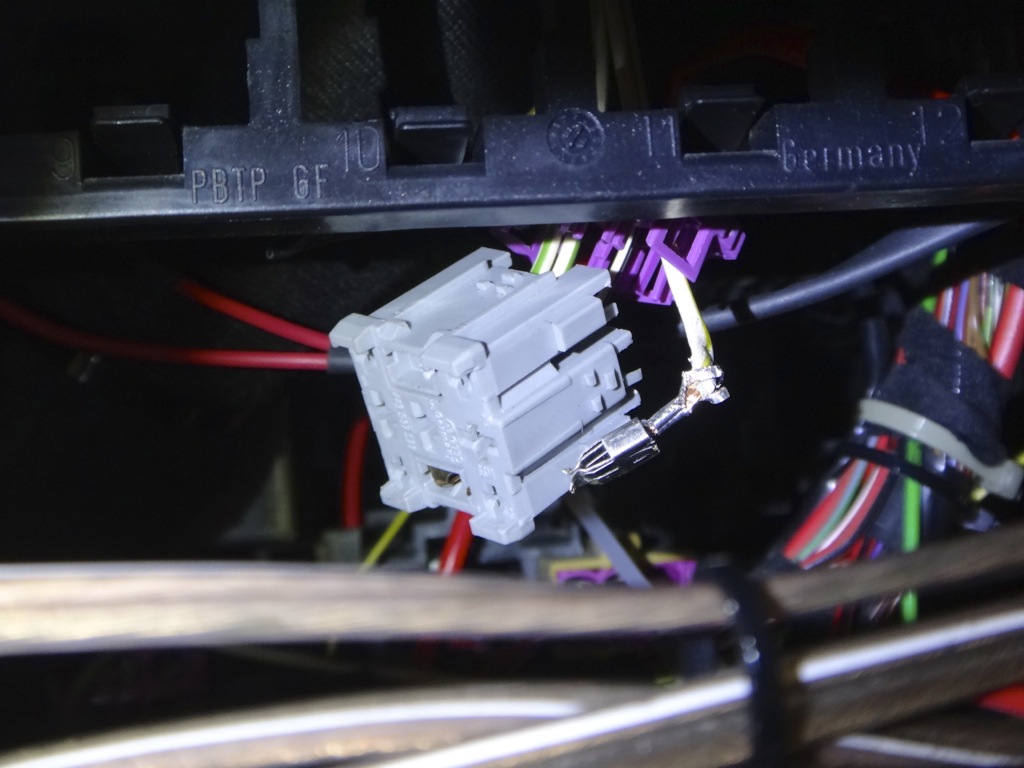
Wired up.
Instead of having the fog light relay be activated by the 75x post and receive power from the fog light switch, I reversed the wires and have it functioning like a normal relay now. 75x supplies power, the fog switch activates the relay. The two pins are different and requires replacing the pins.
Here is the old 86 wire removed.

And the new wire with the correct pin.

Old 86 wire removed from the relay and the old 30 wire hanging off the side. That wire did NOT want to come out...good thing that pin gets cut off.

Next up was the new load reduction relay. This relay will power the distribution box that is powering all of my accessories. The relay will get its power from terminal 30 and be activated by 75x.
Relay and in line fuse for the terminal 30 wire.

Wired up.

Thread Starter
|
Site Moderator/B5 Tech Guru
Joined: Feb 2010
Posts: 1,745
From: Bay Area, CA
I've just added a table of contents for the thread to the first page. Each modification is listed in the order it was completed (roughly.) I have noted any modifications that have been removed or replaced. If I don't have pictures of the installation, the page listed shows a recent picture.
I hope this makes it easier to find what you're looking for.
Engine
1. 18psi tune (PO installed)
2. Replaced turbo oil feed line
3. Forge 007 (Pictured on Page 26)
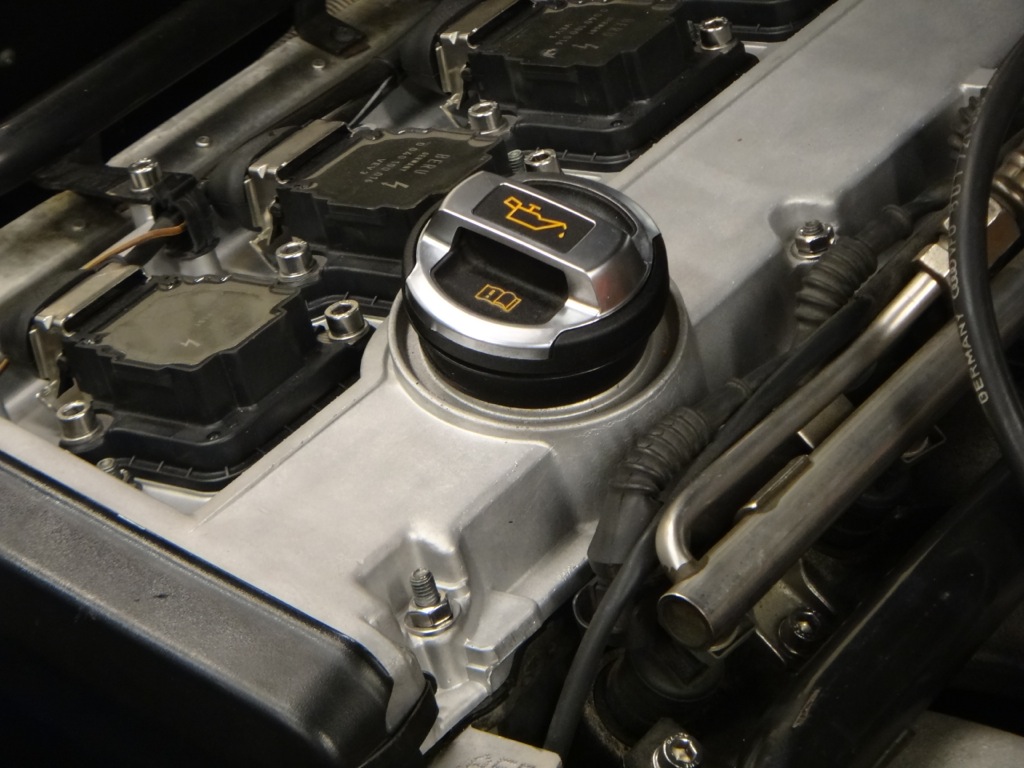
4. R8 oil cap (Page 11)
5. Carbonio CF intake (Page 13)
6. New blue silicone vacuum lines (Page 15)
7. Shaved/polished intake manifold (WIP) (Page 1, 4, 5, 6, 22)
Polished throttle body (WIP) (Page 20, 21)
8. Plasti dipped fluid caps (Page 14)
9. Timing belt service including cam chain tensioner, serpentine tensioner, seals, etc. (Page 26, 27)
10. Bead blasted valve cover (Page 25, 27)
Suspension
1. Meyle 12 piece HD control arm kit including TREs & sway bar end links
2. New motor mounts
3. Neuspeed snub mount
4. S4 rear sway bar (Mentioned on Page 11)
5. 034 street density transmission mounts (Page 14)
6. Sport shocks and springs (Page 23)
Interior/Electronics
1. Sony Xplod stereo, 8" sub in trunk (PO installed)
2. Chrome gauge rings (page 1) (Removed with old cluster)
3. Sunglass holder (Page 3)
4. iPhone integration and mount (Page 6)
5. AWE vent boost gauge (Page 8)
6. Osir shift **** (Page 8)
7. Red LED under dash lights (Page 10)
8. Funk switch (for under dash lights) (Page 10)
9. LED interior lights
10. Sport steering wheel(Page 11)
11. Facelift vent housings (Page 11, 14)
11. Hardwired GPS (Page 11)
12. "A4" marked pedal covers (Page 13)
13. eBay short shifter (Page 13)
14. Redline short shift boot (Page 13)
15. LCD cluster swap (Page 18, 20, 21, 23)
16. Updated flip key remote (Page 20)
17. Leather facelift ebrake handle covers
18. Installed headlight relays using OEM equipment (Page 28, 29)
Exterior
1. Clear side markers (Page 1) (Replaced with smoked side markers)
2. Lower chrome grille (Page 4) (Removed)
3. M3 lip spoiler (Page 6)
4. Shaved badges (Page 6)
5. LED license plate lights (Page 6)
6. RS4 grille (Page 10)
7. Plasti dipped 5 spoke wheels, grille trim, and side mirrors (Page 8, 14)
8. Painted brake calipers red (Page 14)
9. Smoke side markers (Page 24)
10. S4 gloss B pillars (Page 16)
11. Facelift tail lights (Page 16)
12. Facelift independent fog lights (Page 17, 24, 29, 31)
Advancing stages of the exterior
1. 4/23/2010 - See below
2. 5/23/2010 - Essentially stock
3. 8/12/2010 - With 16" 5 spoke wheels
4. 10/8/2010 - Added RS4 grille, chrome lower grille, lip spoiler
5. 9/5/2012 - Plasti dipped wheels, mirrors, red calipers
6. 1/8/2013 - Facelift tail lights
7. 1/26/2013 - Dipped grille, snow photos
8. 2/11/2013 - On sport suspension
9. 2/20/2013 - With updated fogs
I hope this makes it easier to find what you're looking for.
Engine
1. 18psi tune (PO installed)
2. Replaced turbo oil feed line
3. Forge 007 (Pictured on Page 26)
4. R8 oil cap (Page 11)
5. Carbonio CF intake (Page 13)
6. New blue silicone vacuum lines (Page 15)
7. Shaved/polished intake manifold (WIP) (Page 1, 4, 5, 6, 22)
Polished throttle body (WIP) (Page 20, 21)
8. Plasti dipped fluid caps (Page 14)
9. Timing belt service including cam chain tensioner, serpentine tensioner, seals, etc. (Page 26, 27)
10. Bead blasted valve cover (Page 25, 27)
Suspension
1. Meyle 12 piece HD control arm kit including TREs & sway bar end links
2. New motor mounts
3. Neuspeed snub mount
4. S4 rear sway bar (Mentioned on Page 11)
5. 034 street density transmission mounts (Page 14)
6. Sport shocks and springs (Page 23)
Interior/Electronics
1. Sony Xplod stereo, 8" sub in trunk (PO installed)
2. Chrome gauge rings (page 1) (Removed with old cluster)
3. Sunglass holder (Page 3)
4. iPhone integration and mount (Page 6)
5. AWE vent boost gauge (Page 8)
6. Osir shift **** (Page 8)
7. Red LED under dash lights (Page 10)
8. Funk switch (for under dash lights) (Page 10)
9. LED interior lights
10. Sport steering wheel(Page 11)
11. Facelift vent housings (Page 11, 14)
11. Hardwired GPS (Page 11)
12. "A4" marked pedal covers (Page 13)
13. eBay short shifter (Page 13)
14. Redline short shift boot (Page 13)
15. LCD cluster swap (Page 18, 20, 21, 23)
16. Updated flip key remote (Page 20)
17. Leather facelift ebrake handle covers
18. Installed headlight relays using OEM equipment (Page 28, 29)
Exterior
1. Clear side markers (Page 1) (Replaced with smoked side markers)
2. Lower chrome grille (Page 4) (Removed)
3. M3 lip spoiler (Page 6)
4. Shaved badges (Page 6)
5. LED license plate lights (Page 6)
6. RS4 grille (Page 10)
7. Plasti dipped 5 spoke wheels, grille trim, and side mirrors (Page 8, 14)
8. Painted brake calipers red (Page 14)
9. Smoke side markers (Page 24)
10. S4 gloss B pillars (Page 16)
11. Facelift tail lights (Page 16)
12. Facelift independent fog lights (Page 17, 24, 29, 31)
Advancing stages of the exterior
1. 4/23/2010 - See below
2. 5/23/2010 - Essentially stock
3. 8/12/2010 - With 16" 5 spoke wheels
4. 10/8/2010 - Added RS4 grille, chrome lower grille, lip spoiler
5. 9/5/2012 - Plasti dipped wheels, mirrors, red calipers
6. 1/8/2013 - Facelift tail lights
7. 1/26/2013 - Dipped grille, snow photos
8. 2/11/2013 - On sport suspension
9. 2/20/2013 - With updated fogs
Last edited by BaseDrifter; Aug 28, 2013 at 10:02 PM.
Thread Starter
|
Site Moderator/B5 Tech Guru
Joined: Feb 2010
Posts: 1,745
From: Bay Area, CA
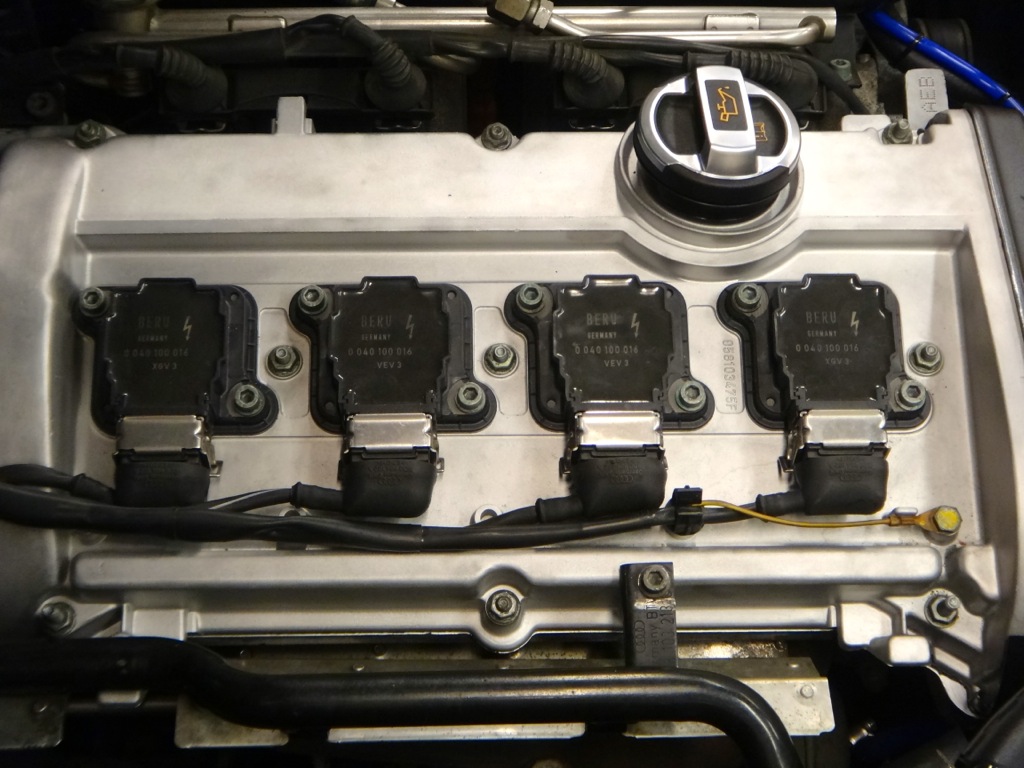
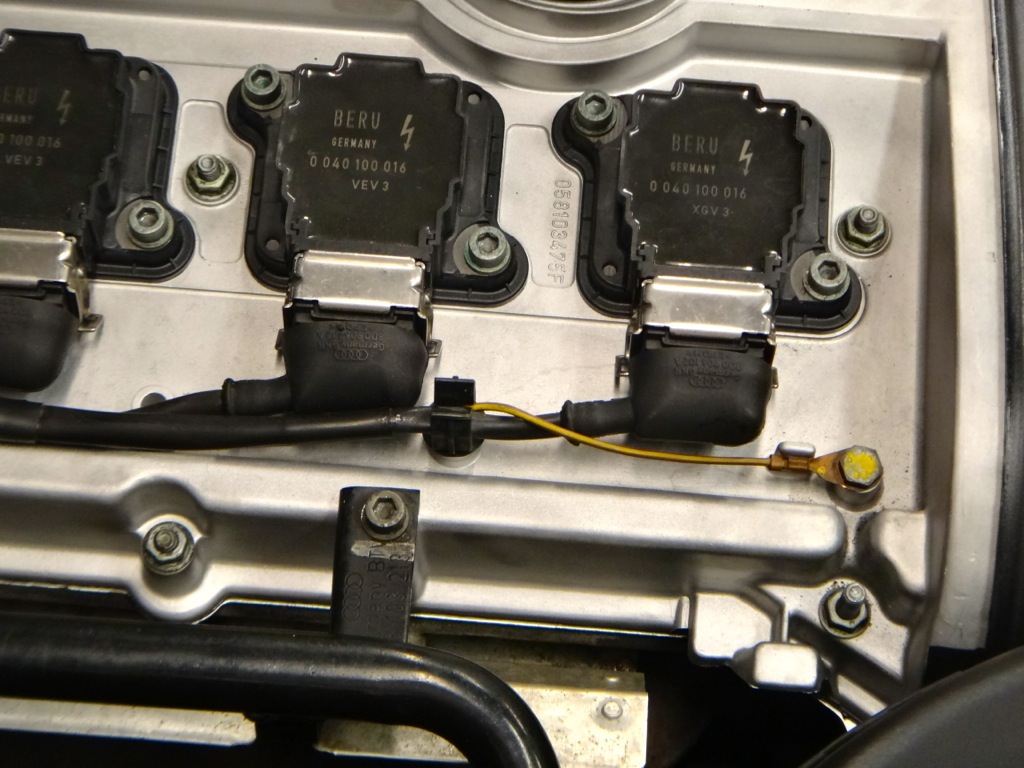
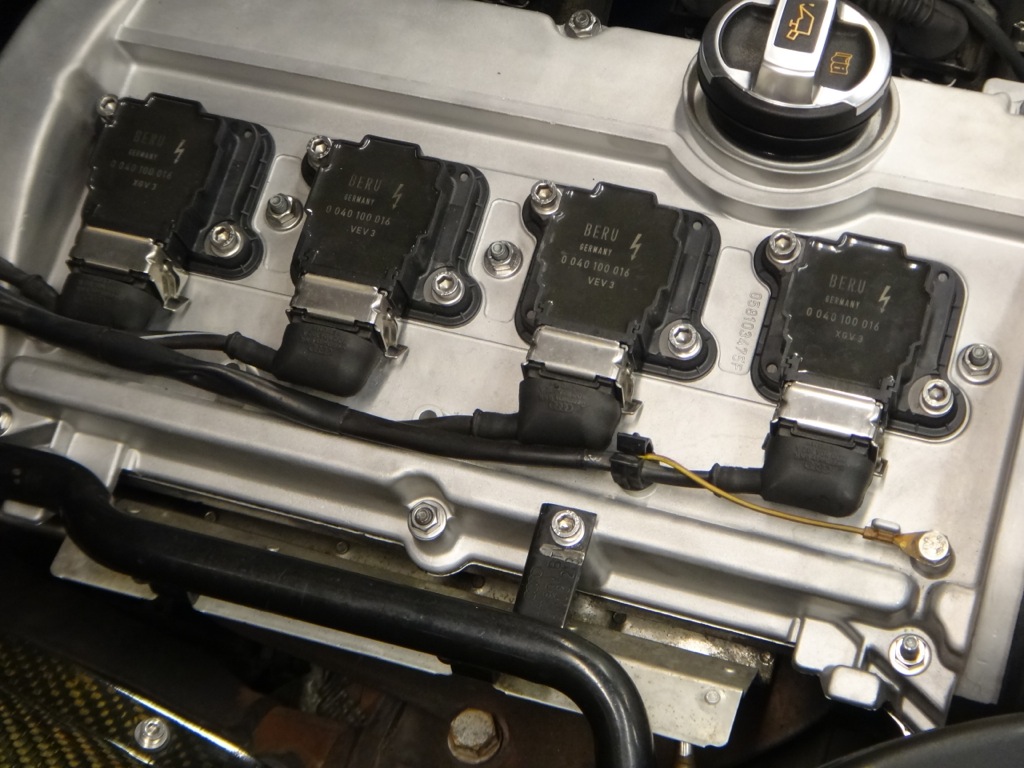
Today I swapped some of the engine bay fasteners out for stainless steel replacements. I swapped the valve cover nuts, coil pack & ground bolts, fuel rail, upper coolant pipe, breather pipe, throttle cable bracket, and the visible throttle body bolt. No more visible green hardware.
Before:

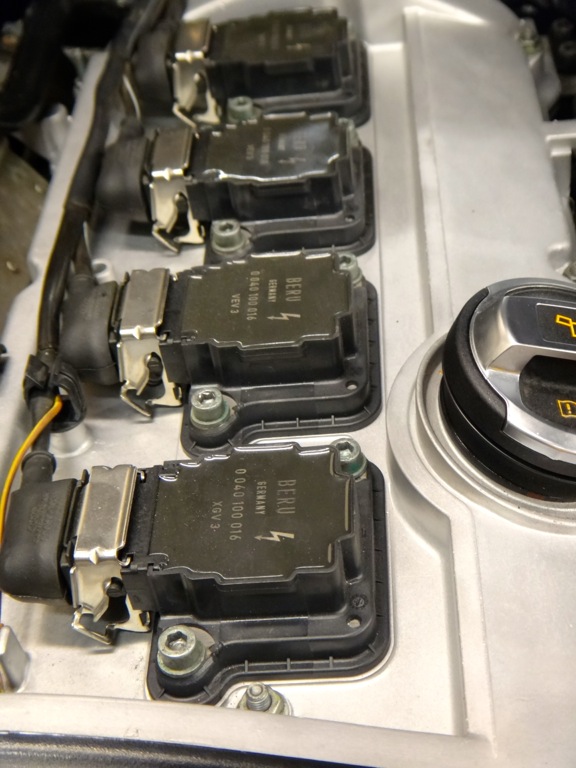
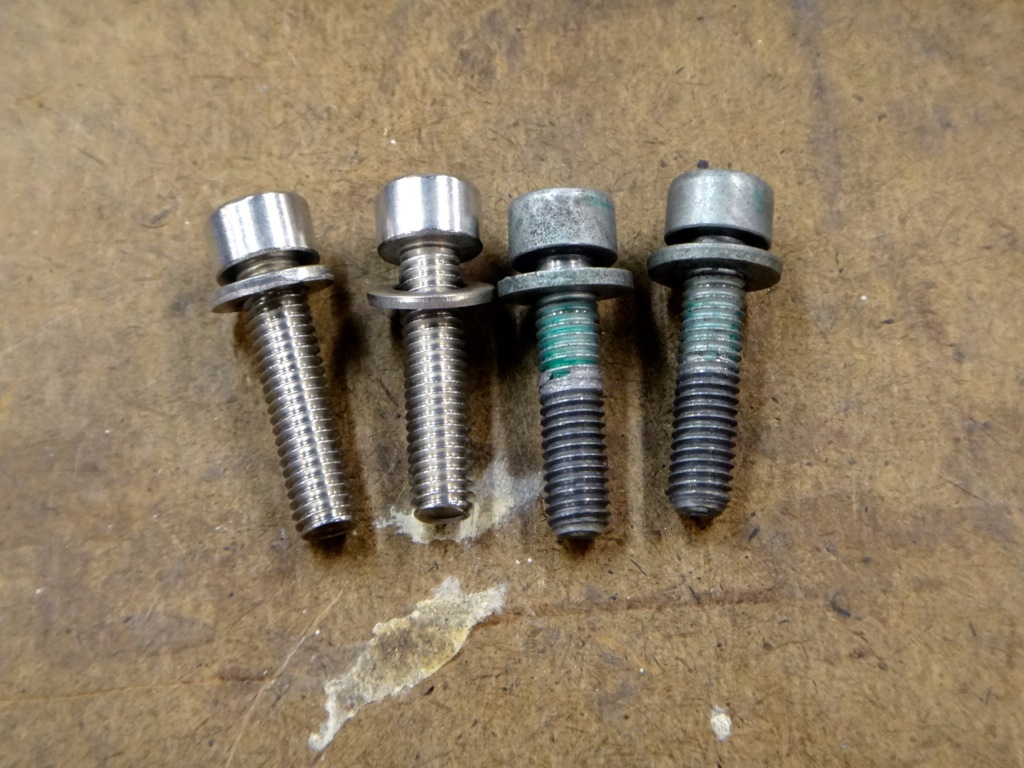
After:
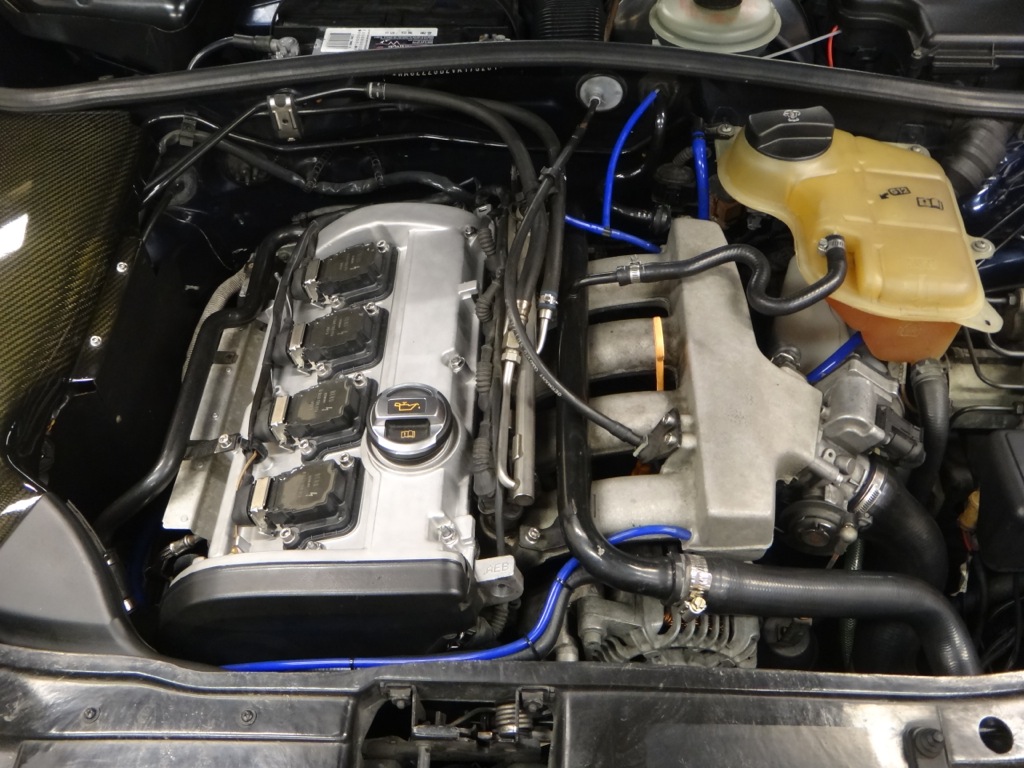
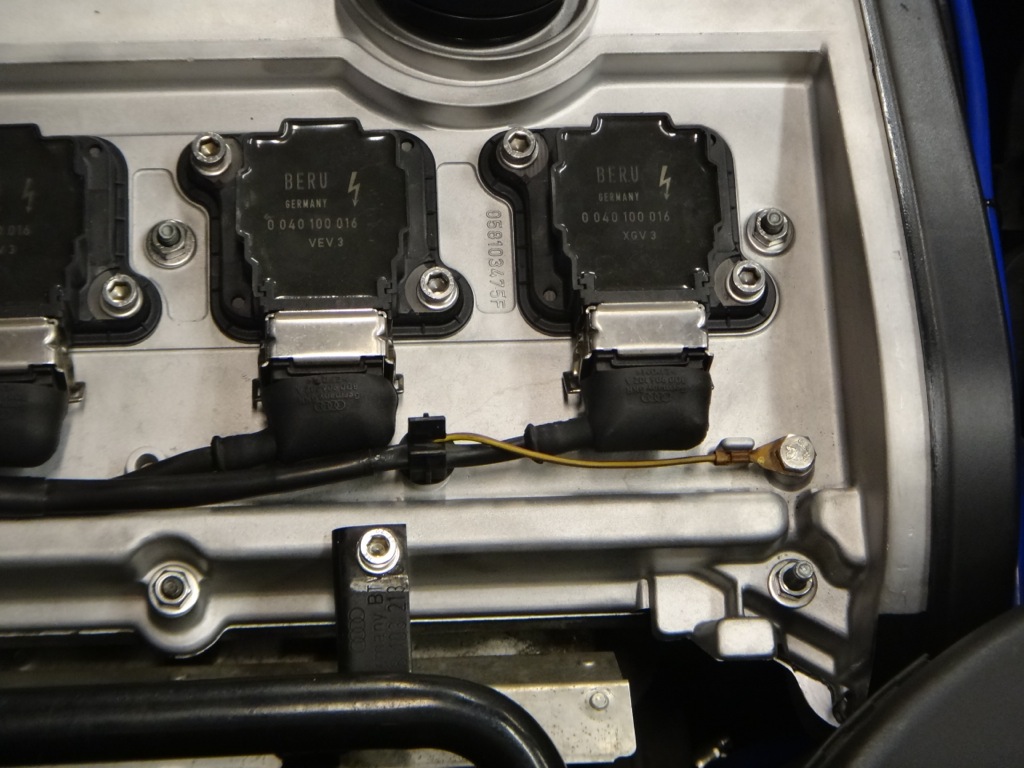
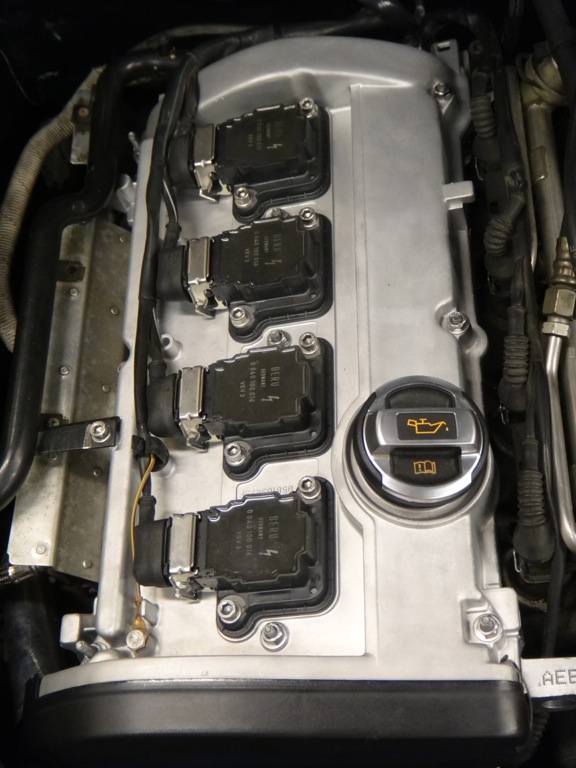
Before:


After:


2nd Gear
Joined: Jul 2012
Posts: 988
From: Warrenton VA
You are either a prefectionist or you have too much time on your hands if the green bolts bothered you haha. It does look cleaner though if you where looking at them
Last edited by Pbcrazy; Aug 29, 2013 at 09:05 PM. Reason: iPhone autocorrect :(