
Brushed shift bezel for A6/allroad/S6


Thread Starter
|
1st Gear
Joined: Aug 2004
Posts: 437
From: near Boston, MA
So, a local allroad owner and I have been chatting for some time to brush his badly pitted shift bezel. I met up with him yesterday to swap out his pitted one for a spare bezel (also badly pitted) I had on hand that I brushed the other day.
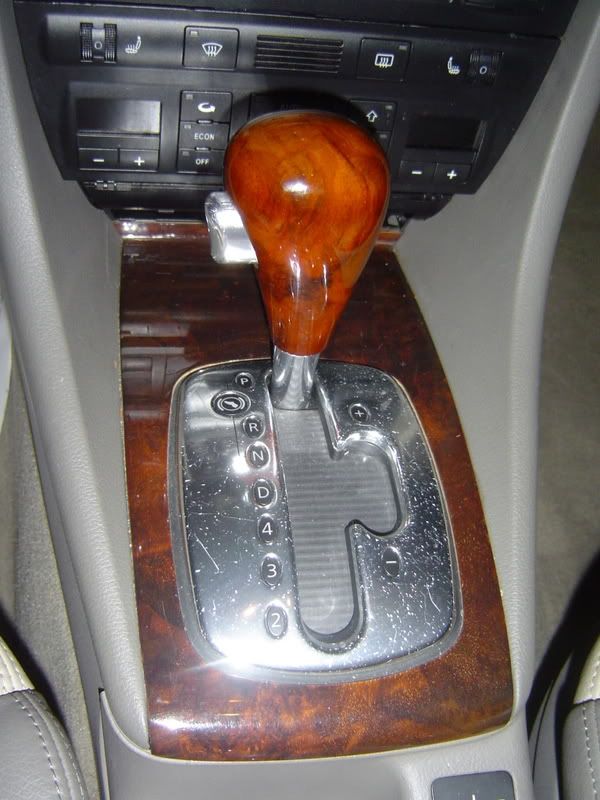
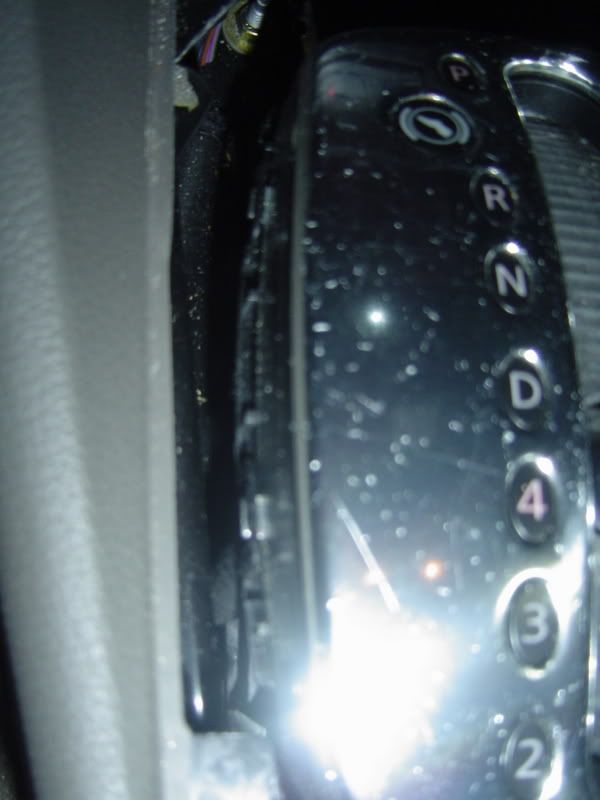
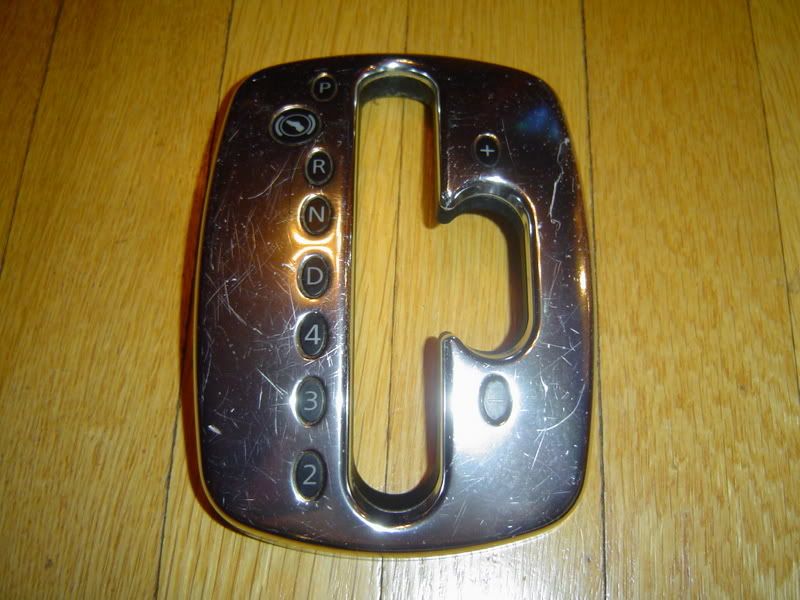
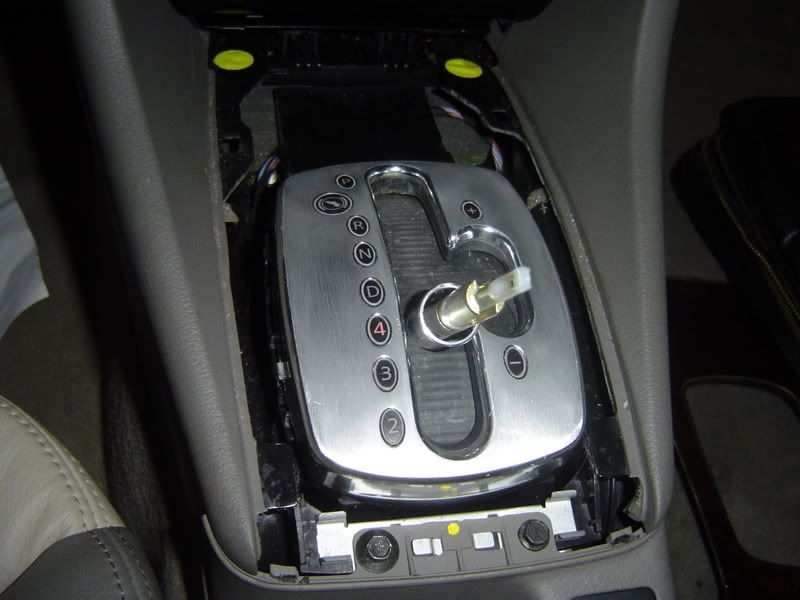
Here is the allroad's bezel, waiting to get swapped out...
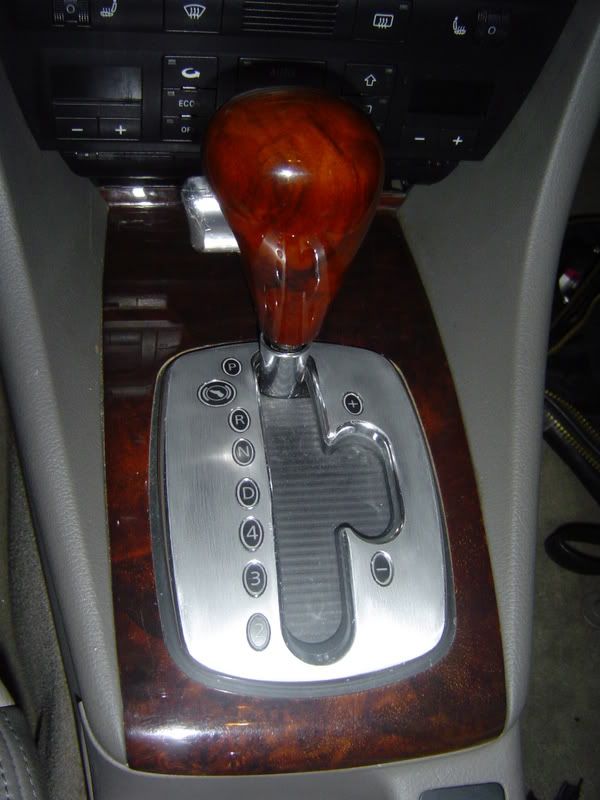
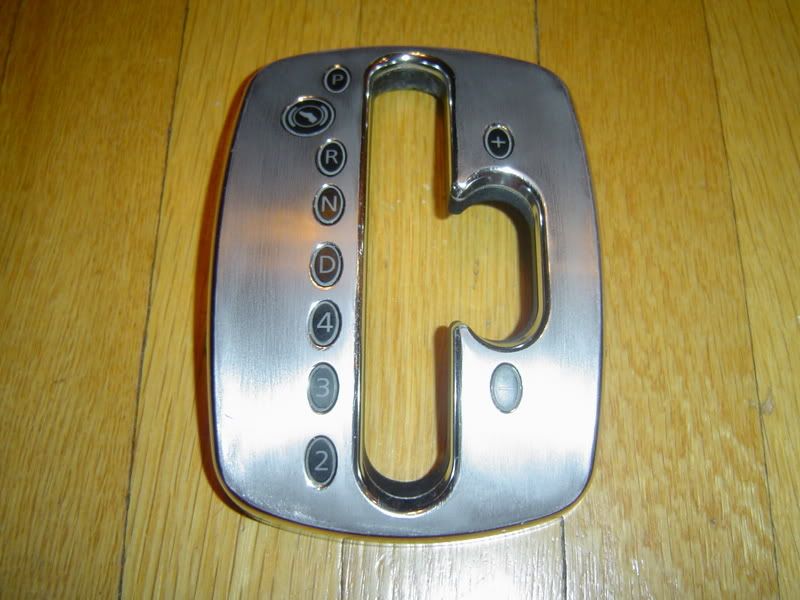
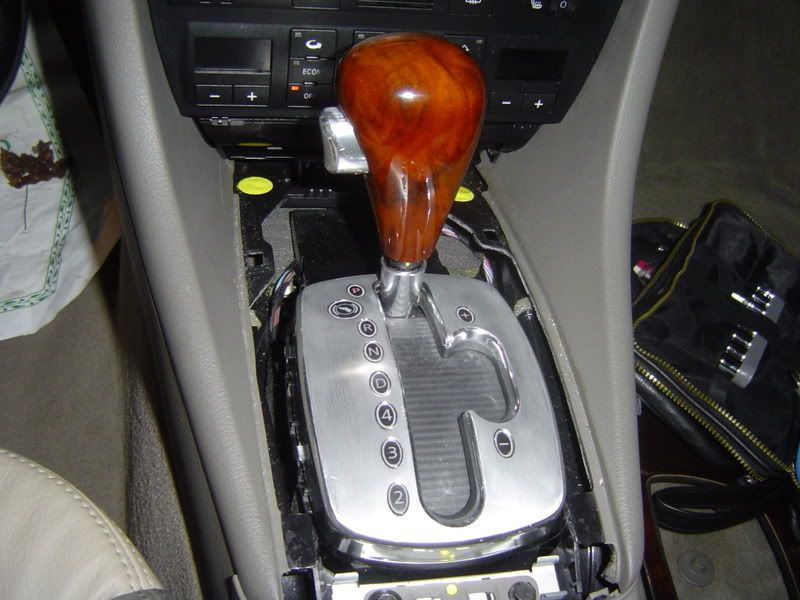
...and the finished product!
It is really not that hard, although there are a few challenges along the way. Here is the process for anyone that might want to try this on their own, and this applies for any C5 platform model with tiptronic (A6/allroad/S6, note the RS6 bezel is already brushed).
Shift bezel removal
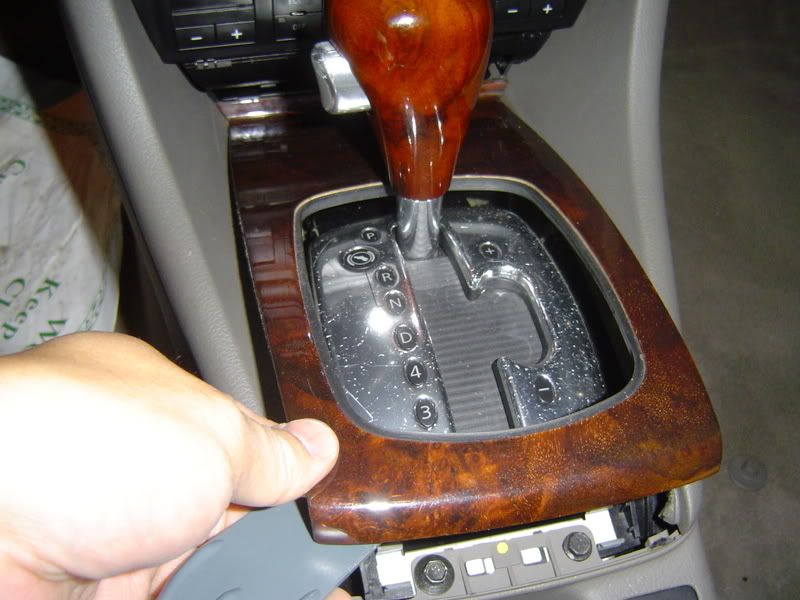
First, you have to remove the wood trim shift surround. Using a plastic putty knife, get in on the rearward edge of the surround and release the rearward edge of the trim. Remove the shift surround by lifting up while moving it rearward to clear the ashtray...
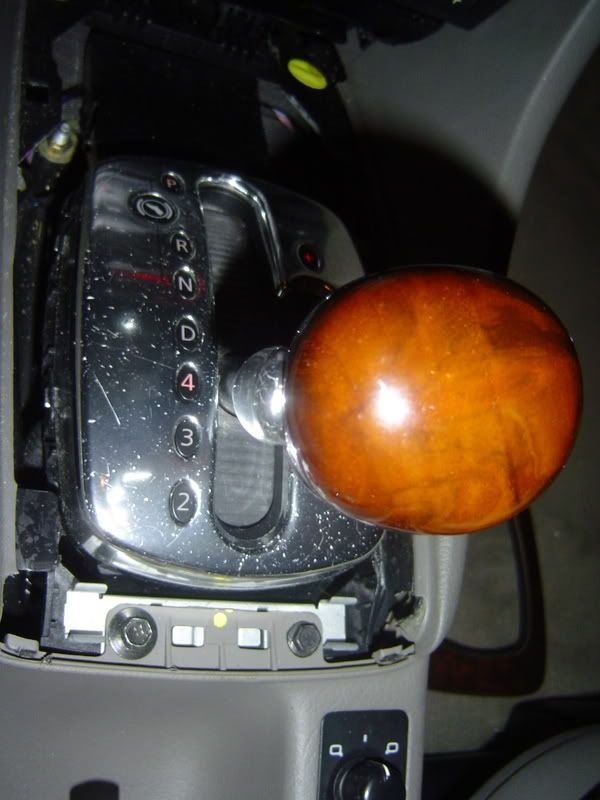
Next, shift the car into 4th gear (or "S" if so equipped) so we can remove the shift ****...
Here is the tricky part, and I do not have pictures since it requires two hands to do it. Using a putty knife or something firm with a think edge, separate the metal collar of the shifter's shaft from the shift **** by prying at the seam between the **** and the collar. Once that is separated, pull the shift ****'s button out and pull up HARD. The **** will come off. If you have a spare blade fuse sitting around, stick it in the slot on the bottom edge of the button so the button does NOT retract into the ****. I did not follow my own step here and it resulted in an extra 30 minutes and a trip for SabaTronicO to the WalMart next door for a tool (although I finally got it out before he returned). Anyway, with the **** removed, set that side.
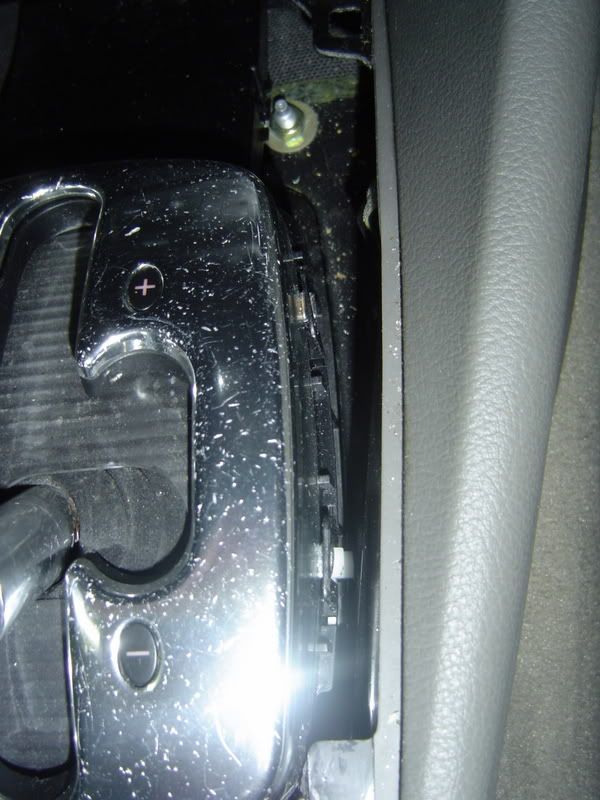
You will see two tabs on each side of the bezel. Gently pry those back to release the tabs...but be careful, they are extremely brittle!
Once the bezel is released, pull straight up to get more of the tiptronic cable so you can get at this wire connector under the bezel...
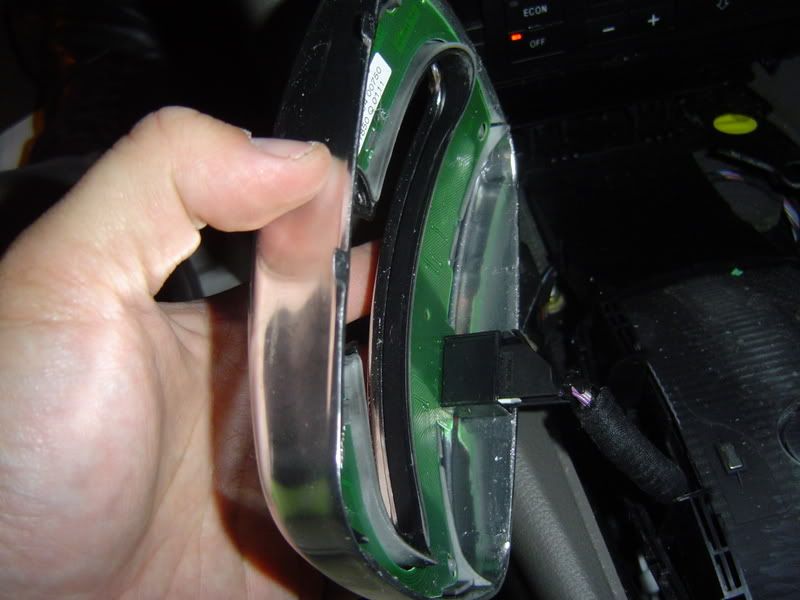
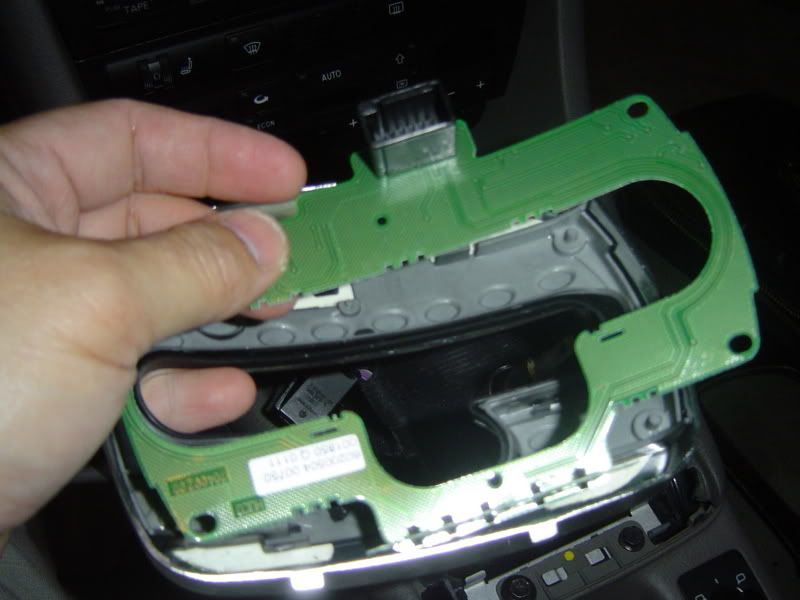
Release the cable connector, and then gently remove the electronic circuit board under the bezel...
Okay, you are now ready for the fun part!
Brushing the bezel
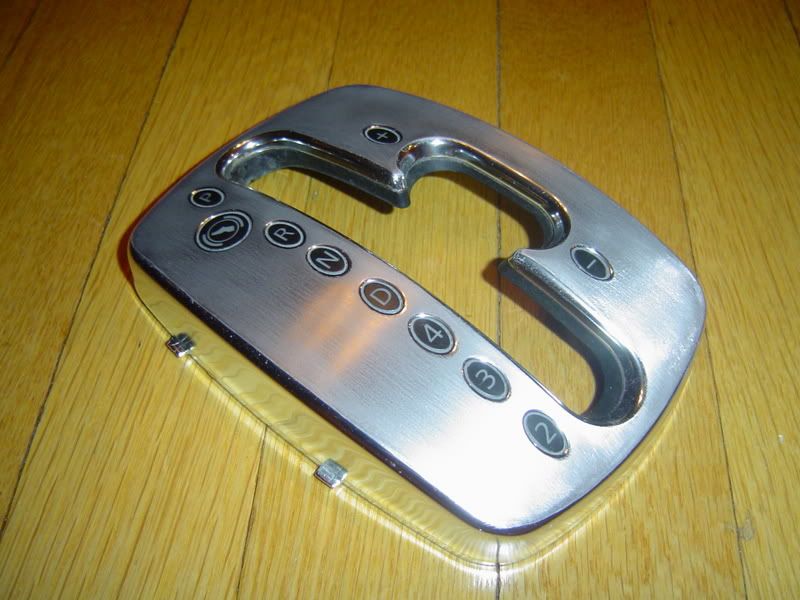
Here is the condition of the bezel I had on hand, the "donor" bezel...
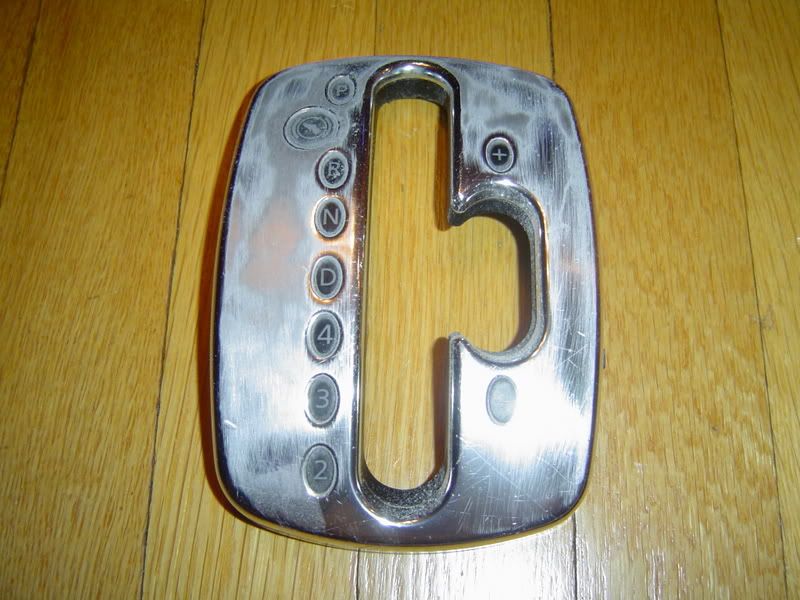
Using a rubber sanding block (the kind that takes the 1/4 strip of sandpaper) with coarse grit (I used 150 grit) sandpaper and go back and forth in one direction to remove the shiny finish of the bezel. Here is a pic of the shiny surface in process of being removed...
Don't panic about the plastic button shift indicator "windows." If you are using a firm sanding block, they will be unharmed. I also cheated a bit by going in the perpendicular direction on the forward and trailing edge of the bezel to get a better "edge" between the shiny original bezel finish and the brushed finish. Once I had that edge, I went back to the original direction of sanding to finish the brushing.
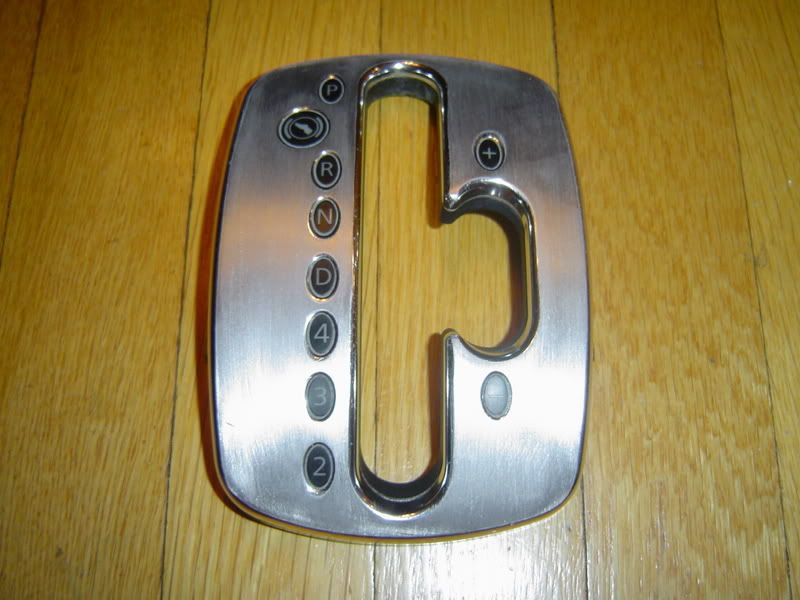
Continue to sand until you have a rough brushed look to the bezel...
Now change to a finer grit sandpaper to get a more even brushed look. I used 400 grit for this step here...
Reinstallation
Reinstall the circuit board and snap the bezel back into place...
Reinstall the shift ****. Make sure the button is pulled all the way out so the internal pin does not break the white plastic retaining slot at the top of the shifter.
Make sure you can shift easily from gear to gear, then snap back into place the shift collar (I forgot to do that in the pictures), reinstall your shift surround, and enjoy!!!
After doing this a few times now, I think it is time to fix the one in my car!!! ))
))
Here is the allroad's bezel, waiting to get swapped out...
...and the finished product!
It is really not that hard, although there are a few challenges along the way. Here is the process for anyone that might want to try this on their own, and this applies for any C5 platform model with tiptronic (A6/allroad/S6, note the RS6 bezel is already brushed).
Shift bezel removal
First, you have to remove the wood trim shift surround. Using a plastic putty knife, get in on the rearward edge of the surround and release the rearward edge of the trim. Remove the shift surround by lifting up while moving it rearward to clear the ashtray...
Next, shift the car into 4th gear (or "S" if so equipped) so we can remove the shift ****...
Here is the tricky part, and I do not have pictures since it requires two hands to do it. Using a putty knife or something firm with a think edge, separate the metal collar of the shifter's shaft from the shift **** by prying at the seam between the **** and the collar. Once that is separated, pull the shift ****'s button out and pull up HARD. The **** will come off. If you have a spare blade fuse sitting around, stick it in the slot on the bottom edge of the button so the button does NOT retract into the ****. I did not follow my own step here and it resulted in an extra 30 minutes and a trip for SabaTronicO to the WalMart next door for a tool (although I finally got it out before he returned). Anyway, with the **** removed, set that side.
You will see two tabs on each side of the bezel. Gently pry those back to release the tabs...but be careful, they are extremely brittle!
Once the bezel is released, pull straight up to get more of the tiptronic cable so you can get at this wire connector under the bezel...
Release the cable connector, and then gently remove the electronic circuit board under the bezel...
Okay, you are now ready for the fun part!
Brushing the bezel
Here is the condition of the bezel I had on hand, the "donor" bezel...
Using a rubber sanding block (the kind that takes the 1/4 strip of sandpaper) with coarse grit (I used 150 grit) sandpaper and go back and forth in one direction to remove the shiny finish of the bezel. Here is a pic of the shiny surface in process of being removed...
Don't panic about the plastic button shift indicator "windows." If you are using a firm sanding block, they will be unharmed. I also cheated a bit by going in the perpendicular direction on the forward and trailing edge of the bezel to get a better "edge" between the shiny original bezel finish and the brushed finish. Once I had that edge, I went back to the original direction of sanding to finish the brushing.
Continue to sand until you have a rough brushed look to the bezel...
Now change to a finer grit sandpaper to get a more even brushed look. I used 400 grit for this step here...
Reinstallation
Reinstall the circuit board and snap the bezel back into place...
Reinstall the shift ****. Make sure the button is pulled all the way out so the internal pin does not break the white plastic retaining slot at the top of the shifter.
Make sure you can shift easily from gear to gear, then snap back into place the shift collar (I forgot to do that in the pictures), reinstall your shift surround, and enjoy!!!
After doing this a few times now, I think it is time to fix the one in my car!!!
))
Thread
Thread Starter
Forum
Replies
Last Post
ricomilion
Allroad Model Line
0
Jul 31, 2012 10:01 AM