
DIY: BlauSport Struts

3rd Gear
Joined: Dec 2008
Posts: 1,941
From: IL
Monday got in the passenger side front one - SO MUCH EASIER; it makes such a huge difference when you know exactly HOW TO DO it 
Yesterday I rented the compressors from AutoZone and I replaced both rear struts in about 5 hours, give or take. It took me though about 45 minutes to undo the top nut on the first one, until I found a vice-grip with the CURVED jaw. I personally only had a straight jaw one, and the damn shaft was spinning in it no matter what.
Boy, what the difference in ride!!!! Actually all 4 struts were shot...
I subscribe to everything you said about these struts, Jim. Even the cornering improved, and same way as you said...with no body roll.
However, I still have thuds especially when going over dips, so I suspect the bushings on the control arms are shot as well. That can wait though...unless I find some "holiday" prices on good control arms.
P.S Blaufergnugen forgot to send new lower spring stops... but after a year probably would have been worthless to even contact them about it... I had to use the old ones.
Last edited by chefro; Nov 17, 2010 at 10:31 PM.
3rd Gear
Joined: Dec 2008
Posts: 1,941
From: IL
I'm posting several photos that are meant to compliment Jim's wonderful and EXTREMELY USEFUL write-up (thanks again, JIM - your insight was priceless), as the job itself most certainly applies to any strut brands (inserts) others may choose to go with.
Again, I'm only trying to highlight a few things about the job I found to be of interest, or that lacked visual aid in Jim's very thorough description.
-
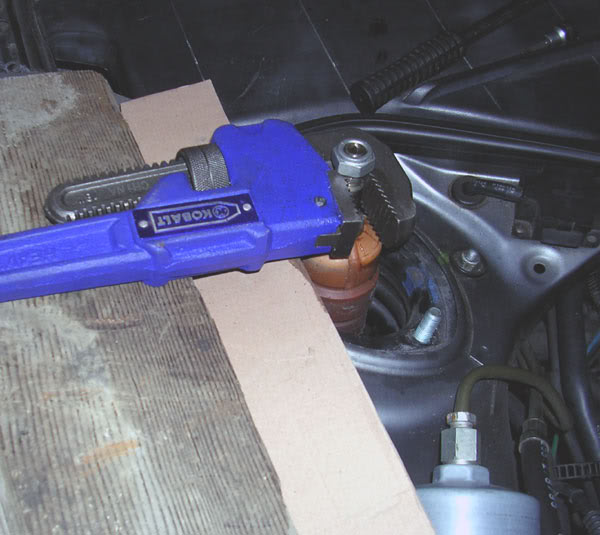
The Pipe Wrench (18 inch) use on the Threaded Cap:
-
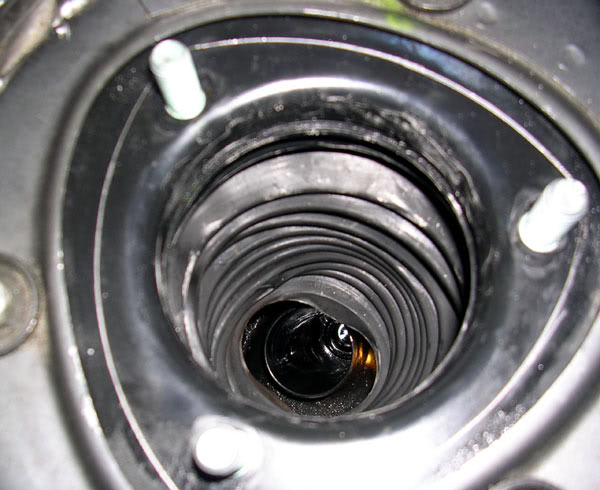
Best spot to jackup the suspension to expose the shaft when removing it (and not only then):
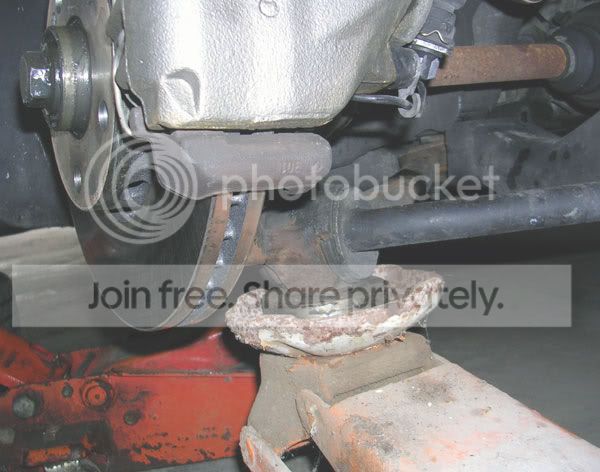
-
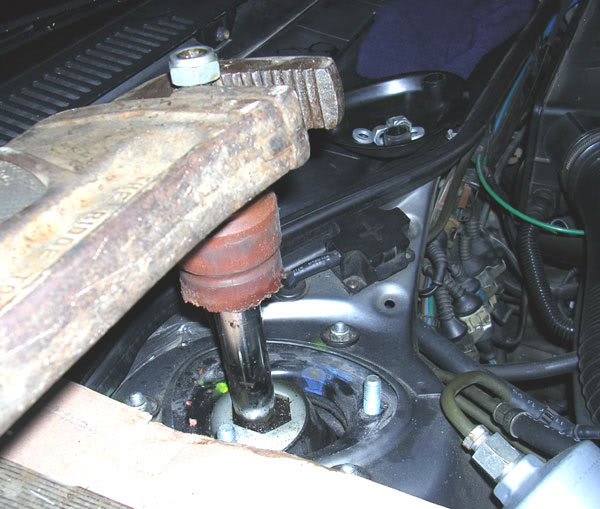
One modality to pull the cartridge up (with the upper nut screwed back in), via pipe wrench:
-
If you can't budge it with the 18inch wrench, then grab a 36" one:
-
Installing the Dust Boot from above, same as in Jim's description:
-
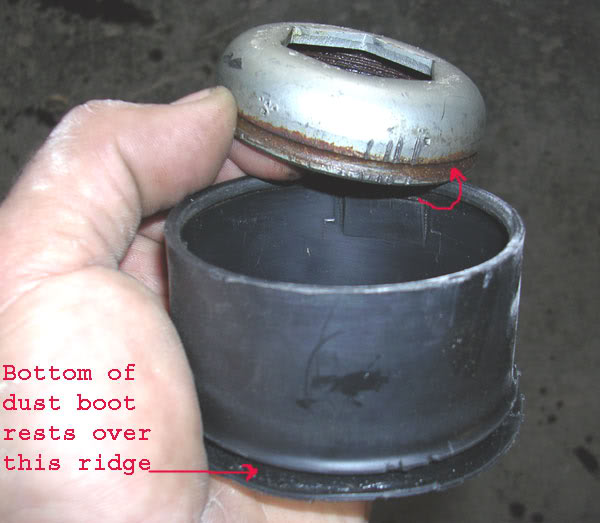
The plastic cover I was talking about, the dust boot's lower edge fastens onto:
-
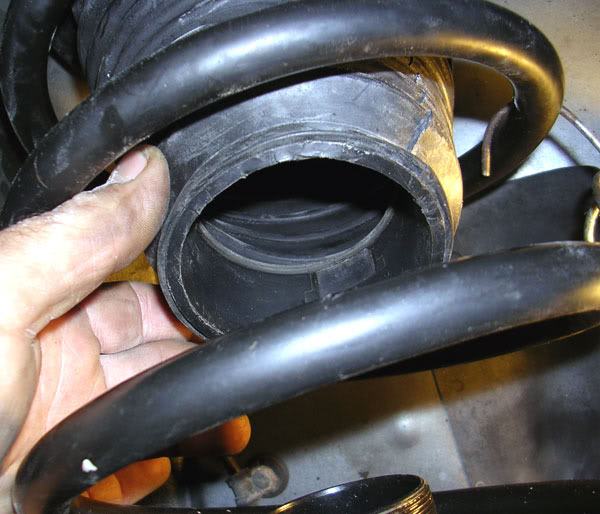
And the boot fastened onto it, before inserting the cartridge:
-
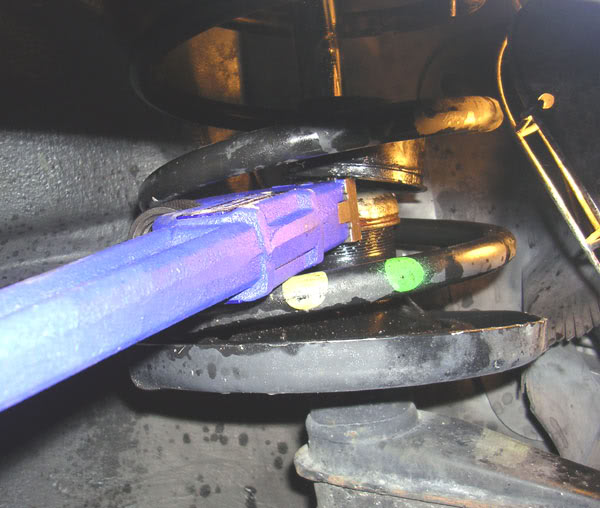
Zip-tied it before sliding it over the Threaded Cap, which I already tightened:

-
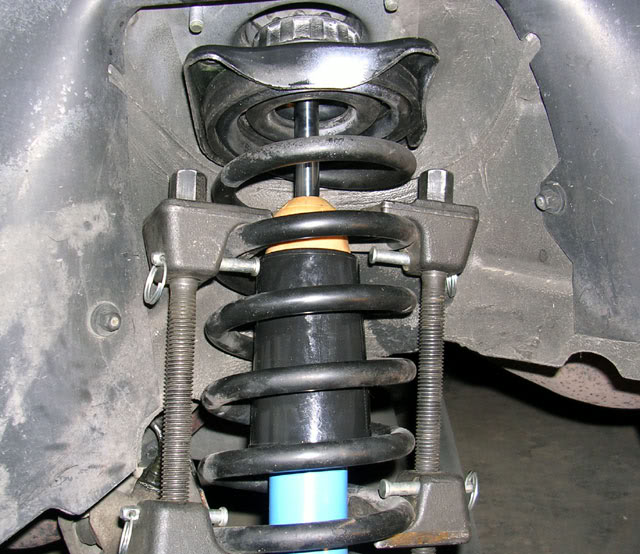
New upper mount is spot on the markings:

-
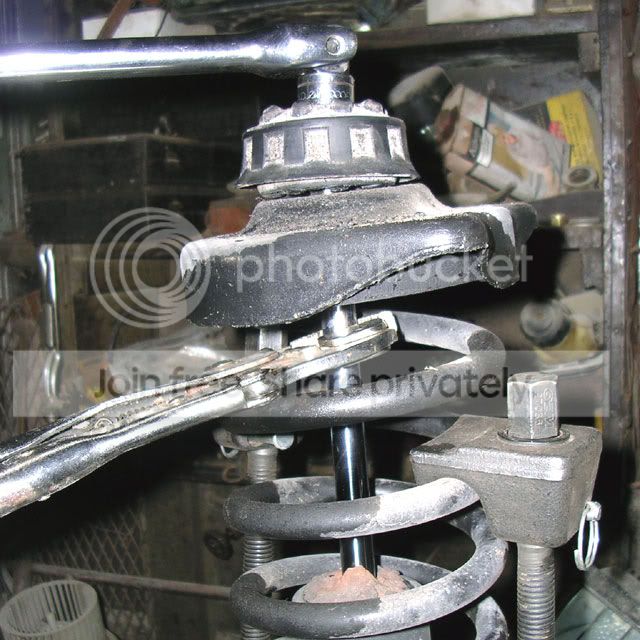
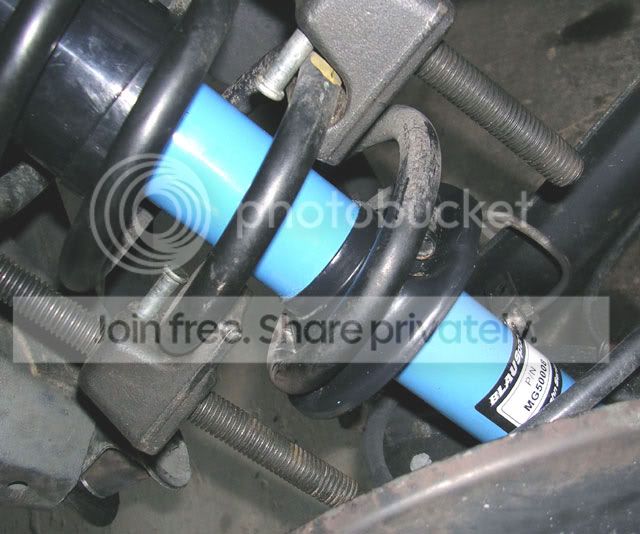
One modality to remove the upper nut on the rear strut - the old cartridge is in the vice, and I use a breaker bar for better leverage, while the CURVED JAW vice-grips are holding the shaft:
-
If are not rusted, the old lower coil stops can be reused (as said, Blau didn't send me new ones... so much for trusting anymore a certain vendor, nowadays):
-
I personally didn't have to lower the suspension to fit the assembly with the new insert in - lower bolt is in already, as the suspension loweres itself when removing the lower bolt; As I recall Jim's is a Quattro, so the rear suspension on mine is much simpler:
-
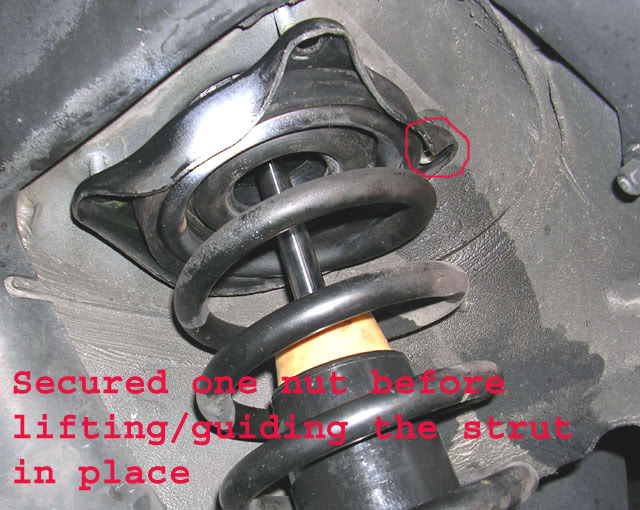
I also found it really helpful to fasten one upper nut (again, the lower bolt was already in place) before jacking up the suspension:
-
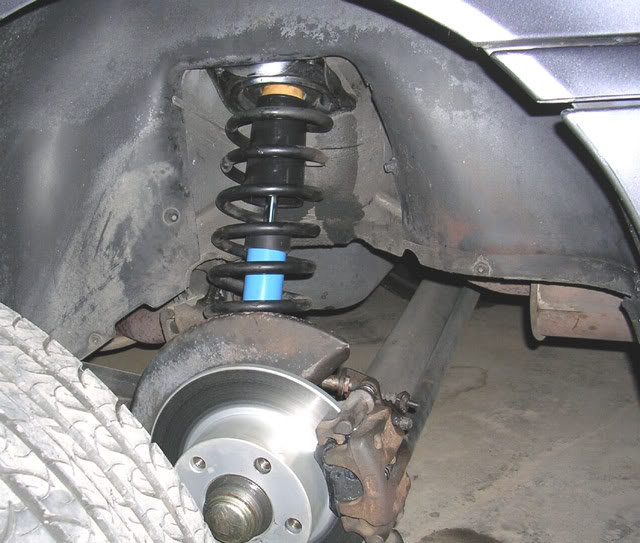
This last pic shows the assembly in with all three upper nuts screwed in, just before jacking up the suspension to torque everything to specs:
Again, I'm only trying to highlight a few things about the job I found to be of interest, or that lacked visual aid in Jim's very thorough description.
-
The Pipe Wrench (18 inch) use on the Threaded Cap:
-
Best spot to jackup the suspension to expose the shaft when removing it (and not only then):
-
One modality to pull the cartridge up (with the upper nut screwed back in), via pipe wrench:
-
If you can't budge it with the 18inch wrench, then grab a 36" one:
-
Installing the Dust Boot from above, same as in Jim's description:
-
The plastic cover I was talking about, the dust boot's lower edge fastens onto:
-
And the boot fastened onto it, before inserting the cartridge:
-
Zip-tied it before sliding it over the Threaded Cap, which I already tightened:
-
New upper mount is spot on the markings:
-
One modality to remove the upper nut on the rear strut - the old cartridge is in the vice, and I use a breaker bar for better leverage, while the CURVED JAW vice-grips are holding the shaft:
-
If are not rusted, the old lower coil stops can be reused (as said, Blau didn't send me new ones... so much for trusting anymore a certain vendor, nowadays):
-
I personally didn't have to lower the suspension to fit the assembly with the new insert in - lower bolt is in already, as the suspension loweres itself when removing the lower bolt; As I recall Jim's is a Quattro, so the rear suspension on mine is much simpler:
-
I also found it really helpful to fasten one upper nut (again, the lower bolt was already in place) before jacking up the suspension:
-
This last pic shows the assembly in with all three upper nuts screwed in, just before jacking up the suspension to torque everything to specs:
Thread Starter
|
4th Gear
Joined: Mar 2009
Posts: 3,042
From: Indiana
Oh ya.. yours is a non-quattro.. makes the rears MUCH easier 
I do believe, however, that Blau meant for you to reuse your lower coil stops/seats as mine where one piece with the strut. I have seen this elsewhere.
Ride good, no?
Good Job!
I do believe, however, that Blau meant for you to reuse your lower coil stops/seats as mine where one piece with the strut. I have seen this elsewhere.
Ride good, no?
Good Job!
3rd Gear
Joined: Dec 2008
Posts: 1,941
From: IL
Well, as said, it is easy to do it when you know how and what to do...thanks to you!
Got myself now new brakes all around and struts. LOL
I need to replace sometime the control arms (or whatever else is the culprit for the still existing thuds), and to change the ...Rear Main Seal, but I need to bite a huge wad of confidence (or drink a lot) before starting to pull out the engine...hehehehe
Got myself now new brakes all around and struts. LOL
I need to replace sometime the control arms (or whatever else is the culprit for the still existing thuds), and to change the ...Rear Main Seal, but I need to bite a huge wad of confidence (or drink a lot
) before starting to pull out the engine...hehehehe

Thread
Thread Starter
Forum
Replies
Last Post