
Removing BROKEN STUD

Thread Starter
|
3rd Gear
Joined: Dec 2008
Posts: 1,941
From: IL
The car is back together, and it runs great. So all that engine work wasn't in vain.
However (damn, I hate this word; it always segways some sort of trouble or problem, doesn't it?)... When putting everything back together underneath after the engine work (also changed the oil), I noticed a little drip of oil/fluid on the tranny pan studs/nuts.
After running it for about a week and a half to make sure everything is ok, I decided to get in the tranny the right amount of fluid (since Blau sent me last time a quart short), so it was a good occasion to drain it again.
I got indeed some more debris in the fluid, so from now she should be ok.
Now it starts the "fun". I didn't know the torque for the pan nuts. Having seen the little drips on the studs, I decided to tighten them as snug as I could. Well, well...what do you think? I snapped a stud. And the sob is exactly the one above the driver side cat! It would have been so much easier to deal with if it was one of the other three...
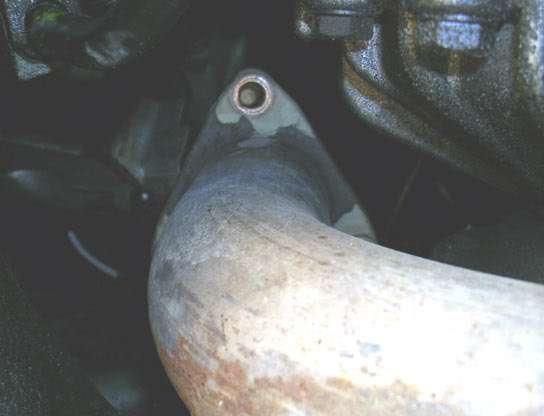
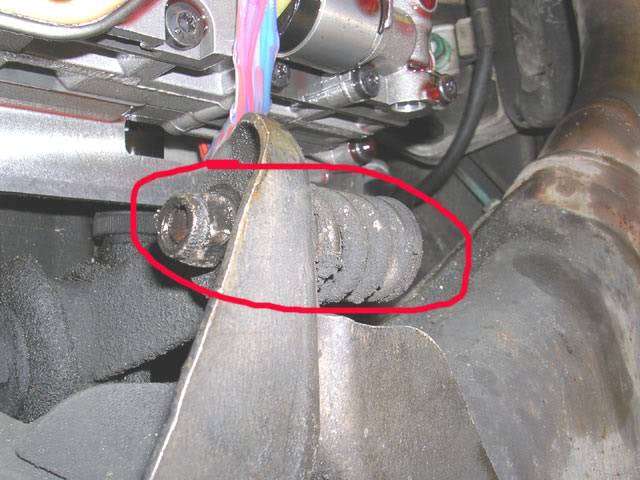
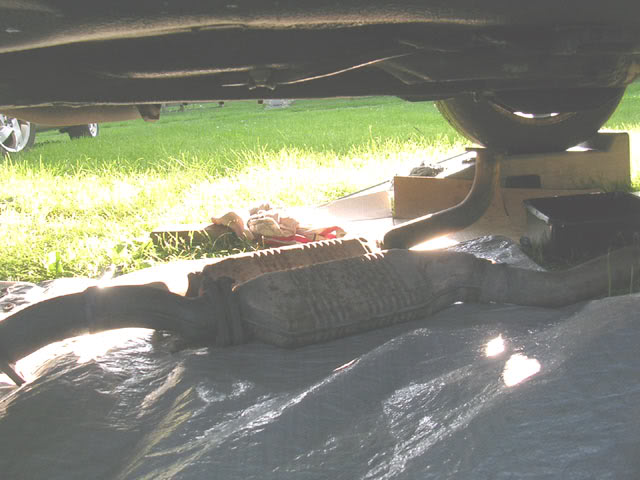
Make long story short, this is what I'm talking about:
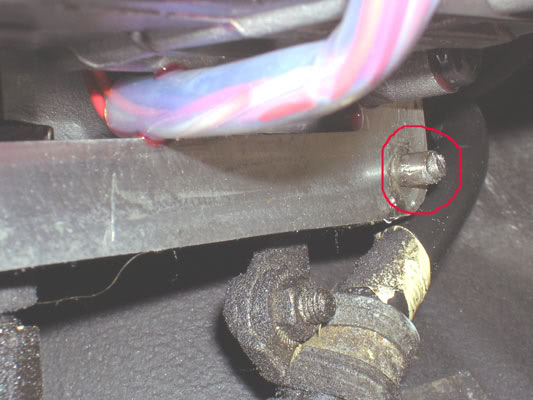
-
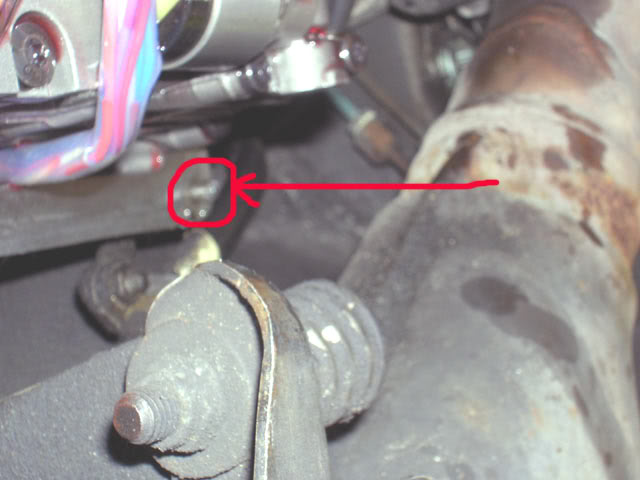
-
I haven't enough room to grip it with some pliers, channel locks, or vice grips. I already dropped the pan again, thinking that would give me room - but it didn't.
The way I look at it, I would have to either drop the valve body (which I don't want to do), or to drop the cat. The problem is that I would have to drop both of them, since they are interconnected. If it was on the passenger side, that cat could have came out by itself.
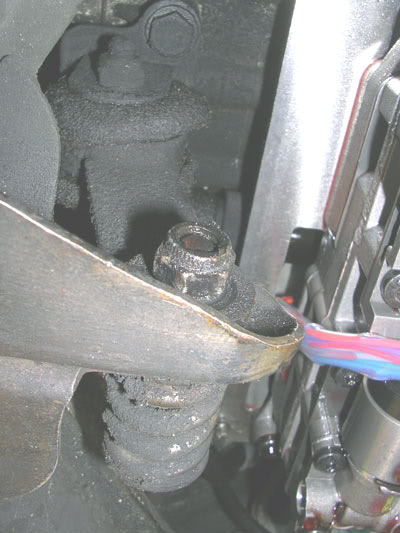
I am looking at those rusted old bolts and I'm wondering what the heck am I suppose to do?
Have already tried a bolt extractor (left-handed or countersink, or how is refered to), but the bit just walks on the surface. I cannot penetrate the stud. Taking the cats down would give me a straigth shot at it. Right now I am "drilling" in an angle, since the drill's chuck hits against the cat.
My questions, guys:
1) Do I have to drill in a dead straight (centered) position?
2) Is there any way the stud would come out from drilling in it from an angle without dropping the cats?
3) Do I have to try to punch a hole in the stud first? (Hole puncher is that tool called?)
4)-Last - Is there a possibility that my bits and removers are not hard enough to penetrate the stud? What should I look for: diamond coated (expensive proposition I would assume) or titanium coated? Anything else better?
Thanks guys.
chefro
(one step forward; three steps back)
...
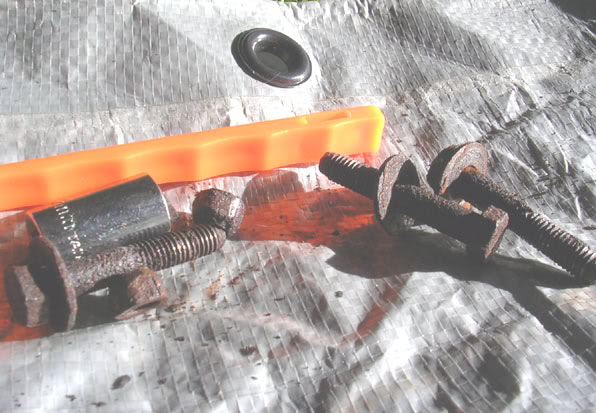
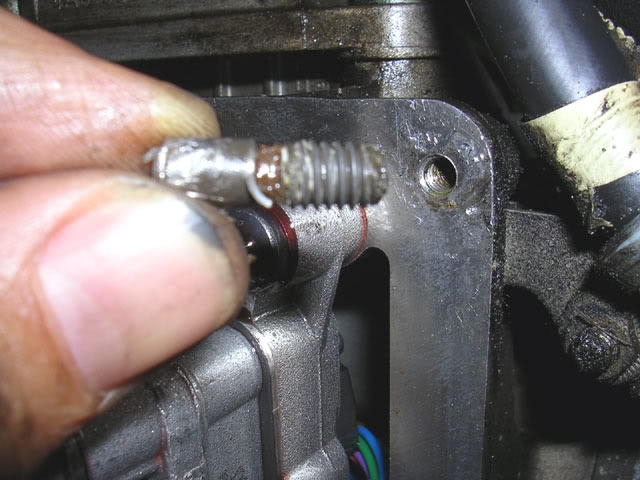
PS. If you were wondering how the studs look like:
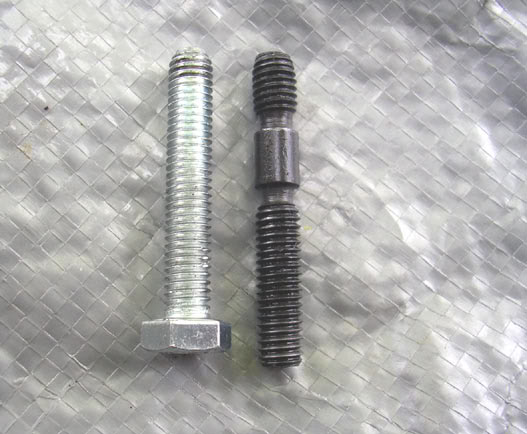
I'm thinking to just replace all 4 with bolts (like the one in the pic). Good or bad idea?
However (damn, I hate this word; it always segways some sort of trouble or problem, doesn't it?)... When putting everything back together underneath after the engine work (also changed the oil), I noticed a little drip of oil/fluid on the tranny pan studs/nuts.
After running it for about a week and a half to make sure everything is ok, I decided to get in the tranny the right amount of fluid (since Blau sent me last time a quart short), so it was a good occasion to drain it again.
I got indeed some more debris in the fluid, so from now she should be ok.
Now it starts the "fun". I didn't know the torque for the pan nuts. Having seen the little drips on the studs, I decided to tighten them as snug as I could. Well, well...what do you think? I snapped a stud. And the sob is exactly the one above the driver side cat! It would have been so much easier to deal with if it was one of the other three...
Make long story short, this is what I'm talking about:
-
-
I haven't enough room to grip it with some pliers, channel locks, or vice grips. I already dropped the pan again, thinking that would give me room - but it didn't.
The way I look at it, I would have to either drop the valve body (which I don't want to do), or to drop the cat. The problem is that I would have to drop both of them, since they are interconnected. If it was on the passenger side, that cat could have came out by itself.
I am looking at those rusted old bolts and I'm wondering what the heck am I suppose to do?
Have already tried a bolt extractor (left-handed or countersink, or how is refered to), but the bit just walks on the surface. I cannot penetrate the stud. Taking the cats down would give me a straigth shot at it. Right now I am "drilling" in an angle, since the drill's chuck hits against the cat.
My questions, guys:
1) Do I have to drill in a dead straight (centered) position?
2) Is there any way the stud would come out from drilling in it from an angle without dropping the cats?
3) Do I have to try to punch a hole in the stud first? (Hole puncher is that tool called?)
4)-Last - Is there a possibility that my bits and removers are not hard enough to penetrate the stud? What should I look for: diamond coated (expensive proposition I would assume) or titanium coated? Anything else better?
Thanks guys.
chefro
(one step forward; three steps back)
...
PS. If you were wondering how the studs look like:
I'm thinking to just replace all 4 with bolts (like the one in the pic). Good or bad idea?
3rd Gear
Joined: Nov 2007
Posts: 1,980
From: Northern California
I would try a metal punch on the center of the broken stud to create a point where the reverse drill bit can start. Just set it on the center of the stud and bang it with a hammer for a few times.

Senior Member
Joined: Apr 2007
Posts: 517
From:
For the Audi A6 C4, the torque for the four 6mm studs on the automatic transmission pan is 6 Nm (53 inch lb) per both the Bentley and the Blau instructions.
You may want to use a 3" diameter pnematic cut off tool and a die grinder on the exhaust pipe to catalytic converter bolts, if you can't get them loose with a wrench. Be sure to have the pan on, when you do this. Audi uses some very hard steels in their bolts and studs, which makes it difficult to drill or cut them the normal way.
With the catalytic converter out of the way, try using a new vise grip with the screw greased. Next, tighten the vise grip screw even tighter with another vise grip.
The transmission body is soft aluminum, so with a 6mm stud it would be difficult to hand drill a hole exactly in the center of the broken stud and not wander into the soft aluminum without a drill guide.
I have used the super tight vise grip to remove 10mm tripple square bolts with stripped heads on the axle flanges.
Thread Starter
|
3rd Gear
Joined: Dec 2008
Posts: 1,941
From: IL
You guys are always so helpful. Appreciation has no right words through a lcd screen.
Well, the bolts were stubborn. Stubborn as the snapped stud.
Guess what, though? I'm more stubborn than those freaking things. I PBlasted the three bolts flanging the cats' common end pipe to the middle pipe, and after I posted I started going at'em. I was able to take the suckers down.
With both cats out of the way, I wanted to try the vice grips before going to the store to buy a metal puncher. "Stubby" came out after some serious wrestling, but it came out.
I'll post a few pics a bit later.
I came in the house to look on vagcat the size of the exhaust flange bolts, because I won't put the old ones back on.
So far, so good. It seems I weathered the "storm". Pfewwwwwwwwwww...
T H A N K S gents!
Thread Starter
|
3rd Gear
Joined: Dec 2008
Posts: 1,941
From: IL
Ok.
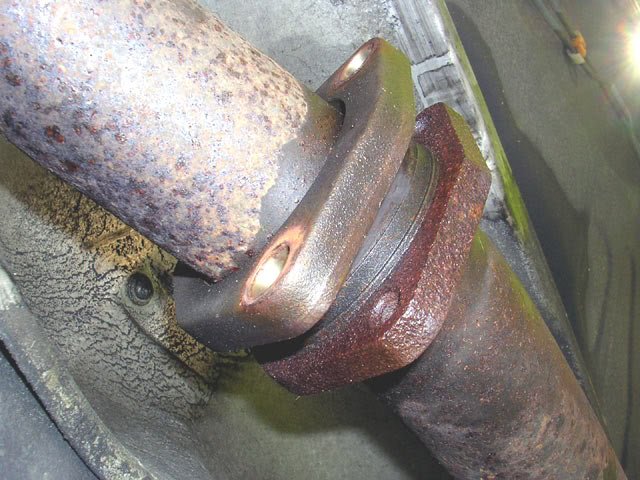
I tackled first the bolts at the "middle" flange (right after the cats), which I sprayed with PBlaster several times. They gave in after some serious opposition. In the future I would start with the one at the top of the "triangle". Not much room in there because of the heat shield's "hat" profile. Those copper nuts as they start rusting are a serious problem. I had to use vice grips (to hold counter) because no socket or wrench could grip them anymore. The rust just eats away the head's profile.
-
-
Next was to remove the downpipes from the heads. Easy task since I just put the new nuts in when tackling the engine several weeks back.
-
Last step was to remove the spring-loaded bracket holding the cats up and secure.
-
The cats dropped immediately
-
As the cats came off, I had plenty room to grip the snapped stud with the vice-grips. Slowly, but steadily it finally came out.
-
Another one for the gipper!
(although the gipper was the one who screwed up in the first place!)
I guess the gipper either needs to buy a watch repair man's hands, or a small numbers torque wrench.
Last edited by chefro; Jun 16, 2009 at 12:08 AM.
Senior Member
Joined: Apr 2007
Posts: 517
From:
Why don't you replace those 8mm steel bolts with 5/16" stainless steel bolts? I use a flanged nut then a lock washer then a nut on the end of the bolt. The 5/16" hardware is cheaper in stainless steel than 8mm.
25.4mm = 1"
25.4mm = 1"
Last edited by a6hcw; Jun 16, 2009 at 09:45 PM.

1st Gear
Joined: Dec 2008
Posts: 140
From: West Palm Beach, FL

Thread Starter
|
3rd Gear
Joined: Dec 2008
Posts: 1,941
From: IL
LOL...you guys crack me up! 
hcw, thanks for the suggestion bro. As cg figured out, I already purchased yesterday the 8M x 35s bolts and nuts for them. They are stainless steel, but I still used some antiseize paste. They didn't have the x 45s, so are on the short side (the nut tightened is right on the edge of the bolt's bottom end) but 4 bolts + 4 nuts at O'Reillys cost me $ 6 and change.
I wrestled a little bit with the cats (together are pretty heavy...lol); I had to use my entire body to get them back up: knees, belly, arms, head, ears, LOL. It was hard until I slipped the spring-loaded bracket on to hold them up, then everything is easy.
I'll jot down that 5/16'' standard size for future work on the exhaust flanges!
Thanks man.
P.S.
OH, the car is indeed "already done" :0