
Sunroof Switch Plate Possible SWAP?

Thread Starter
|
3rd Gear
Joined: Dec 2008
Posts: 1,941
From: IL
Happy New Year to all!
I hope everyone had a wonderful and safe holiday bash (this sort of applies more to the Europeans- or former Europeans who maintain their "customs" here, across the pond).
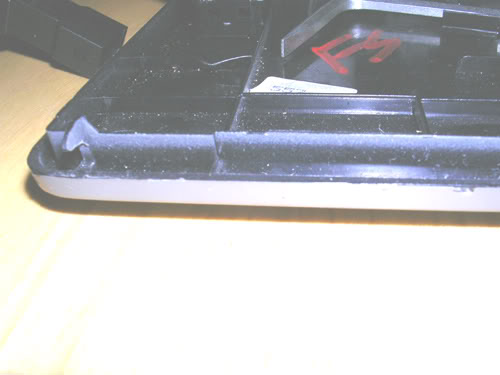
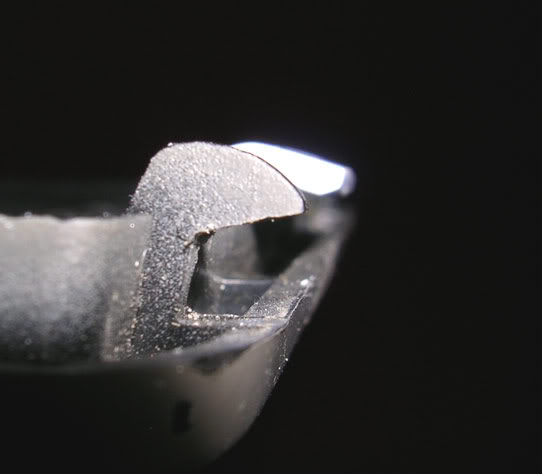
Since I recently unclogged the sunroof drain holes, I took off the switch cover panel to clean the connections. While attempting to bend up a little more the metal contacts - more specifically the two unwelded "fingers", I broke one of them.
The cover plate was anyway screwed in the headliner (unprofessionally). Moreover, it misses all the plastic clips on the inside that would hold it in place in the headliner's cutoff. Also, as soon as I brought it in the house, the light plastic switch fell in my hands. It had a plastic "ear" broken that retains the spring over the contact metal plate, and it is no wonder why it seemed loose while still mounted in the car.

I fixed it by glueing a tiny piece of plastic in place, which I filed it at the top to retain again the spring.

Well, I could live with the cover panel screwed in place although it doesn't sit in place exactly sturdy and flush with the headliner. However, now probably the sunroof will malfunction/not function with the broken metal connector.
So I skimmed through several auto parts Internet places, and I can only find the potentiometer (around $ 83!; # 4438205410) - which I don't need, and the cover plate ($ 150!; # 895 877 829A 7CX) - which I need.
I didn't find the switch itself (# 895 959 613).
Looking on E-Bay, and comparing the prices, I was wondering if it is possible to swap the plate/switch for one fitting a 1999 A8.
For comparisson, I include pics with both models.
A6


A8


The power supply connector and the potentiometer seem the same to me, as well as the switch itself.
The only difference is the light unit, 2 bulbs on the A8 versus only one bulb in the A6. The positions for the light, however seem to be the same: "OPEN DOOR", "OFF"-in the middle, and "ON".
The dimensions for the A6 cover plate are: L 8 2/8 inches X W 7 3/8 inches.
Would it be possible to SWAP the cover plates?
Can anyone with an A8 or with knowledge of the A8 (someone who deals on a regular basis with various models, like auditech79) confirm/infirm if it possible to do this swap?
Knowing the dimensions of the A8's cover plate would be very handy.
Thank you guys.
I hope everyone had a wonderful and safe holiday bash (this sort of applies more to the Europeans- or former Europeans who maintain their "customs" here, across the pond).
Since I recently unclogged the sunroof drain holes, I took off the switch cover panel to clean the connections. While attempting to bend up a little more the metal contacts - more specifically the two unwelded "fingers", I broke one of them.
The cover plate was anyway screwed in the headliner (unprofessionally). Moreover, it misses all the plastic clips on the inside that would hold it in place in the headliner's cutoff. Also, as soon as I brought it in the house, the light plastic switch fell in my hands. It had a plastic "ear" broken that retains the spring over the contact metal plate, and it is no wonder why it seemed loose while still mounted in the car.
I fixed it by glueing a tiny piece of plastic in place, which I filed it at the top to retain again the spring.
Well, I could live with the cover panel screwed in place although it doesn't sit in place exactly sturdy and flush with the headliner. However, now probably the sunroof will malfunction/not function with the broken metal connector.
So I skimmed through several auto parts Internet places, and I can only find the potentiometer (around $ 83!; # 4438205410) - which I don't need, and the cover plate ($ 150!; # 895 877 829A 7CX) - which I need.
I didn't find the switch itself (# 895 959 613).
Looking on E-Bay, and comparing the prices, I was wondering if it is possible to swap the plate/switch for one fitting a 1999 A8.
For comparisson, I include pics with both models.
A6
A8
The power supply connector and the potentiometer seem the same to me, as well as the switch itself.
The only difference is the light unit, 2 bulbs on the A8 versus only one bulb in the A6. The positions for the light, however seem to be the same: "OPEN DOOR", "OFF"-in the middle, and "ON".
The dimensions for the A6 cover plate are: L 8 2/8 inches X W 7 3/8 inches.
Would it be possible to SWAP the cover plates?
Can anyone with an A8 or with knowledge of the A8 (someone who deals on a regular basis with various models, like auditech79) confirm/infirm if it possible to do this swap?
Knowing the dimensions of the A8's cover plate would be very handy.
Thank you guys.
Thread Starter
|
3rd Gear
Joined: Dec 2008
Posts: 1,941
From: IL
Ok,
I "listened" to Auditech's advice and gave up on the swapping thought. Therefore, I purchased an used plate from a salvage place.
It is in far better shape than what I had in the car, but it still came with 2 out of 3 plastic retainers missing. But heck, you can't beat $ 20! A new one is around $ 150...
Crappy weather... don't have a garage so I can do some (other) work on the car... what else can an Audi owner do to keep himself busy? Well, how about pulling a McGyver on the new cover plate?
So I decided to do something about the missing plastic retainers.
I tried to glue a couple of plastic pieces I cut into a similar shape with the original one left intact, but that did not work. The "design" does not allow for sufficient contact surface.
So I went to the store and started looking around for something that would resemble sturdy plastic and that would give me an idea...
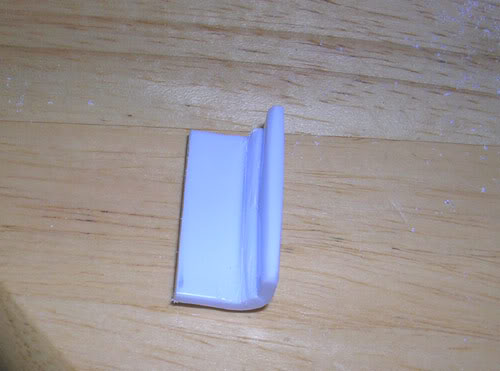
Well, I ended up with ... over-the-door plastic hangers... ... $ 1.25 (although I ended up using only one)... and some plastic epoxy... $ 4.95

The hangers provide for an L-shape needed to go over the cover's raised edge, and the same time provides for a wide area of contact for gluing.
I don't have a coping/jeweler's saw, so I helped myself with the hack saw I have in the tool shed. Also I used a file to smoothen the edges of the finished cut piece.
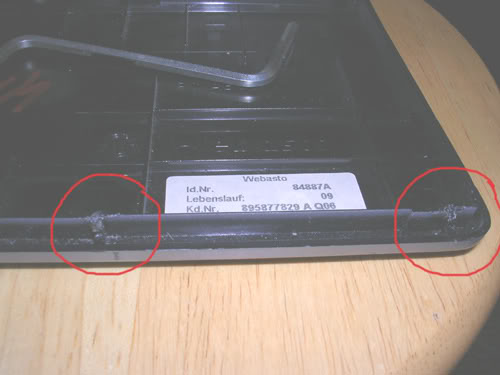
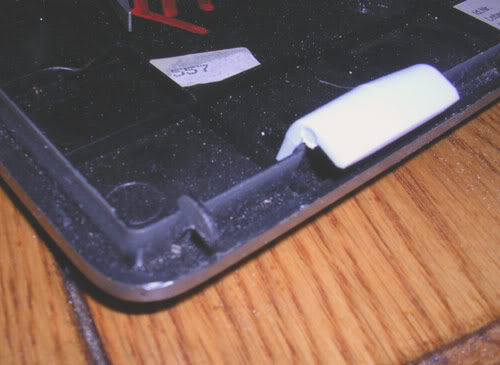
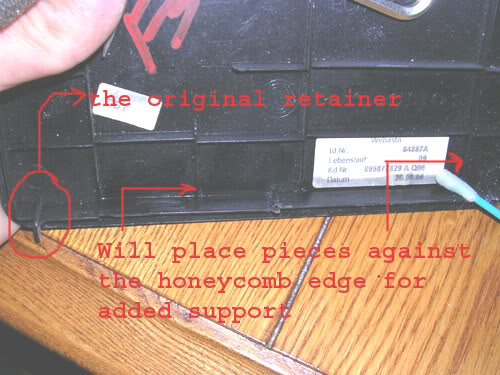
The back of the cover plate (or the inside surface) has a somewhat of a "honeycomb" design at the end with the plastic retainers, and the clusters have some raised edges/walls. They are perfect to "wedge" the fix pieces against them. One of the photos will show that later.
So I measured the side that would project outside and hold against the headliner (just like the original plastic retainer).
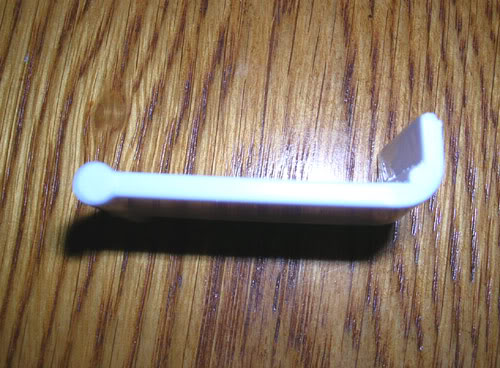
It was about 3/16''. First cut with edges smoothed:
Before making the second cut, I filed the surface that would contact the raised edge so it would be even.
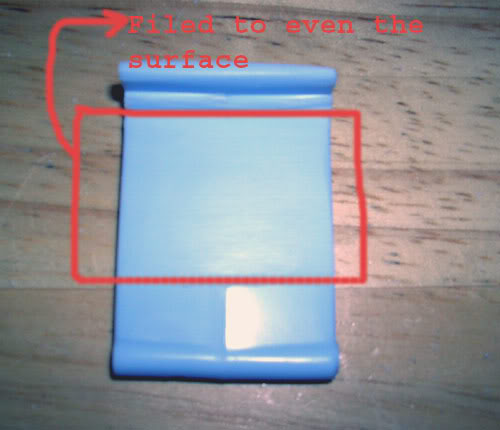
Second cut made; the surface to be glued is a bit longer, as the raised edge of the honeycomb wall is about 4 - 4 1/2-16''. I didn't round the straight edge of this cut, as it would come in contact with the bottom of plate. Leaving it straight will make a better bond with the bottom of the plate - so another contact/support point.
Before cutting a second piece, I made sure it fits as close as possible in a position similar with the original retainer (although it doesn't have quite the same angle, it comes pretty close):
As a matter of fact, it turned out that it holds the cover plate in place even better/tighter than that skinnish original...
Second piece is cut. At this point I need to straighten the bottom edge, as the hacksaw had a mind of its own on this cut...

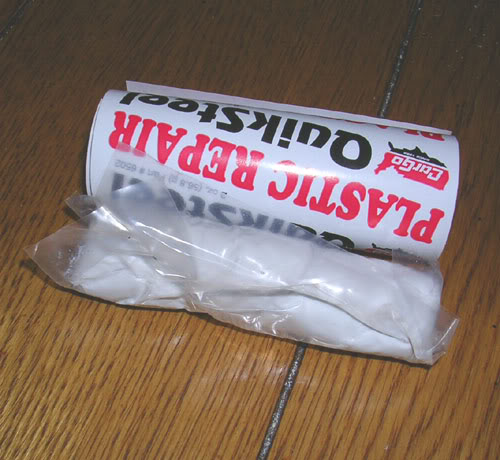
With the pieces ready for bonding, I grabbed the epoxy, sliced a small piece and kneaded it until ready to apply.
Before applying the putty, I sanded lightly the place where the bond will be created, and cleaned it with some rubbing alcohol. Now you can see the "honeycomb" clusters, and where exactly I placed the cut pieces. The pieces will have 3 points of contact: two "walls" of the cluster, and the bottom of the plate...
I applied the kneaded epoxy, set the pieces in place and let it cure overnight...
You can go over it with a tank.... probably the cover plate itself will break/crack before the bond would give up...

If you ever get your retaining clips broken, reconsider replacing the cover plate with a new one. Save yourself some money and pull a McGyver...
I "listened" to Auditech's advice and gave up on the swapping thought. Therefore, I purchased an used plate from a salvage place.
It is in far better shape than what I had in the car, but it still came with 2 out of 3 plastic retainers missing. But heck, you can't beat $ 20! A new one is around $ 150...
Crappy weather... don't have a garage so I can do some (other) work on the car... what else can an Audi owner do to keep himself busy? Well, how about pulling a McGyver on the new cover plate?
So I decided to do something about the missing plastic retainers.
I tried to glue a couple of plastic pieces I cut into a similar shape with the original one left intact, but that did not work. The "design" does not allow for sufficient contact surface.
So I went to the store and started looking around for something that would resemble sturdy plastic and that would give me an idea...
Well, I ended up with ... over-the-door plastic hangers...
... $ 1.25 (although I ended up using only one)... and some plastic epoxy... $ 4.95The hangers provide for an L-shape needed to go over the cover's raised edge, and the same time provides for a wide area of contact for gluing.
I don't have a coping/jeweler's saw, so I helped myself with the hack saw I have in the tool shed. Also I used a file to smoothen the edges of the finished cut piece.
The back of the cover plate (or the inside surface) has a somewhat of a "honeycomb" design at the end with the plastic retainers, and the clusters have some raised edges/walls. They are perfect to "wedge" the fix pieces against them. One of the photos will show that later.
So I measured the side that would project outside and hold against the headliner (just like the original plastic retainer).
It was about 3/16''. First cut with edges smoothed:
Before making the second cut, I filed the surface that would contact the raised edge so it would be even.
Second cut made; the surface to be glued is a bit longer, as the raised edge of the honeycomb wall is about 4 - 4 1/2-16''. I didn't round the straight edge of this cut, as it would come in contact with the bottom of plate. Leaving it straight will make a better bond with the bottom of the plate - so another contact/support point.
Before cutting a second piece, I made sure it fits as close as possible in a position similar with the original retainer (although it doesn't have quite the same angle, it comes pretty close):
As a matter of fact, it turned out that it holds the cover plate in place even better/tighter than that skinnish original...
Second piece is cut. At this point I need to straighten the bottom edge, as the hacksaw had a mind of its own on this cut...
With the pieces ready for bonding, I grabbed the epoxy, sliced a small piece and kneaded it until ready to apply.
Before applying the putty, I sanded lightly the place where the bond will be created, and cleaned it with some rubbing alcohol. Now you can see the "honeycomb" clusters, and where exactly I placed the cut pieces. The pieces will have 3 points of contact: two "walls" of the cluster, and the bottom of the plate...
I applied the kneaded epoxy, set the pieces in place and let it cure overnight...
You can go over it with a tank.... probably the cover plate itself will break/crack before the bond would give up...
If you ever get your retaining clips broken, reconsider replacing the cover plate with a new one. Save yourself some money and pull a McGyver...
Last edited by chefro; Jan 25, 2009 at 07:32 PM.

Thread Starter
|
3rd Gear
Joined: Dec 2008
Posts: 1,941
From: IL
LOL... more of a gross and primitive repair.
I don't know if McGyver would be impressed or not, but the darn thing will stay in place now as it should.
For some reason, though, I feel some starry Audi religious eyes
 looking at this and thinking it's a blasphemous or sacrilegious repair...
P.S.
Therefore, a little sacrifice or offering for the Audi Gods:
Starry eyes
Oh, starry eyes, oh
Standing alone in the light
You could see her cry
With a smile and a wink
And a sparkle in her eyes.
She calmly sighed, "I will be alright"
Oh, starry eyes, oh
Standing alone in the light
You could see her cry
With a smile and a wink
And a sparkle in her eyes.
She calmly sighed, "I will be alright"
Last edited by chefro; Jan 26, 2009 at 12:20 AM.

Thread
Thread Starter
Forum
Replies
Last Post