
**Pictures** Wow... that sucked REALLYY BAD ***Fixed now though***


Thread Starter
|
2nd Gear
Joined: Oct 2006
Posts: 1,362
From: Columbus, GA
Everything is done... hoses installed, all nipples have been repaired and cured. All that is left is installing the Intake Manifold and Fuel rail.
**Urgent**
I need the Torque and Torque sequence for the Intake Manifold Bolts.
It's already installed but i can't torque it down until I get the sequence. Anyone with a bentley manual or any other manual please help me get the torque sequence and torque requirement.
Thank you. :">
**Urgent**
I need the Torque and Torque sequence for the Intake Manifold Bolts.
It's already installed but i can't torque it down until I get the sequence. Anyone with a bentley manual or any other manual please help me get the torque sequence and torque requirement.
Thank you. :">
Thread Starter
|
2nd Gear
Joined: Oct 2006
Posts: 1,362
From: Columbus, GA
Ok, so its all finished now. Boost leak is gone too(replaced boost hoses with hosetechniques hoses)
The metal set held the nipple on hreat and I sealed up the oil dipstick funnel where it broke off for now. Luckily, I've never had to put oil in my car in the almost 4 yrs ive had it. So it's no biggie that i cant check my oil for a week or so. If i had one of those cars that i had to keep checking the oil.. i'd be screwed.
So here's the breakdown of today's events:
[ol][*]Replaced cone filter with HKS super mega flow reloaded Mushroom filter[*]Began replacing stock hoses with high temp silicone hoses - Two hose fittings came off with the hoses; one on the bottom of the intake manifold, and one on a solenoid valve under the throttle body.[*]Pulled the Manifold and fuel rail to get to the hose fitting under the manifold and discovered my oil dipstick funnel and dipstick were completely broken off at the base; this is what was causing the supersaturation of oil on the hose going from FPR to Intake manifold to begin with[*]Capped and sealed off oil dipstick base nub. (temporary)[*]Bored out hose fitting piece left broke off in the manifold and used putty style metal set to adhere the new fitting into the manifold after pressing it in. Used two part plastic epoxy to bond the fitting on the solenoid.[*]Cleaned out manifold plenums good and well.[*]Finished replacing remaining 3.5mm vac hoses prior to reinstallation of manifold[*]put fuel rail and manifold back in... clean as a whistle[*]Also went ahead and replaced the two 8mm hoses on the passenger side by the coolant tank too. (by the way, the stock 8mm hoses over there are fiber reinforced coolant lines and probably shouldn't be replaced with these silicone 8.0mm vacuum hoses... but i had already done it all and didnt feel like reverting back. Hope it holds up to the heat.)[/ol]
Test Run.... no timing advance yet but boost is back up to 21psi on the first run as opposed to the 14psi it had at the start of the day. manifold removal took about 15 minutes... but the whole thing took forever as i was doing it during breaks at work. -shrugs-
I'll have pics posted up tomorrow for it all. I left my camera downstairs in the car.

Thread Starter
|
2nd Gear
Joined: Oct 2006
Posts: 1,362
From: Columbus, GA
[ul][*]Disconnected MAP sensor and one way solenoid (under throttle body)[*]disconnected mechanical portion of fuel rail.[*]Pulled injectors[*]disconnected PCV valve[*]Disconnect chargepipe[*]disconnected various hoses connected to the manifold[*]removed all the manifold bolts, including the ones hold that bracket on (the bracket that is usually covered with the long skinny engine cover under manifold)[*]remove manifold[*]Clean manifold[*]wipe down gasket[*]cap off ports on head where manifold mates to prevent foreign object debrit from getting in.[*]Reassemble[*]Make sure you torque the Manifold bolts to 84in/lbs torque and start in the center and go criss-cross outwards to "stretch" the gasket so it doesnt bunch in the center (which is what could happen if you start on the outside and work inward)[/ul]
It was actually very easy. Good time to replace all those hoses and clean that whole area up.
BTW Here're the leaks I had in hoses that were found during this whole ordeal:
[ol][*]Cloth Braided hose going from the Intake Manifold to the FPR was extremely deteriorated with holes and breaks in about 7 places.[*]Silicone hose going from that EGR clusterfck on top of the valve cover to the Intake Manifold had a hole half the diameter of the hose. (looked like a cut in the hose almost)[*]Silicone hose going from the solenoid changeover valve (Item 6 in THIS diagram) to the EGR clusterfck had a hole chaffed in the side from rubbing on the bracket (Item 2in that picture)[*]Oil Dipstick broken clean off at the base where the plastic funnel meets the metal base (Capped and Sealed off the remaining metal nub)[/ol]

3rd Gear
Joined: Jul 2006
Posts: 1,772
Yep the same things that I found this weekend, now im back up to 20psi and holding good. Gona change out my N75 to wastegate line here this next weekend. Just as preventive maint.
Thread Starter
|
2nd Gear
Joined: Oct 2006
Posts: 1,362
From: Columbus, GA
Ok, here's some pictures:
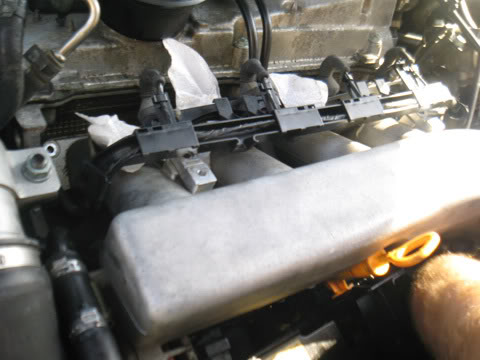
Injectors pulled. Fuel Railand manifold removal in progress
Manifold out. View of bay without it.
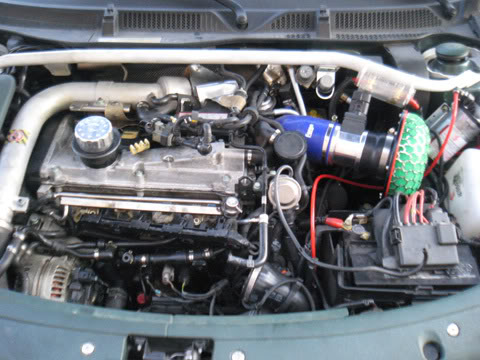
Another view

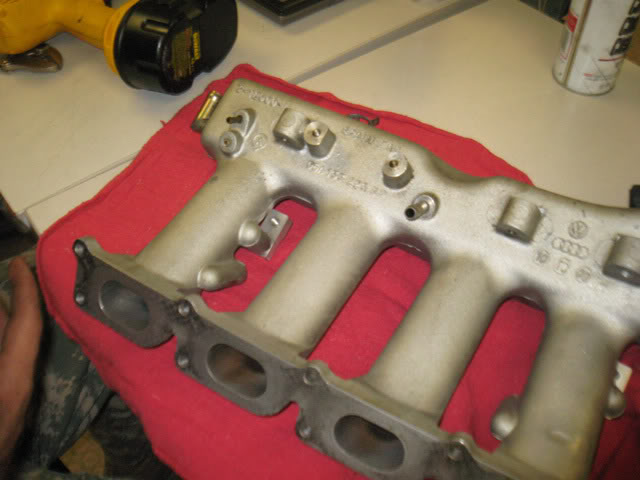
Here's the Manifold laid out on the desk in my office. I photoshopped a circle around the two hose fittings (nipples). as you can see... the lower one is broken off inside.
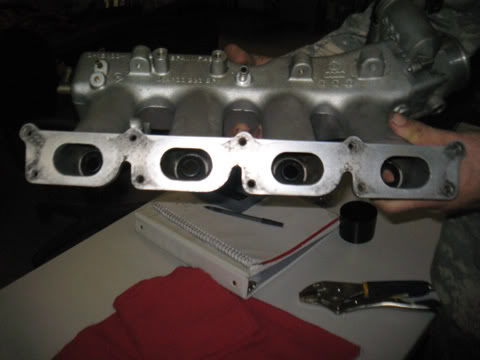
View into plenums. Cleaned it out/off real well with the exception of the gasket residue. Left that there so as to retain a perfect fit with the existing gasket. If it had been changed... then I would have cleaned it off.
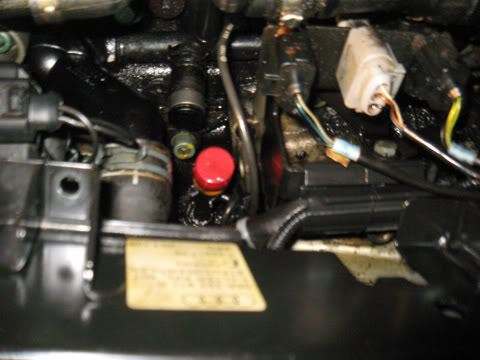
Close-up of the cool cap I put on what was left of the dipstick holder that broke clean off. Cap is temporary, but seals in the oil.
This was this morning after i finished putting on the hoses. You'll still see a few stock hoses in there, but that is because they are pressure or collant lines with fiber threading reinforcement and I'll wait and get the proper type of hose before replacing those.

Yea, interesting project to say the least. lol
Injectors pulled. Fuel Railand manifold removal in progress
Manifold out. View of bay without it.
Another view
Here's the Manifold laid out on the desk in my office. I photoshopped a circle around the two hose fittings (nipples). as you can see... the lower one is broken off inside.
View into plenums. Cleaned it out/off real well with the exception of the gasket residue. Left that there so as to retain a perfect fit with the existing gasket. If it had been changed... then I would have cleaned it off.
Close-up of the cool cap I put on what was left of the dipstick holder that broke clean off. Cap is temporary, but seals in the oil.
This was this morning after i finished putting on the hoses. You'll still see a few stock hoses in there, but that is because they are pressure or collant lines with fiber threading reinforcement and I'll wait and get the proper type of hose before replacing those.
Yea, interesting project to say the least. lol

