
camshaft replacement


AudiForums WilkommenVagen Direktor
Joined: Jan 2010
Posts: 2,945
From: Western MD USA
Viscous fan it a real PITA depending on how "tight" it is on there. You need a pretty decent sized crescent wrench to grap the nut on the back of it. The procedure that sounds the "easiest" to me is to choke up on the serpentine belt around the pulley and clamp it with vice grips to hold the pulley. I don't think that method would have worked on mine, it was a real bear and took some creativity to get it without breaking anything. Remember that the nut is reverse threaded.
good luck
good luck

1st Gear
Joined: Feb 2011
Posts: 25
I put a hex key in the larger (6mm) bolt that is covered by the fan pulley and used it as a stop for the pulley while using a crescent wrench on the fan nut. An extra pair of hands is useful for this part. Might have to utilize a hammer to break it loose like an impact wrench. The special tool for the bumper is a metal rod that screws into the frame of the car allowing you to slide the front clip forward to give you more working room without unhooking everything. I just used the long bolts from the bumper shock absorbers and then supported the weight of the clip with a pair of jack stands.

1st Gear
Joined: Jun 2010
Posts: 272
From: Chesapeake Bay area, Virginia
I just picked up on this thread, and after reviewing it, I would recommend something I seldom do...I would button it up and bag it. What apparently happened is that severe sludge blocked a cam gallery and the cam ate itself up. There are no bearings for the cams, so a new head will be needed along with new cams. You could finish this work and it could happen again the next day....I couldn't sleep with a time bomb like that. If the sludge is that severe, it's a matter of time before the main bearings fry. To be sure of the engine, it would need disassembly and cleaning....and its still an old car with high miles, with other things waiting to jump up and be fixed. If it's still running, maybe you can trade it as a fixwe upper. Whatever the move, I doubt it's worth further investment.
Thread Starter
|
1st Gear
Joined: Feb 2011
Posts: 59
From: mars
ok so thanks for your help and the ideas guys even tho i havent been able to get that sucker off yet... (the viscous fan)
@oldmots thanks for the insight but im not giving up on her just yet. must fix it lol. i cant see myself driving anything else and buying another one like her in a good condition would put a bigger hole in my pocket then trying to fix it by myself so im loosing nothing but my free time lol.
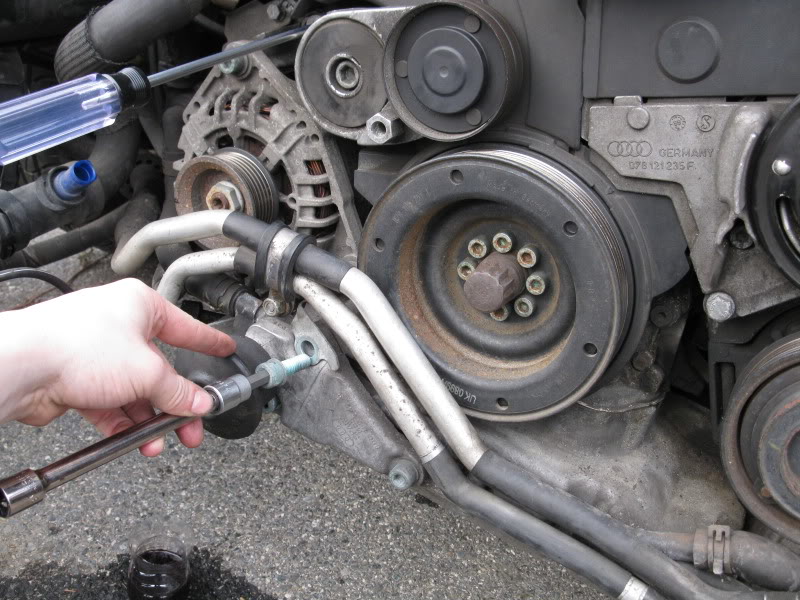
anyway so to get the lock carrier from service position to off the car took some time even tho it was only a few wires and pipes but i was struggling with two metal pipes on the passenger side of the radiator and for who knows what retarded reason i decided to try and twist one:
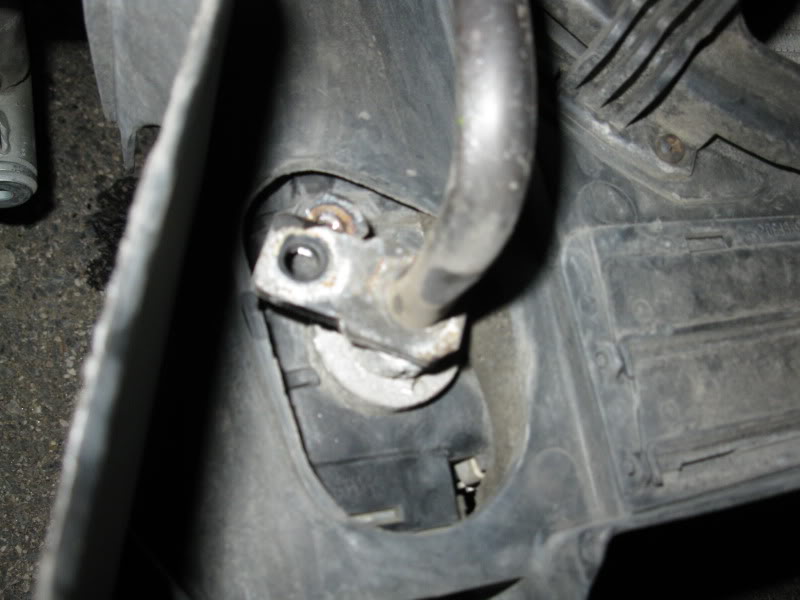
then i realized i can get them of another way:

thats when they poured a little oil:
and i was confused cus why is there oil going to the radiator????
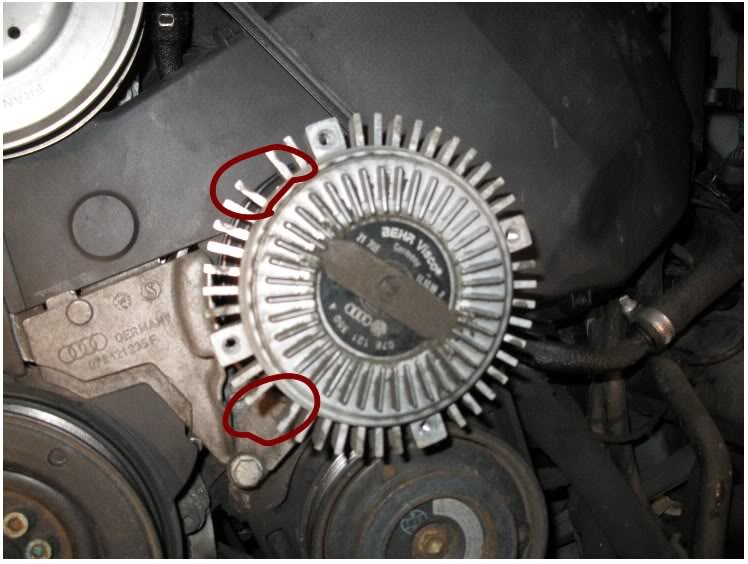
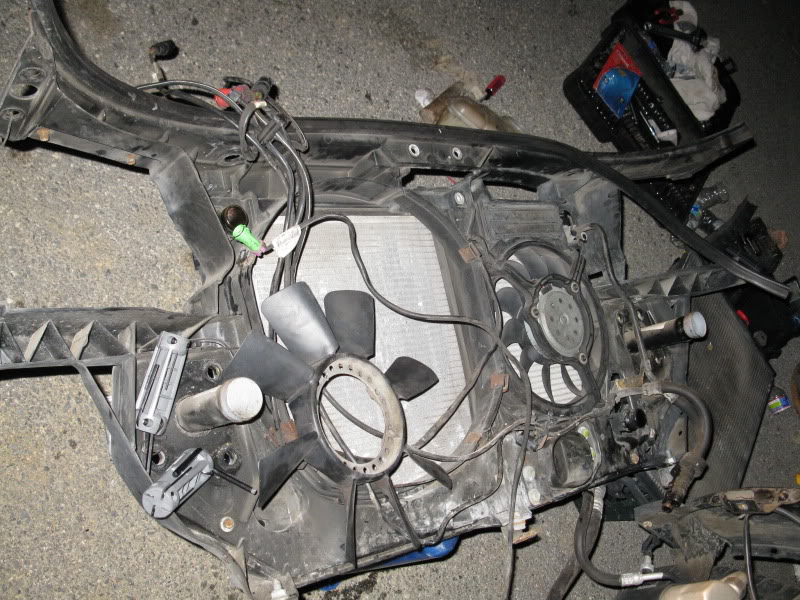
then i started trying to get the fan off i got the blades off of it but couldnt get the damn thing off tried sticking alen keys in it and using a crescet wrench but no success then i tried sticking a huge srewdriver in it which broke 2 teeth here:
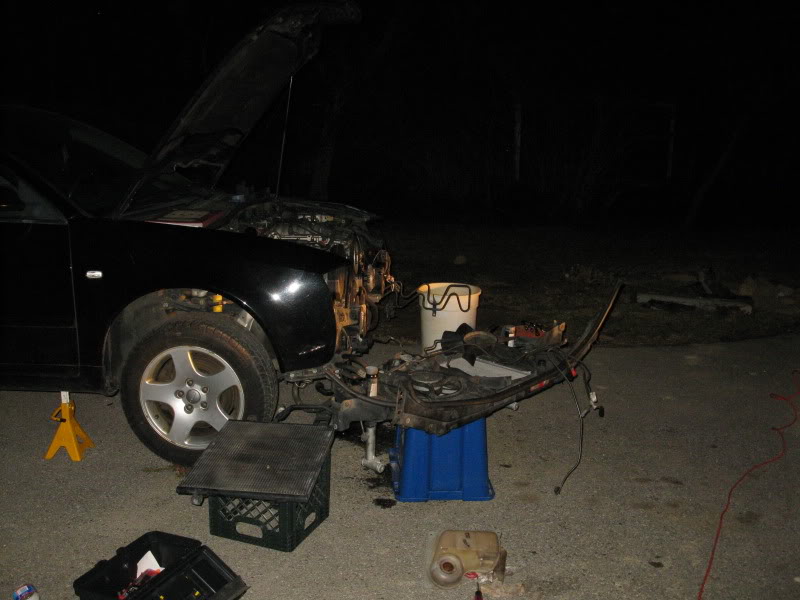
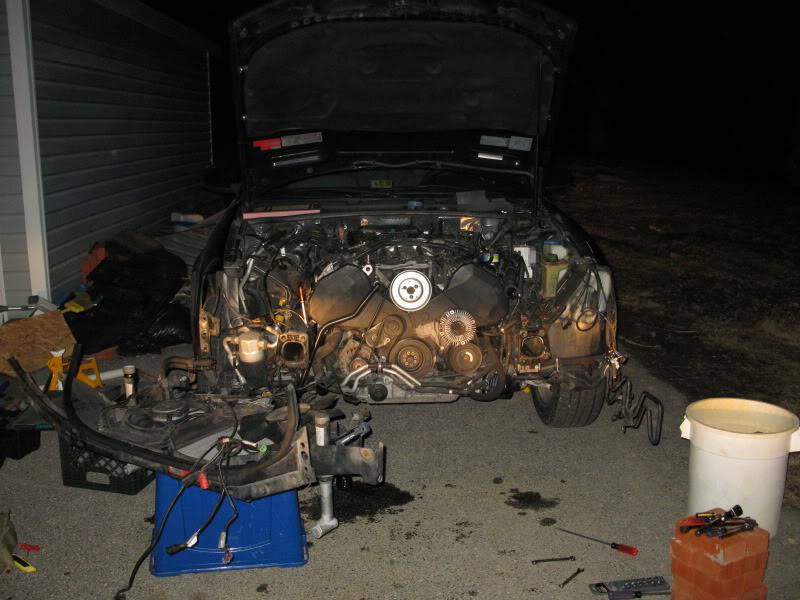
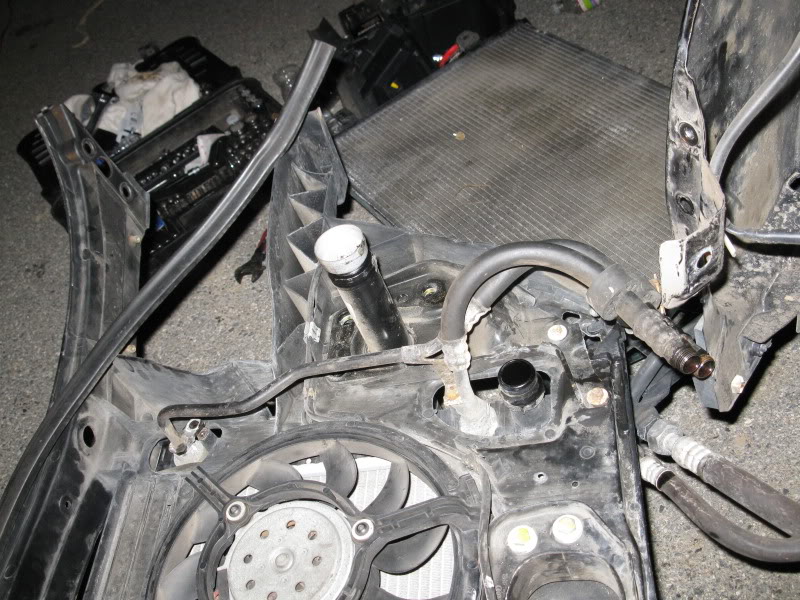
and here is how everything is looking like right now:
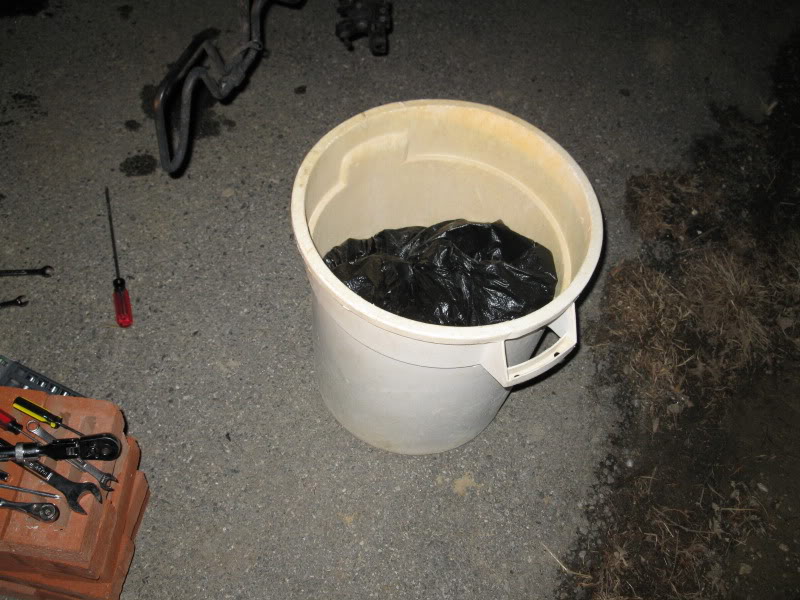
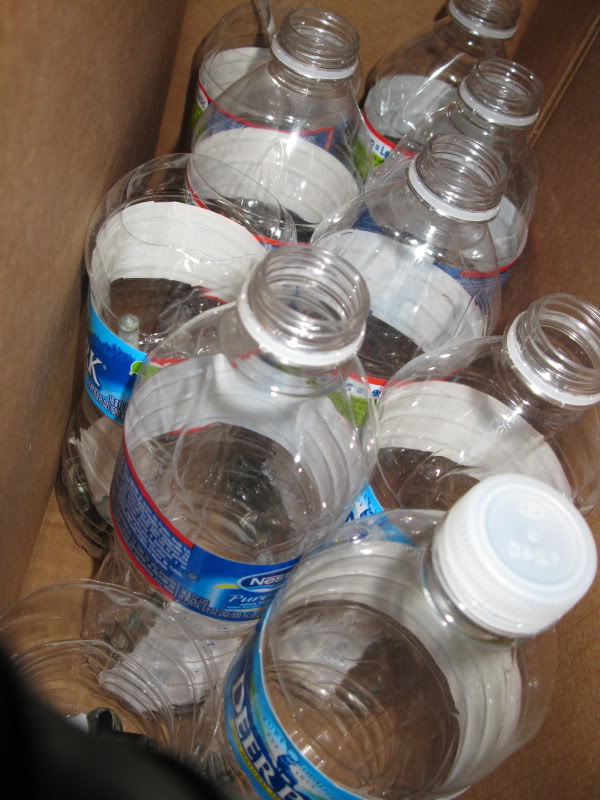
check out my coolant drained into trash bags:
LMAO
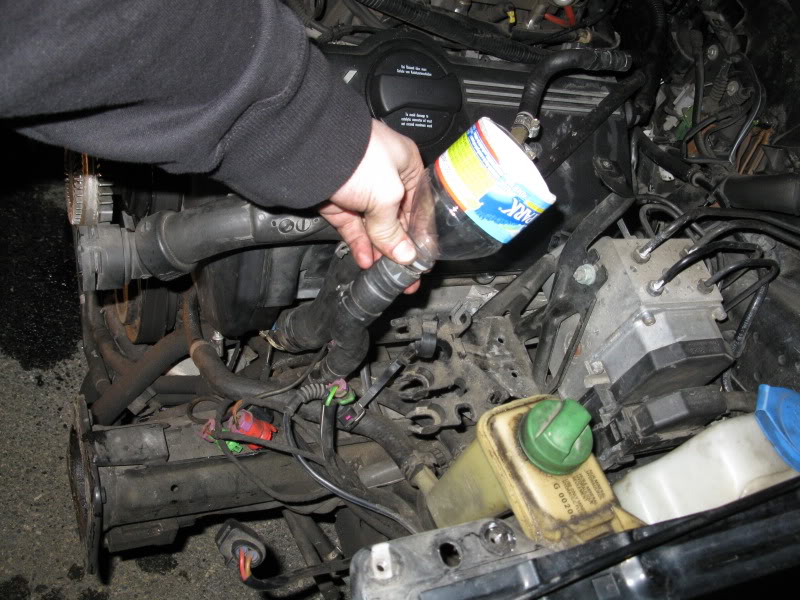
after te radiator was done draining i held this bottle to the pipe from the coolant tank and blew air into it then it drained some more:
and here are the two suckers that made my life hard:
and finnaly check out my system for not loosing anybolts:
lol i put them in different bottles and write a note inside of it so i remember where they came off of.
then my friend dropped by with his honda, he broke the light signal switch which took all my day. because for who knows what reason i let him have some tools and told him to get the air bag off to save me some time (big mistake) the genius killed one of the two bolts on there and now we couldnt get it off so i said well lets go to homedepot get one of those extractor drill bits drill that sucker out. well somehow (i was hungry at that point and paying no attention to what im doing lol) we broke the drill bit inside the bolt. so now we cant even drill into it, about 5 hours later and alot of cursing we got the sucker out got the wheel off changed the switch and then magic . oh wait there is no magic. the damn signal still isnt working lmao. turned out a spring stuck inside the hazard light switch shorted the whole system... fixed it. by that time it was 1030 dark and cold and chance of rain so i covered the mess my audi became to be lol.
guess ill try to get that crazy fan off today.
does anyone have any other ideas as to how to get it off?
@oldmots thanks for the insight but im not giving up on her just yet. must fix it lol. i cant see myself driving anything else and buying another one like her in a good condition would put a bigger hole in my pocket then trying to fix it by myself so im loosing nothing but my free time lol.
anyway so to get the lock carrier from service position to off the car took some time even tho it was only a few wires and pipes but i was struggling with two metal pipes on the passenger side of the radiator and for who knows what retarded reason i decided to try and twist one:
then i realized i can get them of another way:
thats when they poured a little oil:
and i was confused cus why is there oil going to the radiator????
then i started trying to get the fan off i got the blades off of it but couldnt get the damn thing off tried sticking alen keys in it and using a crescet wrench but no success then i tried sticking a huge srewdriver in it which broke 2 teeth here:
and here is how everything is looking like right now:
check out my coolant drained into trash bags:
LMAO
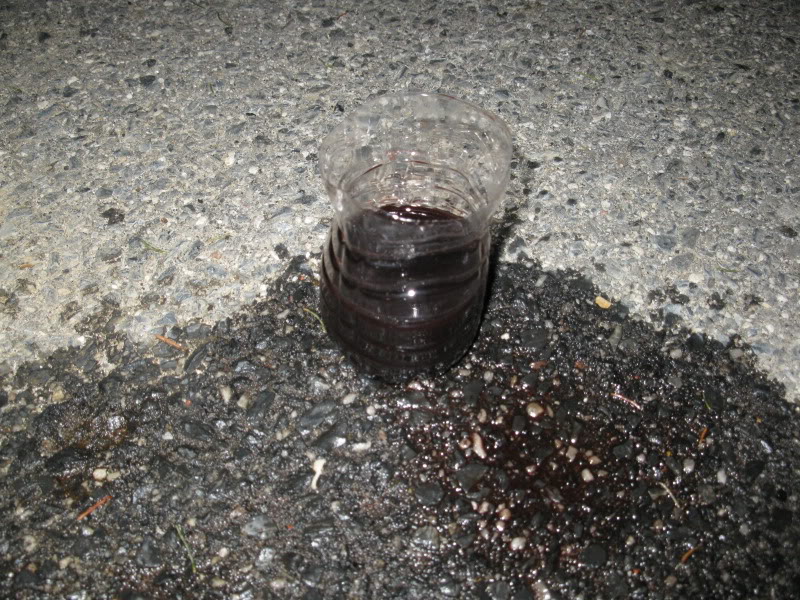
after te radiator was done draining i held this bottle to the pipe from the coolant tank and blew air into it then it drained some more:
and here are the two suckers that made my life hard:
and finnaly check out my system for not loosing anybolts:
lol i put them in different bottles and write a note inside of it so i remember where they came off of.
then my friend dropped by with his honda, he broke the light signal switch which took all my day. because for who knows what reason i let him have some tools and told him to get the air bag off to save me some time (big mistake) the genius killed one of the two bolts on there and now we couldnt get it off so i said well lets go to homedepot get one of those extractor drill bits drill that sucker out. well somehow (i was hungry at that point and paying no attention to what im doing lol) we broke the drill bit inside the bolt. so now we cant even drill into it, about 5 hours later and alot of cursing we got the sucker out got the wheel off changed the switch and then magic . oh wait there is no magic. the damn signal still isnt working lmao. turned out a spring stuck inside the hazard light switch shorted the whole system... fixed it. by that time it was 1030 dark and cold and chance of rain so i covered the mess my audi became to be lol.
guess ill try to get that crazy fan off today.
does anyone have any other ideas as to how to get it off?
Thread Starter
|
1st Gear
Joined: Feb 2011
Posts: 59
From: mars
so i got the viscous fan off today tried allen keys and crescet didnt work then went to sears and got this 3 tools(not the wrench):
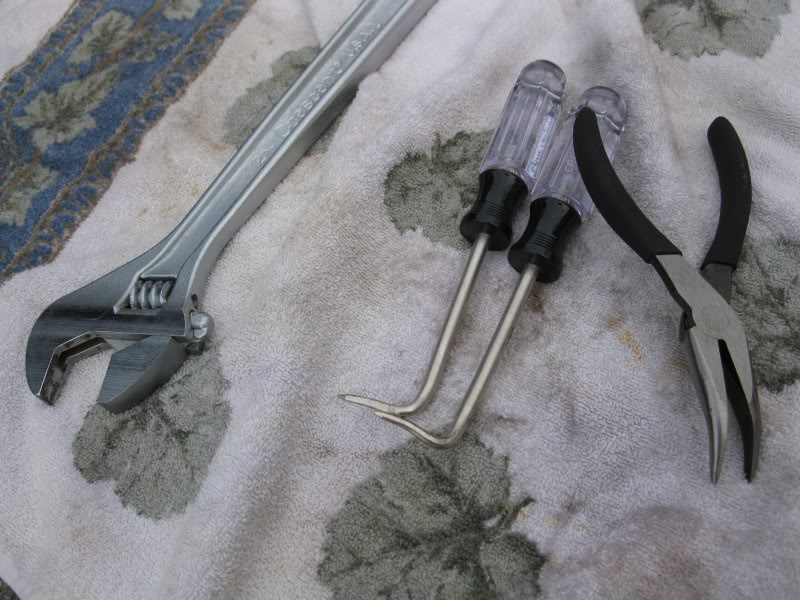
firs i tried those 2 needle things which was useless then i got the 45 degree needle pliers. my friend held them while i twisted the crescet and it came out on the second try! woohoo
twisted this sucker and stuck a screw driver in there to hold it:
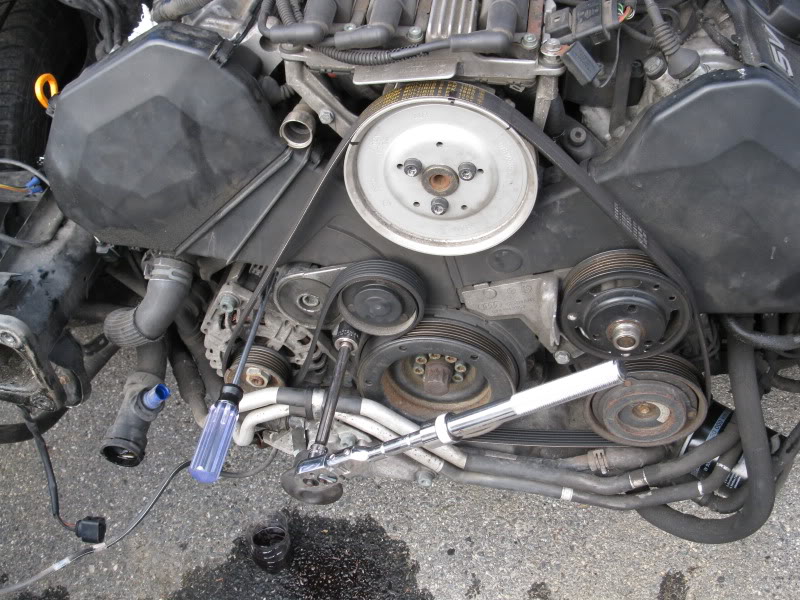
then even tho the manual didnt say to do it i took this bolt out to move those pipes a bit to allow the belt more space to slide out:
for this one i stuck an allen in one hole then a allen conected to a wrench to another broke one loose then the second loose and for the third one i just held the thing with my hand and broke it loose came out pretty easily
then it was off with the tensioner and plastic covers:
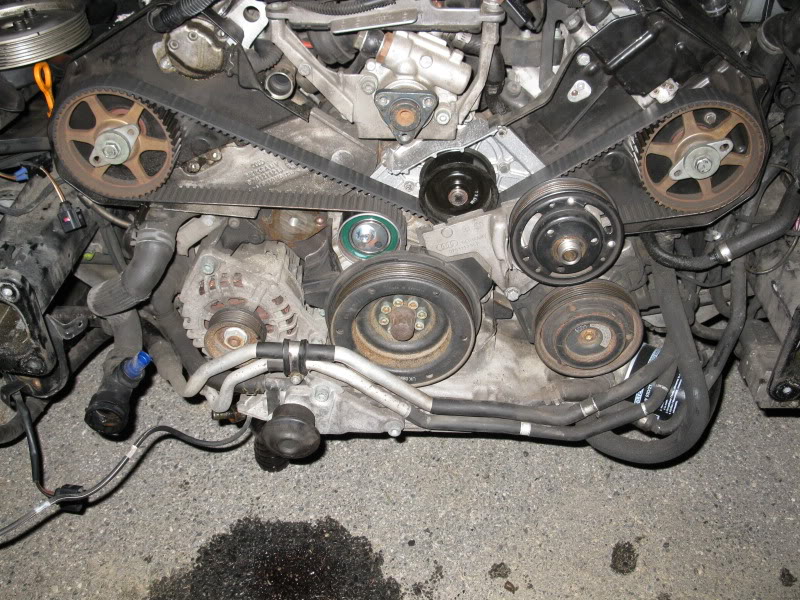
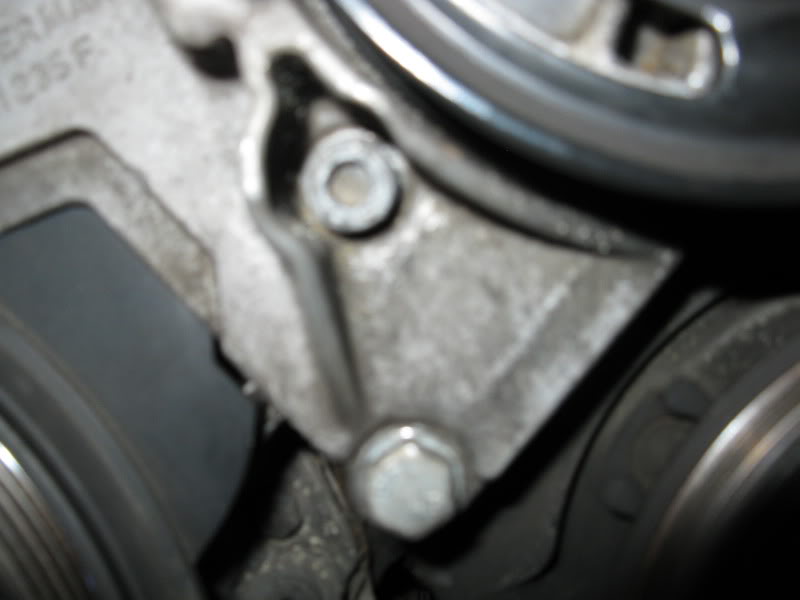
and then i ran into problems. to get the fan assembly bracket thing off it has a few bolts and this one(the top one) was dead (the inside is like buffed and the Allen cant hold it it just damage it more...) so i cant get it off any ideas?
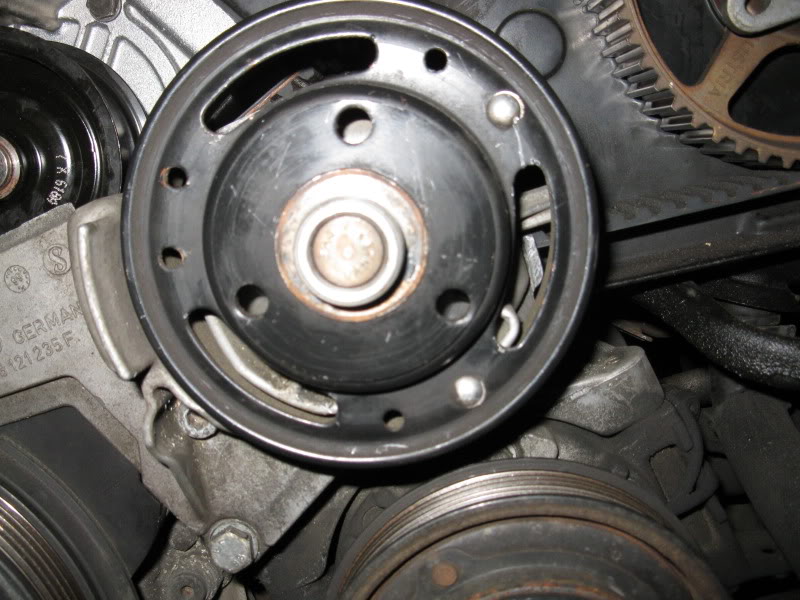
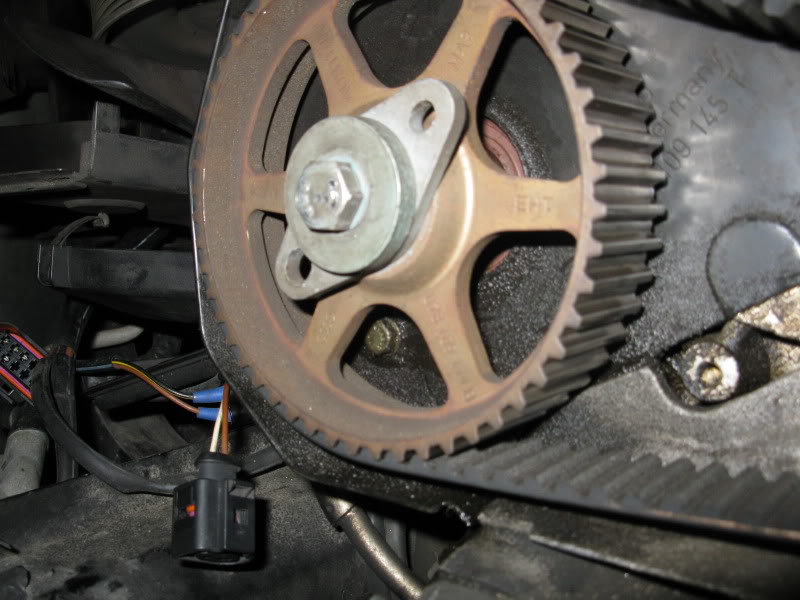
also for this plastic cover, this bolt(the golden one behind that gear) i cant reach. i managed to get a small wrech into there but its so tight that i couldnt turn it... any ideas for this one?
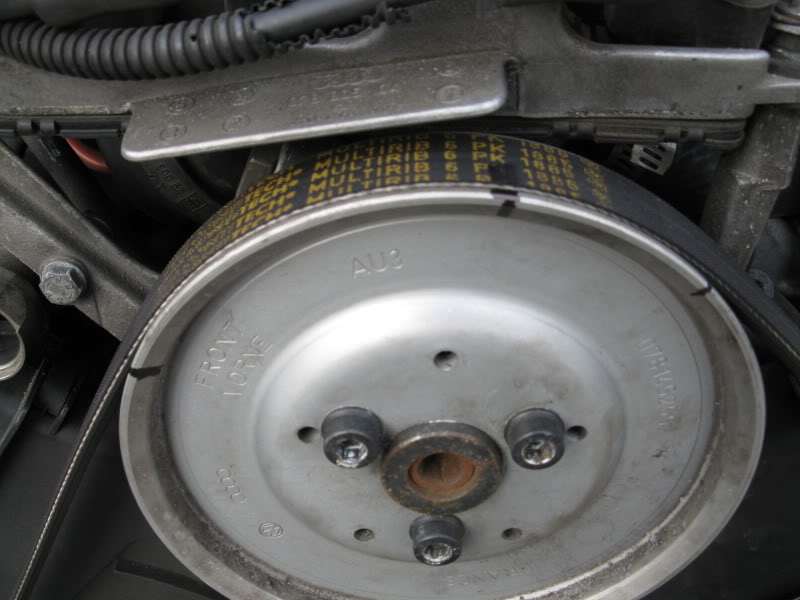
finnaly chekced this out didnt seem too bad
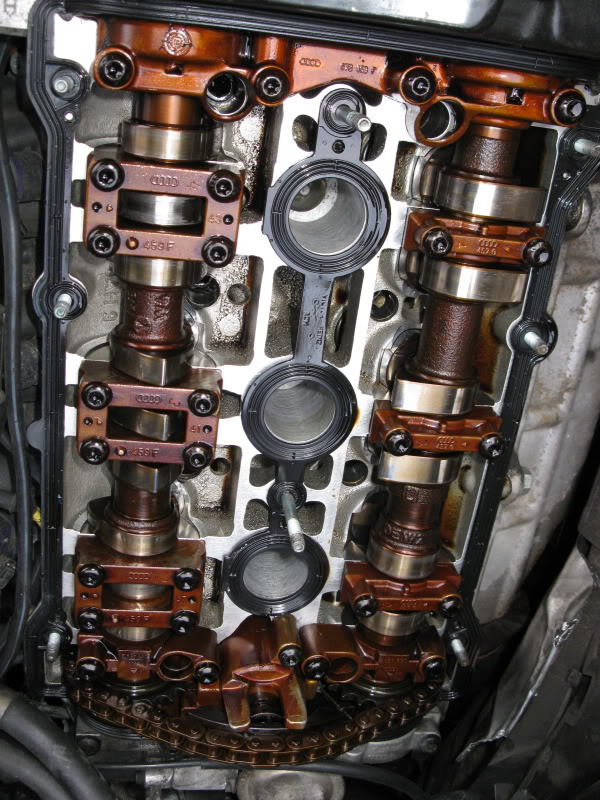
then i found the problem im looking for:
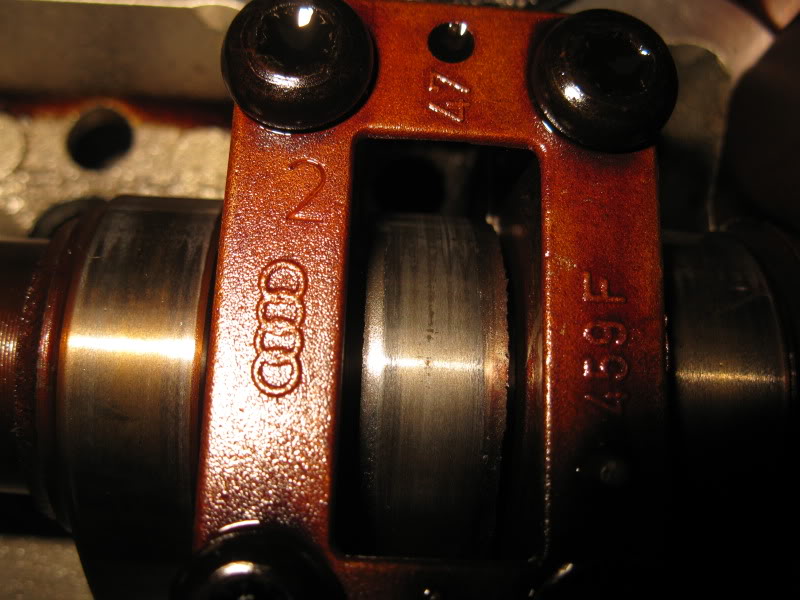
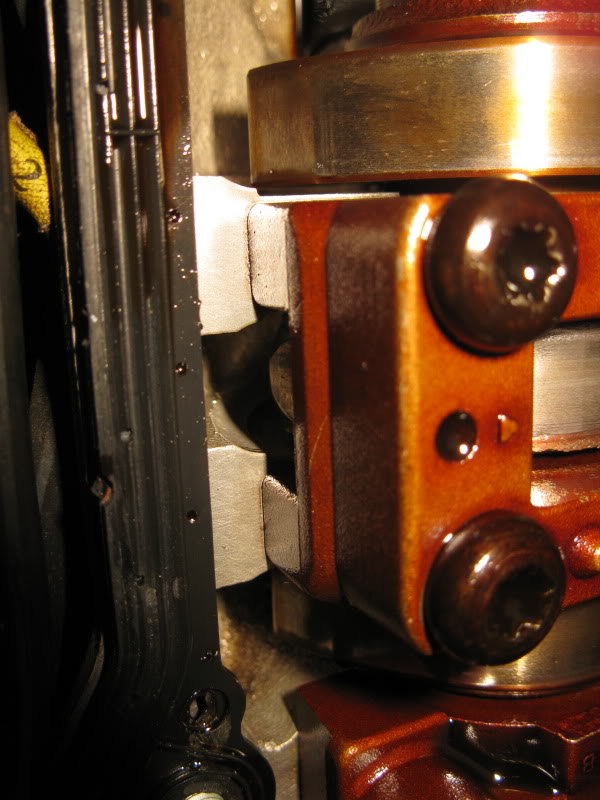
if you look good enough the middle one is scratched so bad its head looks like a circle
and finnaly, audiforums chilling in my engine compartment:

lol
firs i tried those 2 needle things which was useless then i got the 45 degree needle pliers. my friend held them while i twisted the crescet and it came out on the second try! woohoo
twisted this sucker and stuck a screw driver in there to hold it:
then even tho the manual didnt say to do it i took this bolt out to move those pipes a bit to allow the belt more space to slide out:
for this one i stuck an allen in one hole then a allen conected to a wrench to another broke one loose then the second loose and for the third one i just held the thing with my hand and broke it loose came out pretty easily
then it was off with the tensioner and plastic covers:
and then i ran into problems. to get the fan assembly bracket thing off it has a few bolts and this one(the top one) was dead (the inside is like buffed and the Allen cant hold it it just damage it more...) so i cant get it off any ideas?
also for this plastic cover, this bolt(the golden one behind that gear) i cant reach. i managed to get a small wrech into there but its so tight that i couldnt turn it... any ideas for this one?
finnaly chekced this out didnt seem too bad
then i found the problem im looking for:
if you look good enough the middle one is scratched so bad its head looks like a circle
and finnaly, audiforums chilling in my engine compartment:
lol
Thread Starter
|
1st Gear
Joined: Feb 2011
Posts: 59
From: mars
another question that popped into my mid probably too late is, if i desludge this thing should i do it with the messed up parts in there or replace the cam and all that then desludge it? so basicly should i put everything back in place and desludge it? or finish the job and then desludge it?
3rd Gear
Joined: Dec 2008
Posts: 1,941
From: IL
1) It looks like you'll have to take the belt off anyway. Make sure you know exactly where the timing marks are, before you dismount it!!!!
2) You WILL NEED the locking tools to get your timing right when you'll button up the car post repair.
3) The cover in the the previous post will come off after you remove the sprocket. So you have to wait to remove that "golden" bolt anyway. You don't have to employ mechanical yoga for that one.
4) Since you will replace that camshaft, you should remove it and then "desludge" it. In both heads you should have at least one "check valve" that allows the oil to be pumped into the head(s). Locate them and clean them up.
5) If I were you, I'll take both heads to a machine shop and let them deal with the cleaning. However, you'll need new head bolts (and probably head gaskets - to be on the safe side) if you remove the heads.
6) Take the intake off and get to the valley pan ...there are two check valves in there too that can probably use some cleaning, or replacement.
------
Great progress.
Thread Starter
|
1st Gear
Joined: Feb 2011
Posts: 59
From: mars
thanks for the reply chefro its much appreciated. that "golden" bolt drove me crazy i think i passed the point of mechanical yoga, i was doing mechanical kong-fu lol. but it does make sense that it would easily come out after the camshaft sprocket is out. i dont know what i was thinking trying to get it when i could of just waited till the sprocket is out.
anway a few questions for you:
* what locking tools are you talking about?
* when you say "Take the intake off and get to the valley pan" are you talking about the intake manifold?
in anyway when i get to the areas you are talking about ill take pictures of them. so if i am not sure of something, it will be easier to ask/explain (cameras are the best invention ever )
)
when i finish this job and the engine runs i thought of adding this oil additive:
http://www.blauparts.com/proddetail.asp?prod=LM+2009
whats your thoughts about this one?
edit:
when removing the camshaft it says i need to "carefully compress camshaft adjuster using bracket tensioner 3366"

do i must use this 3366 tool from the picture above^^ or is there anyway around this?
. but it does make sense that it would easily come out after the camshaft sprocket is out. i dont know what i was thinking trying to get it when i could of just waited till the sprocket is out.anway a few questions for you:
* what locking tools are you talking about?
* when you say "Take the intake off and get to the valley pan" are you talking about the intake manifold?
in anyway when i get to the areas you are talking about ill take pictures of them. so if i am not sure of something, it will be easier to ask/explain (cameras are the best invention ever
) when i finish this job and the engine runs i thought of adding this oil additive:
http://www.blauparts.com/proddetail.asp?prod=LM+2009
whats your thoughts about this one?
edit:
when removing the camshaft it says i need to "carefully compress camshaft adjuster using bracket tensioner 3366"
do i must use this 3366 tool from the picture above^^ or is there anyway around this?
Last edited by martianbooby; Mar 7, 2011 at 10:58 AM. Reason: forgot something

1st Gear
Joined: Feb 2011
Posts: 23
I'm not sure how you'd go about rigging something up to compress the tensioner. You can buy the tool from Blauparts for $30. I've got a old one laying around if if you are interested.
Also, you may want to set the motor to TDC to make compressing the tensioner easier. Make sure you get 16 chain links between the arrows on the head when you put the new cam back in. It may not line up perfectly but it will be close.
Also, you may want to set the motor to TDC to make compressing the tensioner easier. Make sure you get 16 chain links between the arrows on the head when you put the new cam back in. It may not line up perfectly but it will be close.
Last edited by AndyTR32; Mar 7, 2011 at 03:37 PM. Reason: Add TDC Comment
3rd Gear
Joined: Dec 2008
Posts: 1,941
From: IL
I have personally used that supposedly "anti-friction" engine treatment and I thought was a big mistake. You rub a little bit between the thumb and index finger, and it feels like rubbing micro-crystals of sand paper. It almost had the same consistency of the assembly lube (same company - Lubro/Liqui Moly) I used when rebuttoning the engine.
Would rather put another bottle of ZMax in it than that Lubro Moly product.
I do use though 2-3 times/yr the gas additives: Ventil Sauber/Valve cleaner - Product # 2001 in the link, and Jectron - Fuel Injection Cleaner - Product # 2007. In over 1 1/2 yr I had not even a single misfire.
-----
Chain tensioner - I wouldn't have the slightest idea about it since my car is a SOHC. I'm sure that plenty guys around- just as Andy does, are more than qualified to point you in the right direction.
------
Locking tools: since your is a 2.8 L, I'm not sure if you need the "C"-shaped locking tools, but you would definitely need the Cam locking bar and the crank locking pin.
Keep us posted.
Last edited by chefro; Mar 9, 2011 at 04:56 PM.