
Valley Pan Gasket; Head Gaskets

Thread Starter
|
3rd Gear
Joined: Dec 2008
Posts: 1,941
From: IL
I've been working a lot the past three days, so didn't have time for the car. I'm headed for the store as we speak to get some more cleaning supplies, then finish the exhaust manifold and start reassembling it.
I also ordered the parts I need - about $ 710 worth (ouch), and as soon as I get'em, I'll start reassembling the heads as well.
Damn... I bet I can spend easily $ 2-3000 more to make it closer to "whole" again
I also ordered the parts I need - about $ 710 worth (ouch), and as soon as I get'em, I'll start reassembling the heads as well.
Damn... I bet I can spend easily $ 2-3000 more to make it closer to "whole" again
Thread Starter
|
3rd Gear
Joined: Dec 2008
Posts: 1,941
From: IL
Oh yeah, I had 4 different shopping "spree"s with them.
Well, I did a whole lot of cleaning today:
exhaust manifold (was left from 3 days back), both valve covers, ICV, spyder valve + hoses with it, breather hoses, air box, air intake, throttle body, fuel rail/injectors.
I hope that tomorrow I can "attack" the engine side (pistons + mating surfaces to the heads). Also I plan on painting the valve covers with some engine enamel. I may do the same thing to the intake manifold, instead of polishing it... Easier on the hands, less time to deal with it anymore, and probably what I would spend on polishing supplies may be more than a couple cans of spray paint...
Some pics
-
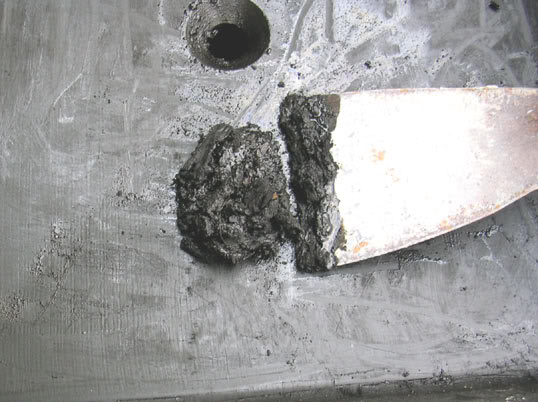
Carbon residue left from 3 days ago in the cleaning pan
-
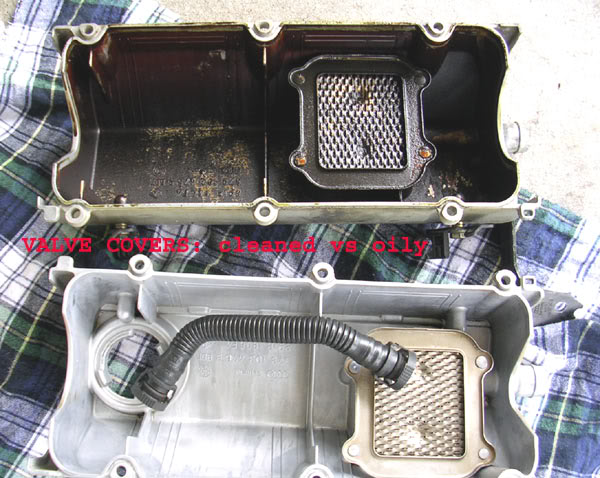
Passenger side cleaned valve cover contrasting with its counterpart
-
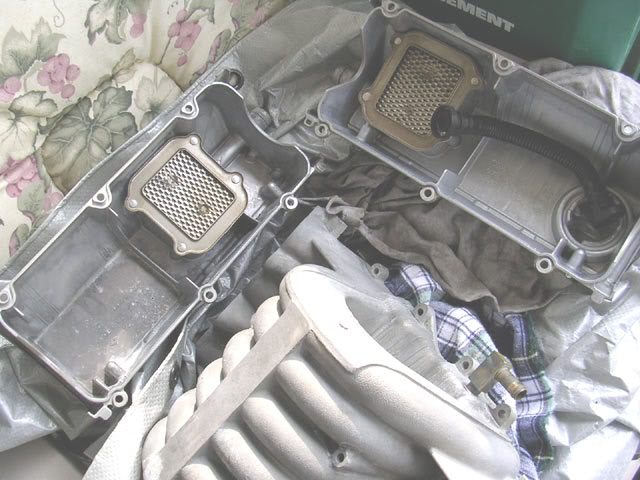
Both cleaned
-
How the exhaust manifold came out - good enough for who's for...
-
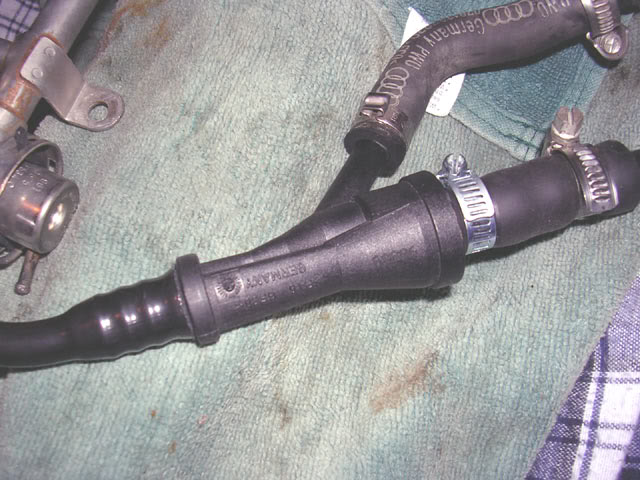
Spyder valve (yes, degreased/cleaned inside as well) - I'll still have to replace some hoses
-
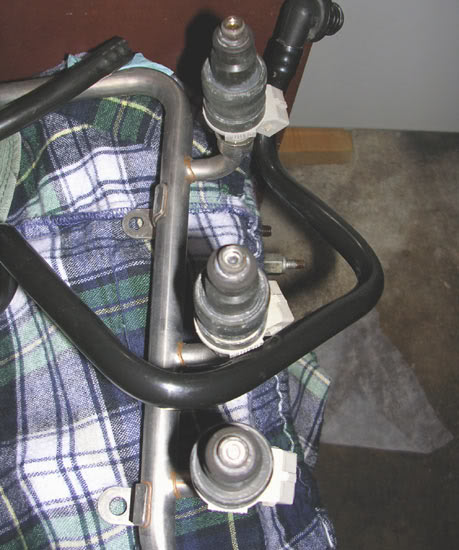
Half side of the fuel rail
Have a nice and quiet evening, gents.
regards.
Well, I did a whole lot of cleaning today:
exhaust manifold (was left from 3 days back), both valve covers, ICV, spyder valve + hoses with it, breather hoses, air box, air intake, throttle body, fuel rail/injectors.
I hope that tomorrow I can "attack" the engine side (pistons + mating surfaces to the heads). Also I plan on painting the valve covers with some engine enamel. I may do the same thing to the intake manifold, instead of polishing it... Easier on the hands, less time to deal with it anymore, and probably what I would spend on polishing supplies may be more than a couple cans of spray paint...
Some pics
-
Carbon residue left from 3 days ago in the cleaning pan
-
Passenger side cleaned valve cover contrasting with its counterpart
-
Both cleaned
-
How the exhaust manifold came out - good enough for who's for...
-
Spyder valve (yes, degreased/cleaned inside as well) - I'll still have to replace some hoses
-
Half side of the fuel rail
Have a nice and quiet evening, gents.
regards.

Senior Member
Joined: Apr 2007
Posts: 517
From:
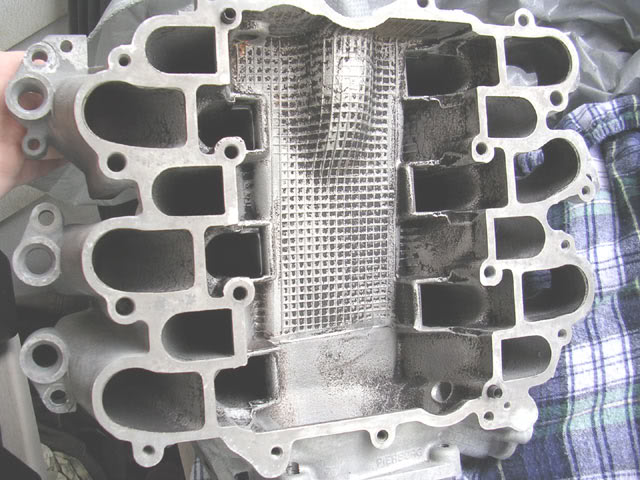
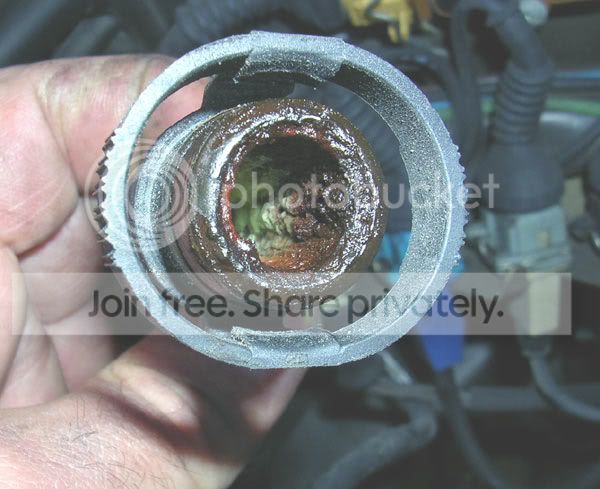
The "spyder" is the vacuum booster for the brake booster. Your valve covers were much cleaner than those on my 1996 A6 Quattro with 2.8L AFC engine. The vacuum booster and the valve cover screens were completely clogged with carbon. The EGR passage was also clogged with carbon. That is what happens when cheap oil is used and the engine is run with a bad head gasket and worn valve stem seals.
Right now I have been replacing the leaky radiator. For some reason the Bentley people forgot about the radiator. Apparently, the radiator fans, the latch plate, the front bumper, the bumper trim and right front head light have to be removed. The condenser has to be suspended from above while the radiator is removed. I had to order new left, right and lower air deflectors, as the rubber was crumbling. One of the lower radiator mounts broke it's stud off. It is almost back together. The front of the radiator fins behind the condenser was plugged over a large area with organic matter. So, if you ever get the front bumper off you may want to check behind the condenser, if you are overheating.
Right now I have been replacing the leaky radiator. For some reason the Bentley people forgot about the radiator. Apparently, the radiator fans, the latch plate, the front bumper, the bumper trim and right front head light have to be removed. The condenser has to be suspended from above while the radiator is removed. I had to order new left, right and lower air deflectors, as the rubber was crumbling. One of the lower radiator mounts broke it's stud off. It is almost back together. The front of the radiator fins behind the condenser was plugged over a large area with organic matter. So, if you ever get the front bumper off you may want to check behind the condenser, if you are overheating.
4th Gear
Joined: Mar 2009
Posts: 3,042
From: Indiana
You just had to so a good left side PCV hose huh? 
I would actually leave the pistons and cylinders alone. Just bring the piston to the bottom and wipe the cylinder with a lint free cloth and light oil (not motor oil). The danger in attacking the pistons is getting crud in the ring lands (ring groves in the piston) and/or getting crud trapped between the ring and cylinder. Both of these are not good and could result in a broken piston ring or scratched wall. Just Seafoam after it's back together, or even leave it.
I would actually leave the pistons and cylinders alone. Just bring the piston to the bottom and wipe the cylinder with a lint free cloth and light oil (not motor oil). The danger in attacking the pistons is getting crud in the ring lands (ring groves in the piston) and/or getting crud trapped between the ring and cylinder. Both of these are not good and could result in a broken piston ring or scratched wall. Just Seafoam after it's back together, or even leave it.
Thread Starter
|
3rd Gear
Joined: Dec 2008
Posts: 1,941
From: IL
hcw,
thanks for the heads up. Actually I did remove the bumper, so I'll keep an eye on the condenser.
My EGR passage actually didn't look too bad. I'll leave alone the valve itself.
The ICV had some buildup stuff inside but
 Purple Power took care of it. It also cleaned the valve covers.
Jim,
actually there's some dried up carbon already peeled off from the pistons. Should I just tried to gingerly remove it. I mean some of the pieces are quite sizeable. I guess it just happened as it sat with the heads off for a while now.
If it is too much of a hassle (risk of dropping some in between the piston and cylinder), then I'll leave'm be.
If needed, I'll use Seafoam before changing the oil (which I had in plan to do anyway).
P.S. Actually both breather hoses seemed to be ok, although one retaining end ring of the driver side hose broke. If it doesn't fit tight anymore I will just put a clamp on it.
Here's how they looked when I took the heads off:
-
thanks for the heads up. Actually I did remove the bumper, so I'll keep an eye on the condenser.
My EGR passage actually didn't look too bad. I'll leave alone the valve itself.
The ICV had some buildup stuff inside but
Purple Power took care of it. It also cleaned the valve covers.Jim,
actually there's some dried up carbon already peeled off from the pistons. Should I just tried to gingerly remove it. I mean some of the pieces are quite sizeable. I guess it just happened as it sat with the heads off for a while now.
If it is too much of a hassle (risk of dropping some in between the piston and cylinder), then I'll leave'm be.
If needed, I'll use Seafoam before changing the oil (which I had in plan to do anyway).
P.S. Actually both breather hoses seemed to be ok, although one retaining end ring of the driver side hose broke. If it doesn't fit tight anymore I will just put a clamp on it.
Here's how they looked when I took the heads off:
-
Thread Starter
|
3rd Gear
Joined: Dec 2008
Posts: 1,941
From: IL
I'm done with all the "parts" cleaning... including the exhaust heads, which I will spray paint as well. The cleaning was more of a "prep" step for painting.
I was finally able to remove the O2sensors....thank god for braker bars...
I'll move after lunch to the engine bay area.
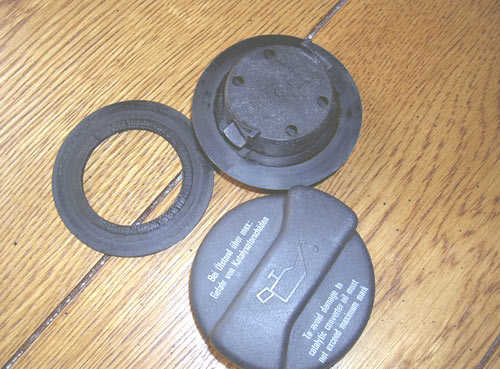
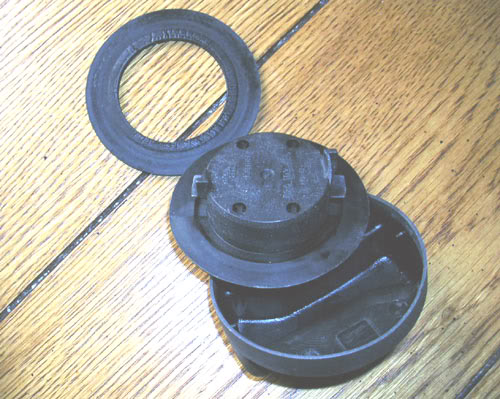
The last word is for folks whose oil filler cap is not ermetically retaining the oil in the valve cover (I had a light oil dribble from it, that's what prompted me to check it out); and also would rather replace just the gasket vs purchasing a new cap. I know they're not expensive, but I personally would rather pay 80 cents for a gasket instead of $ 5-10 (depending what and where you buy it from) for a new whole cap.
The cap comes apart:
-
-
This is actually the breakdown of the actual mounting positions
-
-
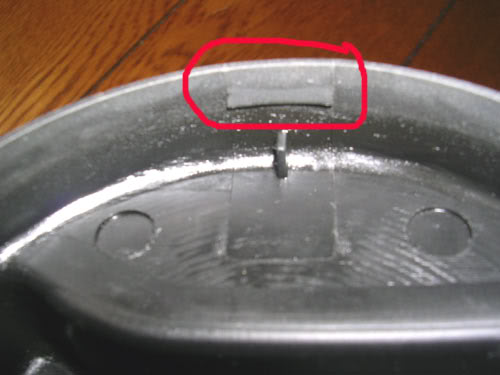
The cap has some small retaining tabs. While holding and pulling the inner piece from the metal clips that fasten the cap to the valve cover, I located the small tab and pried the cap to get the inner piece over the tab. Pulling the inner piece over just two tabs is enough to release it.
-
-
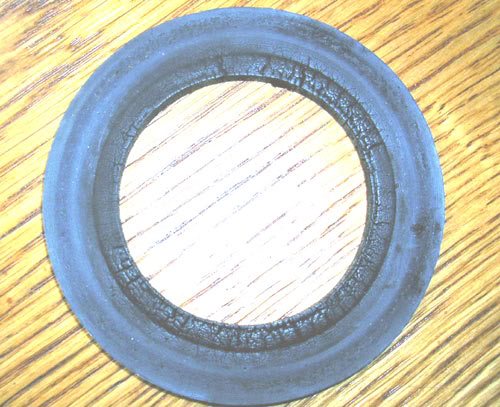
And here's the crappy gasket that needs be replaced
-
I personally didn't know the cap comes apart, so others may benefit from this; or maybe not.
Just thought it may be good to share it with others.
I was finally able to remove the O2sensors....thank god for braker bars...
I'll move after lunch to the engine bay area.
The last word is for folks whose oil filler cap is not ermetically retaining the oil in the valve cover (I had a light oil dribble from it, that's what prompted me to check it out); and also would rather replace just the gasket vs purchasing a new cap. I know they're not expensive, but I personally would rather pay 80 cents for a gasket instead of $ 5-10 (depending what and where you buy it from) for a new whole cap.
The cap comes apart:
-
-
This is actually the breakdown of the actual mounting positions
-
-
The cap has some small retaining tabs. While holding and pulling the inner piece from the metal clips that fasten the cap to the valve cover, I located the small tab and pried the cap to get the inner piece over the tab. Pulling the inner piece over just two tabs is enough to release it.
-
-
And here's the crappy gasket that needs be replaced
-
I personally didn't know the cap comes apart, so others may benefit from this; or maybe not.
Just thought it may be good to share it with others.