
40V in a B5? Yes please.

Legal Moderator
Joined: Oct 2008
Posts: 1,975
From: st cloud, mn. you too? hit me up...
To my understanding the 2.8 block is practically the same as the 2.7 block. I think the 2.8 has a slightly bigger bore but the stroke is the same. Here is my dilemma. I read somewhere that if you are building the entire motor from scratch, its better to start with the 2.8 block rather than the 2.7 block. Is there any difference between the two? I don't know, that's why I am asking.
1st Gear
Joined: Jun 2013
Posts: 352
From: USA
Are the 2.7t intake ports on the heads located in the same place as the 2.8 heads? If so its possible to mount the PES G2 Supercharger, also known as the Eaton M62.
Next question. One turbo or two? I am not sure but I was thinking running one turbo off both exhaust banks would be better because you would only have to run cooling plumbing for one turbo instead of two. Then again... I do realize the 2.7t is designed for two turbos, so is it better to stick with two?
Next question. One turbo or two? I am not sure but I was thinking running one turbo off both exhaust banks would be better because you would only have to run cooling plumbing for one turbo instead of two. Then again... I do realize the 2.7t is designed for two turbos, so is it better to stick with two?
Legal Moderator
Joined: Oct 2008
Posts: 1,975
From: st cloud, mn. you too? hit me up...
Are the 2.7t intake ports on the heads located in the same place as the 2.8 heads? If so its possible to mount the PES G2 Supercharger, also known as the Eaton M62.
Next question. One turbo or two? I am not sure but I was thinking running one turbo off both exhaust banks would be better because you would only have to run cooling plumbing for one turbo instead of two. Then again... I do realize the 2.7t is designed for two turbos, so is it better to stick with two?
Next question. One turbo or two? I am not sure but I was thinking running one turbo off both exhaust banks would be better because you would only have to run cooling plumbing for one turbo instead of two. Then again... I do realize the 2.7t is designed for two turbos, so is it better to stick with two?
Thread Starter
|
2nd Gear
Joined: Jul 2011
Posts: 843
From: Kirkland, WA
Well, I replaced the tensioner pulley and the plastic idler today. The noise has definitly decreased, but I think that the primary issue is the big idler that used to hold the viscus fan clutch. Aftermarket ones are like $360 and OEM is like $450  .
.
I'm looking into a different belt routing that wouldn't require using that pulley at all.
.I'm looking into a different belt routing that wouldn't require using that pulley at all.

Thread Starter
|
2nd Gear
Joined: Jul 2011
Posts: 843
From: Kirkland, WA
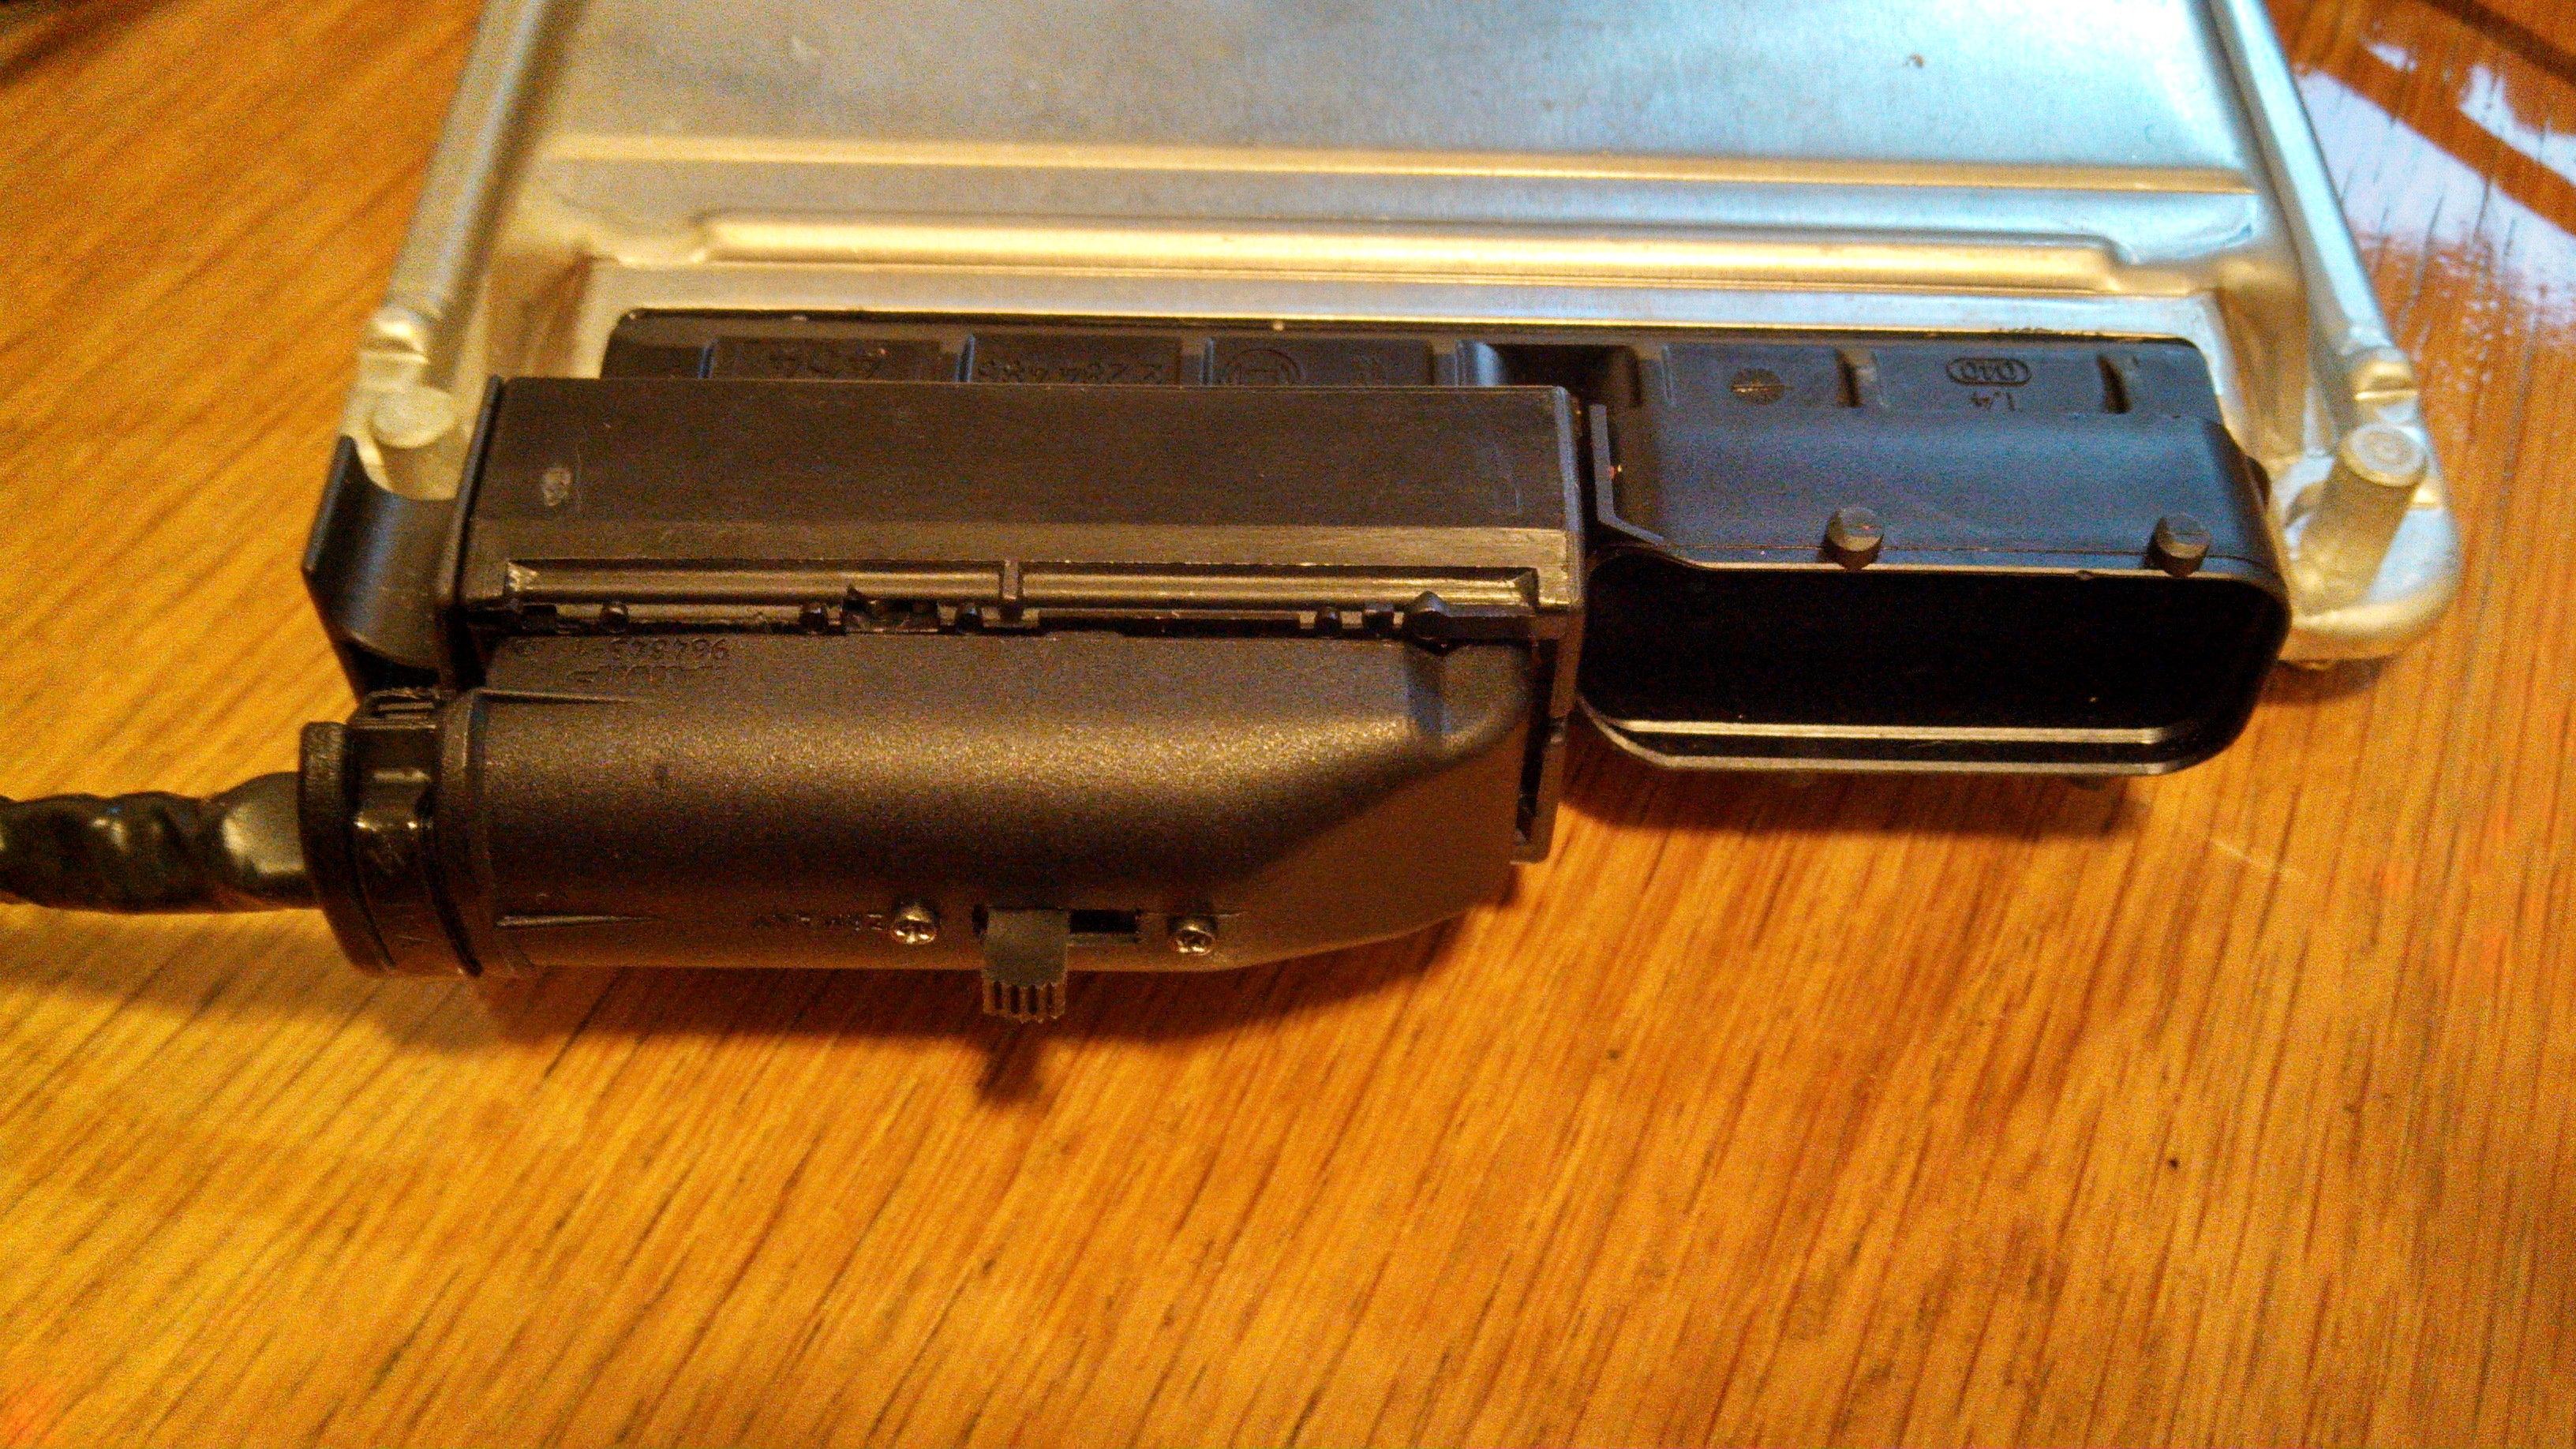
1. Remove the black cover on the back of the plug.


2. Remove the 2 purple retainers.


3. Remove the pin "blocks". These just slide out now that the retainers are out.


4. Slide out individual pins by pressing on the small metal tab to the side of each pin. The pins are numbered on the ends of each side of the "blocks."


Site Moderator/B5 Tech Guru
Joined: Feb 2010
Posts: 1,745
From: Bay Area, CA
Great. Looks just like the cluster plug pins. A lot easier to pull than the double tab style pins used on the relays. Those can be a real pain in the ***. One of the tabs actually worked its way through the side of the relay plug locking itself in position.
Thread Starter
|
2nd Gear
Joined: Jul 2011
Posts: 843
From: Kirkland, WA
Still waiting on the fan pulley bearing to show up. In the mean time I got some other goodies.
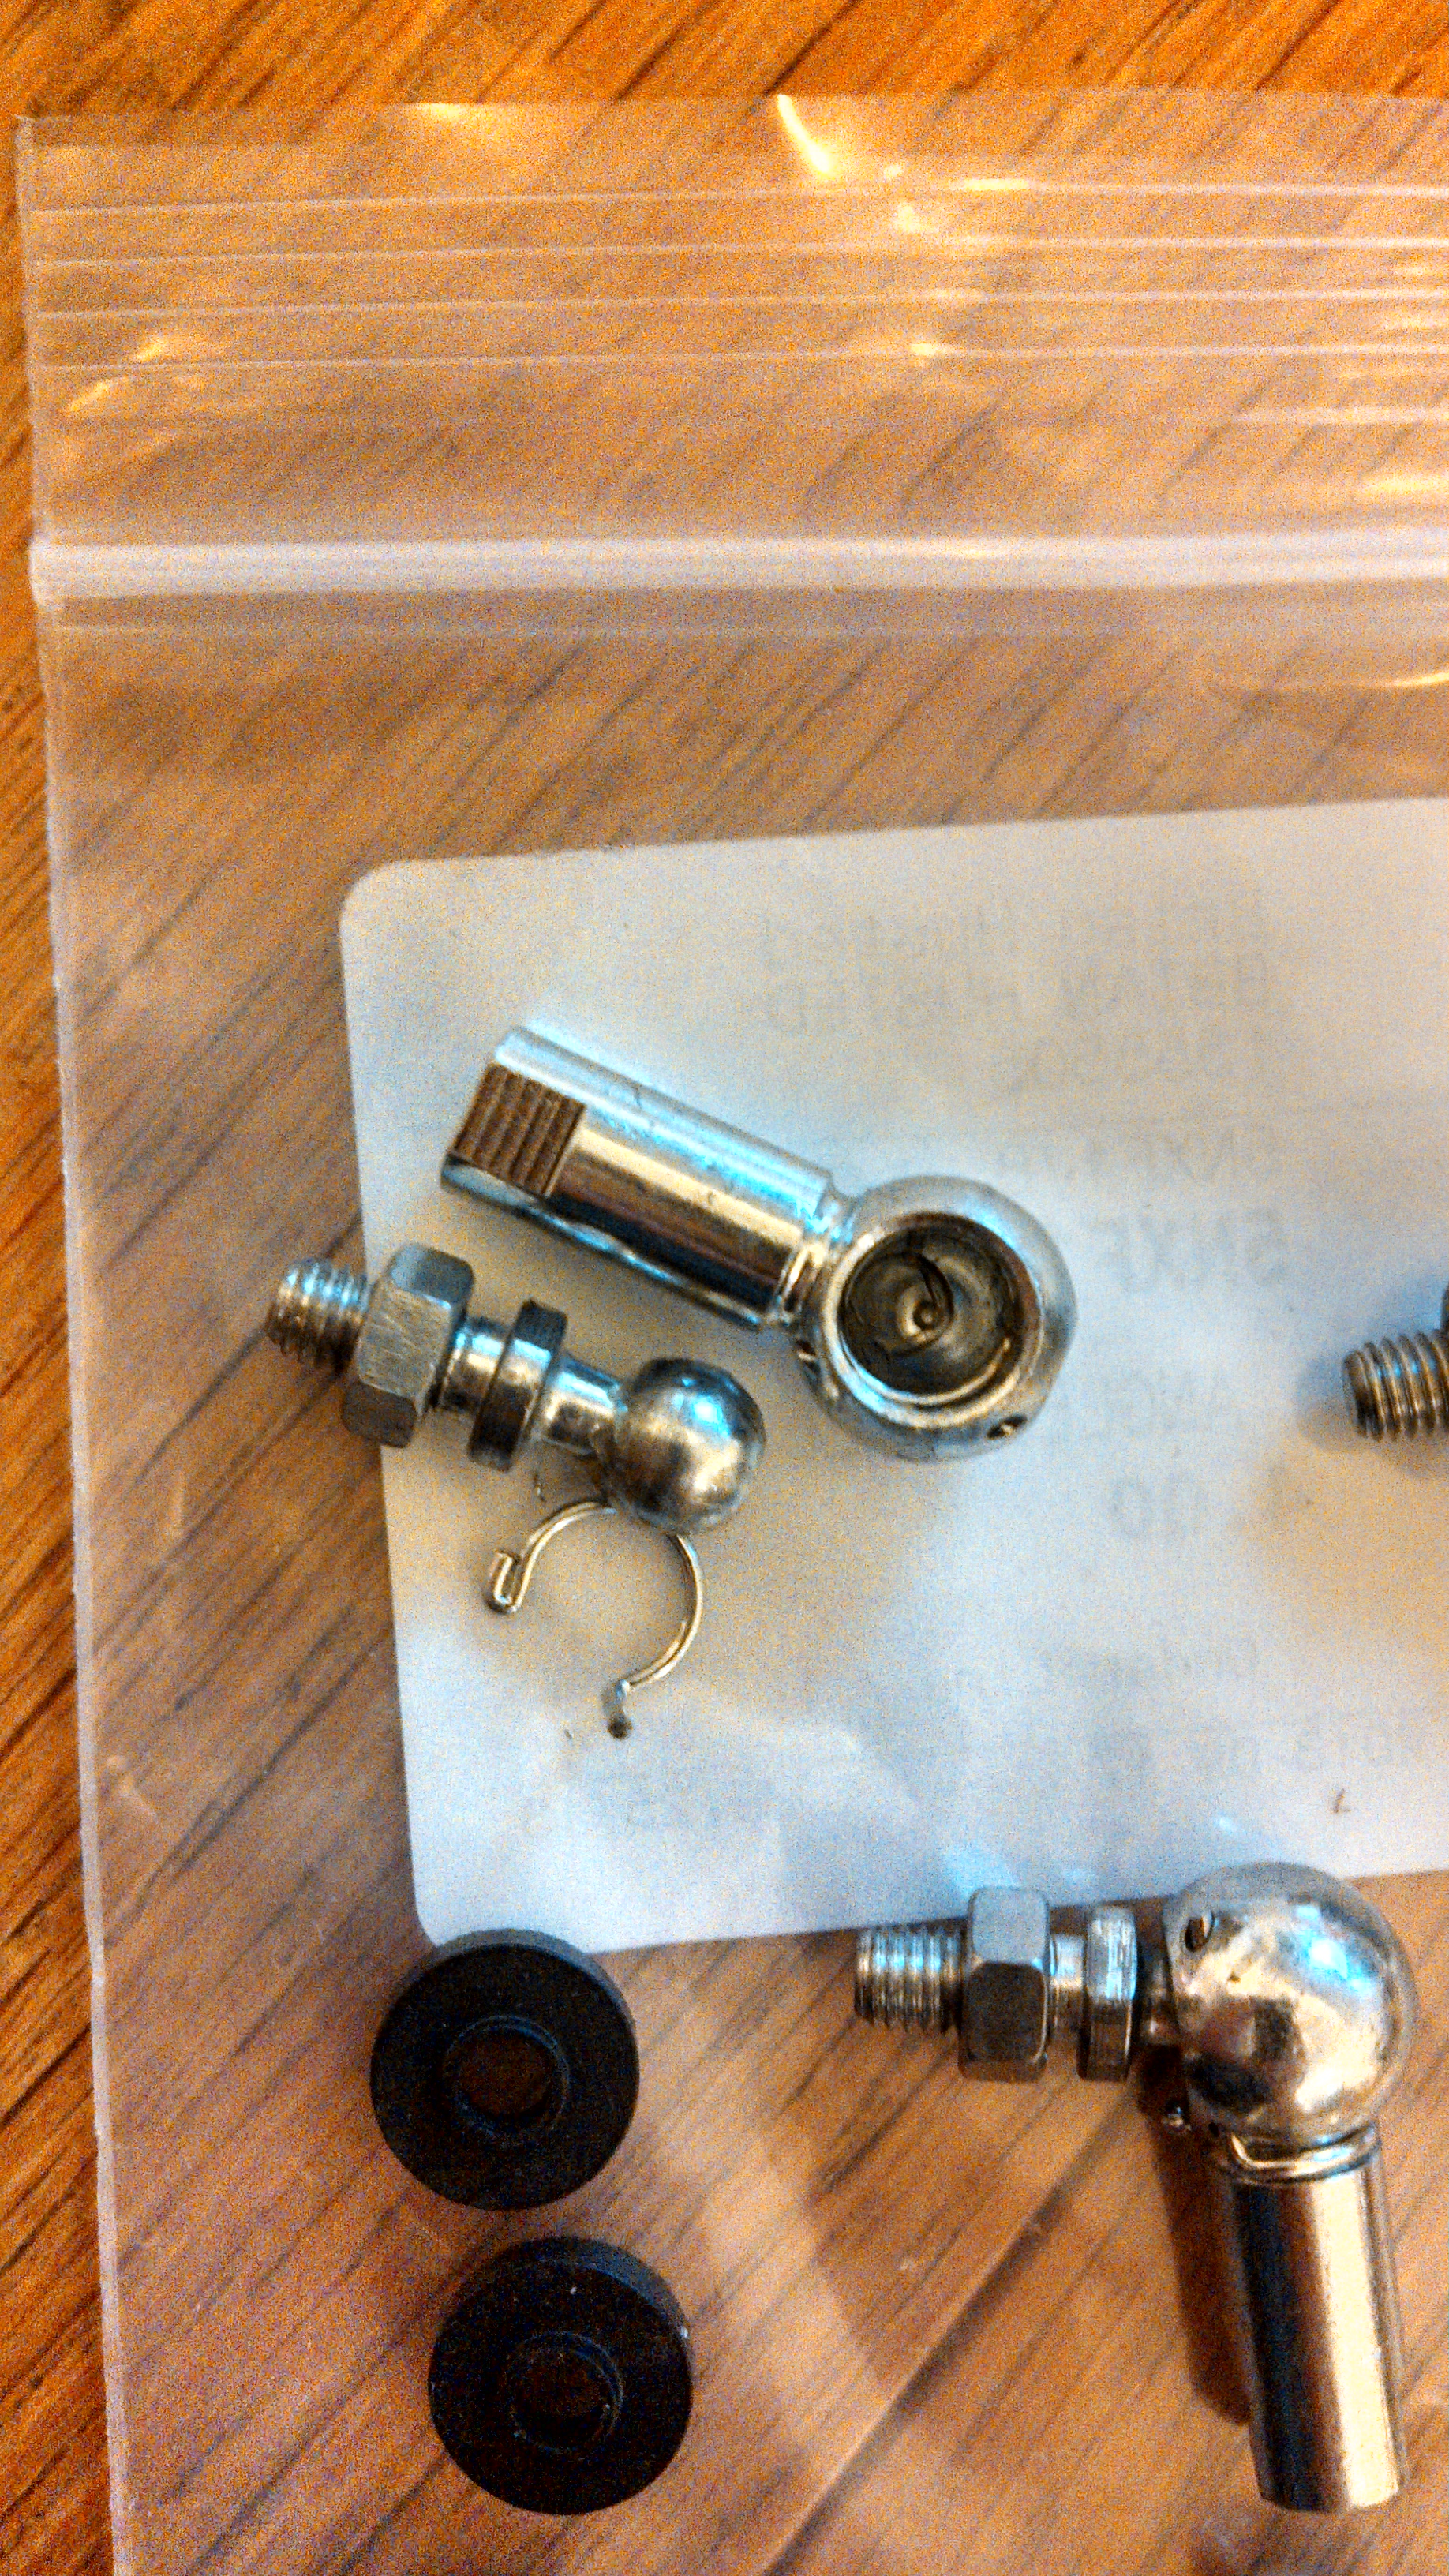
While I was changing out the other two idler bearings on the serpentine, I noticed that one of the intake flap links was totally missing. I'm not real sure what happened here. I've heard of the them breaking, but there were no parts. Just gone. The Gruven links look pretty nice but rather steep at $90. I ordered up some M5 ball joints to make my own for ~$20. These also have the security pin and dust boots.

I also did some more work on my bench flashing harness. I added a switch to simulate the ignition switch and a ground for getting the ECU into boot mode.
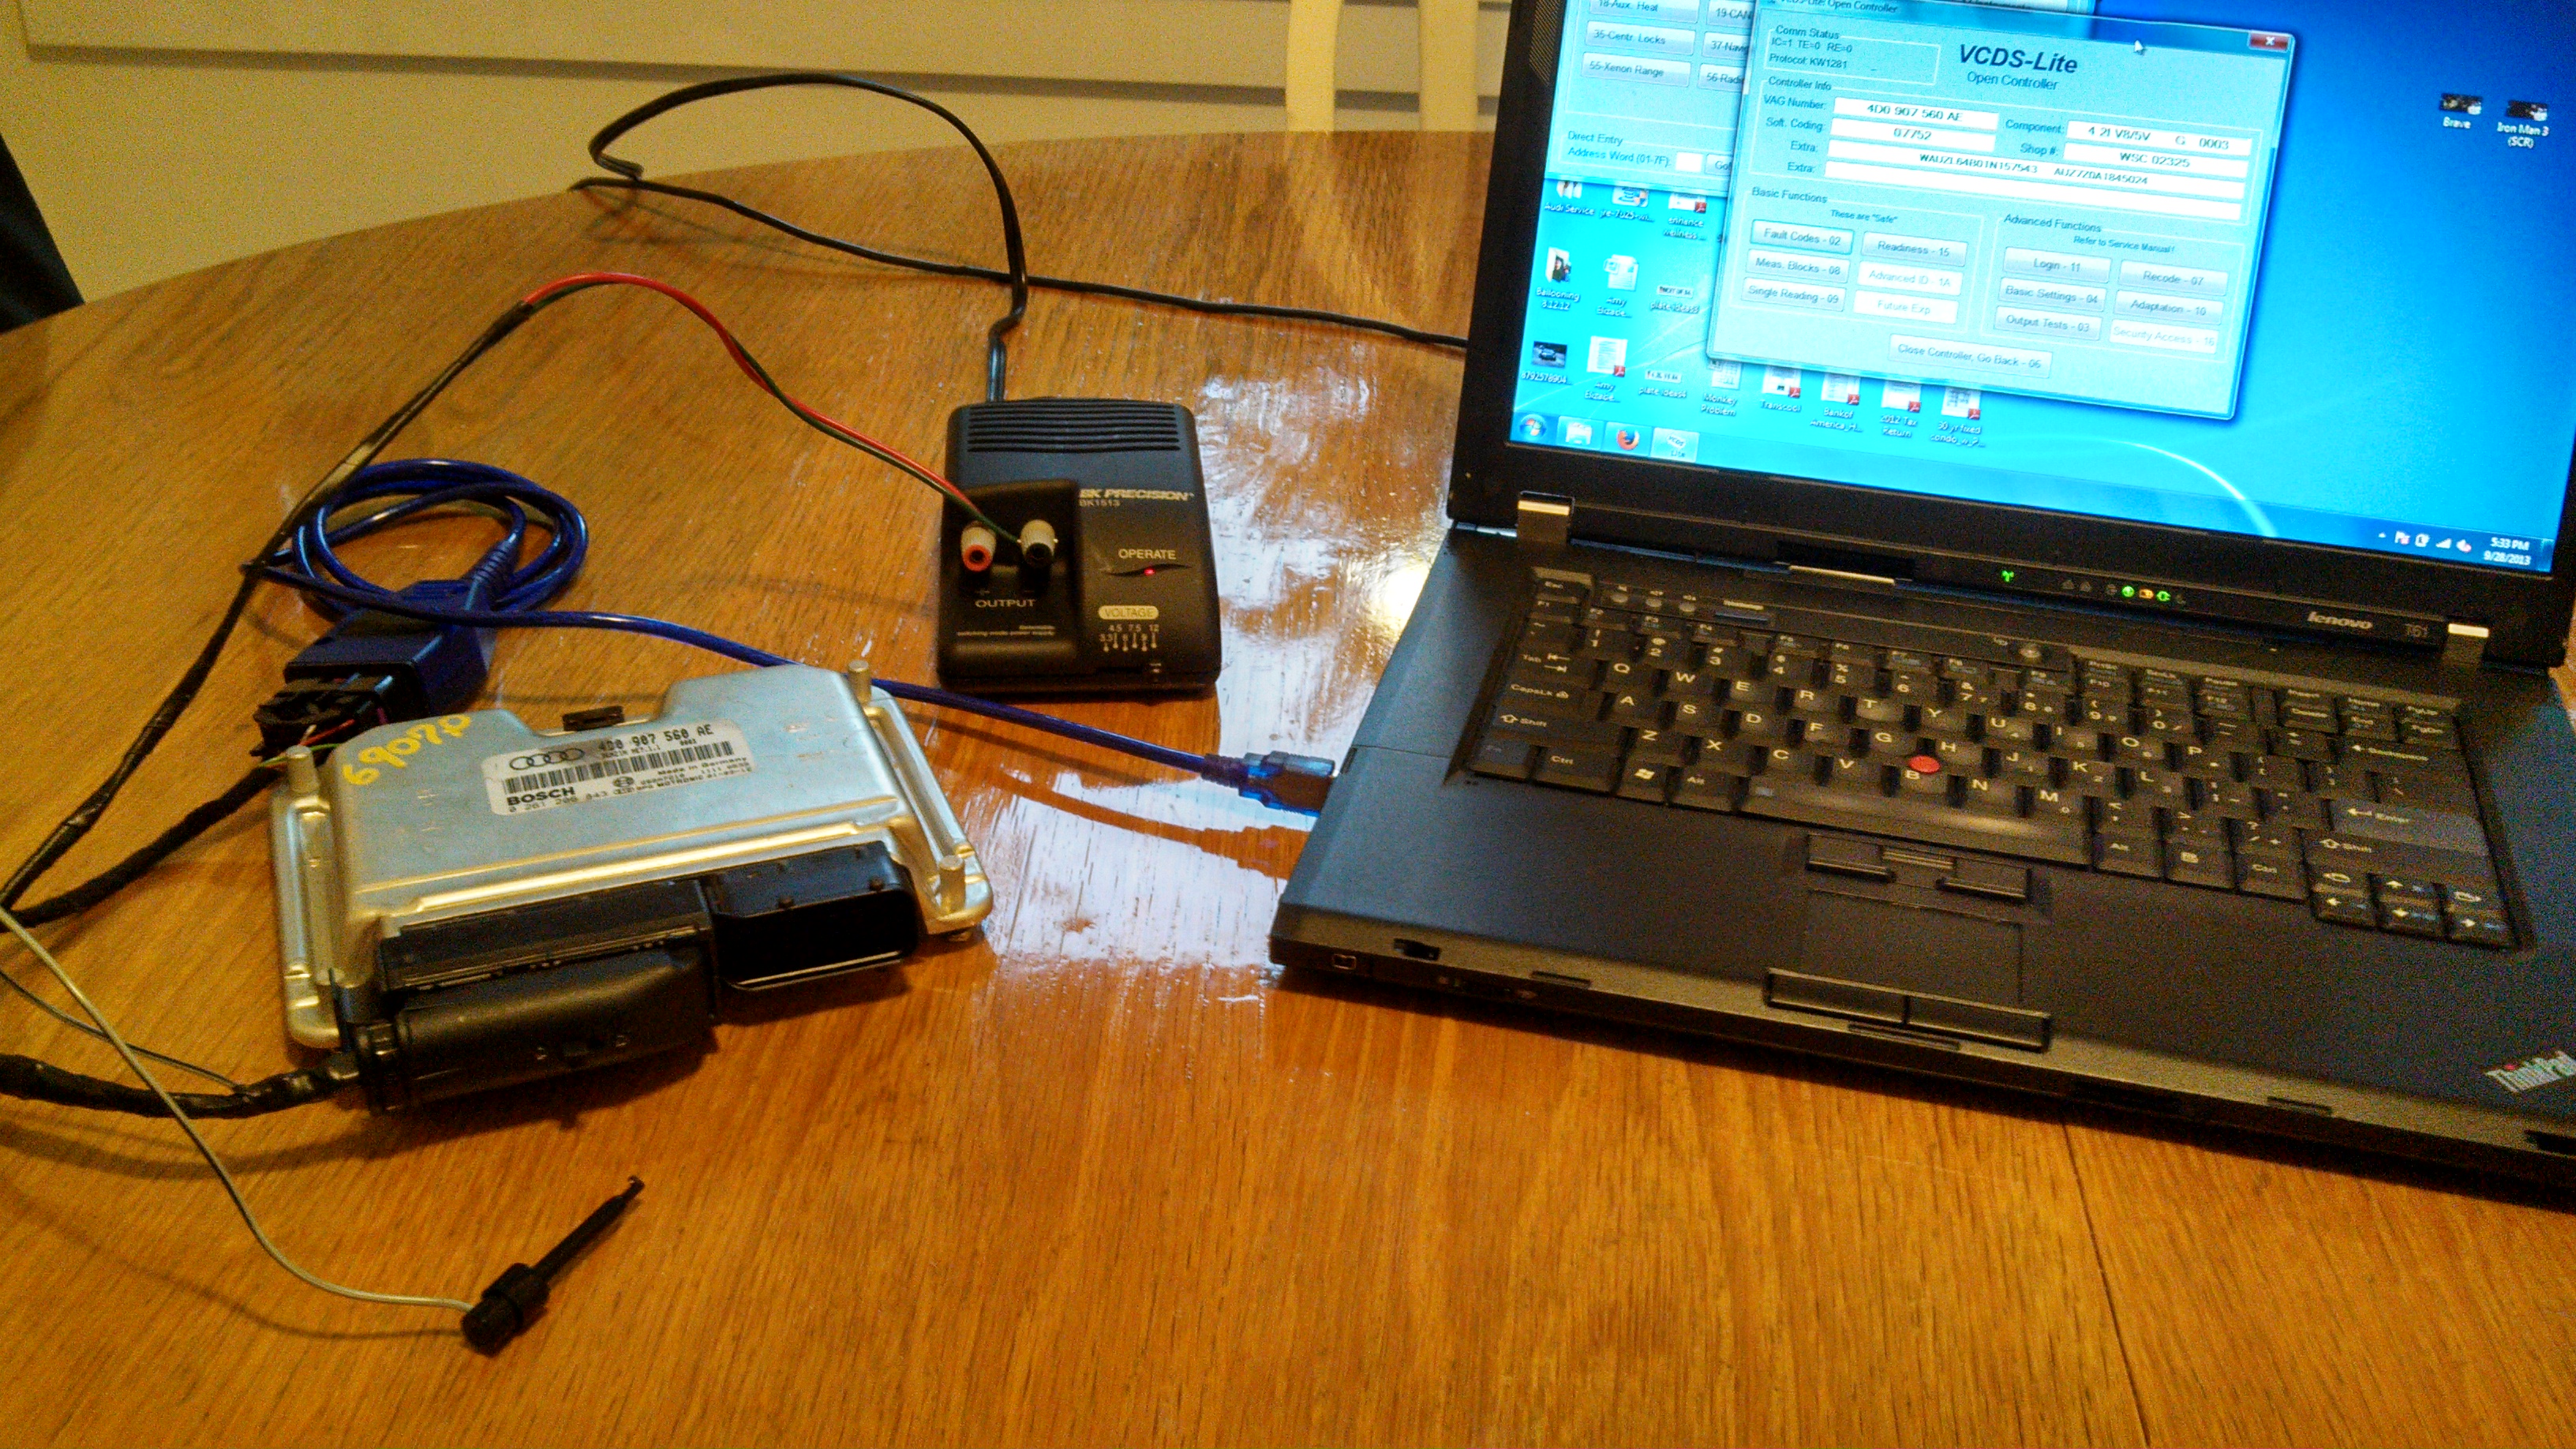
Next up is to defeat the immobilizer and flash the modified S6 file.
While I was changing out the other two idler bearings on the serpentine, I noticed that one of the intake flap links was totally missing. I'm not real sure what happened here. I've heard of the them breaking, but there were no parts. Just gone. The Gruven links look pretty nice but rather steep at $90. I ordered up some M5 ball joints to make my own for ~$20. These also have the security pin and dust boots.


I also did some more work on my bench flashing harness. I added a switch to simulate the ignition switch and a ground for getting the ECU into boot mode.


Next up is to defeat the immobilizer and flash the modified S6 file.
Thread Starter
|
2nd Gear
Joined: Jul 2011
Posts: 843
From: Kirkland, WA
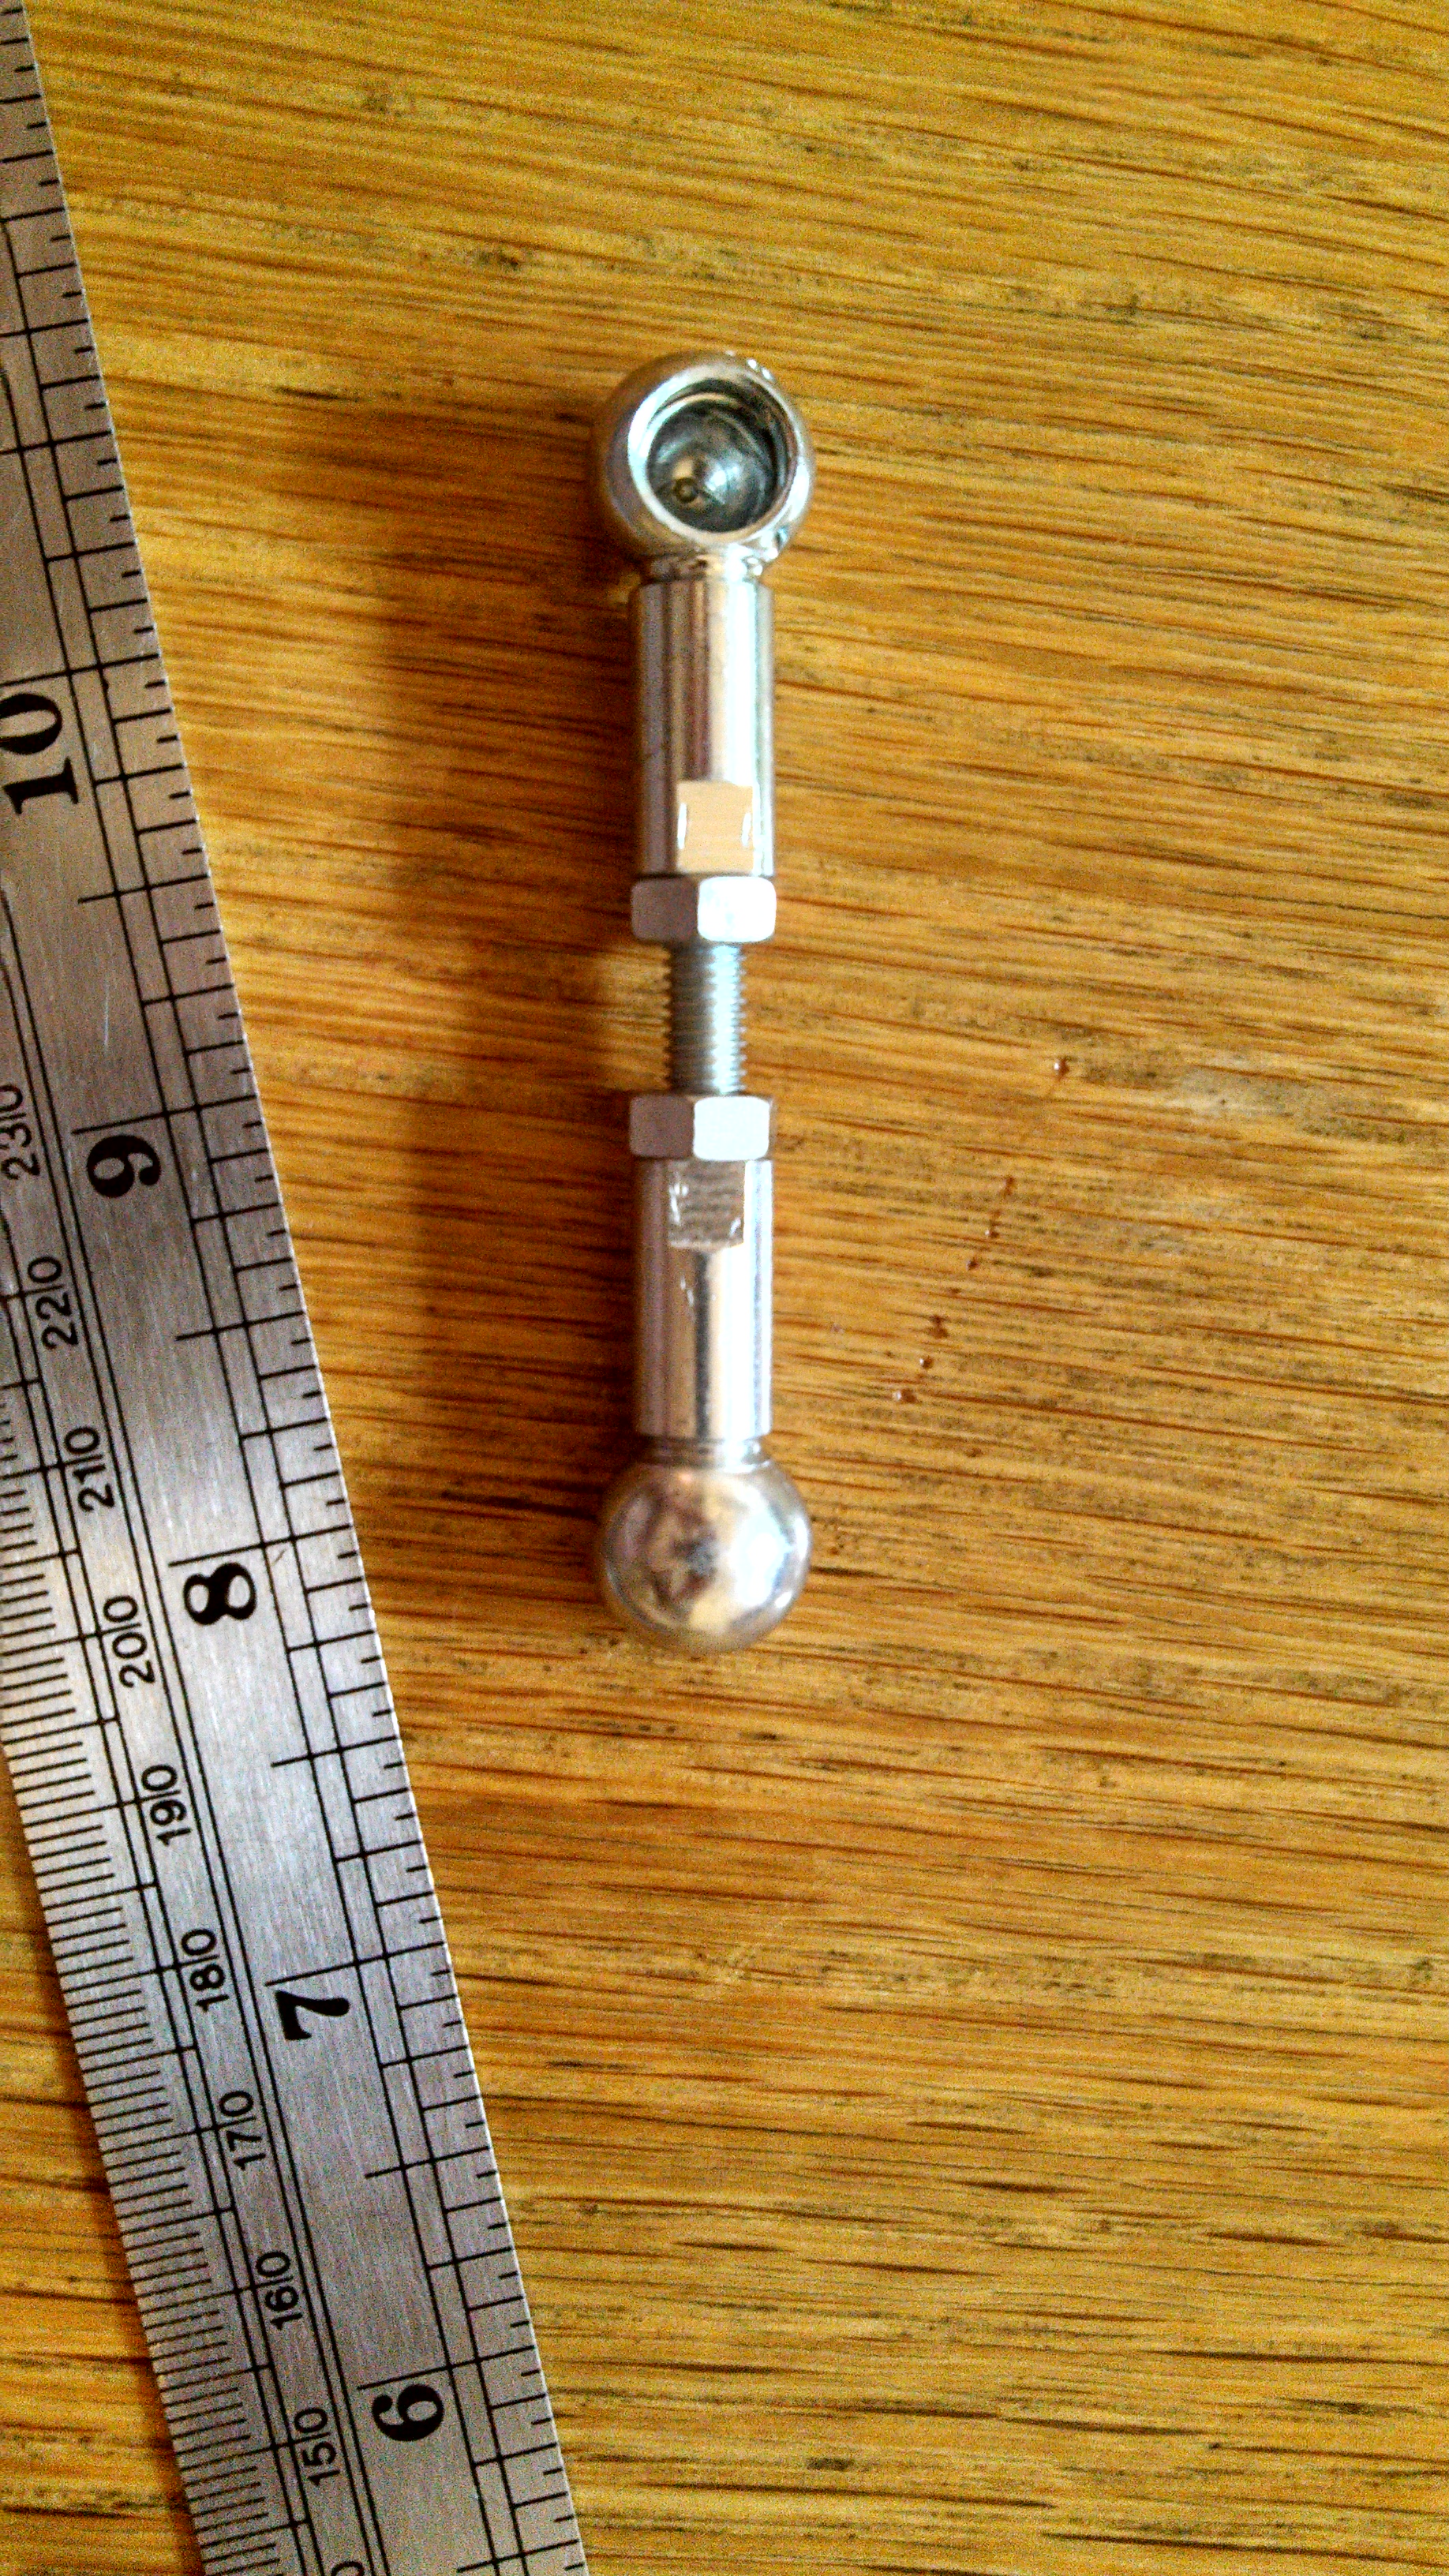
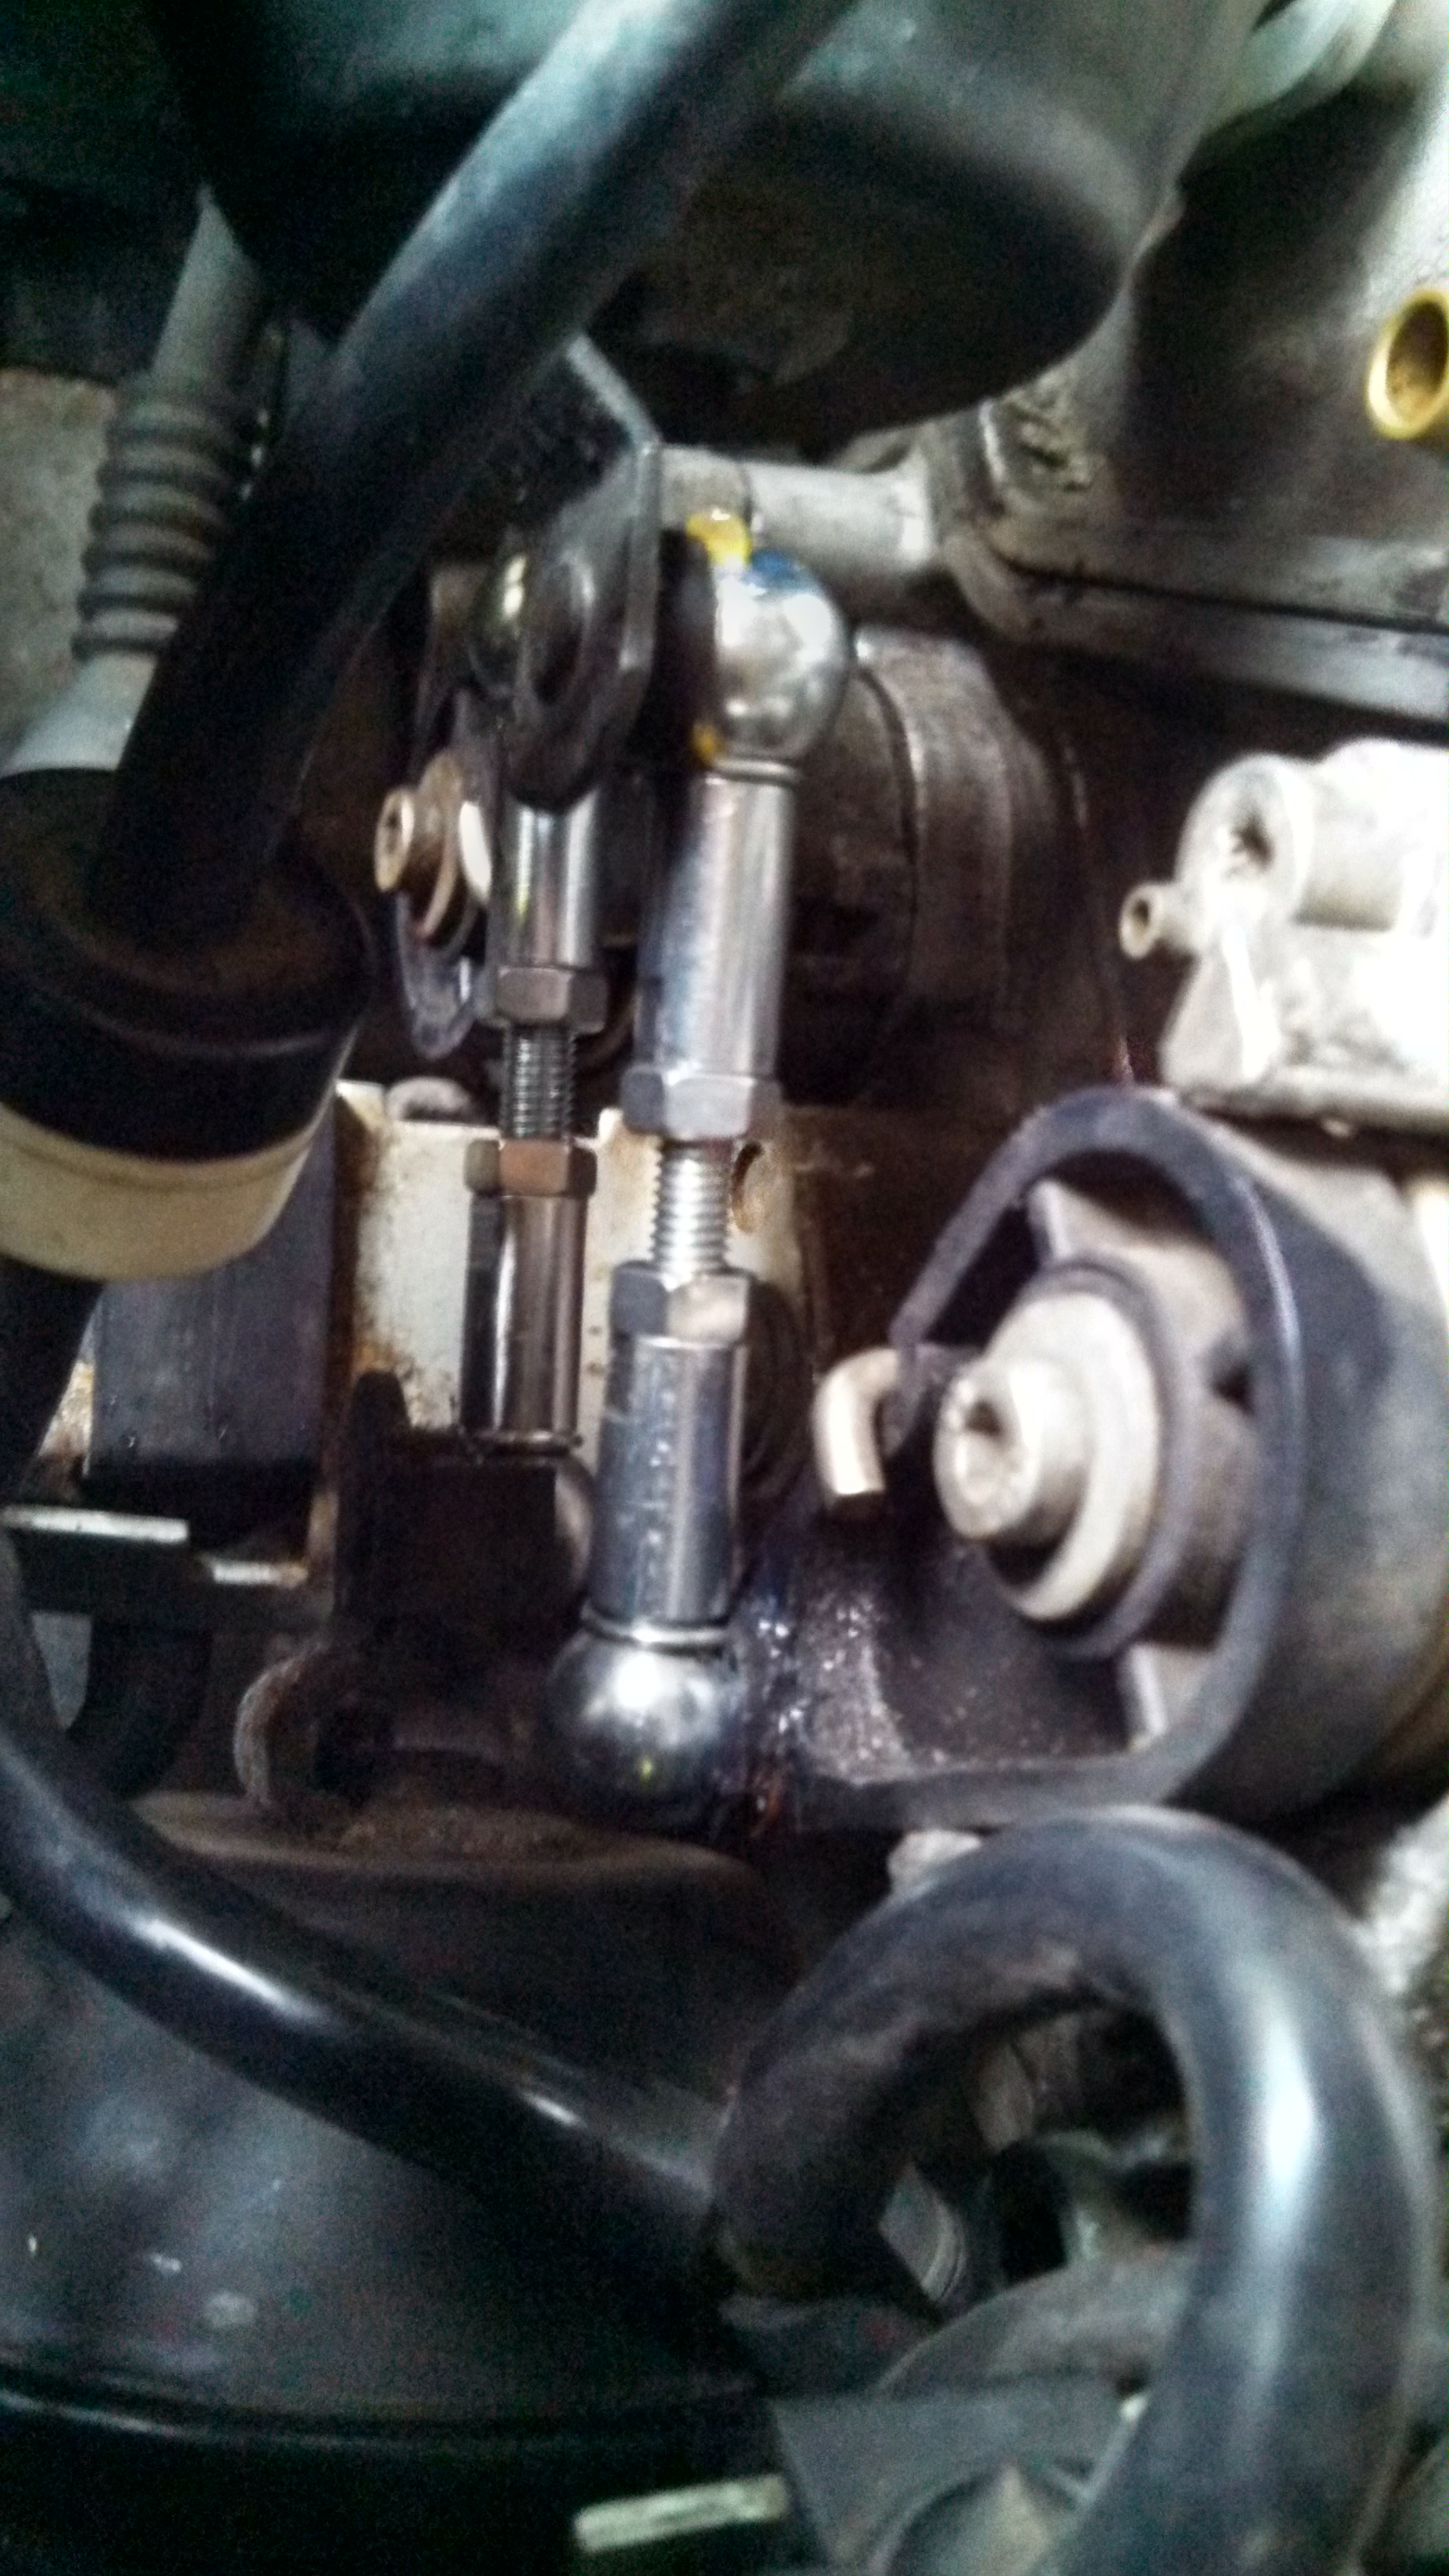
Got my new intake linkage arms made today. Way stronger than the stock plastic ones and much cheaper than the Gruven alternative. Ordered the joints and dust seals from J.W. Winco, Inc. Website and Online Catalog. These joints also include safety locking pins to make sure that they will NOT fall off.
Part numbers:
Joints - 5NXF1/B $3.30 x 4 = $13.20
Dust seals - 12DXF0 $1.37 x 5 = $6.87
Total = $20.07
I ordered the fifth dust seal in case I tore one and it put me over the $20 minimum for free shipping. For the threaded portions to link them together, I went to my local ACE and bought 2 M5x0.8x40mm bolts and cut the heads off for $0.94. I used the nuts that came on the ball stud as the jam nuts and tightened everything down with some blue locktite just to be sure. Total investment $21.01.

