
Firts Aid kit compartment tool tray DIY


Thread Starter
|
Junior Member
Joined: Jun 2008
Posts: 8
Ok so afeter buying my B6 A4 i noticed that the first aid kit was missing from the car. So instead of buying i new
one i decided to make a custon tool tray for it. So heres what you need and heres what to do.
What you need
1) 1 peice of 2" thick foam board(the kind that you use for science projects. If you press down on the surface and
it leaves an imprint then you've got the right stuff) I actually bought mine at Walmart in the arts and crafts
section. It come in a 10" x 20" board
2) 3M spray adhesive
3) Stretchy fabric
4) box cutter and hand saw
What to do
Measure out a 12 1/2" x 7 1/2" section on the board and carefully cut it out using the hand. **Be sure not to press
down on the foam making imprints** At this point you'll need to take this piece out to your car to perfectly fit it
to the compartment. Looking into the compartment you'll notice that part of the bottom is an inch lower than the
rest of it. You will need to cut out a section of the foam piece so that part of it is an 1" thick and the rest
being
2". Use the box cutter to trim the sides until the piece fits into the compartment perfectly. Now you can lay out
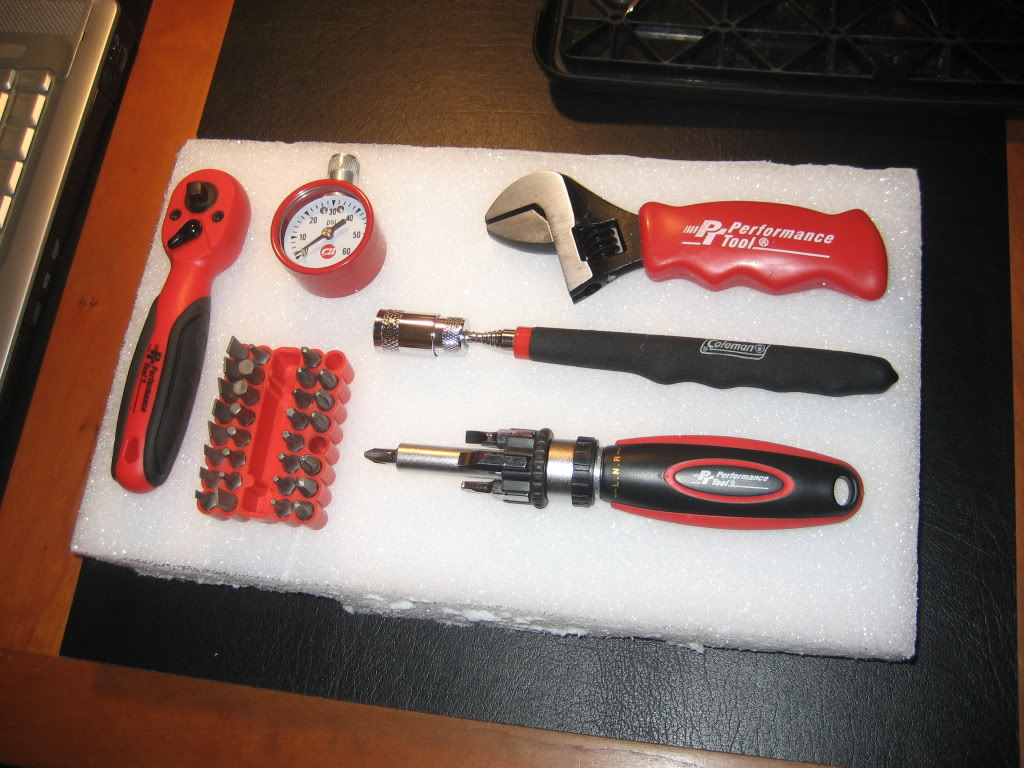
your tools on the foam. Carefully press down on each tool enough so that they are stuck in the foam but able to be
pulled out. I basically stuck them in about half way. Once it's done it should look something like this.
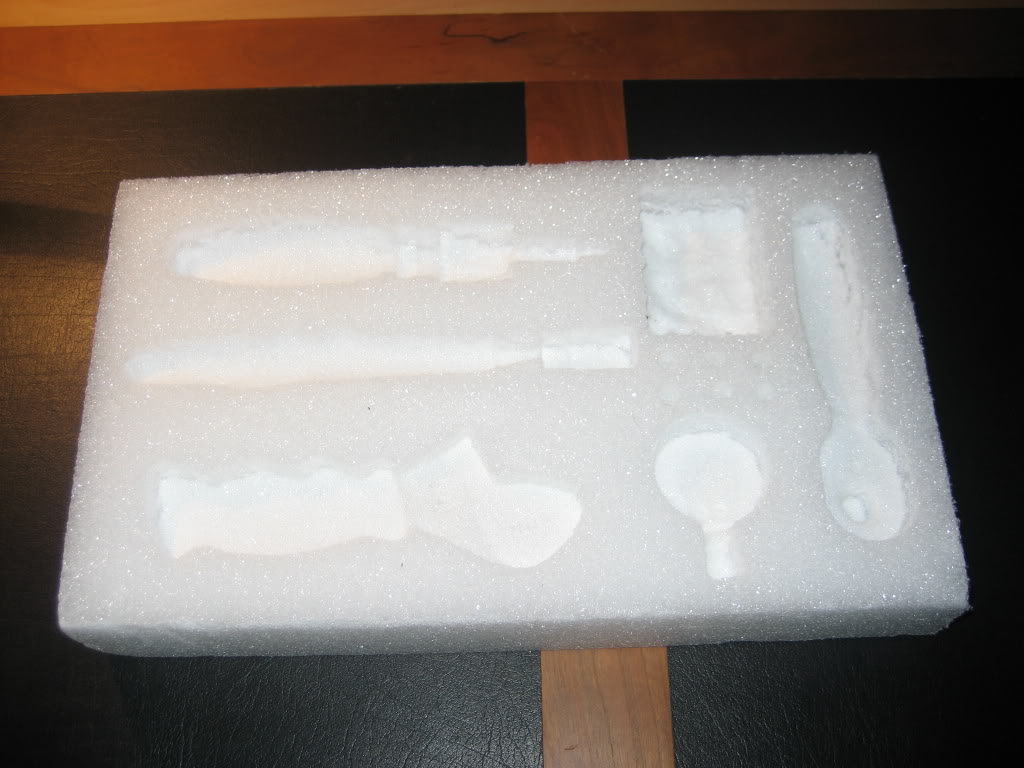
Now remove each tool making sure the imprints are clean and deep enough into the foam.
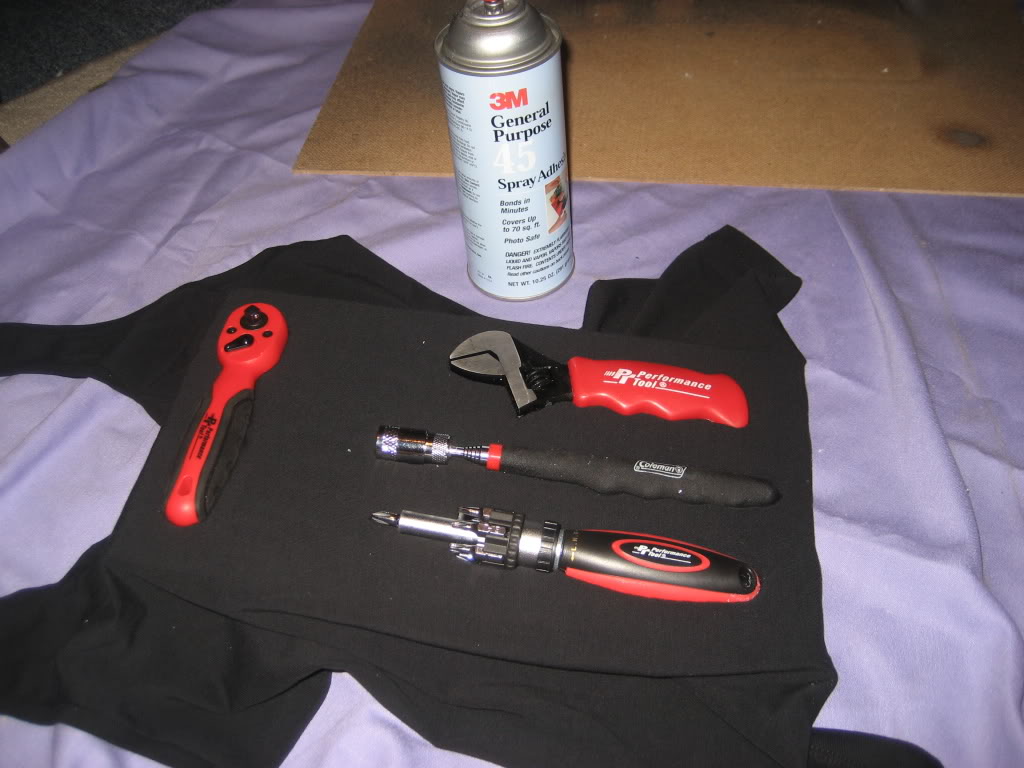
Next take your spray adhesive and spray a medium coat over the top of the foam making sure you get into the tool
imprint. **Be sure not to over spray** Wait 10 minutes allowing the adhesive to tack. Next, lay the adhesive flat
over the entire foam piece leaving a 1 inch flap on each side. Carefully press down on the fabric enough to where it
it sticks. Now take each tool and stick them into the imprints making sure that they are as far in as possible. This
will mold the fabric into the imprints until the glue dries. Should look like this.
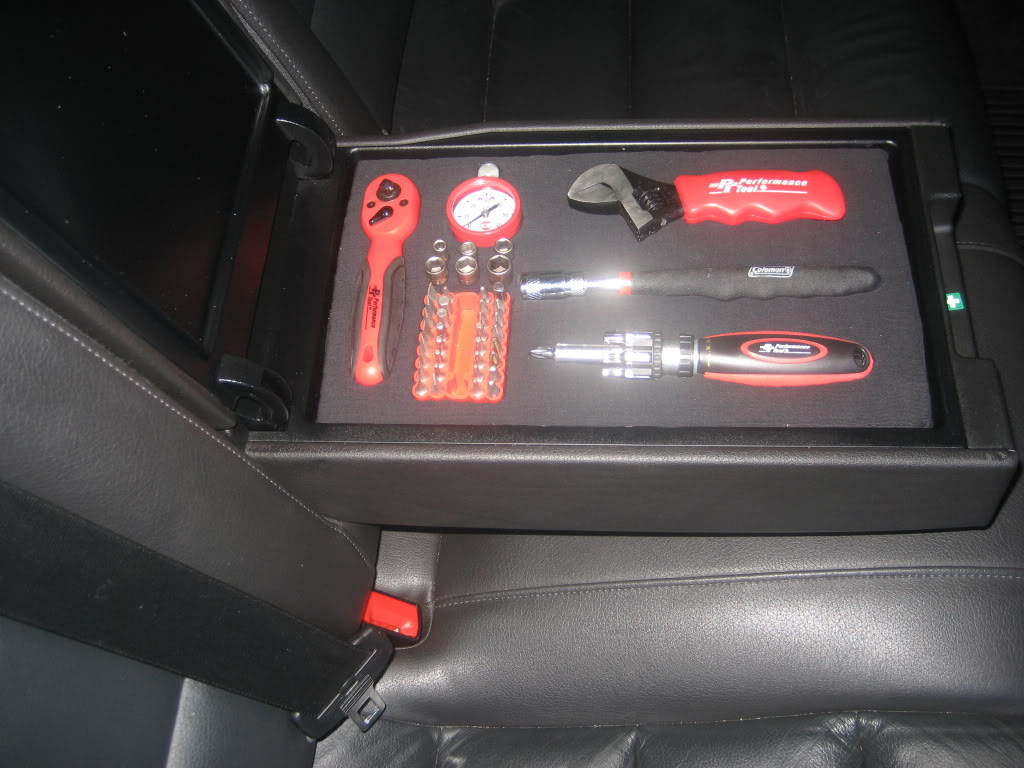
After allowing the glue to dry. Flip the tray over face down and lightly spray adhesive on the flaps and allow 10
minute to tack. Fold up each flap making sure they're nice and tight.

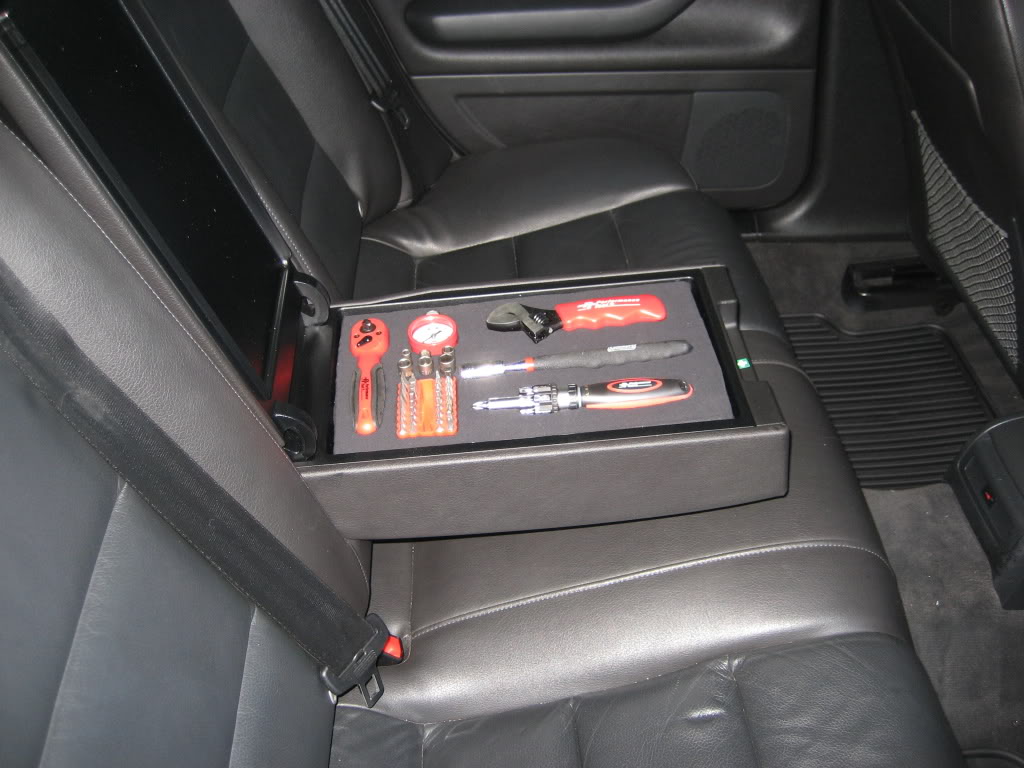
Allow the adhesive to dry and you're done. Install your which should look like this.
one i decided to make a custon tool tray for it. So heres what you need and heres what to do.
What you need
1) 1 peice of 2" thick foam board(the kind that you use for science projects. If you press down on the surface and
it leaves an imprint then you've got the right stuff) I actually bought mine at Walmart in the arts and crafts
section. It come in a 10" x 20" board
2) 3M spray adhesive
3) Stretchy fabric
4) box cutter and hand saw
What to do
Measure out a 12 1/2" x 7 1/2" section on the board and carefully cut it out using the hand. **Be sure not to press
down on the foam making imprints** At this point you'll need to take this piece out to your car to perfectly fit it
to the compartment. Looking into the compartment you'll notice that part of the bottom is an inch lower than the
rest of it. You will need to cut out a section of the foam piece so that part of it is an 1" thick and the rest
being
2". Use the box cutter to trim the sides until the piece fits into the compartment perfectly. Now you can lay out
your tools on the foam. Carefully press down on each tool enough so that they are stuck in the foam but able to be
pulled out. I basically stuck them in about half way. Once it's done it should look something like this.
Now remove each tool making sure the imprints are clean and deep enough into the foam.
Next take your spray adhesive and spray a medium coat over the top of the foam making sure you get into the tool
imprint. **Be sure not to over spray** Wait 10 minutes allowing the adhesive to tack. Next, lay the adhesive flat
over the entire foam piece leaving a 1 inch flap on each side. Carefully press down on the fabric enough to where it
it sticks. Now take each tool and stick them into the imprints making sure that they are as far in as possible. This
will mold the fabric into the imprints until the glue dries. Should look like this.
After allowing the glue to dry. Flip the tray over face down and lightly spray adhesive on the flaps and allow 10
minute to tack. Fold up each flap making sure they're nice and tight.
Allow the adhesive to dry and you're done. Install your which should look like this.
Administrator
Joined: Jul 2006
Posts: 11,670
From: Binghamton, NY
Nice idea and you did a good job creating it - I like it! If I didn't have a five year old and a four year old in the back seat, I'd probably do this. If I did it now though, my tools would be gone and I'd have Doritos or something in there instead


Thread
Thread Starter
Forum
Replies
Last Post
desertsnake1991
Archive - Misc Items for Sale
0
Dec 11, 2012 07:00 PM